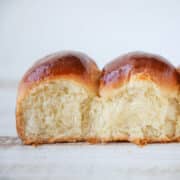
Easy Dinner Rolls
These Easy Dinner Rolls are soft, tender and slightly buttery! With these step by step instructions, making perfect dinner rolls will be so easy you’ll want them every night!
Servings: 12 people
Ingredients
Sponge:
- 2 ¼ teaspoons Dry Active Yeast
- 226 g Whole milk 100°F
- 60 g Water 100°F
- 1 tablespoon Sugar
- 154 g All Purpose Flour
Final Dough:
- 383 g All Purpose Flour
- 65 g Sugar
- 1 teaspoon Kosher Salt
- 94 g Butter softened
- 1 Egg
Total Dough:
- 2 ¼ teaspoons Dry Active Yeast
- 226 g Whole milk 100°F
- 60 g Water 100°F
- 79 g Sugar
- 537 g All Purpose Flour
- 1 teaspoons Kosher Salt
- 94 g Butter softened
- 1 Egg
Instructions
Make the Sponge:
- Heat the milk and water to around 95-100°F in a pot or the microwave.
- In a medium bowl combine all the ingredients for the sponge and mix with your hands. You can mix with a spoon but it is so wet that it will be more difficult.
- Cover with plastic wrap and set in a warm spot until visibly bubbly. It should take about 20 minutes.
Mix the Dough:
- I usually scale the remaining ingredients while the sponge is sitting. (Scale is just a fancy chef word for "weigh".)
- In the bowl of a stand mixer add the flour, remaining sugar, salt, butter, egg and sponge.
- Mix on low speed with the paddle attachment until combined.
- Switch to the dough hook attachment and mix on medium speed until a rough window pane can be pulled. A 'window pane' means the dough will not look perfectly smooth but will have pulled together and made one cohesive dough around the hook. Pinch off a piece and gently pull the sides apart, rotate and pull again, making a square shape. The dough should not tear; you should be able to see through some of the dough like a window pane but then there will be pieces of dough that look rough. This is what you want.
- Scrape the dough into a well-oiled bowl, cover with plastic wrap and allow to proof for 30 minutes in a warm place. Fold the dough by grabbing one side, pull it upwards out of the bowl and then fold it over ⅓ of the dough. Rotate the bowl 180 degrees and repeat with the opposite side. Rotate a quarter turn and repeat the same folding technique. Rotate the bowl 180 degrees and make the final fold. You should have a nice tight square packet of dough.
- Marvel at your skills. Cover with plastic wrap and allow to double. Mine took about an additional 30 minutes.
- While the dough is finishing its bulk proof, grease a 9 x 13 inch baking dish with cooking spray or butter.
- When the dough has doubled and feels light and airy when touched, turn it out onto an un-floured surface. It is soft, supple and not sticky!
- Divide into 12 equal portions. You can eyeball this or weigh them. They should be about 87g each. Place each about equidistant apart in the prepared dish.
- Cover with plastic wrap and place back in the warm spot to double. This took about 30 minutes for mine.
- Preheat the oven to 350°F.
- When the buns are ready to bake (doubled and light and airy), brush with beaten egg.
- Bake in preheated oven for 20-22 minutes or until an instant read thermometer reads 185°F when inserted into the center of one of the middle buns. If you don’t have a thermometer, you can insert a cake tester or toothpick into the center and it should come out with clinging crumbs but no streaks of dough!
- Brush the hot buns with melted butter to emulate my shiny, enticing tops!
- Technically they should cool, but who has the patience? I say dig right on in.
Video
Notes
Presentation -
- If you want perfectly portioned buns, use a kitchen scale! They should be about 87 grams each.
- To get the nice, shiny finish, be sure to brush with a beaten egg before baking and with melted butter after baking!
- You could also shape these rolls into loaves. Follow my brioche bread recipe for dividing, shaping and baking.
- I like to mix the sponge with my hands instead of with a spoon.
- A "window pane" test is when the dough does not look perfectly smooth but pulled together and made one cohesive dough around the hook. Pinch off a piece and gently pull the sides apart, rotate and pull again, making a square shape. The dough should not tear; you should be able to see through some of the dough like a window pane but then there will be pieces of dough that look rough. This is what you want.
- You can use an instant read thermometer to be sure the buns are done baking. You'll know it's when it reads 185°F when inserted into the center of one of the middle buns.
- Take note of the darkness of your pan, dark metal sheet pans tend to cook faster while lighter sheet pans reflect the heat. Glass pans retain heat for longer, so they are more likely to cook the outside of the dinner roll before the interior, so just be careful with the temperature.
Nutrition
Calories: 536kcal | Carbohydrates: 85g | Protein: 13g | Fat: 16g | Saturated Fat: 9g | Polyunsaturated Fat: 1g | Monounsaturated Fat: 4g | Trans Fat: 1g | Cholesterol: 65mg | Sodium: 518mg | Potassium: 209mg | Fiber: 4g | Sugar: 15g | Vitamin A: 492IU | Vitamin C: 0.01mg | Calcium: 70mg | Iron: 4mg