
Strawberry Lemon Scones
These Strawberry Lemon Scones are bursting with fresh strawberry and lemon flavor! They have a tender, moist texture that isn’t cakey! Topped with a generous sprinkle of turbinado sugar for that extra crunch and sweetness!
Servings: 12 Scones
Ingredients
- 1 cup fresh strawberries washed, hulled, chopped and blotted dry
- ½ cup heavy cream
- 2 eggs lightly beaten
- 1 teaspoon vanilla extract
- 2 ½ cups all-purpose flour
- ½ cup granulated sugar
- 1 teaspoon baking powder
- ½ teaspoon kosher salt
- ½ cup unsalted butter cut in small cubes
- 1 tablespoon lemon zest 1 large lemon, only the bright yellow parts!
- 1 tablespoon heavy cream
- Turbinado sugar
Instructions
- Preheat oven to 400° and line a baking sheet with parchment paper.
- Dice strawberries.

- In a 1 cup liquid measuring cup, measure your cream and then add the eggs and vanilla; stir with a fork to mix. Set aside.
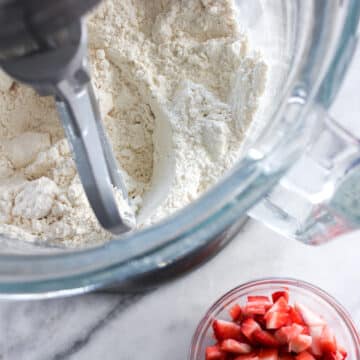
- In a large bowl, whisk together flour, sugar, baking powder and salt. Using a pastry blender (my fave) or two knives, cut the butter into the flour mixture until it resembles coarse crumbs and the largest chunk of butter is the size of a pea.
- Add strawberries and lemon zest to the flour mixture and toss to coat with flour and distribute evenly.
- Make a well in the center of the flour mixture and add the cream mixture. Using a wooden spoon, gently mix until the dough is moistened. There will be some straggling flour/butter mixture in the bottom of the bowl. Fear not, this will get incorporated during the next step.
- Turn out dough onto a well-floured surface. Gently gather the dough into a ball and knead the dough by gently pressing the dough away from you with the heels of your hands and then folding it on itself at least 5-7 times or until it is a cohesive ball. Turn the dough a quarter turn after each fold.

- Place dough on your parchment paper and press out to 1” thickness. [You can roll it if you wish but it is completely unnecessary unless you want to cut out circles or squares.] Using a floured knife or bench scraper, cut the dough into 6 equal triangles and use the bench scraper to gently slide the wedges apart. You want them to be at least 1” apart.
- Brush wedges with cream (not so much that it runs down the sides) and then sprinkle generously with turbinado sugar.
- Bake in preheated oven for about 18-22 minutes or until the tops are golden brown and a toothpick inserted into the fattest part comes out clean.
- Serve warm or at room temperature!
Notes
Let’s get into it like a PROFESSIONAL CHEF:
Presentation - Get a beautiful finish to your scones and lock in their moisture by brushing them with heavy cream just prior to baking. I like to add a little turbinado sugar after brushing with heavy cream, just for an added sugary crunch. Flavor Tips - Just like any baked goods that use fresh strawberries, the dough around the strawberries will be a little moister than the rest of the scone. If that bothers you then use blueberries or dried fruit instead. Technique - Turning out the dough by hand gives you the opportunity to have control over how much gluten development occurs, and also over strawberry distribution. The less gluten development, the more tender your scones, but you still need to be sure they are cohesive! Helpful Tools - I love using a pastry blender to cut the butter into the flour mixture until it resembles coarse, pea-sized crumbs. Cutting the butter into the dry ingredients completely with a pastry blender will make a cohesive dough that requires less wet ingredients and less gluten development. Variations - There are many directions you can take these scones! Make a quick glaze with milks, salt, sugar, and a bit of vanilla extract (like my Classic Donut Glaze) and you’re in for a treat. Storage - Store baked, unglazed scones in an air-tight container at room temperature, refrigerated or frozen. Zip-top plastic bags also work nicely. Scones are best the day they are baked, so I prefer to freeze the cut dough and bake them as they are needed. Alternately scones will keep 3 days at room temperature, 7 days in the refrigerator or 3 months pre-baked and frozen.Nutrition
Calories: 248kcal | Carbohydrates: 30g | Protein: 4g | Fat: 13g | Saturated Fat: 8g | Polyunsaturated Fat: 1g | Monounsaturated Fat: 3g | Trans Fat: 1g | Cholesterol: 60mg | Sodium: 147mg | Potassium: 71mg | Fiber: 1g | Sugar: 9g | Vitamin A: 442IU | Vitamin C: 8mg | Calcium: 40mg | Iron: 1mg