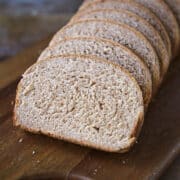
100% Whole Wheat Bread
Old-fashioned 100% Whole Wheat Bread is hearty, slightly sweet, and perfectly chewy inside. This easy recipe is a great way to start baking homemade bread!
Servings: 24 slices
Ingredients
- 2 cups milk 2%, scaled
- 4 tablespoons sugar
- 2 tablespoons shortening
- 1 ½ teaspoons salt
- 1¼ teaspoons active dry yeast aka 1 yeast cake
- ½ cup warm water
- 5 cups whole-wheat flour
Instructions
Mix the dough:
- Boil the milk and water together in a saucepan and pour into your mixer bowl.
- Add the shortening and sugar to the hot liquid and let the mixture cool until it is lukewarm.
- Add the yeast cake to a small amount of water, to which one teaspoon of sugar may be added to soften it. If using dry active, add ¼ cup of warm water (100 ° —110° F) to the yeast and stir to mix. Then add 1 t of sugar to proof the yeast, wait 10 minutes, and if the mixture has tripled, it is ready to use.
- Add the yeast and whole wheat flour to your mixer bowl. Fitted with the dough hook attachment, mix at speed 2 until the dough clings to the hook and cleans the sides of the bowl for about two minutes. Then continue to knead on speed 2 for an additional two minutes.
Bulk Proof:
- Grease a large bowl with vegetable oil. I pour a little oil into my hands and then spread the oil over the insides of the bowl. I find this method more efficient.
- Place the dough in the lightly greased bowl and turn it over to coat all sides with the oil.
- Cover with a damp towel and place in a warm place (80 ° – 85°) for an hour, or until the dough has tripled in size.
- Perform one set of folds on the bread, or punch down the bread and then shape it back into a round.
- Optional second proof. Let the bread rise for one more hour in a warm spot until it has doubled in size.
Shape the loaves:
- Turn the bread out onto a lightly oiled work surface, divide it into two halves. Then, preshape it into two rounds, and let it rest for 10 minutes on the bench. You can eyeball this, but for the most even loaves, use your kitchen scale.
- Final shape into a loaf by pulling it into a rectangular shape. Fold the top half of the dough down toward the center, rotate 180°, then fold the other side down, pressing. Perform 2 thumb folds by rolling the dough around the thumb of your left hand and then sealing the dough with the heel of the right hand. Start on the right side of the log and move across to the left.
Final rise and bake.
- Place the shaped dough into a well-greased loaf pan, seam-side down. Cover with plastic wrap or a towel, and let rise until doubled in volume. Preheat the oven to 400°F.
- Cook the loaves at 400°F for 15 minutes and then decrease the temperature to 350°F for the remaining 45 minutes. My mini loaves were done after an additional 15 minutes at 350°F.
- The loaves are done when the sides pull away from the pan, the crust is a rich, golden brown, and the loaves sound hollow when you firmly tap the top. You can also insert a toothpick into the center of the loaf; the loaves are done when it comes out clean. Immediately remove the loaves from the pans to cool on a wire rack.
Notes
Yield – 2 loaves
Technique – Two loaves will mix better in home mixers, so I always make two at a time and freeze one. You can halve this recipe and make one loaf, but it might be difficult to develop the gluten in most stand mixers, so I suggest kneading by hand.
Variations—Make mini loaves! If you have mini loaf pans, you can divide this dough into 4 to 6 smaller loaves, perfect for crackers! You can slice it thin and toast it with butter or oil. Serve with a charcuterie board or dip it into this apple butter!
Storage –Cool the whole wheat loaves completely before wrapping them in plastic wrap or a zip-top bag. Store at room temperature for up to 3 days, refrigerated for a week, or frozen for up to 2 months.
Nutrition
Serving: 1slice | Calories: 115kcal | Carbohydrates: 21g | Protein: 4g | Fat: 2g | Saturated Fat: 1g | Polyunsaturated Fat: 1g | Monounsaturated Fat: 1g | Trans Fat: 0.1g | Cholesterol: 2mg | Sodium: 9mg | Potassium: 123mg | Fiber: 3g | Sugar: 3g | Vitamin A: 35IU | Calcium: 34mg | Iron: 1mg