This post may contain affiliate links. Please read our disclosure policy.
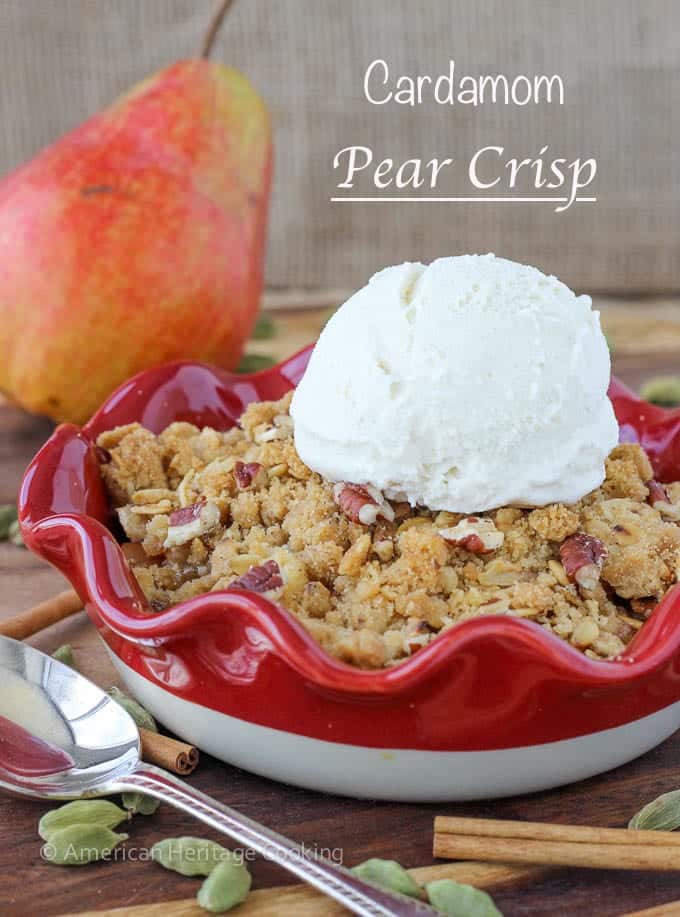
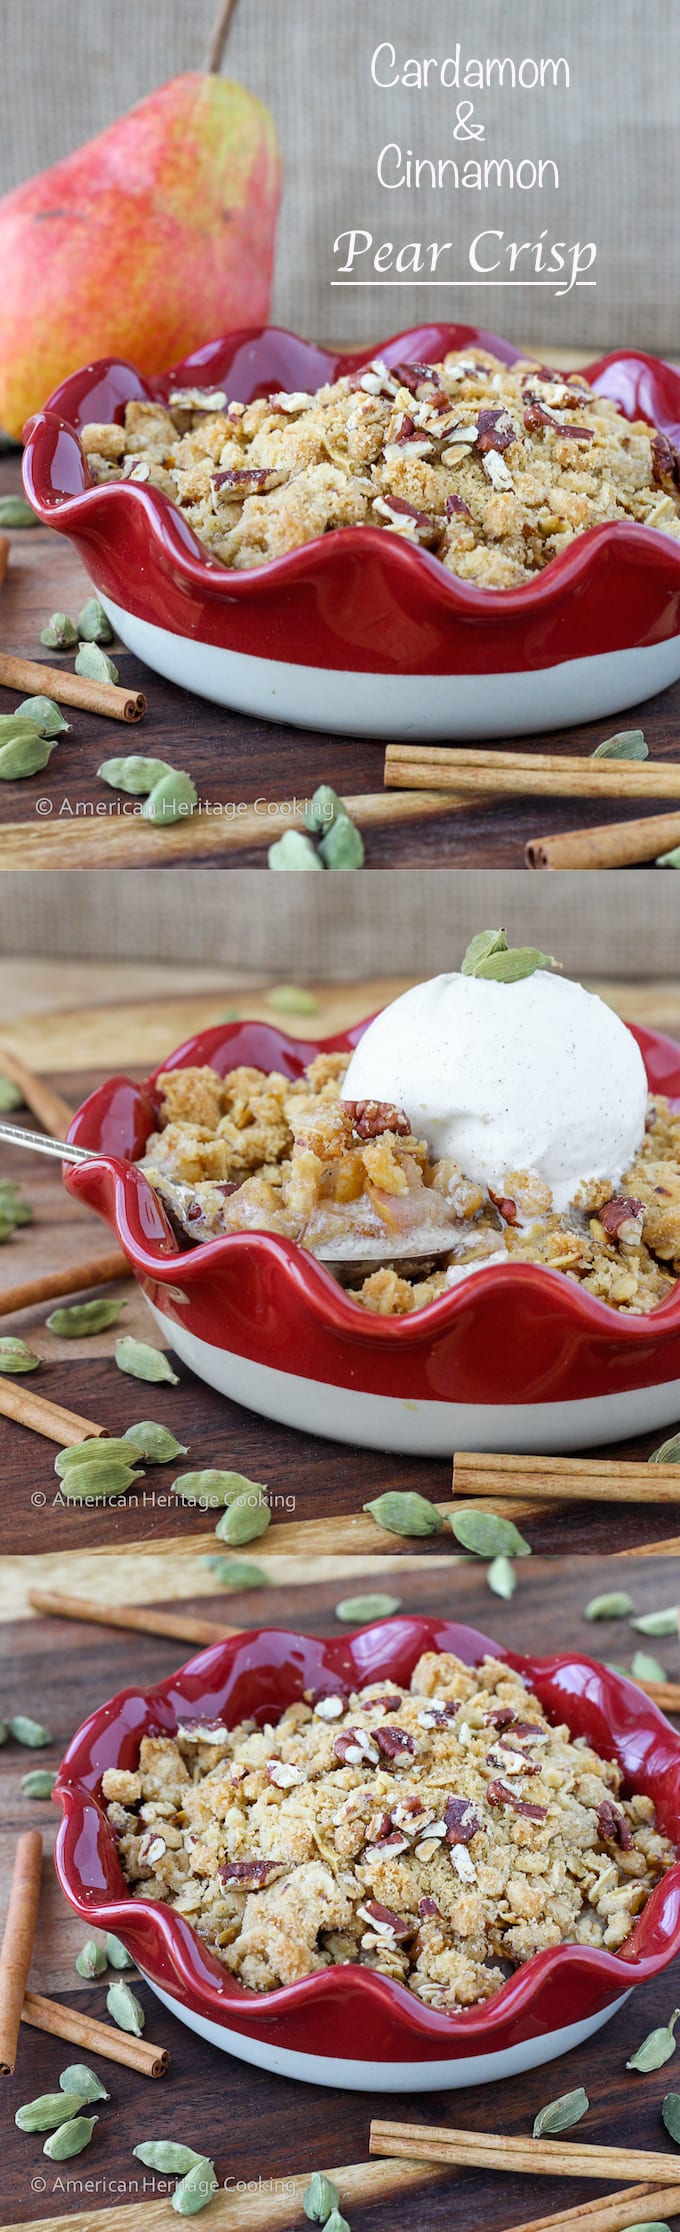
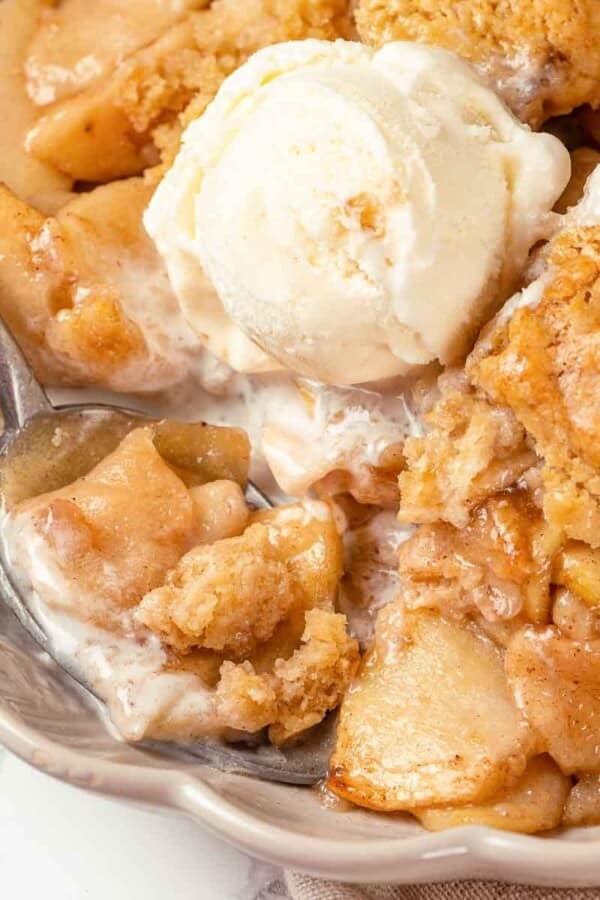
In this Cardamom Pear Crisp, bartlett pears are seasoned with cinnamon and cardamom and topped with a brown sugar oat crumble topping.
I have recently decided that there is no better Fall scent than cardamom and cinnamon.
Ever since I bought some dried green cardamom pods for a Moroccan roasted lamb shank, I have had more ideas for cardamom scented baked goods than days in Fall. The scent is intoxicating and relaxing all at the same time. I sneak little sniffs from the container in the kitchen all day. I know it’s kinda weird. Don’t tell.
I opened the container for my husband to take a sniff and he said, “I want to make a pillow out of that.” Indeed. A pillow. Good idea. Or a pear upside down cake.
Or a pear crisp…

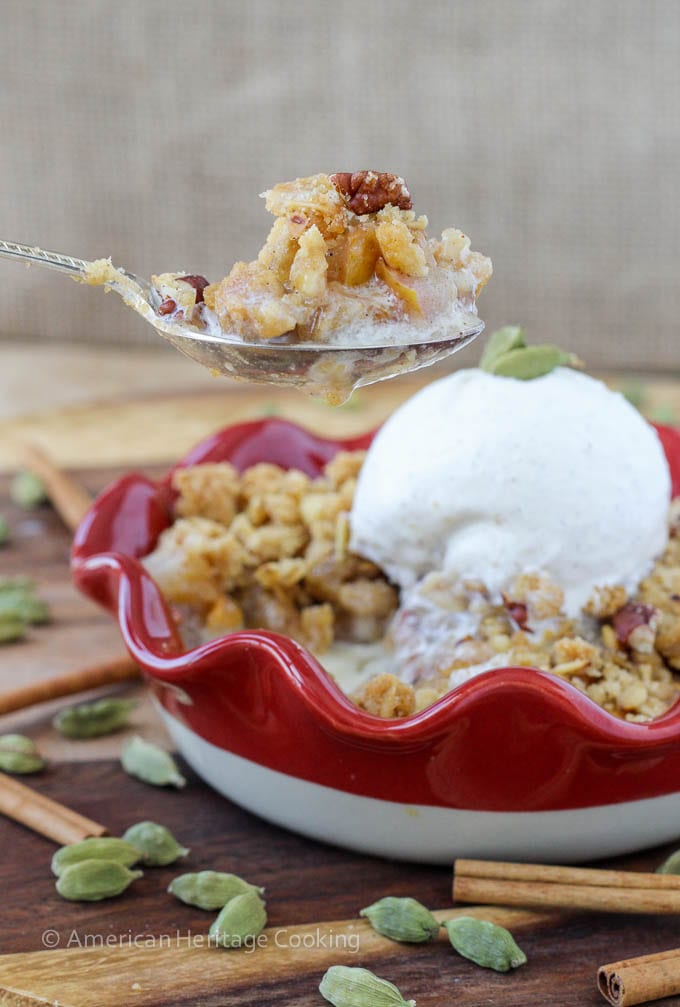
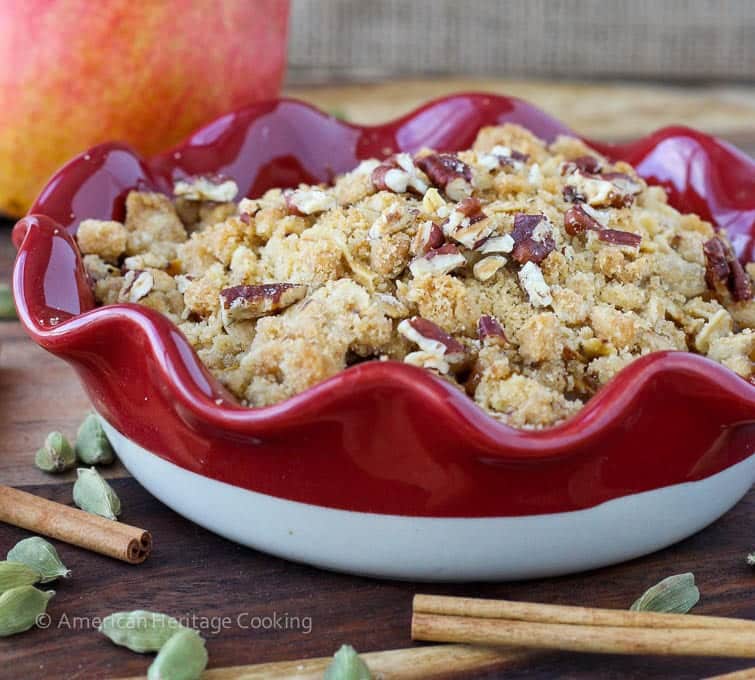
The warm flavors of the cardamom and cinnamon intermingle with the brown sugar crisp and toasted pecans for a flavorful fruit dessert that still highlights the pears!
And, while this cardamom pear crisp generously serves two, you aren’t going to want to share after your first bite! It is warm and comforting and will make you want to cozy up in a blanket next to the fire with a good book.
Or at least that’s how it made me feel!

I used the crisp topping that I created for these Peach Crisp Cupcakes to see if it would work on a larger scale. And does it! It crisped perfectly on top but was still soft!
You could also use the brown sugar oat topping from this easy apple crisp recipe or even this brown sugar streusel!
The proportions are also very easy to adjust for one, which makes this cardamom pear crisp the perfect anytime treat!


Cardamom Pear Crisp
Ingredients
For the Crisp Topping:
- ¼ cup unsalted butter melted
- ½ cup rolled oats
- ½ cup light brown sugar packed
- ½ cup all-purpose flour
- dash cinnamon
For the Pear Filling:
- 2 bartlett pears ripe but not soft (about 2 cups)
- ⅛ teaspoon cardamom
- ¼ teaspoon cinnamon
- 1 tablespoon lemon juice
- 1 ½ teaspoons sugar
- pinch kosher salt
- ½ teaspoon cornstarch
Instructions
Make your crisp topping:
- Preheat your oven to 350℉ and ready two small pie dishes or a small baking dish (see Helpful Tools note).
- Combine all topping ingredients in a medium bowl and stir until the butter has coated everything. The mixture should be crumbly but not dry. If yours is a touch dry, add a bit more butter. Be careful, because too much butter will make the topping greasy. Taste test. Sigh with pleasure. You can keep this covered with plastic wrap in the refrigerator until needed.
Prepare your filling:
- Core and chop pears into a medium dice. I did not peel mine and I loved the added flavor and texture. The most important thing is that the pieces are relatively uniform in size.
- In a medium bowl, mix the chopped pears with all the remaining filling ingredients. Pour into your baking dish. I find that it's helpful to do a quick taste test before I add my cornstarch.
- Remove the crisp topping from the fridge and crumble over the top of the entire dish, squeezing the mixture as you go so that it forms some large and small crumbles. If you don’t want to use all the topping, that is fine. It will keep, covered tightly in plastic wrap, in the refrigerator for a week.
- Bake in preheated oven for 25-45 minutes or until the filling is bubbling and the topping is crisp!
- Let cool 10 minutes before digging in! Top with vanilla ice cream and enjoy!
Notes
Let’s get into it like a PROFESSIONAL CHEF:
Presentation – Bonus points for serving this crisp with a mound of vanilla bean ice cream or a generous spoonful of vanilla bean anglaise. Flavor Tips – Taste your fruit for sweetness. You might want more or less sugar depending on the ripeness of the pears. I like to mix and then taste to get a real indication of how the flavors will meld. Lemon is King in Pear Crisp Land. This is the linchpin. Lemon has a magical quality that allows it to enhance all other flavors. Technique – The key to a thicker filling here is to make sure it bakes long enough! Wait to take the crisp out of the oven until after you can see the filling bubbling. More is more when it comes to the crisp topping. The beauty of this recipe is that it allows for some to sink in and absorb some of the pear juices and some to stay on top and get nice and crispy. Helpful Tools – If you are unsure what size baking dish to use, cut up your pears first and then dump them into a dish that you think will work best. They should come almost to the top. Sometimes I use a pastry blender to make my butter topping crumbly, homogenous, and clumpy. But, you could also do this by hand, in a food processor or in a stand mixer if you so choose. Variations – This recipe serves 2 people generously, but if you would like to make it for a group, double the recipe and then bake it in a 9” pyrex baking dish. The proportions are also very easy to adjust for one, which is kinda lovely. You could add some warming spices based on your preferences, my grandmother is where the cinnamon inspiration came from! Storage – Bake ahead, cool and then freeze for one month. Alternatively, refrigerate leftovers for up to seven days. The streusel topping can be made in advance and refrigerated for 7 days or frozen for up to one month.Nutrition
Before You Go
I hope you enjoyed this professional chef tested recipe. Check out our other delicious, chef-developed easy crisp recipes, like my raspberry rhubarb crisp!


You mention under variations: “This recipe serves 2 people generously, but if you would like to make it for a group, double the recipe and then bake it in a 9” pyrex baking dish.”
I would like to make an even larger version in a 9″ by 13″ baking dish. How much would I need to increase the recipe ingredients by? And would I need to increase the baking time?
Hi Steve! For a 9×13, I’d make 3x the recipe. That will fill the dish nicely without being too shallow. Yes, increase the bake time slightly, plan on ~35–55 minutes and bake until the filling is bubbling and the topping is crisp. The bubbling is your true doneness cue. Happy baking!
There is something about a fall crisp! The cooked pear filling is amazing paired with the cardamom oat streusel; I couldn’t stop eating it. I could eat the streusel by itself, too.
Wow, this crisp sounds amazing! Love that you paired the cardamom with the pears. I always forget about pears until I eat them, and then I wonder why I bake with them so infrequently. Pinned!
LOL! I do the same thing until I bought a bunch of pears and couldn’t eat them fast enough.