This post may contain affiliate links. Please read our disclosure policy.
Choux pastry is one of those foundational recipes that looks intimidating but becomes second nature once you understand the technique. This recipe includes professional consistency tests so you know exactly when the dough is ready to add eggs and ready to pipe.


A Quick Look At The Recipe
This is a brief summary of the recipe. Jump to the recipe to get the full details.
Jump to RecipePrep Time
20 minutes
Cook Time
35 minutes
Total Time
55 minutes
Servings
150 4 cm rounds
Difficulty
Intermediate — stovetop panade with gradual egg incorporation and professional consistency tests to guide the process.
Calories *
21 kcal per serving
Technique
Stovetop panade method with gradual egg incorporation; dough tested for consistency before piping and baked until deeply golden and hollow.
Flavor Profile
Buttery, lightly savory, neutral, subtly eggy.
* Based on nutrition panel
I was always nervous about making choux pastry at home, but the trench consistency test in this recipe was exactly what I needed. I could finally see when the dough was ready instead of guessing, and my cream puffs came out perfectly hollow with a crisp shell. I have already made a double batch for a party. ⭐⭐⭐⭐⭐
Lauren
Why This Recipe Works
- Professional consistency tests included. The trench test, hook test, and ribbon test take the guesswork out of the most critical step in the entire process: knowing when your choux paste has the right consistency. These are the same checks used in professional pastry kitchens, translated for the home baker.
- Gradual egg incorporation for a stable paste. Adding eggs one at a time, while monitoring temperature and texture, controls the final hydration of the paste. Too much egg too fast changes both the structure and the flavor of the finished pastry.
- High butter ratio for a non-stick panade. This recipe uses more butter relative to milk and flour than most standard formulas, which prevents the paste from sticking aggressively to the pot and produces a richer, more tender finished shell.
- Designed to scale. The recipe works reliably from a half batch up to four times the base recipe. Batch size affects stirring effort and equipment capacity, and the notes here address both so you can scale with confidence.
Table of Contents
- Why This Recipe Works
- Ingredients & Substitutions
- Variations on This Choux Pastry (Pâte à choux)
- Professional Tips
- How to Make Choux Pastry (Pâte à choux)
- 3 Tests for Pâte à Choux
- Chef Lindsey’s Recipe Tip
- Recipe FAQs
- More Classic French Recipes
- Recommended Choux Pastry Recipes
- Pâte à Choux Recipe
- Before You Go
Pâte à choux has a reputation for being temperamental, and I will not pretend that reputation is entirely unearned. What I can tell you is that once you understand what you are looking for at each stage, it becomes one of the most repeatable techniques in a pastry kitchen.
This dough is the foundation for cream puffs, éclairs, gougères, and more. If you are new to choux, start here and build from this base. If looking to learn other foundational recipes, try this puff pastry recipe or this pastry cream recipe. You will be able to make many desserts using these recipes, such as this puff pastry fruit tart.
Ingredients & Substitutions
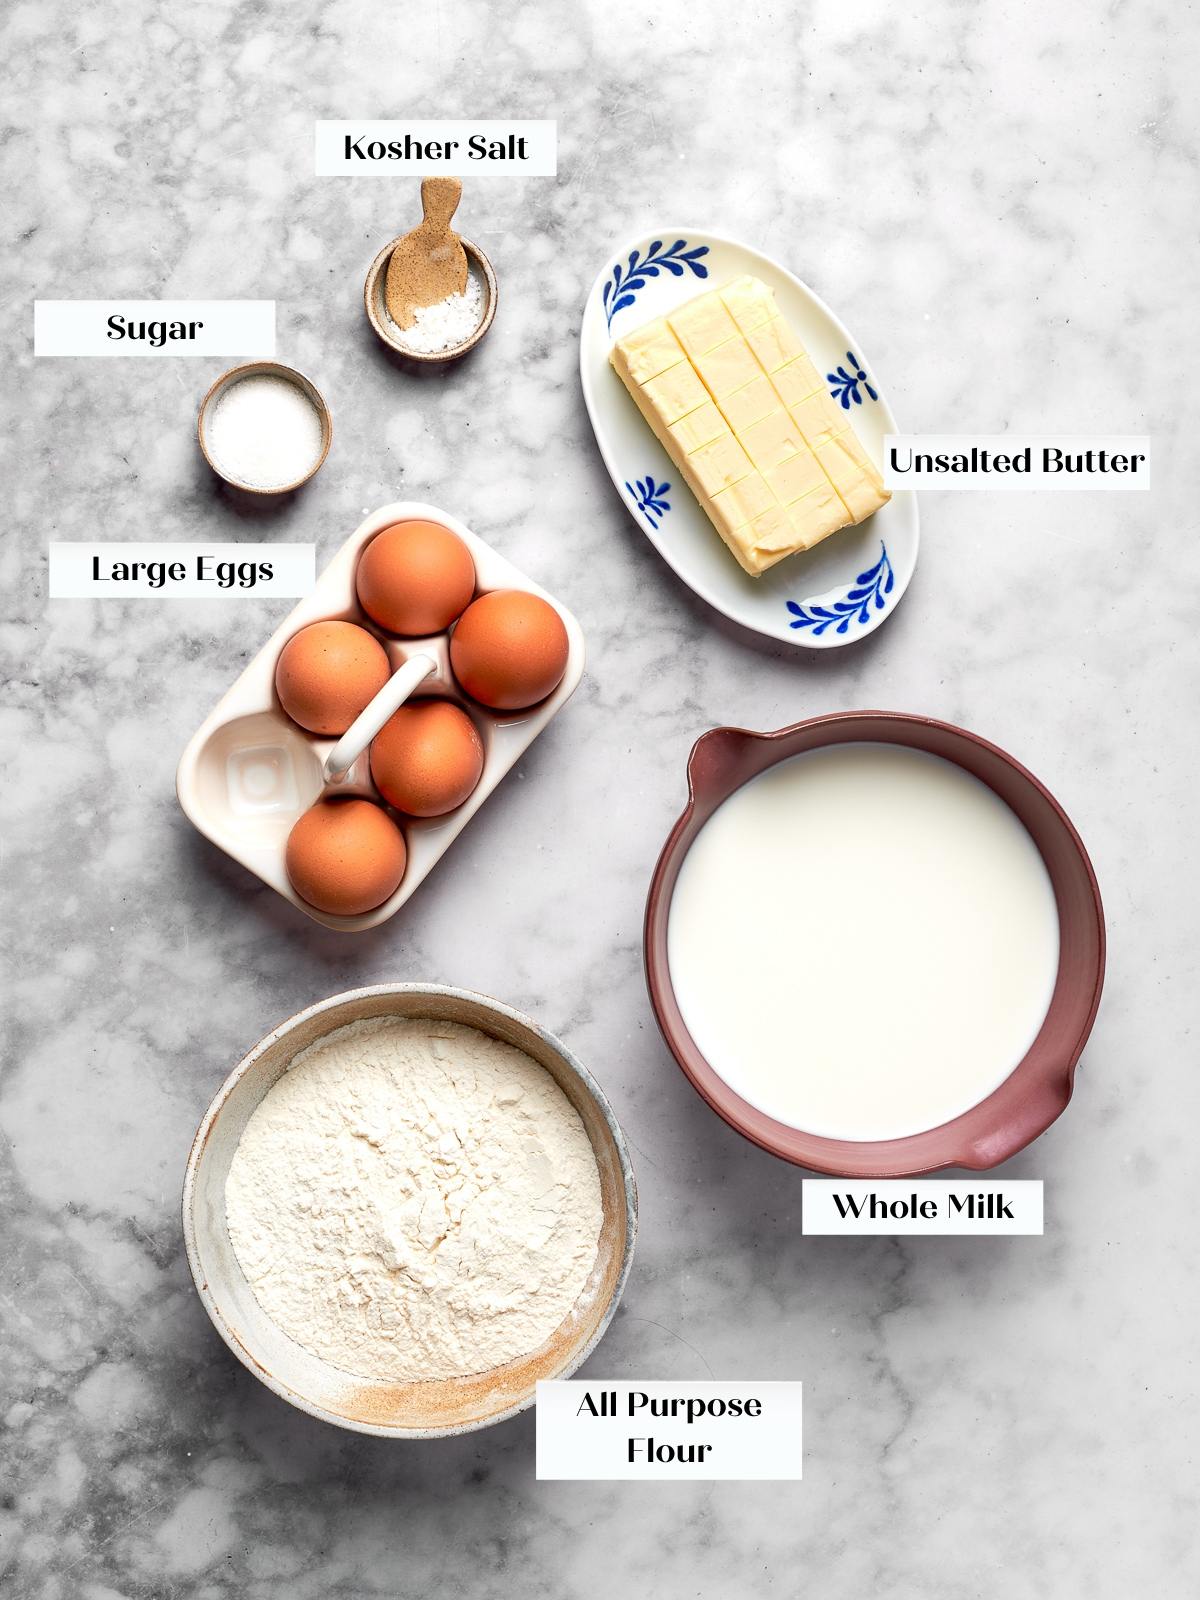
- Unsalted Butter: Butter coats the flour proteins during the panade, which controls gluten development and produces a shell that puffs rather than turns bready. Use it cubed so it melts evenly before the milk comes to a boil.
- Whole Milk: Milk supplies the moisture that converts to steam in the oven, and that steam is what inflates the choux. Lower-fat milk produces paler, drier shells; whole milk gives you a richer, more custardy interior and better browning.
- All-Purpose Flour: Flour forms the structural backbone of the choux. Its starches gelatinize when stirred into the hot milk and butter, which is what enables the paste to trap steam during baking. Weighing the flour using a kitchen scale is the only way to guarantee consistent results.
- Kosher Salt: Salt sharpens the flavor and keeps the richness of the butter and eggs from tasting flat. Measure by weight if you switch salt brands, since crystal size affects salinity.
- Granulated Sugar: A small amount of sugar promotes even browning and a delicate, crisp exterior without making the choux taste sweet. It also slightly tenderizes the finished shell so it snaps cleanly rather than turning hard.
- Large Eggs (variable quantity): Eggs are the primary leavening and structural element in choux pastry. Their water content creates steam, their proteins set the shell, and their fat contributes to the tender, hollow interior. You add them gradually and stop when the paste is smooth, shiny, and falls from the spatula in a thick V shape. That texture cue matters more than the exact count, because how much water evaporated during the panade determines how many eggs the dough can absorb. Over-adding egg loosens the paste beyond recovery and produces flat, soggy puffs.
See the recipe card for full information on ingredients and quantities.
Variations on This Choux Pastry (Pâte à choux)
- Half Batch or Scaled Up. This recipe scales reliably from a half batch up to four times the base formula. Beyond 4x, the volume becomes difficult to stir by hand and you must account for your pot and mixer capacity.
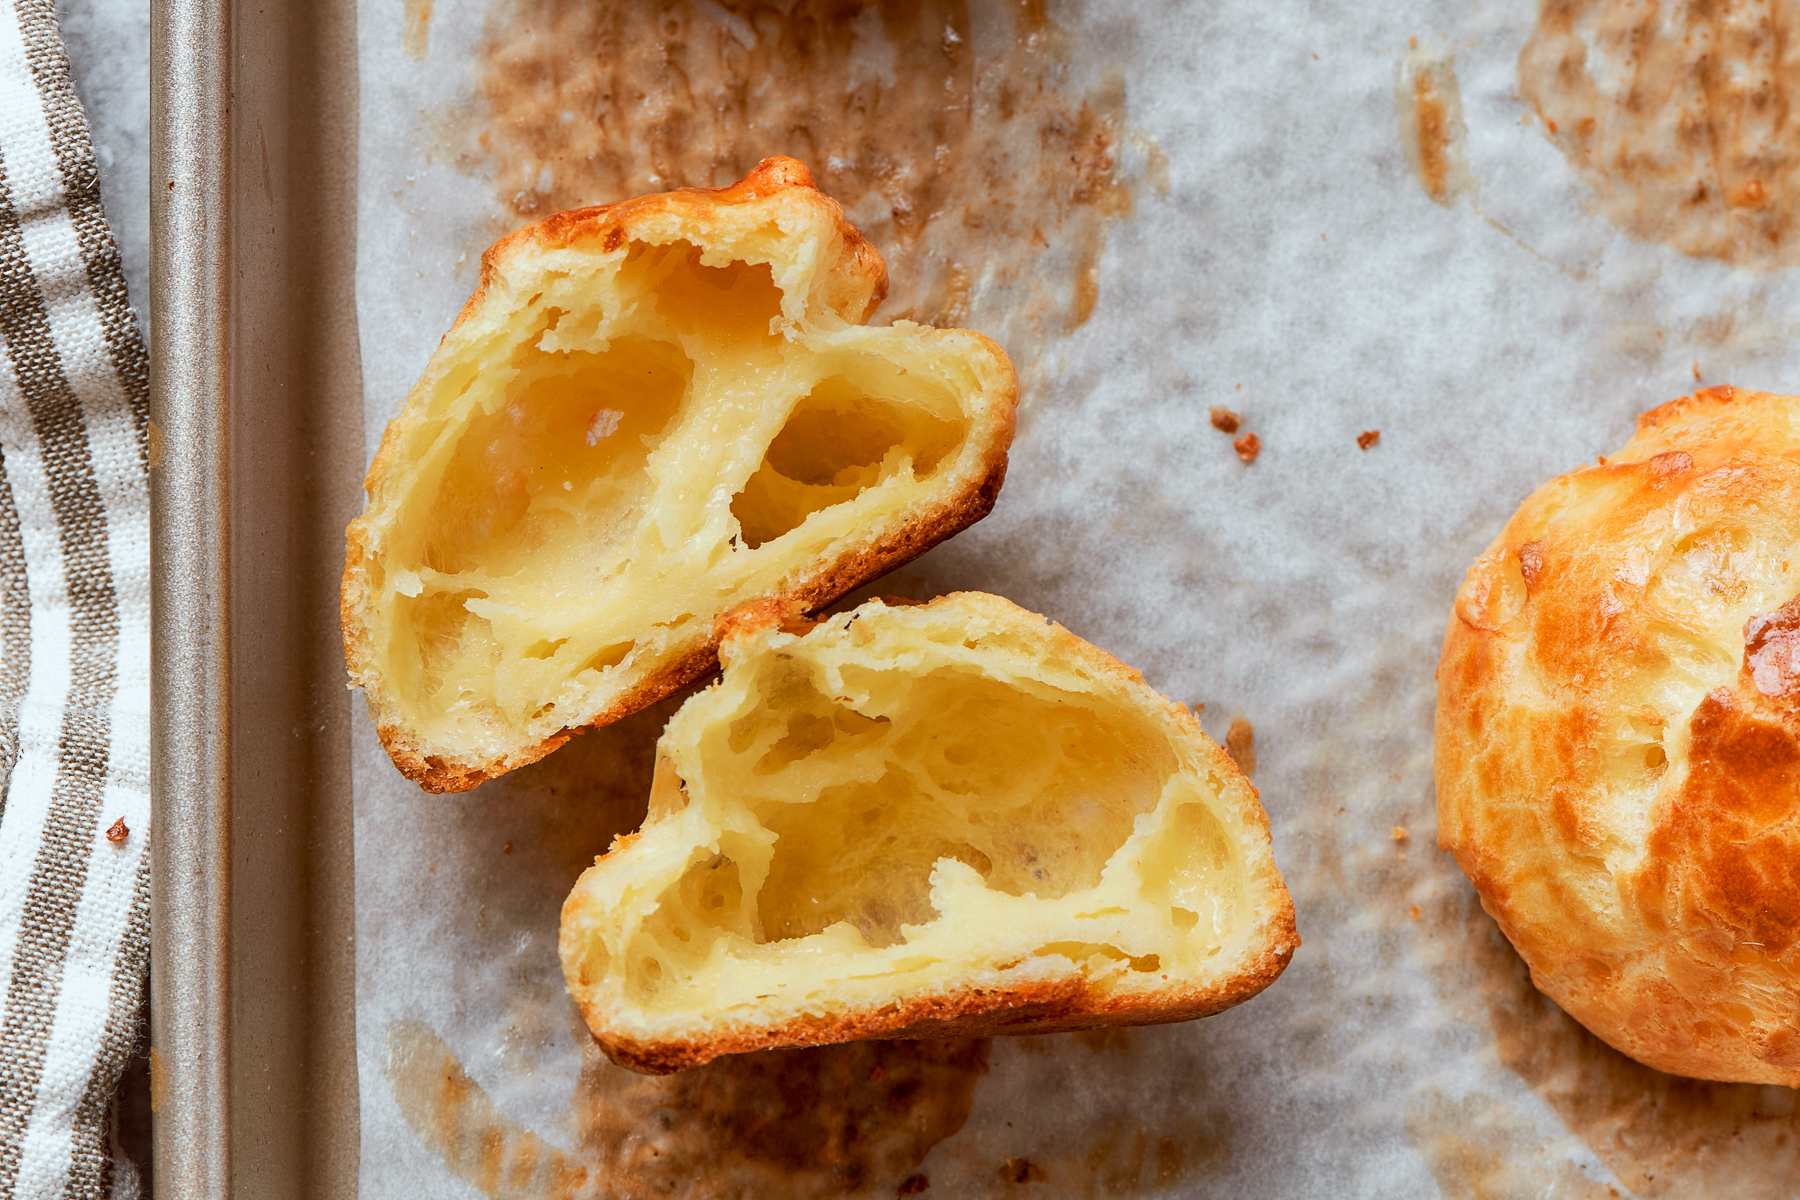
- Savory Choux (Gougères pictured below). Fold finely grated Gruyère or Comté into the finished paste before piping for classic gougères. The cheese adds enough salt and fat that you may want to reduce the measured salt slightly depending on the variety you use.
- By Hand Instead of a Stand Mixer. You can incorporate the eggs entirely by hand using a wooden spoon and a strong arm. It is genuinely labor-intensive to do it correctly, and a stand mixer will give you better rise and a more consistent paste, but the method works if that is what you have.
Professional Tips
- Do not add all the eggs at once. Adding eggs gradually while monitoring texture is what gives you control over the final consistency of the paste. If they go in all at once, you lose the ability to stop at the right moment, and a paste that is too loose cannot be corrected.
- Work quickly after the panade is cooked. The temperature of the dough when you begin adding eggs determines how many eggs the paste will absorb. If the dough cools too much before you start, you may need significantly more egg than the recipe calls for, which changes both the texture and flavor of the finished pastry.
- Watch for butter separating from the dough. This recipe’s high butter ratio means the paste will not brown the bottom of the pot, but if you cook it too long, the butter can begin to melt out. If that happens, transfer the paste to the mixer bowl immediately and proceed from the egg addition step. You will likely need one to one and a half additional eggs.
How to Make Choux Pastry (Pâte à choux)
Setting up before you turn on the heat is the difference between smooth, controlled execution and a scramble at the stove.
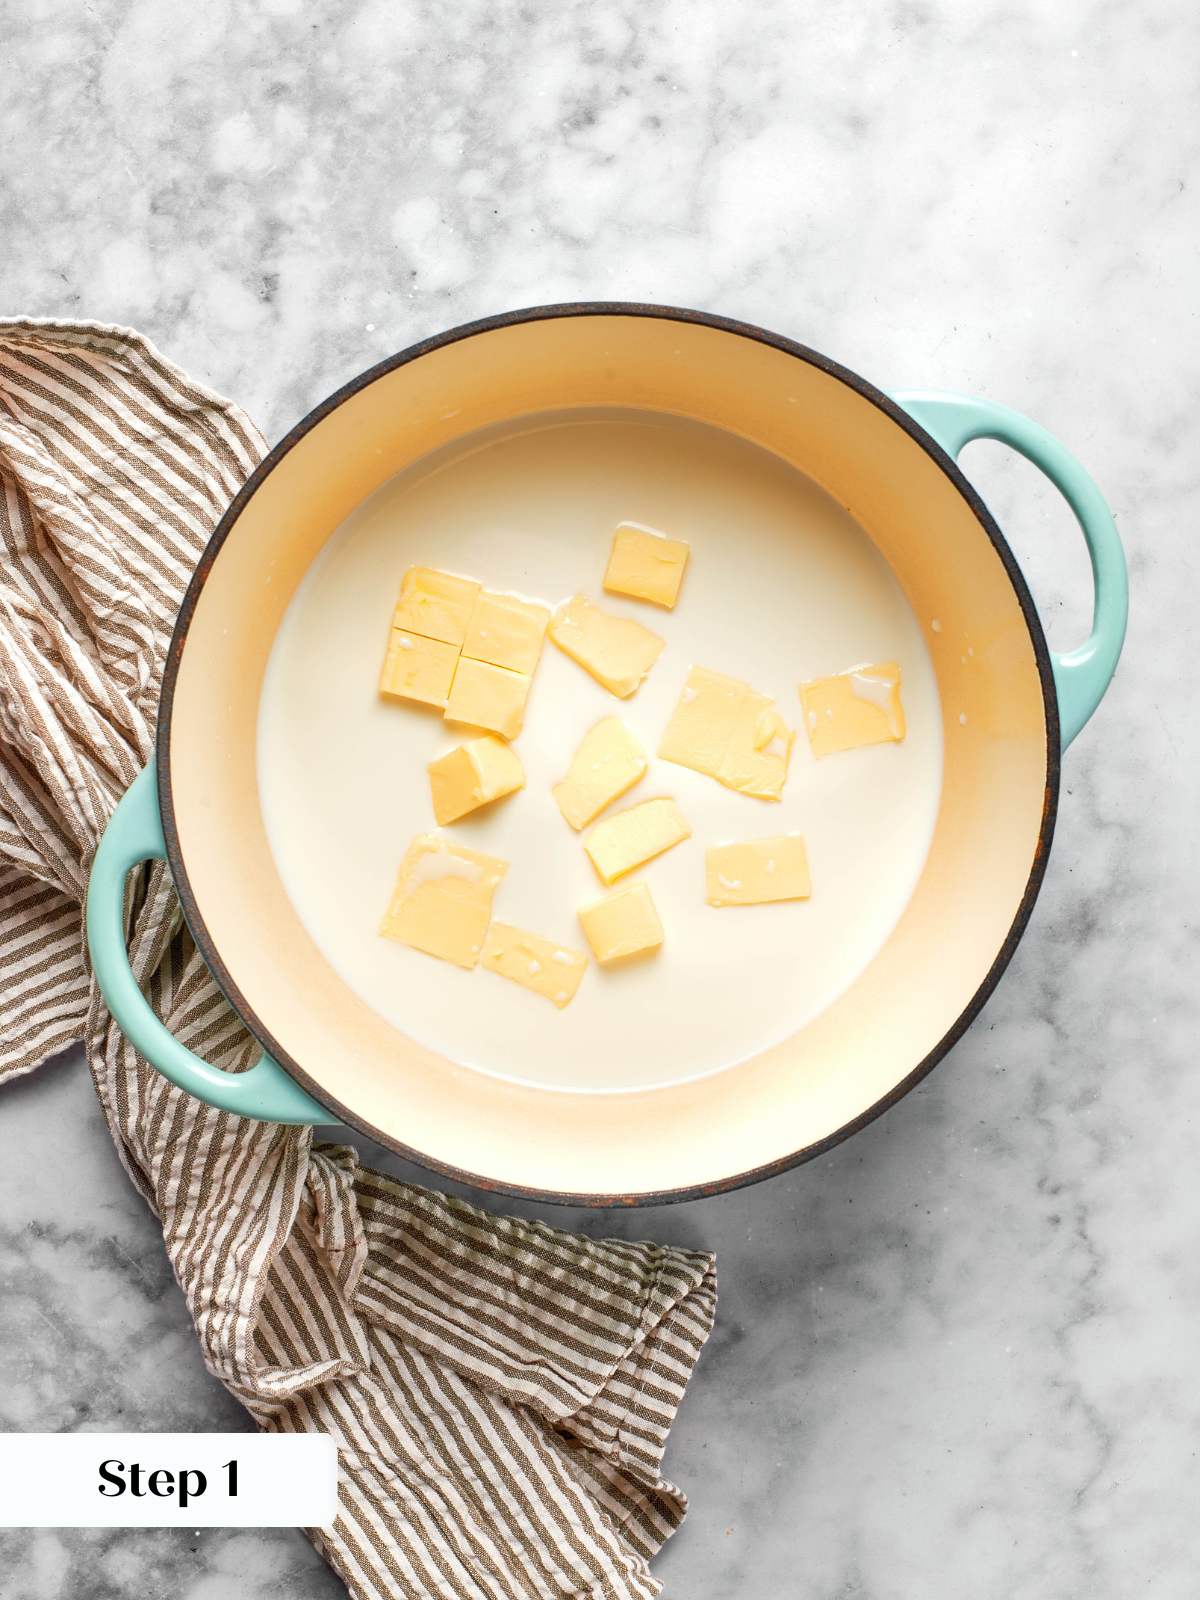
Step 1: Measure and organize all ingredients. Combine the flour, salt, and sugar in a bowl and set it aside. Crack the eggs into a separate container so they are ready to add one at a time. Cube the butter now if you have not already. Cubing the butter helps it melt in sync with the milk coming to a boil (photo 1), so the two happen simultaneously rather than the milk boiling off while you wait for a large cold block to melt.
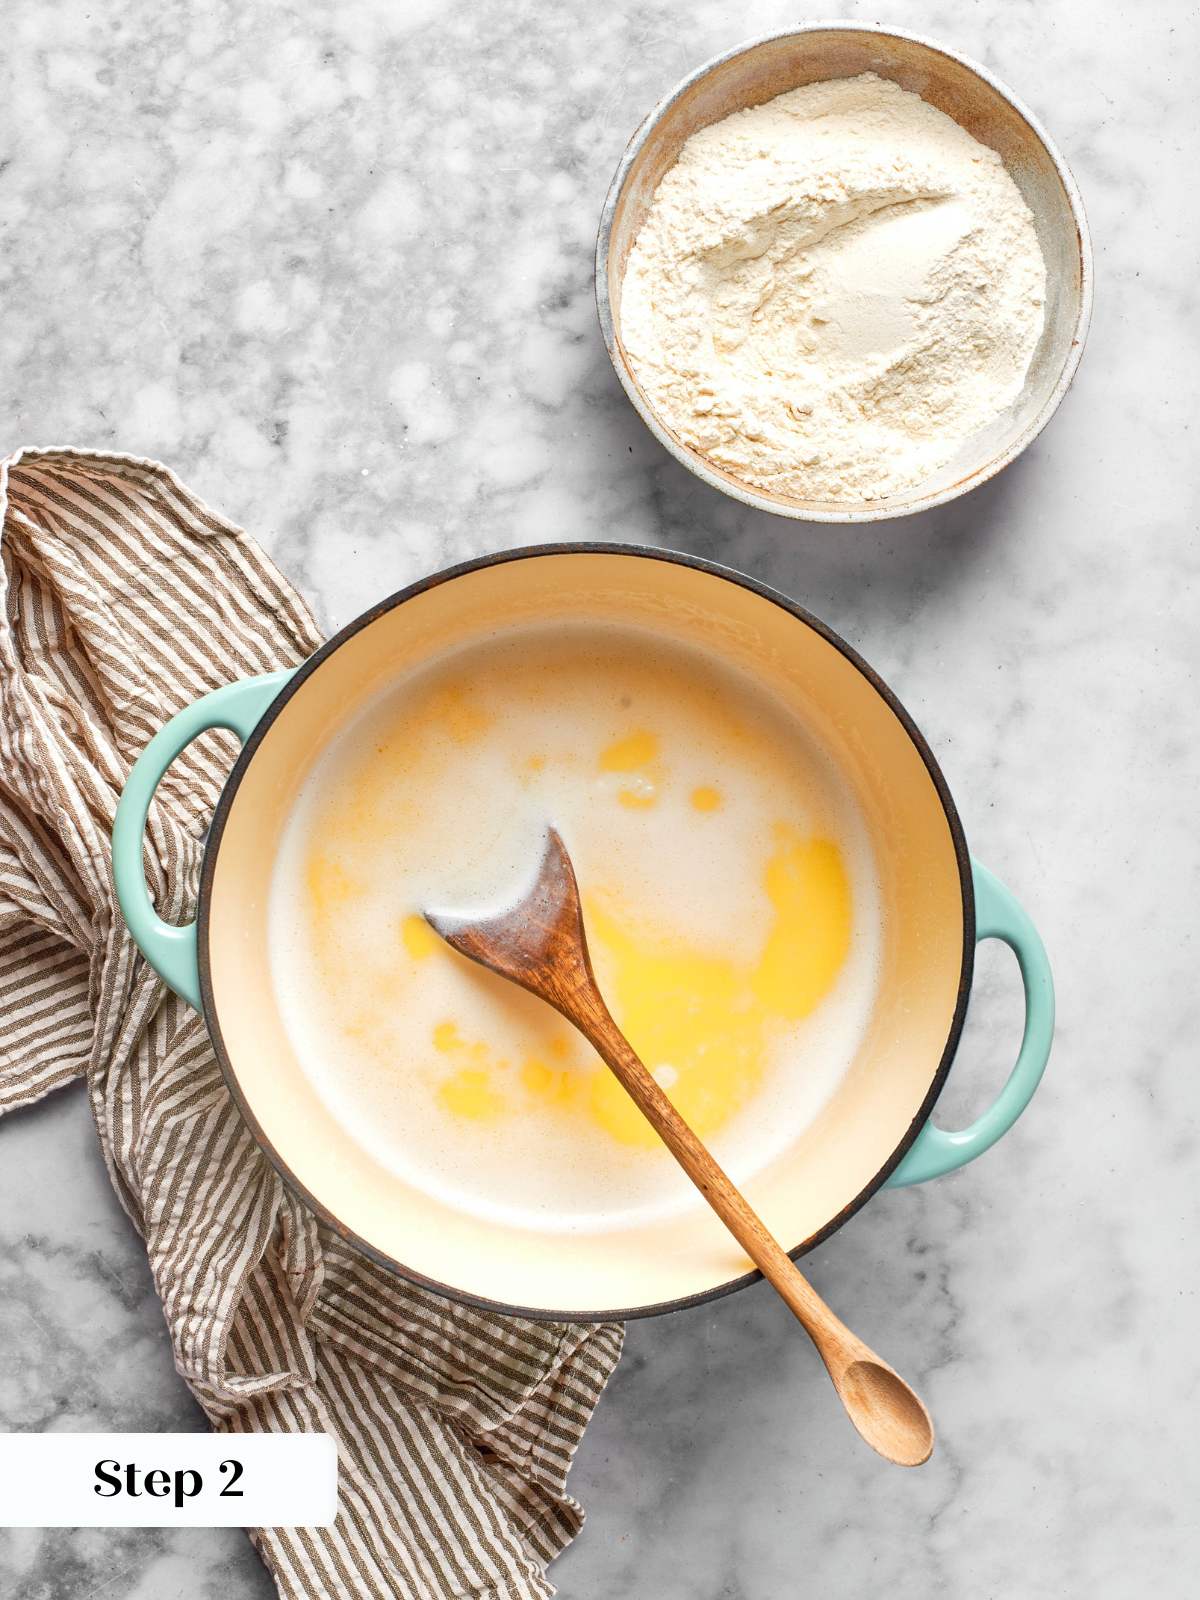
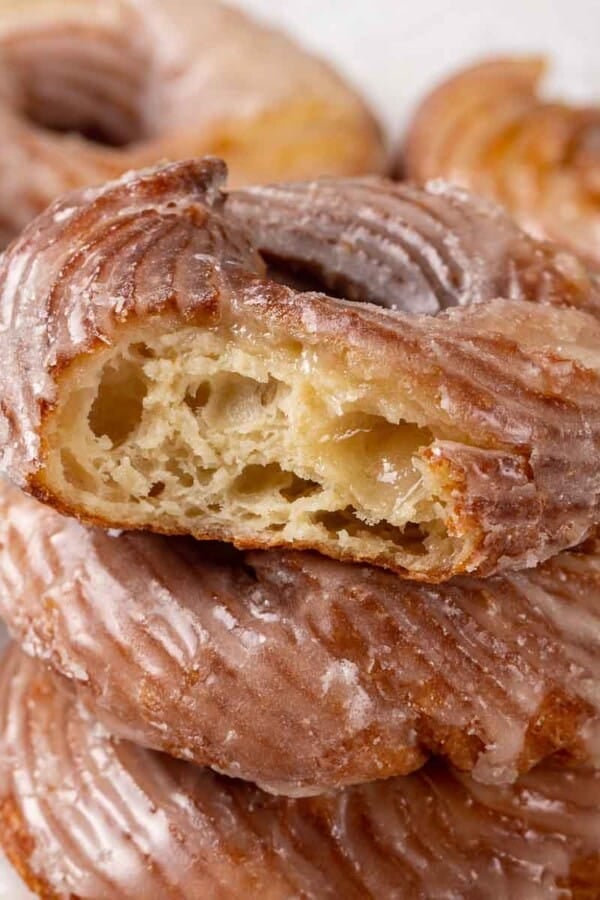
Step 2: Bring the butter and milk to a boil. In a high-sided, heavy-gauge saucepot, combine the cubed butter and milk over high heat. Watch closely. The goal is for the butter to finish melting exactly as the milk reaches a boil, just like when making French crullers. The moment the milk boils, move to the next step. Do not let it continue boiling. (photo 2).
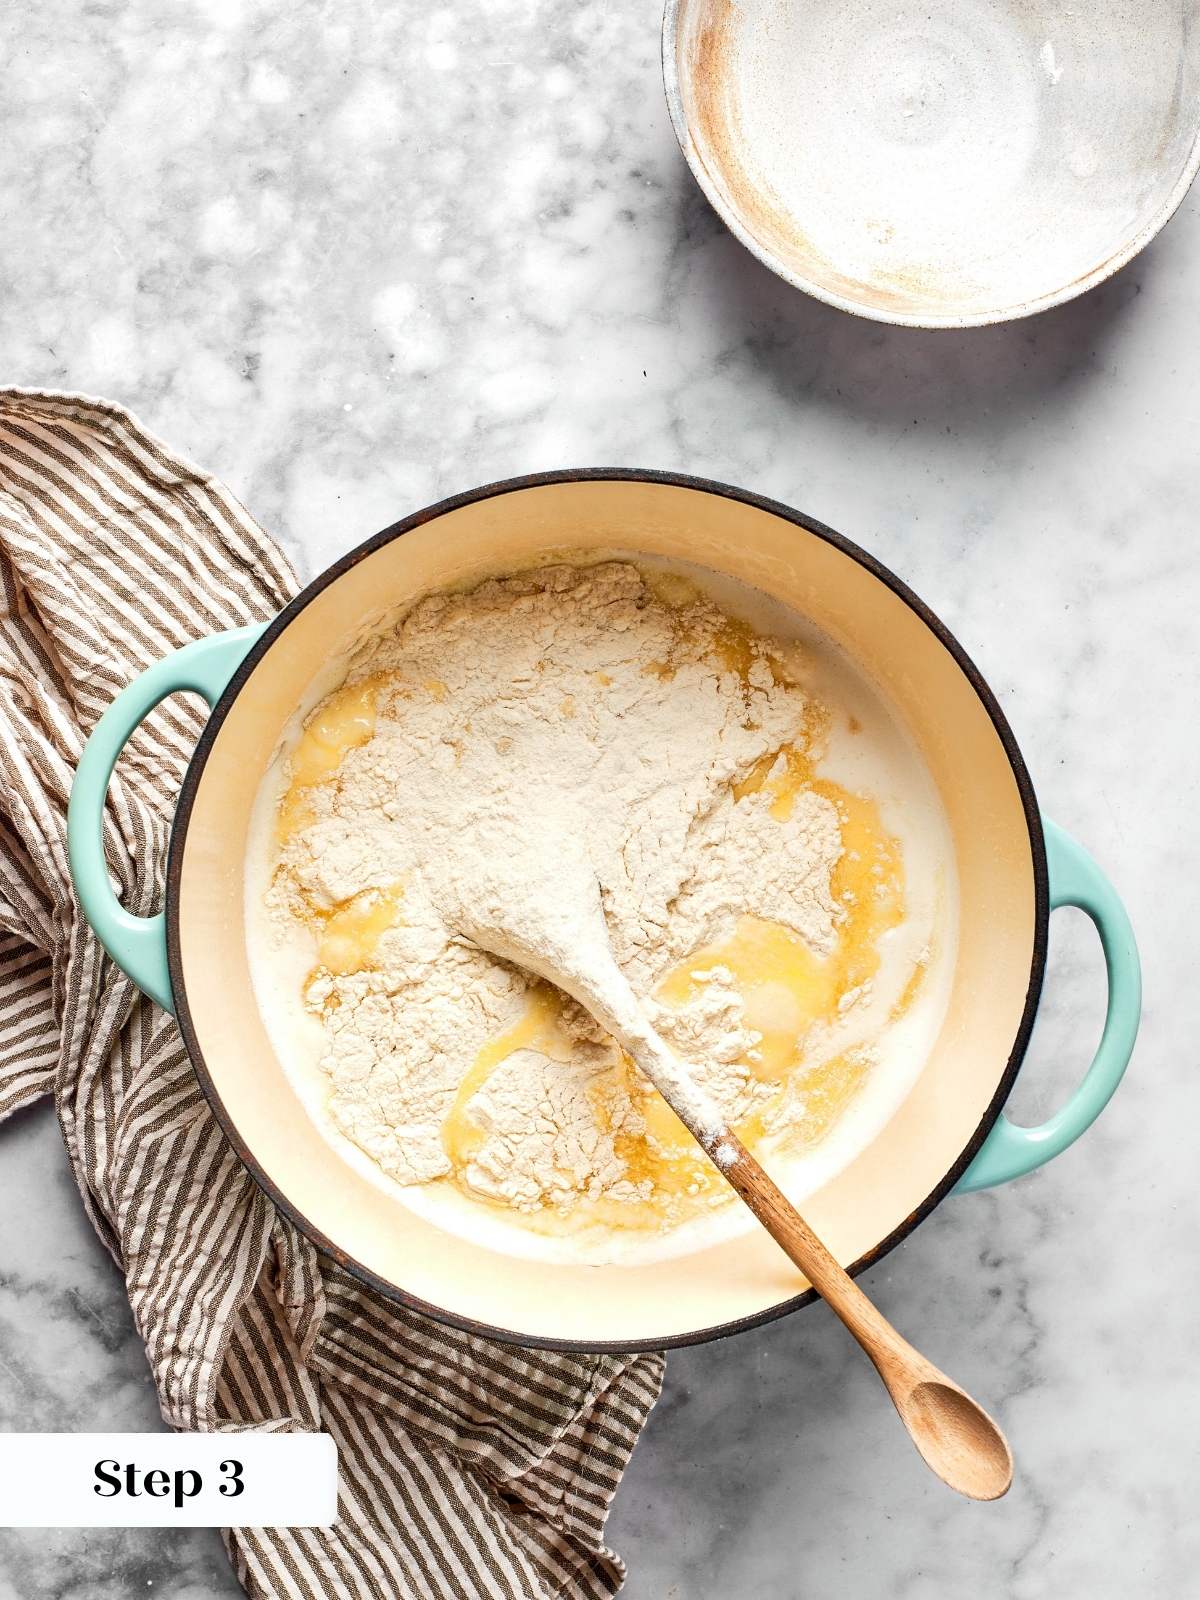
Step 3: Add the flour mixture and begin the panade. Add the flour, salt, and sugar all at once. Stir carefully at first to bring the mixture together without splashing, then once the flour has absorbed the liquid and the mixture thickens, switch to vigorous stirring to smooth out any lumps. A wooden spoon is the right tool here. It gives you leverage against the thickening dough and is easier to grip than a silicone spatula when the paste starts to resist (photo 3).
Step 4: Cook the panade until it clears the pot. Keep the heat on high and stir constantly. The dough will pull away from the sides of the pot and leave a thin, dry coating on the bottom. That coating is the visual signal that enough water has evaporated from the milk and butter to produce a pipeable choux paste. This usually takes about 2 minutes from the moment the flour goes in. Do not rush it or pull the dough early (photo 4).

This recipe has a high ratio of butter to milk and flour, which limits how much the paste will stick to the pot. If you notice the butter beginning to melt out of the dough, transfer it to the mixer bowl immediately and continue from Step 5. You will likely need 1 to 1.5 additional eggs.
Step 5: Transfer to the stand mixer and release the steam. Move the panade to the bowl of a stand mixer fitted with the paddle attachment. Beat on medium-high. The dough will look rough and steamy at first, which is completely normal. You are not incorporating anything yet. You are letting the steam escape so the mixture cools enough to accept eggs without scrambling them. Wait until the steam stops rising before adding a single egg. (photo 5).
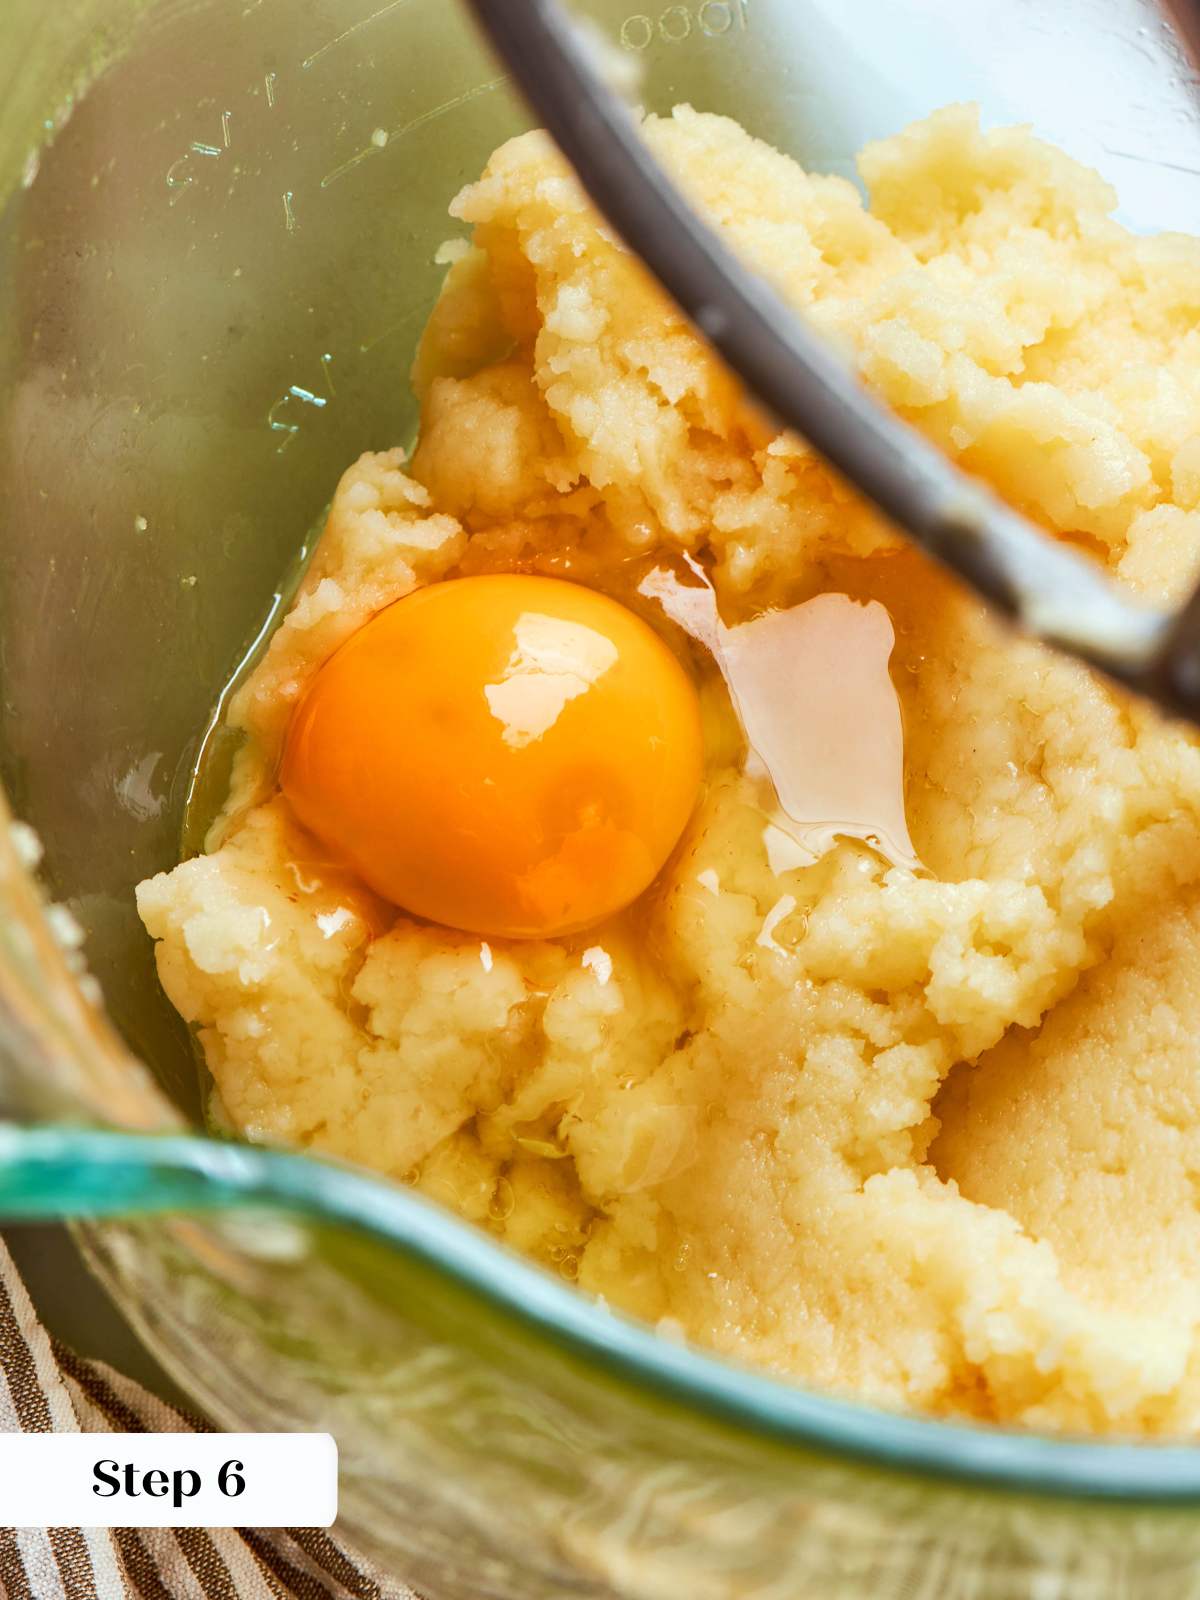
Step 6: Add the eggs one at a time. Once the mixture stops steaming, reduce to medium speed and begin adding the eggs one at a time, letting each egg fully incorporate before adding the next. The dough will look broken and curdled after the first egg or two, and that is fine. It comes back together. Adding eggs to choux paste is similar to the final steps of building Italian meringue buttercream: the interplay between the residual heat of the paste and the added moisture from the eggs determines how the dough develops. If the panade has cooled too much before you start adding eggs, you may need more eggs than the recipe calls for to reach the right consistency, which will alter both the texture and flavor of the finished pastry, which I want you to avoid. (photo 6).
Step 7: Test the choux for doneness. For this particular recipe, I find the trench test to be the most reliable. Some of my pastry cooks preferred the hook test or a combination, but using the ribbon test often resulted in them adding too many eggs. [See photos below]
3 Tests for Pâte à Choux
These are three ways you can test the choux paste for the proper consistency before piping and baking.
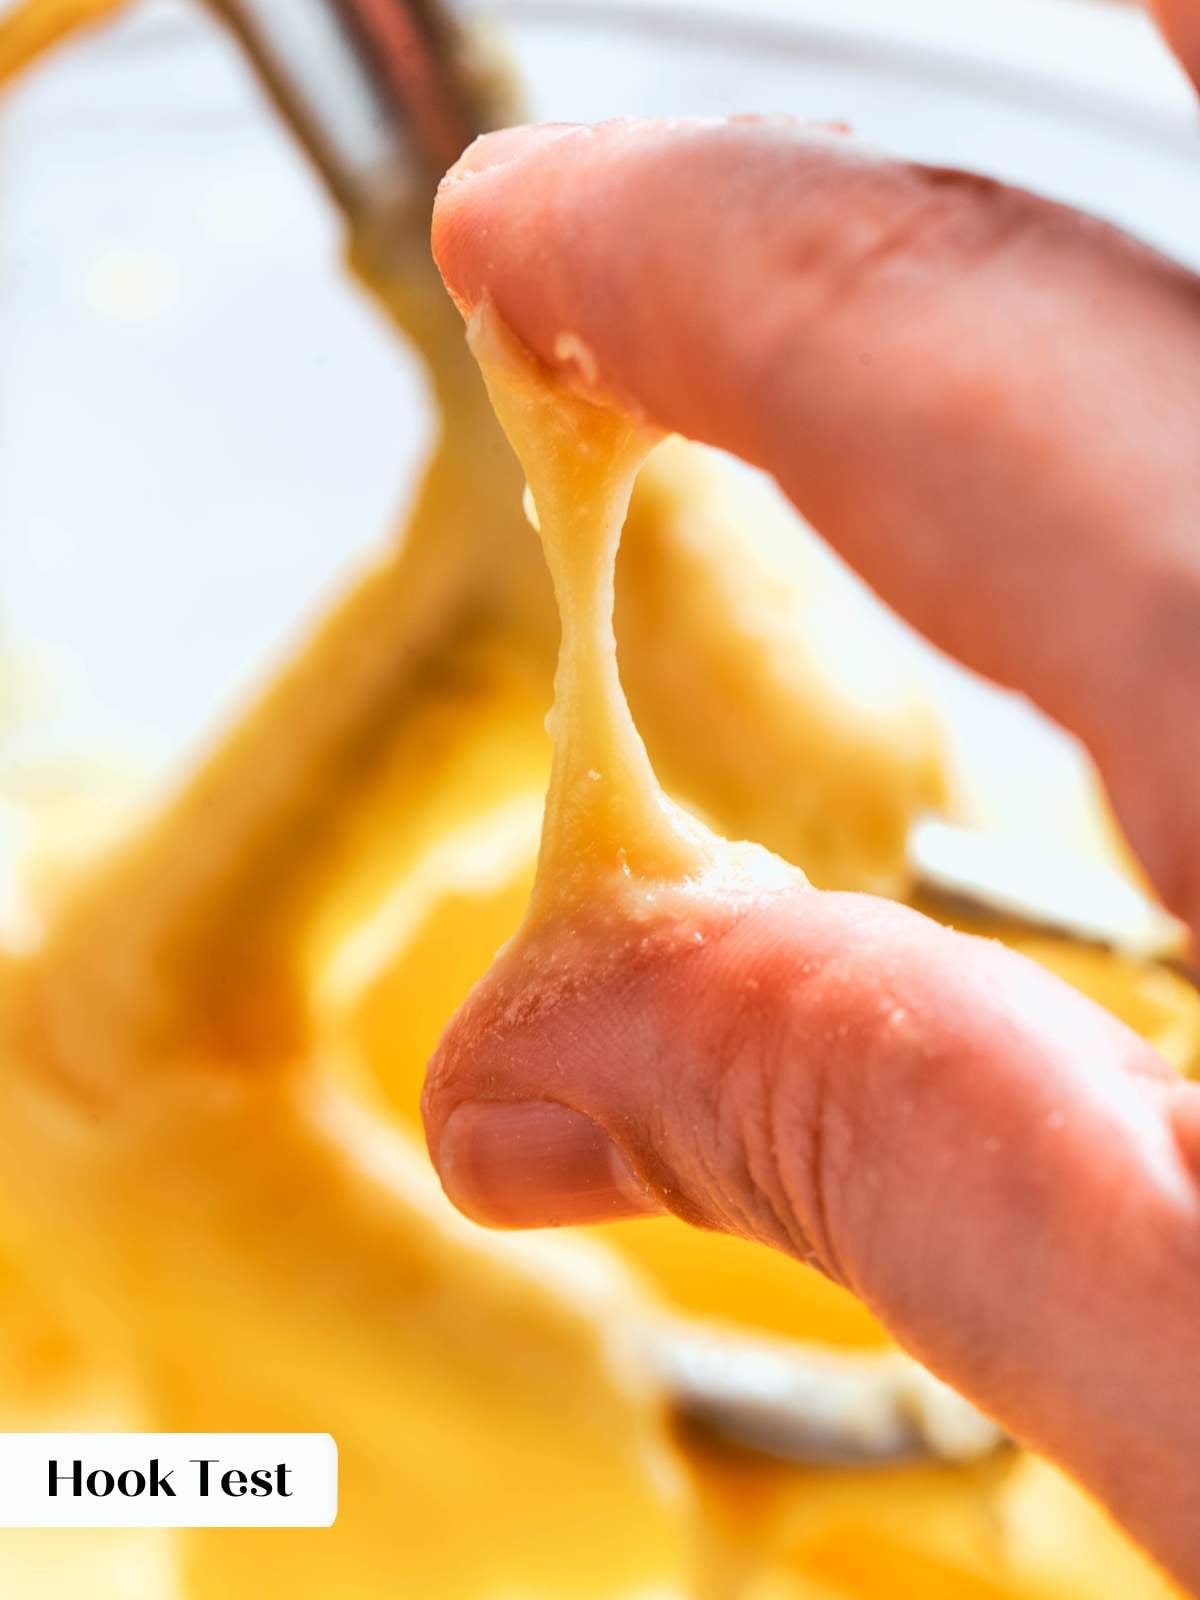
- Hook Test: Dip your forefinger into the choux paste and then bring the thumb and forefinger together, squishing the choux between them. Pull them apart and look at the peaks on either side. They should flop to the side, particularly the one on your thumb. This test takes a little practice to get the right amount of choux on your fingers. Too much or too little can be misleading.
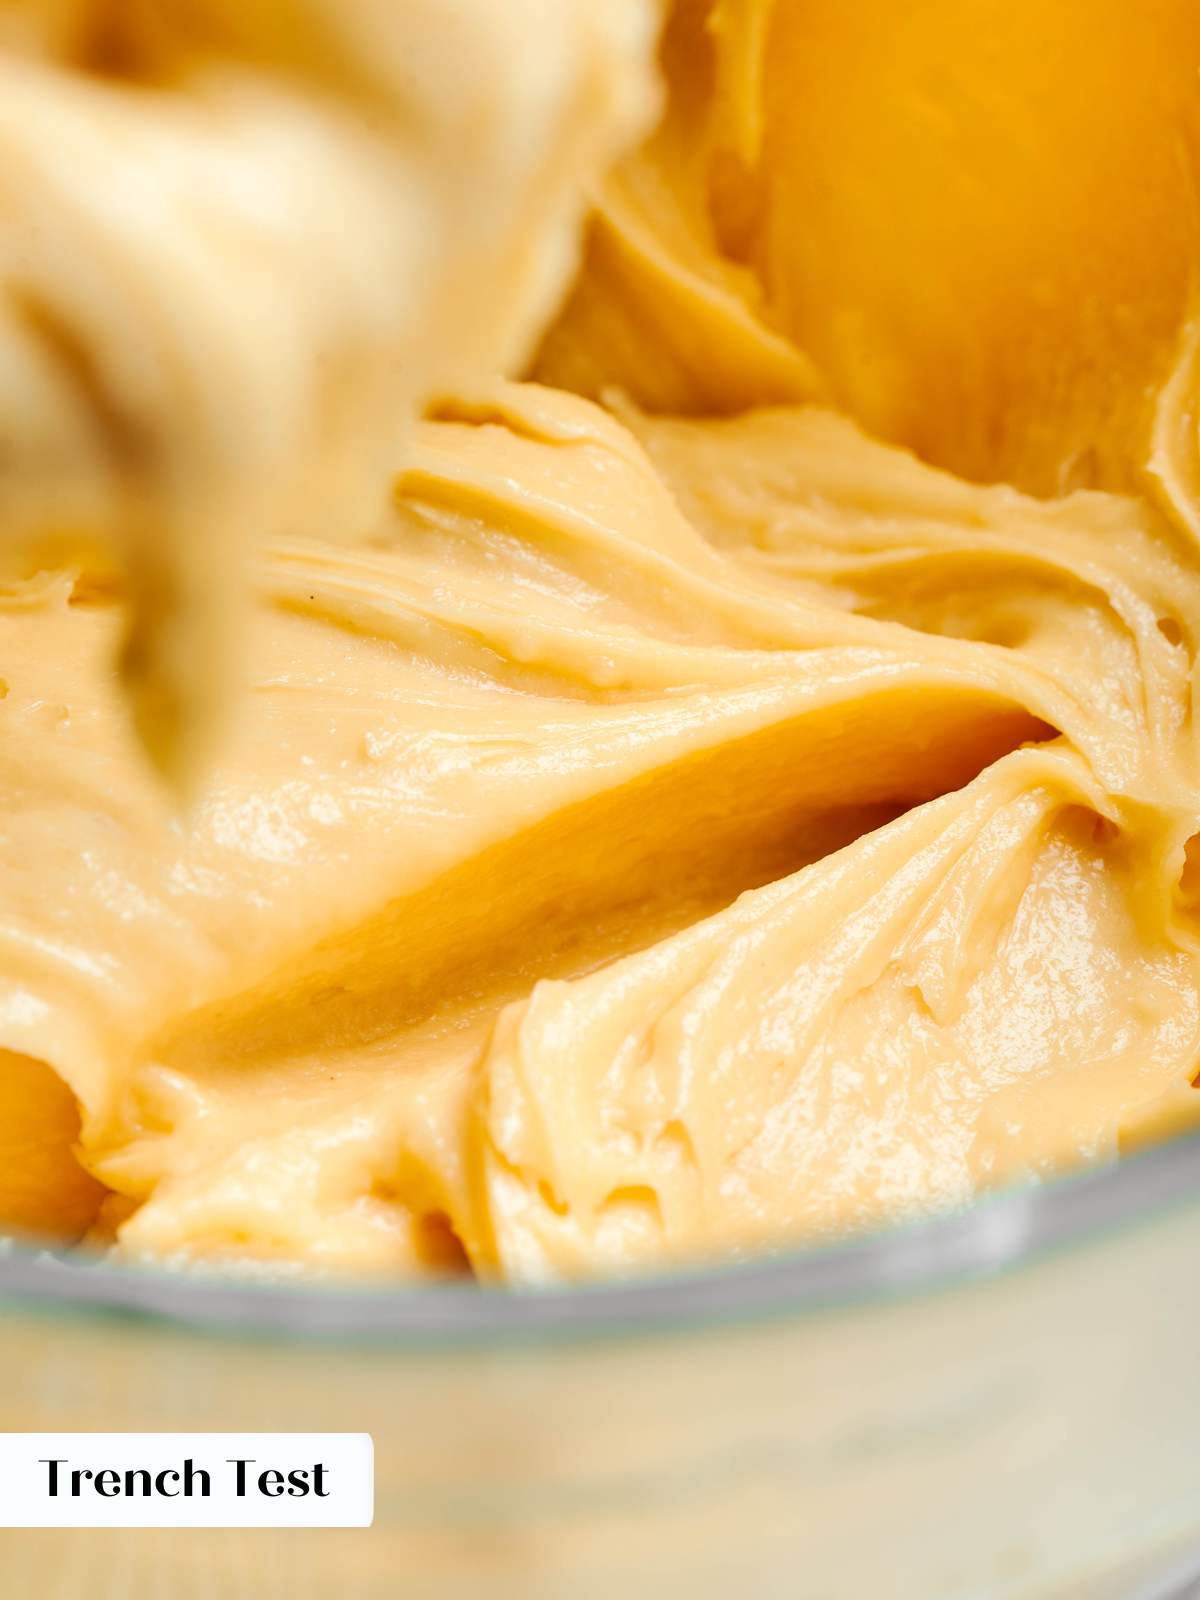
- Trench Test: When you draw your finger through the choux dough, the “trench” that is created should close steadily but not run together. If the sides of the trench don’t move at all, the choux is too stiff. Add another half egg before repeating the test again. Do be mindful that the cooler the choux, the slower the trench will close. Keep this in mind. A member of my team or I made choux every day for about 8 years. It was a rare occasion that more than 2 eggs needed to be added for a 4x batch. That would be about an additional half egg in this recipe at the top end.
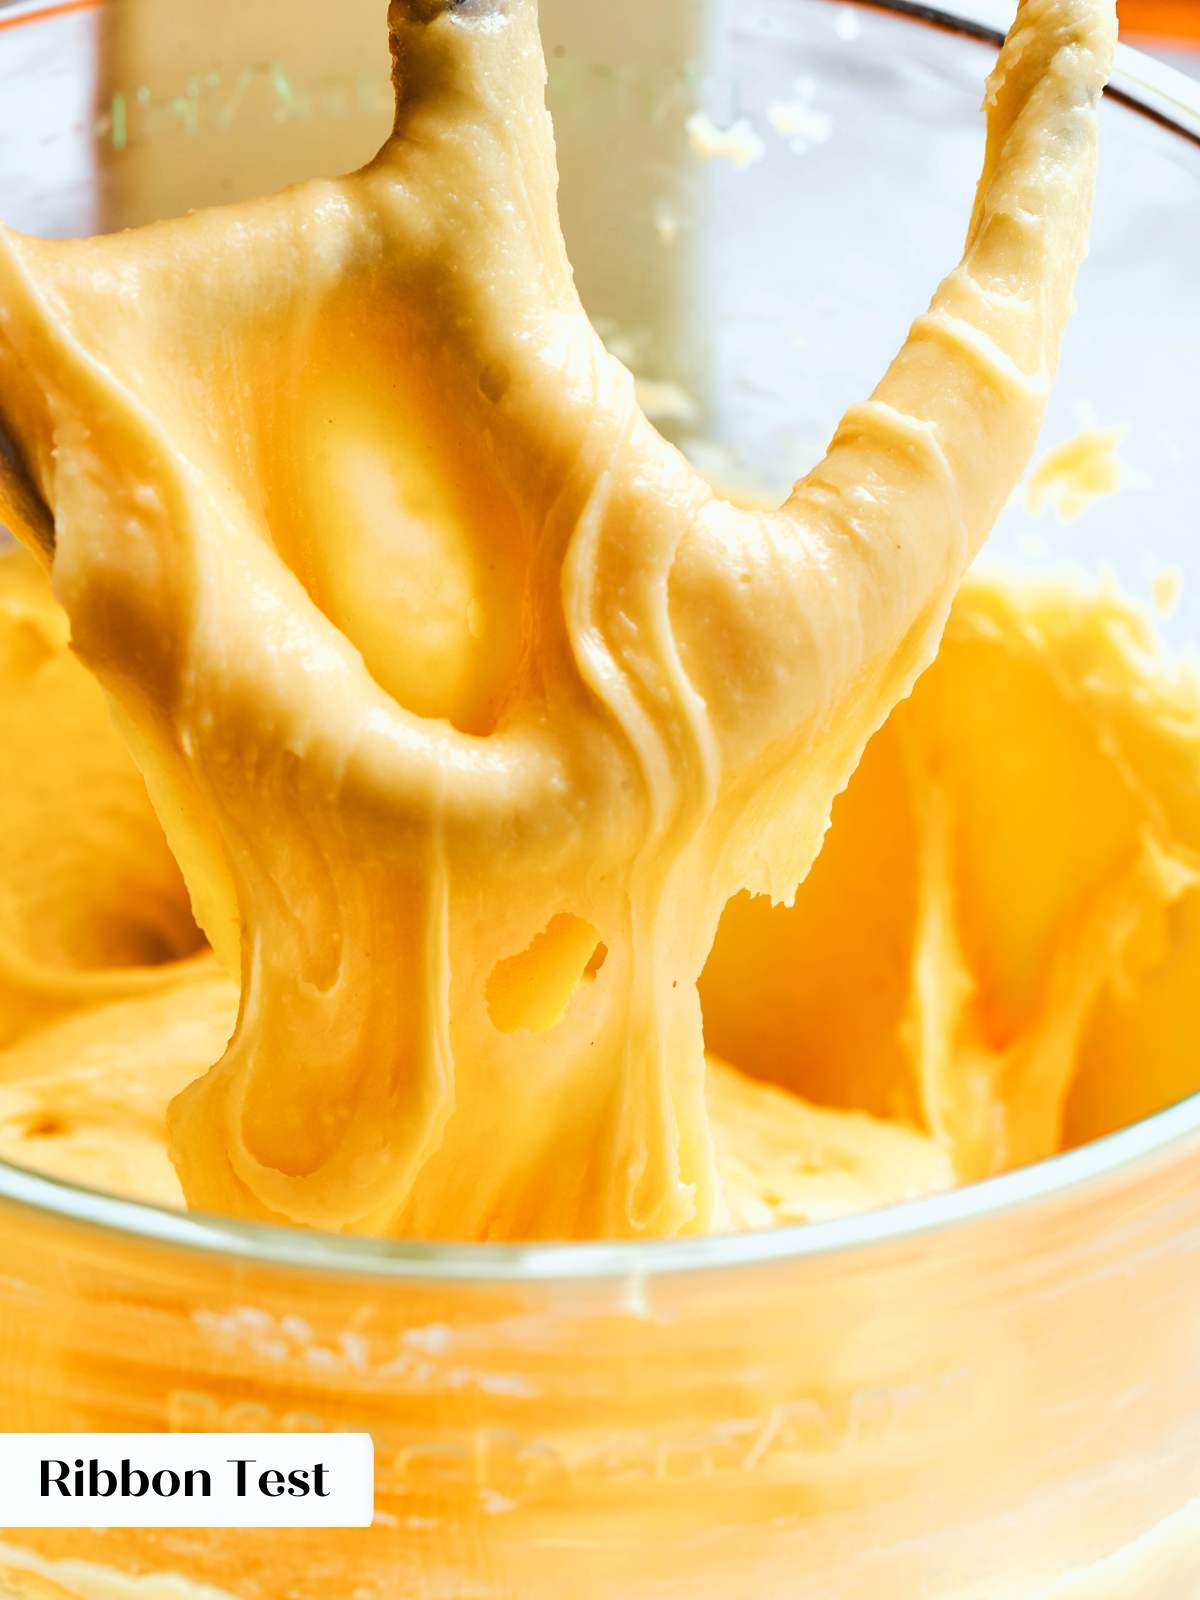
- Ribbon Test: Choux has passed the ribbon test when you insert and remove the paddle from the mixing bowl and the dough falls off the paddle in large ribbons. I find this to be the least effective test especially as the paste cools. Pastry cooks using this test alone often end up with a choux that is too thin.
In rare cases you may need to add more egg than the recipe specifies. Beat an additional egg separately and add it in small additions (part of an egg), testing the dough after each addition. At the upper end, you should need no more than half an additional egg for a standard single batch.
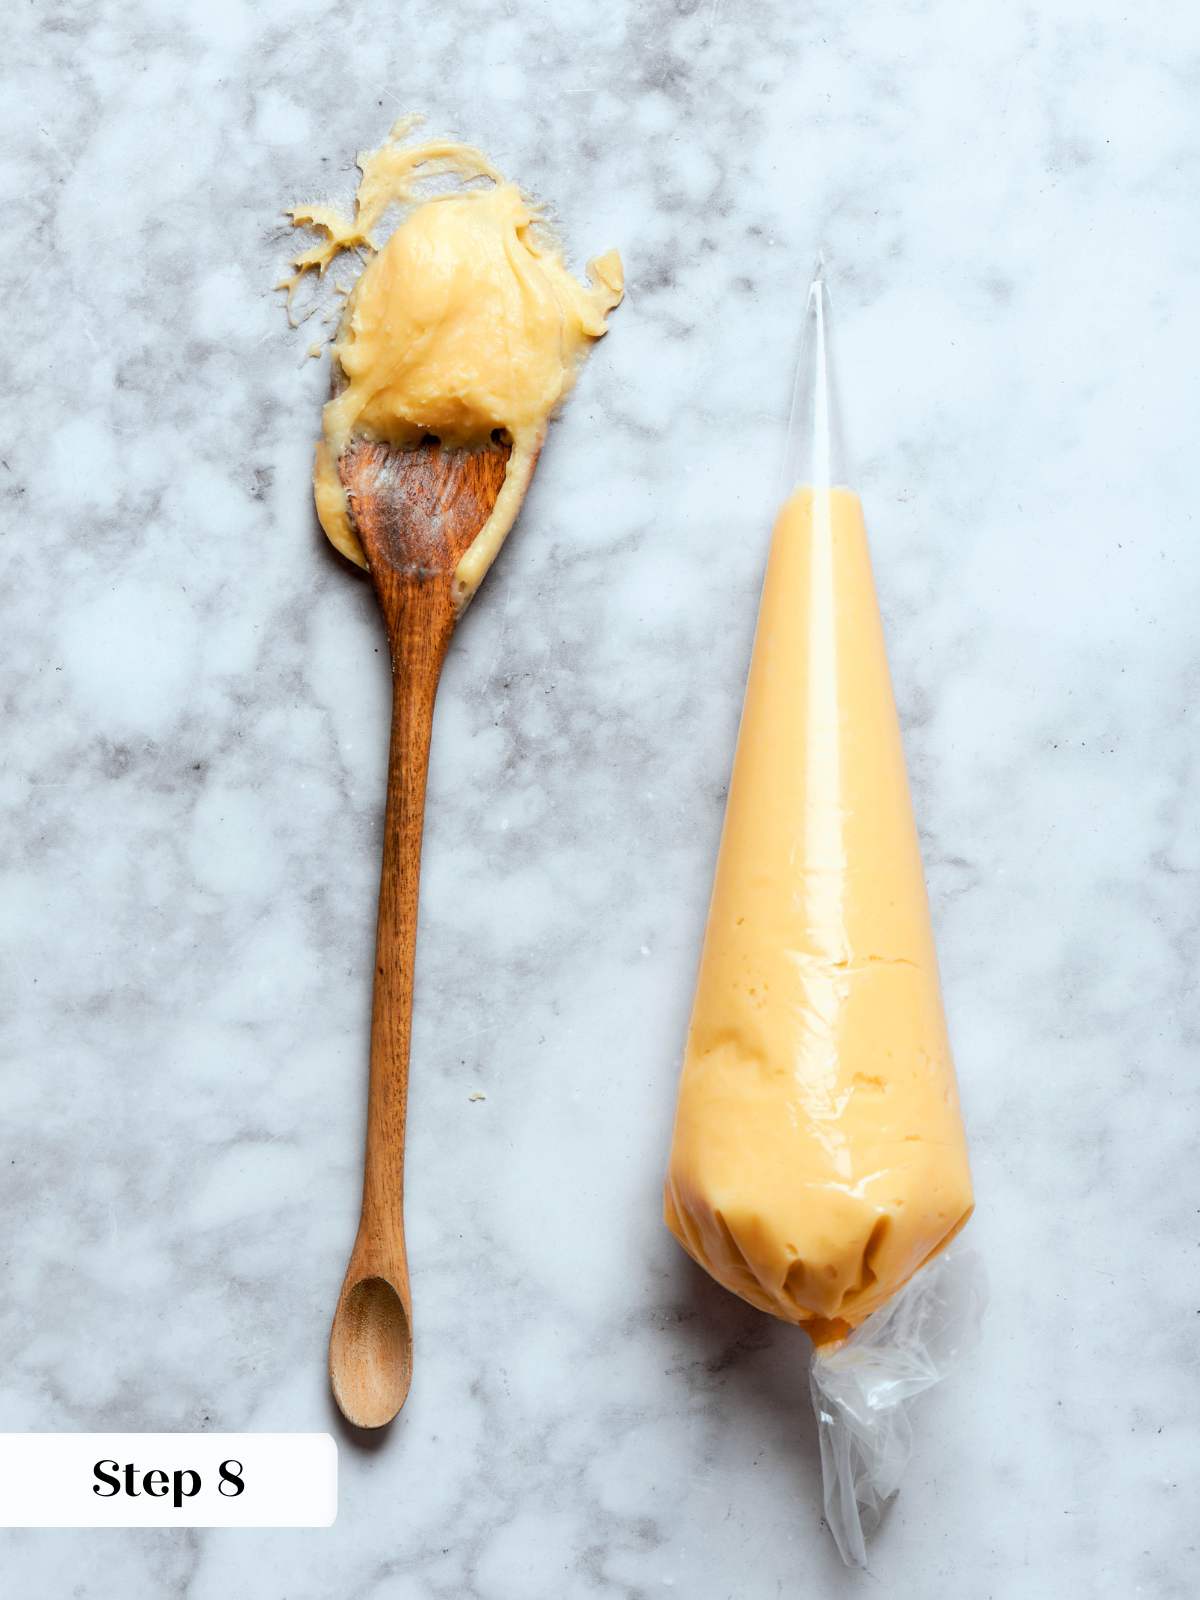
Step 8: Add any mix-ins and transfer to piping bags. If your recipe calls for mix-ins such as cheese for gougères, add them now and beat briefly to combine. Transfer the dough to piping bags. You can pipe immediately or refrigerate the filled bags for up to 3 days. The paste will begin to spot and discolor over time in the refrigerator, which is normal.. (photo 7).
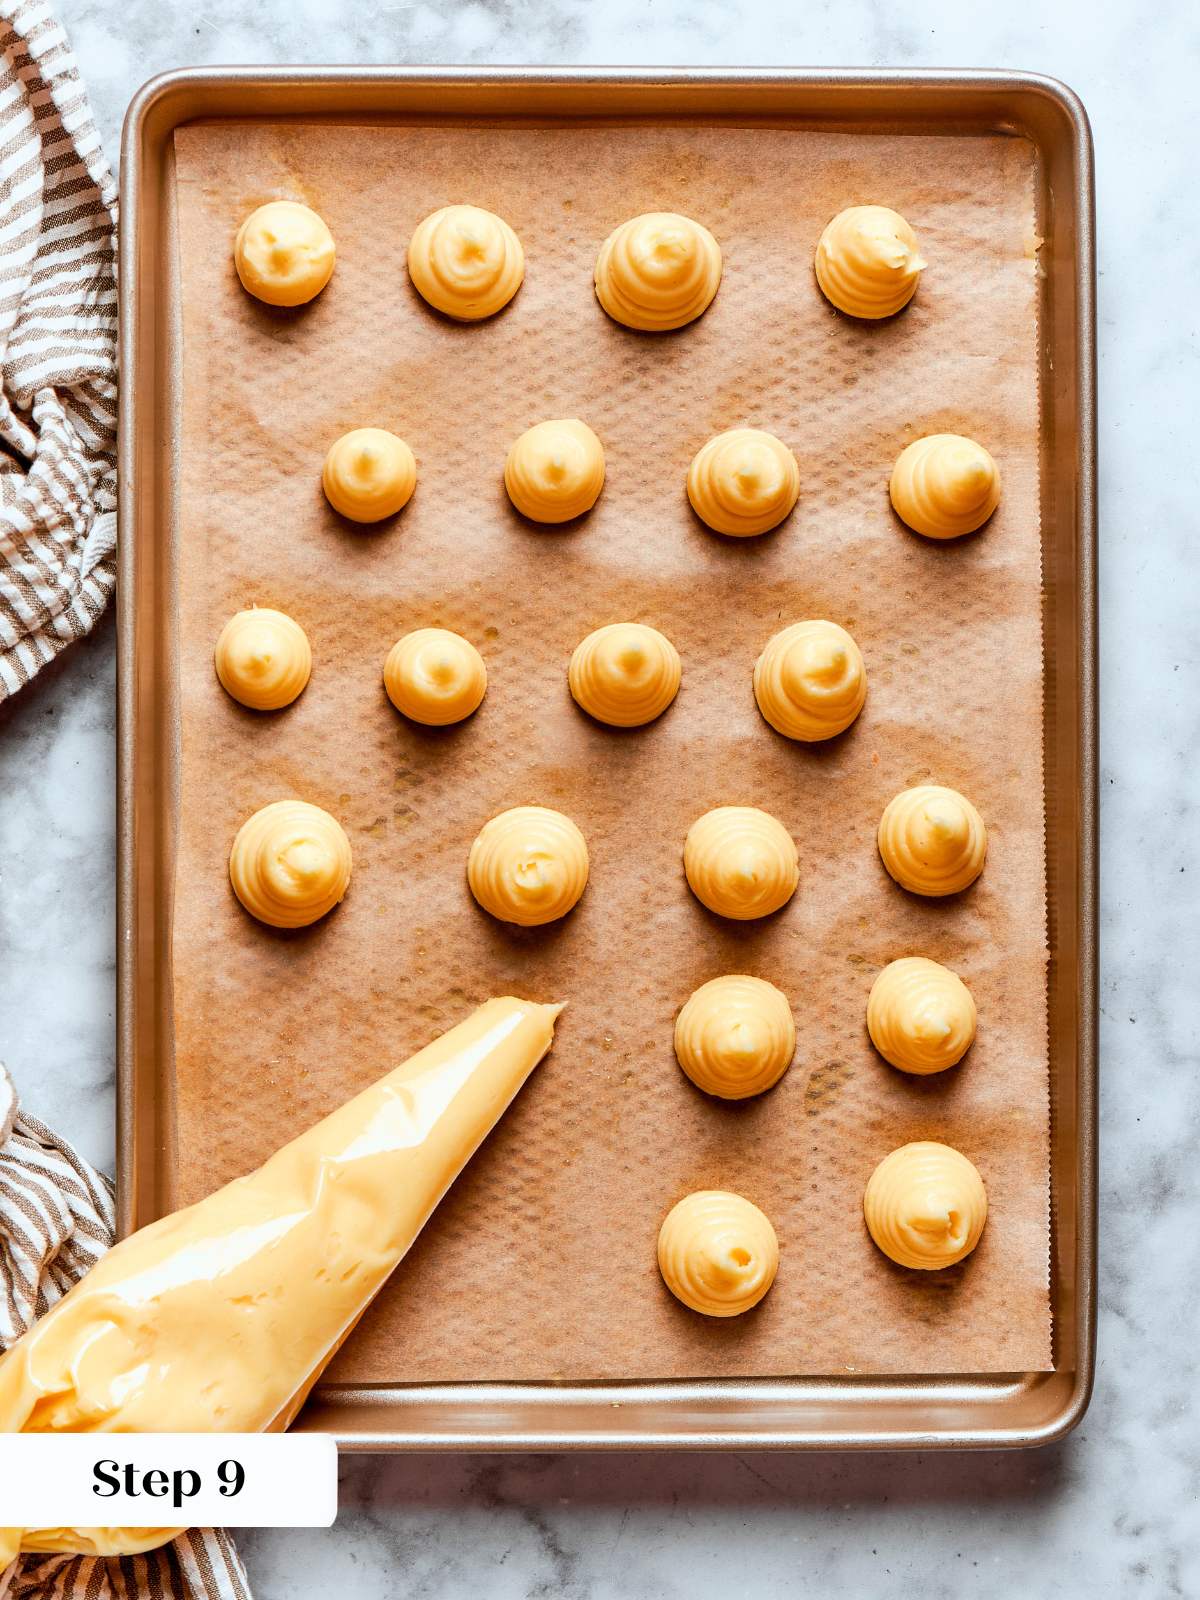
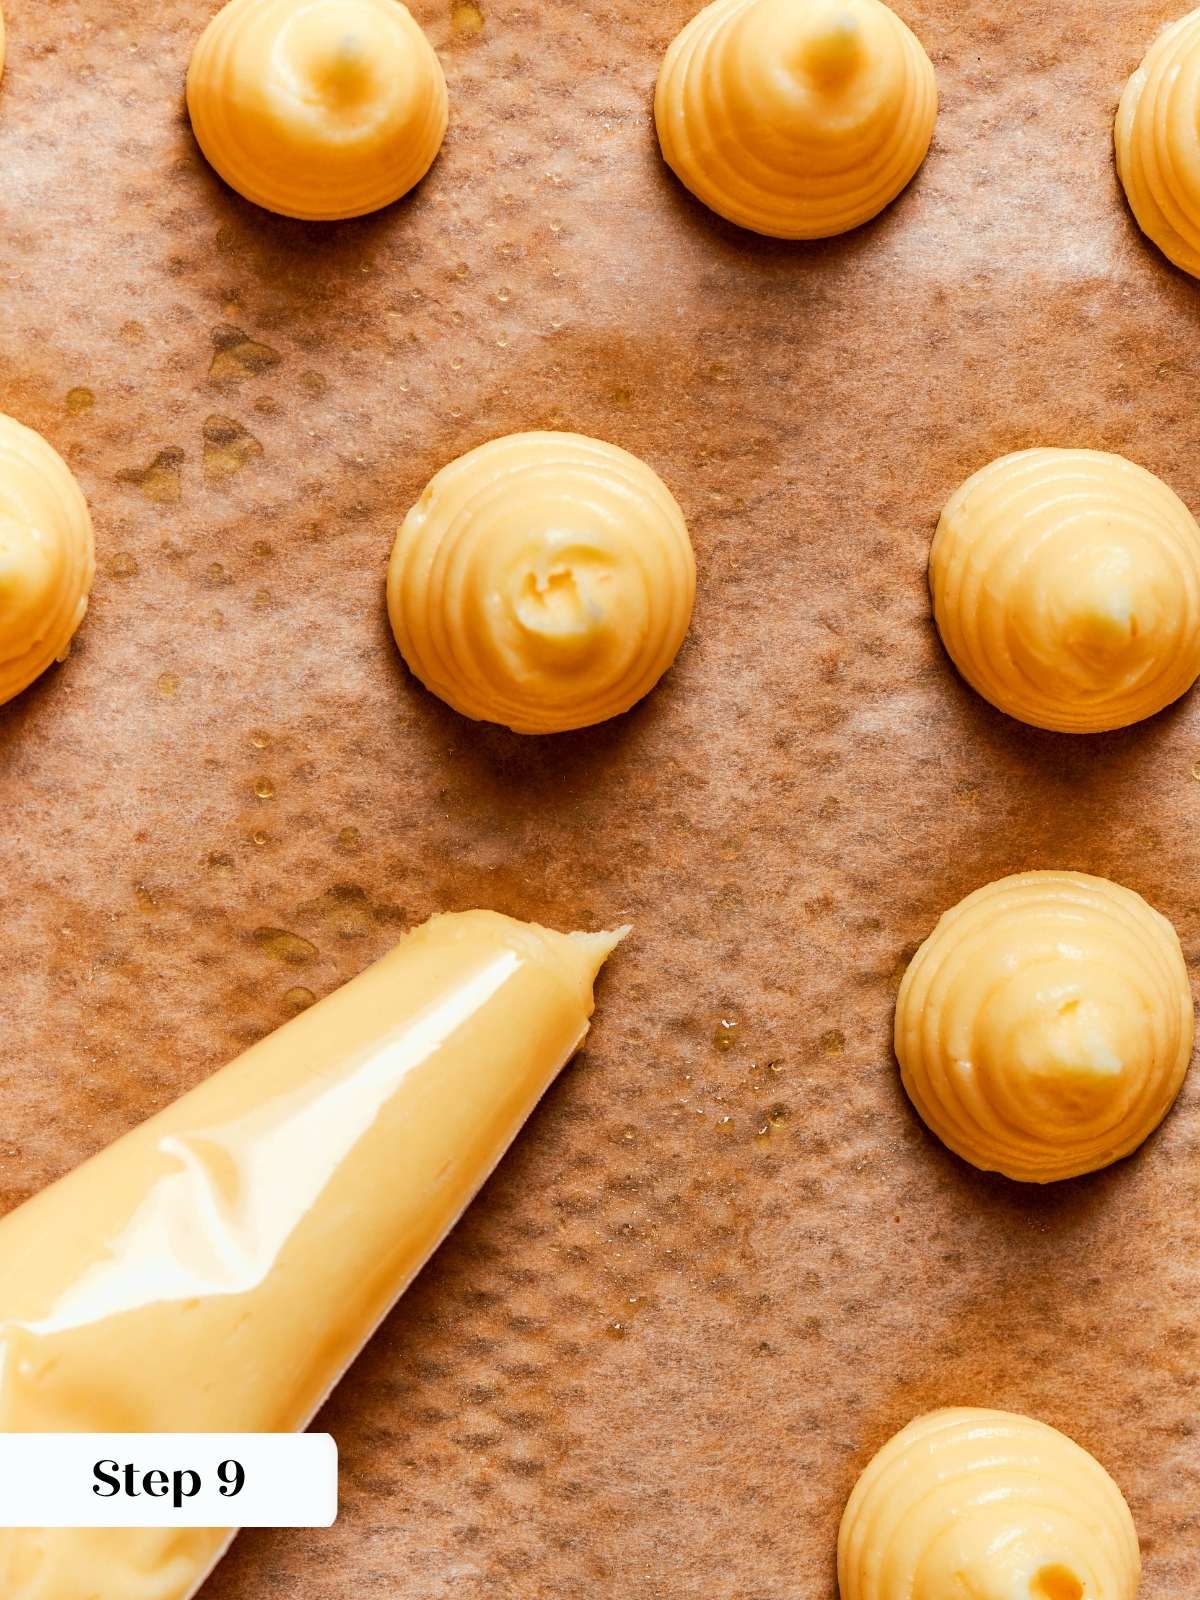
Step 9: Pipe the choux onto prepared baking sheets. Pipe your shapes at an even, consistent pressure. For standard cream puffs and éclairs, no pastry tip is necessary. A straight-cut piping bag gives you clean results without the added variable of a tip size affecting your flow. Space the pieces with enough room to expand (photos 8 & 9).
If you are working with refrigerated dough, allow it to temper at room temperature for an hour before piping.
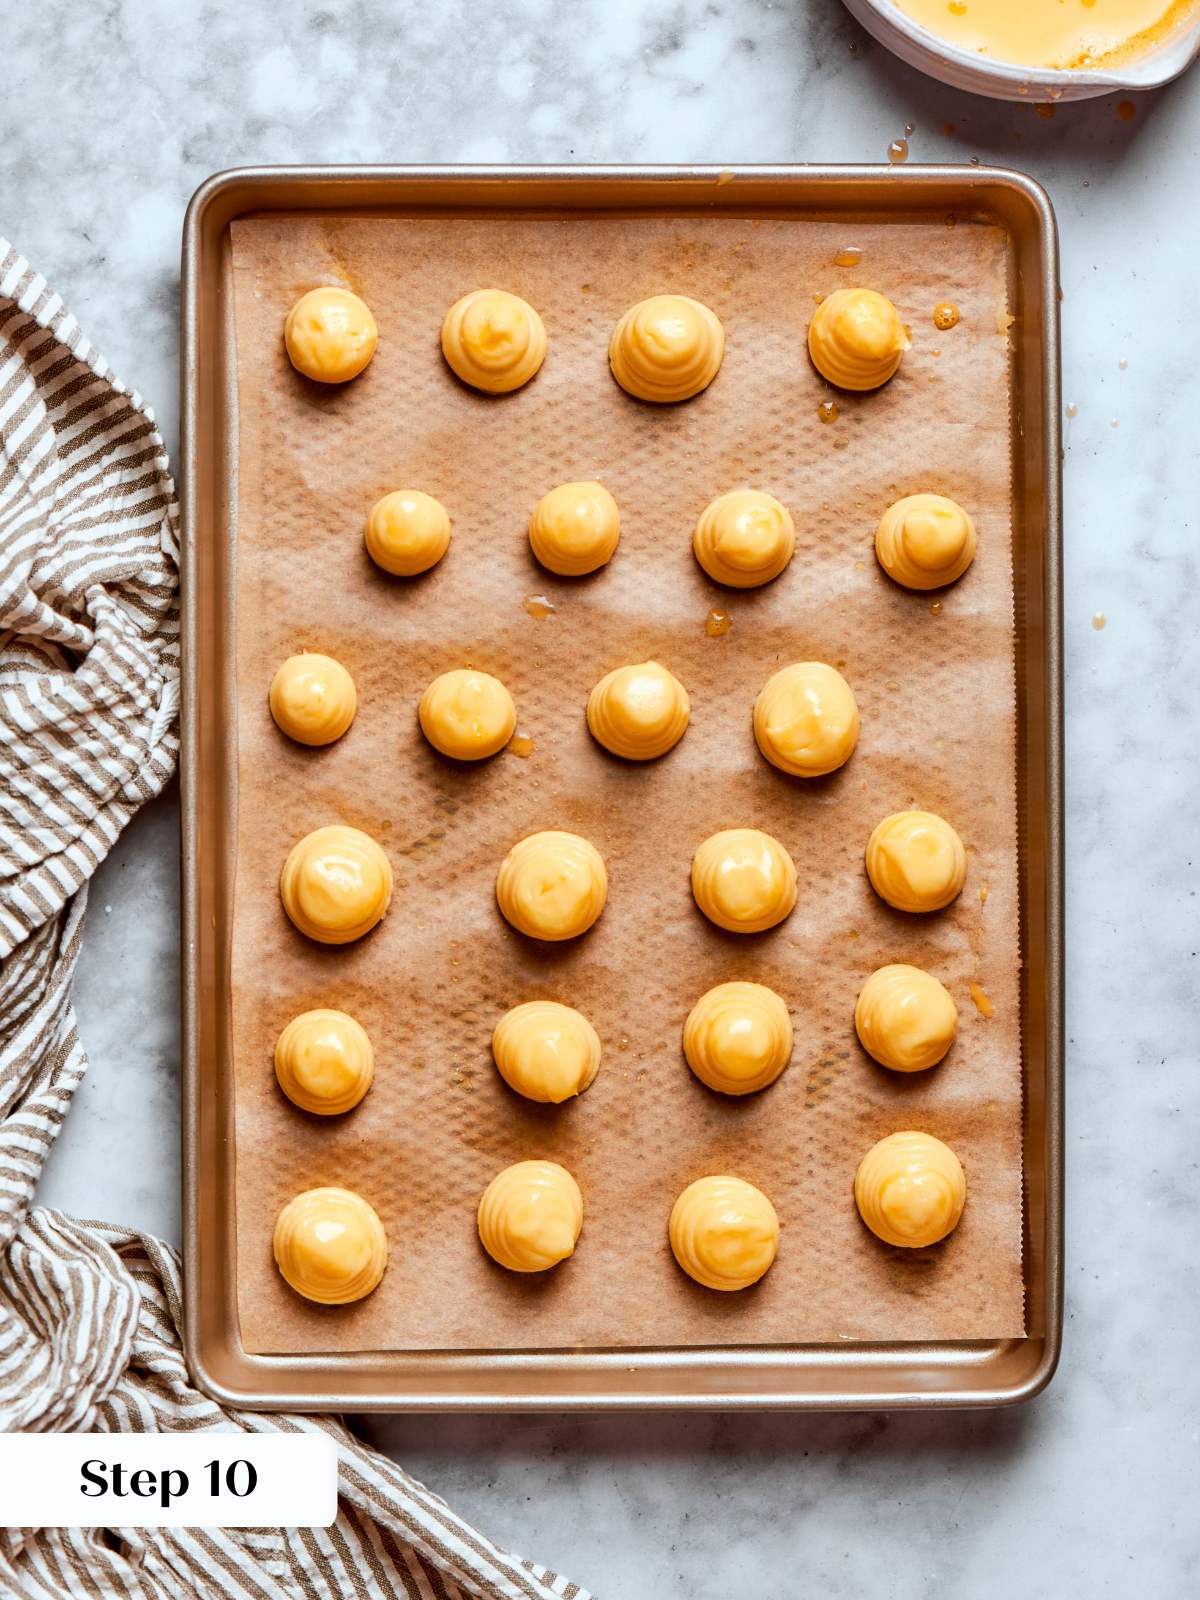
Step 10: Egg wash piped choux. Use a pastry brush to brush the tops of the piped choux with beaten egg (photo 10). If you have any egg left from making the dough, that is perfect! You can use this opportunity to reshape any choux that have points. Nothing gives away a novice baker like a browned point on a gougère or profiterole!
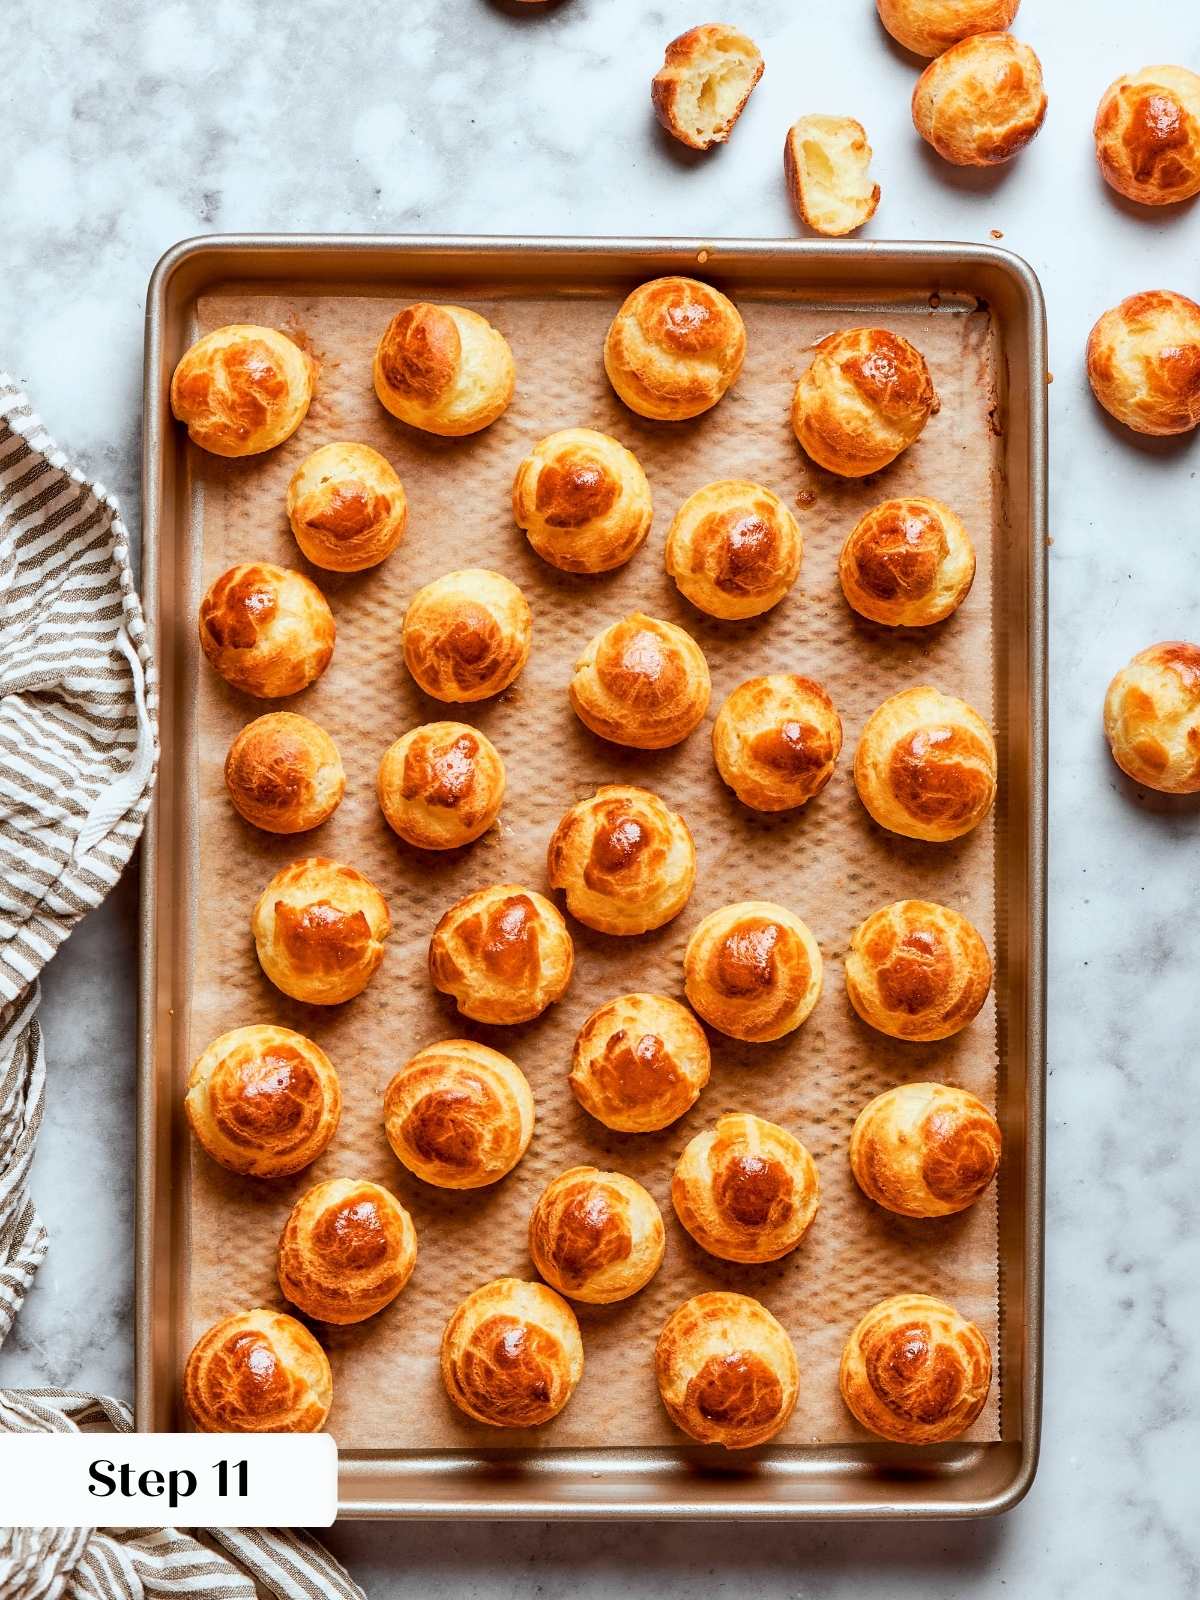
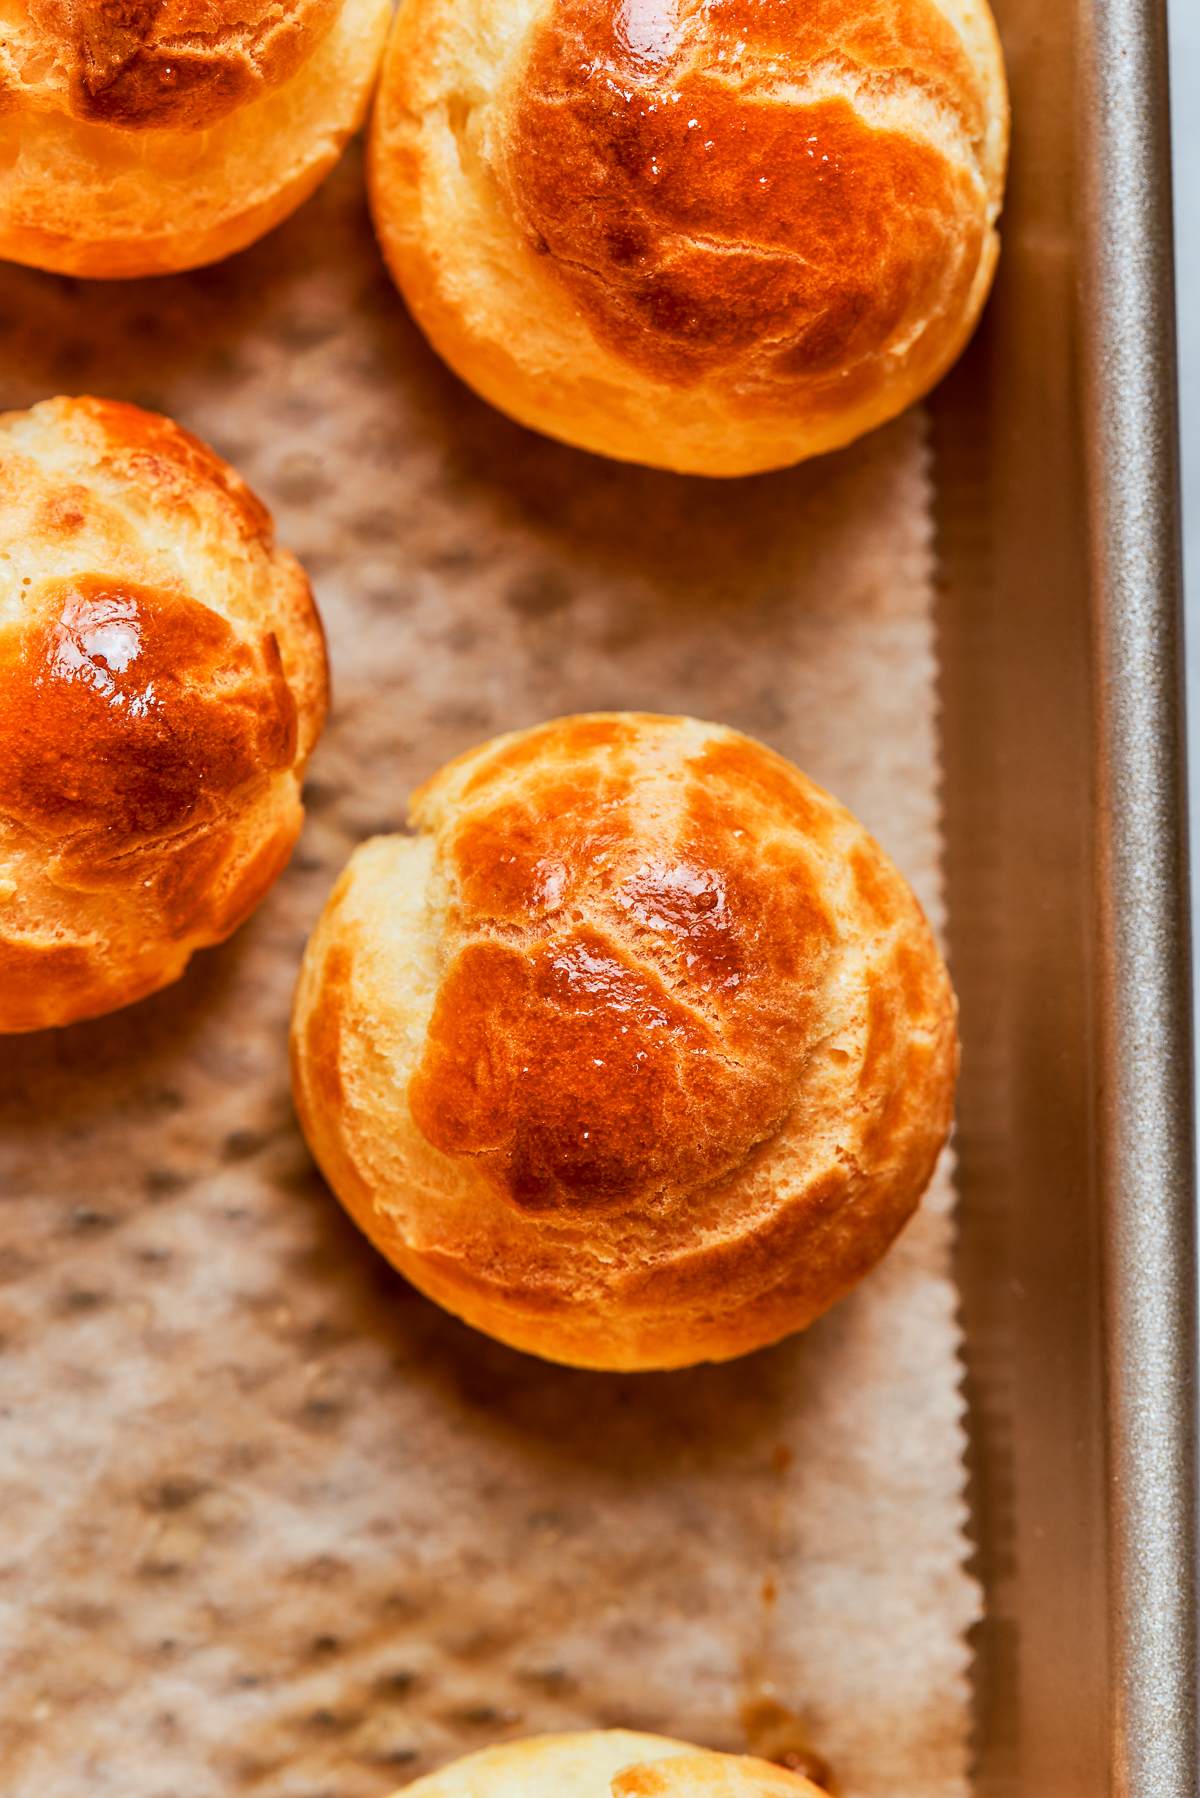
Step 11: Bake at 350°F convection or 375°F conventional. Bake time will vary depending on the size and shape of your piped choux. Do not open the oven door during the first two-thirds of baking. The shells need the sustained heat and trapped steam to rise fully before the structure sets. Once the shells are deeply golden and feel hollow and rigid when you tap them, they are done. A shell that gives slightly when pressed needs more time. (photo 10).
Step 12: Cool completely before filling. Transfer the baked shells to a wire rack and cool completely. Filling warm choux pastry causes the filling to loosen and the shells to soften from the inside. If you are storing unfilled shells for later, freeze them in a single layer and refresh in a 350°F oven to restore crispness before filling. For savory items like gougères, the oven refresh brings back the snap that makes them worth serving. (photo 11).

Chef Lindsey’s Recipe Tip
The single most common reason choux pastry fails is treating the egg count as fixed. The number of eggs in any recipe is a starting point, not a guarantee, because how much water evaporated while cooking your panade directly determines how much egg the dough can absorb. Learn to read the paste which is always more reliable than the number of eggs you have added. Pâte à choux, like inverse puff pastry, rewards repetition, each batch teaches you something the last one could not.
Recipe FAQs
My favorite is the trench test: drag your finger through the paste and watch whether the sides close slowly and steadily. The paste should also fall from a spatula in a thick, smooth V shape, sometimes called a ribbon or hook. If the trench runs immediately, the paste is too loose; if the sides do not move at all, it needs more egg. If it seems slightly too runny, refrigerate the choux 2-3 hours before piping.
The most common causes are adding the eggs too quickly, adding them while the dough is still too hot, or not cooking the panade long enough to evaporate sufficient moisture. Any of these conditions changes the structure of the paste before it ever reaches the oven. Consistent results come from monitoring temperature, adding eggs gradually, and always testing consistency before piping.
Yes, and there are a few ways to do it depending on where you are in the process. Store the raw paste in piping bags in the refrigerator for up to 3 days, or pipe, egg wash, wrap tightly, and refrigerate for up to 3 days or freeze for up to 1 month. I find it best to let frozen piped choux sit in the refrigerator or at room temperature for an hour before baking rather than going straight from freezer to oven.
Unfilled, baked choux pastries keep in the freezer for up to 1 month. For savory items like gougères, refresh them in a 350°F oven to restore the crisp shell before serving. Fill and serve sweet choux the same day for the best texture.
A half batch works reliably, and I have made this recipe at four times the base formula routinely. Beyond 4x, the volume becomes difficult to stir and you need to consider your pot and mixer capacity. Scaling does not change the technique, but it does increase the physical effort of cooking the panade.
More Classic French Recipes

Pies and Tart Recipes
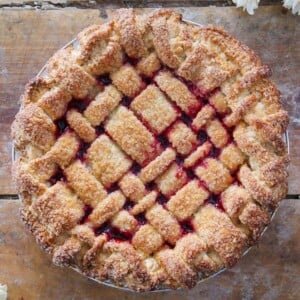
Puff Pastry Fruit Tart
Pies and Tart Recipes
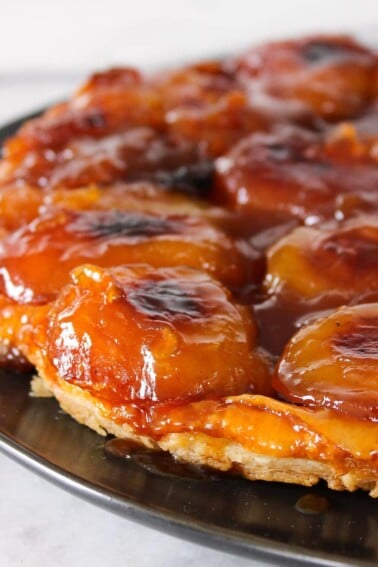
Apple Tarte Tatin
Dessert Recipes
French Crullers
Custard Recipes
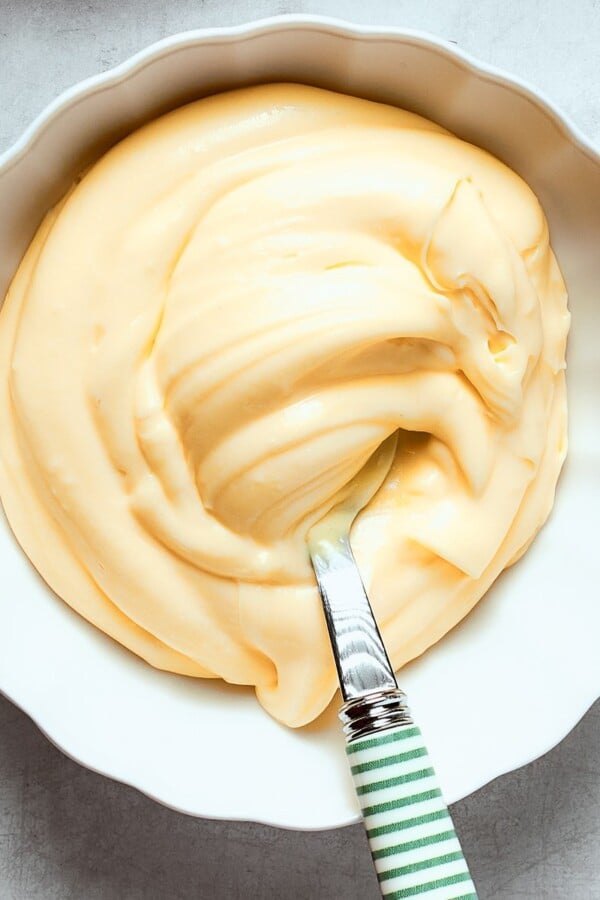
Pastry Cream Recipe (Crème Pâtissière)
If you tried this recipe and loved it please leave a 🌟 star rating and let me know how it goes in the comments below. I love hearing from you; your comments make my day!
Pâte à Choux
Ingredients
- 1 cup unsalted butter 226g, cubed
- 2 cups whole milk 520g
- 2 cups all-purpose flour 248g
- 1¼ teaspoons kosher salt
- 1 teaspoon granulated sugar
- 5 large eggs plus 1 additional egg if needed
Instructions
- Measure and prepare all ingredients before starting. Combine the flour, salt, and sugar in a container and set aside. Crack the eggs into a separate bowl and set aside.
- Add the butter and milk to a high-sided, heavy-bottomed saucepot. Heat on high until the milk just reaches a boil and the butter is fully melted simultaneously. Do not allow the milk to continue boiling.
- Add the flour mixture all at once and stir with a wooden spoon to incorporate. Once the mixture begins to thicken, stir vigorously to smooth out any lumps.
- Continue cooking on high heat, stirring constantly, until a cohesive dough (panade) forms, pulls away from the sides of the pot, and leaves a coating on the bottom. This takes approximately 2 minutes and indicates enough moisture has evaporated for a pipeable paste.
- Transfer the dough to the bowl of a stand mixer fitted with the paddle attachment. Beat on medium-high to release steam.
- Once the dough stops steaming, add the eggs one at a time on medium speed, beating fully after each addition. Continue until the paste is smooth, shiny, and passes a consistency test: drag a finger through the paste and the trench should close slowly, and the paste should fall from the spatula in a thick V shape. If all 5 eggs are incorporated and the paste is still too stiff, beat an additional egg separately and add it in stages, testing after each addition.
- Add any mix-ins called for in your specific recipe. Transfer the paste to piping bags. Use immediately or refrigerate.
- Brush the tops of the piped pastry with egg wash (beaten egg).
- Bake piped choux at 350°F convection or 375°F conventional until deeply golden and hollow inside. I baked these pictured for 20-23 minutes for 4 centimeter gougères. Rotate the trays after 10 minutes. Timing will vary by size and shape.
Notes
Doneness Cue: The trench test (drag a finger through the paste) should show the sides closing slowly and steadily, not immediately.
Storage (raw paste): Store choux paste in piping bags in the refrigerator for up to 3 days, or pipe, egg wash, wrap tightly, and refrigerate for up to 3 days or freeze for up to 1 month. Allow frozen piped choux to sit in the refrigerator or at room temperature for an hour before baking.
Storage (baked): Unfilled, baked choux pastries keep in the freezer for up to 1 month. Refresh savory items like gougères in a 350°F oven before serving.
Nutrition
Before You Go
Choux pastry opens the door to one of the most rewarding categories in classical baking, from éclairs to profiteroles to Paris-Brest. If you are ready to keep going, browse more Dessert Recipes for what to make next.