This post may contain affiliate links. Please read our disclosure policy.
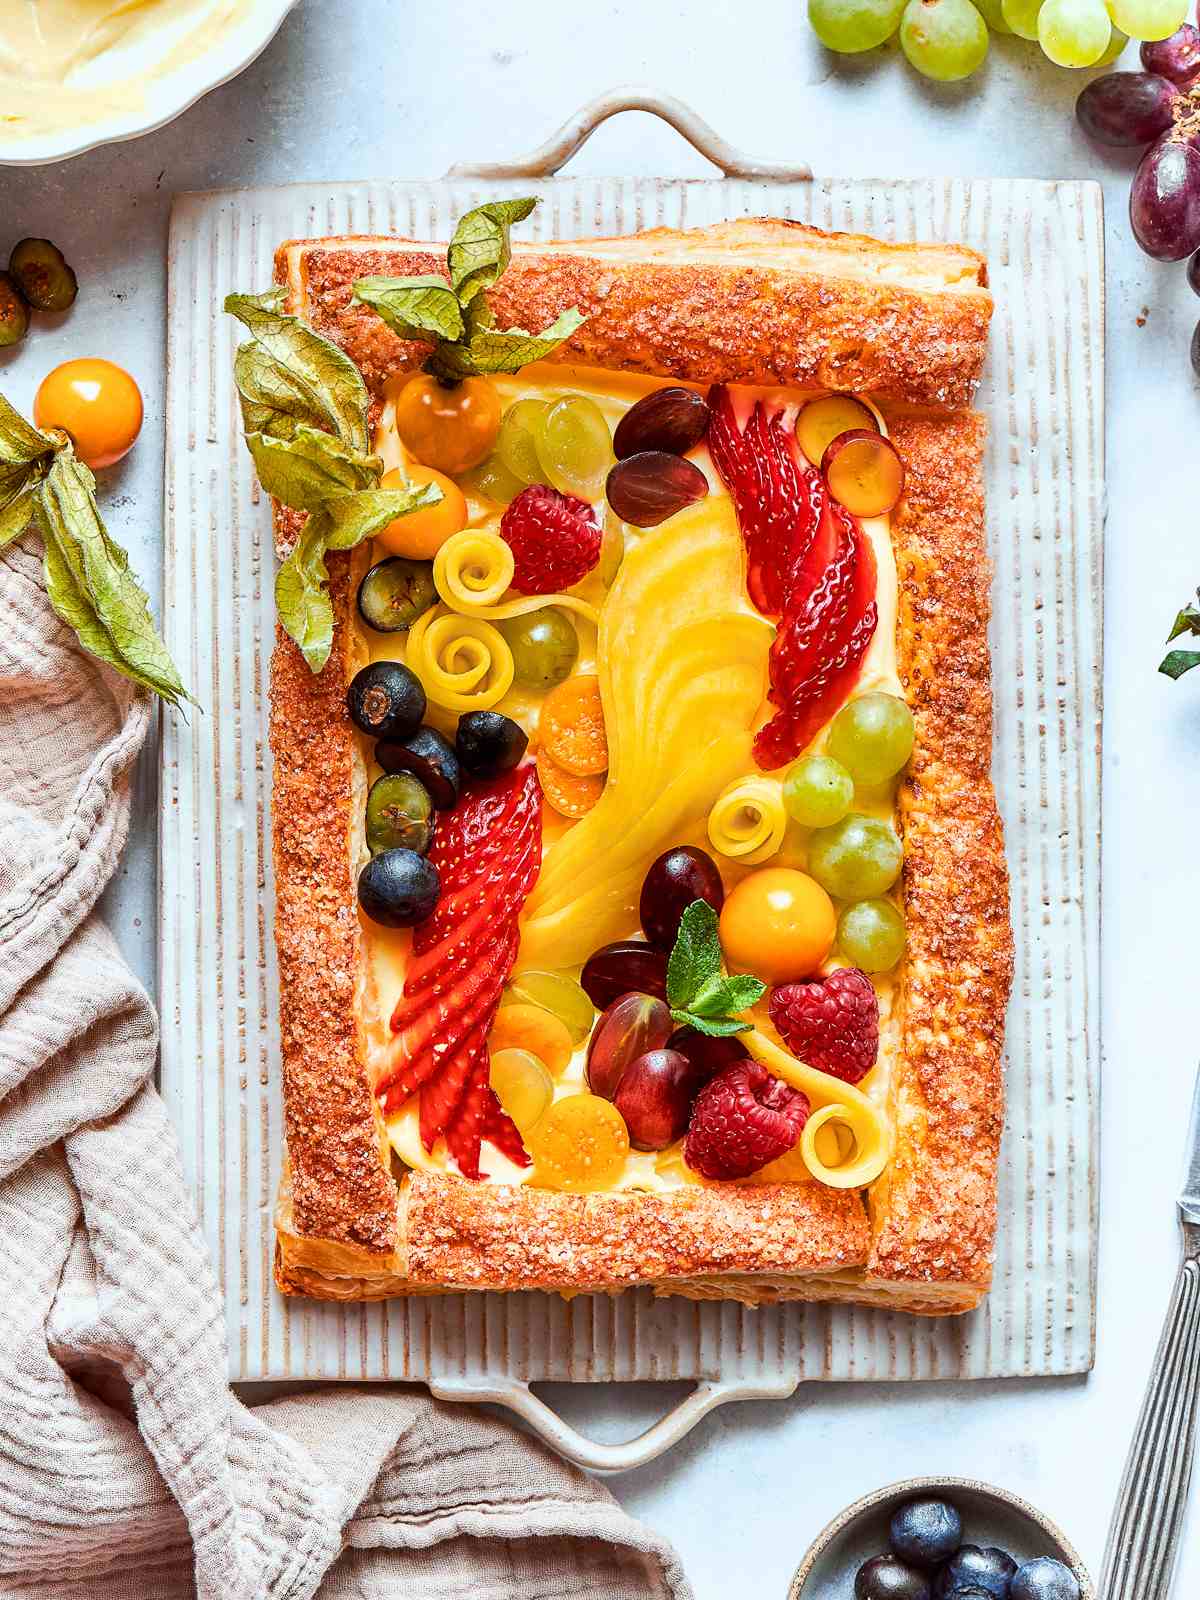
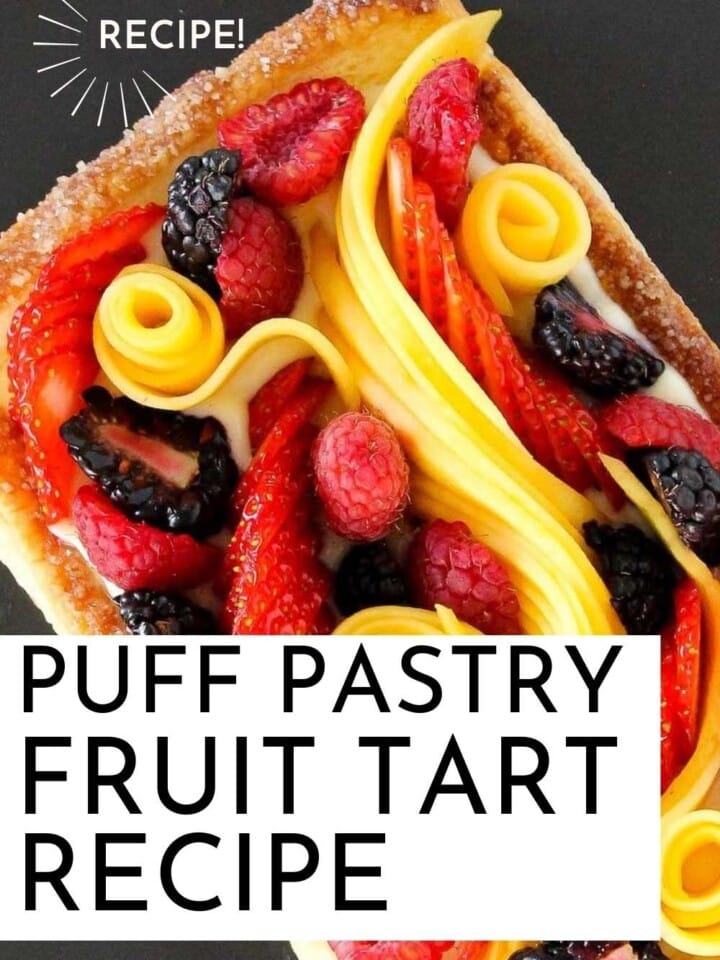
Puff pastry fruit tart looks far more like patisserie work than it has any right to, and it comes together in under two hours with store-bought puff pastry and a simple pastry cream.
A Quick Look At The Recipe
This is a brief summary of the recipe. Jump to the recipe to get the full details.
Jump to RecipePrep Time
30 minutes
Cook Time
20 minutes
Chill Time
1 hour
Total Time
1 hour 50 minutes
Servings
4 slices
Difficulty
Intermediate — pastry cream and puff handling require attention
Calories *
478 kcal per serving
Technique
Vanilla pastry cream is cooked, chilled, and spread into a baked puff pastry shell before topping with fresh seasonal fruit
Flavor Profile
Creamy vanilla custard, buttery pastry, and bright fresh fruit
* Based on nutrition panel
I was nervous about the egg tempering step, but the instructions made it completely clear. The pastry cream set up beautifully and the tart came out looking like something from a bakery case. My family could not believe I made it at home. ⭐⭐⭐⭐⭐
Marie
Why This Recipe Works
- Egg wash creates a clean, structured shell. Using egg wash to adhere the puff pastry border to the base locks the layers together before baking, so the tart holds its shape without a mold.
- Pastry cream fills without weighing the shell down. A properly set Vanilla Bean Pastry Cream is thick enough to stay in place but light enough that it does not compress the layers beneath it.
- Seasonal fruit does the finishing work. Because the shell and cream are both neutral, the tart adapts to whatever fruit looks best, making this as useful in January as it is in July.
Table of Contents
This puff pastry fruit tart looks like it came out of a patisserie case, and it takes about 45 minutes of active work to pull off. The shell is freestanding, the filling sets firmly, and the whole thing comes together without a tart pan or blind baking weights.
If you want to make your own pastry from scratch, my classic puff pastry walks through the full lamination process and produces a shell with noticeably more lift and flake than anything store-bought.
Ingredients & Substitutions

- Egg Yolk and Whole Egg: The yolks enrich the pastry cream and give it a deep, custardy flavor, while the whole egg provides additional structure. Whisk the whole egg completely smooth before measuring, then eyeball half for the cream and reserve the other half for your egg wash.
- Milk: Whole milk is what I always use here because the fat content gives the pastry cream enough body to hold its shape when sliced. Lower-fat milks will produce a thinner cream that may not set properly.
- Cornstarch: This is the thickener that sets the pastry cream to a sliceable consistency. Do not reduce the amount, or the cream will be too loose to hold the fruit in place.
- Sugar: Granulated sugar sweetens the cream without adding any competing flavor. The amount is intentionally restrained so the fruit stays in the foreground.
- Vanilla Bean: Split and scraped vanilla bean is the flavor backbone of this entire tart. If you need a shortcut, pure vanilla extract works, but the paste or bean will give you those distinct flecks and a more complex flavor.
- Puff Pastry: Store-bought works well, but if you want a noticeably flakier, more layered shell, my Inverse Puff Pastry produces superior lift. Thaw fully in the refrigerator before using so it stays cold and rolls without tearing.
- Bourbon: Optional, but it rounds out the cream with a warm, slightly smoky note that pairs well with stone fruit and berries. A teaspoon of pure vanilla extract is a direct swap if you prefer to skip it.
- Fresh Fruits: Use whatever is ripe and at peak flavor. Stone fruits, berries, and sliced citrus all work well arranged on top of the cream.
See the recipe card for full information on ingredients and quantities.
Variations on This Puff Pastry Fruit Tart
- A different filling. Crème légère, which is pastry cream lightened with whipped cream, works beautifully here and gives the filling a slightly lighter texture. Almond cream or hazelnut cream is another option if you want something richer and more structured beneath the fruit.
- Caramel Pastry Cream. Swap the vanilla pastry cream for Caramel Pastry Cream and top with sliced red wine poached pears or bananas for a richer, more autumnal version.
- Individual Tartlets. Cut the puff pastry into smaller rectangles and build miniature shells using the same border technique. Bake time will be shorter, so start checking at 12 minutes.
Professional Tips
- Keep the puff cold at every stage. If the dough softens and loses its chill before baking, the butter layers start to merge, and you lose the lift. If it feels warm or tacky at any point, return it to the refrigerator for 15 minutes before continuing.
- Dock only the base, never the border strips. The holes you poke with a fork give steam a controlled exit so the base stays flat. The border needs to puff freely to create the walls, so leave those strips untouched. I tested this both ways and an un-docked base balloons up and cracks the cream filling.
- Bake at 375°F convection or 400°F conventional. The higher heat sets the layers quickly and drives the lift before the butter can leak out. Start checking at 12 minutes and pull the tart when the border is deep golden and you can see the layers separating on the sides.
- Do not overfill the shell. The pastry cream should come just below the top of the border. Any higher and the fruit will push the cream over the edges when you arrange it, which is my least favorite thing to clean up off a sheet pan.
How to Make Puff Pastry Fruit Tart
Start with the pastry cream since it needs time to chill completely before you can assemble the tart.
Make Pastry Cream
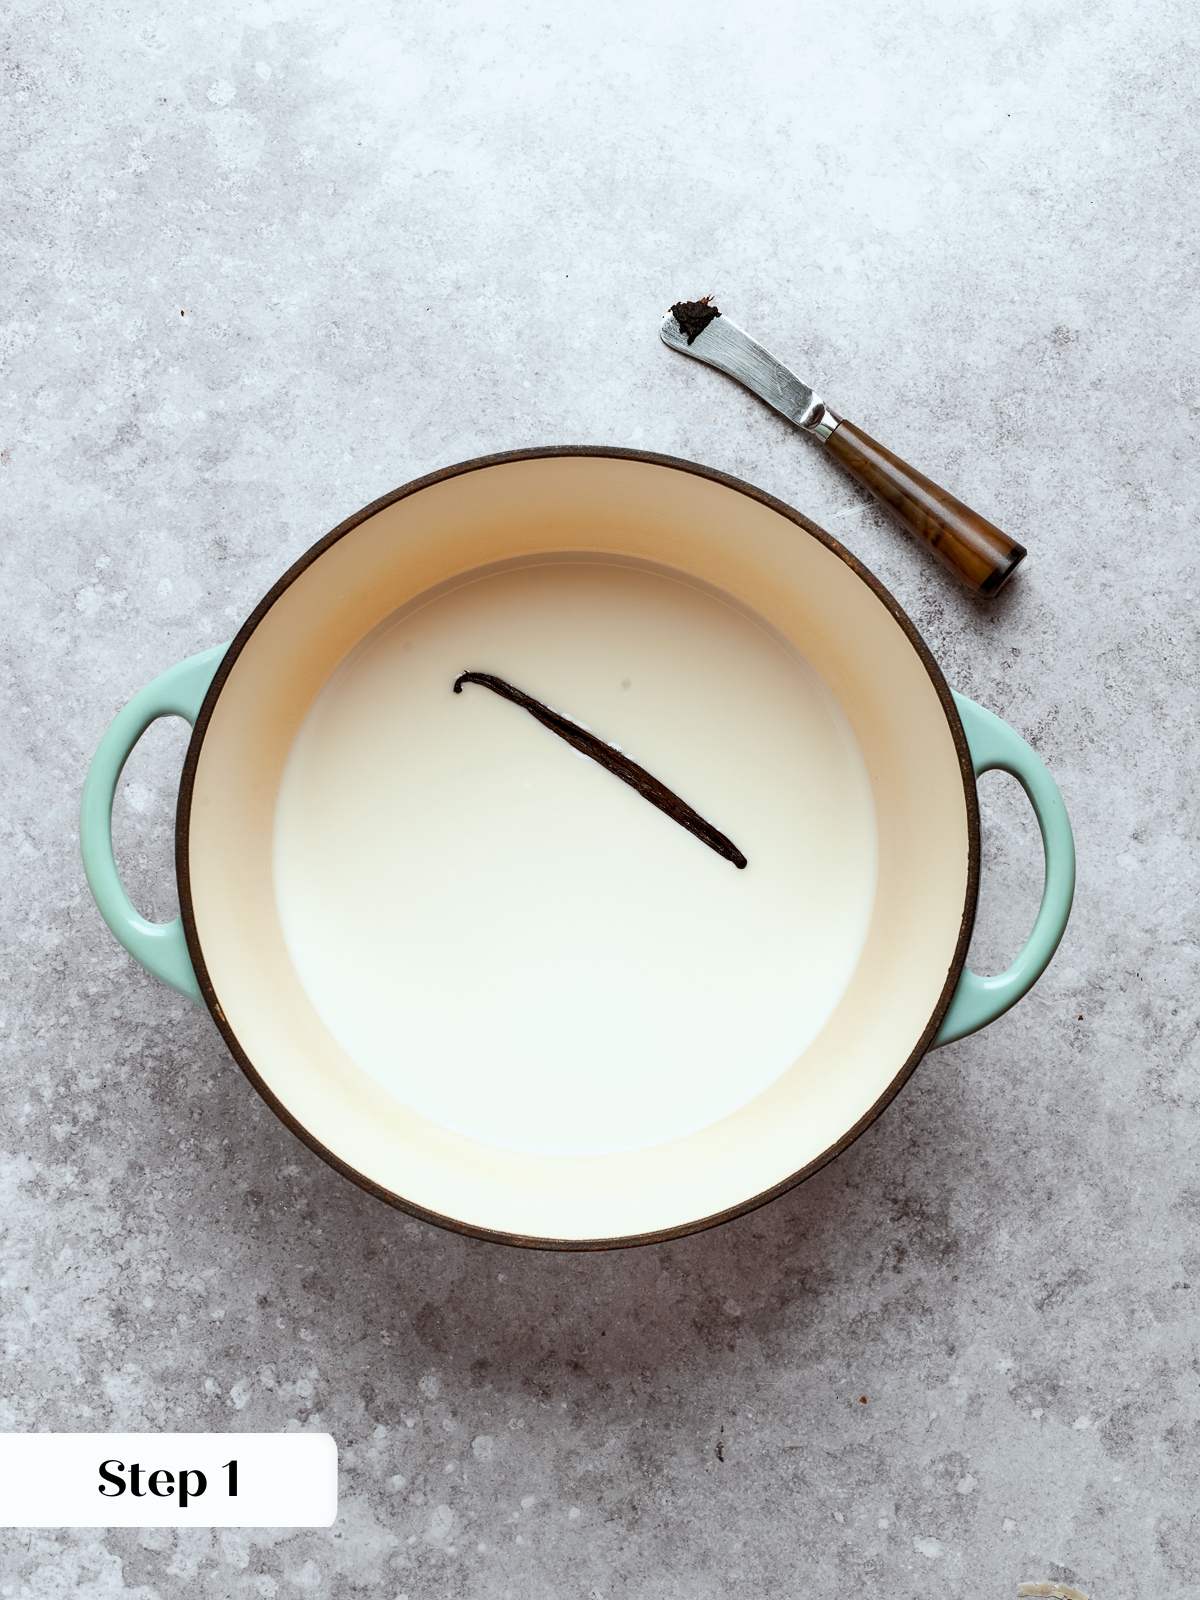
Step 1: Scrape the vanilla bean. Split half a vanilla bean pod lengthwise and use the back of your knife to scrape out the seeds. The seeds are what you want here. You can save the pod for another use or drop it into the milk as it heats for extra depth. (photo 1 below)
Step 2: Heat the milk, sugar, and vanilla. Combine the milk, sugar, and vanilla bean seeds in a medium pot and bring the mixture to a boil over medium heat, stirring occasionally to dissolve the sugar. Bring the milk mixture to a full boil before tempering into the eggs.
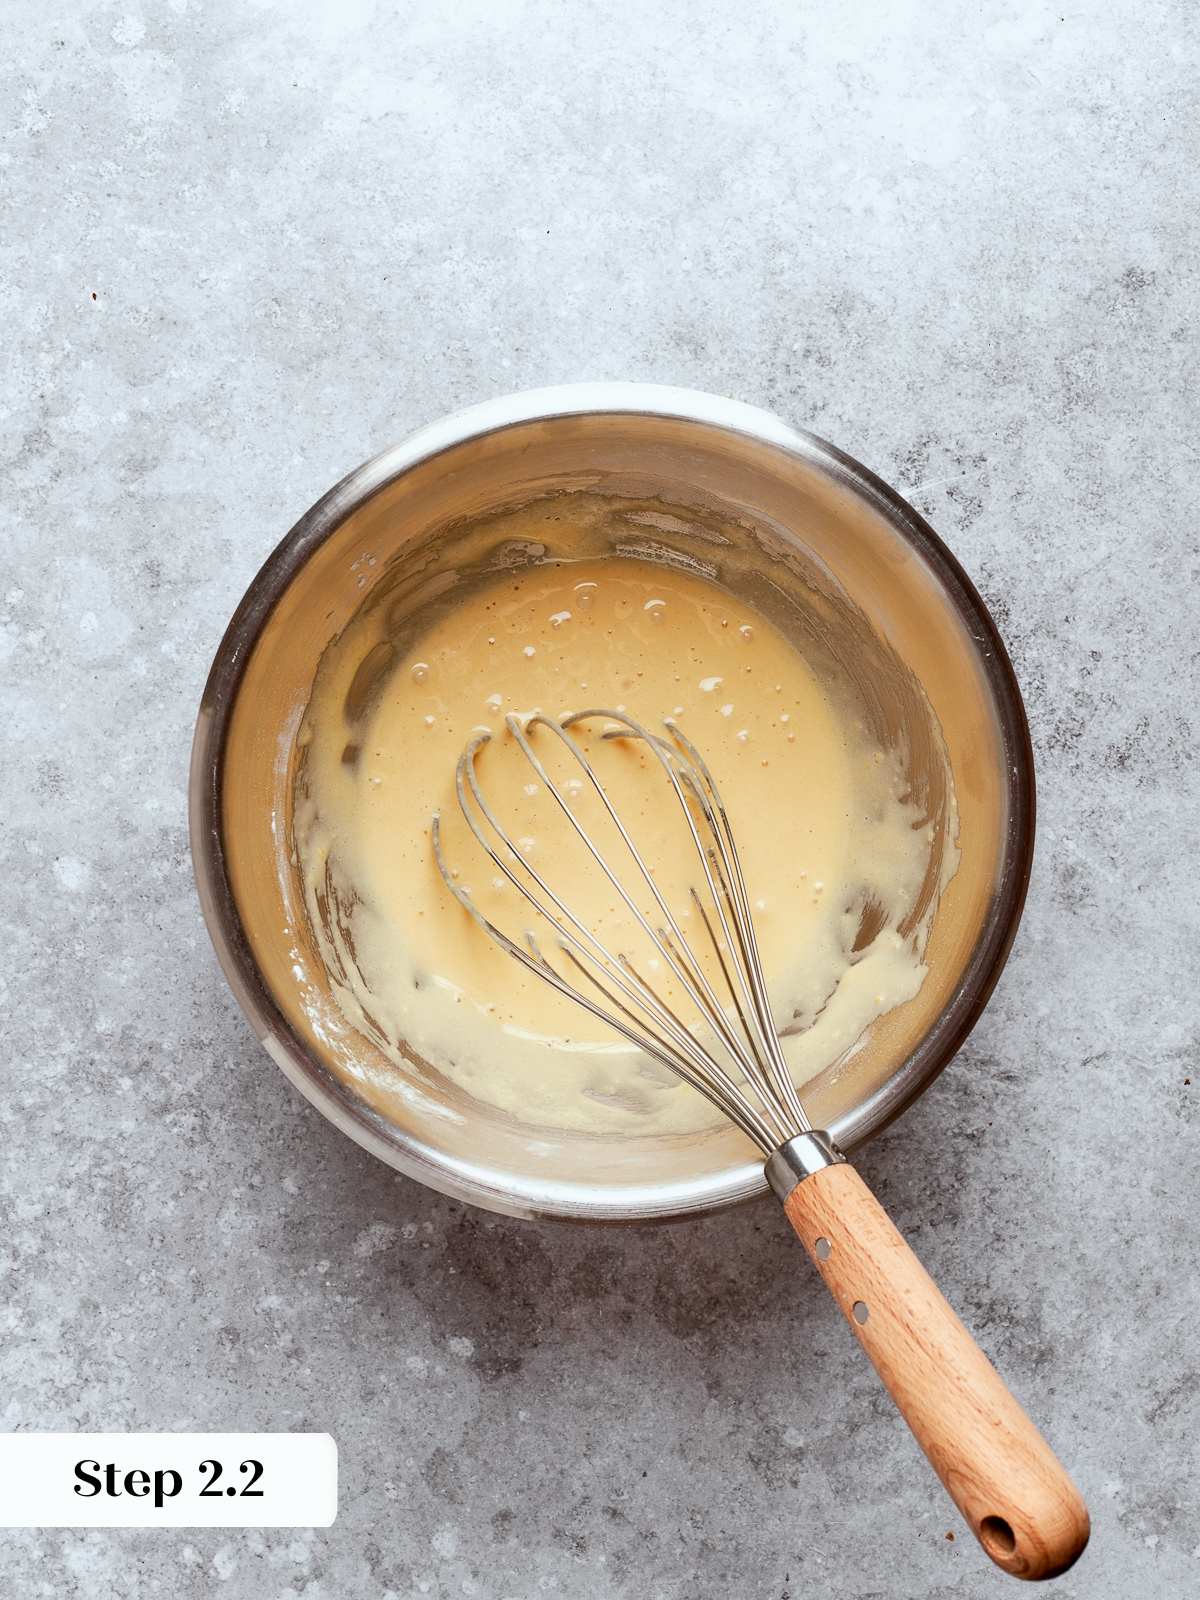
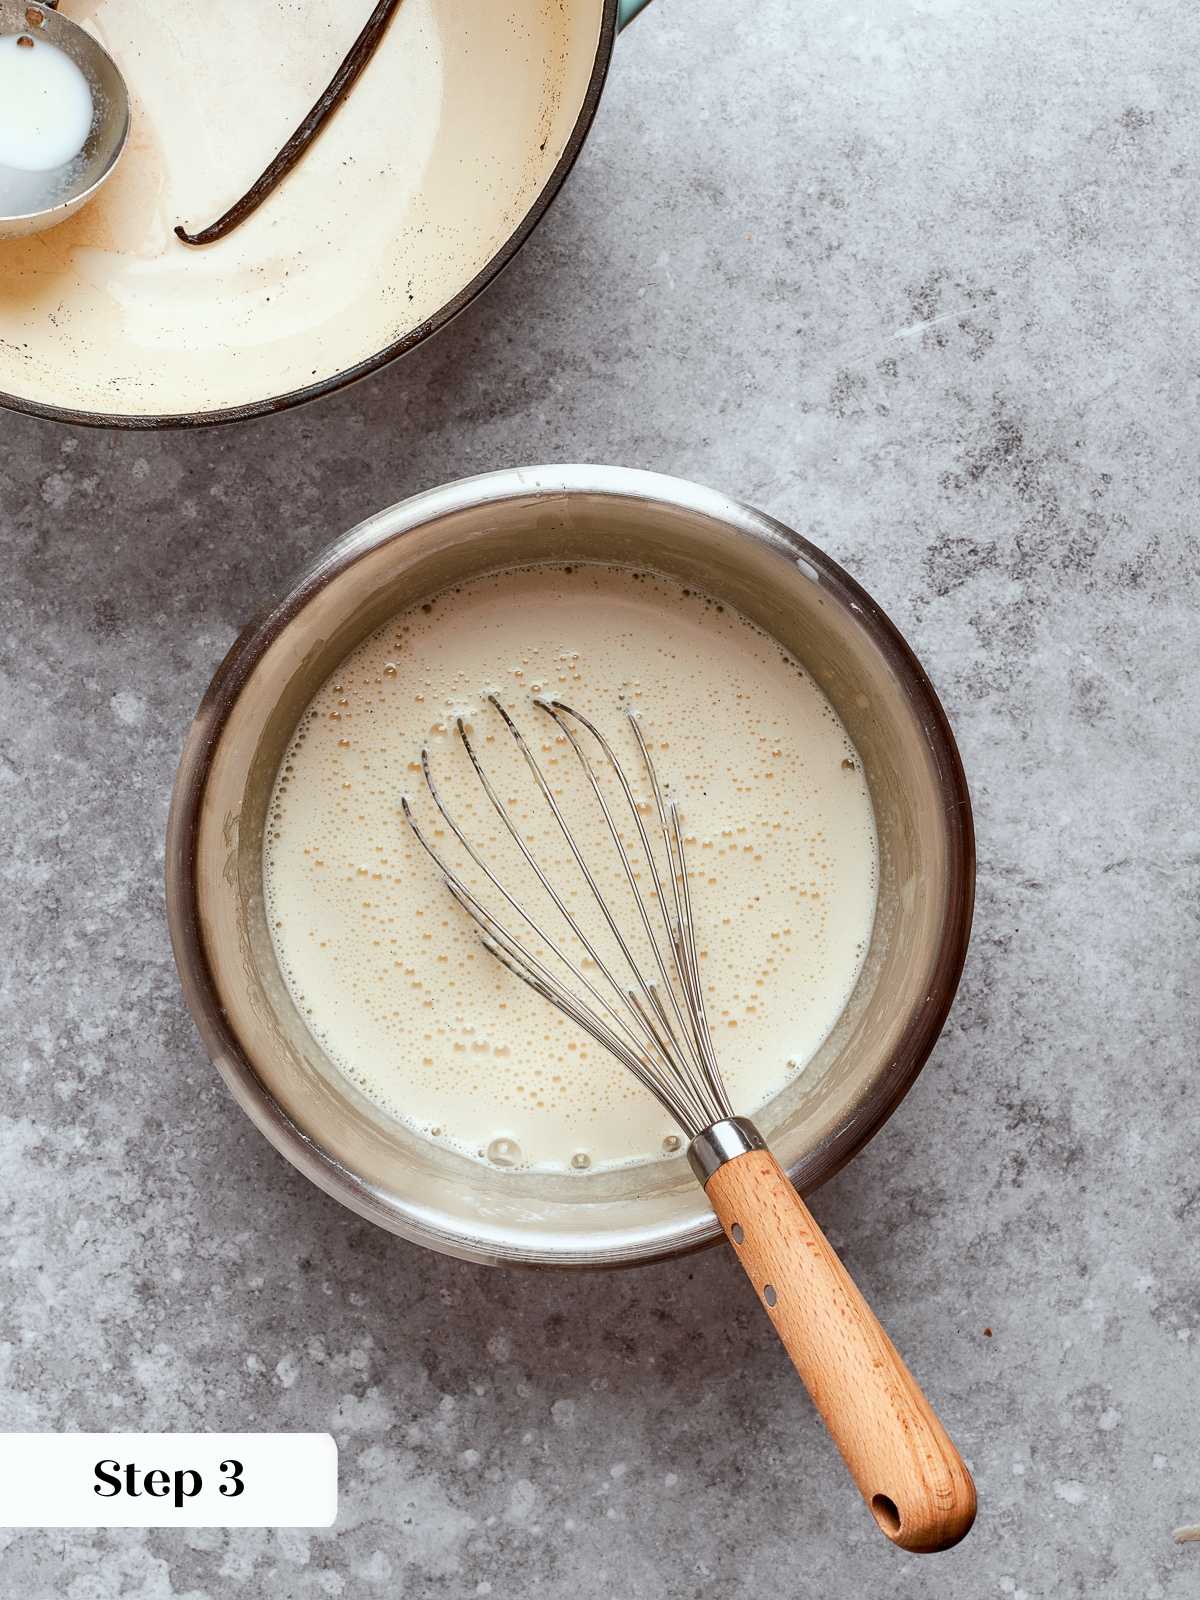
Step 3: Whisk the eggs and temper in the hot milk. In a bowl, vigorously whisk the whole egg, egg yolk, and cornstarch together until the mixture is completely smooth and pale. Then, with one hand whisking constantly, slowly pour the hot milk into the egg mixture in a thin, steady stream. This is called tempering: it gradually raises the temperature of the eggs so they cook with the milk instead of scrambling in it. (photos 2, 3 & 4)
The mixture will look very thin and pale at this point, which is completely normal. The cornstarch cannot thicken until it returns to heat, so do not be alarmed by how liquid it looks — thickening happens in the next step.

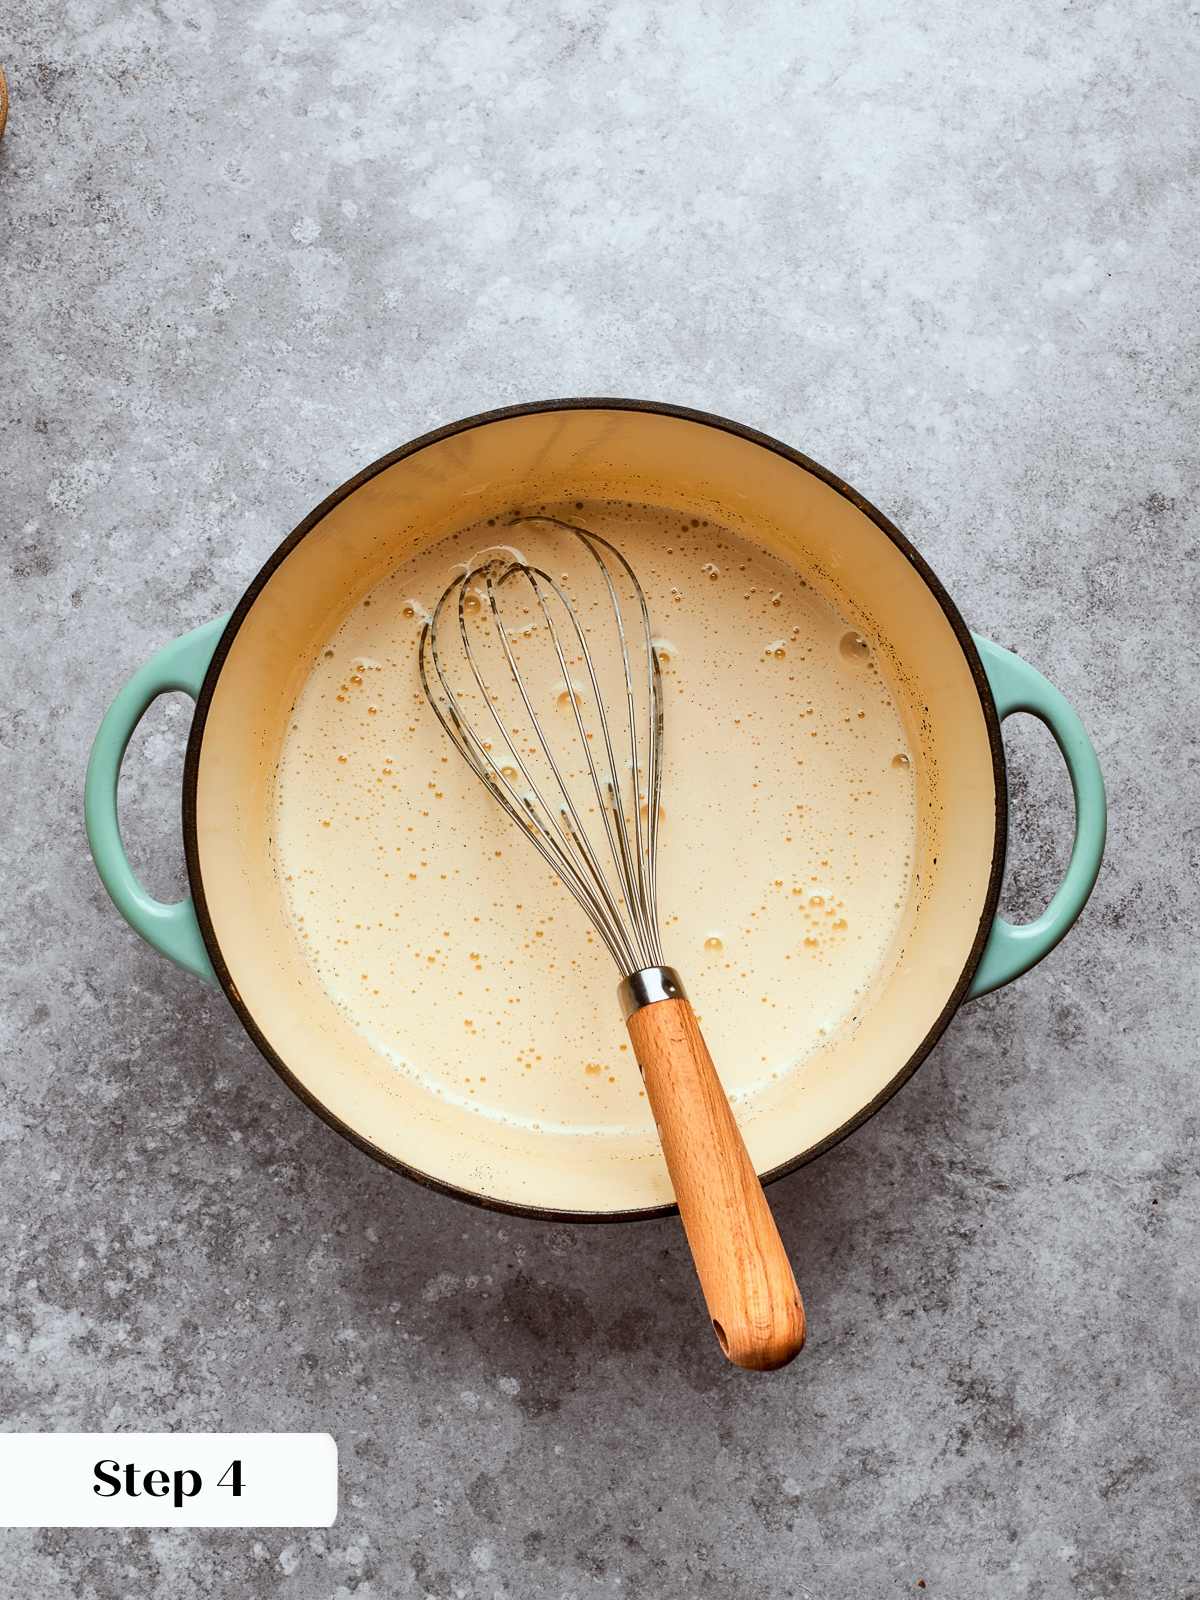
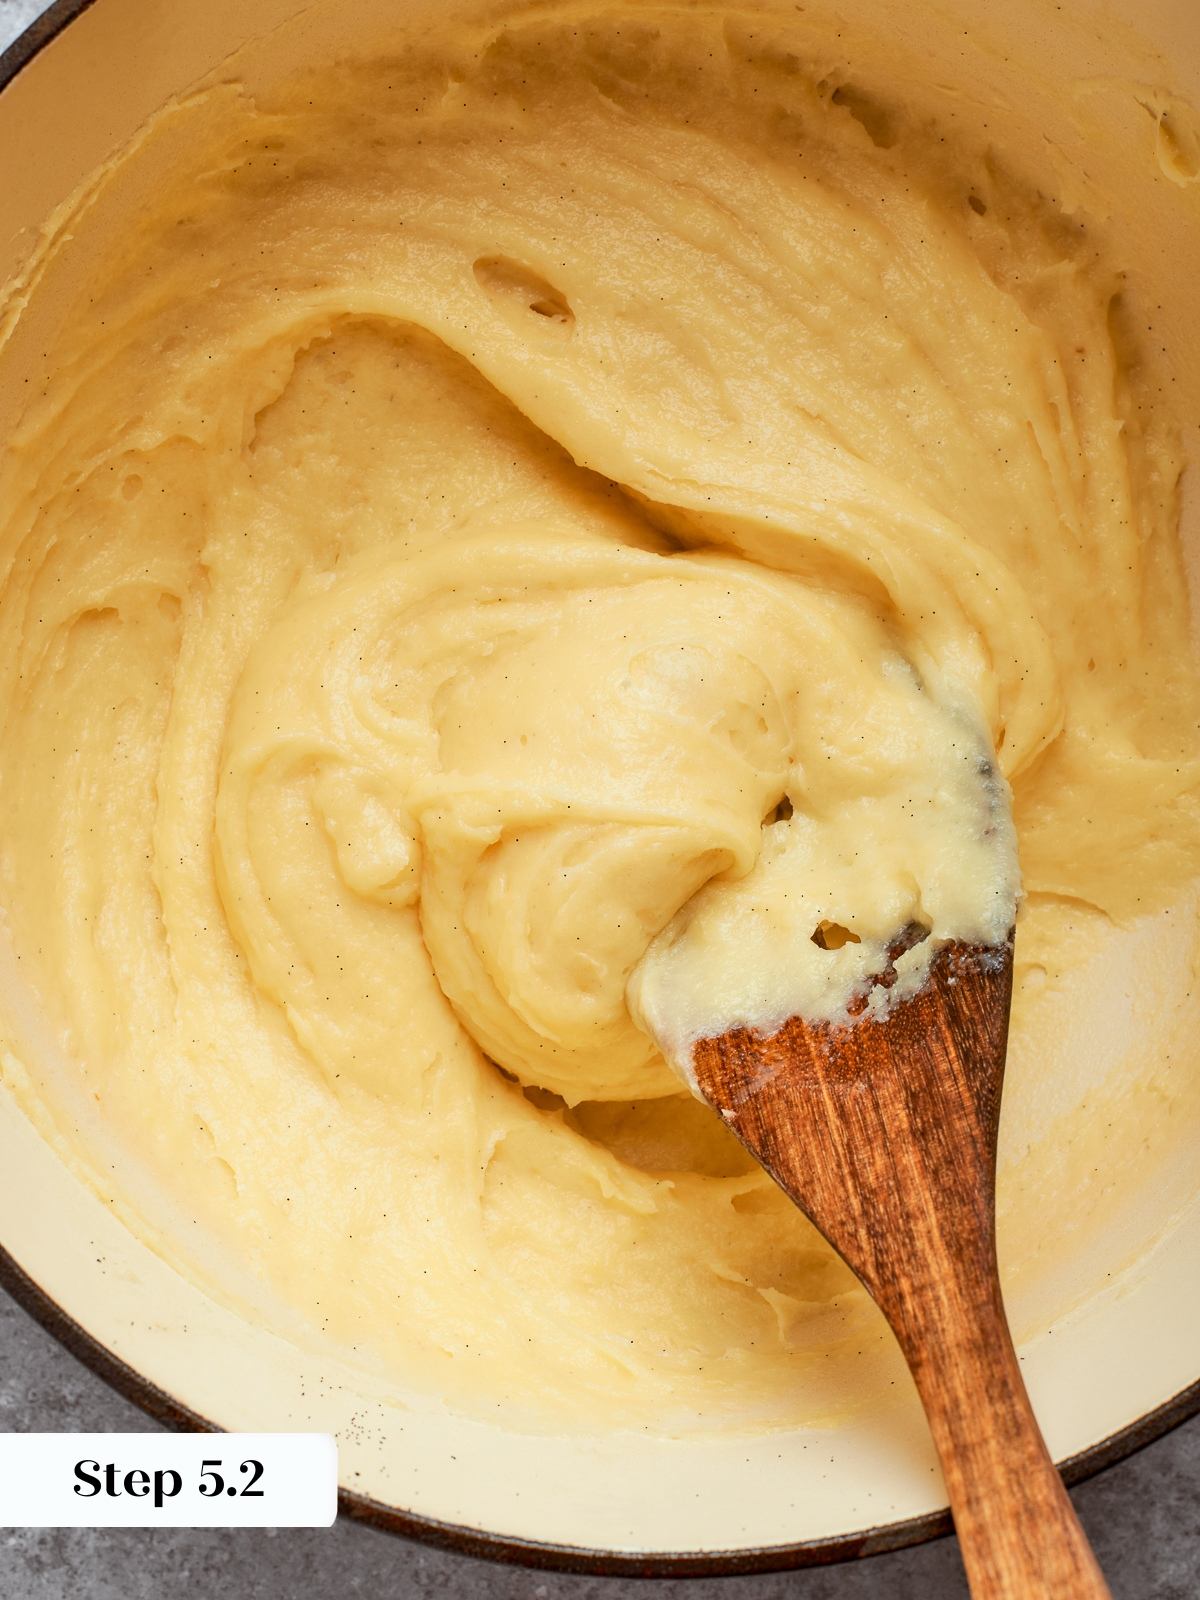
Step 4: Cook the pastry cream until thick and boiling. Pour the tempered mixture back into the pot and set it over medium heat. Whisk constantly as it heats. For the first few minutes it will seem like nothing is happening, then it will begin to tighten and hold the track of the whisk. Keep going. Once it reaches a full boil, continue whisking and let it boil for a full minute. That one minute of boiling is non-negotiable for me: it activates the cornstarch fully and eliminates any starchy flavor from the finished cream. (photos 5 & 6 below)
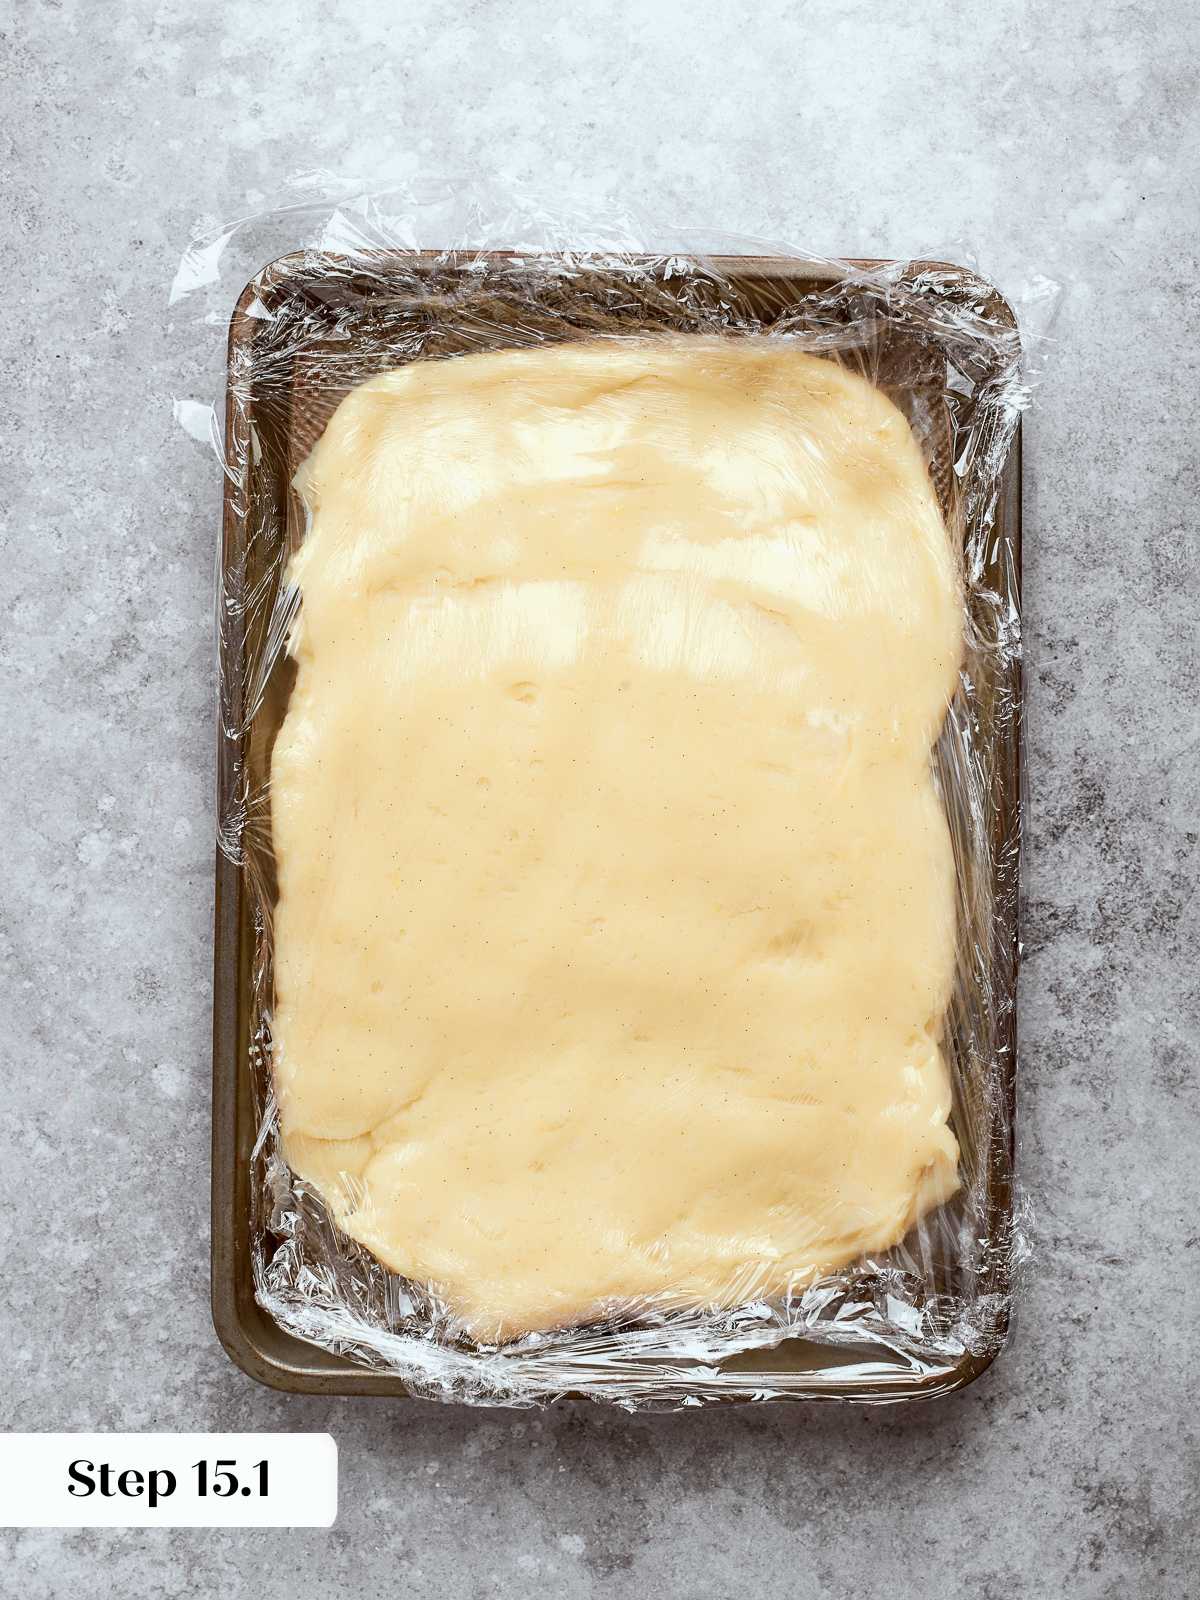
Step 5: Cool the pastry cream. Pour the hot pastry cream onto a baking pan lined with plastic wrap, spreading it into an even layer so it cools quickly. Lay another sheet of plastic wrap directly on top, then poke a few holes in the plastic to let steam escape. Cool it completely at room temperature, then transfer to the refrigerator until cold and fully set, at least a few hours or overnight. The pastry cream will keep for up to 7 days in the refrigerator, which is what I always do when I want to get a head start on assembly. (photo 7)
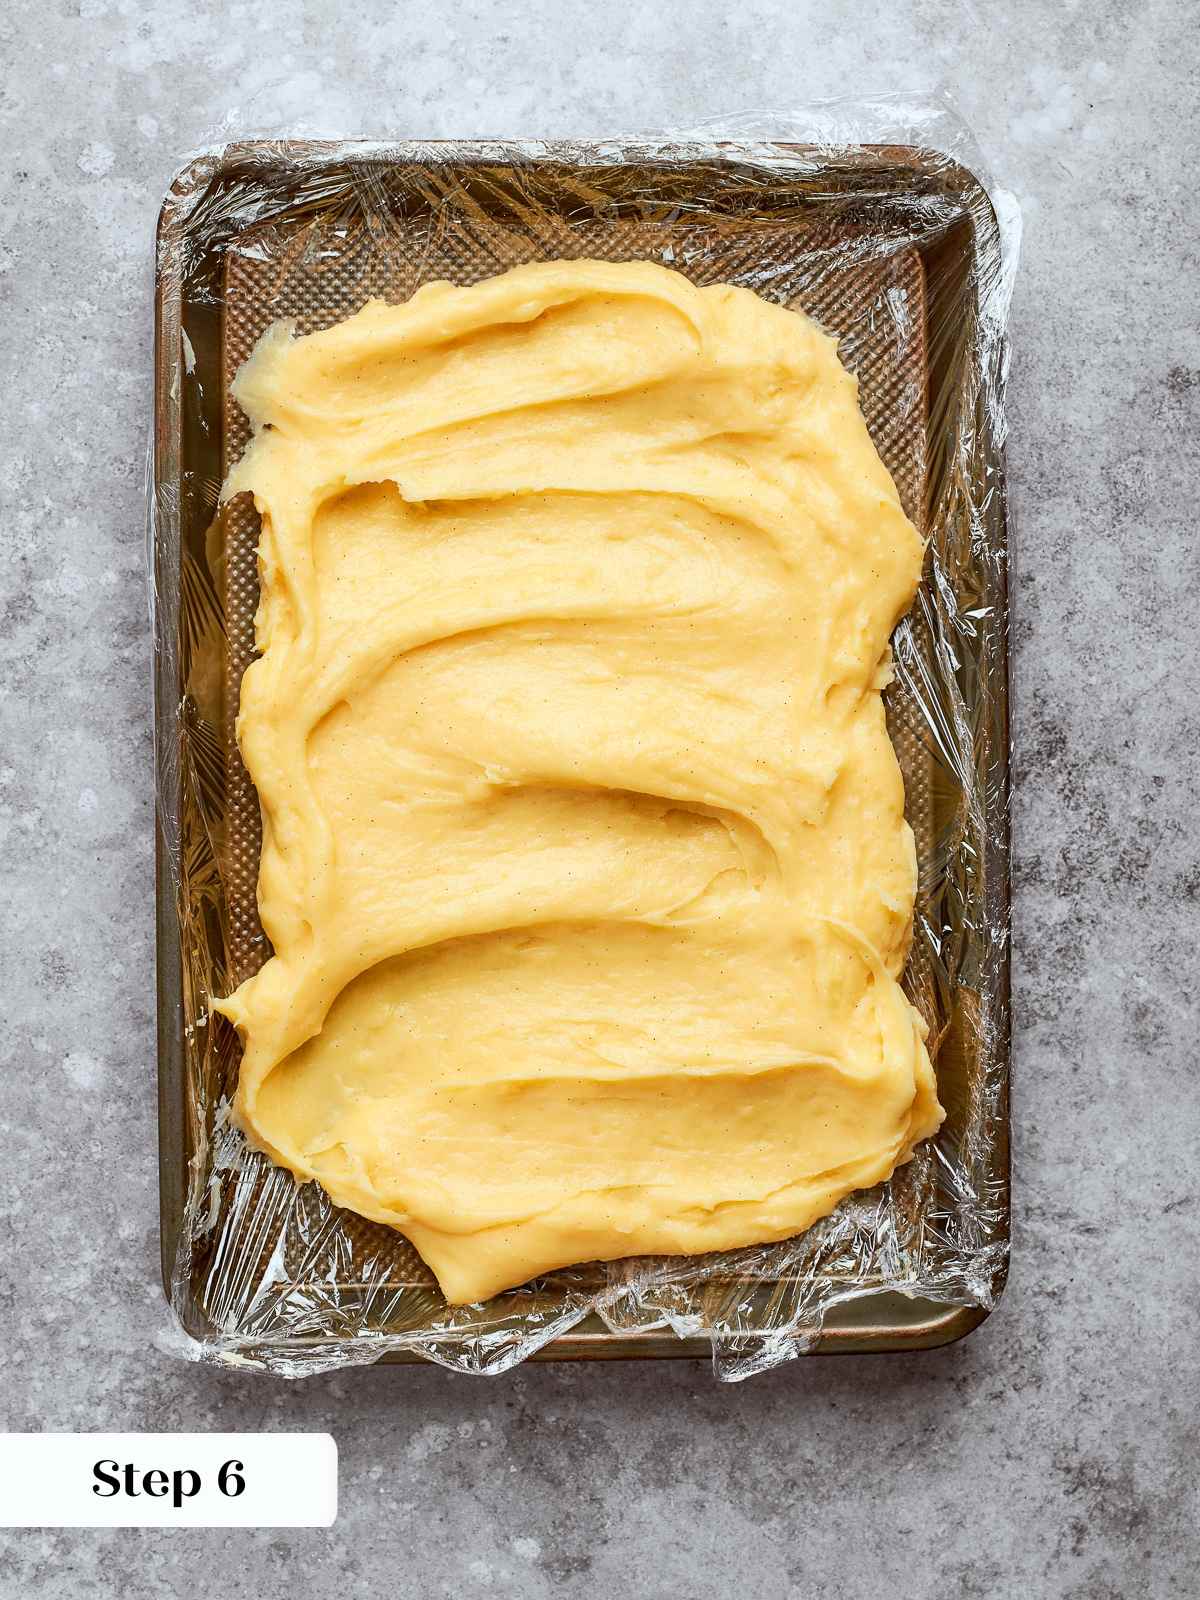
Tip: Spreading the cream thin across a sheet pan rather than leaving it in a deep bowl cuts the cooling time significantly, the increased surface area lets heat escape much faster.
Cut and Bake Puff Pastry
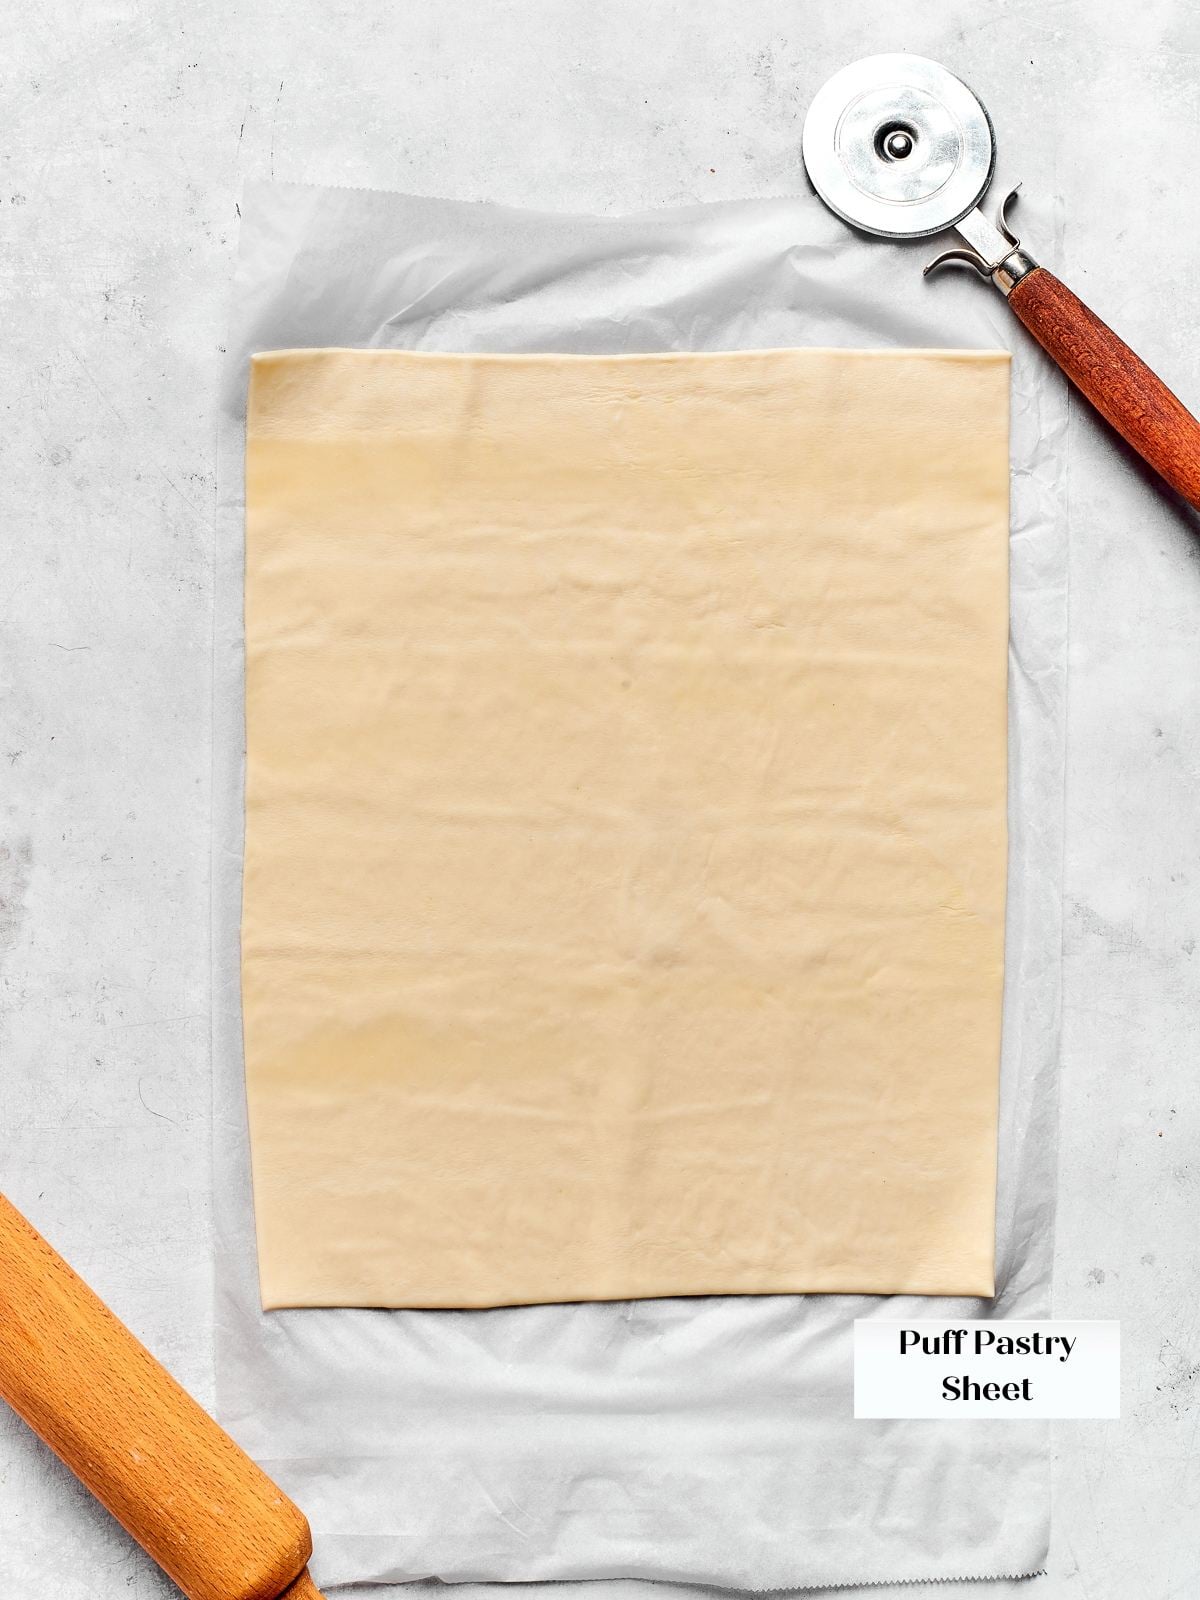
Step 6: Thaw and temper the puff pastry. If your puff pastry is frozen, set it on the counter to thaw until it is just pliable enough to unroll flat without cracking. It should still feel cold to the touch. Do not let it sit out longer than necessary.
The moment puff pastry starts to feel warm or soft, the butter inside begins melting into the dough rather than staying in distinct layers. Those cold, separate butter layers are what create the visible lamination you want on the sides of the finished tart. If the dough feels at all tacky, return it to the refrigerator for 10 minutes before continuing.
Step 7: Cut the base and border strips. Using a ruler and a sharp knife or pizza cutter, cut a rectangle from the puff pastry for your base. The size is flexible: the tart shown is 4×6 inches, but smaller tartlets or a larger single tart both work. From the remaining pastry, cut four strips approximately 2cm wide, one for each side of the base. (photo 8)
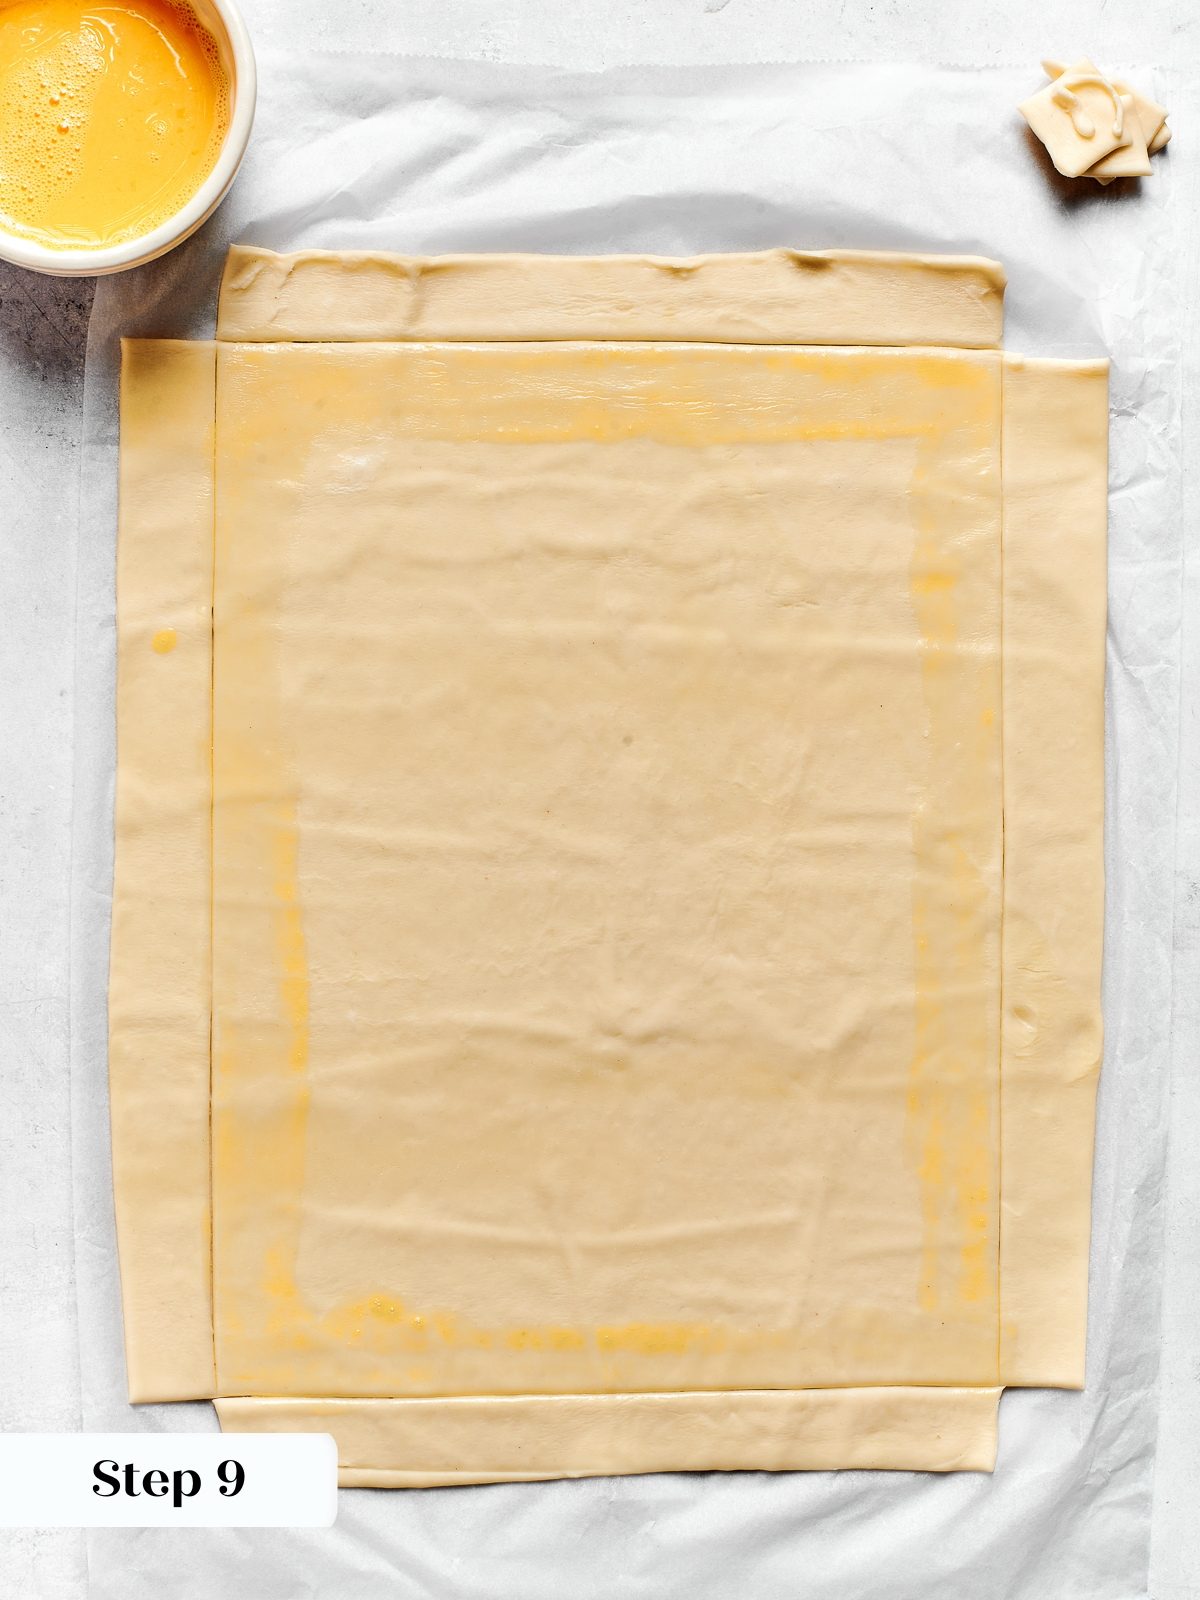
Step 8: Adhere the border strips with egg wash. Brush a thin layer of egg wash along the outer edges of the base, then press one strip onto each side to create a raised border, like the walls of a boat. Use the reserved half egg from the pastry cream or beat a fresh egg. ( photo 9)
This is the step where most cooks run into trouble: if the egg wash drips down the cut edges of the pastry, it seals the layers together and the pastry cannot puff in the oven. Keep the wash on the flat top surface of the base only, use as little as you need, and if any runs down the side, blot it immediately with a dry corner of your brush before it dries.
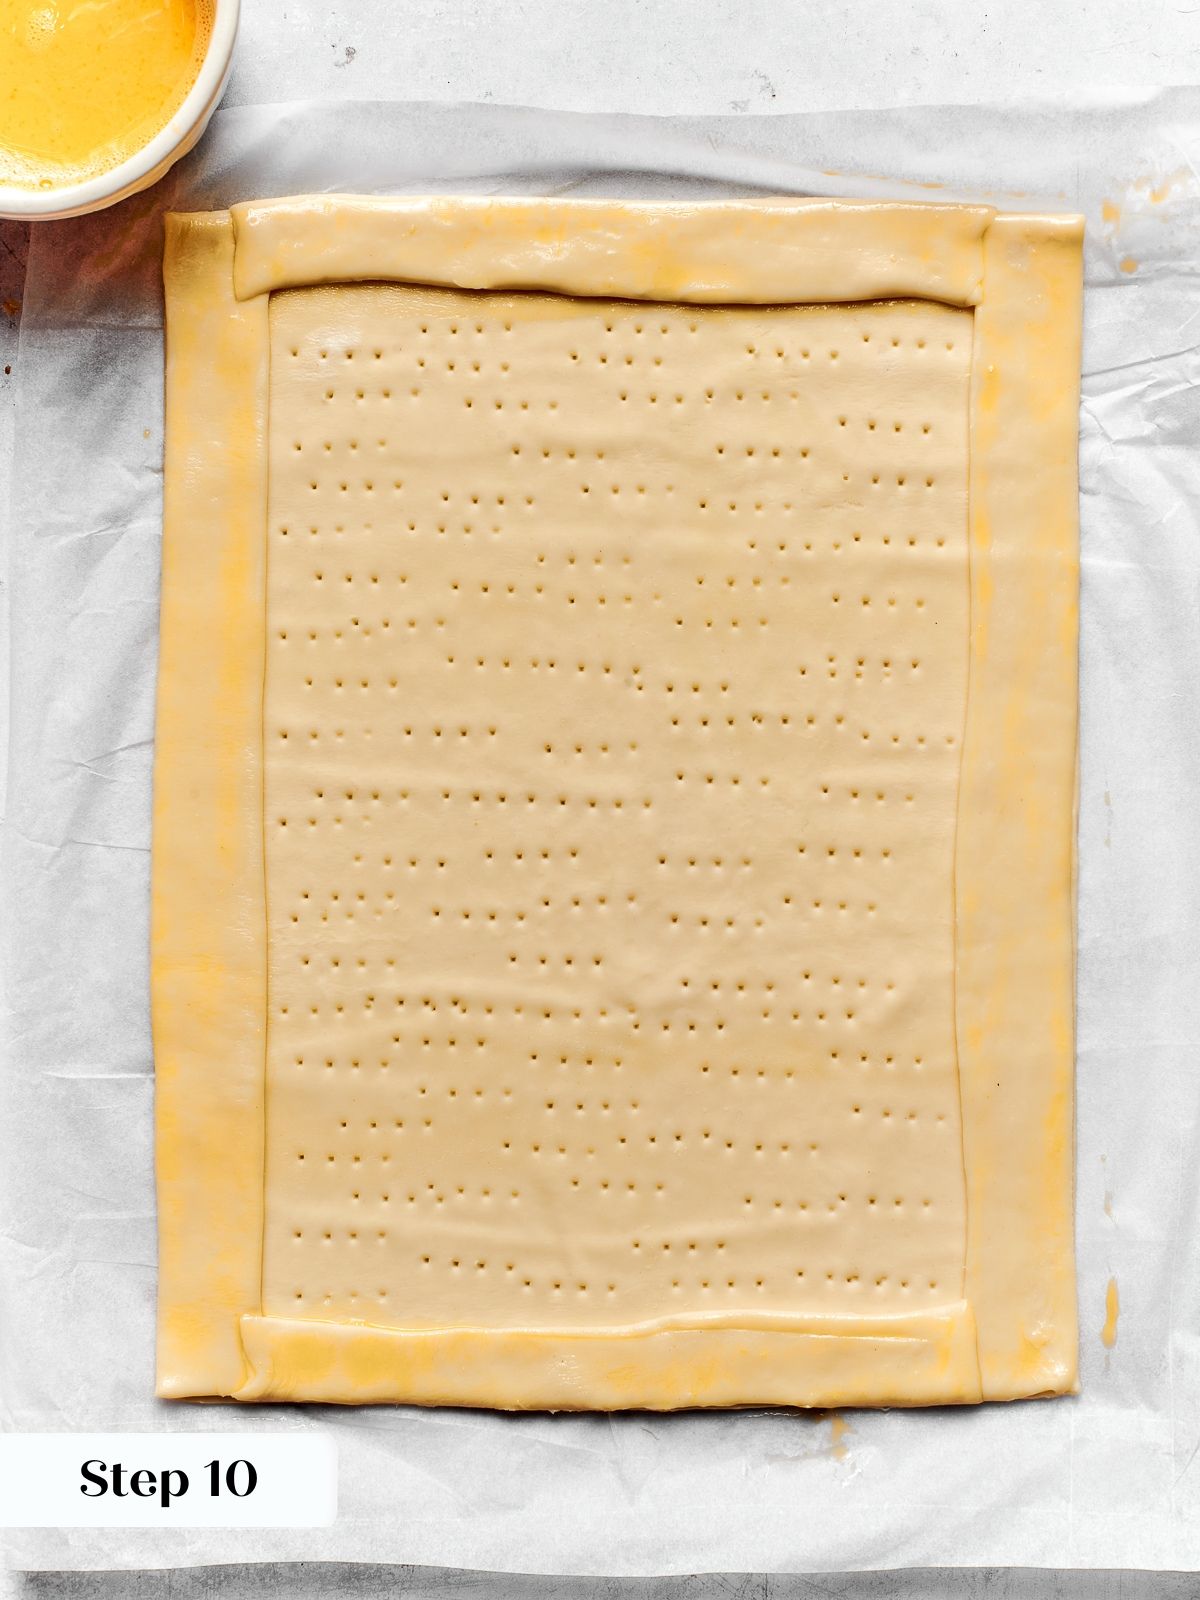
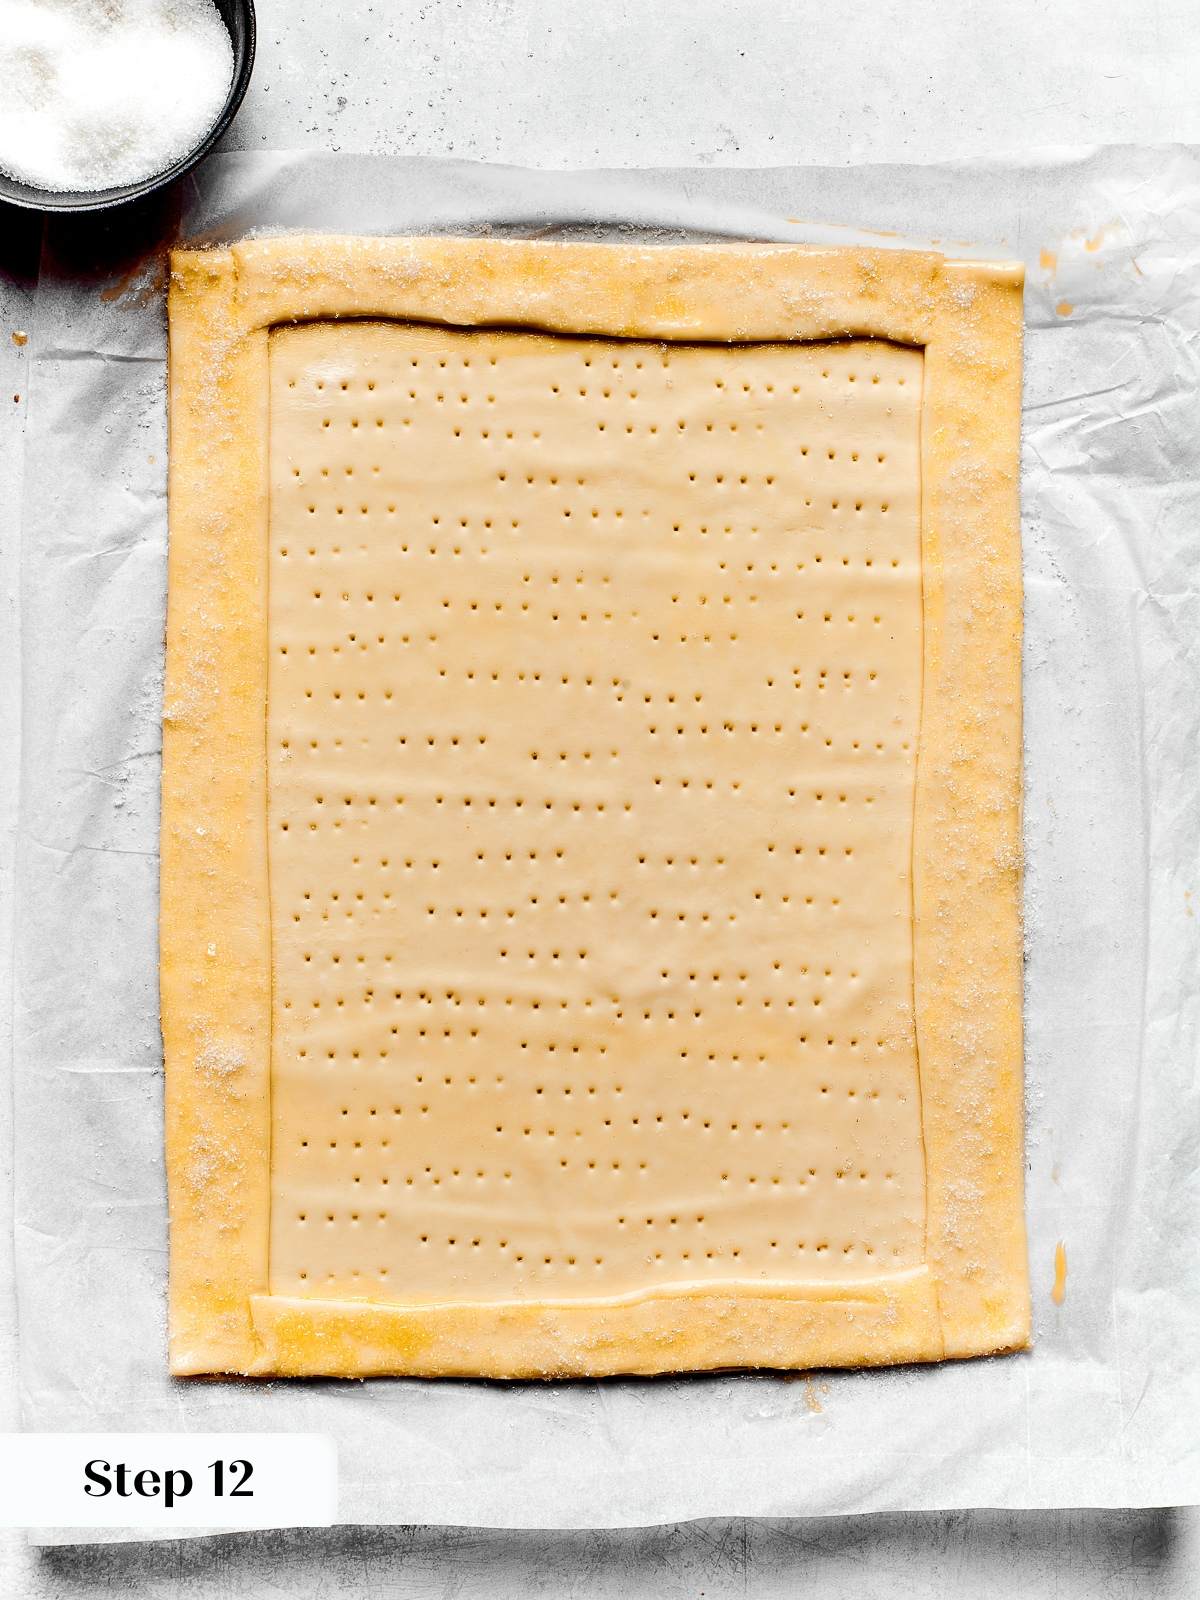
Step 9: Dock the base. Use a fork to poke holes evenly across the interior base of the tart, stopping before you reach the border strips. Docking gives the steam specific exit points so the base rises evenly rather than ballooning in the center. (photo 10)

Step 10: Chill the assembled tart. Transfer the tart to the refrigerator and chill for at least 45 minutes. Cold fat is what creates those distinct, flaky layers during baking. If after chilling the pastry feels soft or looks glossy, it needs more time.
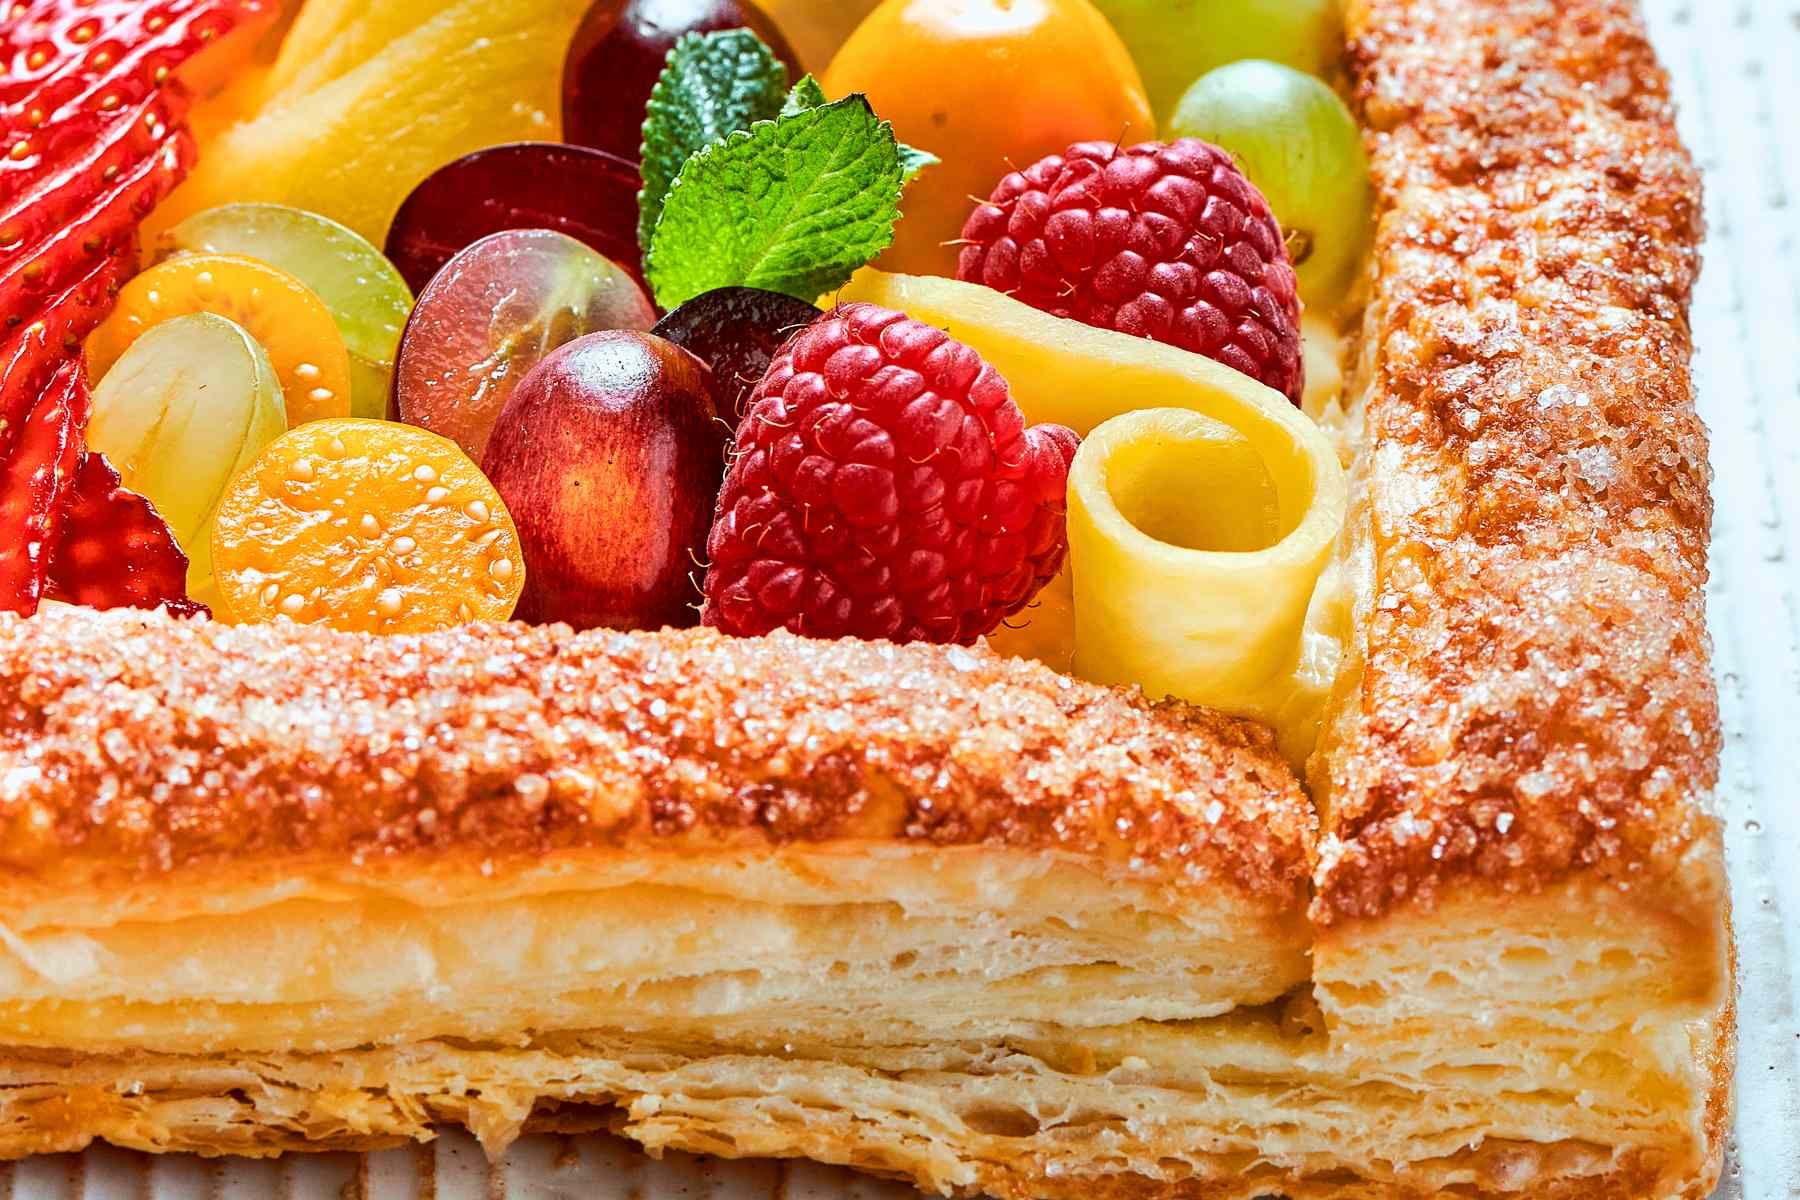
Step 11: Egg wash the border and add sugar. Remove the tart from the refrigerator and quickly brush just the top surface of the border strips with egg wash or a little water. Sprinkle raw sugar over the border for crunch and color. Work quickly: if the pastry has softened during this step, return it to the refrigerator before baking. (photo 11)
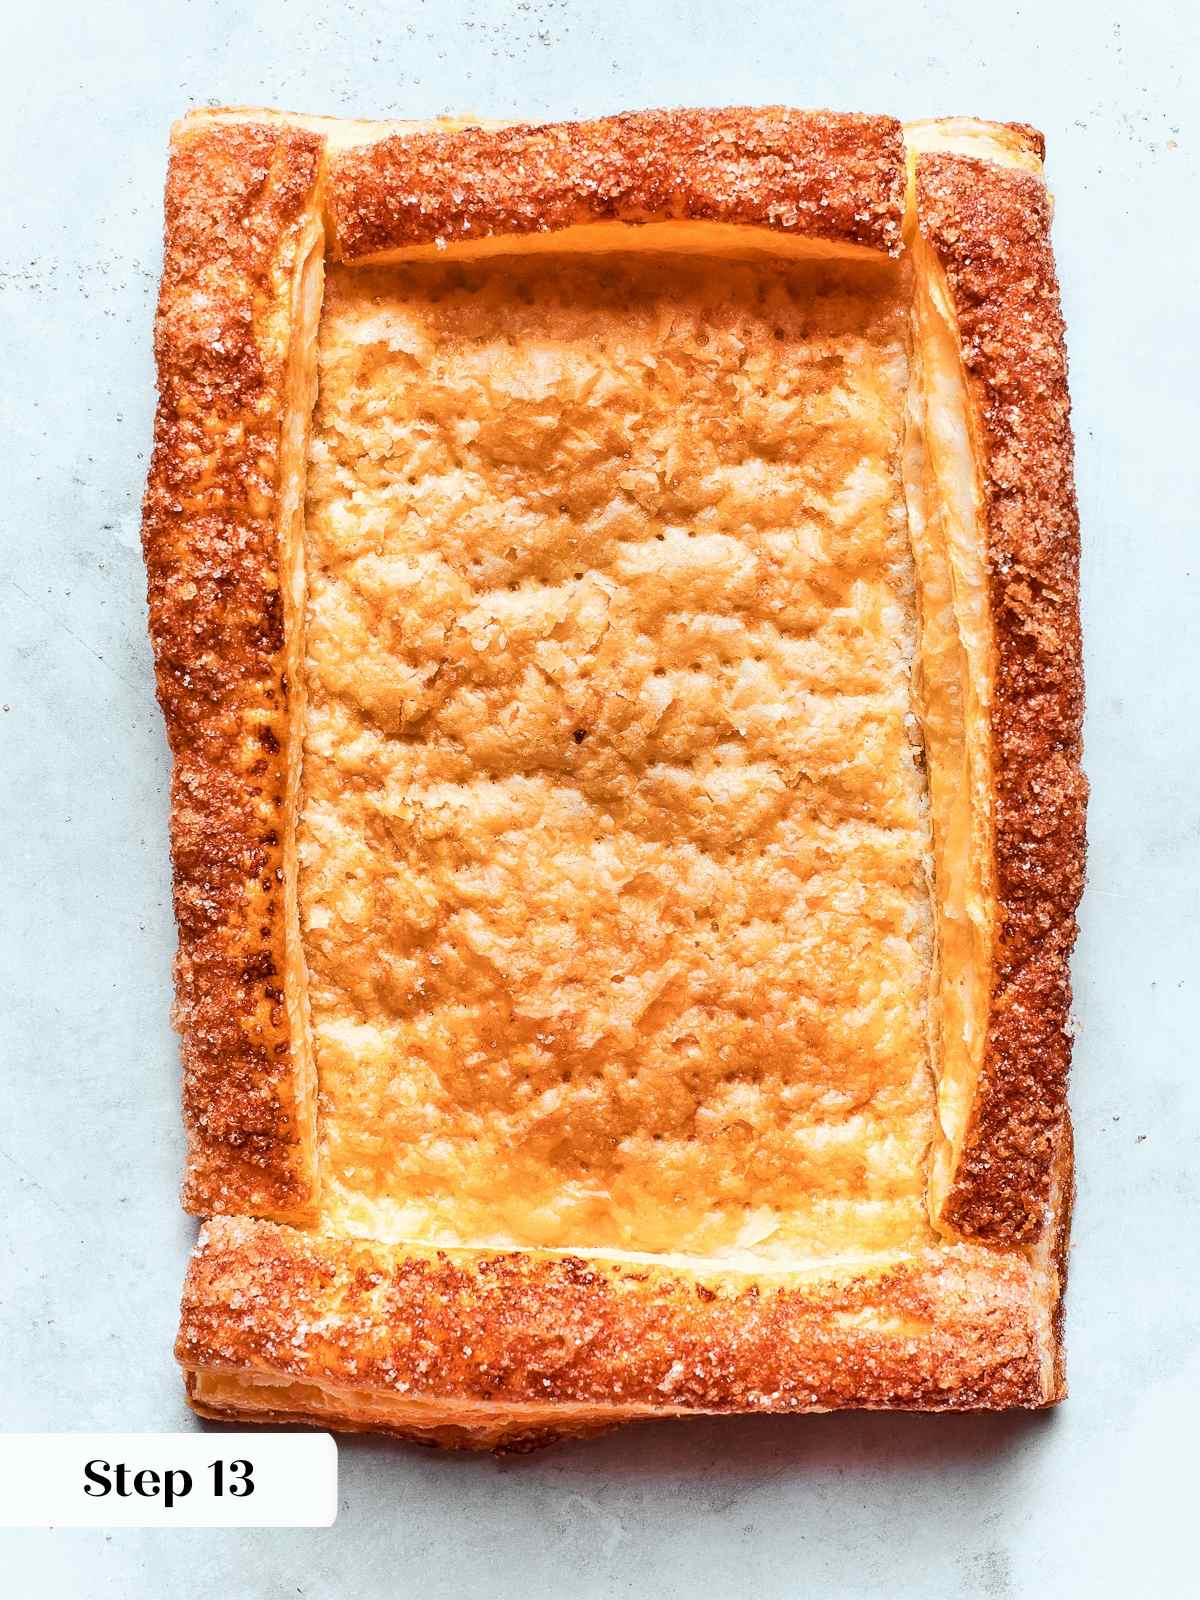
Step 12: Bake the tart shell. Preheat your oven to 375°F convection or 400°F conventional. Place the chilled tart on a parchment-lined baking sheet that has been lightly sprayed with nonstick spray. Bake for 12 to 20 minutes, starting to check at 12. You want deep golden brown borders and visible, distinct layers on the cut sides of the pastry. The size of your tart determines the bake time, so trust your eyes here more than the clock. (photo 12)
Step 13: Cool the tart shell completely. Set the baked shell aside and let it cool to room temperature before adding any filling. Adding pastry cream to a warm shell will cause it to melt and weep.
Assemble Puff Pastry Fruit Tart
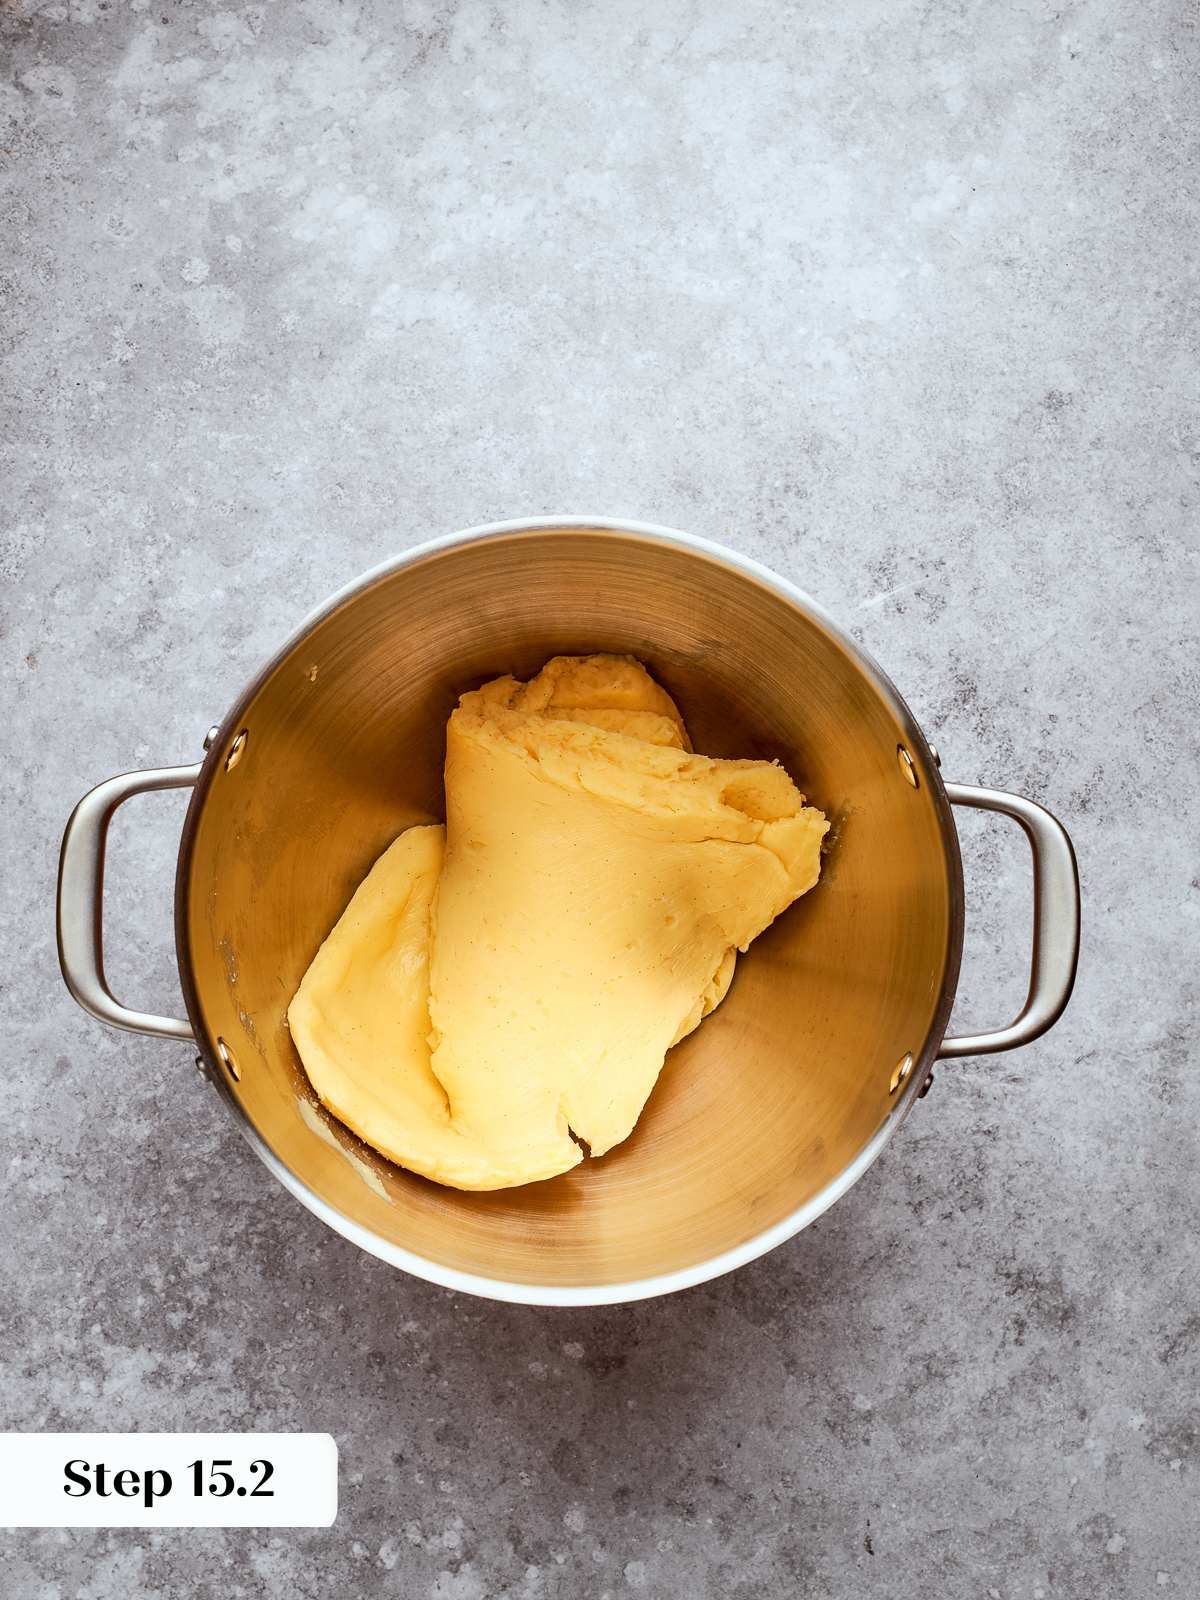
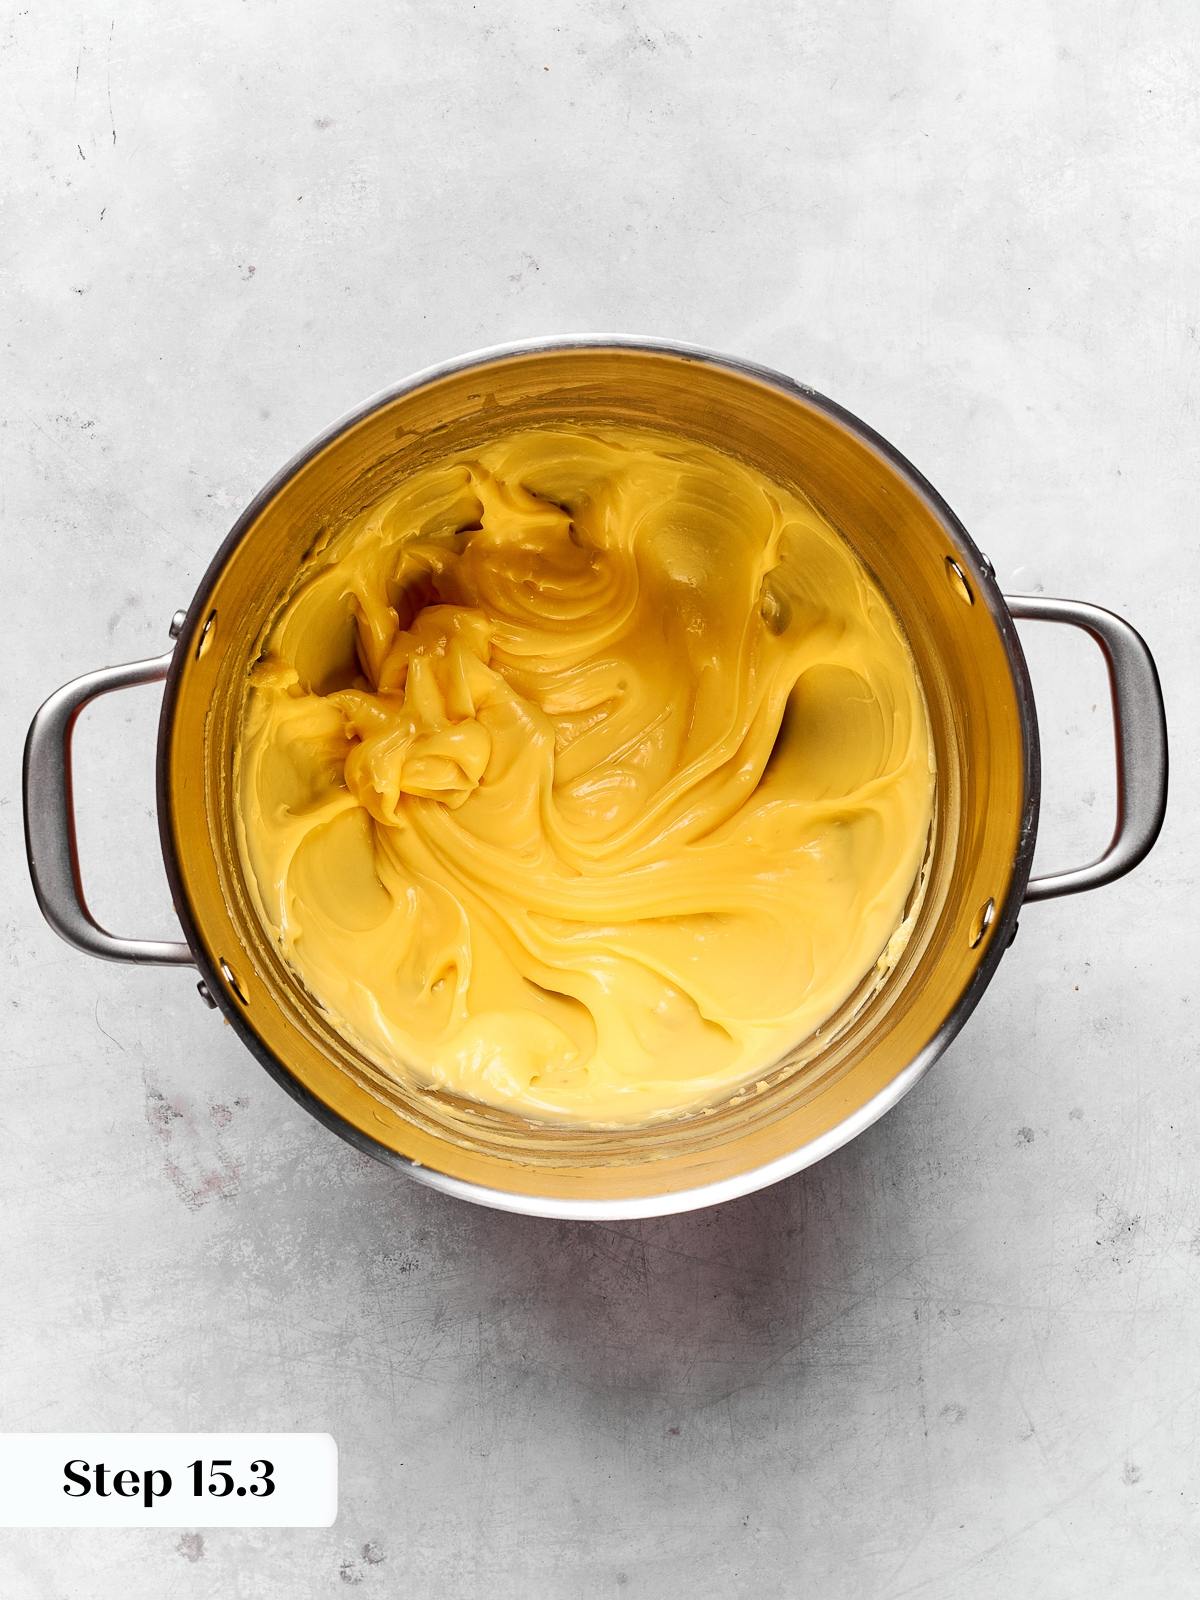
Step 14: Refresh and flavor the pastry cream. Beat the chilled pastry cream in the bowl of a stand mixer fitted with the paddle attachment, or by hand with a rubber spatula, until it is smooth and easily spreadable. This is the moment to add bourbon to taste, if using. The cream will look broken and lumpy at first, which is completely normal: keep beating and it will come together into a silky, smooth texture. (photos 13, 14, & 15)
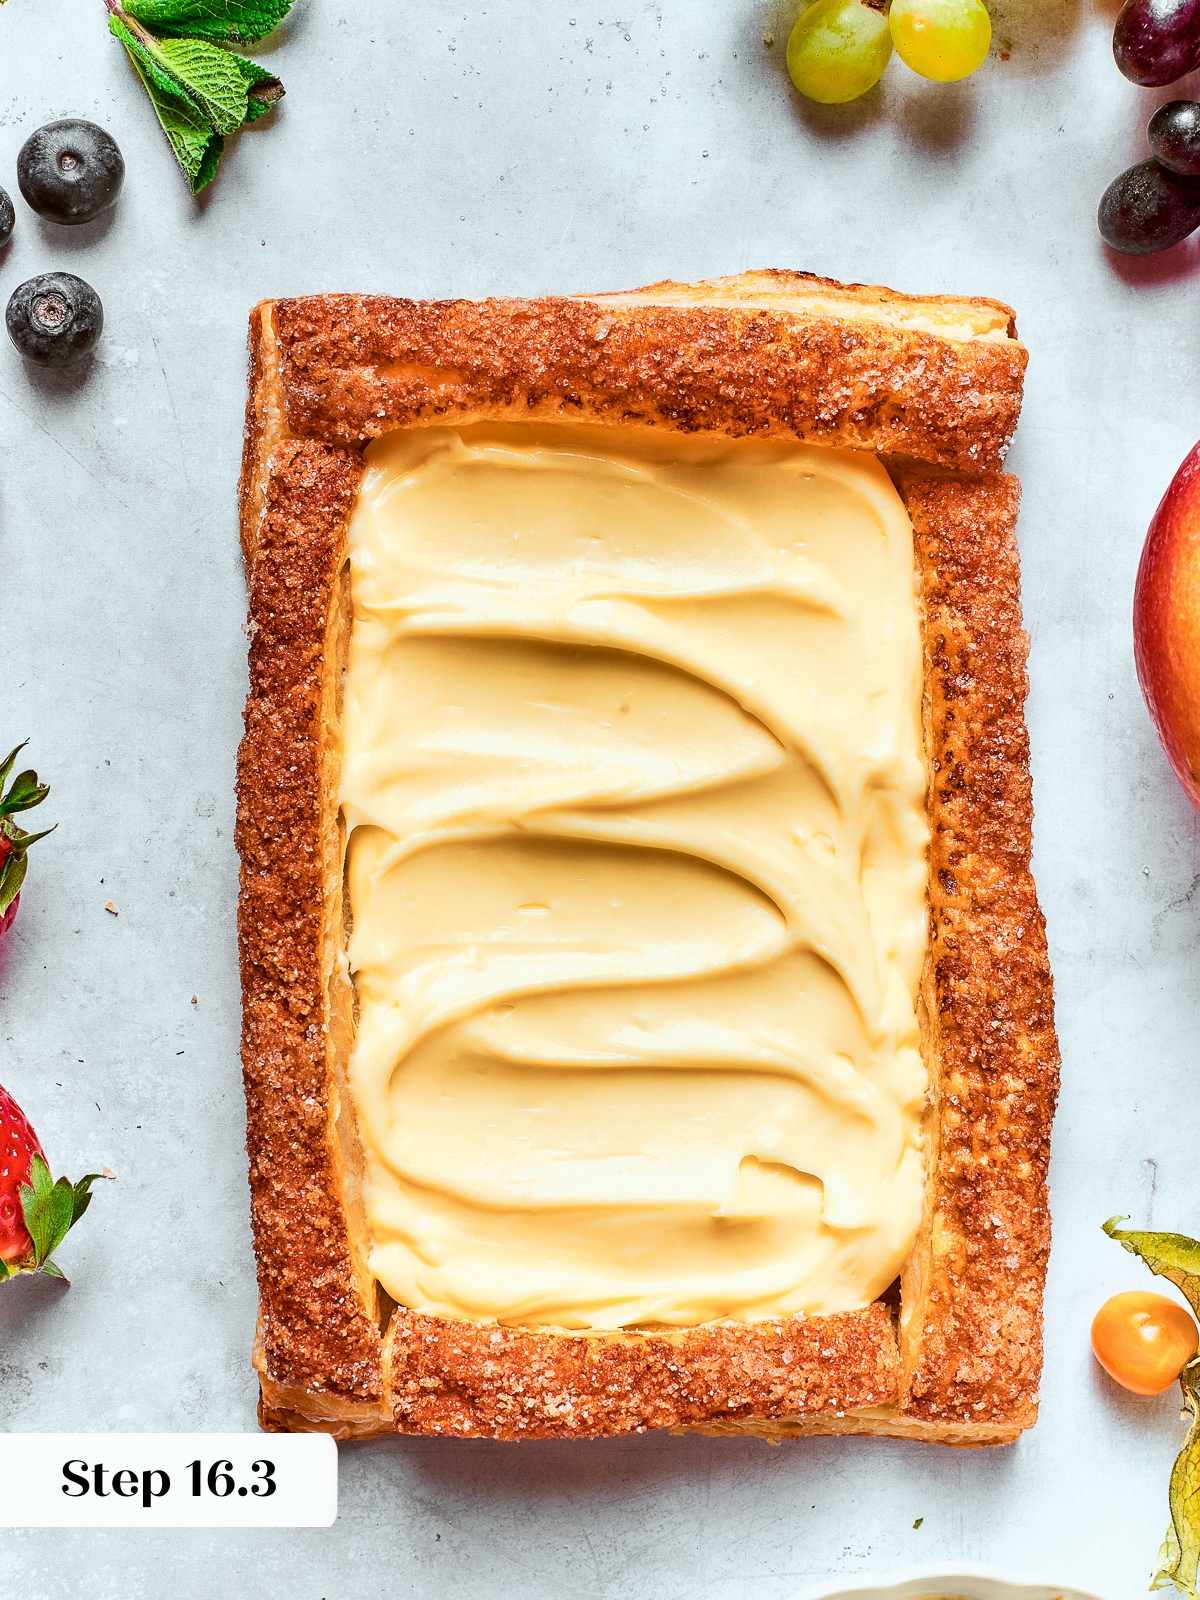
Step 15: Fill the tart shell. Dollop the pastry cream into the cooled tart shell and spread it with an offset spatula until it covers the entire base and reaches just below the top of the border. Do not overfill: the fruit will push the cream toward the edges, and overfilling leads to a messy tart. (photos 16 & 17)
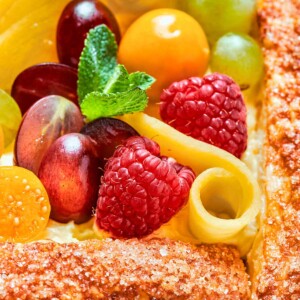
Step 16: Arrange the fruit and serve. Cut and arrange your fruit over the pastry cream however you like: a precise, layered pattern or a generous pile of mixed berries both work beautifully. Refrigerate briefly before serving, and plan to serve this the day it is assembled for the best texture and layers. (photo 18)

Chef Lindsey’s Recipe Tip
The egg wash is doing two separate jobs in this recipe, and it is worth keeping them distinct. On the interior base, where the strips meet the base layer, the egg wash acts as the glue that holds the border in place during baking. On the top surface of the border, it is purely for color and finish. If egg wash drips down the cut sides of the pastry, it welds those layers shut and the puff cannot rise. Brush the top surface only, and if any drips down the sides, blot it immediately with a dry corner of your pastry brush before it dries.
Recipe FAQs
Yes, and I would encourage it. Bake the tart shell the day you plan to serve it and store the pastry cream in the refrigerator for up to 7 days, then assemble just before serving. Keeping the components separate until the last moment gives you the best texture in both the shell and the cream.
This tart is best consumed the day it is made. If you have leftovers, store the components separately: the baked shell at room temperature and the pastry cream in the refrigerator, and reassemble before serving.
Use whatever is in season: berries, sliced stone fruit, kiwi, and figs all work well. The key is choosing a variety of fruits whose flavors compliment each other and flavor of the filling.
Docking gives the steam controlled exit points so the base rises evenly rather than puffing up in the center and cracking the cream filling. If you want to understand the technique in more depth, my post on When To Dock A Pie Crust covers the reasoning behind it. Dock only the base, never the border strips, which need to puff freely to form the walls.

Recommended Tart Recipes
Date Night
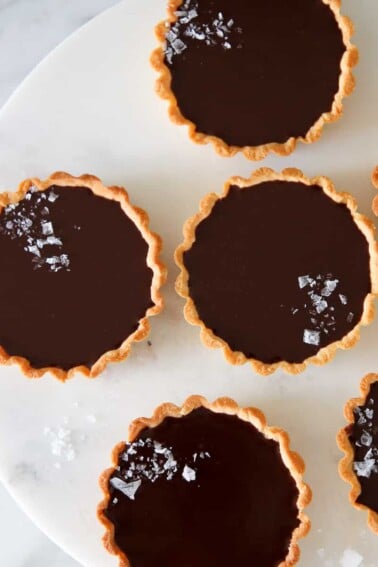
Chocolate Tarts
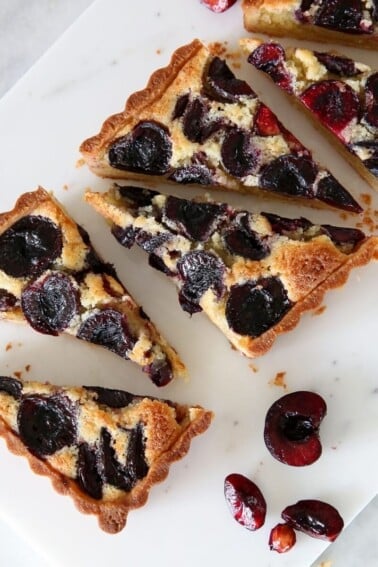
Summer Dessert Recipes
Cherry Almond Tart
Date Night
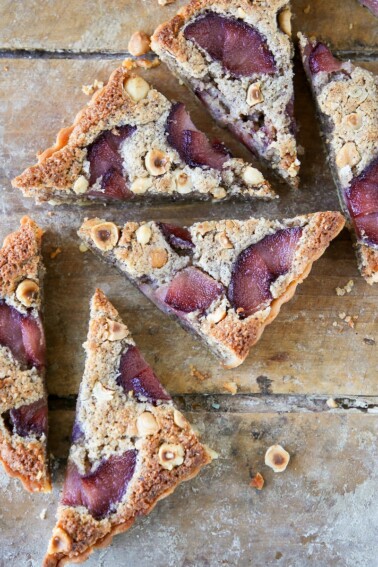
Hazelnut Pear Tart
Date Night
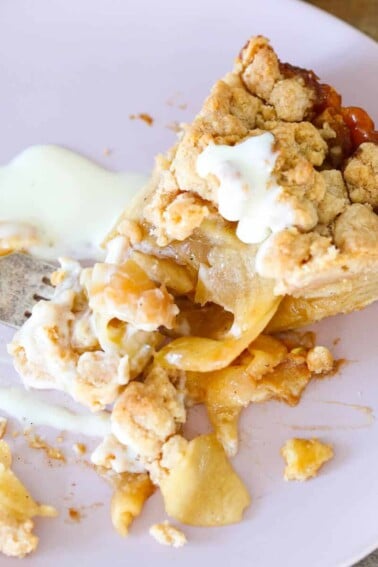
Caramel Apple Tart
If you tried this recipe and loved it please leave a 🌟 star rating and let me know how it goes in the comments below. I love hearing from you; your comments make my day!
Puff Pastry Fruit Tart
Ingredients
Pastry Cream
- 1 egg yolk
- ½ whole egg whisk a full egg until completely smooth with no egg white streaks and use half; save the other half for egg wash
- 1 cup milk
- ¼ cup sugar
- 2 tablespoons cornstarch
- ¼ vanilla bean seeded
- 2 teaspoons Bourbon optional
Tart Shell
- 1 sheet puff pastry homemade or store-bought
Topping
- Fresh fruits
Instructions
- Split and scrape the seeds from the vanilla bean. Heat the milk, sugar, and vanilla seeds in a medium pot and bring to a boil.
- Whisk the egg yolk and half egg with the cornstarch in a bowl. Temper the hot milk into the egg mixture by adding it slowly while whisking constantly, then return the mixture to the pot over medium heat and whisk until it thickens. Boil for a full minute while whisking, then pour onto a plastic-wrap-lined pan, cover with another sheet of plastic wrap, poke holes in the top, and cool completely.
- If the puff pastry is frozen, let it rest on the counter just until pliable but still cold. Cut a rectangular base in your desired size, then cut four strips approximately 2cm wide to form the border walls.
- Brush the top of the base with egg wash and press the strips along each edge to create a raised border. Dock the base with a fork to give steam controlled exit points, then chill the assembled tart for at least 45 minutes.
- Brush only the top surface of the border with egg wash, taking care not to let it drip down the cut sides. Sprinkle with raw sugar and return to the refrigerator if the pastry has softened.
- Bake at 375°F convection or 400°F conventional on a parchment-lined baking sheet for 12 to 20 minutes, until the border is deep golden brown and the layers are visible on the sides. Cool completely before filling.
- Beat the chilled pastry cream in a stand mixer with the paddle attachment or by hand until smooth and spreadable. Mix in Bourbon to taste if using. Spread the cream into the cooled tart shell, filling just below the top of the border.
- Arrange the fruit over the cream, refrigerate briefly before serving, and serve the day it is assembled.
Video
Notes
Doneness Cue: The border should be deep golden brown with visible laminated layers on the cut sides before you pull it from the oven.
Storage: This tart is best consumed the day it is made. If you have leftovers, store the components separately: the baked shell at room temperature and the pastry cream in the refrigerator, and reassemble before serving.
Make Ahead: The pastry cream can be made up to 7 days in advance and stored in the refrigerator. Bake the shell the day you plan to serve and assemble just before serving.
Nutrition
Before You Go
This puff pastry fruit tart, with its crisp caramelized base, silky pastry cream, and glossy fruit, is one of those recipes that earns a permanent spot in your repertoire. If you want to keep exploring, browse my Pie and Tart Recipes or Dessert Recipes for more.


I was nervous about the egg tempering step, but the instructions made it completely clear. The pastry cream set up beautifully and the tart came out looking like something from a bakery case. My family could not believe I made it at home.
So my niece is not a big fan of cake, so I had to get creative for her birthday. I made this tart sans the bourbon and with poached pears; she loved it! She almost didn’t share with anyone. Thank you for the wonderful recipe.
Lost faith in you, Lindsey? Please. I love that I know a pastry chef in NYC! In fact, not only did you fail to disappoint…but you impressed with the addition of bourbon here. Anytime bourbon is involved, I’m a fan. Now I just need to keep from eating this whole tart in one bite. What are the odds of that happening?
Well at least I know I have one fan left, David! Haha! Bourbon is always welcome! And I would never judge you for eating the whole thing! One bite might be tricky but I have confidence in your ability!
This looks awesome! We had your healthy chicken tacos for dinner two days ago – everyone loved them. And also had your roasted lemon chicken on a bed of veggies last Saturday – also a big hit. Thanks!
You are like my one-stop test kitchen! I’m so glad you enjoyed both of those! I made the lemon chicken last week too 🙂 Thank you!