This post may contain affiliate links. Please read our disclosure policy.
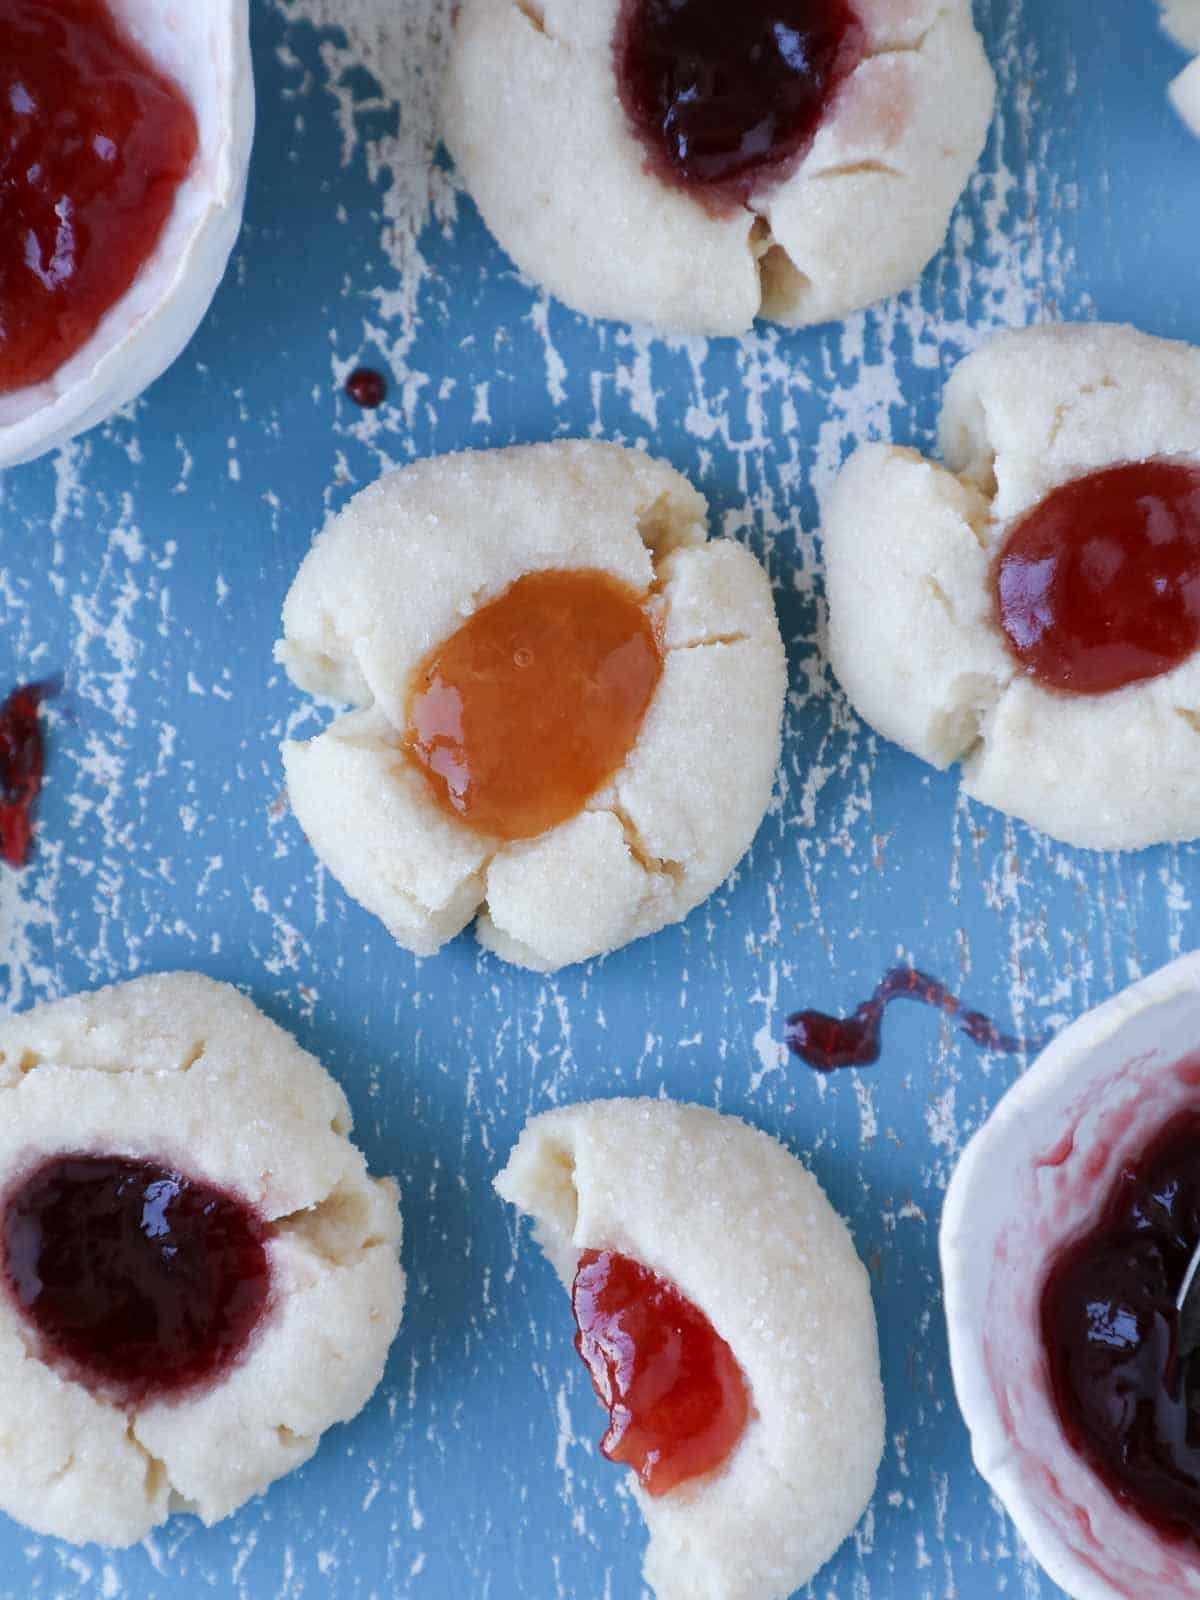
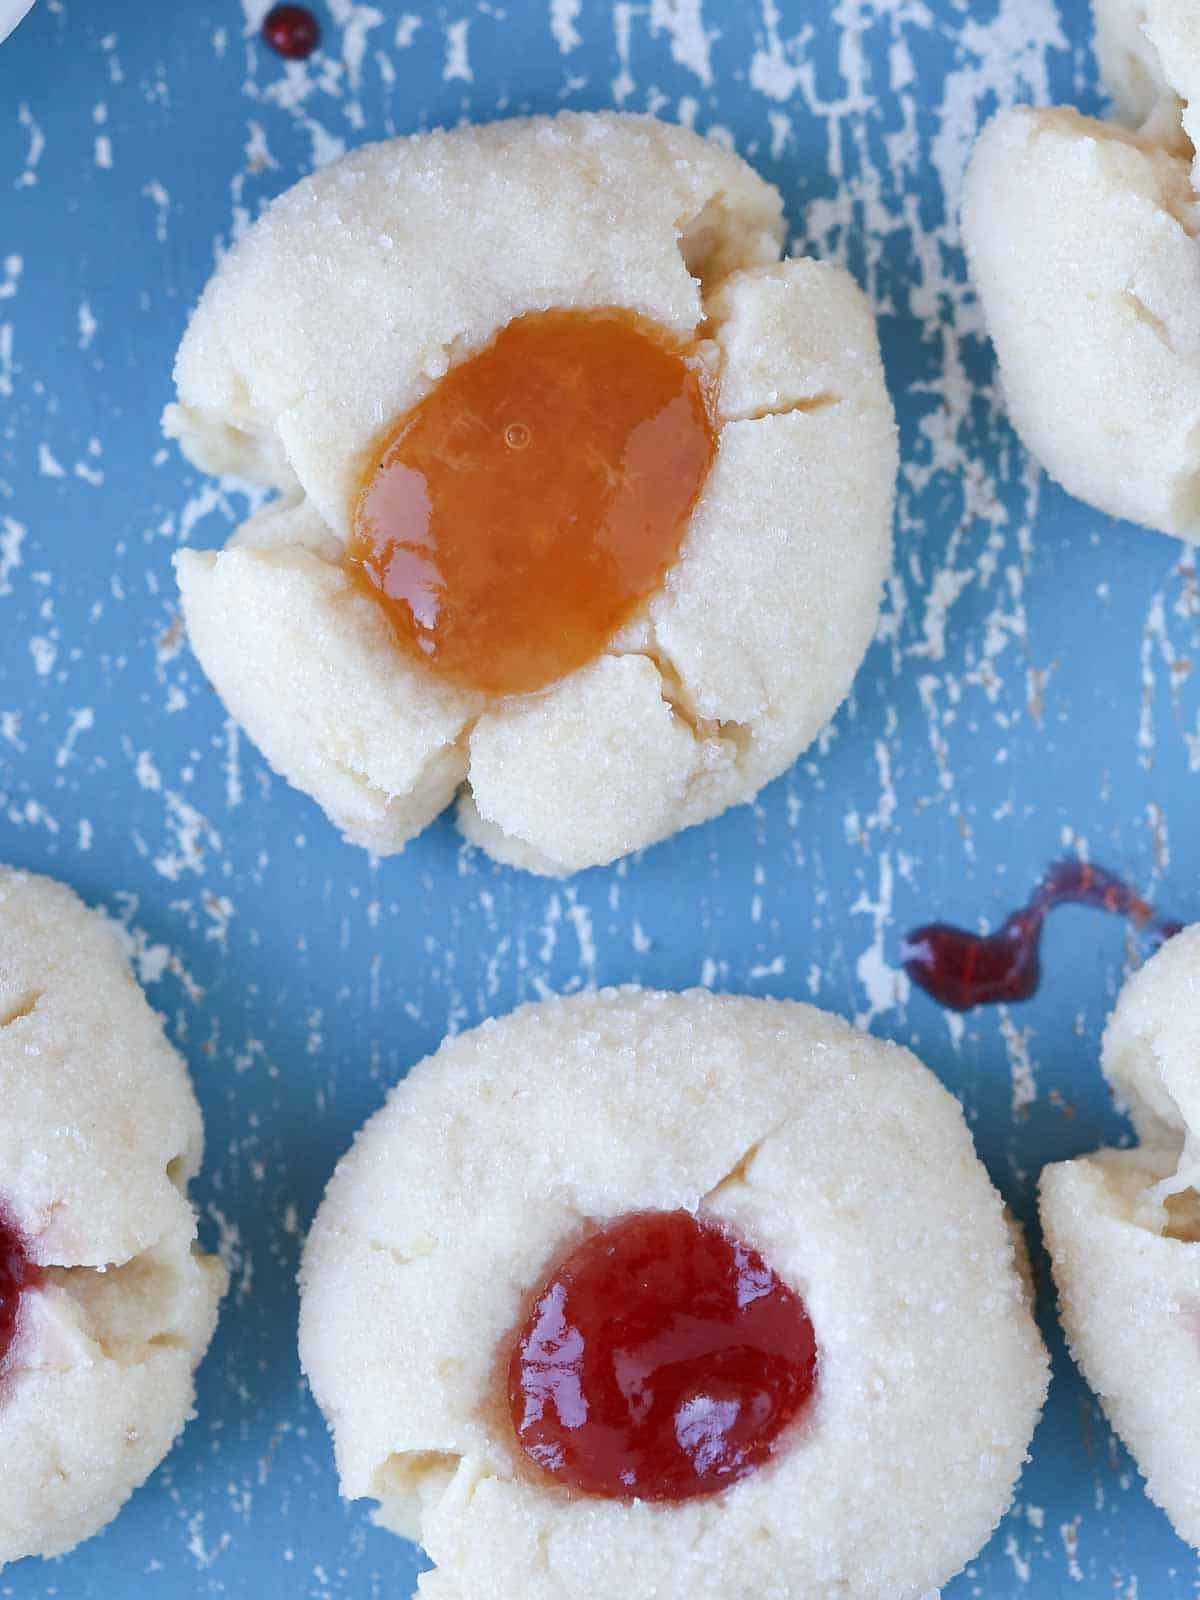
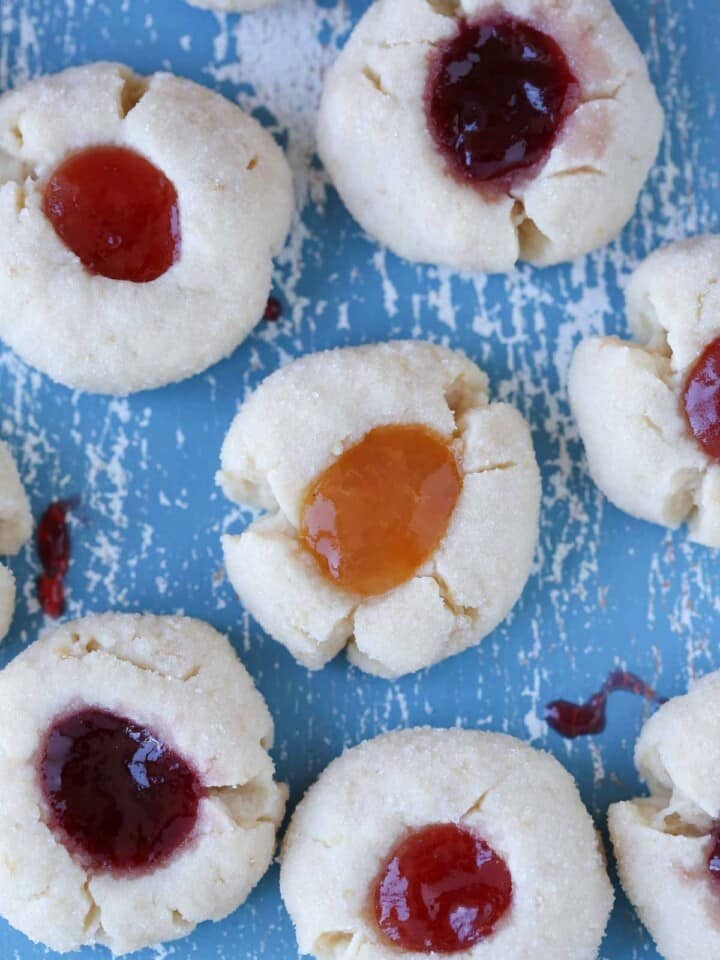
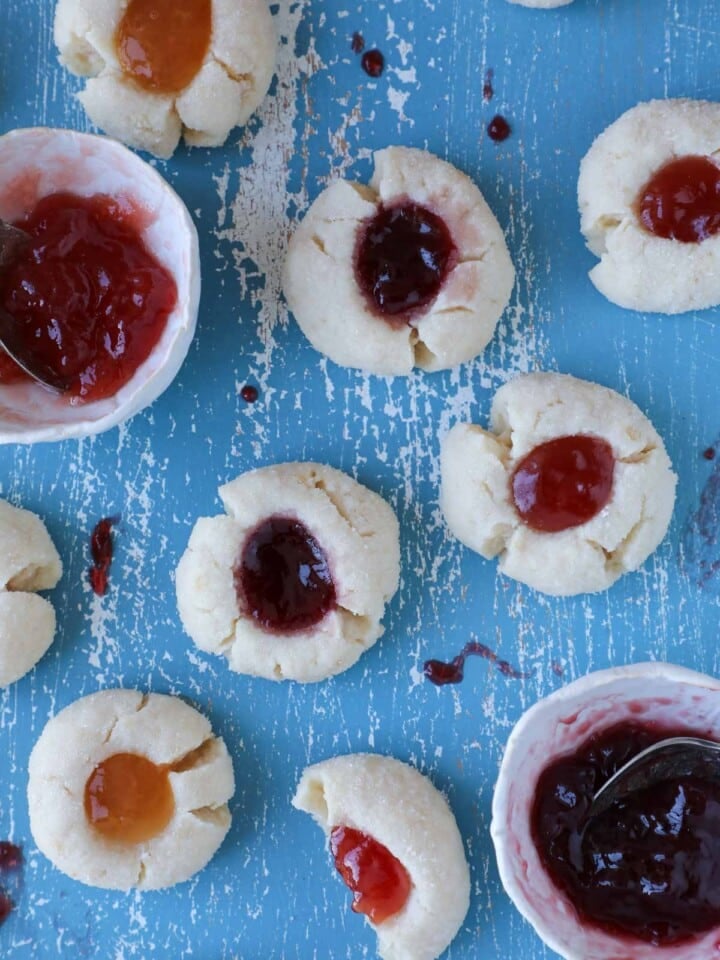
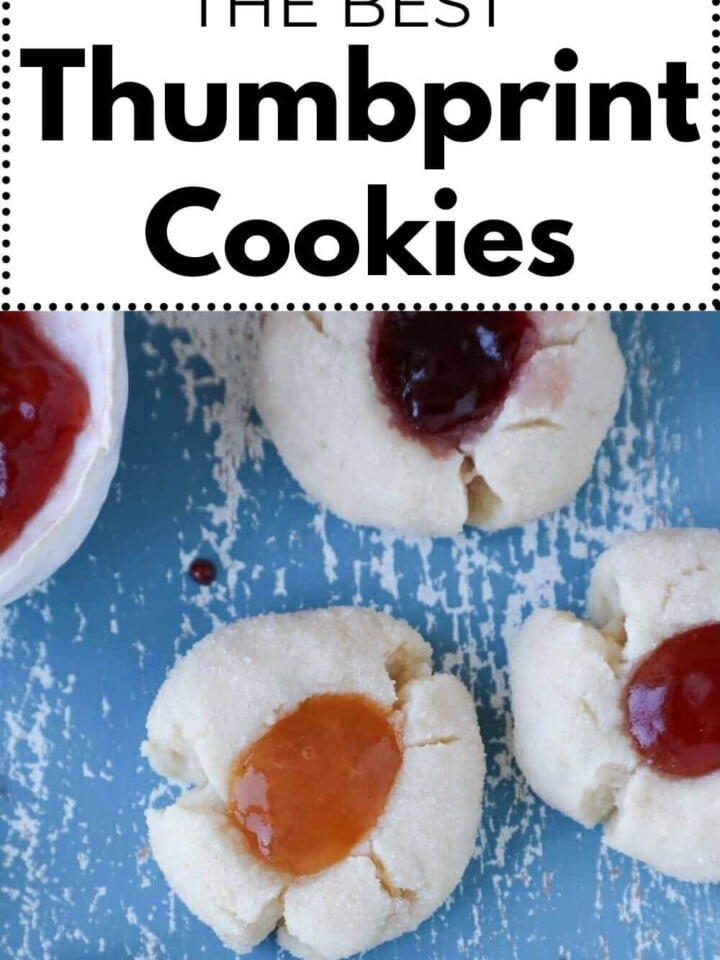
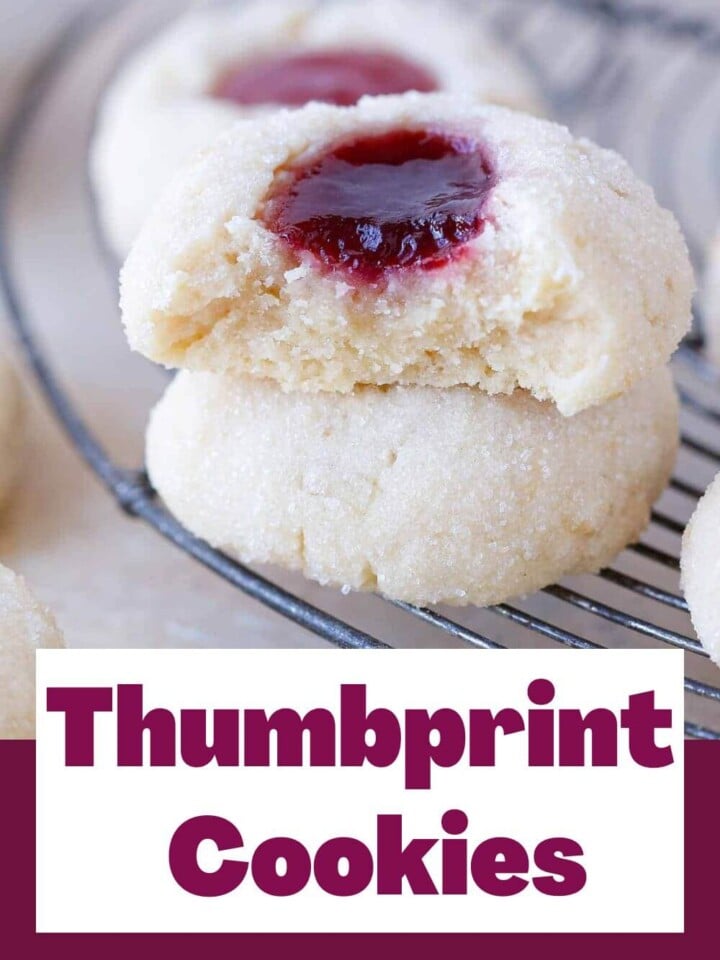
These are the best thumbprint cookies. Tender vanilla cookies, rolled in sugar and baked with jam filling! They are made with only 5 ingredients in under 30 minutes and stay fresh for up to 10 days at room temperature!
A Quick Look At The Recipe
This is a brief summary of the recipe. Jump to the recipe to get the full details.
Jump to RecipePrep Time
15 minutes
Cook Time
15 minutes
Total Time
30 minutes
Servings
15 Cookies
Difficulty
Easy — one-bowl dough, no chilling or special equipment,.
Calories *
140 kcal per serving
Technique
Mix a five-ingredient dough, roll in sugar, press, fill, and bake.
Flavor Profile
Buttery, sweet and filled with jam.
* Based on nutrition panel
I love that this five-ingredient dough could produce something this good! They came out perfectly crisp on the edges with a soft center. I filled half with raspberry jam and half with chocolate ganache and both were excellent. My family finished the entire batch in one afternoon. ⭐⭐⭐⭐⭐
Karen
Why This Recipe Works
- Butter and powdered sugar base. Powdered sugar produces a more tender crumb than granulated sugar because it contains cornstarch, which inhibits gluten development. Much like when we use cake flour in this devil’s food cake it helps create a cookie that melts in your mouth but holds it’s shape.
- Fill before baking. Adding the jam or easy lemon curd before baking allows the filling to meld seamlessly into the cookie.
- Flavor perfected by a professional pastry chef. The cookie dough has the perfect amount of sugar for a lightly sweetened cookie. This way you can roll them in sugar before baking and have the jam in the center without making an overly sweet cookie. It’s all about balance!
Table of Contents
Thumbprint cookies are one of the few recipes where the technique is almost entirely in the shaping. The dough itself is forgiving, the ingredient list is short, and the cookies bake in under fifteen minutes. What separates a good thumbprint from a great one is understanding how the dough should feel at each stage.
Roll them in sprinkles for a birthday party or to make them extra festive on a Christmas cookie tray alongside gingerbread cookies, pfeffernusse, and Mexican wedding cookies. You could also forgo the jam completely and fill them with salted caramel sauce!
Ingredients & Substitutions
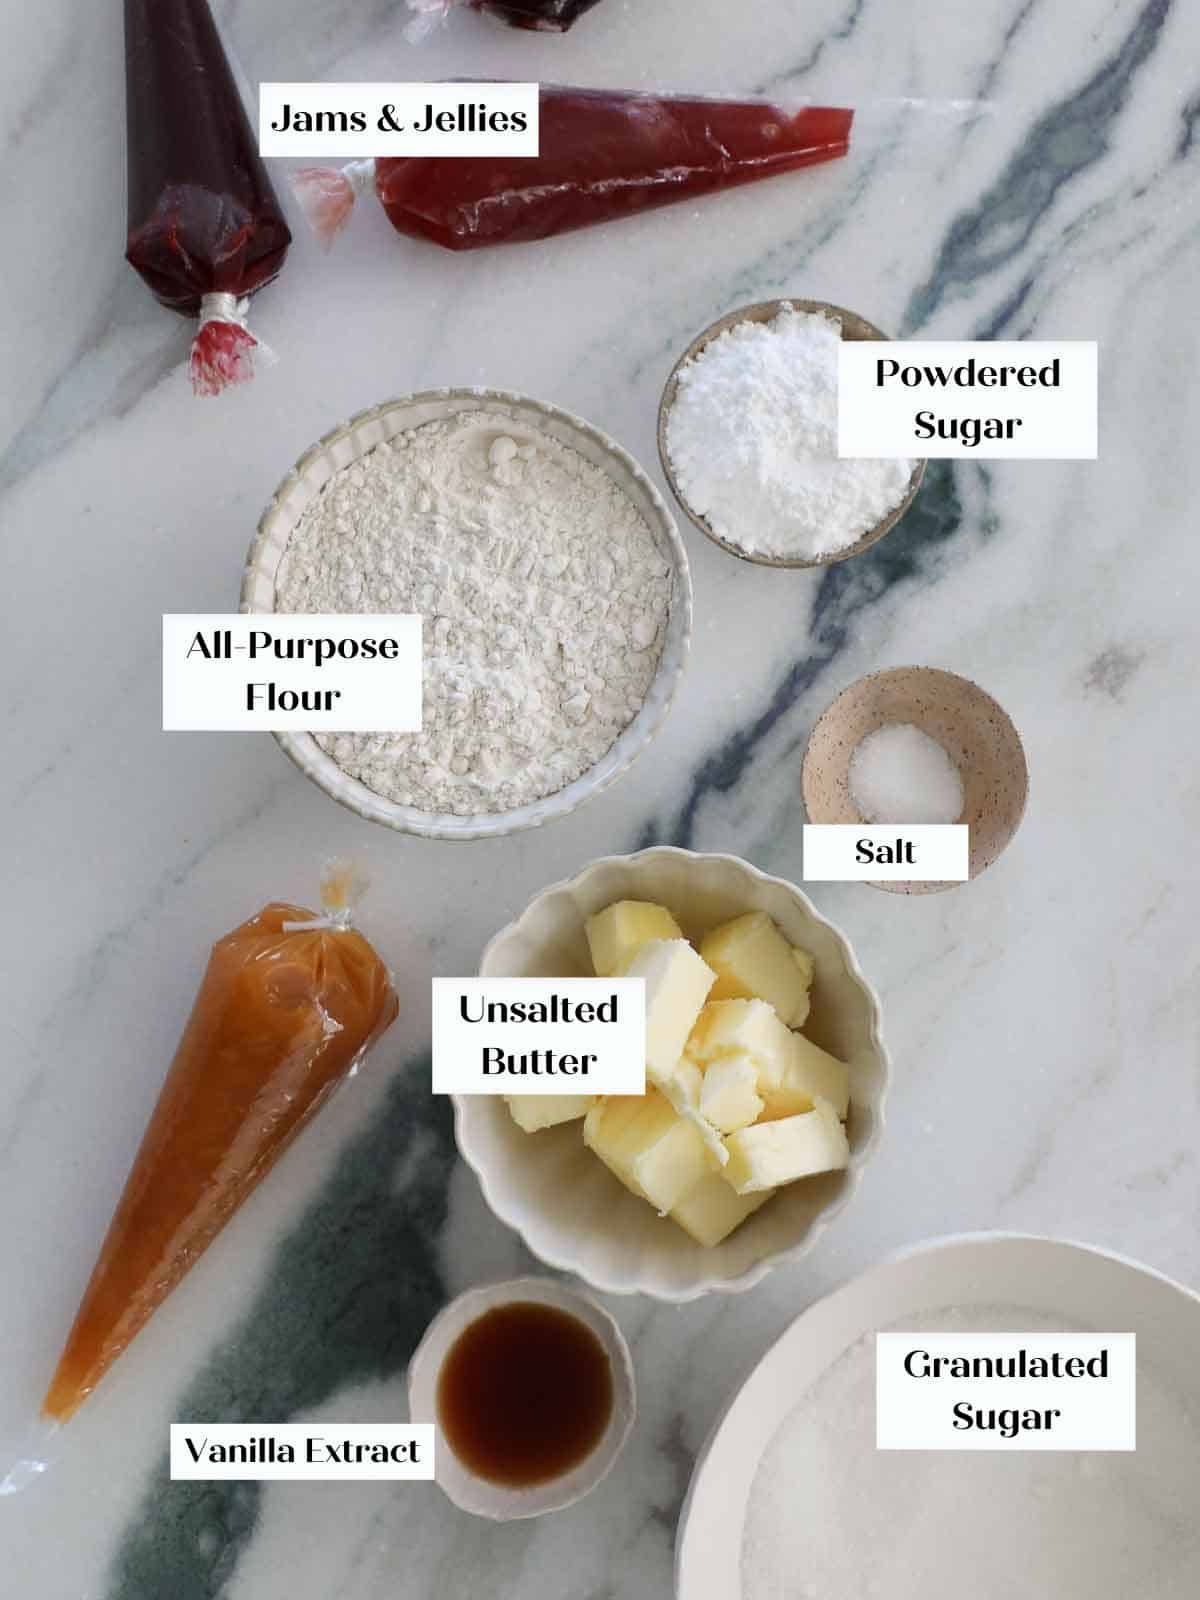
- Unsalted Butter: Softened butter is the base of this shortbread-style dough, and using unsalted butter lets you control the salt level precisely. Room temperature will incorporate into the dough better unlike these thick chocolate chip cookie which need cold but pliable butter.
- Powdered Sugar: Powdered sugar tenderizes the dough more than granulated sugar would because the cornstarch it contains slows gluten development.
- All-Purpose Flour: Standard all-purpose flour gives the cookies just enough structure to hold the thumbprint without crumbling when you press in the center.
- Kosher Salt
- Vanilla Extract
- Granulated Sugar: Rolling the cookie in sugar adds a nice crunch and just a touch of sweetness. I use this trick for a lot of my cookie recipes, including chewy sugar cookies and chewy molasses cookies.
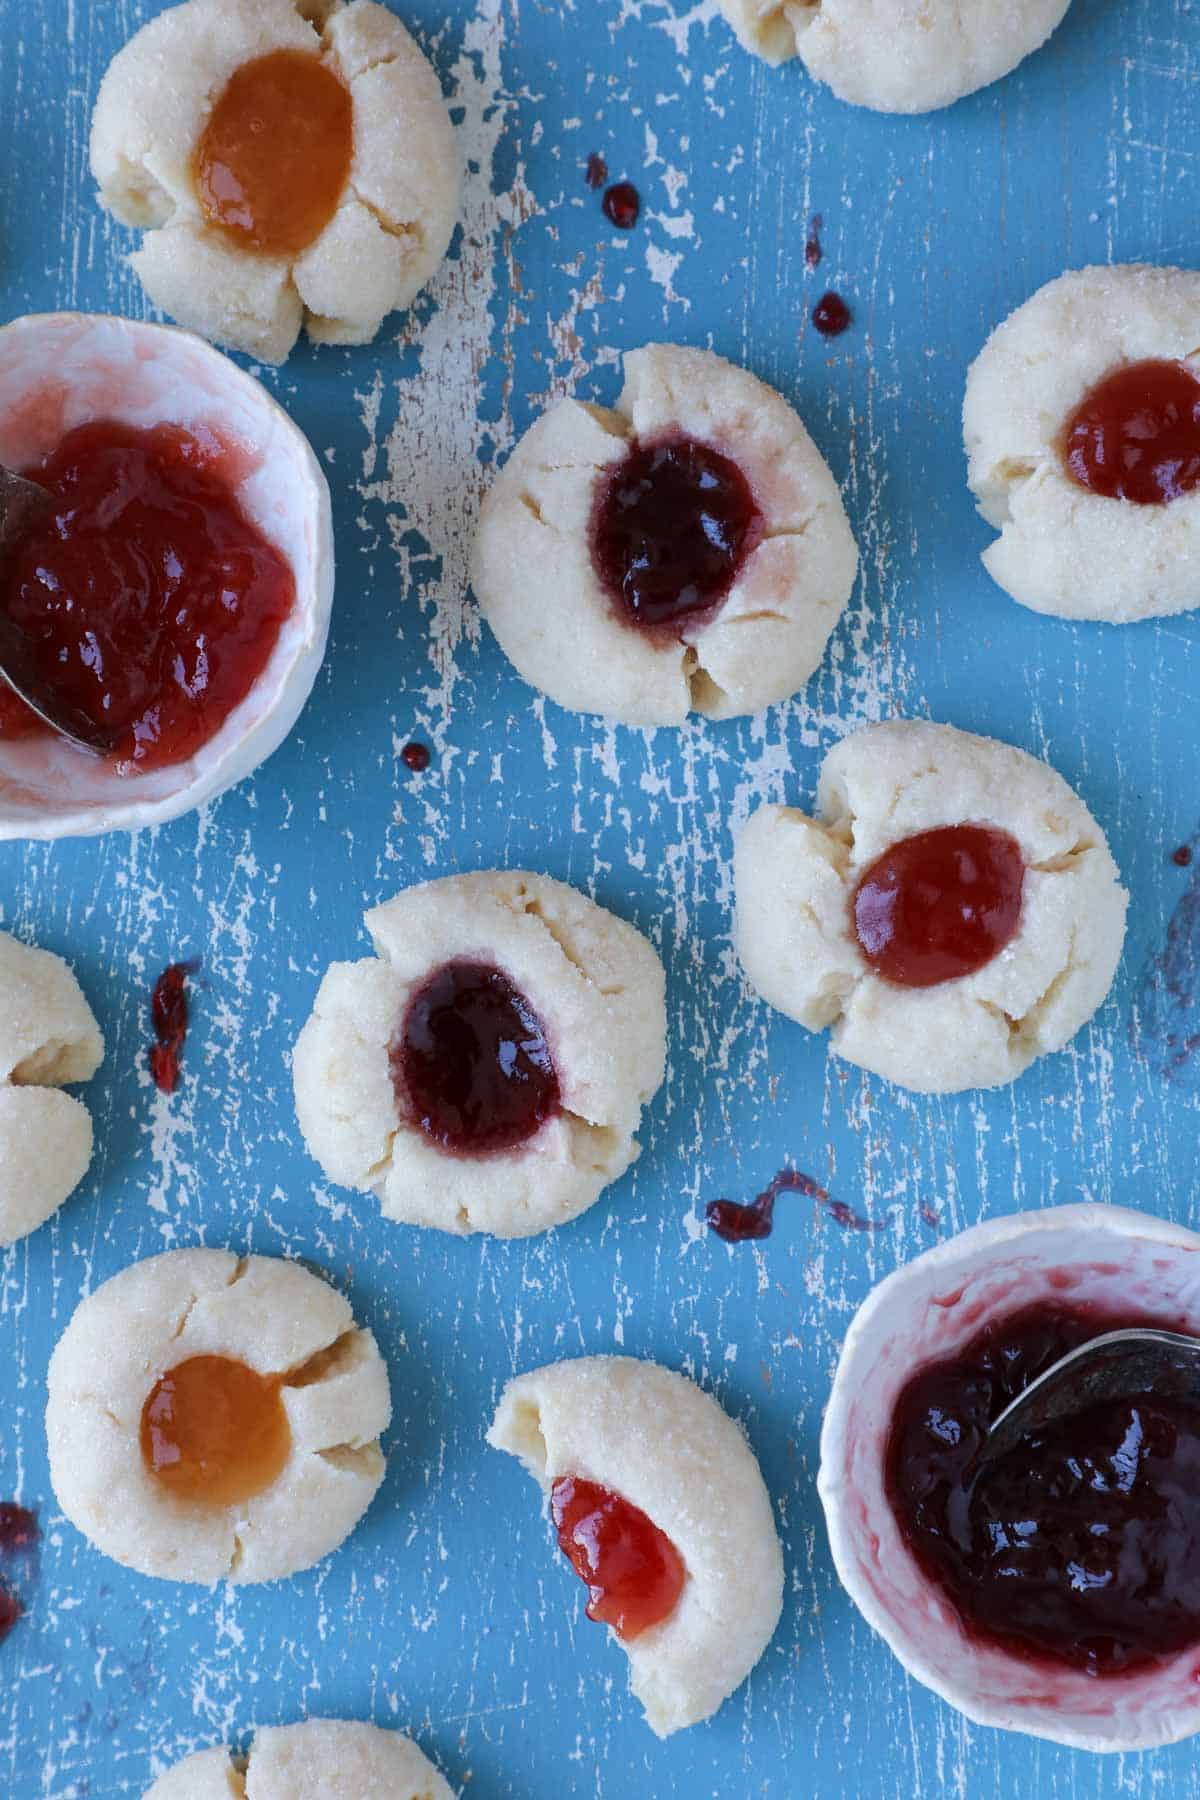
- Jam: Any flavor works, and this is where you can have some fun. Raspberry and apricot, are the most classic choices, or use my easy strawberry jam recipe or a thick fruit preserve.
See the recipe card for full information on ingredients and quantities.
Variations on These Thumbprint Cookies
- Add some flavor. Swap the vanilla for coffee or peppermint extract like I use with these peppermint brownie or you could add some lemon or orange zest to the sugar like I do with my lemon olive oil cake!
- Chopped Nut Coating. Roll the dough balls in finely chopped pecans or walnuts instead of granulated sugar as I do with my favorite cherry cookies!
- Change the filling. Leave the thumbprints unfilled before baking, then fill the centers with this professional chocolate ganache recipe or melted chocolate once the cookies have cooled completely. You could also make these chocolate thumbprint cookies for a chocoholic’s dream cookie. You could also use the strawberry royal icing filing from these Neapolitan thumbprint cookies!
Professional Tips
- Do not use the convection setting. The recipe is written for 325°F conventional, and I tried it both ways: the convection heat causes the edges to set too quickly and the cookies lose that evenly tender texture throughout.
- Press gently and go halfway. The thumbprint should reach about halfway into the cookie, not all the way through. Pressing too deep thins the base and the cookie can crack around the edges or lose its shape as it bakes.
- Watch for the matte surface, not the clock. The cookies are done when the surface looks matte and no longer glossy, which is a more reliable cue than timing alone. Start checking at 12 minutes and pull them the moment that shine disappears.
How to Make Thumbprint Cookies
Use these instructions to make the best thumbprint cookies every time! Further details and measurements can be found in the recipe card below.
Step 1: Preheat the oven and prepare your baking sheet. Set your oven to 325°F conventional, no fan. Line one baking sheet with parchment paper.
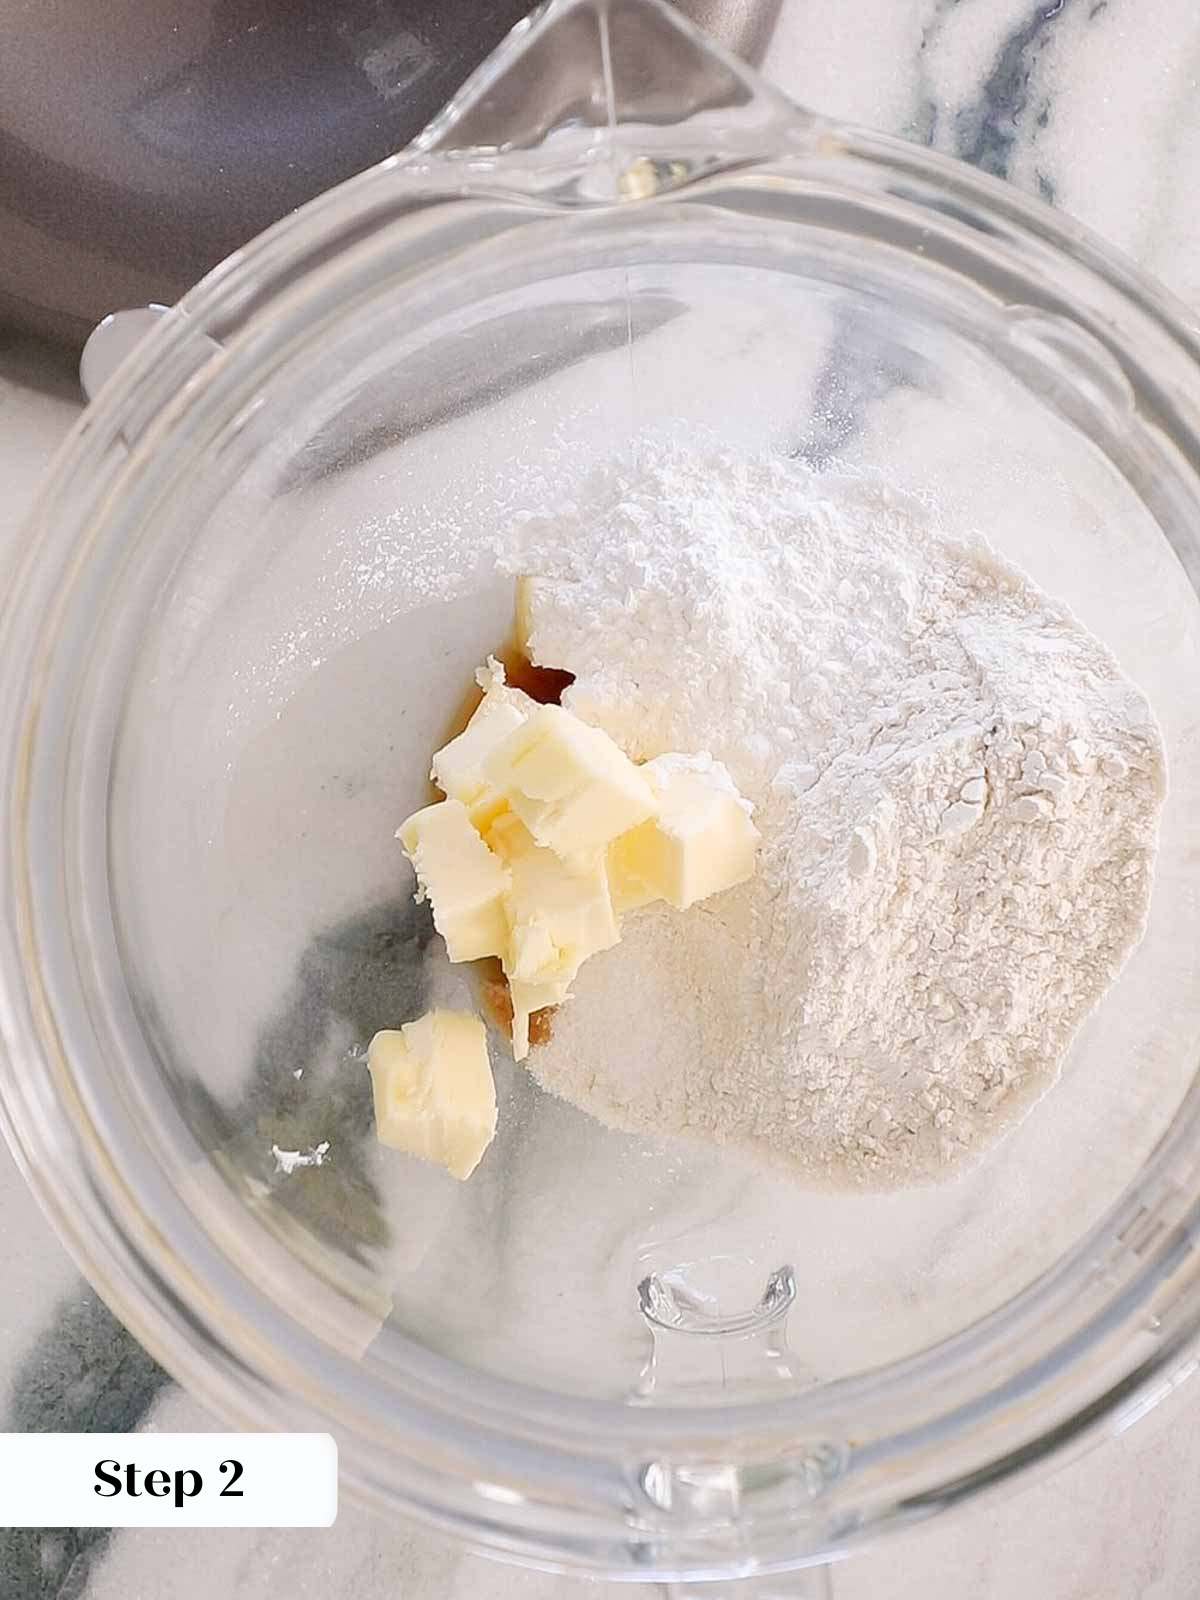
Step 2: Mix the dough. Add the butter, powdered sugar, flour, salt, and vanilla to the bowl of a stand mixer fitted with the paddle attachment. Mix on medium-low until a smooth, cohesive dough forms. It will look crumbly for the first 30 seconds or so. Keep the mixer going, and it will come together into a cohesive dough. (photo 1 below)
This will feel like it takes forever, so long that you might find yourself wondering if it *will* come together, but it will. Patience!
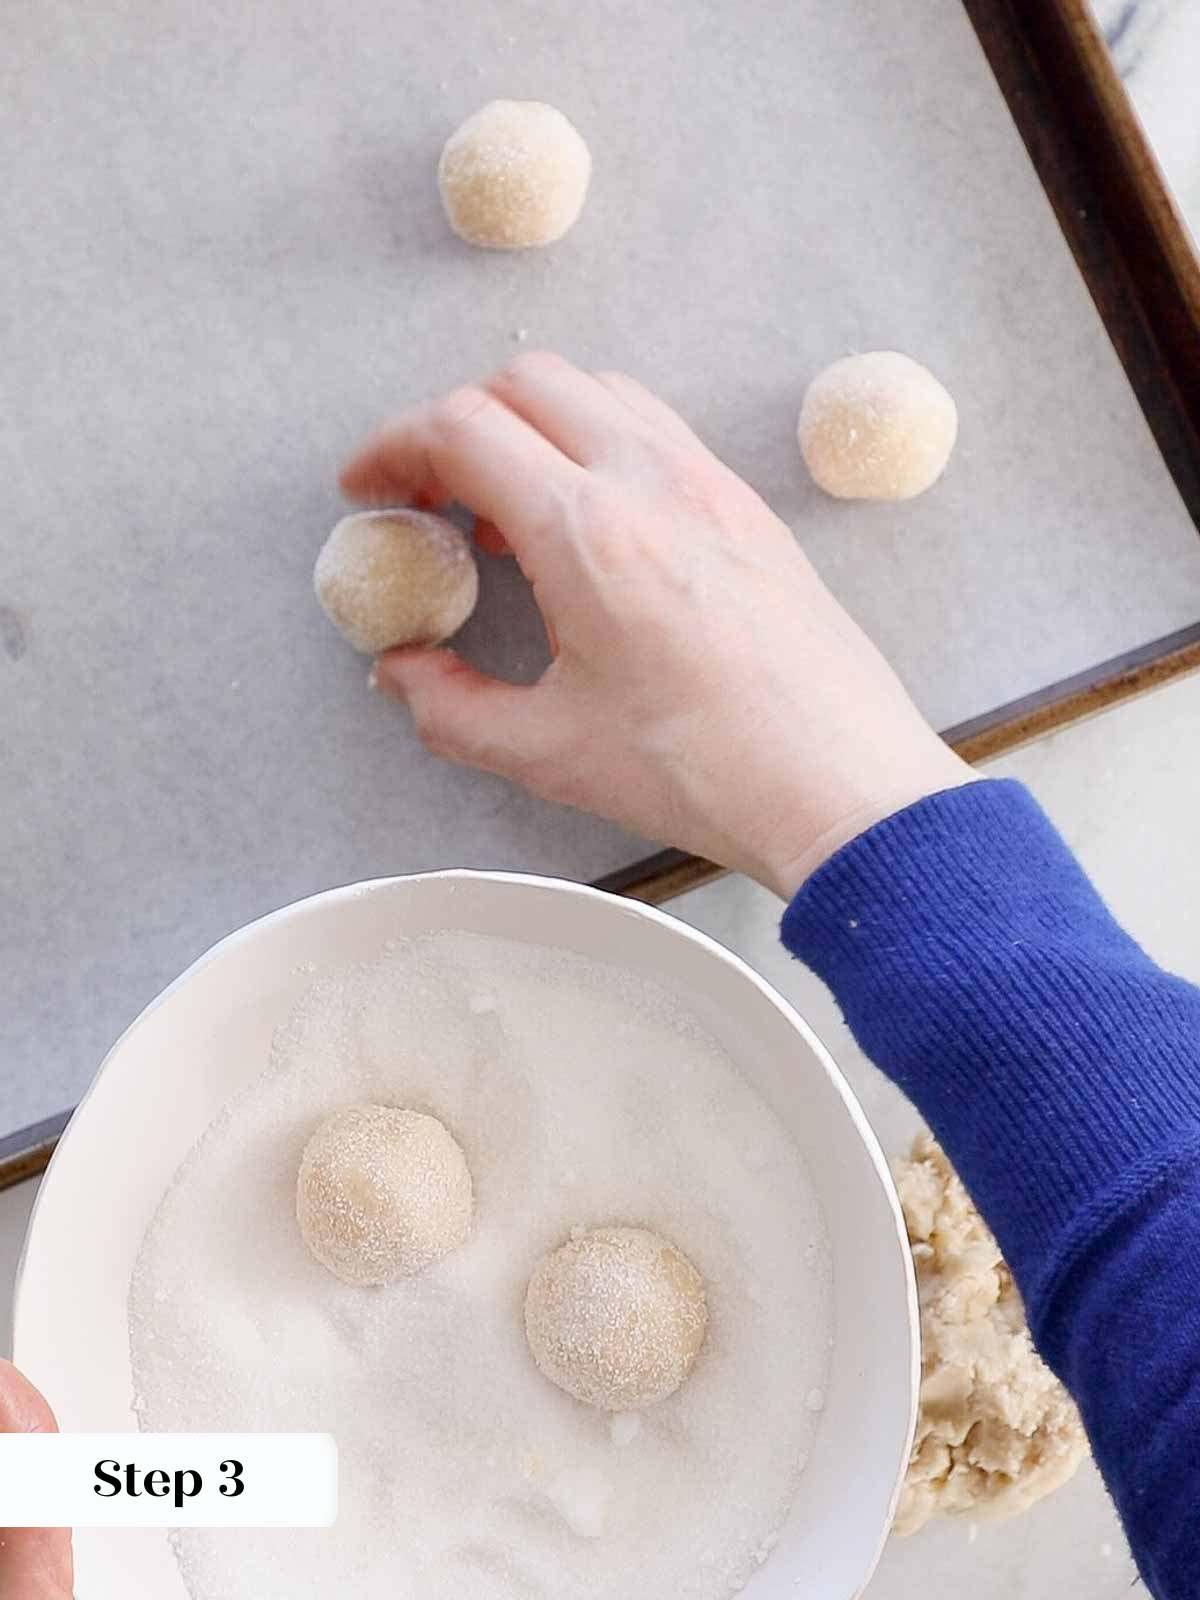
Step 3: Portion, roll, and coat in sugar. Pinch off pieces of dough about one inch across and roll each one between your palms into a smooth ball. Roll each ball in granulated sugar to coat. You should get approximately 15 cookies. (photos 2 & 3)
The sugar coating is not just for sweetness; it gives the exterior a faint crunch that contrasts with the tender interior, which is my favorite part of the whole cookie.

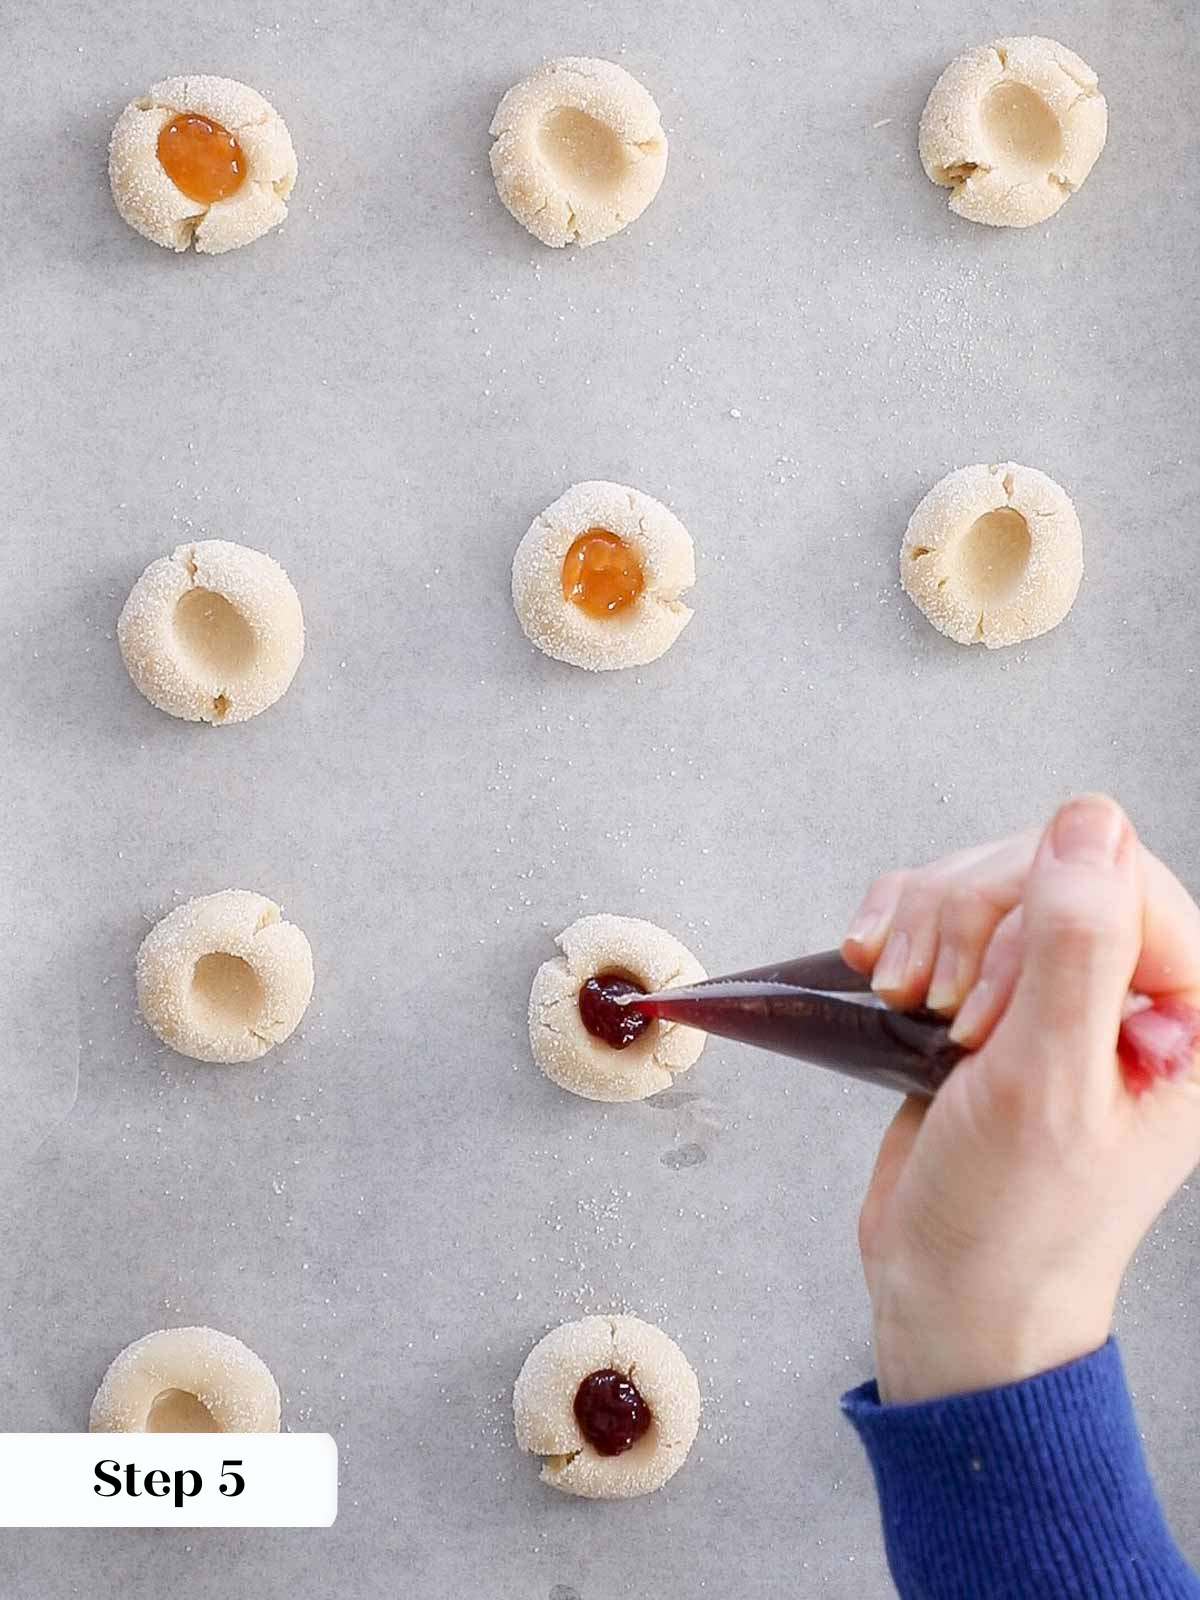
Step 4: Space, press, and fill. Place the sugar-coated balls on the prepared baking sheet about an inch apart. Press your thumb or forefinger gently into the center of each cookie to make an indentation about halfway down. Fill each indentation with jam now, before baking. If you are planning a chocolate filling, leave them unfilled and add the filling after baking. (photos 4 & 5 below)
If you press too hard and the sides crack, just pinch them back together gently. The dough is forgiving.

Step 5: Bake until matte. Bake at 325°F for 12 to 15 minutes, start checking at 12. The cookies are done when the surface looks matte and no longer glossy. I rotated my tray after 6 minutes, which is what I always do with my cookies like this scottish shortbread recipe to ensure even color.
Step 6: Cool completely on a wire rack. Transfer the cookies to a wire rack and let them cool completely before serving. The jam will be molten when they come out of the oven and needs time to set. Biting into one too soon means jam on your chin, which is not the worst problem to have, but still.
Chef Lindsey’s Recipe Tip
If you over-filled or under-filled your thumbprints, or if the jam ran outo of the cracks in the dough during baking, just add more jam after they are baked. They will still taste delicious and look beautiful!
Recipe FAQs
Yes. Store them in an airtight container at room temperature for up to 10 days. Cookies filled with jam stay soft and moist the longest, though they taste best within the first 5 days making them perfect for your christmas cookie tin or plate!
Any thick, seedless jam with good acidity works well, such as raspberry, apricot, or strawberry. Avoid very thin or low sugar preserves, which can run out of the indentation during baking. If you want to try a winter variation, these cranberry thumbprint cookies show how a tart fruit filling can work beautifully in this style of cookie.
You can, but reduce or omit the kosher salt in the recipe to compensate. The dough is already delicate in its balance of sweet and savory, and too much salt will push it off.
Press gently and stop about halfway through the cookie. Deep, forceful thumbprints thin the base and stress the edges. If cracks do form, pinch them back together before baking.
The surface will shift from shiny to matte as the moisture bakes off. That visual change is your cue, not the color. Start checking at 12 minutes and pull them as soon as the gloss disappears.
Recommended Cookie Recipes
Cookie Recipes
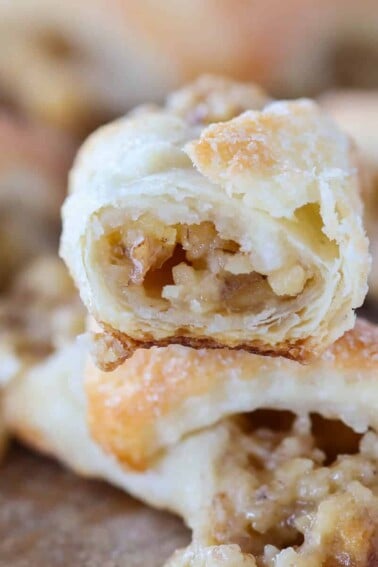
Hungarian Nut Roll Cookies (Walnut Filling)

Cookie Recipes
Apricot Kolacky Cookie (Kiffles) Recipe
Cookie Recipes
Cream Cheese Chocolate Chip Cookies
Cookie Recipes
Nutella Cookies
If you tried this recipe and loved it please leave a 🌟 star rating and let me know how it goes in the comments below. I love hearing from you; your comments make my day!

Thumbprint Cookies
Ingredients
- ½ cup unsalted butter — softened
- ⅓ cup powdered sugar
- 1 ⅓ cup all-purpose flour
- ½ teaspoon kosher salt
- 1 teaspoon vanilla extract
- ¼ cup granulated sugar — for rolling
- ⅓ cup jam — any flavor
Instructions
- Preheat the oven to 325°F conventional (no fan) and line one baking sheet with parchment paper.
- In the bowl of a stand mixer fitted with the paddle attachment, combine the butter, powdered sugar, flour, salt, and vanilla extract. Mix on medium-low speed until a smooth dough forms.
- Pinch off pieces of dough about an inch across and roll into balls. Roll each ball in granulated sugar. You will have approximately 15 cookies.
- Place the balls on the prepared baking sheet about an inch apart. Press your thumb or forefinger gently into the center of each cookie to create an indentation that goes about halfway through.
- Fill the indentations with jam before baking. If using a chocolate filling, bake the cookies unfilled and add the filling after they cool.
- Bake for 12 to 15 minutes, rotating the tray after 6 minutes, until the surface looks matte and no longer glossy.
- Cool completely on a wire rack before serving or storing.
Notes
Doneness Cue: The surface will shift from shiny to matte. Pull the cookies as soon as the gloss disappears, starting to check at 12 minutes.
Storage: Store in an airtight container at room temperature for up to 10 days. Cookies taste best within the first 5 days, though jam-filled cookies stay soft and moist for the full 10 days.
Nutrition
Before You Go
These buttery, jam-filled cookies are one of my favorite things to bring to a holiday cookie spread. If you want more inspiration, browse my cookie recipes or make these amaretti cookies next!


I love that this five-ingredient dough could produce something this good! They came out perfectly crisp on the edges with a soft center. I filled half with raspberry jam and half with chocolate ganache and both were excellent. My family finished the entire batch in one afternoon.
Hi Karen! These cookies never last long in my house either! Thank you for coming back and commenting it always makes our day! ~CLF team
I’ve made a lot of thumbprint cookies over the years, but this recipe is on another level! Baking the jam ensures that it sets up perfectly! The cookies stay soft for days. I tried apricot and raspberry, and both were absolutely delicious!
I made these because I promised cookies and realized I only had butter, flour, and jam. Baking until the tops looked matte instead of browned was the key. I felt like this dough was forgiving even when I worked fast. I am absolutely saving this recipe forever!