This post may contain affiliate links. Please read our disclosure policy.
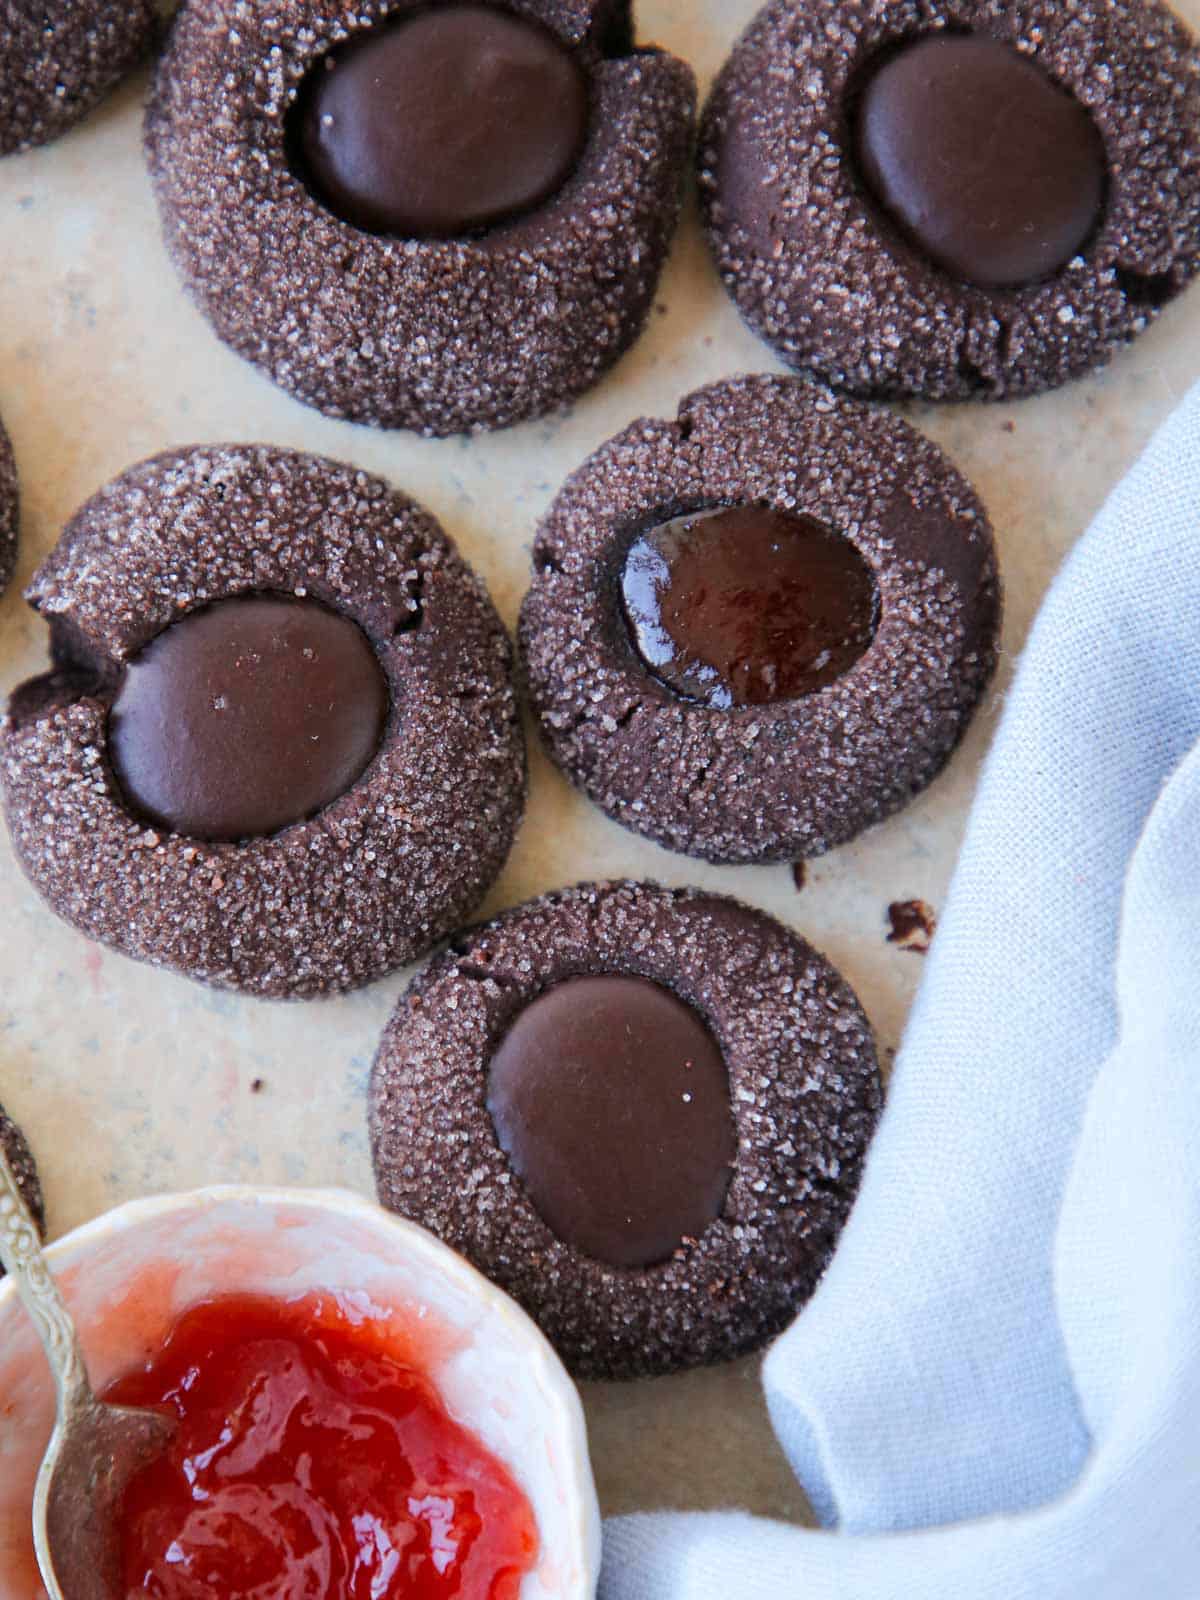
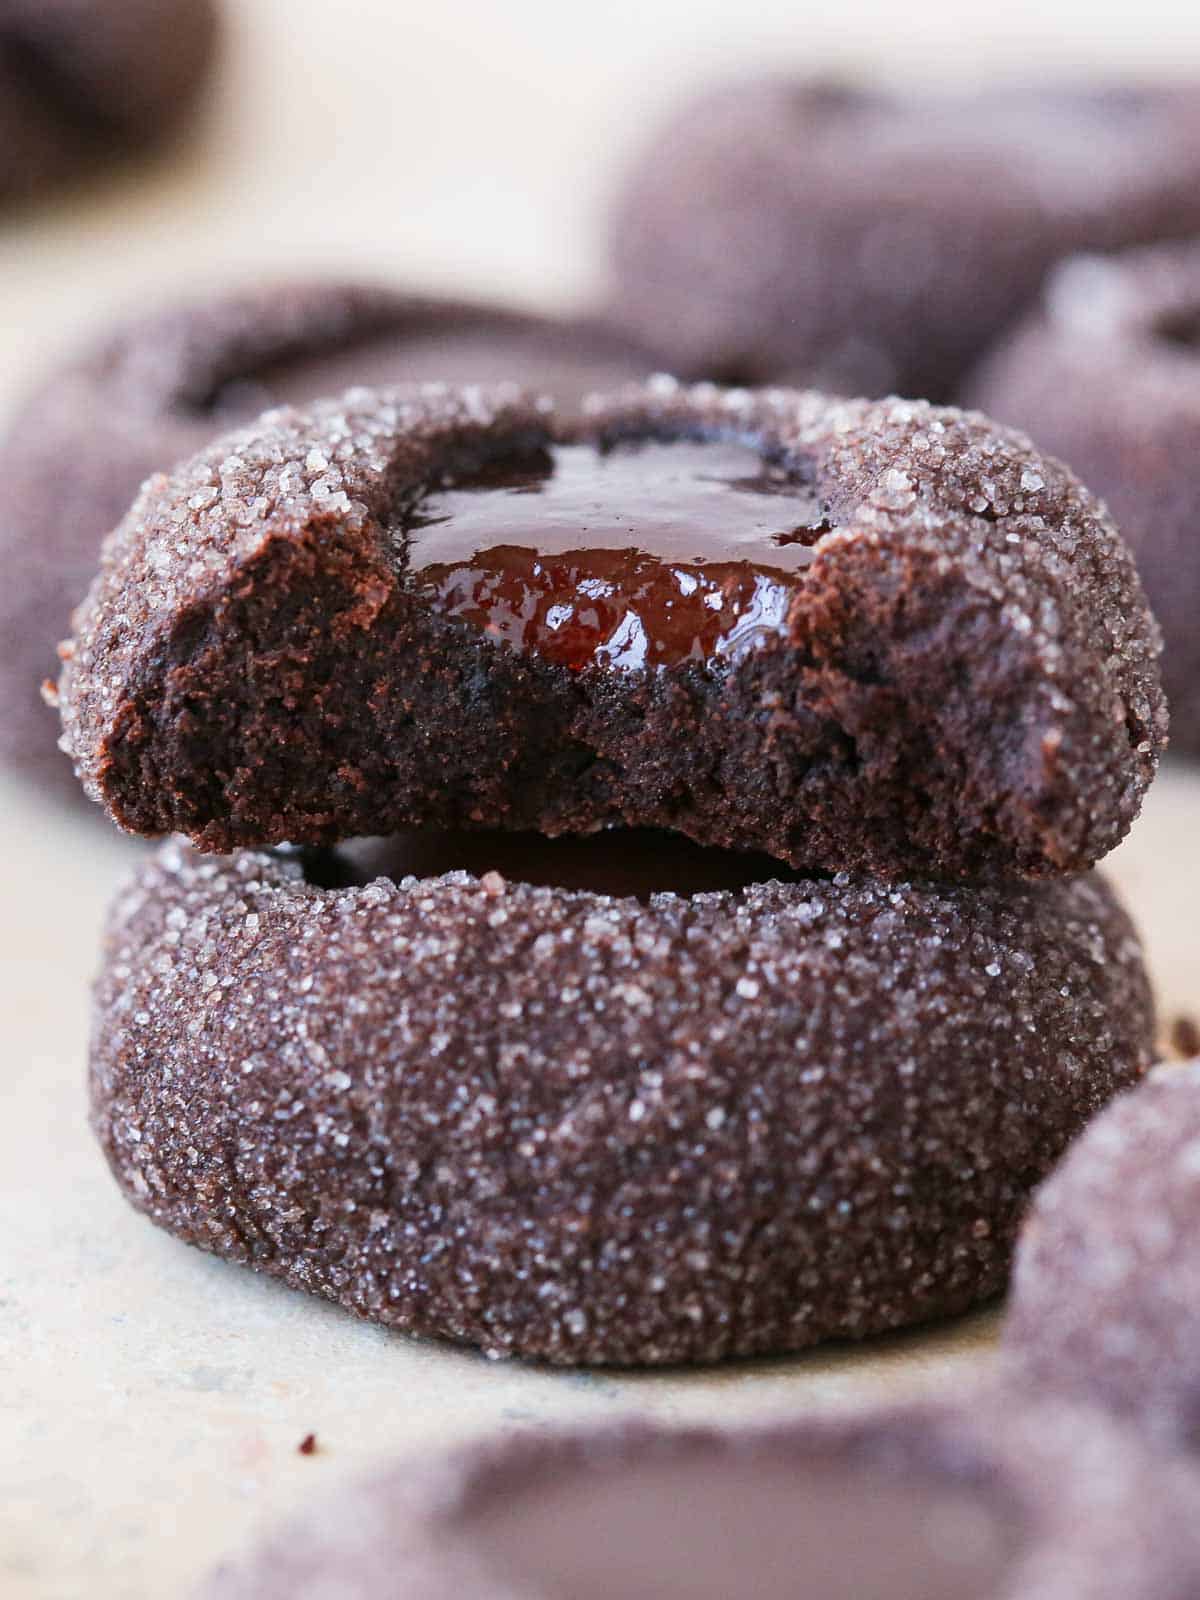
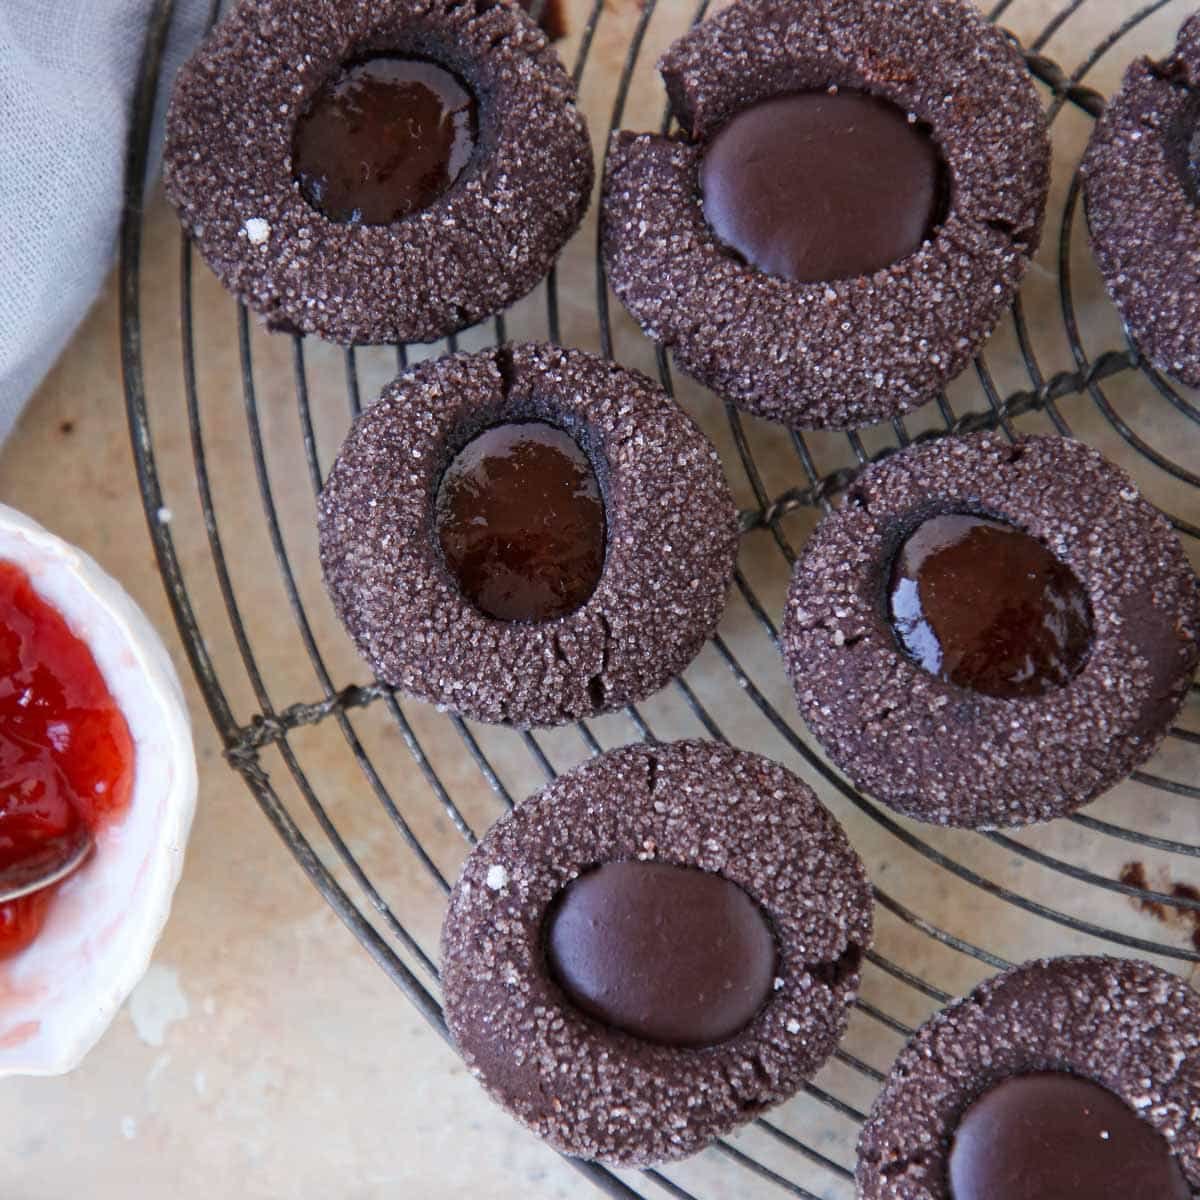
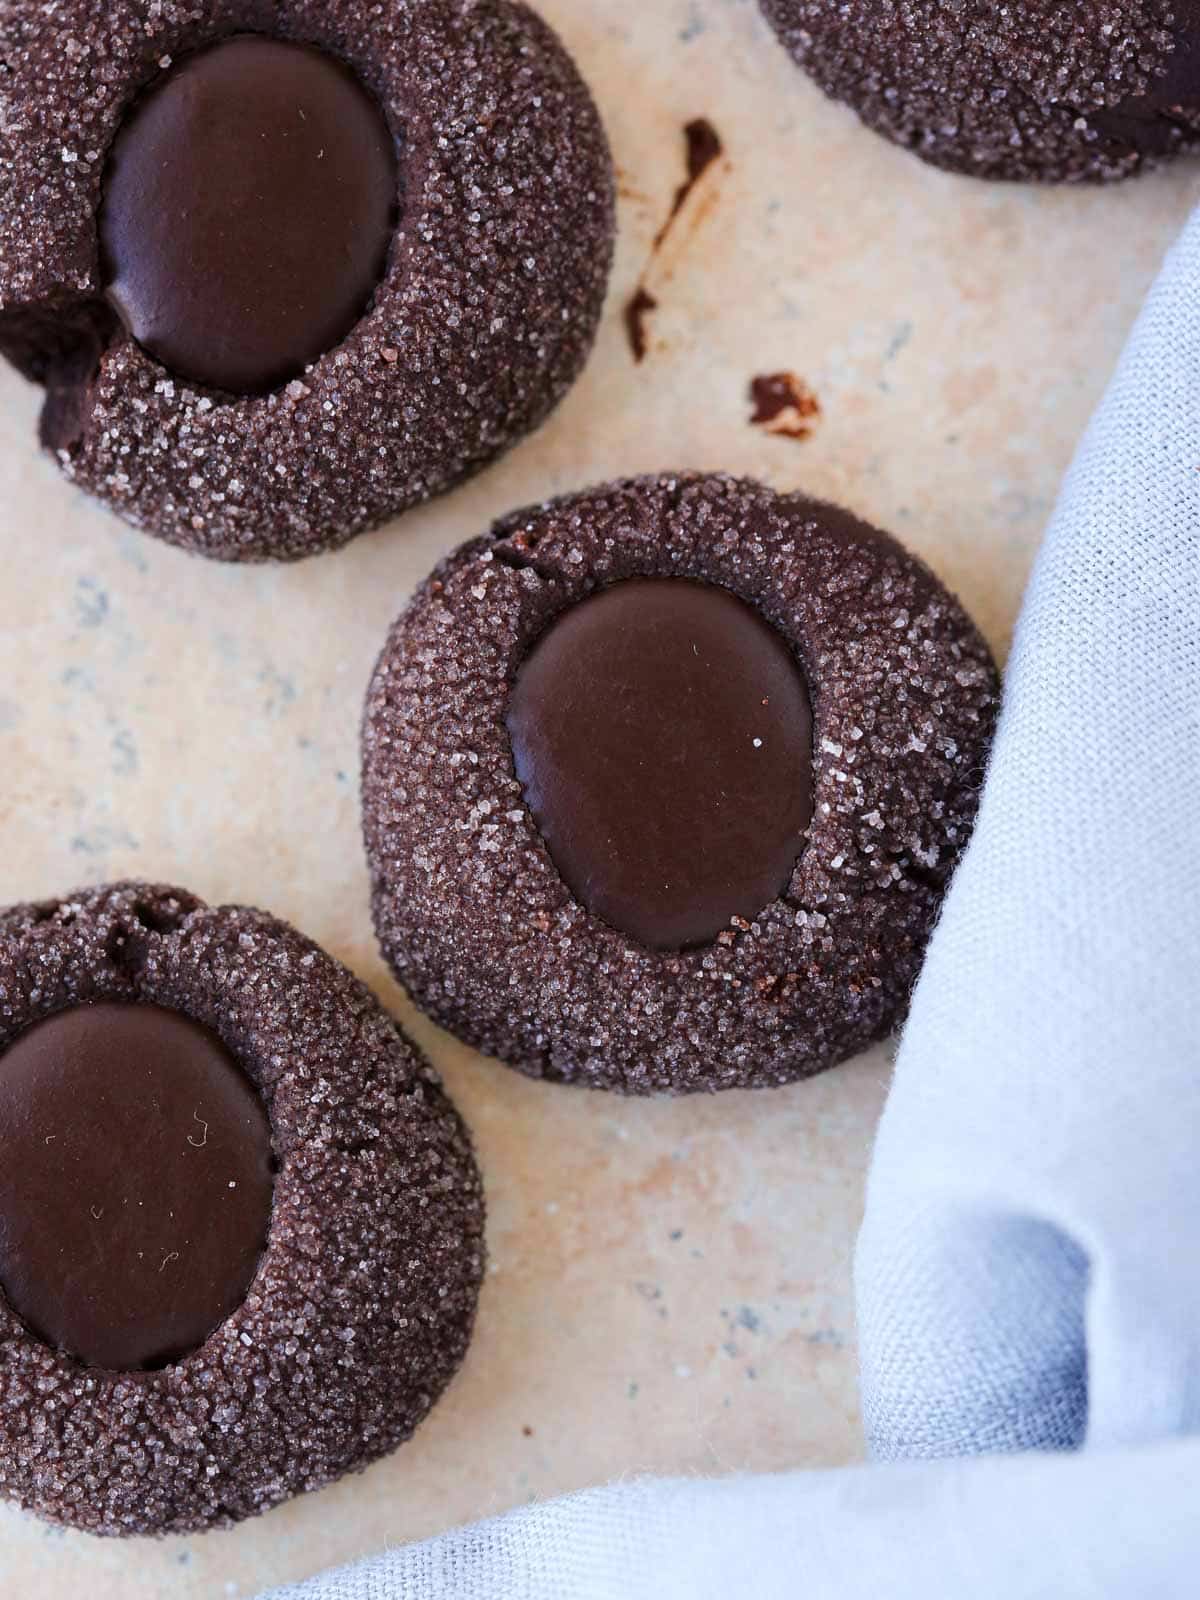
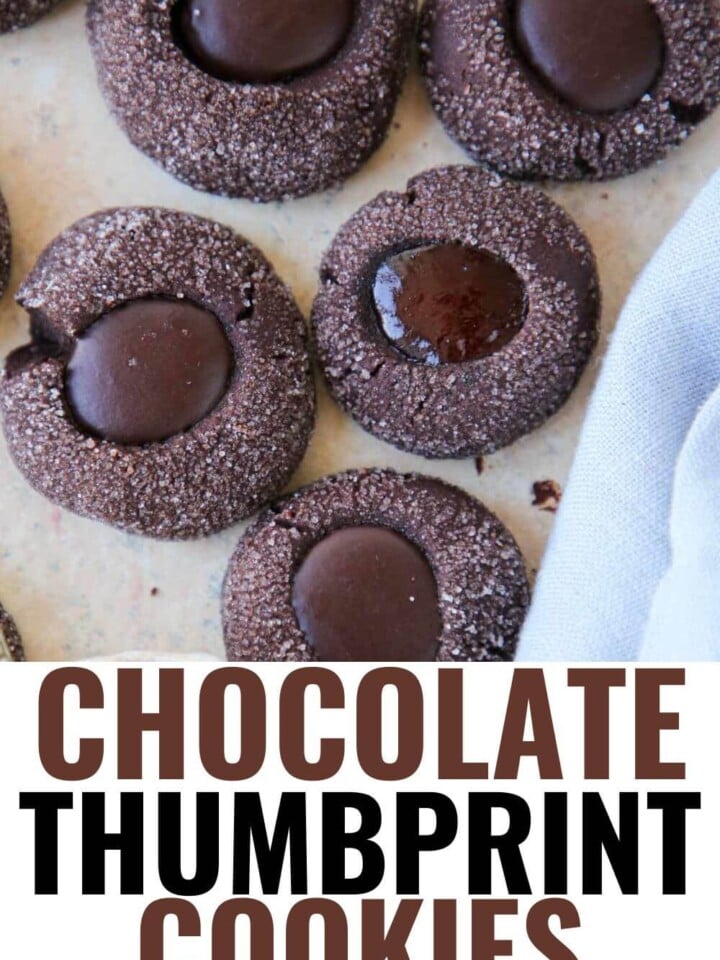
These are the best Chocolate Thumbprint Cookies and they are made in under 30 minutes! No chilling required! They are tender, moist and intensely chocolate. Fill them with an easy chocolate ganache for a rich chocolate cookie or raspberry jam!

A Quick Look At The Recipe
This is a brief summary of the recipe. Jump to the recipe to get the full details.
Jump to RecipePrep Time
10 minutes
Cook Time
12 minutes
Total Time
22 minutes
Servings
15 Cookies
Difficulty
Easy
Calories *
174 kcal per serving
Technique
Make cookie dough, divide, roll, press, and bake, make ganache and fill.
Flavor Profile
Rich chocolate cookies with a rich and smooth ganache filling.
* Based on nutrition panel
These chocolate thumbprint cookies are absolutely amazing. The rich, fudgy dough paired with that silky ganache center is pure perfection. I made them for a game night, and they were the first to disappear from the table! Thank you for sharing such a foolproof and impressive treat!⭐⭐⭐⭐⭐
Mara
You know I love all things chocolate and the richer the better. Look no further than these double chocolate chip cookies, chocolate bundt cake, the best chocolate ice cream or silky chocolate pudding. Filling these easy thumbprint cookies with chocolate is decadent like a chocolate pudding cookie, but I actually preferred them with jam. While you’re jamming, make a batch of thumbprint cookies too!
The jam soaks the cookie, which makes it even more moist and flavors the cookie all the way through. I made these with Smucker’s strawberry jam, but you could also use my mixed berry jam.
These cookies are excellent Christmas cookies served with gingerbread cookies, linzer cookies and chocolate crinkle cookies. I also make these easy, two-bite cookies for Valentine’s Day, Mother’s Day and bake-sales all year round.
Table of Contents
Why These are the Best Chocolate Thumbprint Cookies
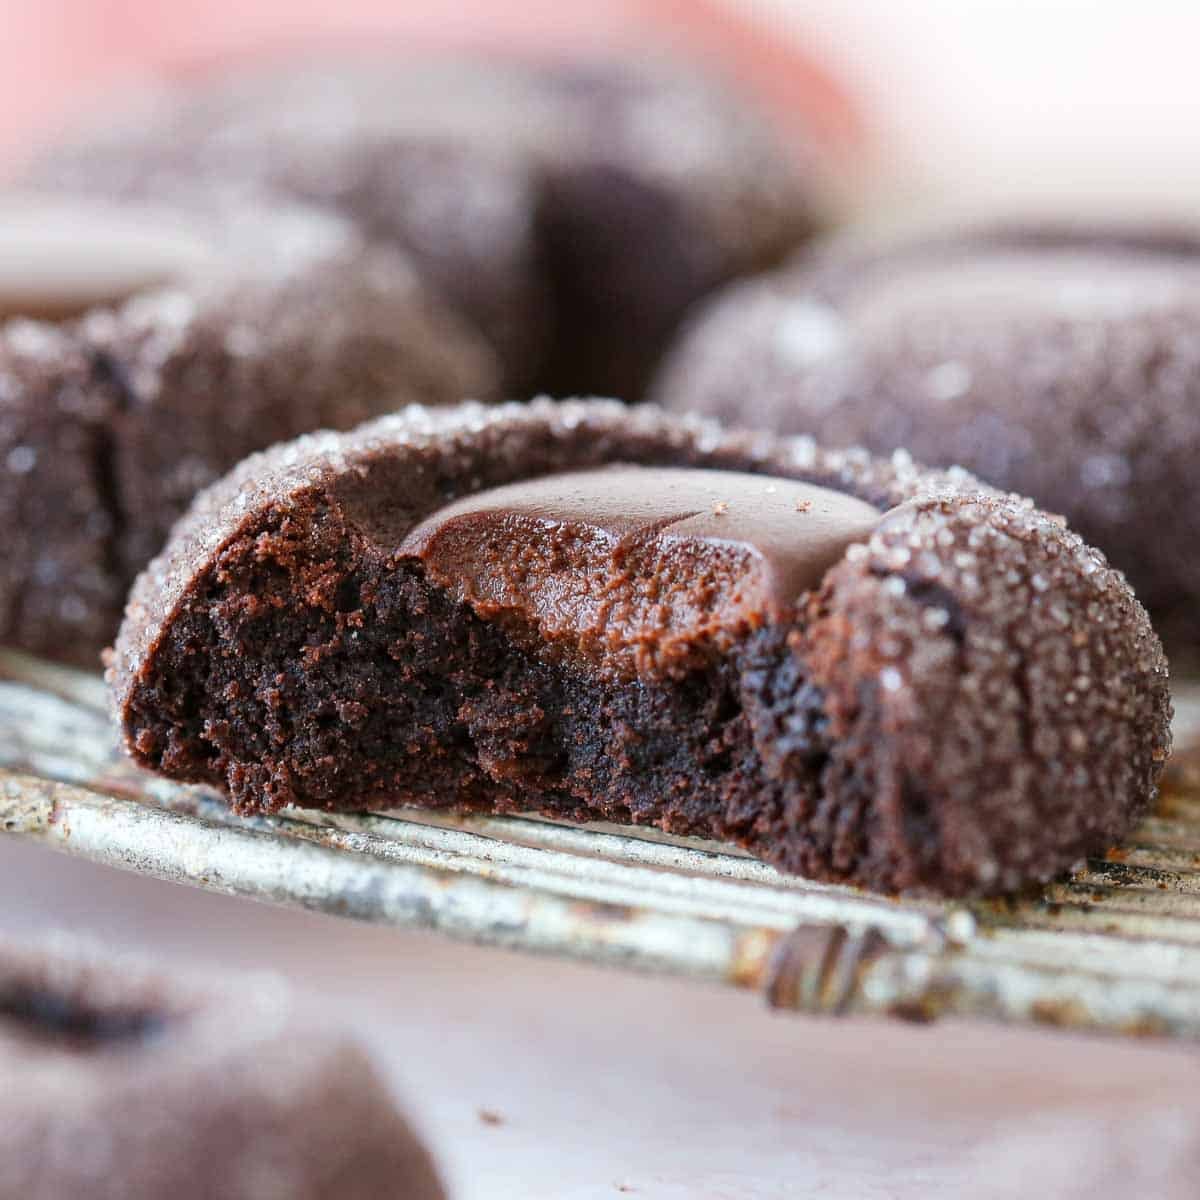
- Soft, tender, moist cookies. The cookies are tender and moist without being underbaked. You will love the slightly crumbly texture of these butter cookies.
- Cookies in under 30 minutes! The dough does not need to chill before baking, which means you’ll have cookies cooling in under 30 minutes!
- Soft ganache filling that sets at room temperature. This recipe calls for a 50:50 ganache, which is just fancy pastry chef speak for equal parts chocolate and heavy cream. That ensures a soft ganache that will be solid at room temperature.
Professional Tips for Making Chocolate Thumbprints
- Choose a thicker jam. A thick jam like this homemade mixed berry jam will be better than a looser preserve like peach preserves or even this quick strawberry jam, because the looser preserves will run out of the cookie as it bakes and will just end up on your baking sheet.
- Make the thumbprint twice. If you are going to fill these cookies with ganache, I suggest pressing the thumbprint before baking and then again right after they come out of the oven. This will ensure a nice space for your ganache.
- Cut the butter in for the most tender cookies. We make the dough by cutting the butter into all the ingredients until it comes together in a soft cookie dough. Using this mixing method eliminates the need for liquid ingredients and creates less gluten. This yields a very tender, crumbly cookie.
- Don’t use your thumb for the most perfect cookies! I use my forefinger to make the indentation in these cookies, but you can also use the back of a round teaspoon measuring spoon or tart-tamper for perfectly round centers.
Ingredients Needed
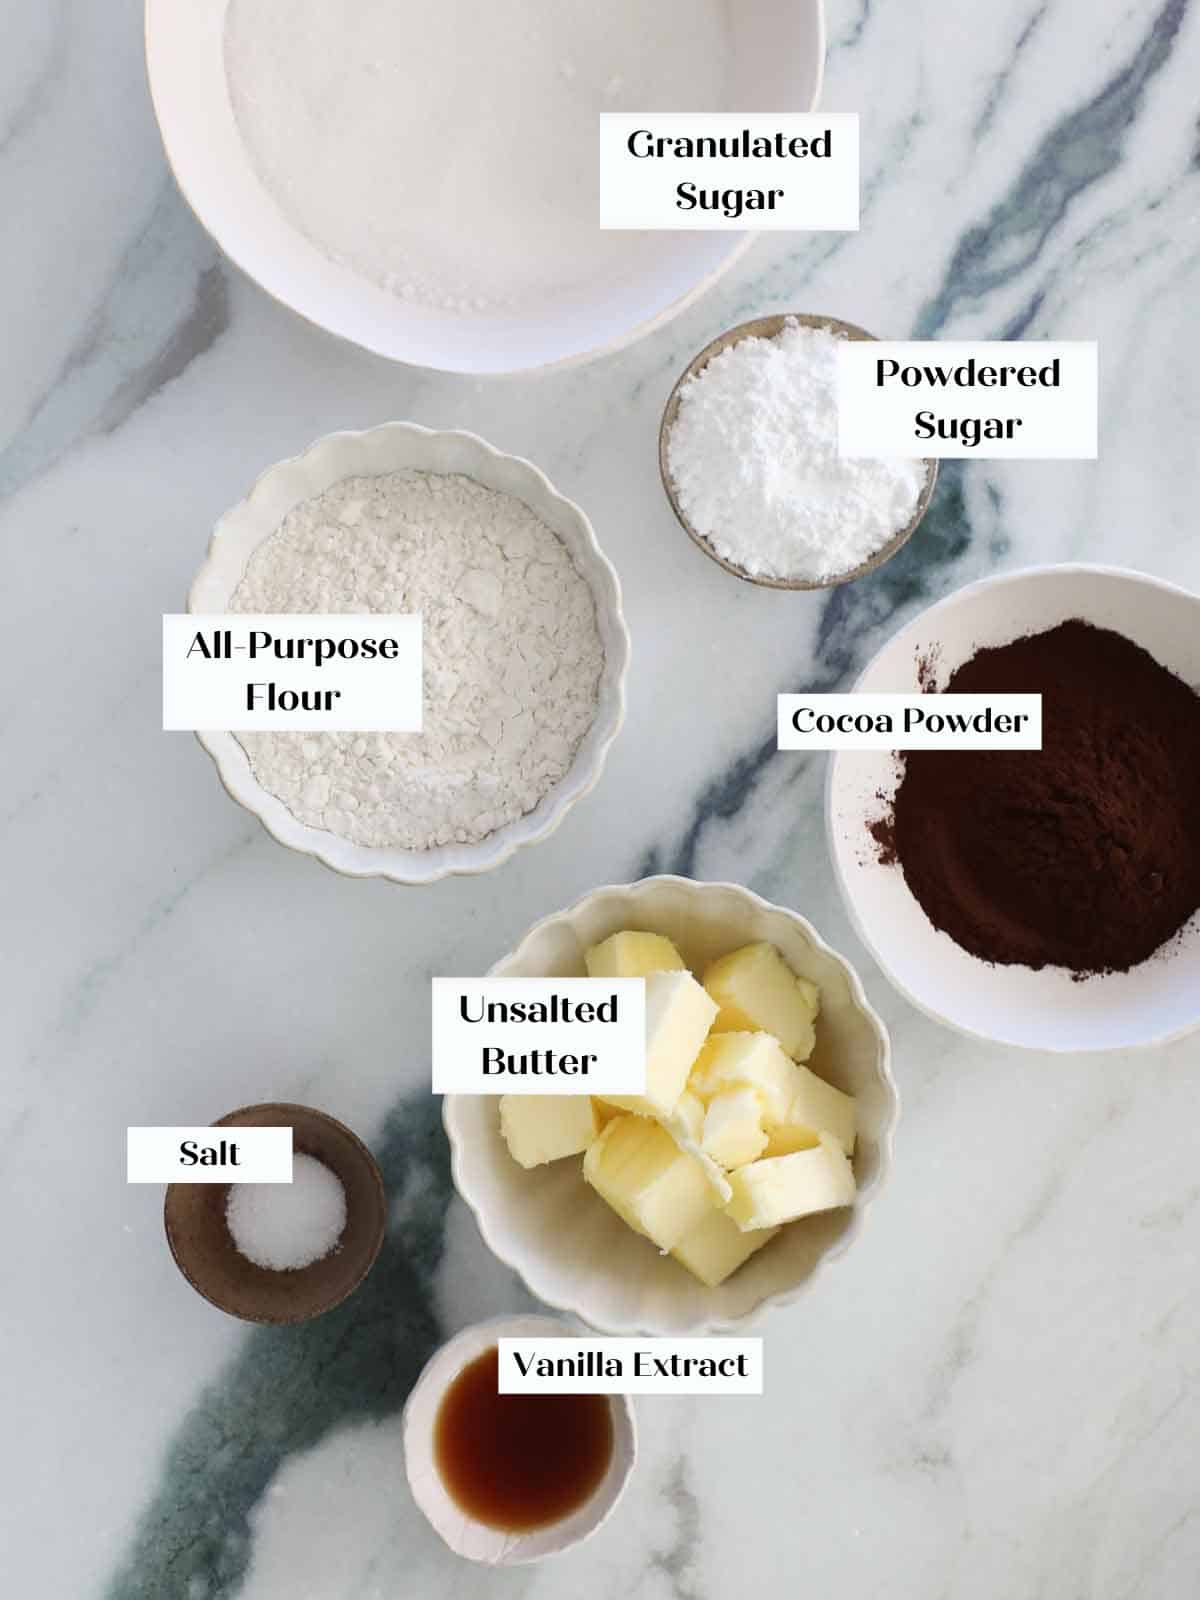
- Unsalted Butter: The cookie dough will come together easier if the butter is softened. Unlike with chewy cookies like chewy sugar cookies, room temperature or very soft and pliable is ideal.
- Powdered Sugar: Powdered sugar is very finely ground and will mix into the cookie dough better than granulated sugar. This also makes it sweeter by the ounce than granulated sugar.
- All-purpose Flour
- Dutch-Processed Cocoa Powder: I prefer Dutch-processed cocoa powder for its flavor in this recipe, but any quality cocoa powder will be good.
- Kosher salt: Kosher salt is essential in these cookies. It heightens the chocolate flavor, tames the sweetness and gives the cookies depth.
- Vanilla Extract: Vanilla extract enhances the chocolate flavor just like in devil’s food cake, and it also adds just enough moisture to the dough!
- Granulated sugar: This is just for rolling the cookie dough in before baking. It adds a nice crunch and just a touch extra sweetness.
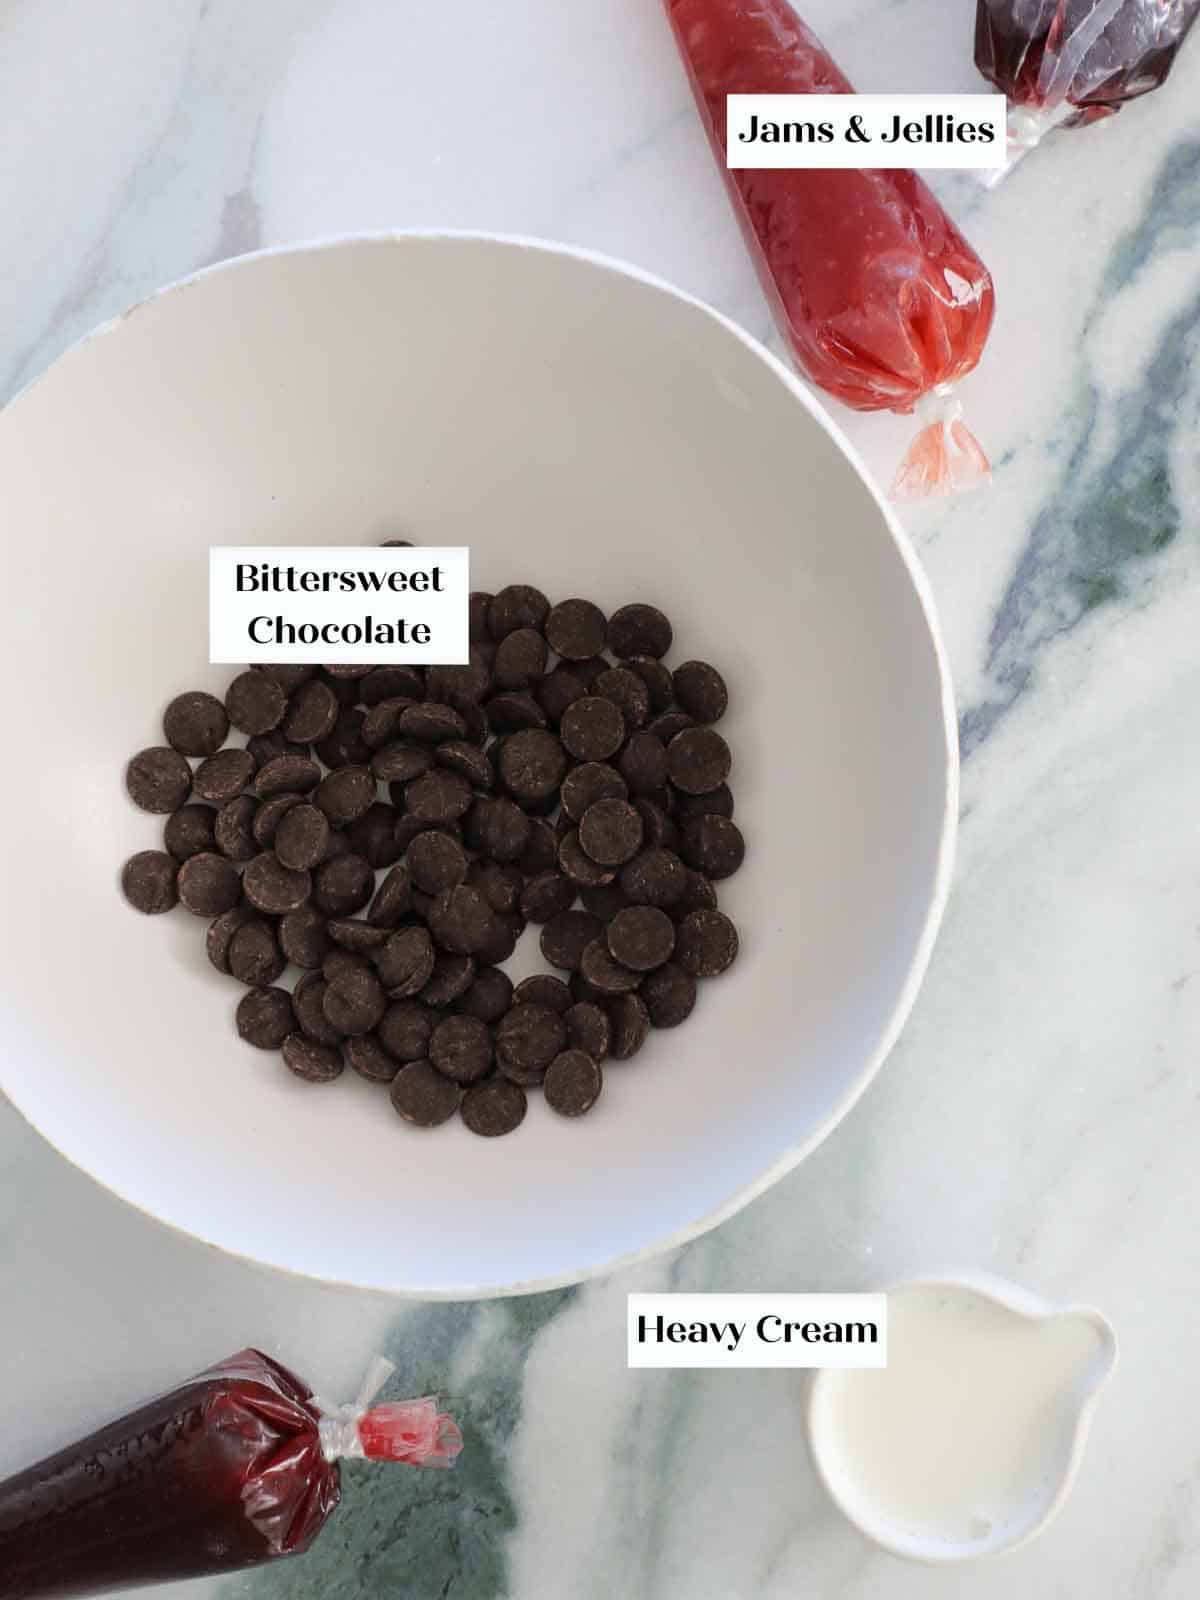
- Semi-sweet Chocolate: Use a good quality semi-sweet or bittersweet chocolate for the ganache filling. I used Ghirardelli bittersweet morsels for the cookies in the photos.
- Heavy Cream
- Jam (if desired)
See the recipe card for full information on ingredients and quantities.
Possible Variations & Substitutions
- Heavy Cream: I actually couldn’t find heavy cream in any store around my Manhattan studio, so I know for a fact that these cookies also work with half and half! I tried 8 different places then gave up. They will also work with non-dairy creamer.
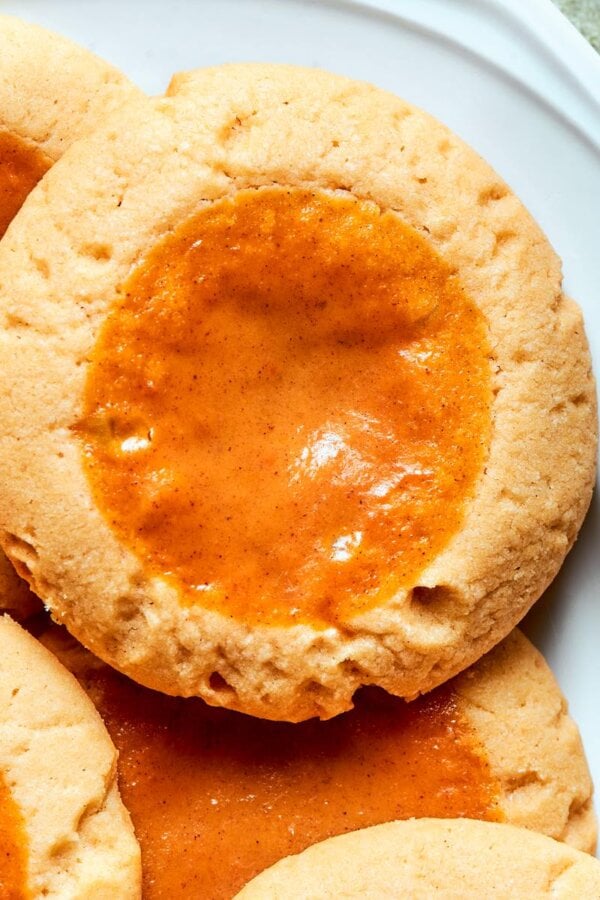
- Use jam instead of chocolate: I tried these chocolate thumbprints with raspberry, strawberry and apricot jam. I preferred the raspberry and strawberry, but the strawberry (just Smucker’s Strawberry Jam – nothing fancy) was really exceptional! If raspberry is more your thing, you should check out these white chocolate raspberry cookies as well.
- Make them in the shape of a heart. Press them into a small heart-shaped cookie cutter for a perfect heart or mold the dough into the shape of a heart by joining two small balls of dough. A way easier alternative to these chocolate sugar cookies or Valentine’s Day cookies!
- Add your favorite alcohol or extract to the chocolate ganache. Add 1 tablespoon whiskey, Cointreau, Chambord, Frangelico or any other alcohol to the ganache after it emulsifies. I do this with my flourless chocolate torte, and it is exceptional! You could also add peppermint or coffee extract!
How to Make Chocolate Thumbprints
Use these instructions to make chocolate thumbprints with chocolate ganache! Further details and measurements can be found in the recipe card below.
Make & bake the cookies:
Step 1: Preheat the oven to 325°F conventional (no fan) and line one baking sheet with parchment paper. I do not recommend using the convection setting for these cookies.
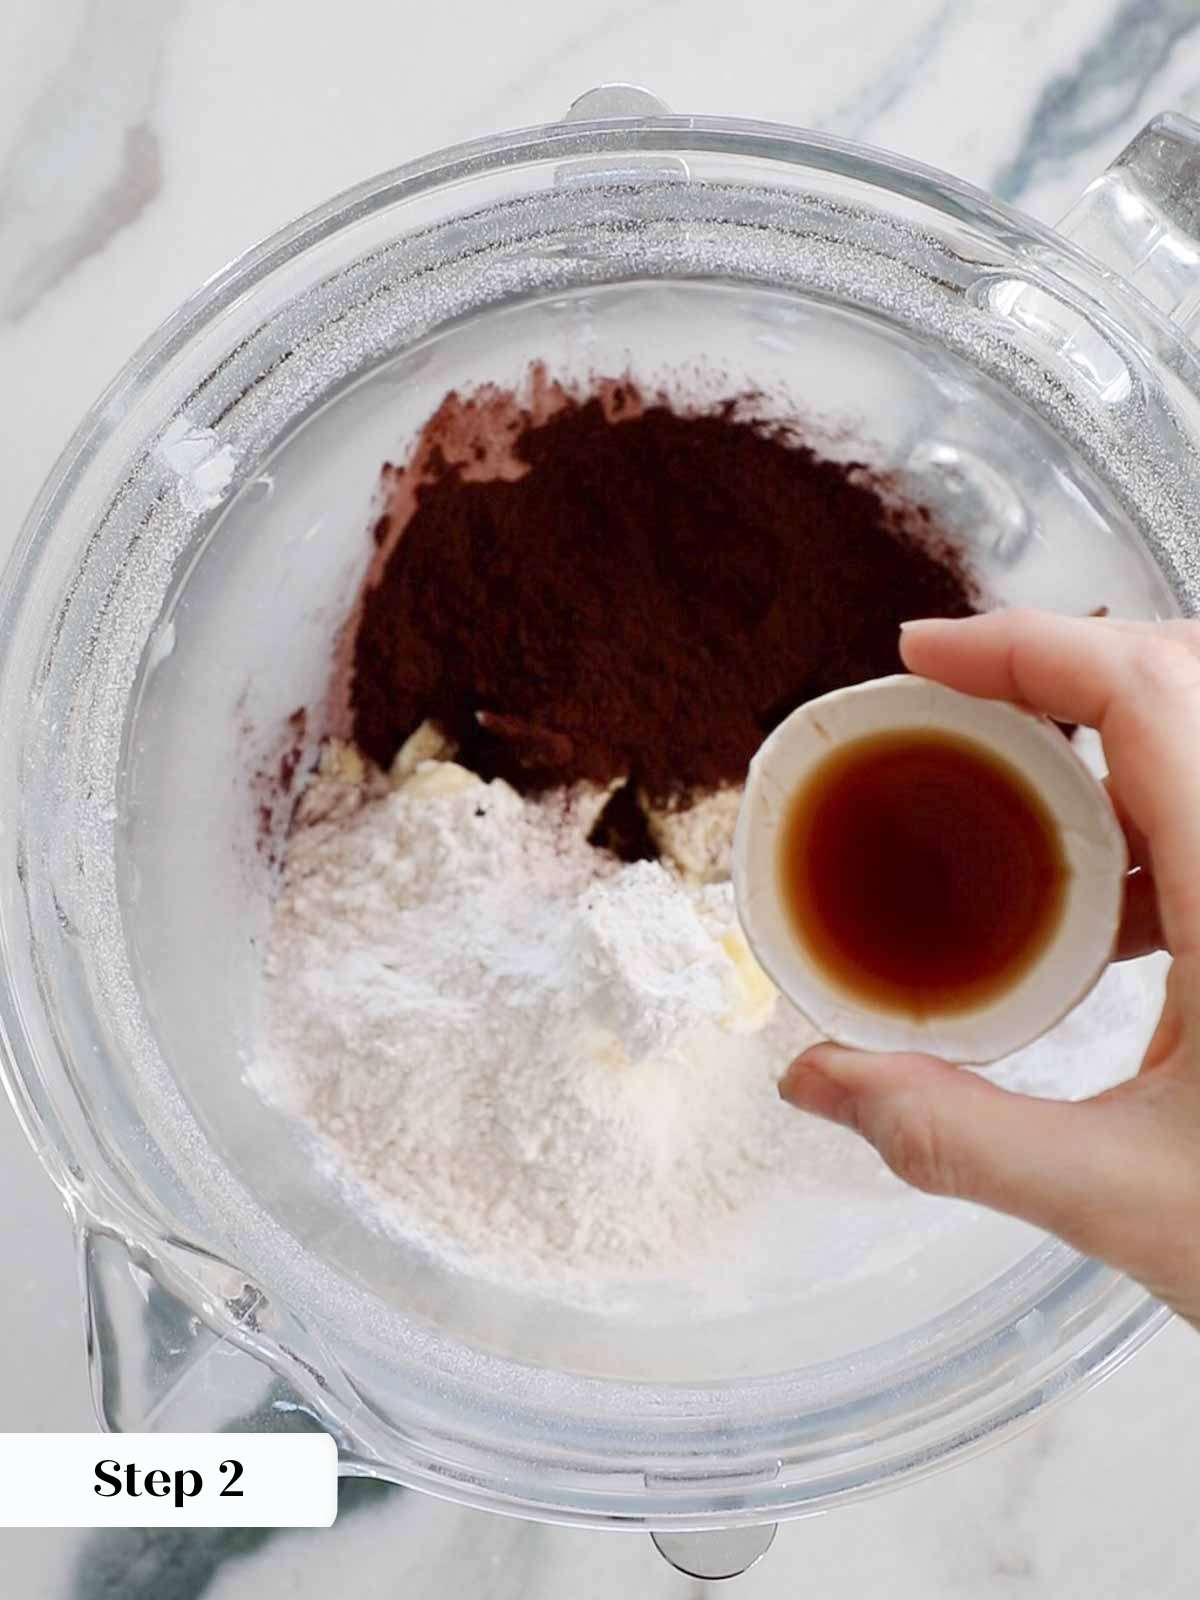
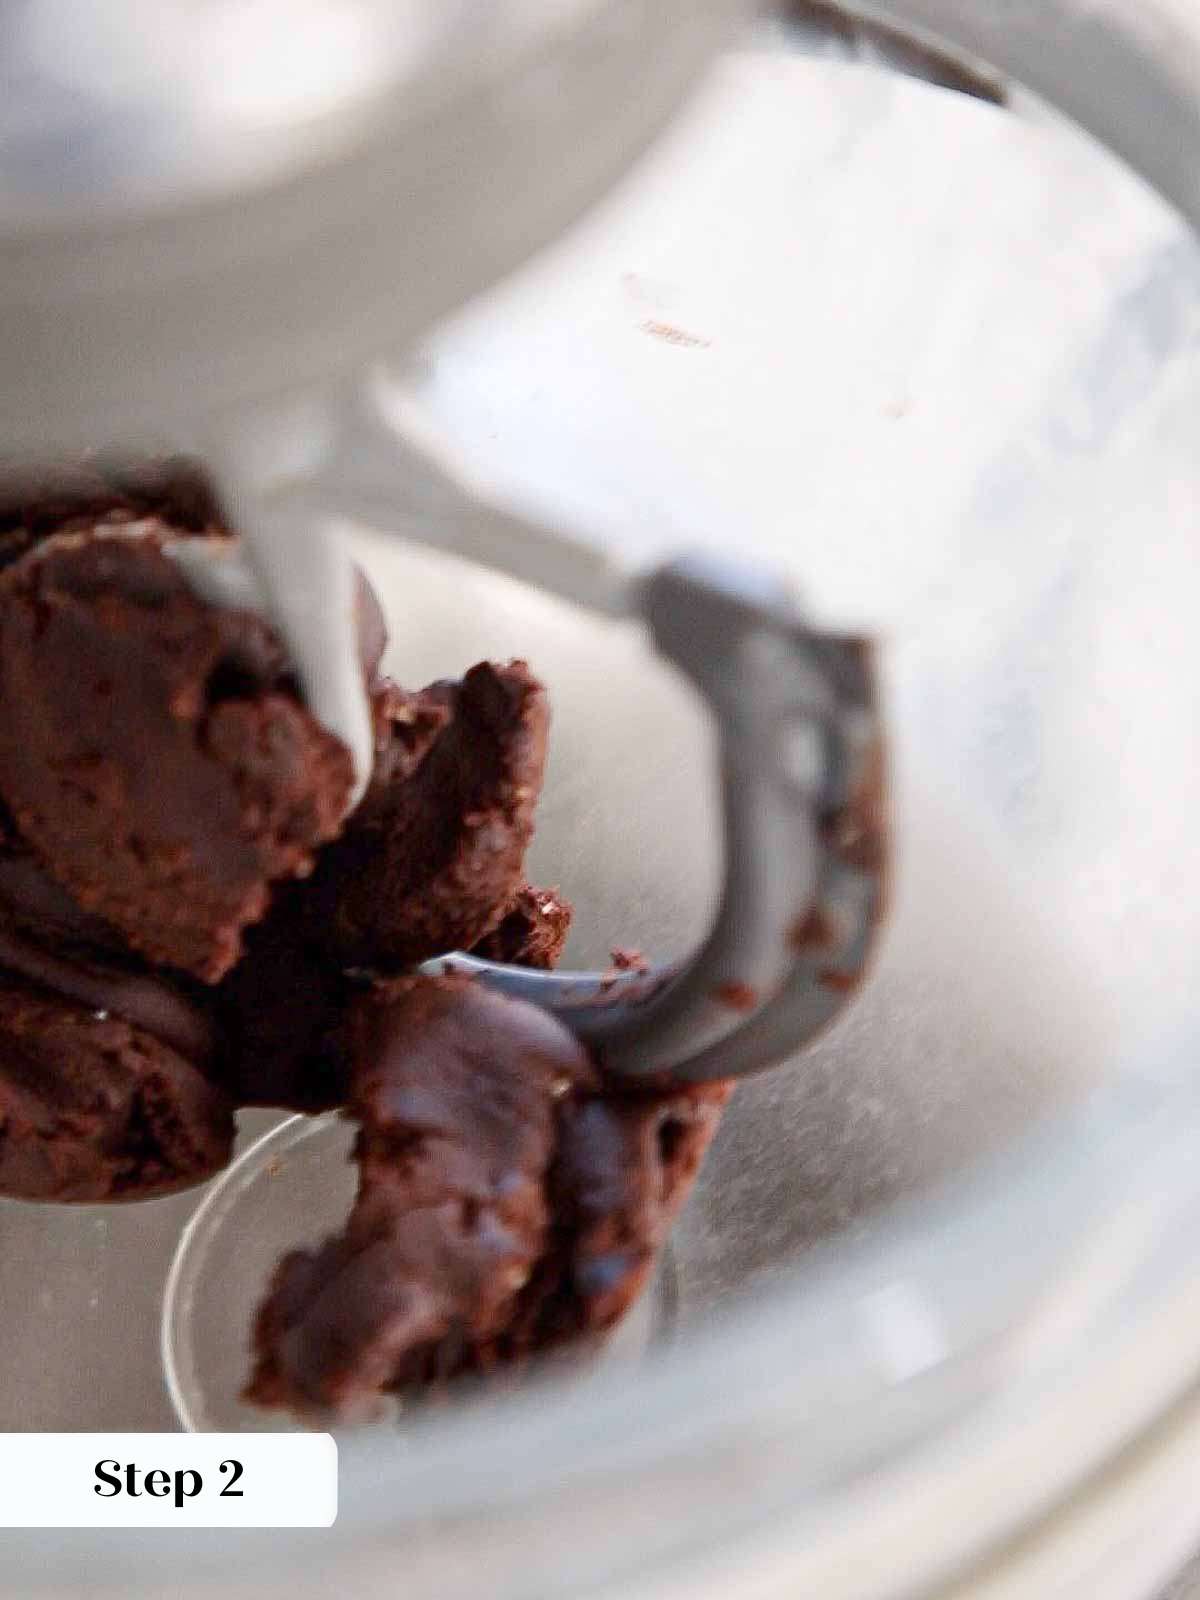
Step 2: In the bowl of a stand mixer fitted with the paddle attachment, add the butter and all the dry ingredients. (Butter, powdered sugar, all-purpose flour, cocoa powder, kosher salt, and vanilla extract.) Mix on medium-low speed until a smooth dough forms.
This will feel like it takes forever, so long that you might find yourself wondering if it will come together, but it will. Patience!
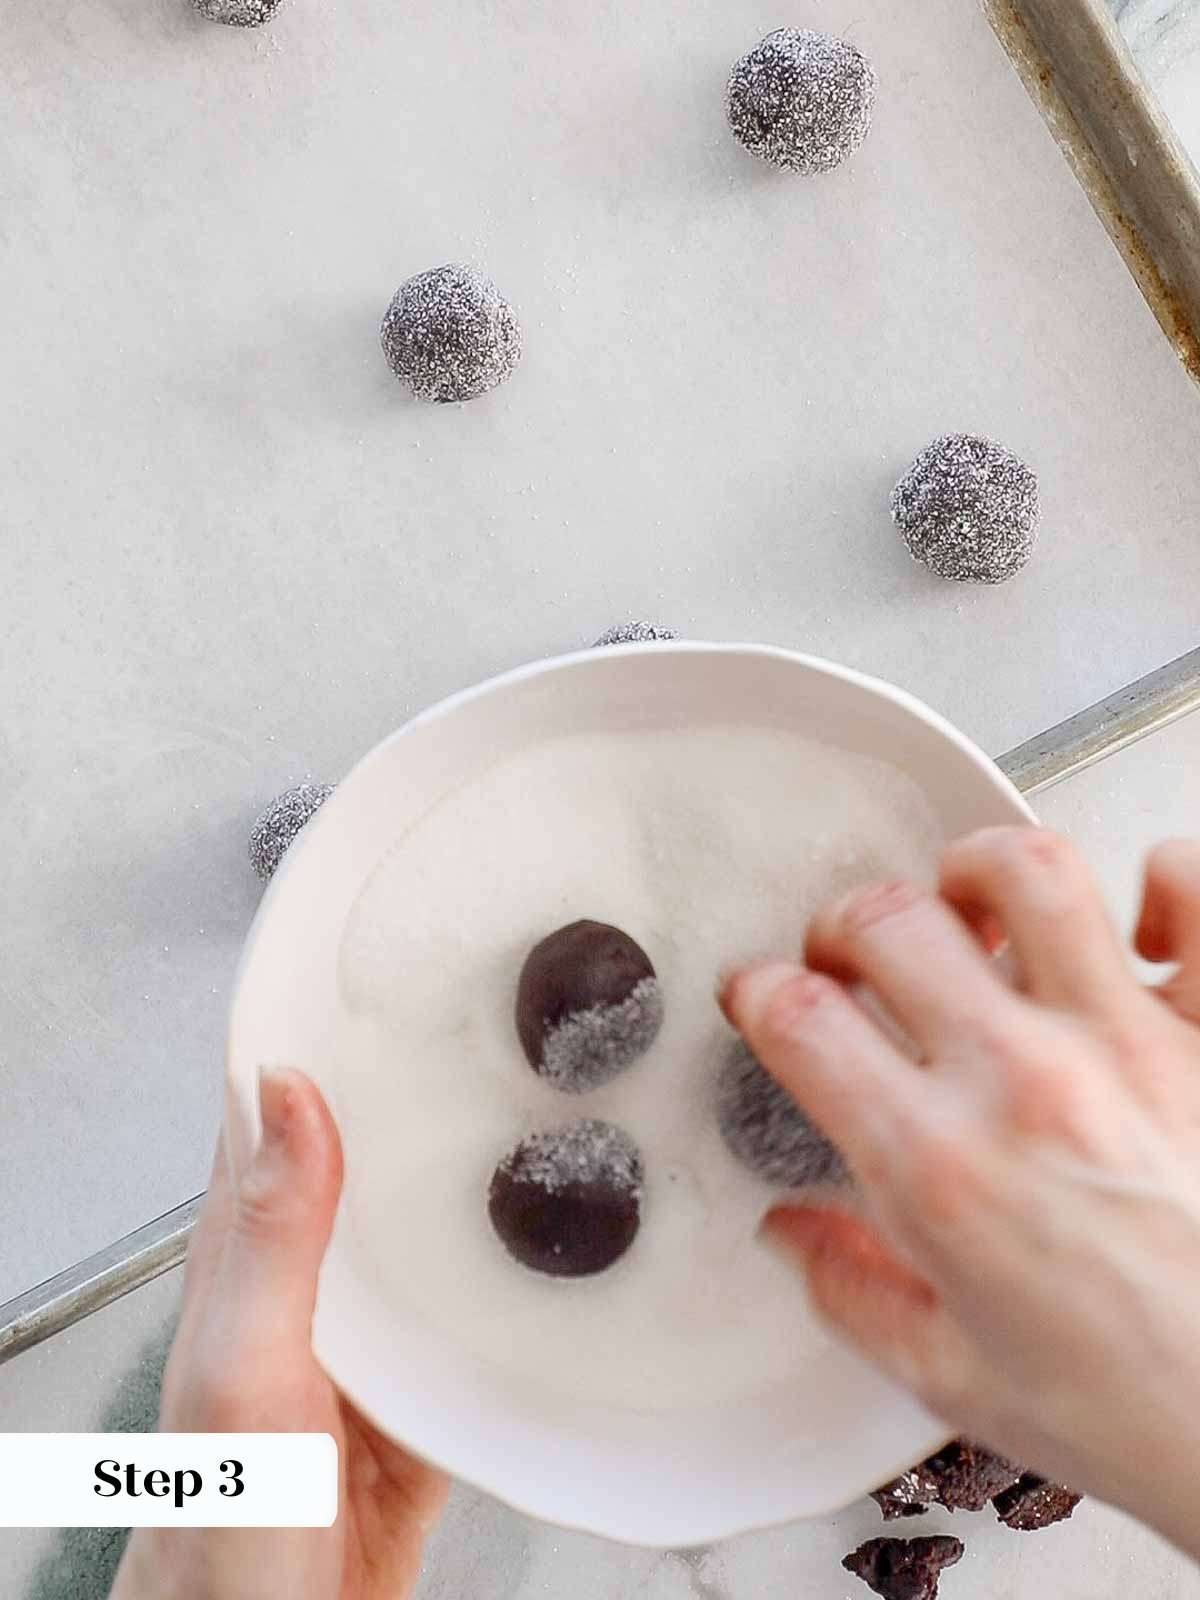
Step 3: Pinch off pieces of dough about an inch across. Roll into a ball and then roll the cookie dough balls in granulated sugar. You will have approximately 15 cookies.
Step 4: Place on parchment lined baking sheet about an inch apart, offset slightly. Press your thumb or forefinger into the center of each cookie gently, making an indentation. It should go about halfway into the cookie.
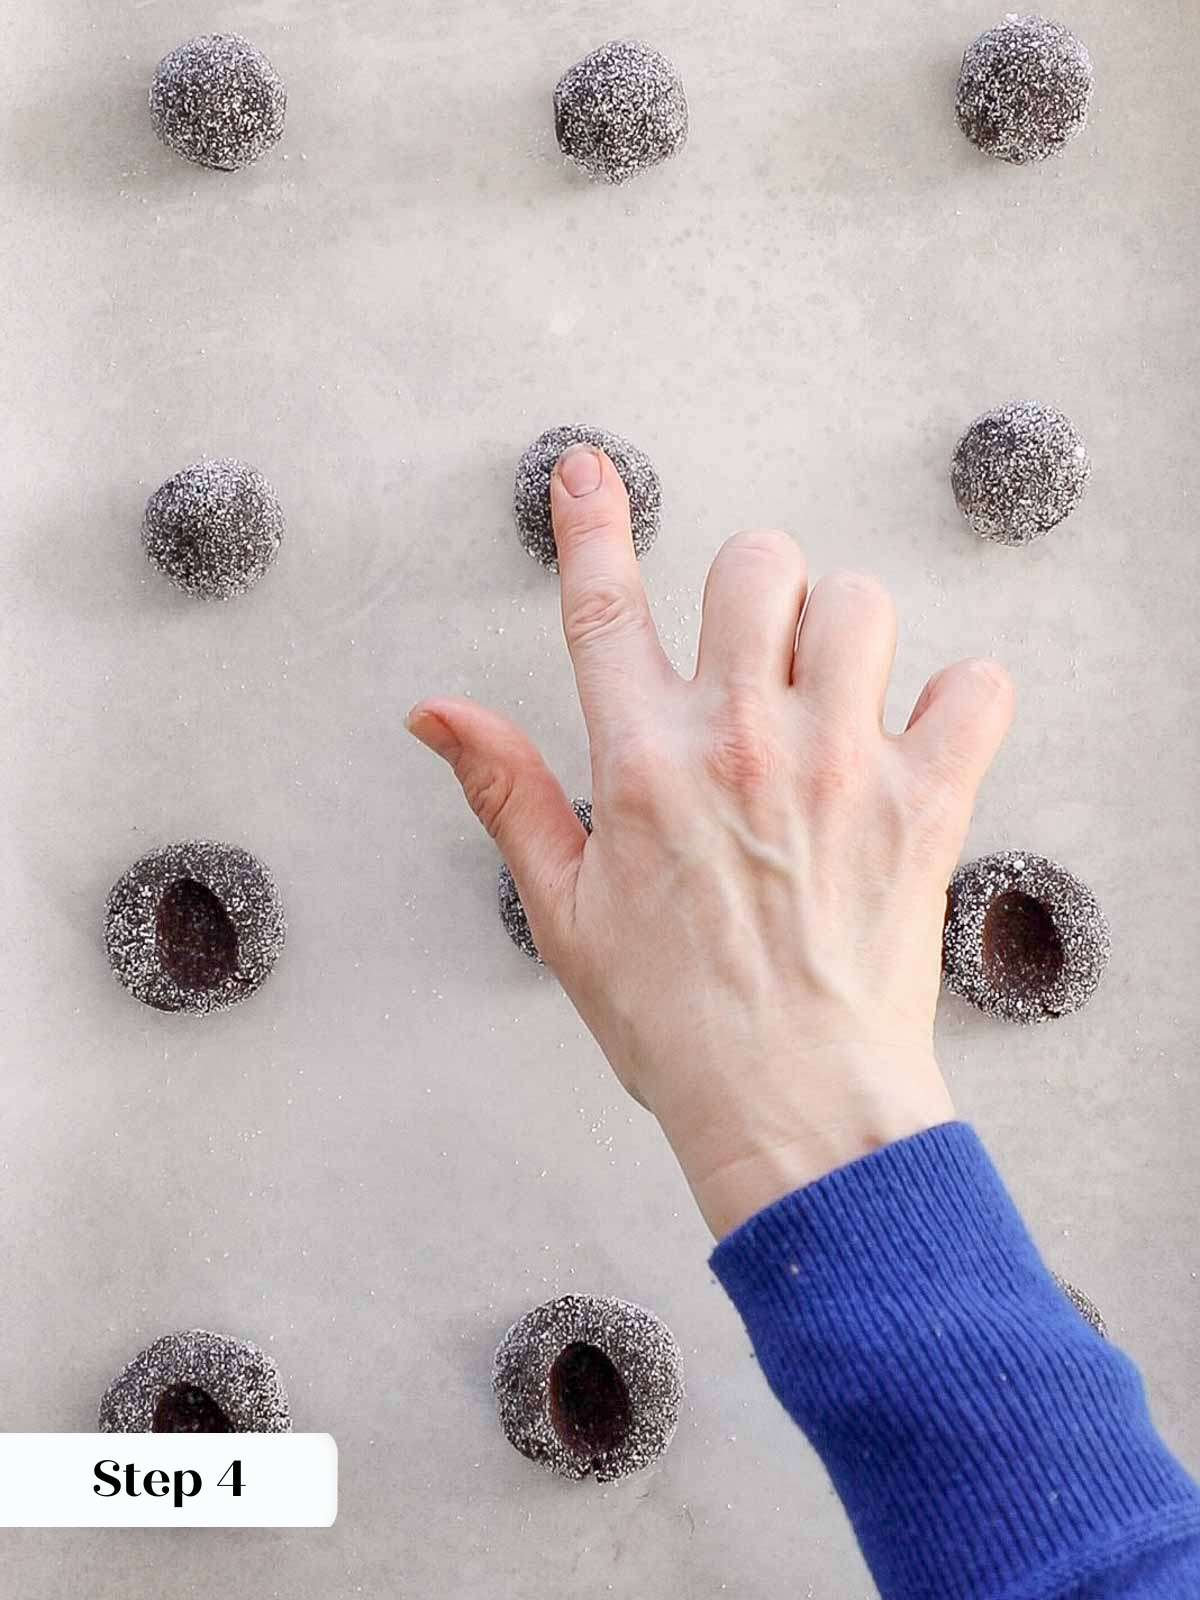
If filling with jam, pipe or spoon the jam into the center of each cookie before baking. It will be about ½ teaspoon each, but it depends on your thumbprint!
Step 5: Bake in preheated oven for 12-15 minutes or until the surface looks matte and no longer glossy. I rotated my trays after 6 minutes.
Step 6: If you are filling with ganache, press the baked centers down slightly to make a little more space for your filling. The cookies puff slightly in the oven and this just allows for a nice amount of chocolate filling.
Step 7: Cool completely on a wire rack before filling.
Prepare the Ganache:
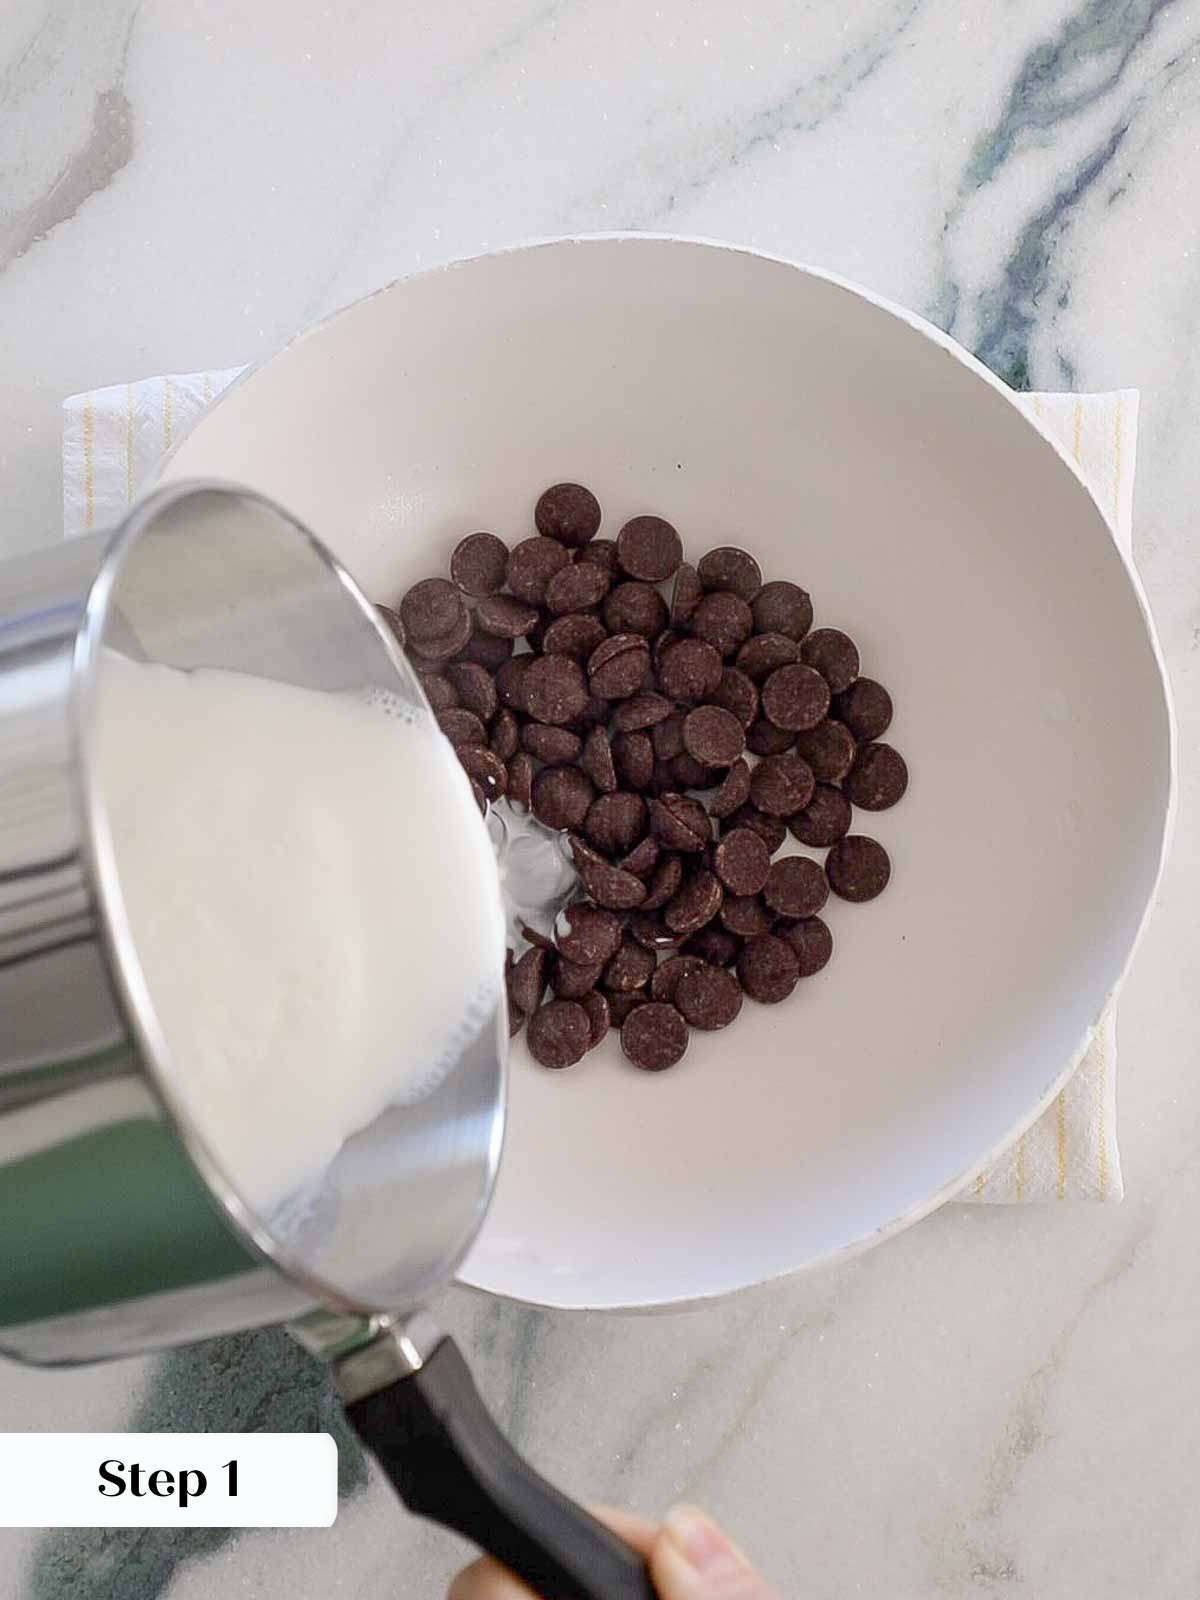
Step 1: While the cookies bake, prepare the ganache. Place chopped chocolate or chocolate chips in a medium bowl set on a folded tea-towel. Heat cream in a small saucepan just until it comes to a boil then pour over the chocolate.
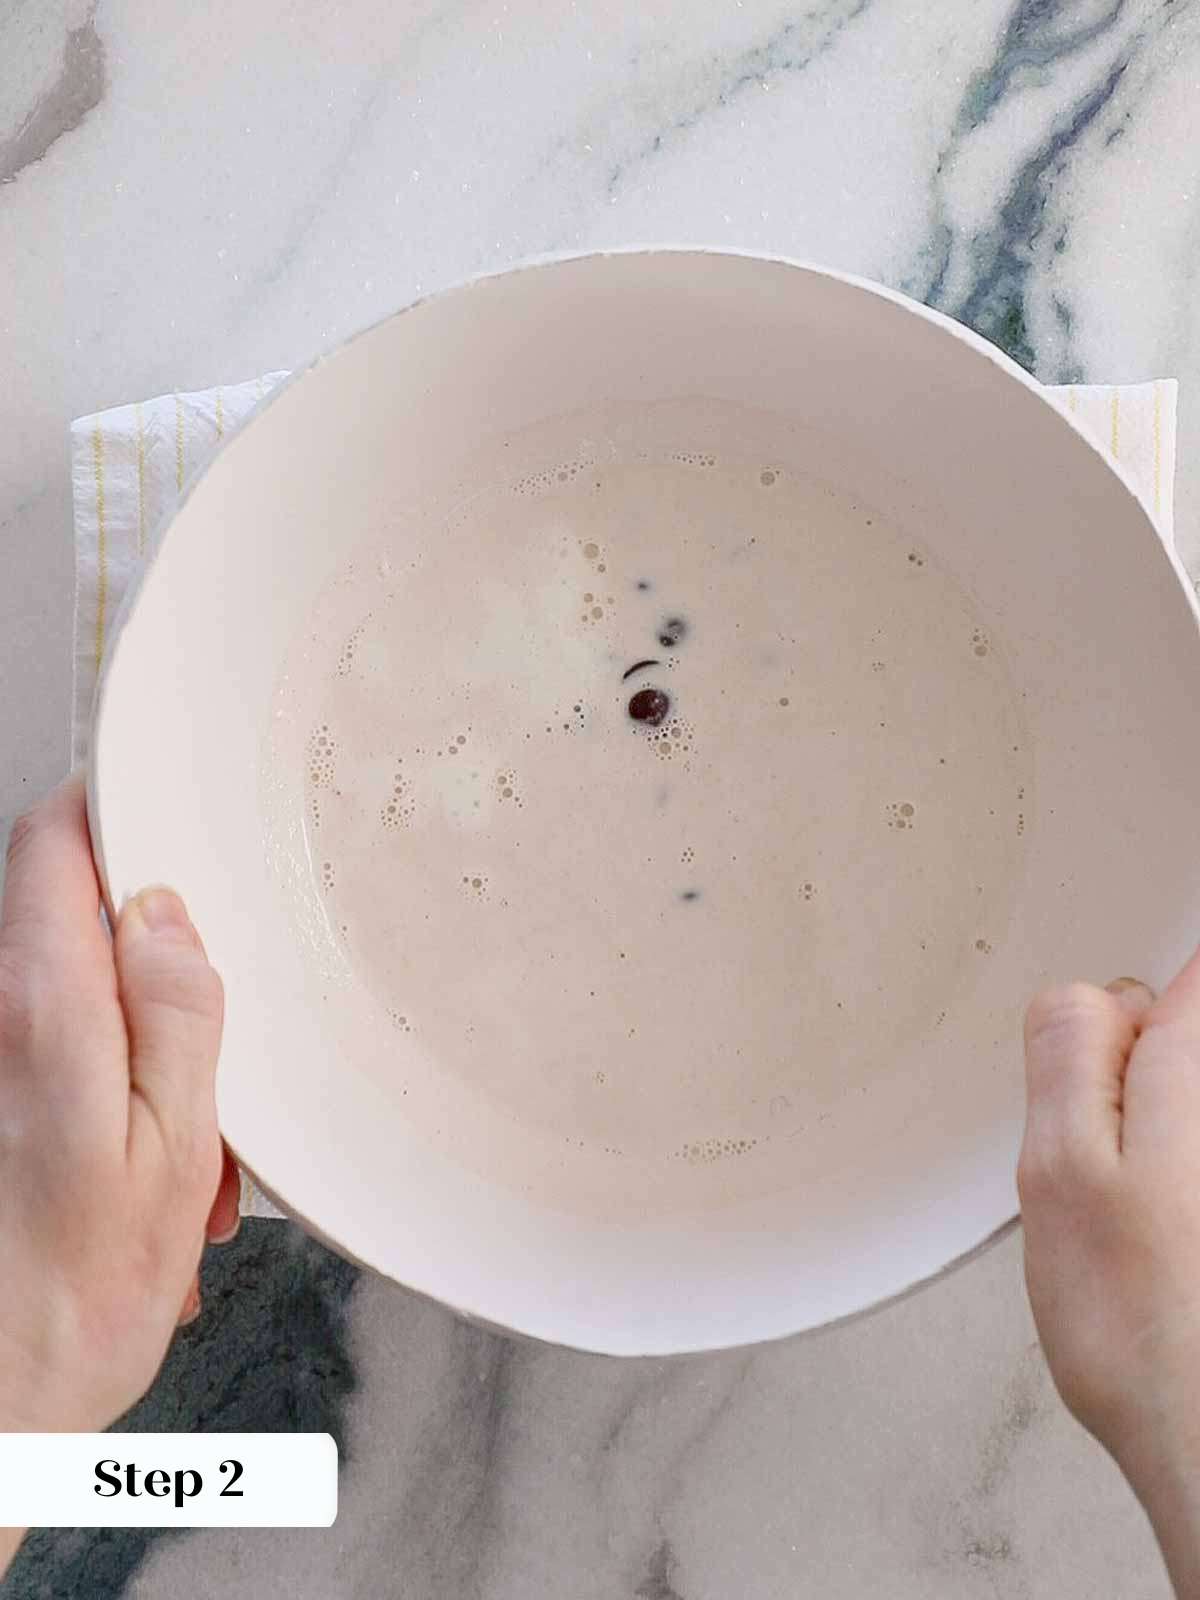
Step 2: Allow the cream to sit on the chocolate undisturbed for 2 minutes. This melts the chocolate and will allow you to emulsify the ganache easily with less whisking. Less whisking means less of a chance for the ganache to break.
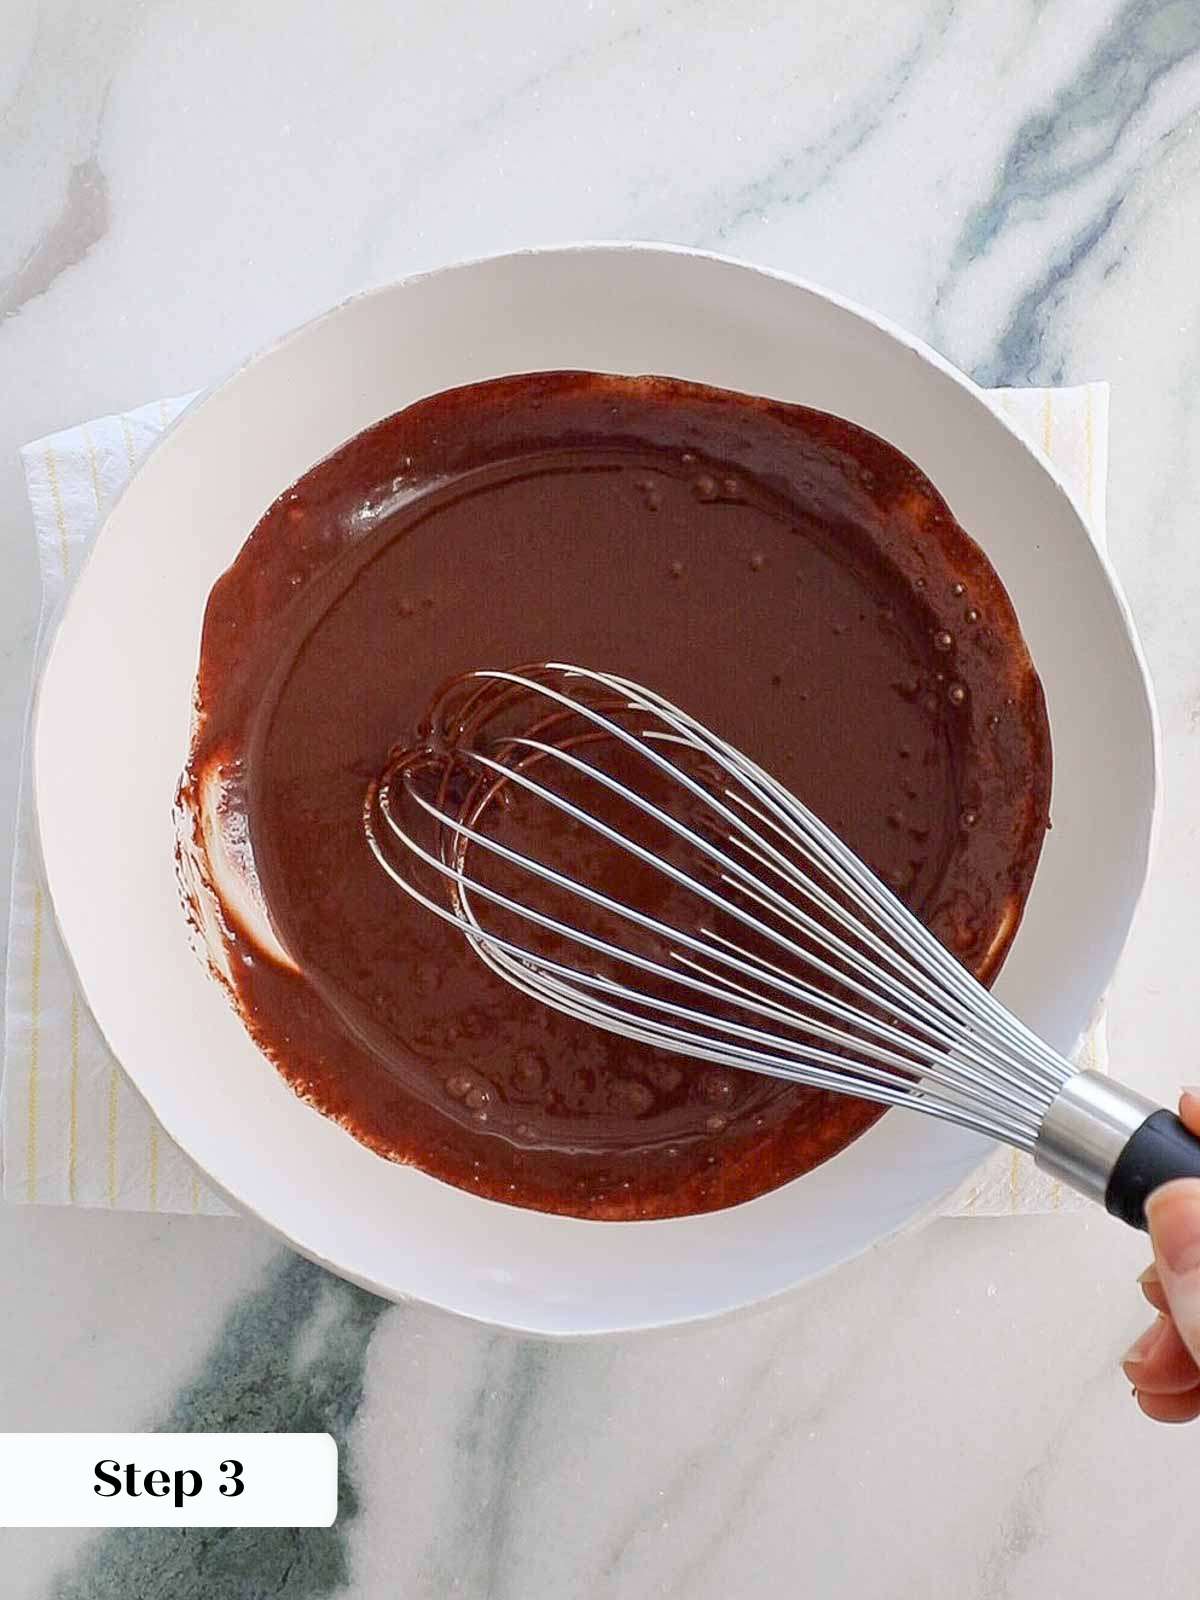
Step 3: Start whisking in one direction in the center of the chocolate until you see a smooth ganache beginning to form. Then gradually make your whisking strokes larger, pulling in more of the cream. Once a smooth ganache forms, stop whisking. Add any flavorings you desire at this point.
Step 4: Transfer to a piping bag or cover the surface with plastic wrap and allow to cool while the cookies finish baking and they cool completely.
Fill Chocolate Thumbprints with Ganache:
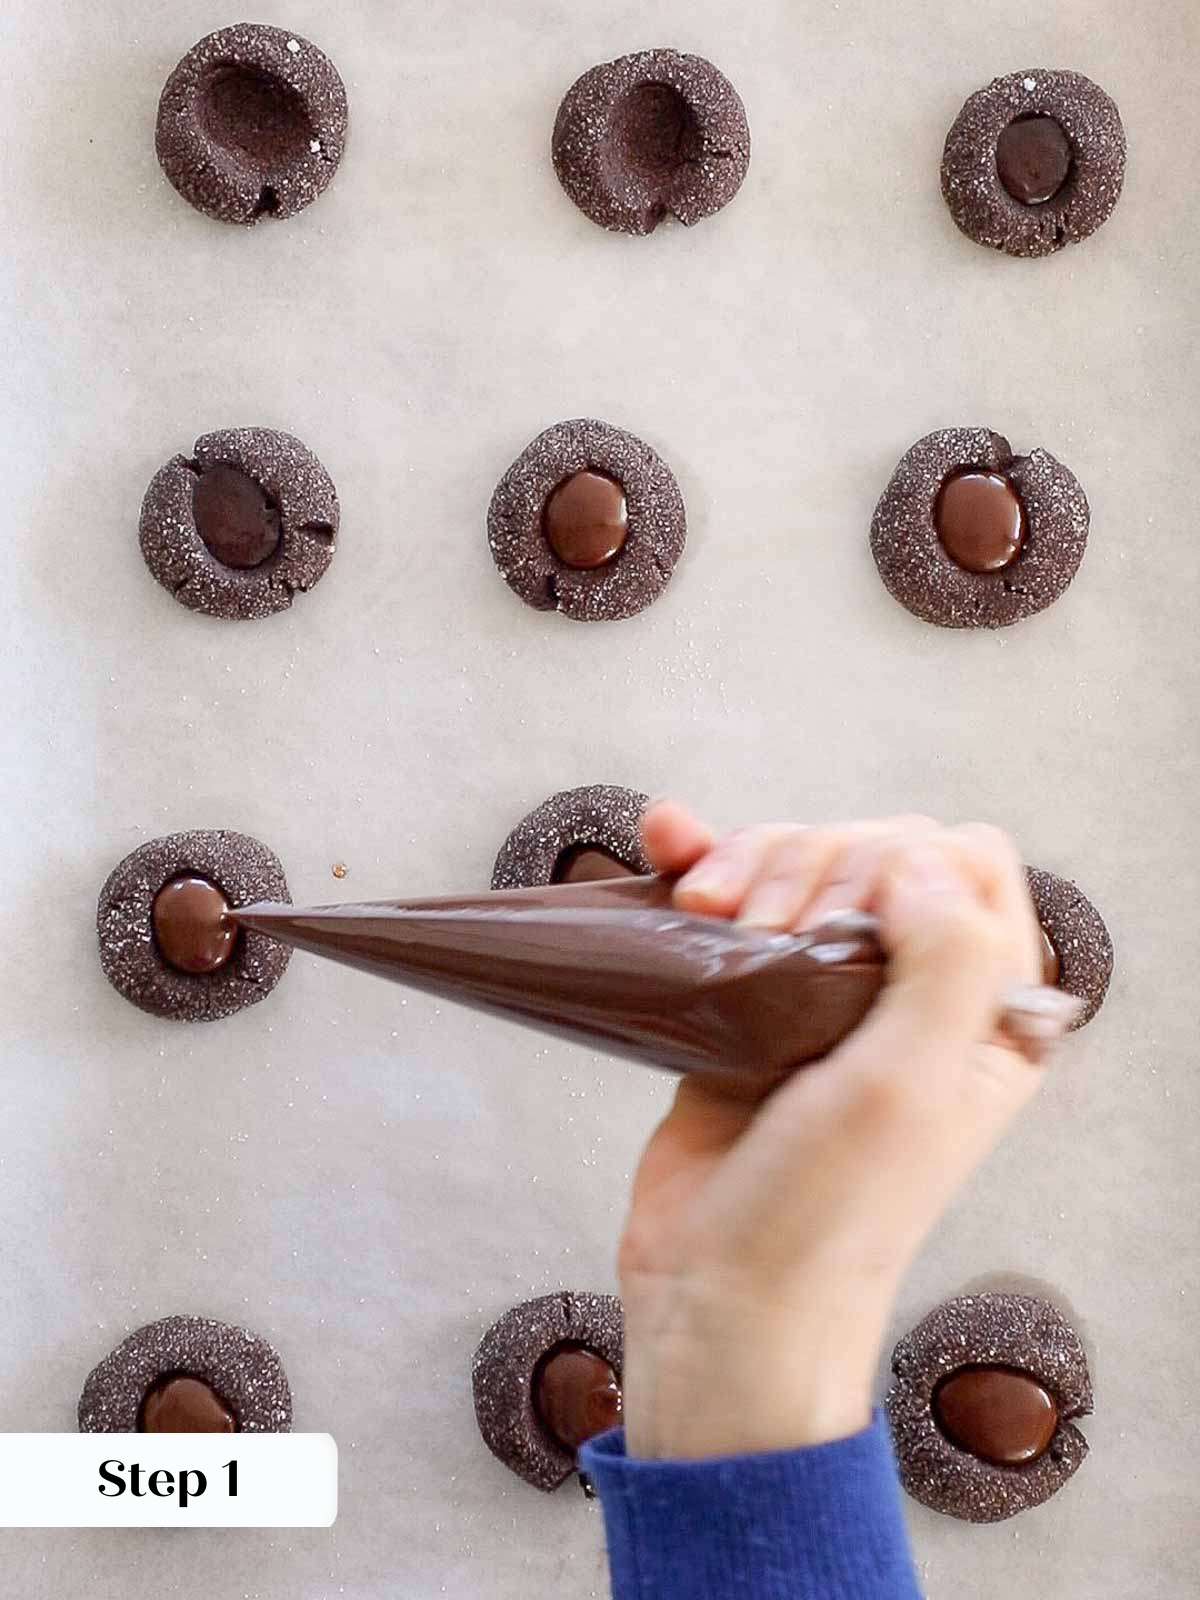
Step 1: Once the cookies are completely cool, pipe or spoon some of the ganache into each thumbprint. Piping the ganache will make for more perfect thumbprint cookies.
You want the ganache to be loose enough to flow freely. This will give you smooth tops on the filling. If the ganache has thickened too much, warm it gently over a pot with warm water. Stir it just enough to loosen.
Step 2: Let the thumbprints set, or don’t! They will taste delicious even if you are too impatient to wait for the ganache to set.
Chef Lindsey’s Recipe Tip
To enhance the chocolate thumbprints filled with chocolate ganache, try sprinkling crushed dehydrated strawberries or sprinkles on top before the ganache sets. This will add a little pop of color! It’ll look like these Valentine’s Day Cookies or chocolate sugar cookies.
Frequently Asked Questions
Store these cookies in an airtight container at room temperature for up to 10 days or frozen for up to 3 months. They taste best when eaten within 5 days, but those filled with jam will stay soft & moist for 10 days! There is no need to refrigerate thumbprint cookies and they will have the best texture when stored at room temperature.
You can freeze baked thumbprint cookies for up to 3 months. I would not recommend freezing the dough.
Thumbprints crack if the dough is too cold or pressed to aggressively. I recommend using your index finger and pressing firmly but make the indent slowly. I know they are called “thumbprints” but most people’s thumbs are actually too big for this task and will crack the dough! If the dough does crack, just form it back into a round shape around the fingerprint. No big deal!
It is important that you don’t chill this dough. The butter solidifies and it will make the dough crack and fall apart when shaped and pressed with your thumb. Shape and bake immediately after mixing, or if you accidentally chilled the dough, allow it to warm up to room temperature before continuing.
If you tried this recipe and loved it please leave a 🌟 star rating and let me know how it goes in the comments below. I love hearing from you; your comments make my day!

Chocolate Thumbprint Cookies
Ingredients
- ½ cup unsalted butter softened (113g)
- ⅓ cup powdered sugar 36g
- 1 cup all-purpose flour 126g
- ⅓ cup dutch processed cocoa powder 40g
- ½ t kosher salt
- 1 t vanilla extract
- ¼ cup granulated sugar for rolling
- ⅓ cup jam
- ½ cup bittersweet chocolate chopped or morsels
- ½ cup heavy cream
Instructions
Make & bake the cookies:
- Step 1: Preheat the oven to 325°F conventional (no fan) and line one baking sheet with parchment paper. I do not recommend using the convection setting for these cookies.
- Step 2: In the bowl of a stand mixer fitted with the paddle attachment, add all the ingredients. (Butter, powdered sugar, all-purpose flour, cocoa powder, kosher salt, and vanilla extract.) Mix on medium-low speed until a smooth dough forms.
- Step 3: Pinch off pieces of dough about an inch across. Roll into a ball and then roll in granulated sugar. You will have approximately 15 cookies.
- Step 4: Place on parchment lined baking sheet about an inch apart, offset slightly. Press your thumb or forefinger into the center of each cookie gently, making an indentation. It should go about halfway into the cookie. Fill with jam before baking, but bake unfilled for a chocolate filling.
- Step 5: Bake in preheated oven for 12-15 minutes or until the surface looks matte and no longer glossy. I rotated my trays after 6 minutes.
- Step 6: If you are filling with ganache, press the baked centers down slightly to make a little more space for your filling. The cookies puff slightly in the oven and this just allows for a nice amount of chocolate filling.
Prepare the Ganache:
- Step 1: While the cookies bake, prepare the ganache. Place chocolate in a bowl set on a folded tea-towel. Heat cream just until it comes to a boil then pour over the chocolate.
- Step 2: Allow the cream to sit on the chocolate undisturbed for 2 minutes. This melts the chocolate and will allow you to emulsify the ganache easily with less whisking. Less whisking means less of a chance for the ganache to break.
- Step 3: Start whisking in one direction in the center of the chocolate until you see a smooth ganache beginning to form. Then gradually make your whisking strokes larger, pulling in more of the cream. Once a smooth ganache forms, stop whisking. Add any flavorings you desire at this point.
- Step 4: Transfer to a piping bag or cover the surface with plastic wrap and allow to cool while the cookies finish baking and they cool completely.
Fill Chocolate Thumbprints with Ganache:
- Step 1: Once the cookies are completely cool, pipe or spoon some of the ganache into each thumbprint. Piping the ganache will make for more perfect thumbprint cookies.
- Step 2: Let the thumbprints set, or don’t! They will taste delicious even if you are too impatient to wait for the ganache to set.
Notes
Presentation – Fill with the chocolate ganache after baking or fill with your favorite jam before baking.
Variations – Try adding 1 tablespoon liquor to the ganache.
Storage – Store these cookies in an airtight container at room temperature for up to 10 days. They taste best when eaten within 5 days, but those filled with jam will stay soft & moist for 10 days! Nutrition Note: The calories are calculated on using the chocolate ganache and not the jam.
Nutrition
Before You Go
I hope you enjoyed this professional chef tested recipe. Check out our other delicious, chef-developed chocolate recipes or peruse our 200+ cookie recipes, like these lemon blueberry cookies!


These chocolate thumbprint cookies are absolutely amazing. The rich, fudgy dough paired with that silky ganache center is pure perfection. I made them for a game night, and they were the first to disappear from the table! Thank you for sharing such a foolproof and impressive treat!
Hello Lindsey,
thank you for this recipe. Quick, easy peasy and tasty to boot.
Hi Bruce! Happy to hear it, thanks for coming back to leave a comment. Happy baking!
Wonderful 😊
Hi Kitty! Aw thank you! So happy you loved them, those little ganache centers are my favorite part.
I remembered making thumbprints as a kid and wanted a chocolate version. Rolling them in sugar gave the prettiest slight crunch as they baked. The ganache firms just enough to give each bite a perfect soft center. Love love love