This post may contain affiliate links. Please read our disclosure policy.
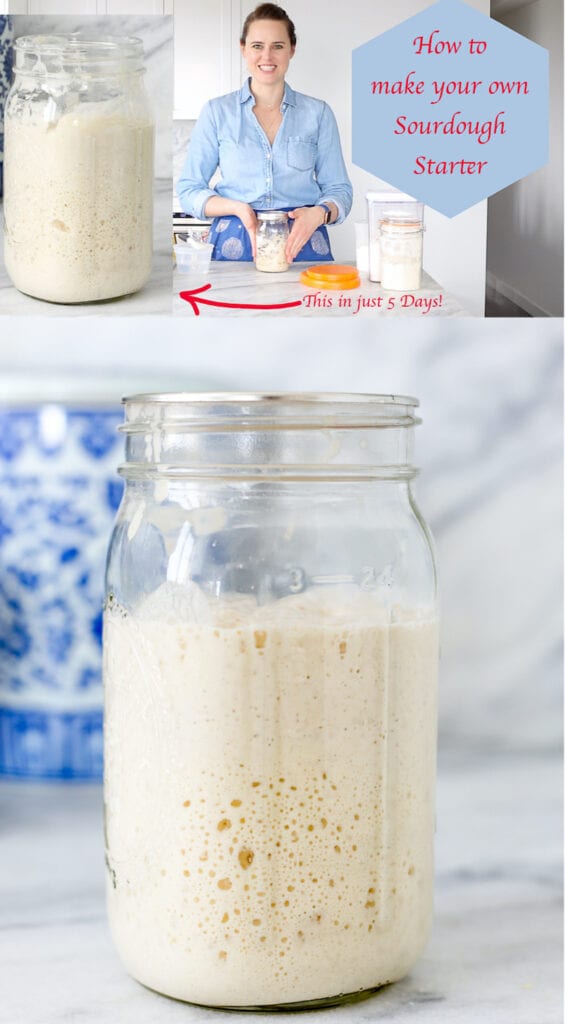
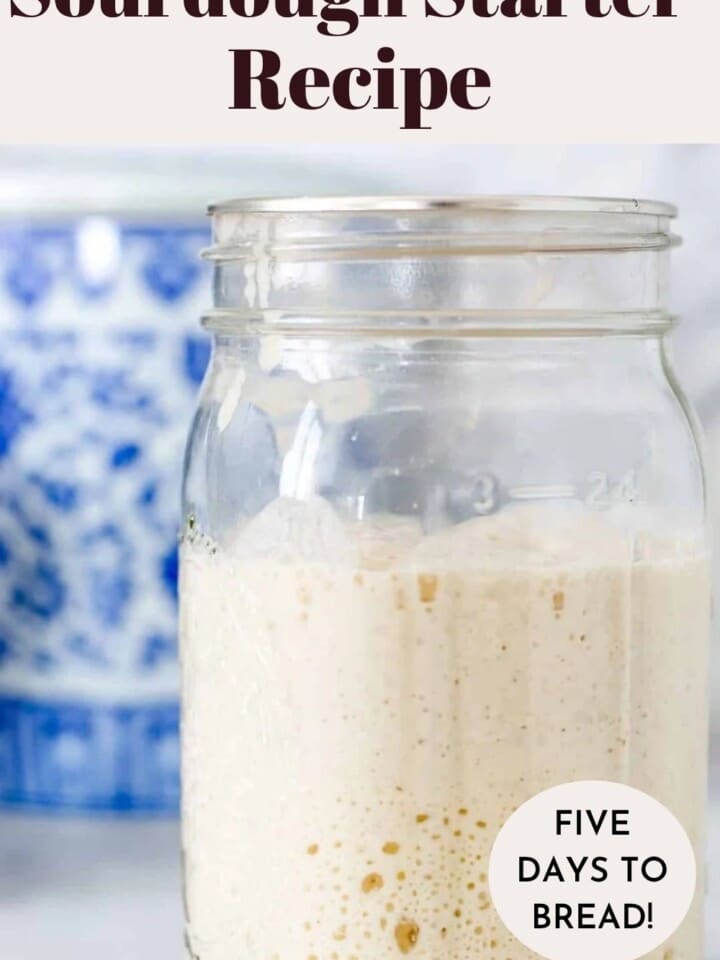
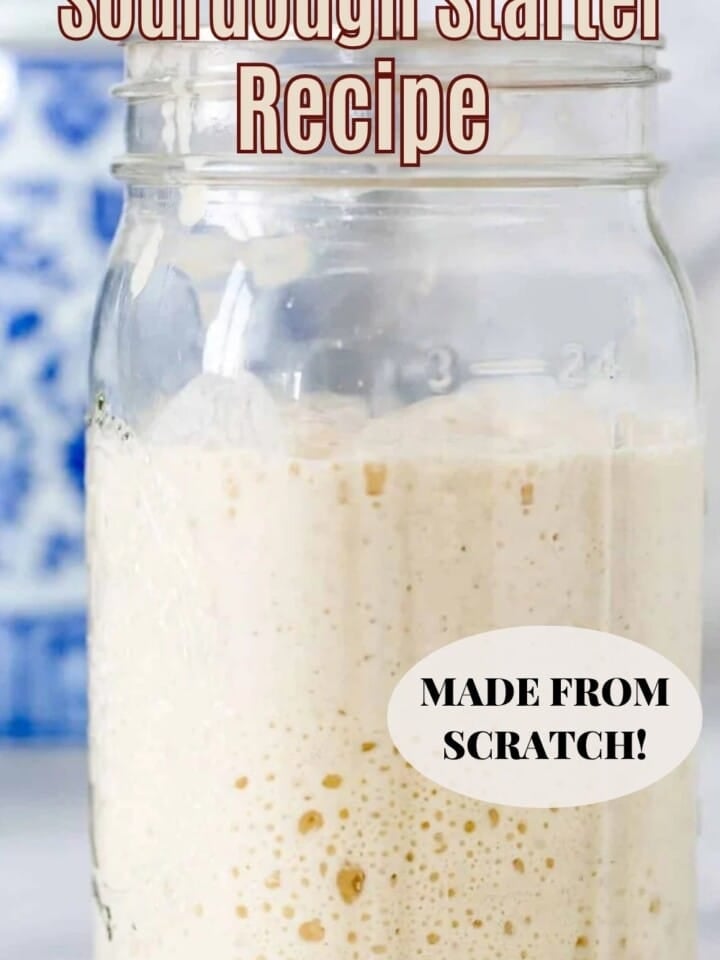
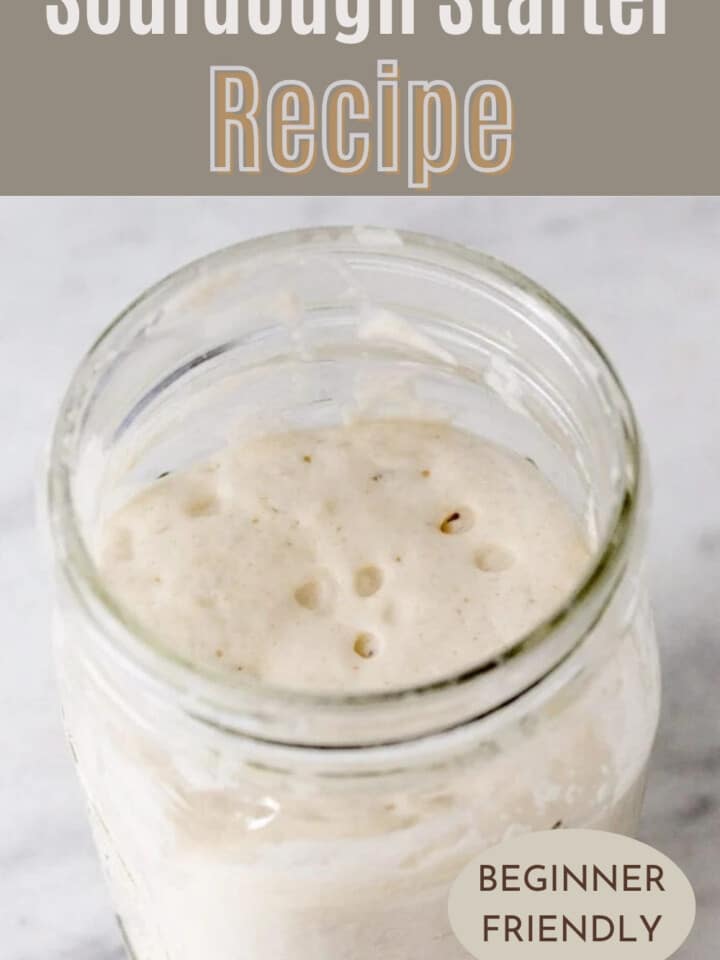
With this easy to follow sourdough starter recipe, you can be making fresh sourdough bread from your own starter in just five days! This is a day by day recipe that provides detailed answers to all your starter questions!
A Quick Look At The Recipe
This is a brief summary of the recipe. Jump to the recipe to get the full details.
Jump to RecipePrep Time
5 days
Total Time
5 days
Servings
6 servings
Difficulty
Easy but requires patience.
Calories *
417 kcal per serving
Technique
Feed daily with rye flour and water, switching to all-purpose on Day 4 for balanced flavor.
Flavor Profile
Mildly tangy, yeasty, and earthy.
* Based on nutrition panel
Featured Comment
⭐⭐⭐⭐⭐ Thank you for all the tips and tricks on how to start and keep a starter happy! My starter is doubling and seems happy, can’t wait to make my first loaf! – Mara
Table of Contents
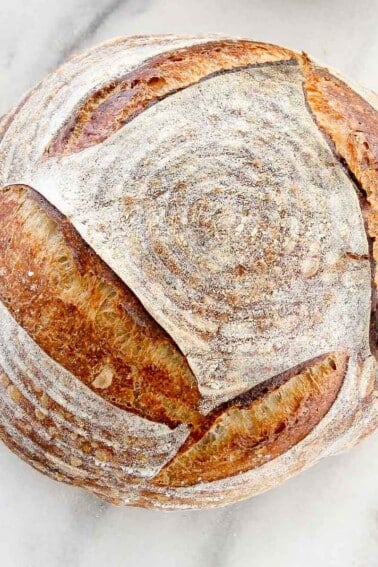
The sourdough starter is the foundation of any good sourdough bread, and all you need to make your own is flour, water, and patience. Using the wild yeast found in flour, water, and the air, you can create an active, bubbly starter in just five days! I will teach you how to make and care for your sourdough starter. Be sure to watch the video along with my 10 sourdough starter tips video.
Once you have created and cared for your sourdough starter for days, you will want to make bread! Start off with my easy sourdough bread recipe that is perfect for beginners or this cherry sourdough bread! Perhaps you’re tired of waiting and want your bread now. Make this same day sourdough bread!
What is a Sourdough Starter?
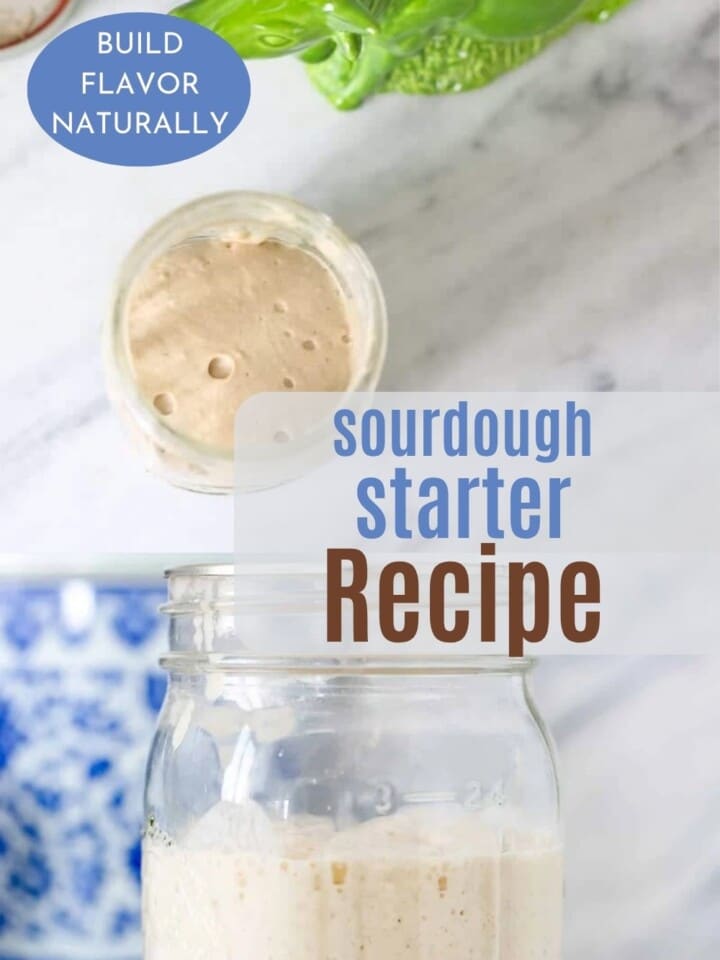
A sourdough starter is a living ecosystem: simply a fermented blend of flour and water, housing a stable community of beneficial bacteria and wild yeasts. Through consistent care and feeding, it’s used to leaven and flavor sourdough bread. Sourdough bread has been around for thousands of years before the invention of commercial yeast! There are a lot of benefits from the fermentation cycle that creates those beneficial bacteria. The more well-taken care of and the older a starter gets, the more you will achieve superior flavor and texture in your breads.
Ingredients & Substitutions
- Rye Flour: I start my levain with rye flour because whole grain flours like rye or whole wheat flour are less processed than AP, so there is more natural yeast in the flour. This gives the starter a kick-start. Then I switch to unbleached all-purpose flour on Day 4 because rye flour has a very specific flavor, and I don’t want all of my bread to taste like fermented rye. If I want that flavor, I’ll add rye flour to my bread. Think of it like creating a neutral sourdough base. All the sourness without the specifics.
- Water: Tap water works just fine! You can use bottled water if you prefer, but I don’t find that it makes a difference. When feeding or growing your levain, I find it best to use water at room temperature. If you find that your starter is doubling too quickly for you to use it at its peak, try mixing it with cold water.
- All-Purpose Flour: I use all-purpose flour to feed my levain, keeping the flavor neutral. You can also use bread flour. This allows me to make delicious sourdough hot cross buns and whole wheat sourdough bread from the same starter.
See the recipe card for full information on ingredients and quantities.
Professional Tips
- Weigh your starter! This, like most pastry, is science. While cup measurements tend to vary in grams, the volume of your starter changes by the minute. 1 tablespoon after 8 hours is completely different than 1 tablespoon after 17 hours. You could inadvertently add three times the amount of yeast culture one day and then barely any the next. Invest in a kitchen scale.
- Patience is key. You’re creating an ecosystem here from scratch; let it grow! The number of days required to develop a strong, bubbly levain varies depending on the type of flour. If you are using bleached or bromated all-purpose flour, it may never be strong enough, and these flours typically don’t contain much natural yeast, if any.
- Get to know your starter. You need to know how long it takes for it to double, so that it reaches that high point, at the exact time you want to mix your dough. You can also adjust how fast it is growing. For example, if it doubles in 6 hours, maybe where you are keeping it is warm and conducive to rapid growth. If you don’t have a colder part of your house, put it in a pot full of ice water overnight or feed it with cold water. And make sure you weigh it and stick to 10% of the flour by weight.
Liquid vs. Stiff Levain
A traditional starter (stiff levain) has equal parts flour and water, while a liquid levain has more water than flour. There are some slight differences between the two; while a liquid levain is easier to mix, it can actually “peak” faster than a stiff levain. They also affect the resulting dough in different ways. Liquid levain will add more hydration to your bread, resulting in a more open, airy, and light crumb structure. Pay attention to what the recipe is calling for and feed your levain accordingly. You can use the same starter and go from stiff to liquid levain. Generally, I use a 125% liquid levain in my recipe that calls for it, meaning 100g flour + 125g water + 10g old starter.

How to Make This Sourdough Starter Recipe
Use these instructions to make your very own sourdough starter! Further details and measurements can be found in the recipe card below.
Day 1: Mix flour and water to start fermentation. Combine 100g of rye flour and 100g of water in a clean container, cover it, and let it sit at room temperature for 24 hours on your kitchen counter. Make sure all the flour has been properly hydrated.
You can start with all-purpose flour, but make sure it isn’t bleached. Either way, using AP will take longer for your starter to be ready to use since it is more processed and has less natural yeast, which slows down the fermentation process.
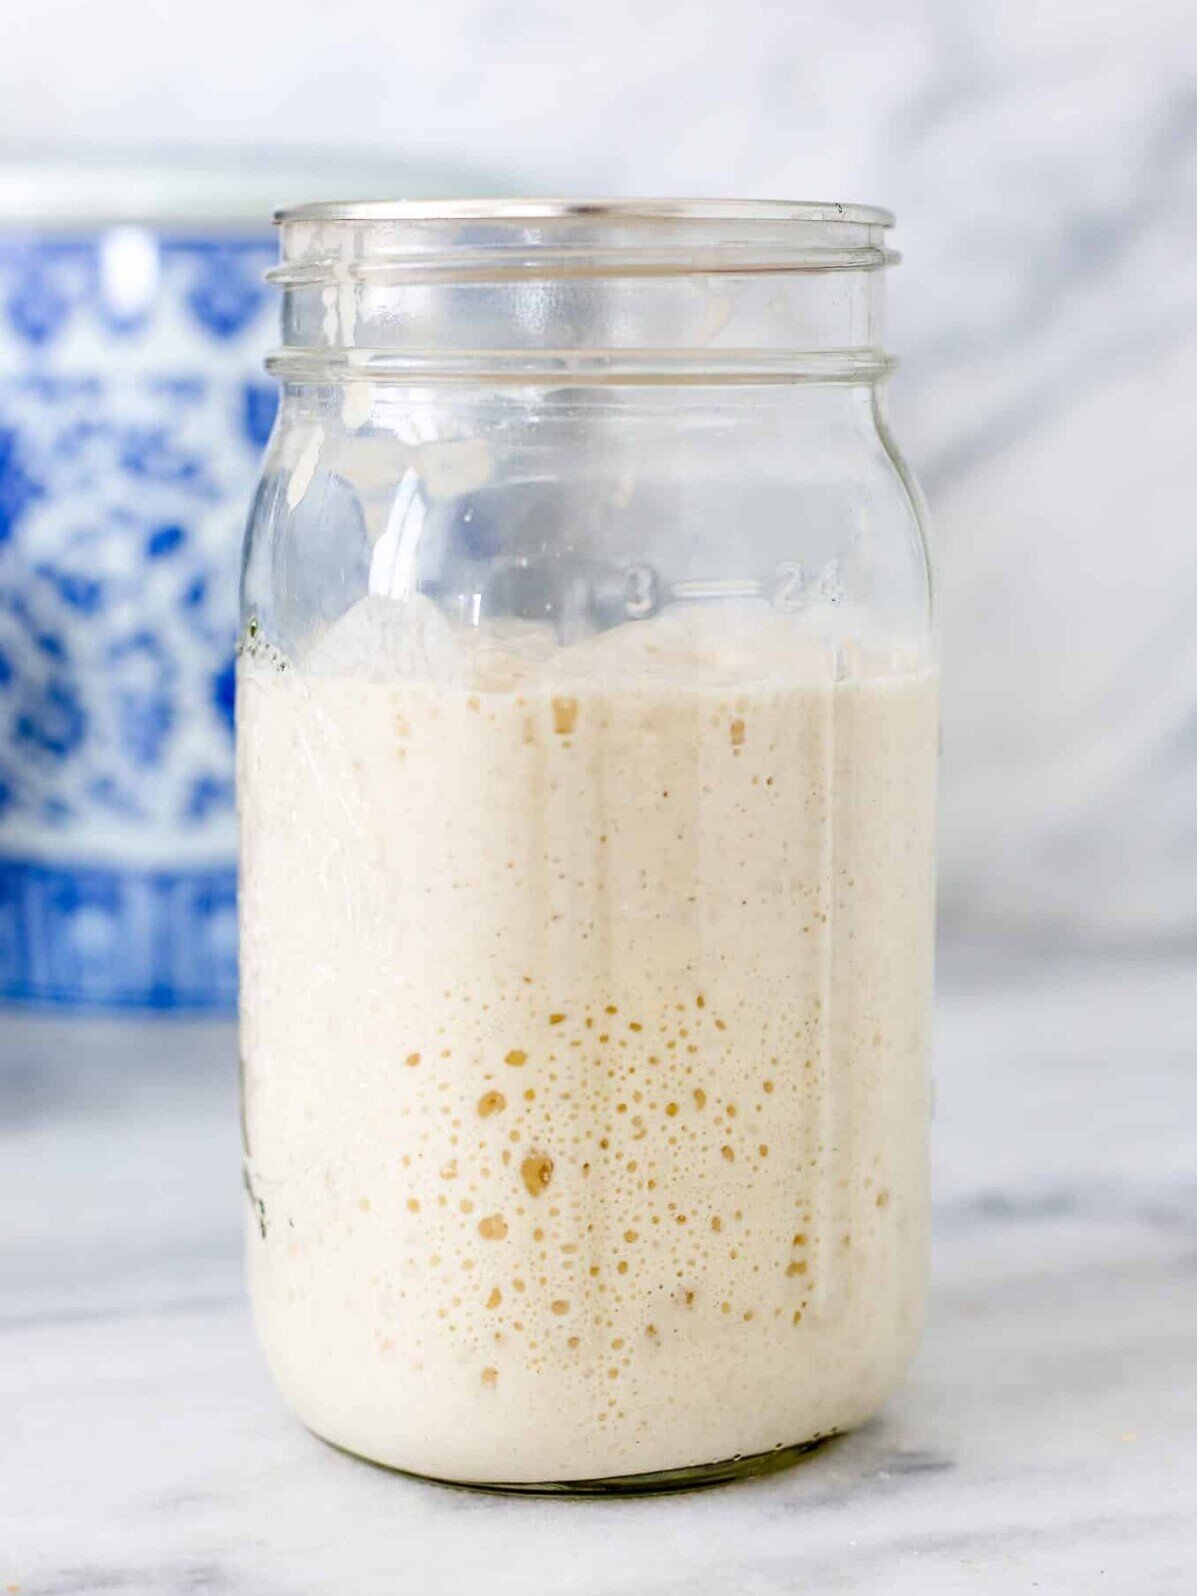
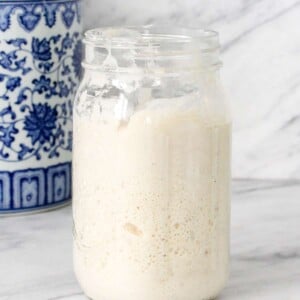
Day 2: Add starter to grow activity. In a clean container, combine 100g of rye flour, 100g of water, and 100g of yesterday’s starter and stir together. Throw out the remaining starter. Cover and let sit out at room temperature for 24 hours. You should start seeing bubbles and some activity.
I like to have two jars that I rotate through. That way, one is clean, dry, and ready for use. If you don’t have two containers, you can use a bowl or a quart container to scale into. Just be sure to get all the starter into your container.
Day 3: Repeat Day 2. Your starter should be just about double or more!
Day 4: Switch to all-purpose flour. Combine 100g all-purpose flour, 100g water, and 100g yesterday’s starter. Throw out the remaining starter. Cover and let sit out at room temperature for 24 hours. The starter will definitely double and have larger air pockets.
If your levain hasn’t doubled at this point, I would let it rise another day with the rye flour before switching to the all-purpose flour.
Day 5: Repeat Day 4. Mine had tripled by this point. You can totally use it to leaven bread!
Days 6 & 7: Maintain a consistent feeding schedule. Repeat Day 4.
Feeding your starter for the long term: You want to achieve controlled growth of your starter when you plan to use it for bread. This is all in the feeding and feeding schedule. Once you have an active starter, you can switch to the following ratio for a stiff levain:
100g water
10g previous day’s starter
100g AP flour
Or this one for a liquid levain:
125g Water
10 g Previous day’s starter
100g AP Flour
Chef Lindsey’s Recipe Tip
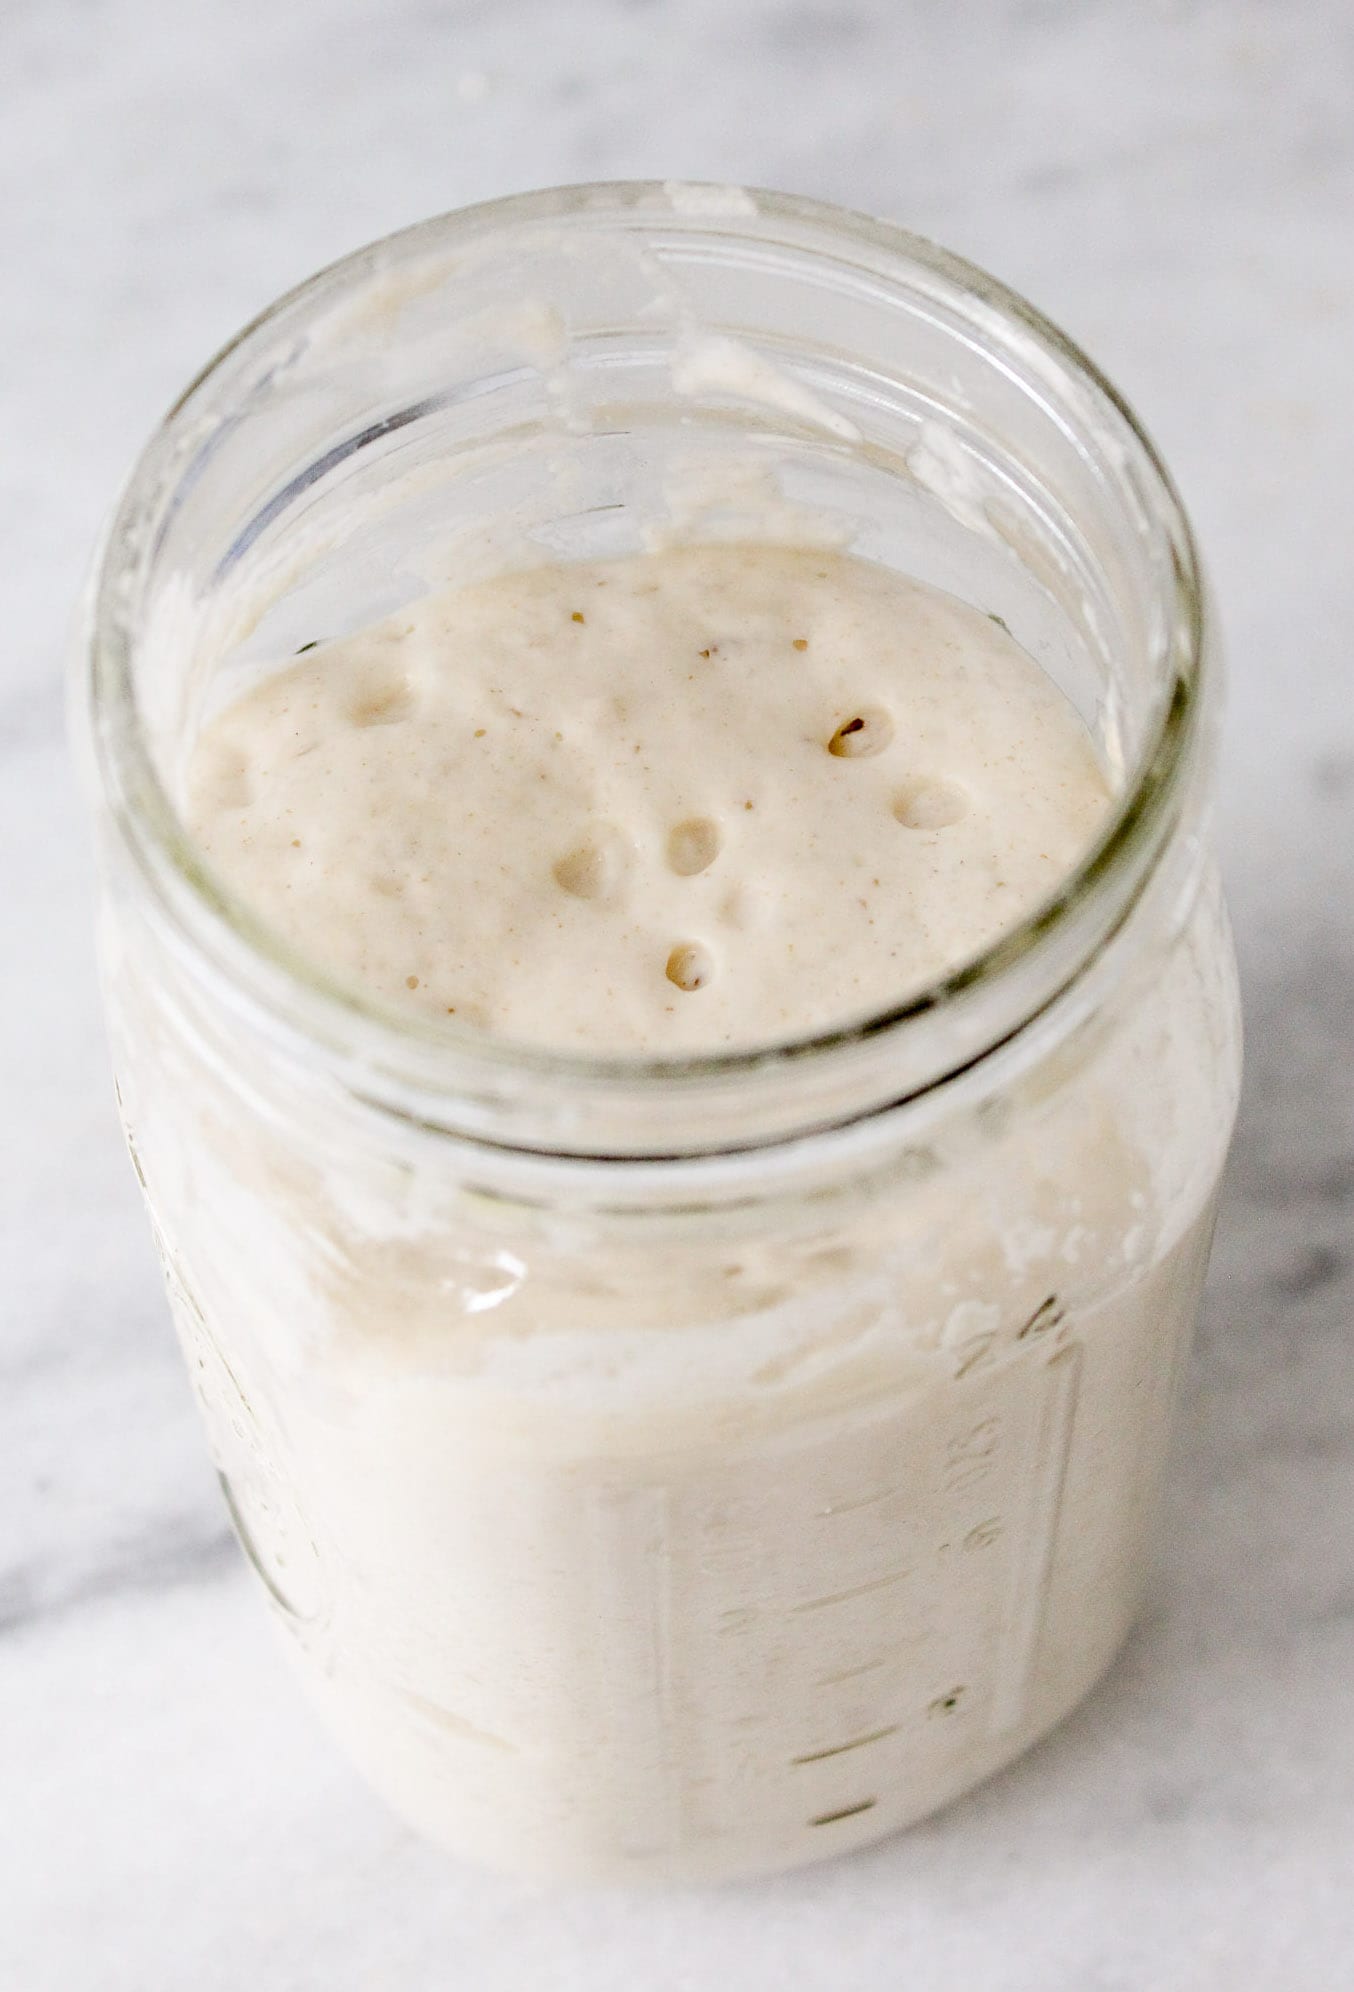
It is easiest to track the rise and fall of my starter if I scrape the sides of my jar clean and use a rubber band to mark where my freshly fed starter lies. This can also help you understand when your starter is peaking and if it has doubled.
Recipe FAQs
Store your starter in a glass jar with a lid. I’ve used quart containers and ball jars. They all work as long as you keep it covered because you don’t want it to dry out. You can keep it at room temperature if you plan to feed it every night. Otherwise, keep it in the refrigerator and take it out every two weeks to feed. You can even put it in the freezer and feed her every other month, but I don’t suggest that for maintaining a happy, strong starter!
Breathe. You probably didn’t. Most sourdough levains can be revived. Here are some common causes of *almost* death: Did you neglect it? Is there that black liquid on top? Don’t worry, that is “hooch,” and it’s your starter’s way of telling you it’s hungry! This happens to the best of us. Leave it out at room temperature for 8 hours, then resume feeding it. The longer she has been neglected, the more consecutive days I will feed her before putting her back in the refrigerator. Two weeks? I’ll feed her two nights in a row. Two months? At least five consecutive days of feeding or until she doubles in 12 hours. Also, consider putting her in the freezer so you don’t have to have a panic attack every 2 weeks!
It totally is wasteful, but it’s in the name of naturally leavened bread, so worth it. You don’t have to throw it away; you can keep sourdough discard in another jar in your fridge and use it for other sourdough discard recipes. My favorites are these sourdough pancakes and sourdough waffles! You can also make these crunchy sourdough discard crackers or sourdough pizza dough to create the best pizza crust. There are many options to avoid wasting.
Part of creating a starter is getting to know it and its many shades. When you first start it, if you use rye flour, it will be brownish-red to grey. This all depends on the type of rye or whole-grain flour you use! Then, when you start to feed it all-purpose, it will slowly turn a medium-cream color. The exact color also depends on how processed your all-purpose flour is. BUT! If your starter is pink, that is mold, and you should throw it directly in the garbage. The environment in a starter isn’t conducive to mold or bacteria growth, but if you use a contaminated container or utensil, you could contaminate your starter.
Recommended Sourdough Bread Recipes
Sourdough Bread Recipes
Easy Sourdough Bread Recipe
Sourdough Bread Recipes
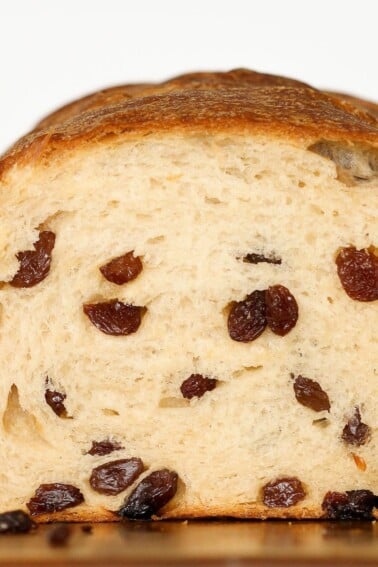
Sourdough Raisin Bread
Dinner Roll Recipes
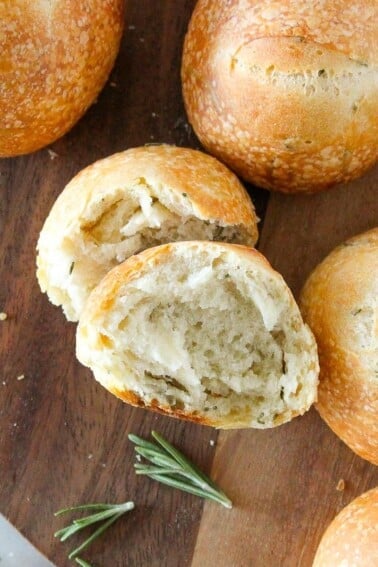
Sourdough Rolls
Sourdough Bread Recipes
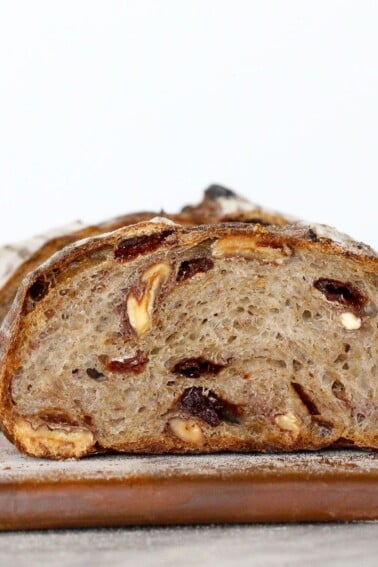
Cherry Sourdough Bread
If you tried this recipe and loved it please leave a 🌟 star rating and let me know how it goes in the comments below. I love hearing from you; your comments make my day!

Sourdough Starter Recipe
Ingredients
- 300 g rye flour
- 700 g water
- 400 g all-purpose flour
Instructions
- Day 1: Combine 100g of rye flour and 100g of water in a clean container, cover it, and let it sit at room temperature for 24 hours. Make sure all the flour has been properly hydrated.
- Day 2: In a clean container, combine 100g of rye flour, 100g of water, and 100g of yesterday’s starter. Throw out the remaining starter. Cover and let sit out at room temperature for 24 hours. You should start seeing bubbles and some activity.
- Day 3: Repeat Day 2. You may already see some fermentation activity. Your starter should be just about double or more!
- Day 4: Combine 100g all-purpose flour, 100g water, and 100g yesterday’s starter. Throw out the remaining starter. Cover and let sit out at room temperature for 24 hours. The starter will definitely double and have larger air pockets.
- Day 5: Repeat Day 4. Mine had tripled by this point. You can totally use it to leaven bread!
- Days 6 & 7: Repeat Day 4.
- Feeding your starter for the long term: You want a controlled growth of your starter when you are going to use it for bread. This is all in the feeding. Once you have an active starter, you can switch to the following ratio for a stiff levain:100g water10g previous day's starter100g all-purpose flourOR this one for a liquid levain:125g water10g previous day's starter100g all-purpose flour
Video
Notes
Nutrition
Before You Go
I hope you enjoyed creating your own sourdough starter! Now that you have established a strong levain. Be sure to check out other sourdough bread recipes, such as these amazing sourdough cinnamon rolls or these sourdough rolls.


Loved this guide Lindsey, really easy to follow and Im going to give it a try at the weekend. Will share pics. thanks and ove the blog.
Thanks! Good luck, Pauline!
thank you for your post! On recipe, I tried it and it is delicious thank you so much!
I’m glad, Ched
Only 9 hours I refreshed mine, today Day 2, and it has already tripled. Beautiful thing!
Check you out!!! Nicely done!
I really love these, Thanks for the recipe.
I really love to try this.
So sorry I didn’t see this sooner! I will get right on it!! Thanks so much!!
Easiest recipe on my site 😉 Good to hear from you!
Thanks for this informative post!
So, you don’t remove some of the starter as you’re building it? You just keep adding more and more to your jar? I’d better get a much larger jar.
No so you are weighing a specific amount of the starter each time. I go back and forth between two jars to make it easier. During the creation process you are using 100g of your old starter plus more flour and water. Then during the maintenance process you use just 10 g of your old starter. I hope that clarifies. I am going to re-write some of the instructions to make that more clear!
Excellent guide here, Lindsey! We’ve been baking all sorts of breads here, and sourdoughs have been some of the more popular. Robbie has been enjoying helping making the dough each day…and then helping eat said bread with jam later in the day. (Heck, it’s given us something to do lately!) Hopefully my starter doesn’t kick the bucket, but if it does then I’m coming back here to your guide! Also, “If you like your levains like your women; low maintenance”…HAH!
I am sure your starter won’t kick the bucket! It sounds like you and Robbie are busy bees in the kitchen! There is nothing better than fresh bread with butter and jam! Love!