This post may contain affiliate links. Please read our disclosure policy.
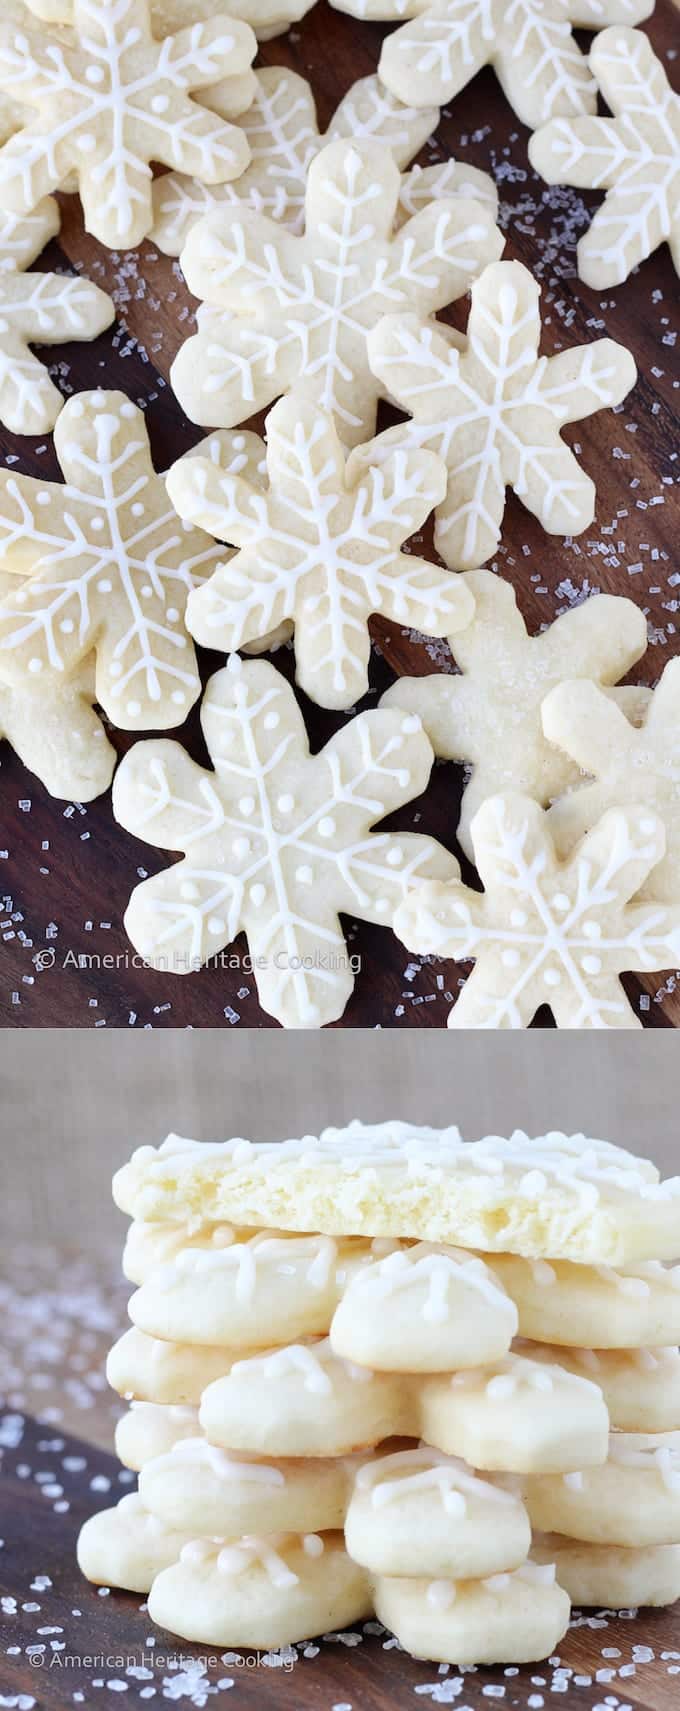
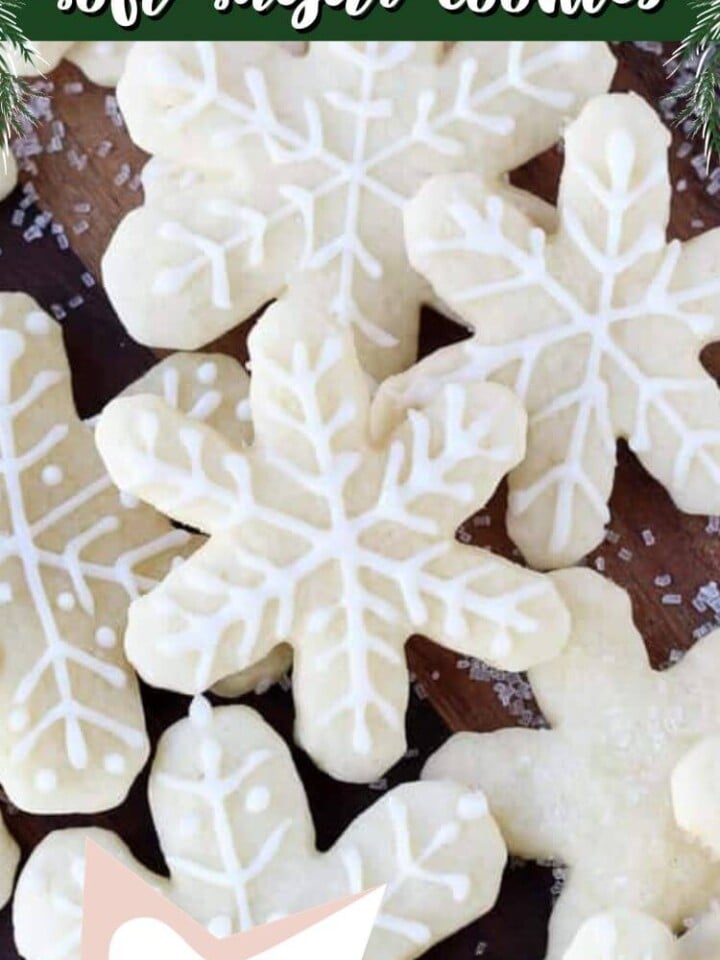
This is the perfect soft sugar cookie recipe. Made in 1 bowl with only 6 ingredients, it is incredibly easy! The dough is easy to roll, won’t spread when baked and is soft and slightly chewy with a rich vanilla flavor.


A Quick Look At The Recipe
This is a brief summary of the recipe. Jump to the recipe to get the full details.
Jump to RecipePrep Time
15 minutes
Cook Time
8 minutes
Decorating Time
30 minutes
Total Time
23 minutes
Servings
40 Cookies
Difficulty
Easy
Calories *
128 kcal per serving
Technique
Make cookie dough, roll, chill, cut and bake, make royal icing, ice cooled cookies.
Flavor Profile
Vanilla sugar cookie with a lemon royal icing.
* Based on nutrition panel
Perfect cookies! I made these in a stand mixer and they turned out great! Super easy to make, I cut them into rounds, hearts, and stars. I will be making these for Christmas to use in a cookie decorating session with my little niece and nephew; they will love it!⭐⭐⭐⭐⭐
Mara
Why This is the Best Soft Sugar Cookie Recipe
- An easy cookie to make & roll. The cookie dough is made in one bowl with melted butter using only pantry ingredients! The dough rolls easily doesn’t even need flour if you use my parchment technique!
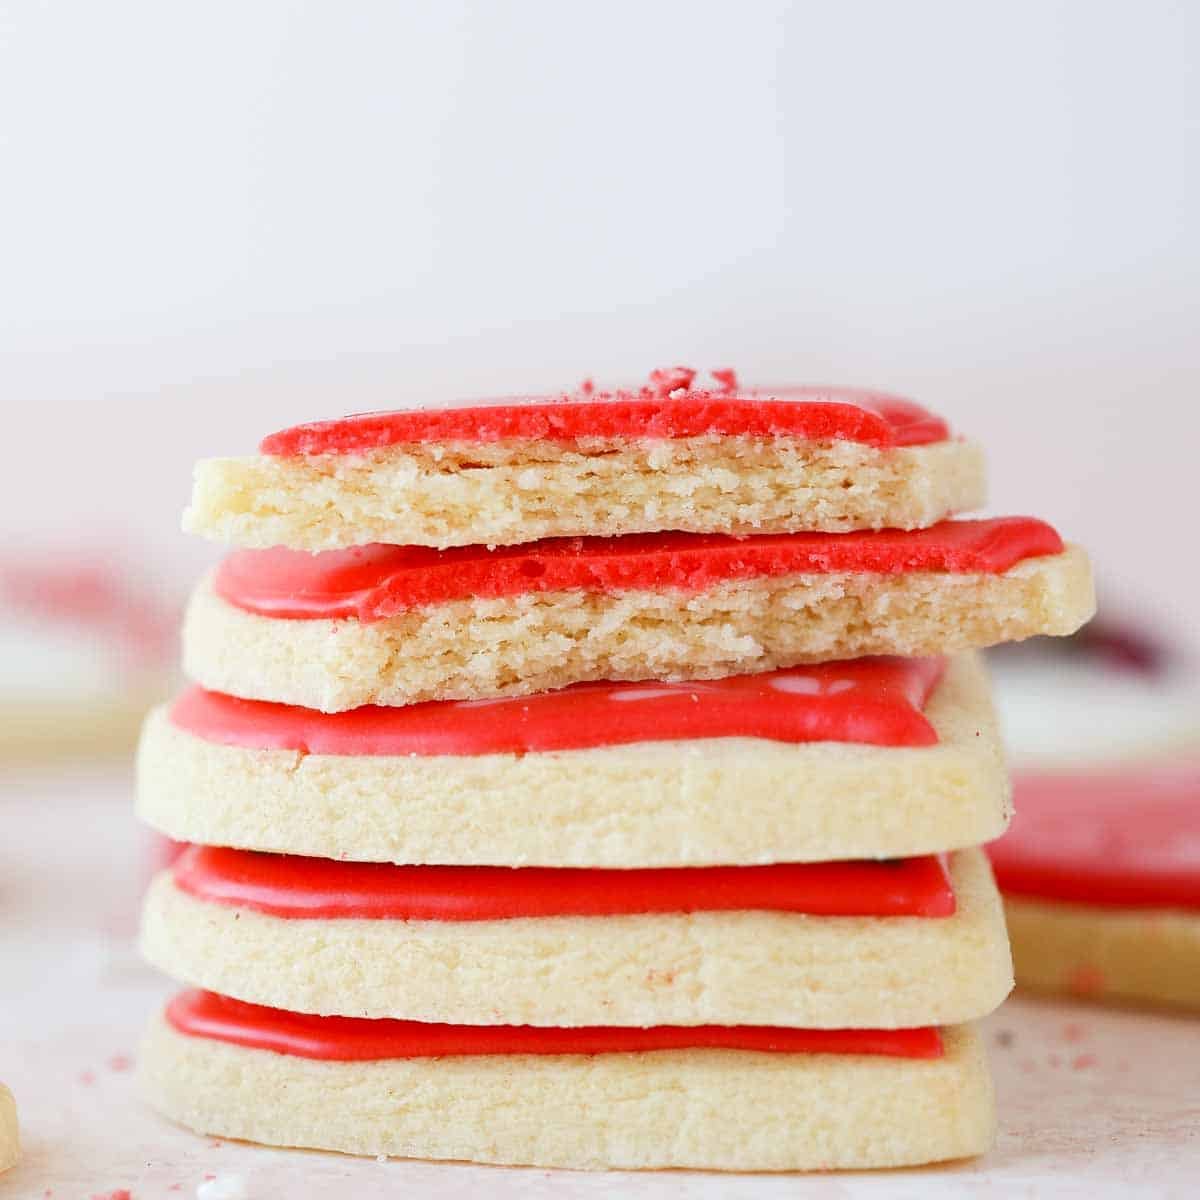
- Delicious cookie even undecorated. Many recipes may make pretty rolled sugar cookies, but not many can be delicious, consistent AND beautiful! The cookie is perfectly sweetened with a delightful vanilla flavor. It is soft and slightly chewy.
- The perfect decorating cookie. This recipe makes soft cookies that won’t spread when baked; they will hold even the most detailed shape! They also bake flat for a smooth decorating surface. This makes it easier to make detailed designs without running or pooling icing.
Table of Contents
This is a completely updated rolled sugar cookie recipe. It is more like the soft, slightly chewy sugar cookies we sold in our bakery. This easy cookie bakes flat for easy decorating, won’t spread and has a wonderful flavor without any icing!
In the photos I’ve decorated them with my tried and true royal icing recipe but you could use a easy cookie icing, sanding sugar or leave them unadorned. These are the perfect cut-out sugar cookie to add to your holiday tray with chewy molasses cookies, peanut butter blossoms, snowball cookies, and pfeffernusse.
This was originally posted in 2014, and the recipe make a soft but cakey rolled sugar cookie. It is phenomenal but not what is pictured. I have left the original recipe in the Notes in the Recipe Card below, so that if you are returning, you can make the recipe you came for.
Ingredients Needed
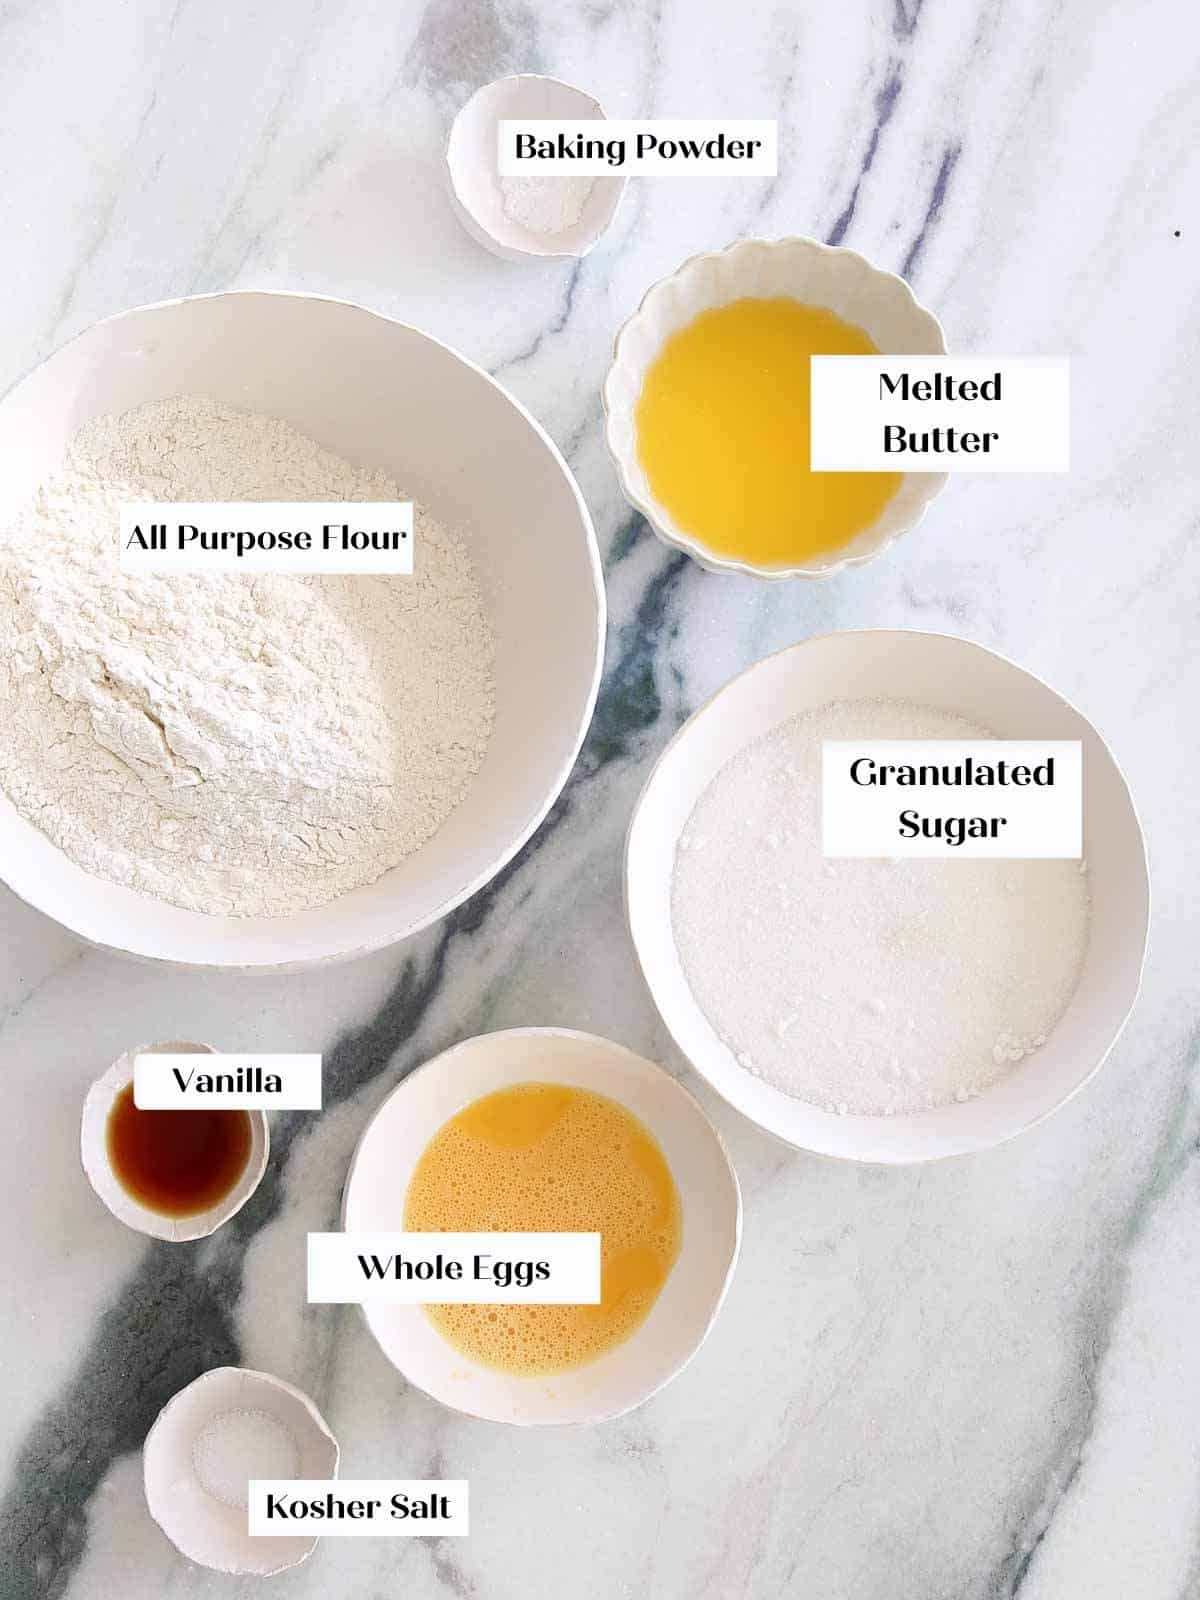
- All-Purpose Flour: Both all-purpose flour or pastry flour would work in these cookies. There is just enough gluten to create structure without making them tough. Don’t even consider looking at bread flour in this recipe. No, ma’am.
- Baking Powder: There is just enough baking powder to leaven these cookies without making them puffy. Too much will create a dome on the top of the cookies.
- Kosher Salt
- Butter: I use unsalted butter for baking, because you want to control the amount of salt you are adding. The melted butter adds fat and moisture and makes these simple cookies chewy and soft.
- Granulated Sugar: There is just enough sugar for the perfect flavor, but not so much that makes the cookies spread. Unlike this chewy sugar cookie recipe, which are intended to spread, these soft sugar cookies hold their shape.
- Whole Egg: The eggs are here to add fat, moisture and emulsify the dough. The fat from the yolk adds richness and helps keep the cookies chewy.
- Vanilla Extract
See the recipe card for full information on ingredients and quantities.
Variations & Substitutions
- Experiment with icing: Try with this cream cheese icing for cookies or simply brush with beaten egg white then dip in sanding sugar or sprinkles. Decorate for Valentine’s Day like these Valentine’s Day Cookies. The same cookie recipe but with a whole different look!
- Flavor the dough: Tired of plain vanilla? Heard. Try using a little almond, peppermint, or coffee extract instead. You can also zest lemon, orange or another citrus into the sugar before mixing. You could also make a chocolate variation with these soft chocolate sugar cookies or a cinnamon version such as my favorite cinnamon sugar cookies!
- Add sprinkles, chocolate chips or other add-ins: That’s right, you can (and should) add some fun mix-ins to the dough. Try chopped nuts, mini chocolate chips, sprinkles or other small additions that will still allow you to roll and cut the dough.

Professional Tips for Making Cut-Out Sugar Cookies
- Roll out using 2 pieces of parchment paper. I roll this dough between two pieces of parchment, which eliminates the need for additional flour. No mess and no added flour to the dough (this dampens the flavor, makes them dry and more brittle).
- Roll at room temperature. This dough rolls best at room temperature. You can either refrigerate it then let it sit out again before rolling, or simply roll it right after mixing.
- Don’t skip the chilling. You can make the dough, roll, cut, and freeze for 15 minutes before baking, and this recipe will make perfect looking cookies. However, the cookies will be ever so slightly tough. It is best to refrigerate the dough after rolling and then right again before baking. This makes the most tender, soft sugar cookies.
How to Make Soft Cut Out Sugar Cookies
Use these instructions to make the perfect soft sugar cookies! I’ve also included my recipe for royal icing and how to make it. If you want a full tutorial, my royal icing with meringue powder post will tell you everything there is to know about making and using royal icing in this post.
Make the cookie dough:
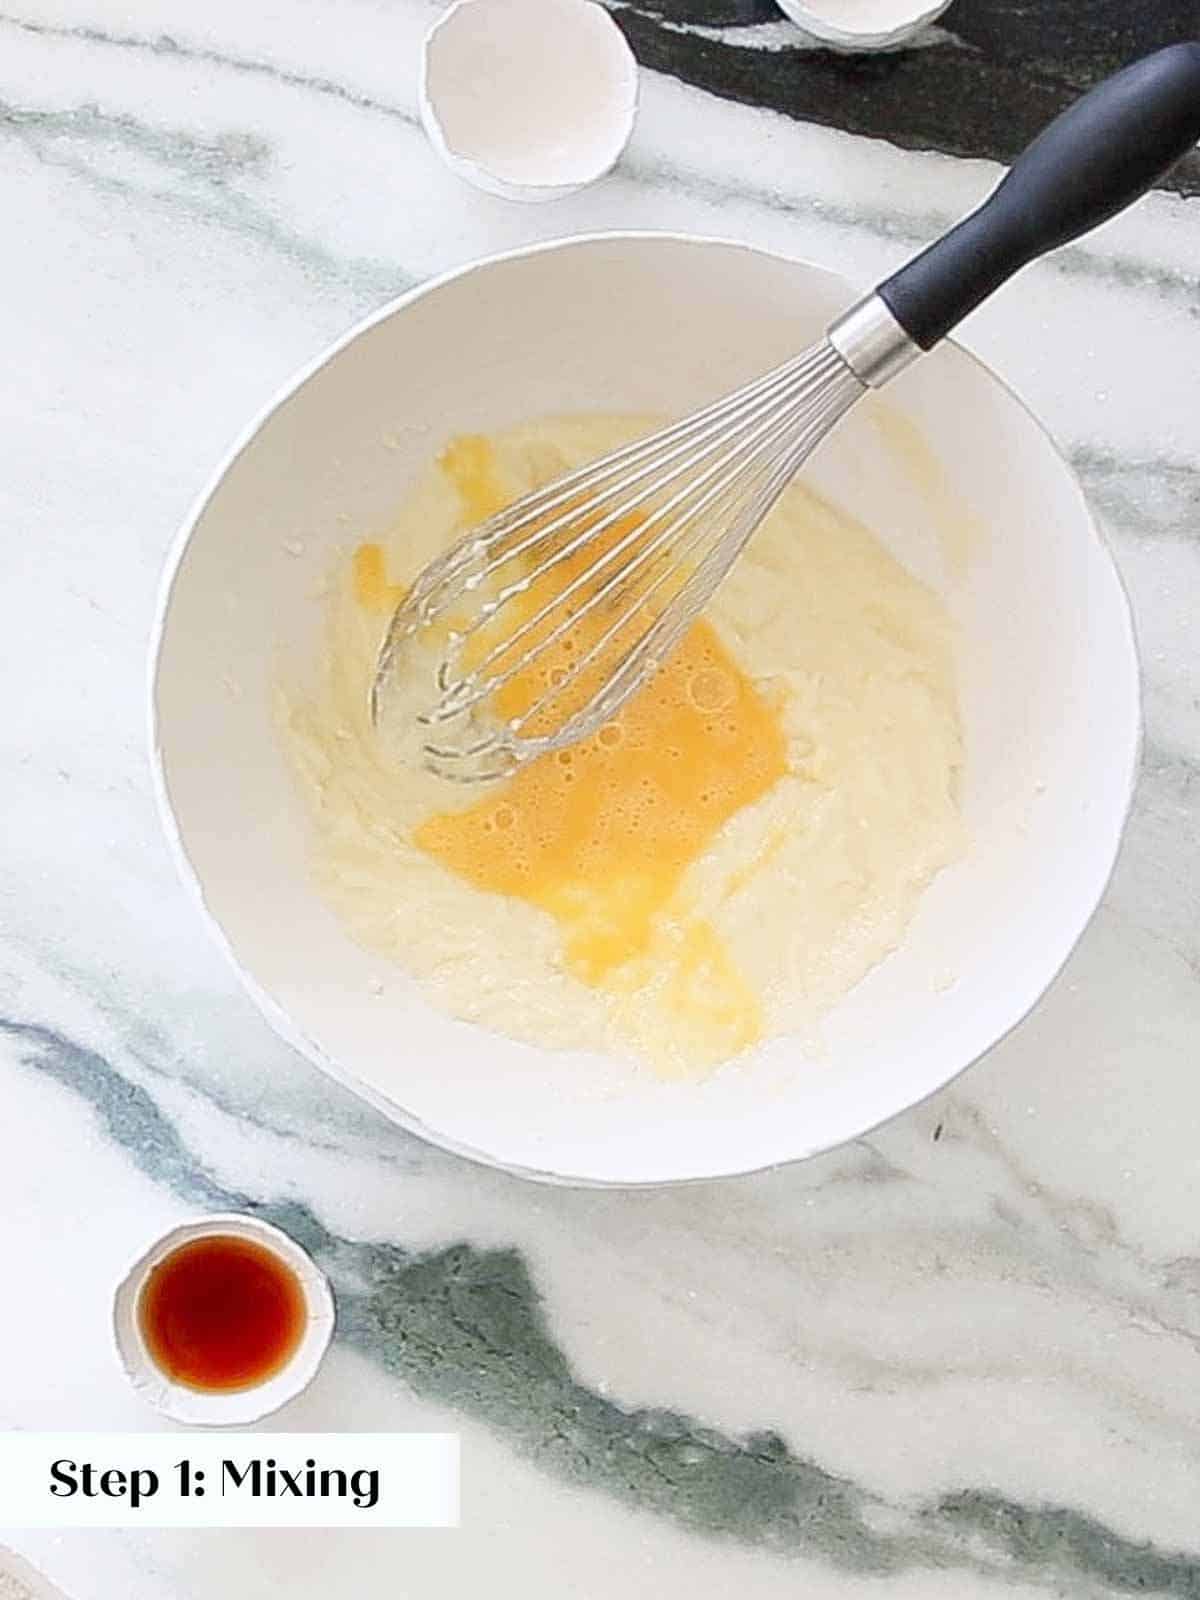
Step 1: In a large bowl whisk together flour, baking powder, and kosher salt. Set aside.
Steps 2: In another large bowl, melt the butter (I used the microwave) just until melted but not hot. Whisk in the sugar followed by the egg and vanilla. Whisk vigorously until the mixture is emulsified. You shouldn’t see any streaks of butter or egg.
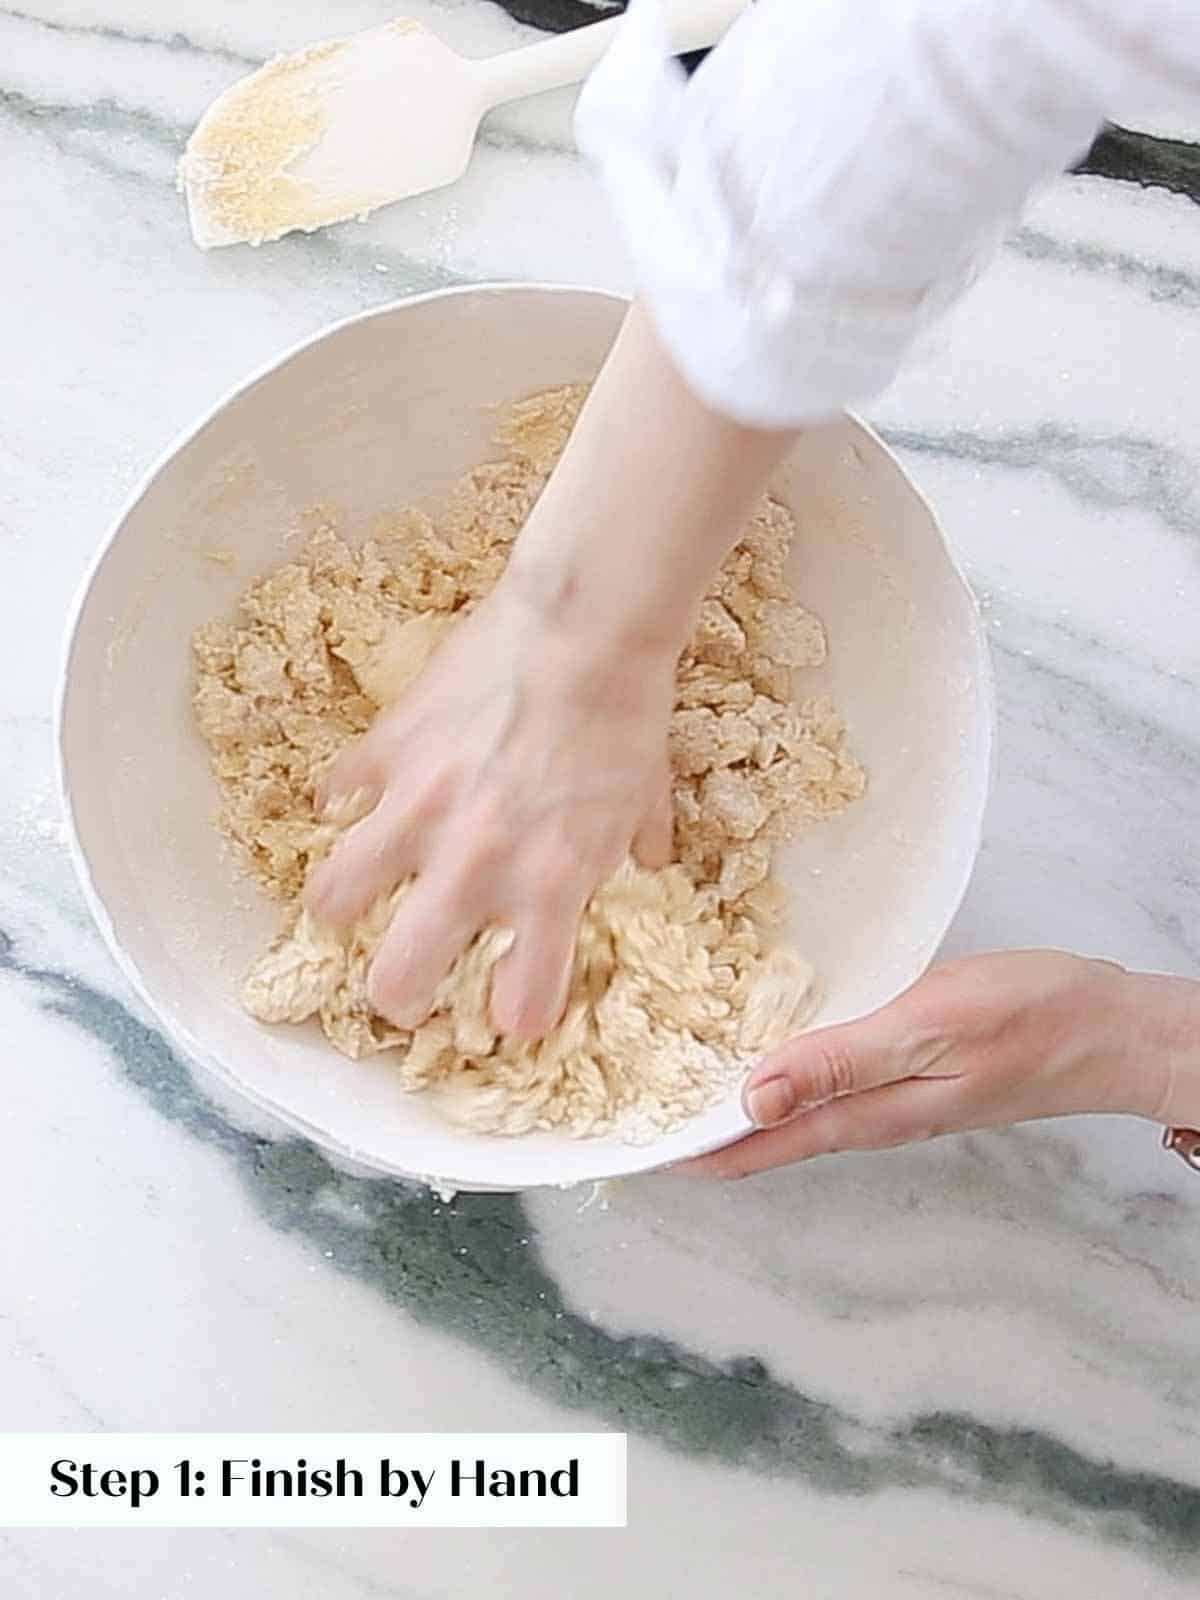
Step 3: Slowly stir in the flour mixture.
It does look like a dry dough, so I like to finish by hand, squeezing the dough together. This incorporates the flour faster without developing too much gluten.
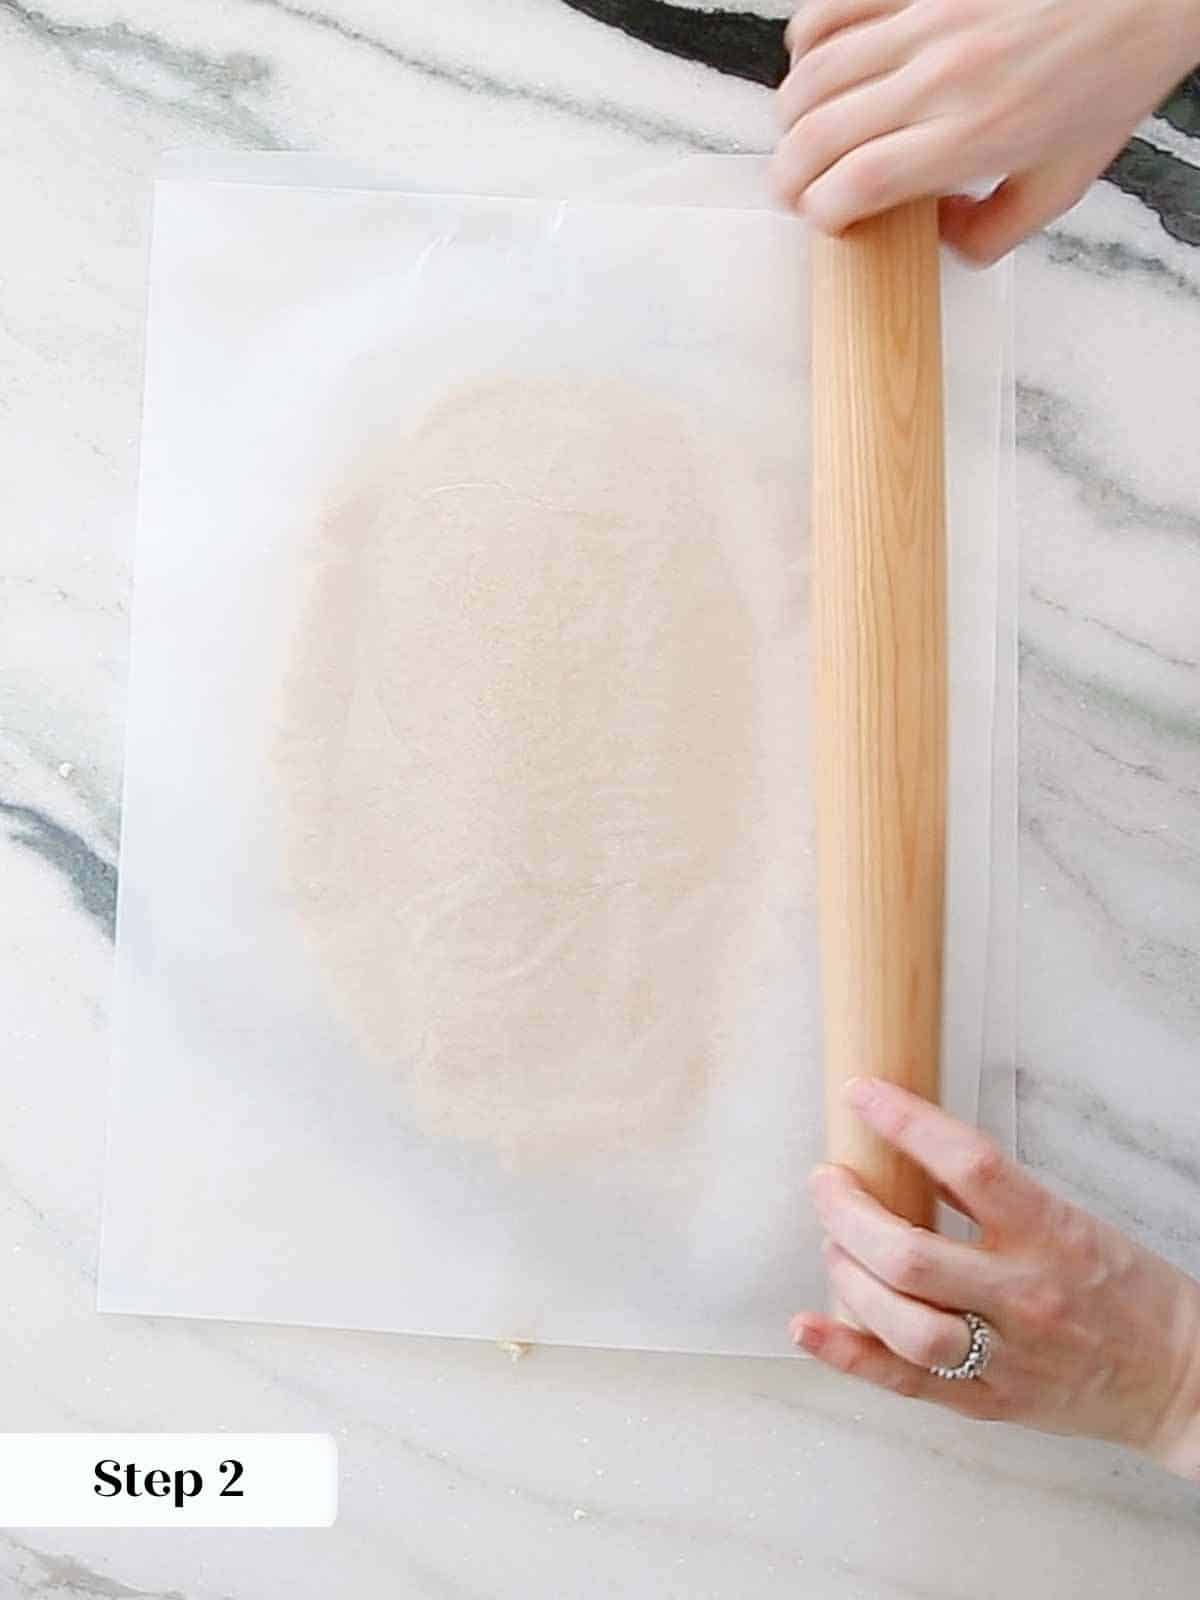
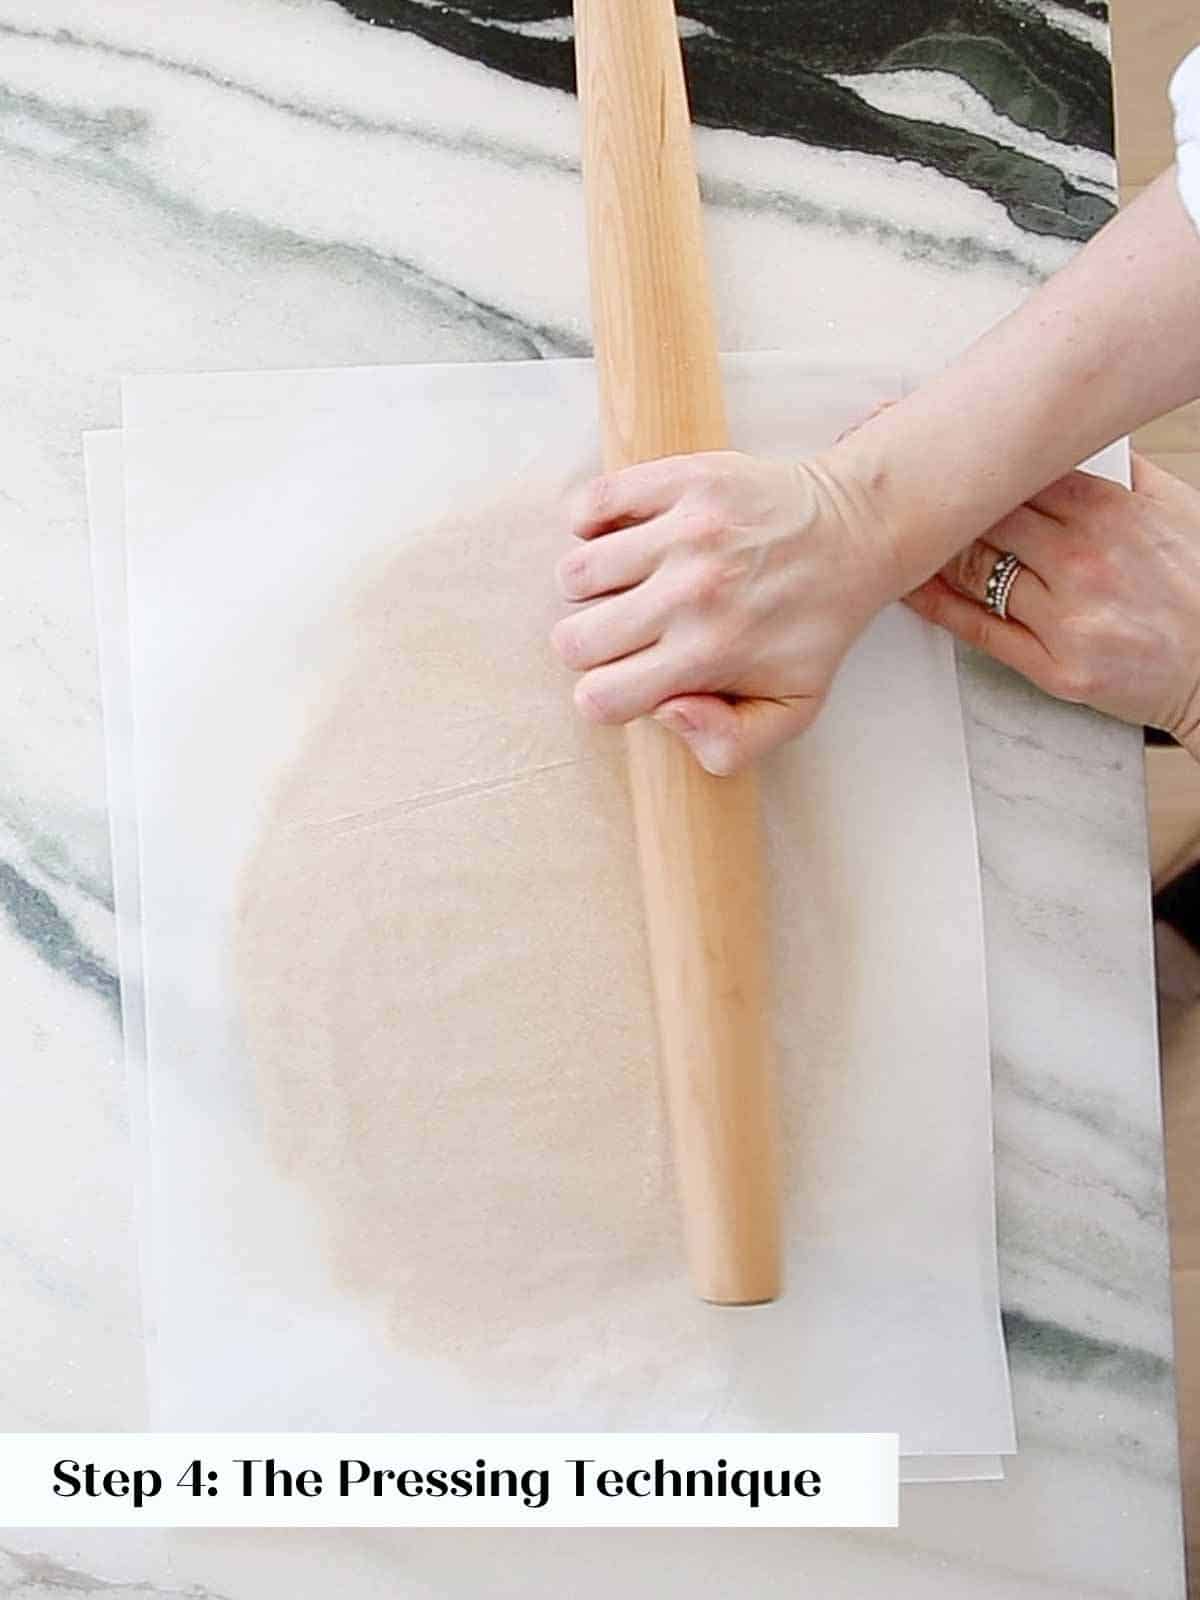
Step 4: Roll your dough while it is at room temperature. Roll the dough to approximately ¼ inch. You will have the best results if rolled between two pieces of parchment, but you can also roll out on a lightly floured surface.
Chef Lindsey’s Recipe Tip
Chef Lindsey’s Dough Pressing Technique: To easily smooth and flatten cookie dough between pieces of parchment paper, I like to press the dough away from me with a rolling pin in one hand while the other hand holds both pieces of parchment securely. This is essentially creating a (wo)man-powered dough sheeter! This works best with a flat rolling pin rather than a tapered French pin, but you can achieve the same results with a tapered as I did in the photos.
Step 5: Refrigerate the dough until chilled.
This will only take 30 minutes, but I like to give it a full 2 hours or overnight to let the gluten relax.
Cut & bake cookies:
Step 6: When you are ready to bake, preheat your oven to 325° F convection or 350° F conventional, and line two baking sheets with parchment paper.
If you rolled your dough out between sheets of parchment, you can use those to line your pans.
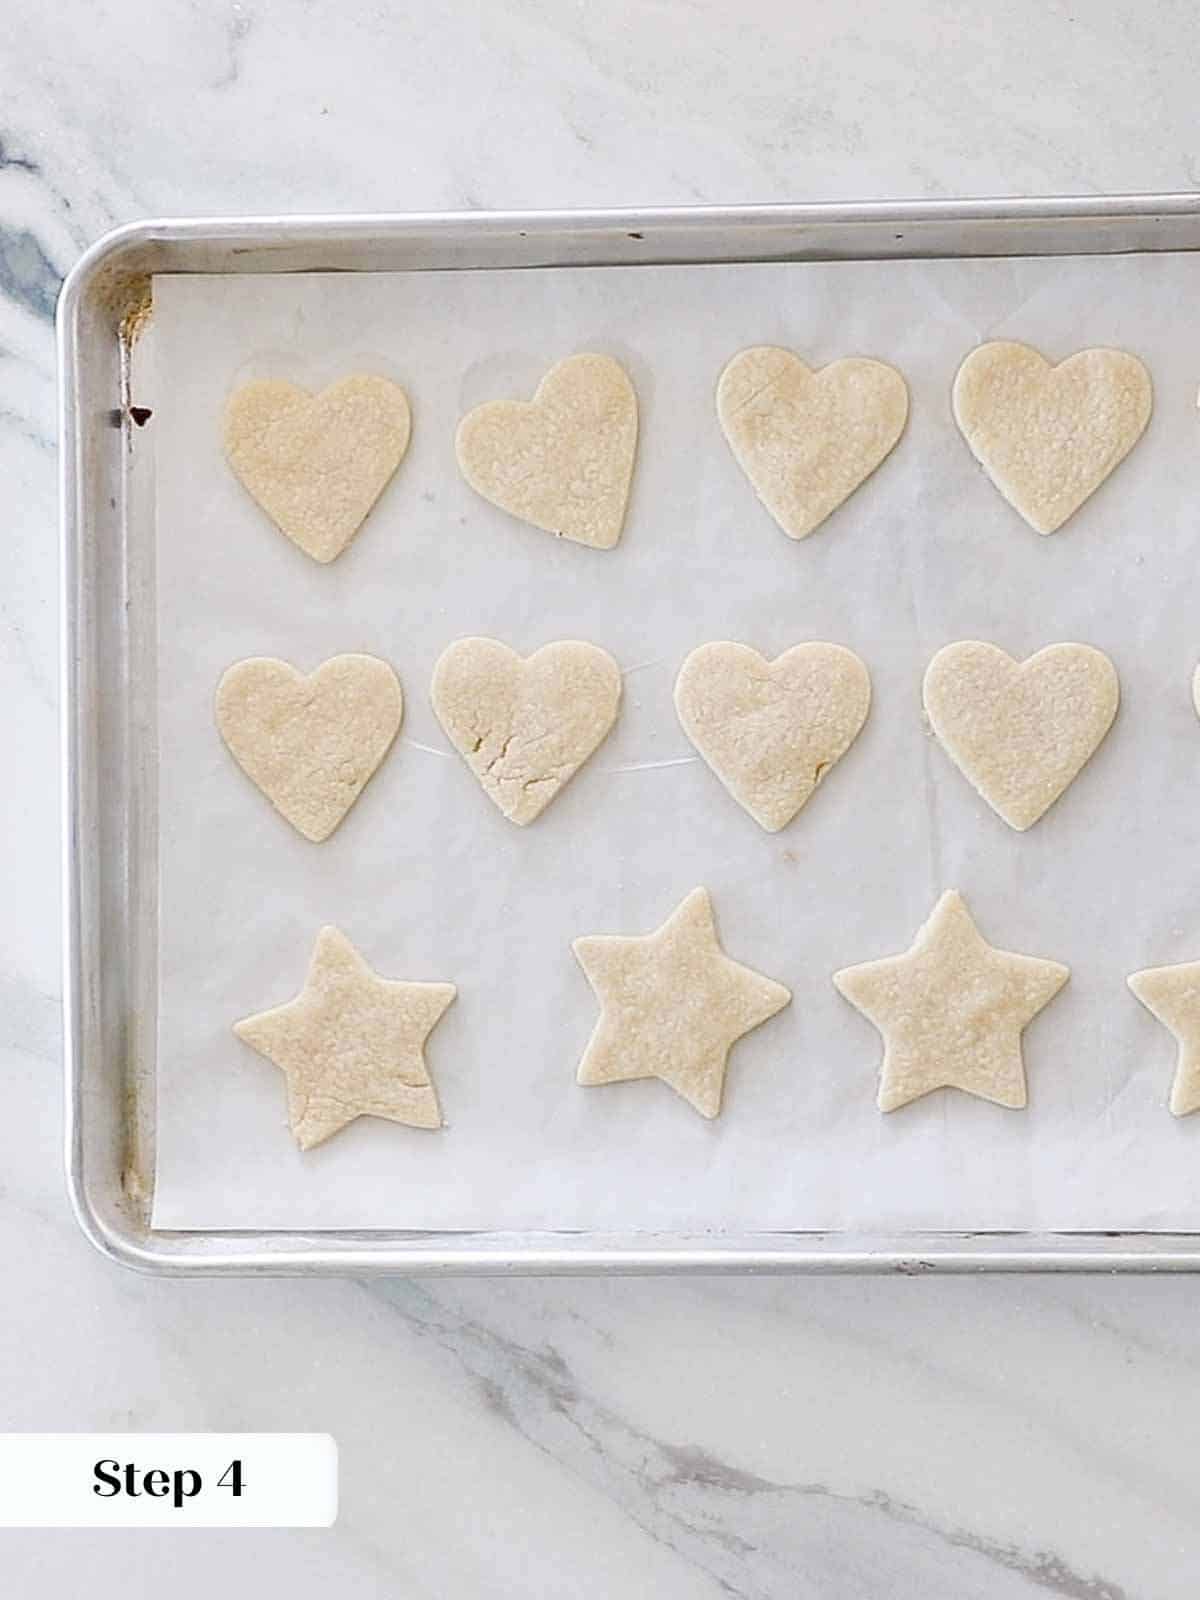
Step 7: Unstick the parchment from both sides of the dough, then cut shapes with a lightly floured cookie cutter. Chill the cookies before baking. It will only take about 20 minutes.
Step 8: Bake in preheated oven for 7-9 minutes or until the cookies look matte in the center and have a few small cracks. Some of the edges might have begun to brown.
I bake all the same shapes on one sheet to ensure even baking.
Step 9: Cool completely before icing.
Make Royal Icing:
Step 1: In a large bowl or in the bowl of a stand mixer fitted with the whisk attachment, combine the dried egg whites and lemon juice. Whisk until soft peaks form.
Step 2: Add all the powdered sugar and whisk to combine.
Separate the icing into different bowls and add food dye. Be sure to keep an eye on the consistency and stop adding if it gets too thin.

Step 3: For outlining using the ribbon test. The icing should cascade slowly off your spatula and remaining clearly visible on the surface for a few moments (about 5-6 seconds) before slowly disappearing.
Step 4: For flooding using the same ribbon test, the icing should cascade off your spatula and almost disappear instantly into the rest of the icing.
You can make the icing too thin and then it won’t set hard. It will take a little practice to get your perfect consistency: thin enough to easily spread but not so thin as to not set or be transparent.
Step 5: Transfer outline and flooding icings to separate bags.
A quick royal icing tutorial:
This is a very quick overview of icing sugar cookies with royal icing.
Step 1: Starting smaller than you think, cut the tip off the outline piping bag. Test a line. If it squiggles when you squeeze it, cut it just a little bigger. Test and repeat until you get a thin straight line. Repeat the same process with the flooding bag but cut it large enough to get a nice flow of icing without squeezing too hard.
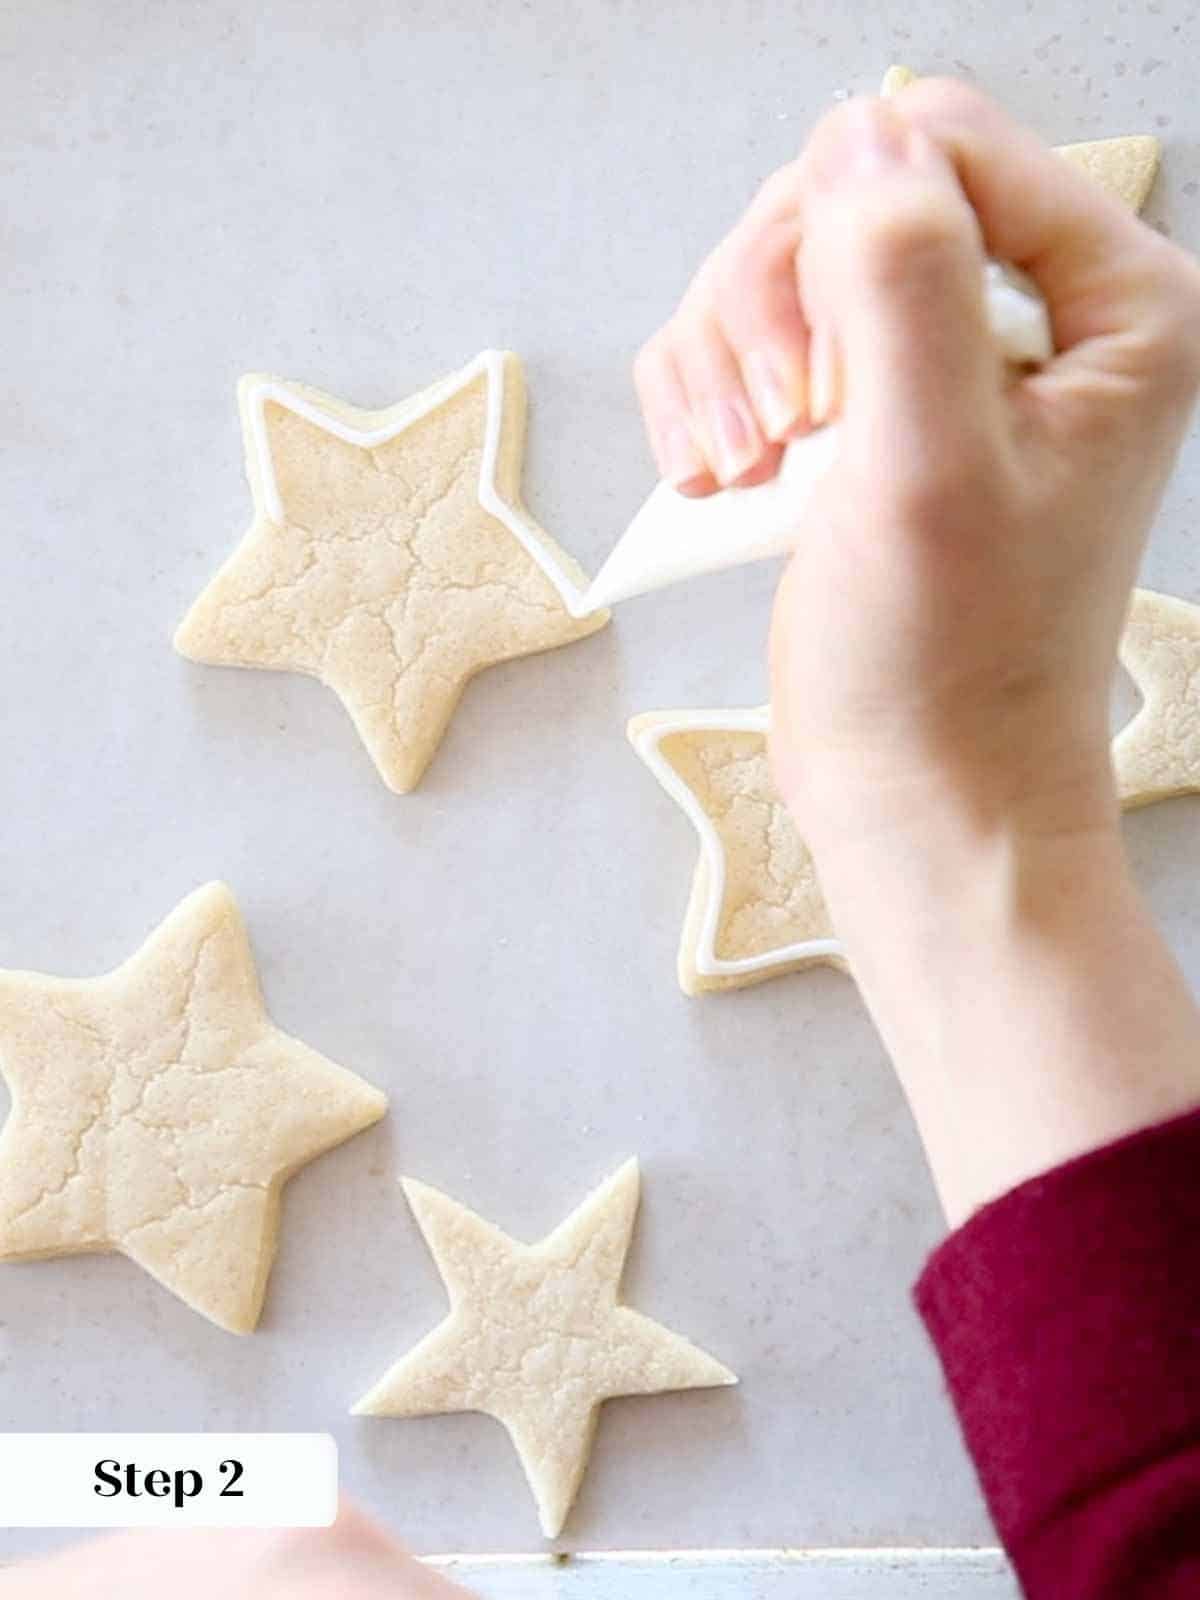
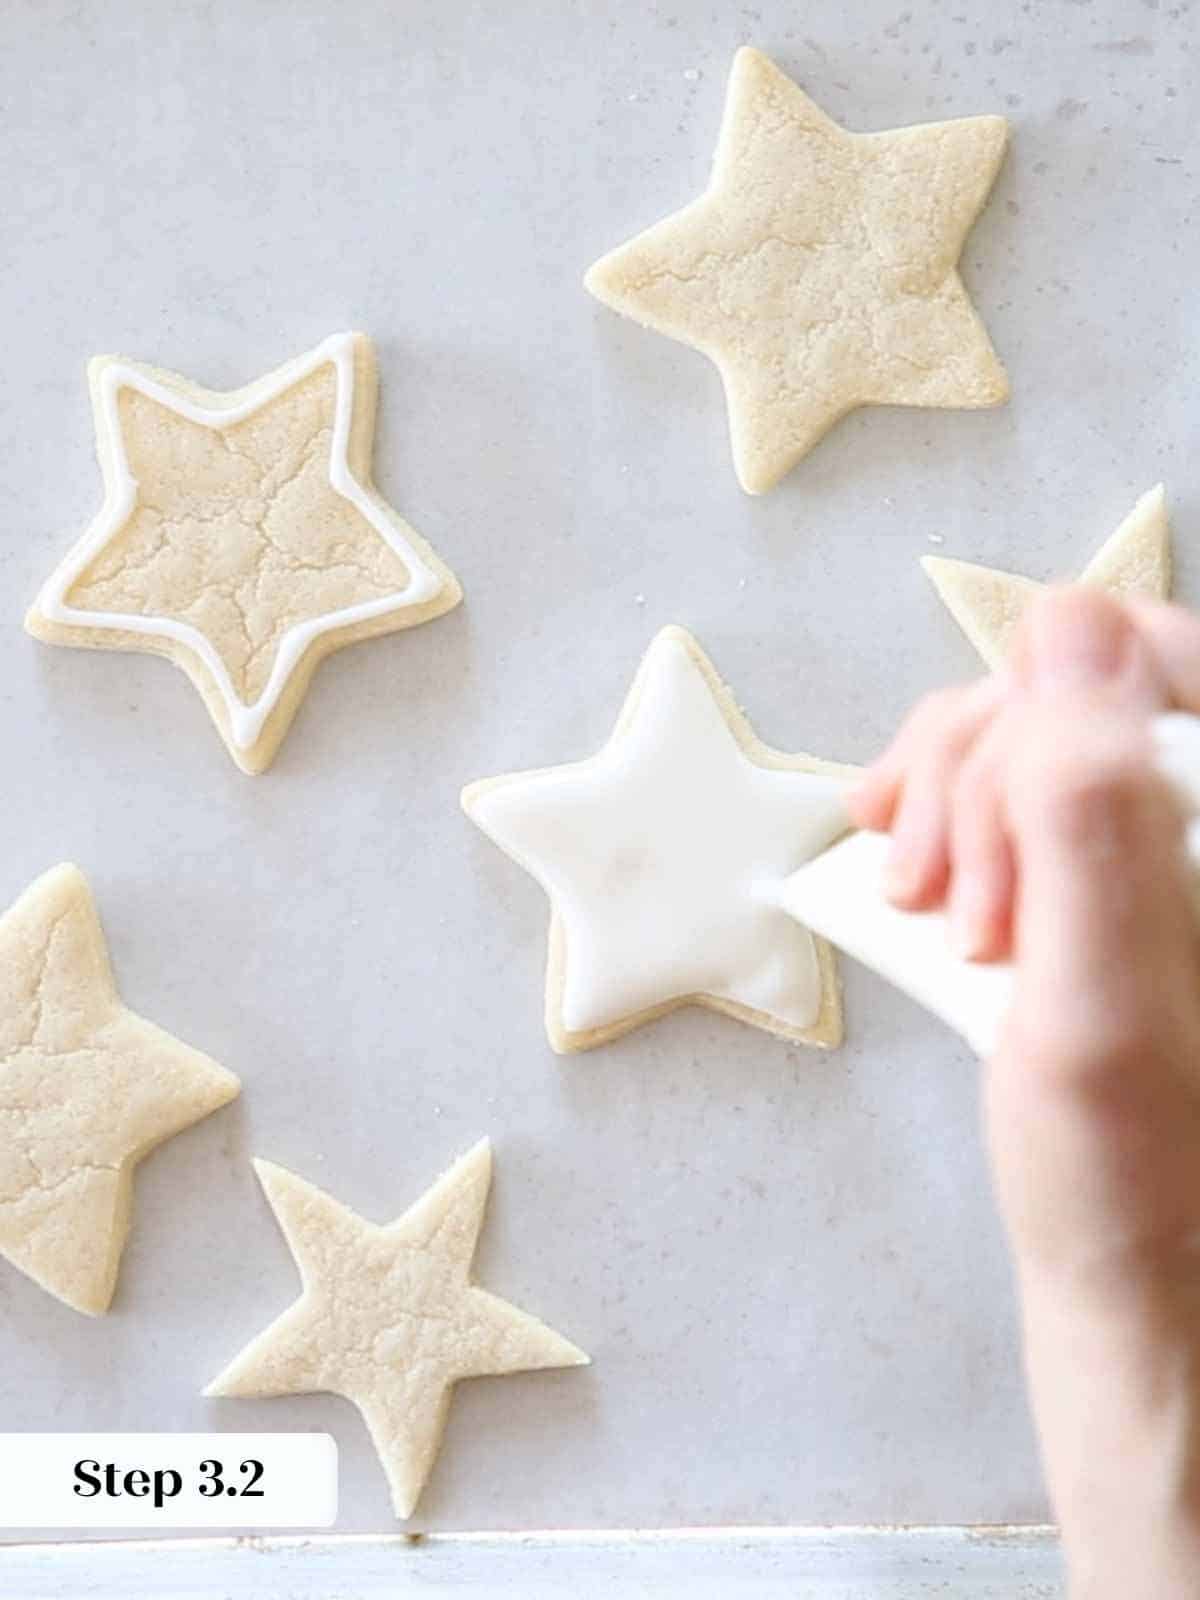
Step 2: Working with 1-3 cookies at a time, use the outline bag to trace the outline of the cookie. Leave a 1/16th in border around the edges so it doesn’t run off the cookie!
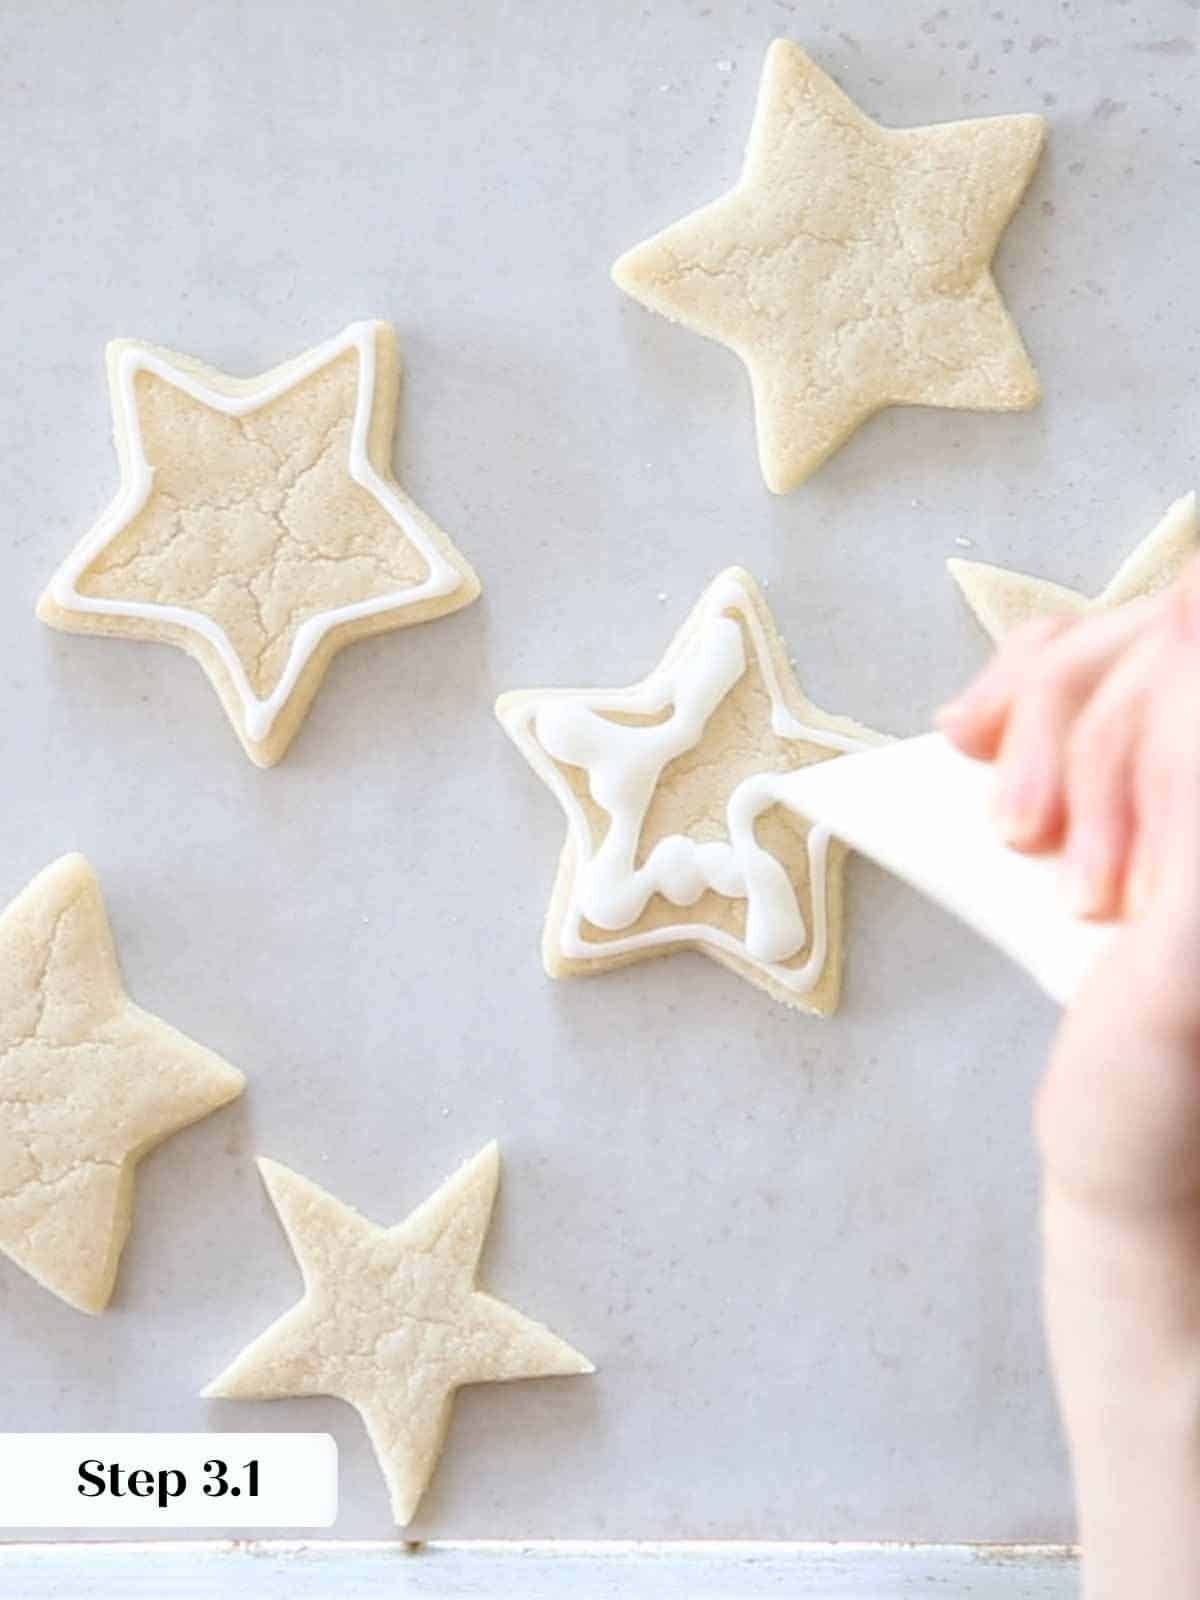
Step 3: Switch to the flooding bag and squeeze a squiggle of icing inside the outline across the cookie you are icing. Use a cake tester, wooden skewer, or be lazy like me and use the tip of the flooding piping bag, to spread the icing around into one even layer. You should not be able to see the cookie through the icing, but it should not be so thick that it flows over the outline. The outline should blend perfectly with the filling. If it doesn’t and you have a visible line, you can try to blend them or you can just outline fewer cookies before flooding next time.
One of the benefits of using the piping bag to spread, is that you can add more icing easily as you go.
Step 4: Let the icing set at least 30 minutes before adding another layer of icing. Say you are piping buttons on Santa’s coat, let the bottom red set before adding the black buttons, or it will sink in and not be crisp. Same goes for colors next to each other, for example, the red part of Santa’s cap and the white part. Let the red (or white) set first, then pipe the outline for the next part.
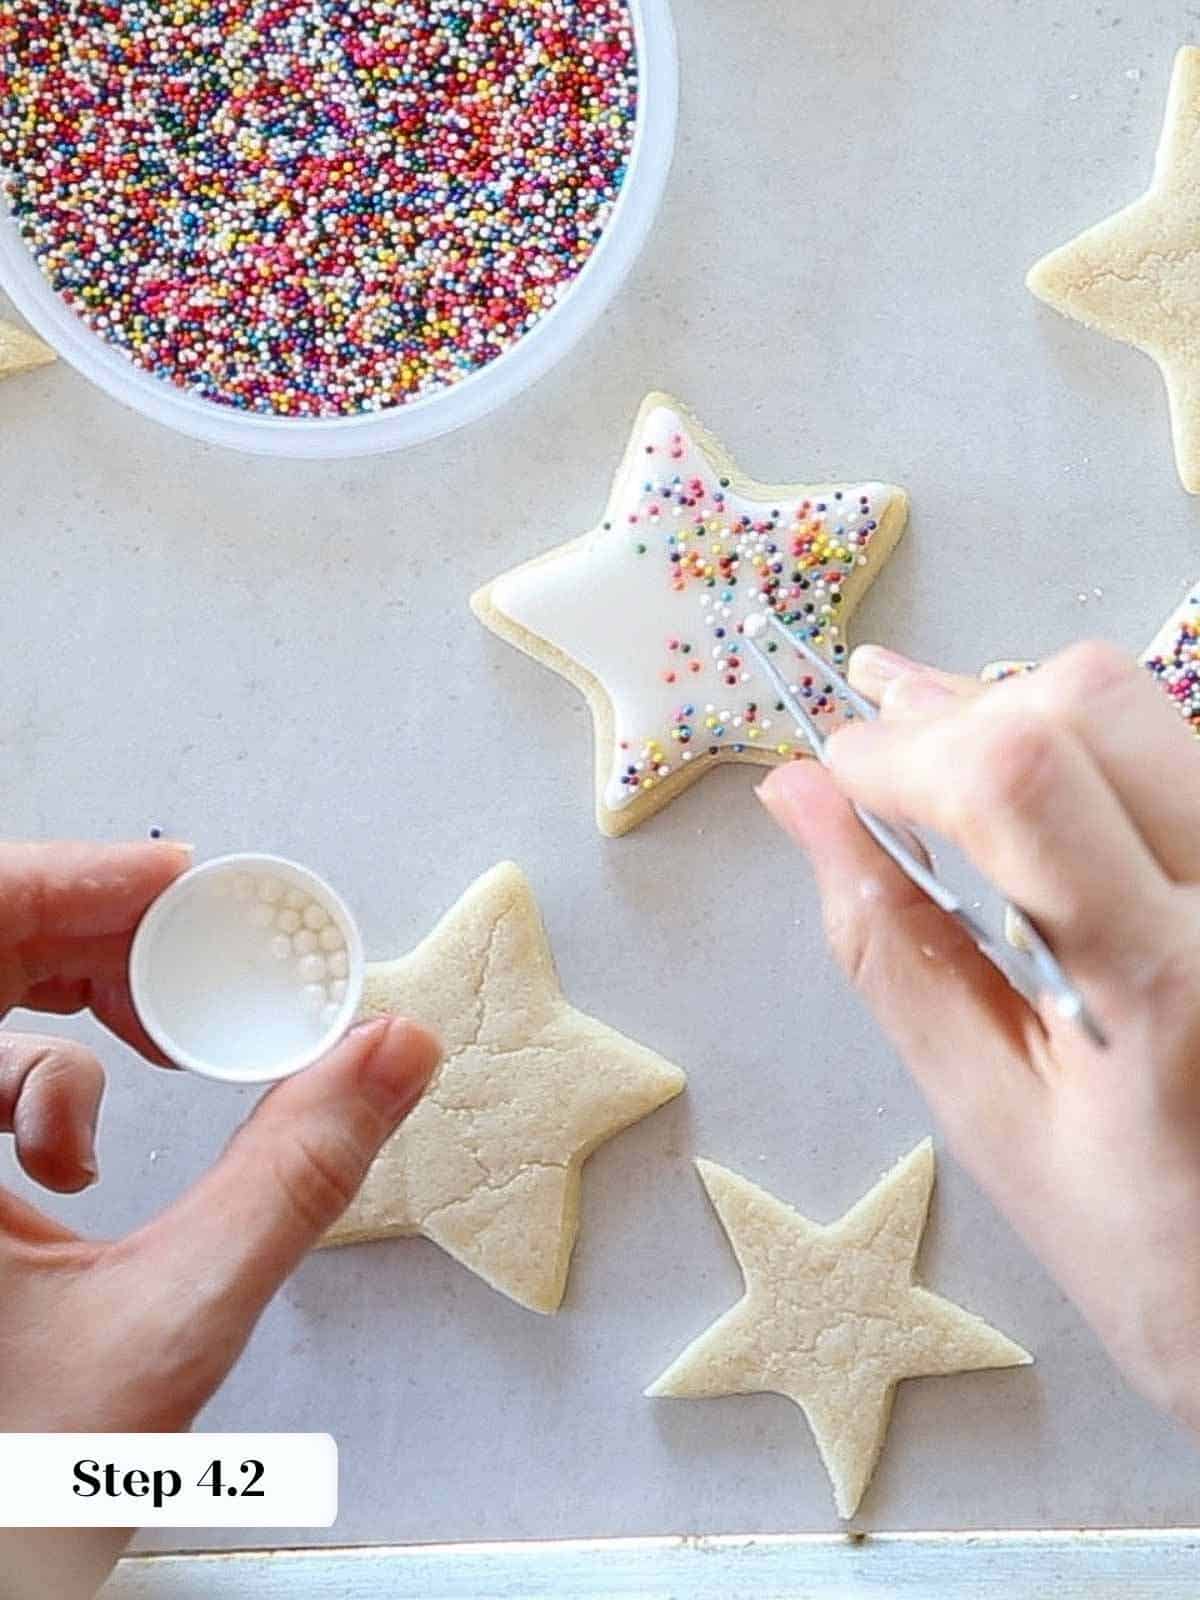

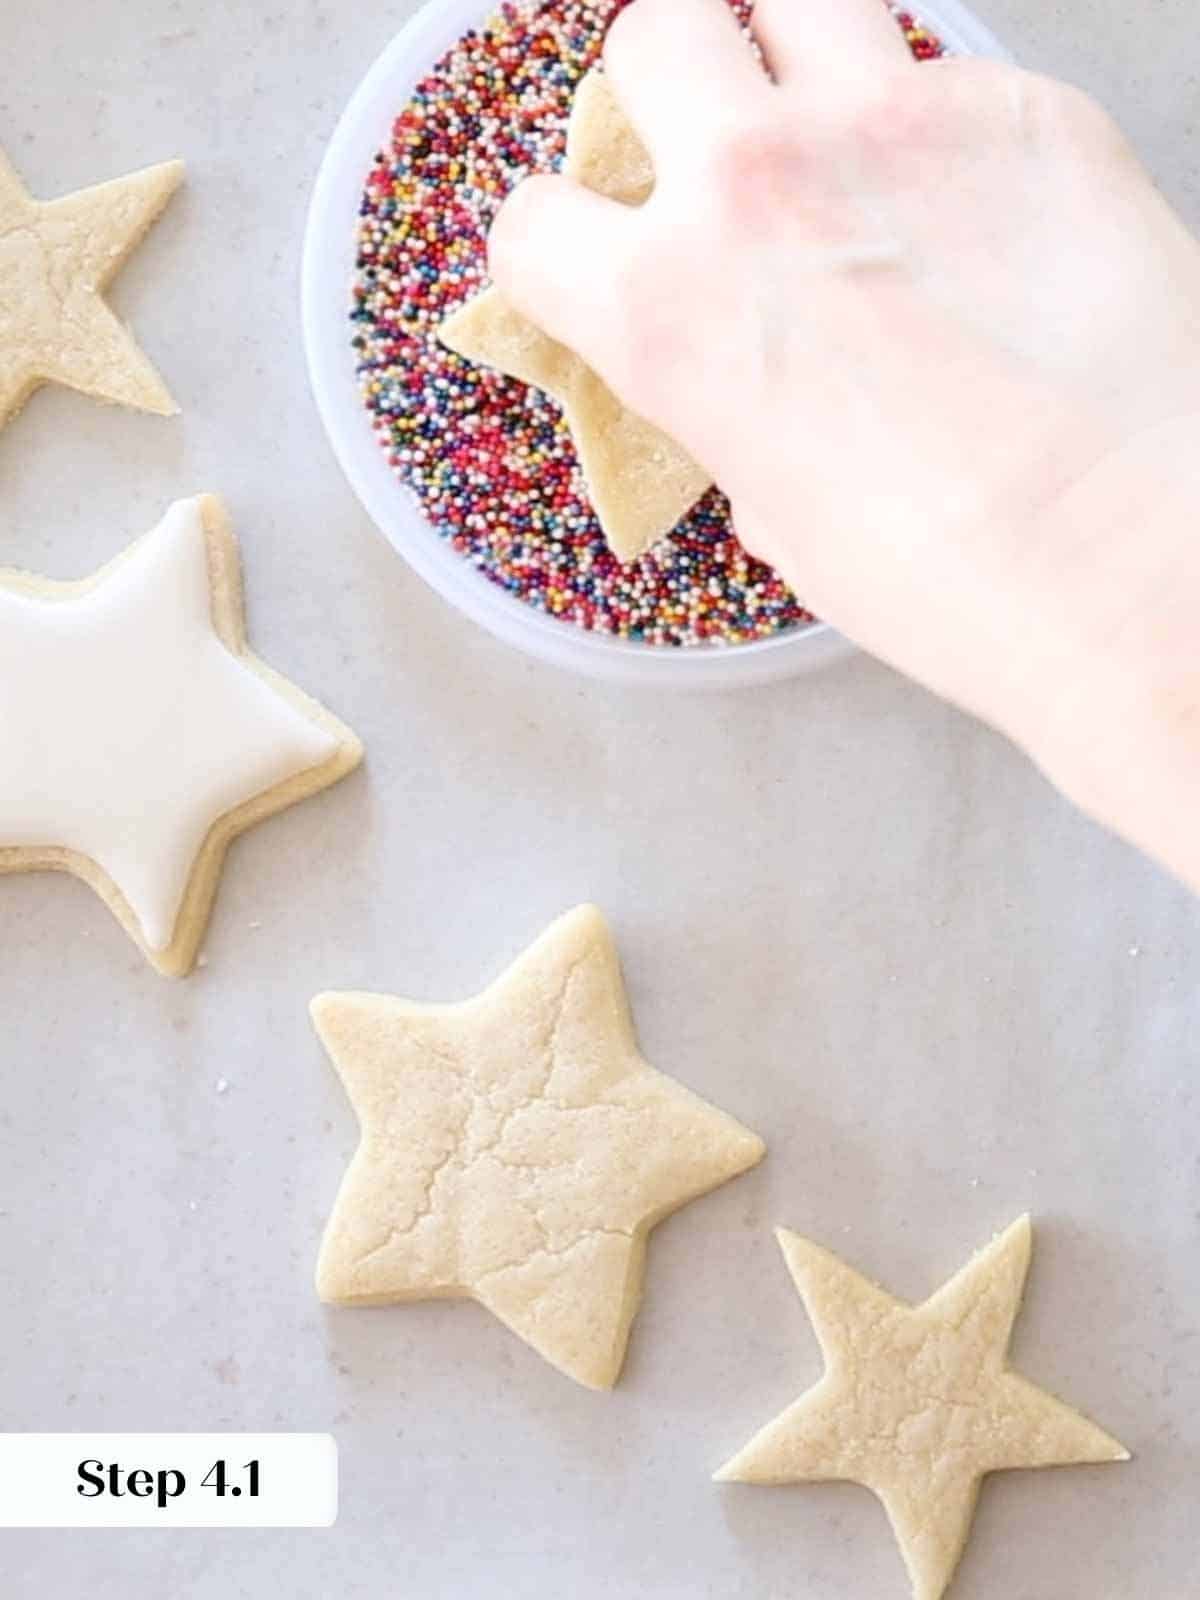
Step 4.2: To cover the whole cookie in sprinkles or rainbow jimmies, then let the icing set for about 3 minutes (the time it takes to flood all 3 outlined cookies!) before dipping the whole thing in sprinkles. You want to flip it quickly and dip and flip back before he icing has a chance to run. Just do it confidently and surprise yourself! Alternatively, you can sprinkle on the jimmies and add other decorative elements like the sugar pearls or gold balls. I added them with tweezers but I can’t help myself. You do you!
Royal icing needs to dry at room temperature overnight. It can be wrapped but don’t let the plastic wrap touch the tops of the cookies. I always let them dry unwrapped for at least 3 hours before wrapping. I don’t freeze them. Don’t even look at the refrigerator. The moisture will be absorbed by the icing and it will soften and bleed. You didn’t work this hard for that to happen.
Recipe FAQs
Store soft sugar cookies with royal icing at room temperature for up to 10 days. Allow the icing to set 24 hours before stacking, and allow it to set 3 hours before wrapping with plastic wrap (not touching the surface).
These sugar cookie are excellent when baked from frozen. You don’t need to adjust the oven temperature but they will bake an additional 1-2 minutes depending on the size of the cookies.
You can stop this recipe at many steps during the process to easily prep in advance. Make the dough (rolled or unrolled), wrap and freeze before cutting, or, even better, prepare through cutting, then freeze the cut cookies between two layers of parchment. Bake from frozen when ready!
I have successfully made this recipe in an 80 quart stand mixer. You can add a little milk to help the dough easily come together in a larger batch without mixing by hand. Be sure the weight the ingredients in a larger batch because a little bit extra flour will not incorporate.
These are excellent shipping cookies! This makes them the perfect gift. They are delicious up to 10 days after being made when iced, they stack nicely, and they aren’t too fragile. For a bonus, you could add in the best snickerdoodle cookies too, because they are also excellent for shipping!
Recommended Sugar Cookie Recipes
Cookie Recipes
Cinnamon Sugar Cookies
Cookie Recipes
Chewy Molasses Cookies
Cookie Recipes
Chai Sugar Cookies
Cookie Recipes
Funfetti Cookies
If you tried this recipe and loved it please leave a 🌟 star rating and let me know how it goes in the comments below. I love hearing from you; your comments make my day!

Soft Cut-Out Sugar Cookies
Ingredients
For the Cookies:
- 2 ⅓ cups flour *see note
- ½ teaspoon baking powder
- ½ teaspoon kosher salt
- ½ cup melted butter
- 1 cup sugar
- 1 whole egg
- 2 teaspoons vanilla
For royal icing:
- 1 box powdered sugar 1 lb (454g)
- 6 ½ tablespoons Lemon Juice juice from approximately 2 medium lemons, 85 g
- ¼ cup dried egg whites or meringue powder 22g
- Milk as needed, approximately 20 g
For a simple cookie icing:
- 3/4 cup powdered sugar
- 1/4 teaspoon vanilla extract
- 3-5 teaspoons milk
Instructions
Make the cookie dough:
- In a large bowl whisk together flour, baking powder, and kosher salt. Set aside.
- In another large bowl, melt the butter (I used the microwave) just until melted but not hot. Whisk in the sugar followed by the egg and vanilla. Whisk vigorously until the mixture is emulsified. You shouldn’t see any streaks of butter or egg.
- Slowly stir in the flour mixture.
- It does look like a dry dough, so I like to finish by hand, squeezing the dough together. This incorporates the flour faster without developing too much gluten.
- Roll your dough while it is at room temperature. Roll the dough to approximately ¼ inch. You will have the best results if rolled between two pieces of parchment, but you can also roll out on a lightly floured surface.
- Refrigerate the dough until chilled. This will only take 30 minutes, but I like to give it a full 2 hours or overnight to let the gluten relax.
Cut & bake cookies:
- When you are ready to bake, preheat your oven to 325° F convection or 350° F conventional, and line two baking sheets with parchment paper.
- Unstick the parchment from both sides of the dough, then cut shapes with a lightly floured cookie cutter. Chill the cookies before baking. It will only take about 20 minutes.
- Bake in preheated oven for 7-9 minutes or until the cookies look matte in the center and have a few small cracks. Some of the edges might have begun to brown. I bake all the same shapes on one sheet to ensure even baking.
- Cool completely before icing.
Make Royal Icing:
- In a large bowl or in the bowl of a stand mixer fitted with the whisk attachment, combine the dried egg whites and lemon juice. Whisk until soft peaks form.
- Add all the powdered sugar and whisk to combine.
- Separate the icing into different bowls and add food dye. Be sure to keep an eye on the consistency and stop adding if it gets too thin.
- For outlining using the ribbon test. The icing should cascade slowly off your spatula and remaining clearly visible on the surface for a few moments (about 5-6 seconds) before slowly disappearing.
- For flooding using the same ribbon test, the icing should cascade off your spatula and almost disappear instantly into the rest of the icing.
For the simple icing:
- Simply whisk all the ingredients together, adding a little milk at a time until it flows from the whisk but briefly holds a line on top of the icing in the bowl.
Video
Notes
Nutrition
Before You Go
I hope you enjoyed this professional chef tested recipe. Check out our other delicious cookie recipes, like this spritz cookie recipe or my ice box cookies!


I knew I should have just skipped this recipe, not only is rolling out the dough before cutting just a pain, after refrigeration it was like chipping stone to cut out shapes. What a waste of time. Threw all hit 6 shapes away and those I had to hammer cutter to go through the dough. I’m sorry, but this recipe is just stupid and not normal.
Hi Mary! I’m sorry that was your experience, that’s really frustrating. This dough is designed to be rolled while it is at room temperature and then refrigerated until chilled. If it was like stone, it likely chilled too long. It should be firm but still cuttable, so letting it sit a few minutes before cutting will help. Did you roll between parchment as written? Happy to troubleshoot with you!
I spent so much time making this recipe. It was dry and crumbly and the dough would not come together. I managed to barely cut a few shapes out to bake them before trashing the rest of the dough. After baking it was tough and tasteless. I think maybe too much flour is in the recipe… I also didn’t add any extra flour for rolling to be clear, just put between parchment as directed. It definitely needed more moisture of some kind.
Hi Tara, I am so sorry you had this experience. I have done some digging because you are not alone in this result and I think the issue is my rounding the volume measurement up (assuming fluffed and not compacted flour) to match my gram measurements. I developed this recipe in metric as I do all my recipes. I have adjusted the recipe card and I will retest it just to be sure. ~Lindsey
My niece asked specifically for “the soft kind,” so I searched for a recipe like this. Rolling between parchment made a big difference in keeping the dough even! My niece loved decorating them and kept coming back for more, she says it’s her favorite cookie! Thanks chef!
Perfect cookies! I made these in a stand mixer and they turned out great! Super easy to make, I cut them into rounds, hearts, and stars. I will be making these for Christmas to use in a cookie decorating session with my little niece and nephew; they will love it!
Amazing cookies, Lindsey! My cookies tasted delicious but they came out a bit too ‘chewy’ and tough. What do you recommend?
Hi Brooke – It’a hard for me to tell without seeing or trying but the most likely reason is the dough was overworked either during the mixing or during the rolling. Alternatively too much additional flour could have been worked in during the rolling and cutting, which also makes them tough. The same thing will happen if you re-roll the same dough too many times. If they also shrunk, they were most likely over worked and/or not rested long enough. Happy baking! ~Lindsey
This was horrible. The dough did not squeeze together by hand, followed the recipe to a T. It was crumbly and never stuck together to even get rolled out, had to trash it.
I’m sorry you had that result. It could be a volume measurement issue. I have made this exact recipe in large scale (50 pounds at a time) in a commercial kitchen, and I have never had an issue.
The grandma’s old fashioned sugar cookies recipe from 2014 that contained buttermilk – saw a previous comment that says to add buttermilk to step 3
Question: was the 2014 recipe similar to this updated recipe except for the buttermilk?
Hi Roselyn! I made a note about this at the bottom of the recipe card! Happy baking!
Hi Lindsey,
I am going to make these cookies as a hostess gift. In your “notes” you have your 2014 recipe. Not quite sure if I am supposed to add the 1/2 tsp baking powder and add 1/2 cup of buttermilk to dry ingredients. Please clarify.
Thank you
Kathee Giannini
Hi Kathee! Thanks for commenting, I’ve updated the note to be phrased a little more clearly!
For my 2014 variation: Add 1/2 tsp baking powder to the dry ingredients. You add the 1/2 cup of buttermilk in during Step 3 of making the cookie dough. It’s sort of like a cake batter, in that you alternately add the buttermilk and the flour mixture (starting and ending with the flour mixture). This is a beautiful hostess gift, happy baking!
Oh no, I just made a batch. They tasted fine, but I didn’t add butter milk because it wasn’t listed in the ingredients. I followed the recipe. I must say, they were very easy to make and the shape stayed perfectly. What does adding buttermilk do?
Hi Kathee! I’m so happy to hear they were easy and kept their shape! The buttermilk and baking powder would just shift the cookie into being more of a cake-like texture.
I am so disappointed. Made this recipe exactly as directed. After chilling the dough, it remained super crumbly and it wouldn’t hold the mold of a cookie. I unfortunately had to throw it all out and go with a different recipe. Bummed to have wasted so much time on Christmas eve 😔
Hi Cindy, That is too sad. I also made these this year with my 3 year old son from the recipe card, so I know the recipe works as written. Perhaps it is a measuring issue. The dough is on the drier side to keep it soft and holding sharp corners; it is pretty susceptible to small variations. I always use a kitchen scale and use the gram measurements. ~Lindsey