This post may contain affiliate links. Please read our disclosure policy.
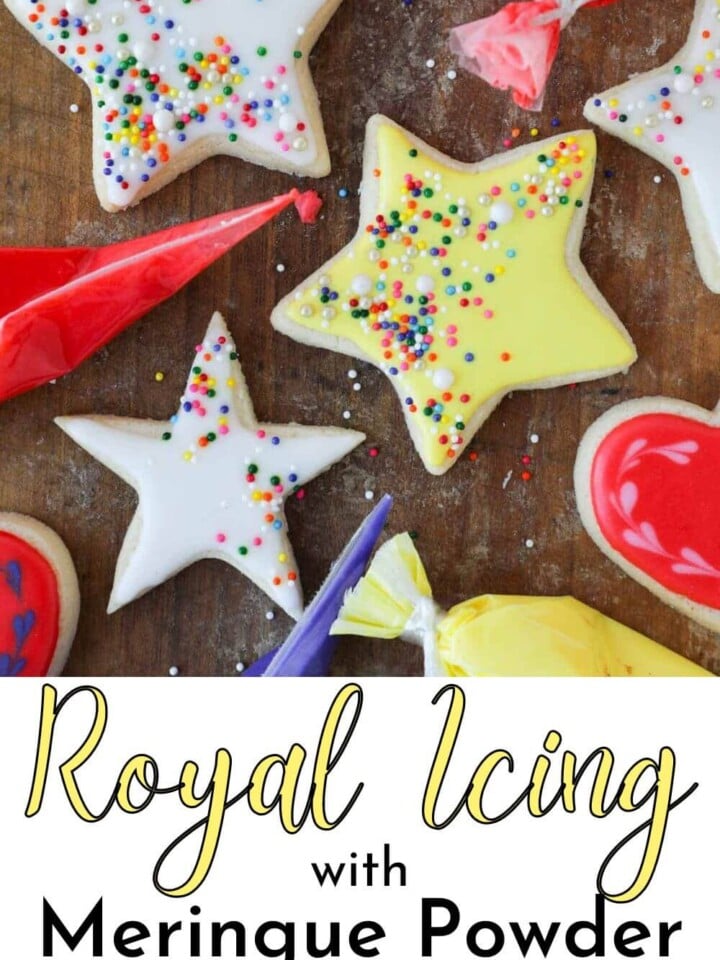
This is a professional recipe for Royal Icing with Meringue Powder that uses lemon juice for a flavorful, less sweet royal icing. An easy recipe using only 4 ingredients. Perfect for decorating cookies, cakes, gingerbread houses, brownies and bars!

This is the royal icing recipe I use in my bakery business. It is consistent, sets quickly, has a shiny finish that is still soft. The meringue powder makes it shelf stable and safe for anyone to consume unlike royal icing made with raw egg whites. You can even substitute the meringue powder for dried eggs whites if that is what you have on hand.
I used this recipe to ice these soft cut out sugar cookies as well as these Valentine’s Day cookies. Substitute the lemon for orange juice for a delicious alternative to easy sugar cookie icing on these chocolate sugar cookies!
Table of Contents
- Why This is the Best Royal Icing Recipe
- Professional Tips for Making Royal Icing
- Ingredients Needed
- Variations & Substitutions
- Why use royal icing over plain icing?
- How to Make Royal Icing with Meringue Powder
- Chef Lindsey’s Recipe Tip
- Additional Tips for Icing Cookies with Royal Icing
- How to store royal icing?
- Frequently Asked Questions
- Royal Icing Recipe
- Before You Go
Why This is the Best Royal Icing Recipe
- Made with meringue powder. Making this icing with meringue powder makes it shelf stable and safe for everyone to eat even pregnant women and little ones!
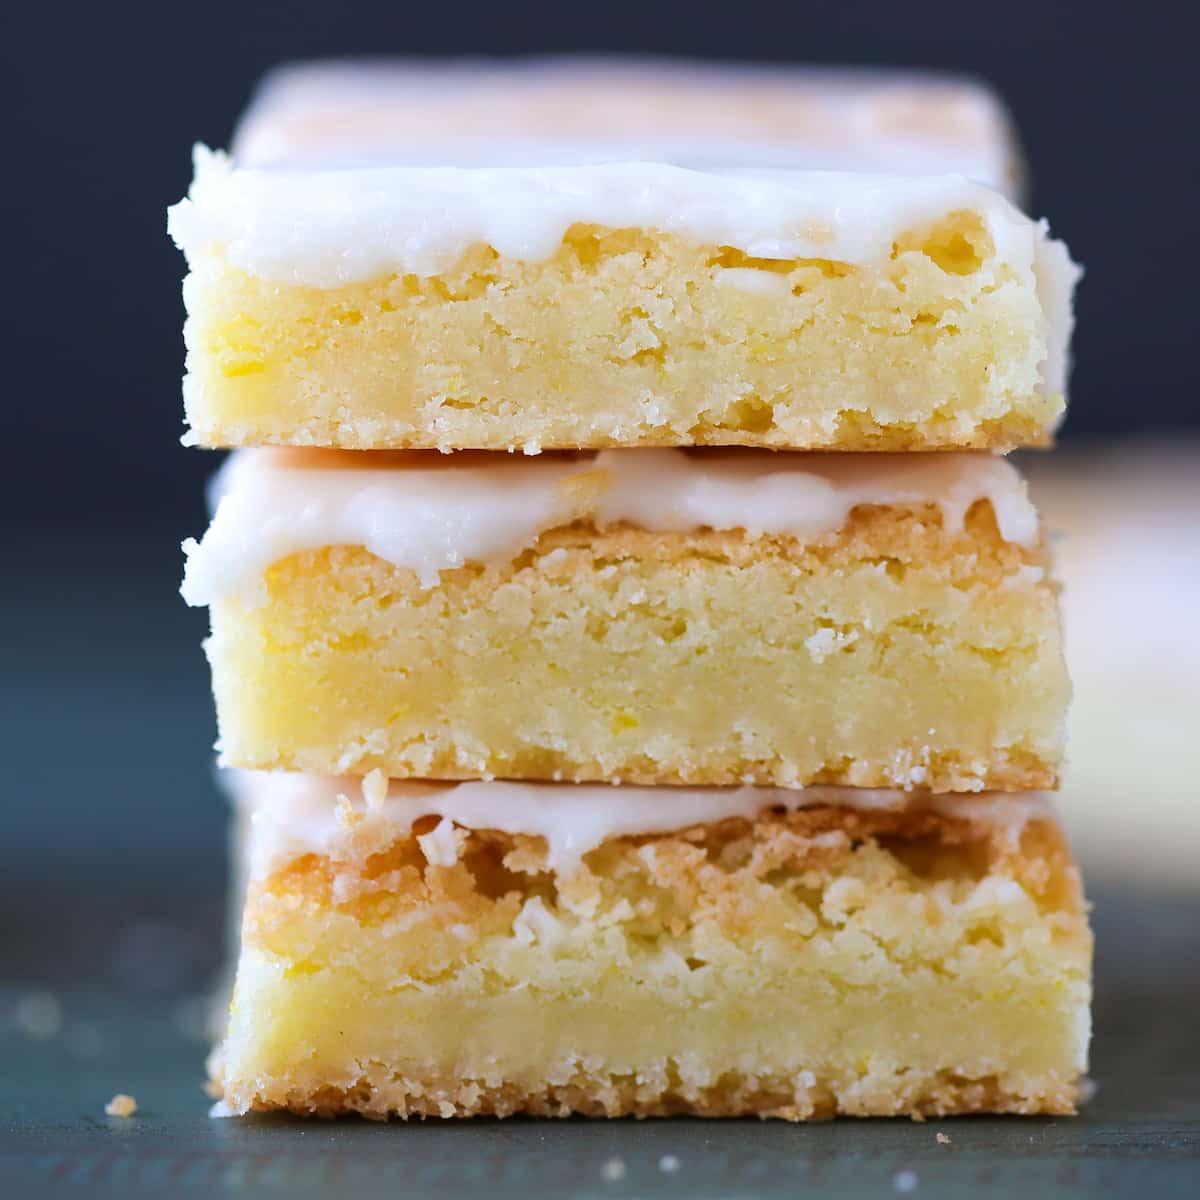
- Versatile recipe. Use this royal icing to decorate sugar cookies, gingerbread cookies, cakes or even as an icing for lemon blondies!
- Sets quickly and remains soft. This recipe sets quickly, so you won’t have to wait too long before adding another layer of decorative piping, but it remains soft even when fully set! This keeps cookies extra soft by locking in the moisture.
- Not too sweet. This recipe is different from every other recipe because it uses lemon juice rather than water! The lemon juice cuts the sweetness of the powdered sugar and adds another layer of flavor to cookies like these cut out sugar cookies!
- Scaled to one box of powdered sugar. That’s right if you have a standard 1 lb box of confectioner’s sugar, you don’t even have to measure your sugar! As a pastry chef, this is a critical time saver.

Professional Tips for Making Royal Icing
- When making a larger batch be sure to add the food coloring before the milk. I have made this recipe in an 80 quart commercial stand mixer, but you always want to follow the process of mix, divide, color and then thin out to the desired consistency. Making a half recipe works best when mixed by hand with a bowl and a whisk.
- This icing only needs 30 minutes to set before adding another color or layer! If you are adding decorative dots on Santa’s coat or two distinct colors next to each other, allow one to set 30 minutes before adding a second. This will keep the second color from sinking into the first, which gives you those professional clean, sharp lines!
- Allow cookies to dry over night before stacking. While this icing sets quickly, it is not fully set for 24 hours. I wrap them with plastic wrap not touching the surface after 4 hours and then let them sit overnight. They can be stacked after that time.
- For the most vibrant colors use gel food coloring. You can absolutely dye this icing with regular food dye found in most supermarkets, however, this is best for pastel colors and not vibrant reds, greens, yellows, etc. In order to use enough food dye to get bright colors, it will make the icing too runny for outlining and even flooding in the case of red, for example.
Ingredients Needed
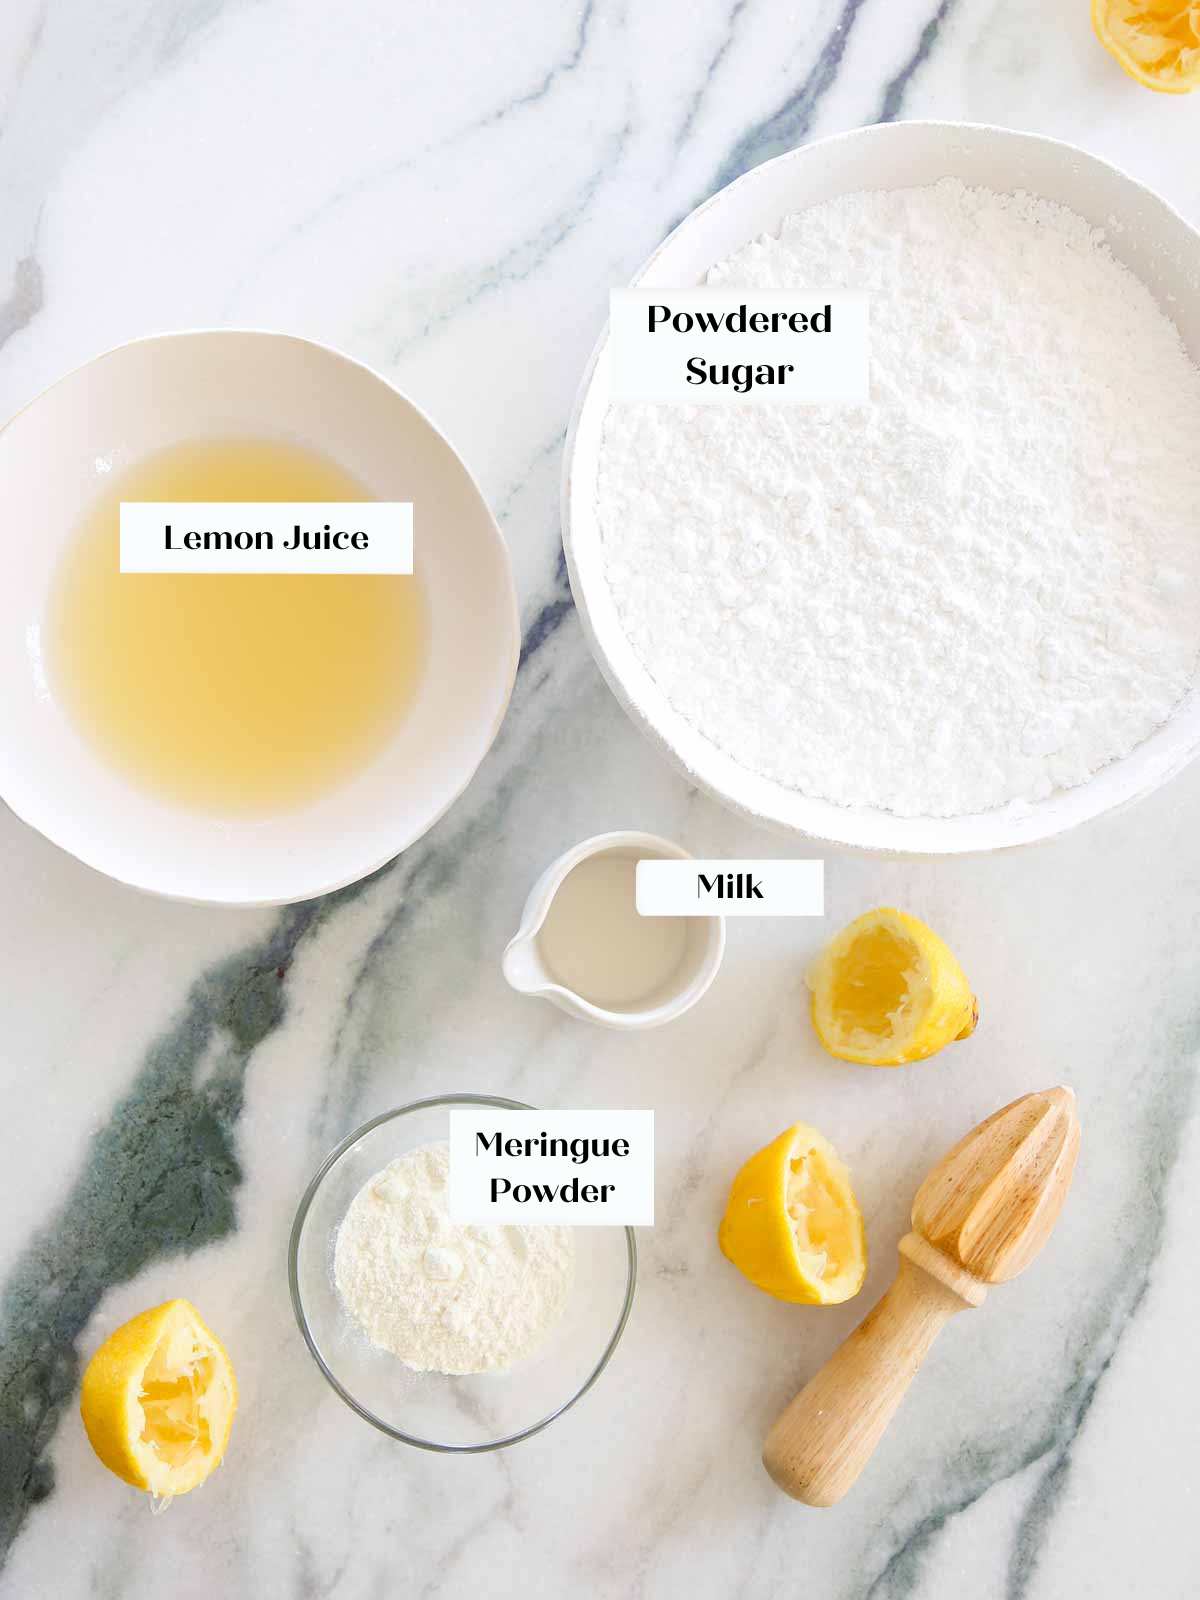
- Meringue Powder. I use meringue powder in the recipe below but it also works equally well with dried egg white powder. They also sell vanilla flavored meringue powder for that vanilla flavor without the brown tint!
- Lemon Juice: I strongly suggest using fresh lemon juice in this recipe. It is the dominant flavor and freshly squeeze or frozen juice will provide a fresh, bright flavor. If you’d like to experiment with lemon curd, check out my lemon swiss meringue buttercream next!
- Powdered Sugar: Powdered sugar or confectioner’s sugar is 10x finer than granulated sugar and will create the perfect icing consistency. This royal icing recipe is scaled to a 1 pound box of powdered sugar for easy mixing, but you can purchase a larger quantity and simply measure 4 cups!
- Milk: Add whole milk or any alternative milk to achieve the desired consistency. I prefer cow’s milk for the color. It helps keep the flavor and color pure.
- Gel Food Coloring: I prefer gel food coloring to liquid food coloring typically found in the baking aisle of grocery stores because it is more concentrated. I use AmeriColor but ChefMaster makes a more affordable, yet quality product, with vibrant colors. You can use liquid food coloring in this recipe, but only for pastel colors. Omit the milk, the coloring will add enough liquid. I also use one consistency for outlining and flooding with liquid food coloring.
On the left are cookies that I decorated with this royal icing using liquid food coloring and on the right are ones decorated with the same icing recipe but with gel food coloring. You can see that the yellow on the left was almost too loose to hold it’s shape and it isn’t quite as vibrant as the ones on the right. That is the darkest green I was able to achieve without making the icing too loose.


See the recipe card for full information on ingredients and quantities.
Variations & Substitutions
- Swap out the lemon juice. Substitute orange juice or another citrus juice for the lemon juice. You can also use water for a completely neutral flavor.
- Add flavoring. Use water instead of the lemon juice and then add clear vanilla extract or even just a hint of almond extract for a classic royal icing flavor.
- Substitute for the meringue powder. You can use the same amount of egg white powder for the meringue powder to the same effect. You can also substitute the egg whites from 3 large eggs or even 90 g pasteurized boxed egg whites for both the lemon juice and the meringue powder.
Why use royal icing over plain icing?
Royal icing ensure a thicker, opaque icing layer. The meringue ensures a pure white icing even without coloring unlike easy cookie icing, which needs just a drop of white gel coloring for that completely opaque, white color. This royal icing recipe is also less sweet than plain icing and has a wonderful lemon flavor.
How to Make Royal Icing with Meringue Powder
Use these instructions to make royal icing with meringue powder! Further details and measurements can be found in the recipe card below.
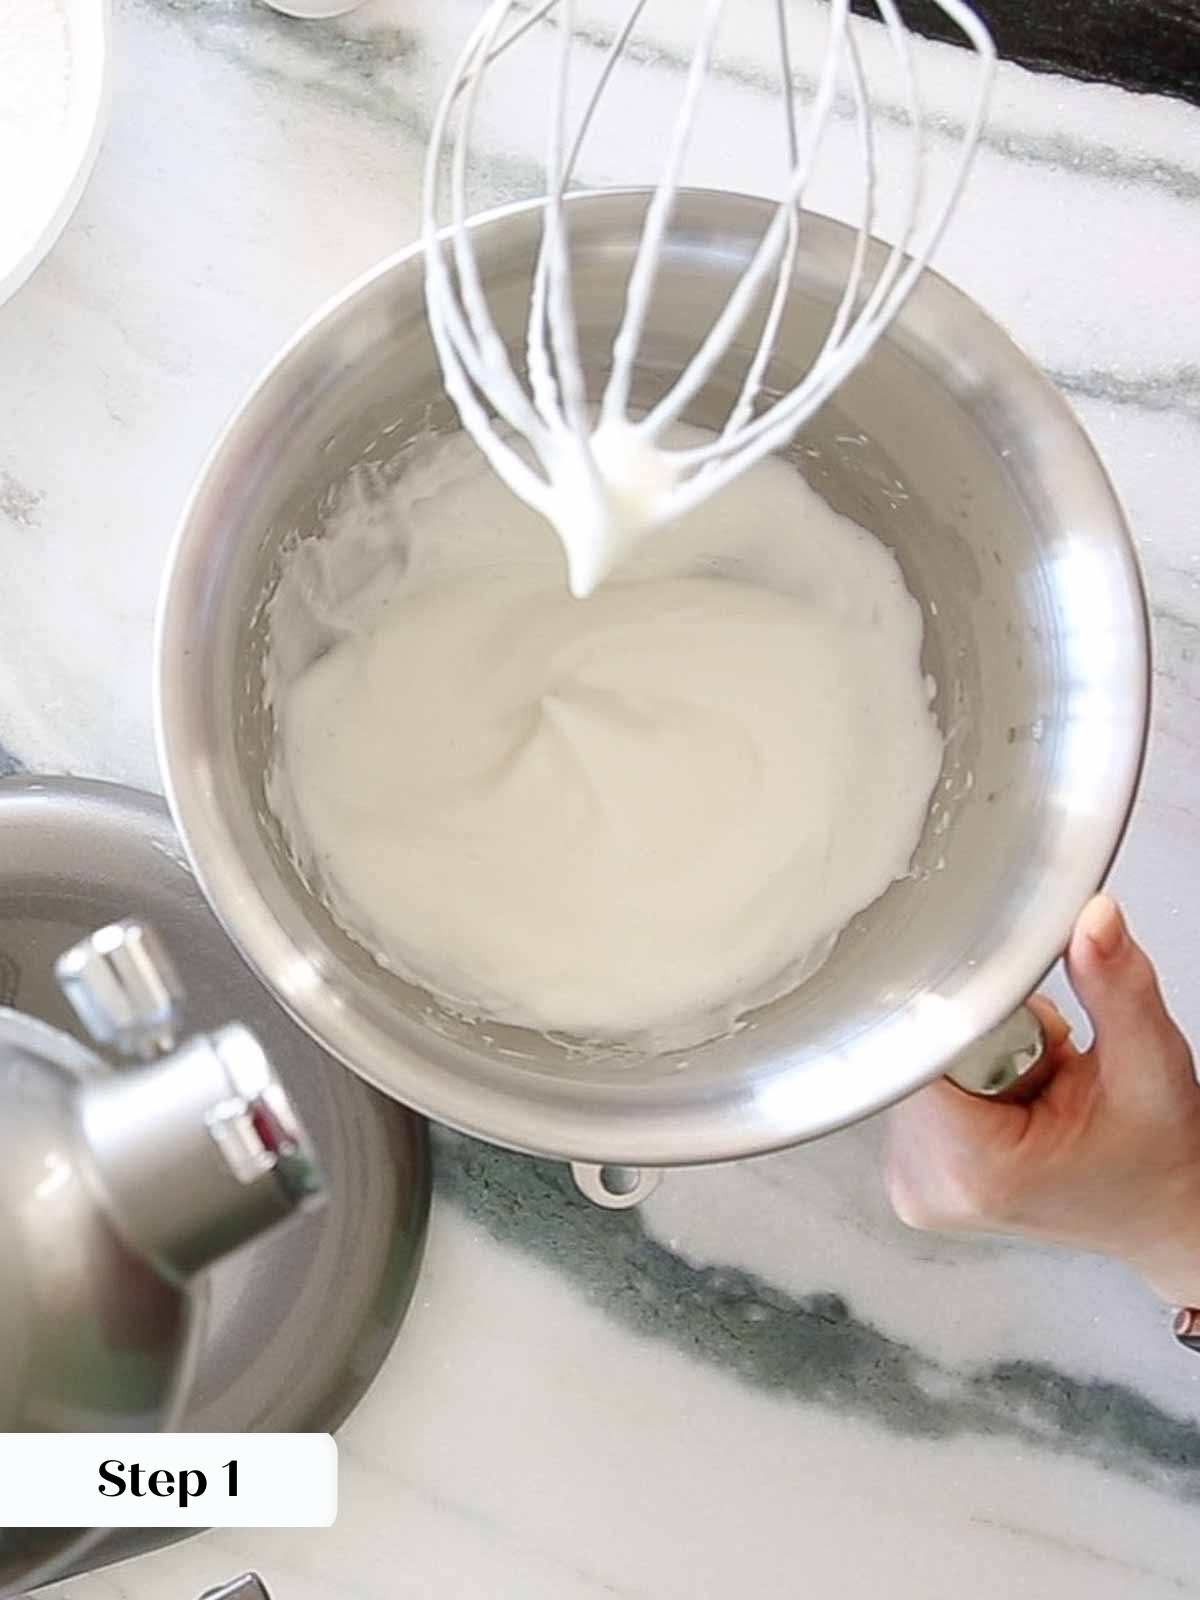
Step 1: In a large bowl or in the bowl of a stand mixer fitted with the whisk attachment, combine the meringue powder and lemon juice. Whisk until soft peaks form.
Soft peaks are the stage when whipping egg whites will form a peak on the top of a whisk and then gently fall to one side. It’ll look like Santa’s hat! And don’t panic, this recipe still works if the meringue is whipped to stiff peaks.
Step 2: Add all the powdered sugar and whisk just to combine. I use spatulas for adding food coloring and thinning the icing with milk to avoid adding extra air bubbles.

Step 3: If making more than one color, separate the icing into different bowls before adding gel food dye.
I always reserve a little of the original, un-dyed, icing to thicken icing or soften colors as needed. It is better to thicken royal icing using thicker icing rather than adding pure powdered sugar.
Step 4: Once you have created the desired color, test the consistency by dragging your spatula through the icing and then pulling it out. Watch how the icing falls off the spatula and back into the bowl.
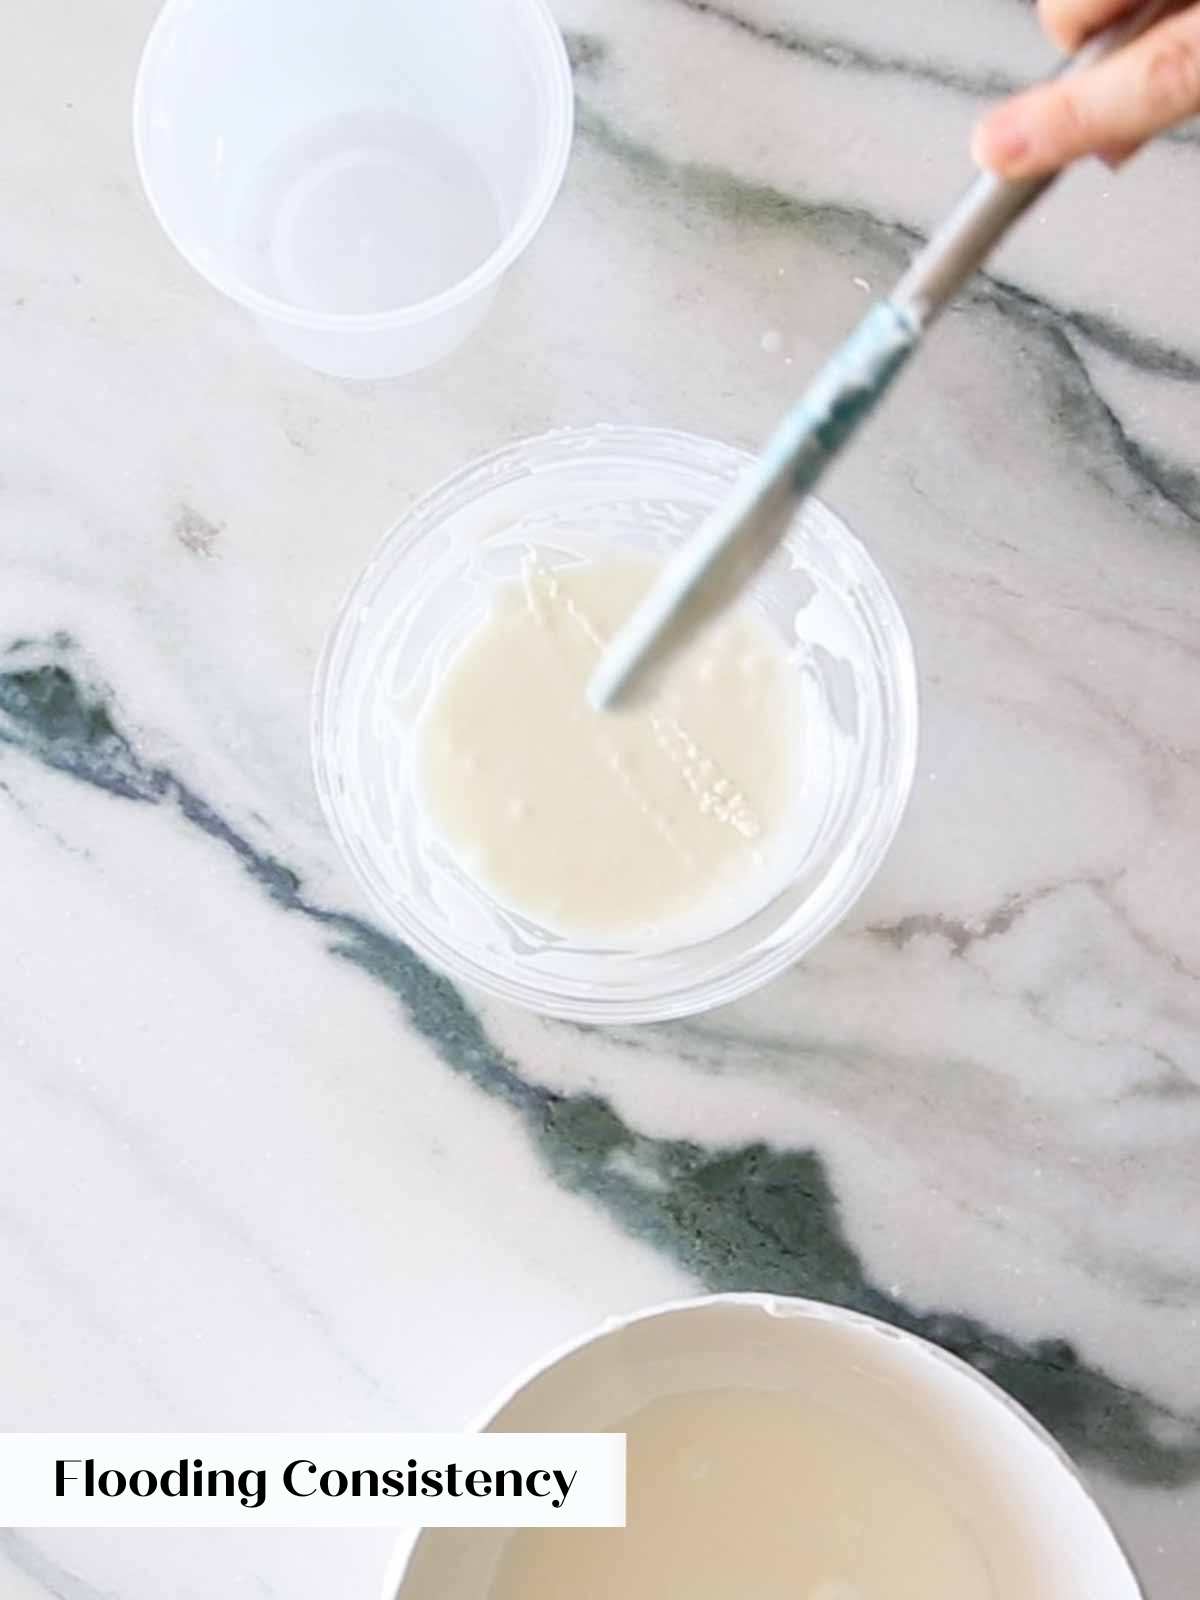
It is best to work with two consistencies for the same color: a flooding consistency and an outlining consistency. This will ensure you have perfect edges and details but the icing is the right thickness and also is easy to pipe and spread. Using an outlining consistency for flooding will create a very thick layer of icing, but conversely using a flooding consistency for outlining will not produce a thick enough layer and it could just all spill off the cookie!
- Outlining Consistency: The icing should cascade slowly off your spatula and remaining clearly visible on the surface for a few moments (about 5-6 seconds) before slowly disappearing.
- Flooding Consistency: The icing should cascade off your spatula and almost disappear instantly into the rest of the icing.

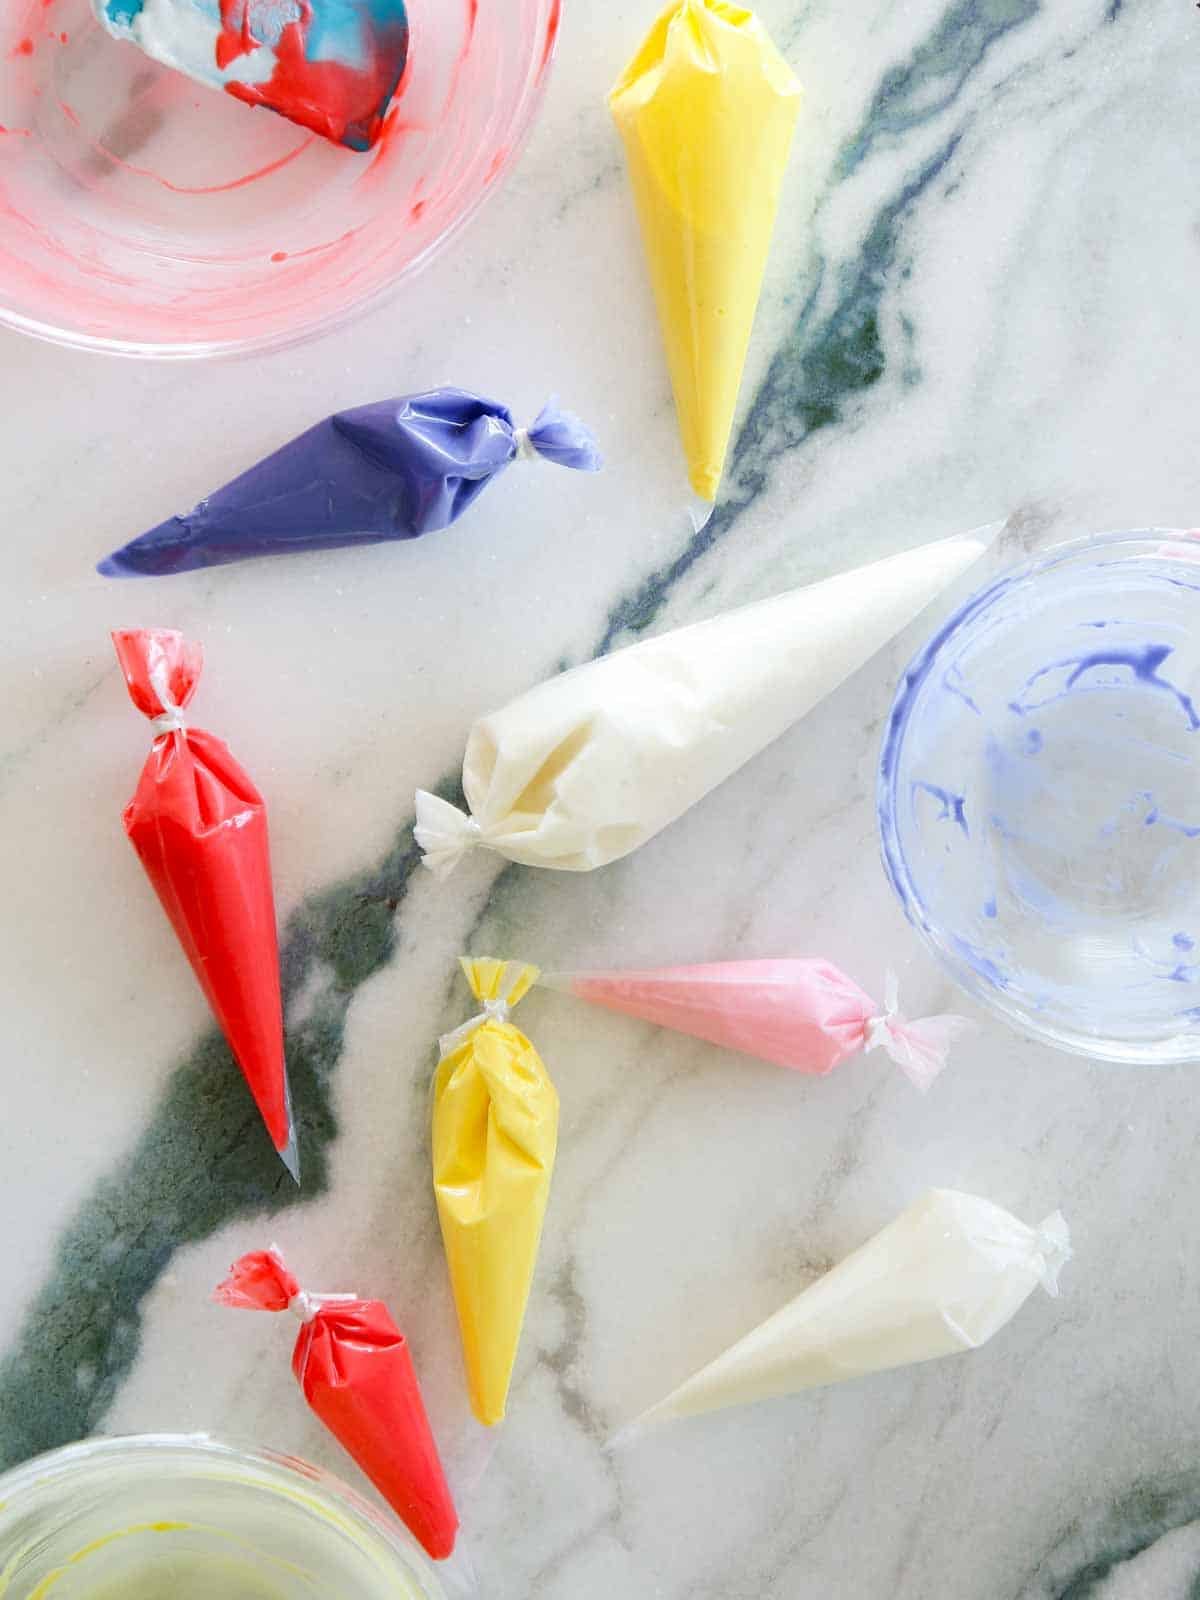
Step 5: I thin to the perfect outlining consistency, transfer some to a piping bag but I leave the majority in the bowl to be thinned further into flooding consistency. Transfer the flooding consistency to a separate piping bag.
If royal icing is too thin then it will not set. I add milk by the drop rather than the teaspoon. I would rather take a little extra time at this stage then waste icing or time later trying to fix it.
Step 6: You can get to this stage in the recipe and then store the colored icing in bags up to a week. If they separate, simply shake the icing in the bag to get it to come together.
The icing color will intensify in the bags overnight, but it will not, however, intensify on the cookie! This is important for two reasons: If you are making the icing ahead, you don’t want to be surprised in the morning by your new colors, but don’t expect the icing to change colors once piped and drying.
Chef Lindsey’s Recipe Tip
If you are icing brownies or blondies rather than decorated sugar cookies, I recommend using the “flooding” consistency described above. You can either allow it to set completely before cutting for perfect clean lines or letting it set an hour before slicing. This will create a fun poured effect on each blondie!
Additional Tips for Icing Cookies with Royal Icing
- I do not use a piping tip. I simply cut a hole in a plastic piping bag. This is faster and allows you to have many colors going at the same time without fussing with or cleaning a coupler. I have iced more than 10,000 cookies with this icing and you can trust me on this.
- I do not recommend encouraging faster drying with a fan. It won’t significantly speed up the full drying process but it will dry out your cookies! It also could create a more “crunchy” icing and who wants that?
- Only outline 3 cookies before flooding. If you wait too long, the outline will set and the flooding will not meld with the outline, leaving you with an obvious line. You can, of course, do one cookie at a time, but this isn’t the fastest method! From someone who has iced thousands of sugar cookies and put more royal icing bows on gingerbread bears than I care to remember.
How to store royal icing?
There are a few key things to know about storing royal icing both before and after piping.
- Storing royal icing before piping: Store un-used or leftover royal icing in closed piping bags or in bowls with plastic wrap or a damp paper towel directly on the surface. This will keep the icing from setting. Store at room temperature for up to a week. It will keep for longer but the integrity of the icing will suffer.
- Storing cookies decorated with royal icing: Allow cookies decorated with royal icing to sit at room temperature uncovered for 4 hours before wrapping. Let them dry overnight before stacking. I know it’s hard to wait but you are tough and can do anything!
- Refrigerating or Freezing cookies decorated with royal icing. I do not recommend either freezing or refrigerating decorated cookies. When the decorated treats are brought back to room temperature the royal icing will bloom and will have a crackled appearance with inconsistent coloring. I know other people say you can, but I would ask you if those people have made tens of thousands of decorated cookies in a commercial kitchen?
- Storing brownies or bars decorated with royal icing. The same rules apply to other treats decorated with royal icing, but the stakes are generally lower and you didn’t spend hours decorating them, so, for me, I don’t mind storing those in the freezer for longer storage.
Frequently Asked Questions
Let it set at least 30 minutes before adding layers of detail on top of a royal icing base. Dots or lights on Christmas trees for example. This will keep your details crisp and from sinking into the lower layers of icing. Allow cookies to dry 4 hours before wrapping and 24 hours before stacking.
Both egg whites and meringue powder produce beautiful royal icing. Royal icing made with fresh egg whites does have a shinier finish when dry, but that made with meringue powder is still shiny. Meringue powder is pasteurized so it is safe for consumption by everyone while egg whites might not be.
This is a shelf-stable icing especially if thinned with water rather than milk. It will still have the best consistency if used within 10 days. If it separates, simply shake vigorously until it comes back together.
If you tried this recipe and loved it please leave a 🌟 star rating and let me know how it goes in the comments below. I love hearing from you; your comments make my day!

Royal Icing
Ingredients
- 4 cups powdered sugar 1, 1 pound box
- 6 ½ tablespoons lemon juice juice from approximately 3 medium lemons
- ¼ cup meringue powder
- 1 tablespoon whole milk as needed
Instructions
- In a large bowl or in the bowl of a stand mixer fitted with the whisk attachment, combine the meringue powder and lemon juice. Whisk until soft peaks form.
- Add all the powdered sugar and whisk to combine.
- If making more than one color, separate the icing into different bowls before adding gel food dye.
- Once you have created the desired color, test the consistency by dragging your spatula through the icing and then pulling it out. Watch how the icing falls off the spatula and back into the bowl. It is best to work with two consistencies for the same color: a flooding consistency and an outlining consistency. This will ensure you have perfect edges and details but the icing is the right thickness and also is easy to pipe and spread
- Outlining Consistency: The icing should cascade slowly off your spatula and remaining clearly visible on the surface for a few moments (about 5-6 seconds) before slowly disappearing.
- Flooding Consistency: The icing should cascade off your spatula and almost disappear instantly into the rest of the icing.
- I thin to the perfect outlining consistency, transfer some to a piping bag but I leave the majority in the bowl to be thinned further into flooding consistency. Transfer the flooding consistency to a separate piping bag.
- You can get to this stage in the recipe and then store the colored icing in bags up to a week. If they separate, simply shake the icing in the bag to get it to come together.
Notes
Presentation – Let it set at least 30 minutes before adding layers of detail on top of a royal icing base.
Variations – Substitute orange juice or water for the lemon juice. Add flavorings like clear vanilla extract or almond extract. You can also use egg white powder in place of the meringue powder or substitute 3 egg whites from large eggs (90g) for both the powder and lemon juice.
Storage – Allow cookies to dry 4 hours before wrapping and 24 hours before stacking.
Nutrition
Before You Go
I hope you enjoyed this professional royal icing recipe. Check out our other delicious icing and buttercream recipes, or explore ways to use this icing on our cookie recipes and these brownies & bars recipes!


Hi, how long do you whip the powdered sugar with the meringue? What is the speed setting for a standard mixer? I’ve failed so many times trying to make royal icing. 🙁 I end up with tiny little’ bumps under the icing. I’m excited to try your recipe. There’s still hope
Many thanks
Samantha
Hi Samantha! You are absolutely not alone, royal icing can be surprisingly finicky, but I’m so glad you’re giving it another go. Add all the powdered sugar and whisk just to combine. You don’t need to whip the powdered sugar for long at all, just until everything is incorporated. Overmixing here can add air bubbles, which might be part of those tiny bumps you’re seeing under the icing. As for speed, I recommend mixing on low to medium-low (speed 2–3 on a standard stand mixer) to keep things smooth and avoid whipping in too much air. You can always finish by hand with a spatula when adding food coloring or adjusting consistency to further minimize bubbles. You’re going to do great, and keep me posted on how it goes!