This post may contain affiliate links. Please read our disclosure policy.
This perfect ermine frosting recipe uses a cooked flour base, which makes it light and airy like whipped cream but with the stability of Swiss meringue buttercream!

A Quick Look At The Recipe
This is a brief summary of the recipe. Jump to the recipe to get the full details.
Jump to RecipePrep Time
30 minutes
Cooling Time
45 minutes
Total Time
1 hour 15 minutes
Servings
12 Cupcakes
Difficulty
Moderate
Calories *
224 kcal per serving
Technique
Cook flour base, cool, whip butter and combine with flour base, add vanilla.
Flavor Profile
Fluffy vanilla frosting.
* Based on nutrition panel
I’ve been making this recipe for about a year now on your moist vanilla cake and it is fantastic every time! I even added oreo crumbs to one batch for my son’s birthday cake to look like dirt. People RAVED! …⭐⭐⭐⭐⭐
Michelle
As a pastry chef, I’m typically pretty cool, calm & collected in the kitchen. It takes a lot to get me in a tizzy (some previous co-workers might disagree hehe). But this ermine frosting got me all kinds of worked up! It’s rare for me to find something truly new, and when I do, I dive right in.
I checked all my vintage cookbooks and only found 2 recipes that were for a boiled frosting thickened with flour. They were both in Southern Living Cookbook Desserts 1968 edition. The one I made below is adapted from Mrs. Elsie Ramey of Winchester, Virginia and it is called “Dreamy Frosting” in the book. I don’t know the origins of “Ermine” but I think “Dreamy” is more accurate!
Let’s just have one more quick mo’ about this frosting! It is light, fluffy, airy and not too sweet. I used 1 cup of sugar and it was sweeter than my Swiss meringue buttercream but you can reduce it to ½ cup for a very lightly sweetened and airy frosting. I was truly blown away by this frosting.
Table of Contents
Why You Will Love Ermine Frosting
- Light, fluffy, whipped cream-like texture. My recipe notes say, “Dang. This is amazing.” I’ve been baking professionally for over 10 years and I was wowed.
- But with the stability of Italian meringue buttercream! It set firm and solid in the refrigerator and, in my opinion, was more pleasant to eat cold than IMB or SMB because there is less butter. Unlike those two, it is egg-free!
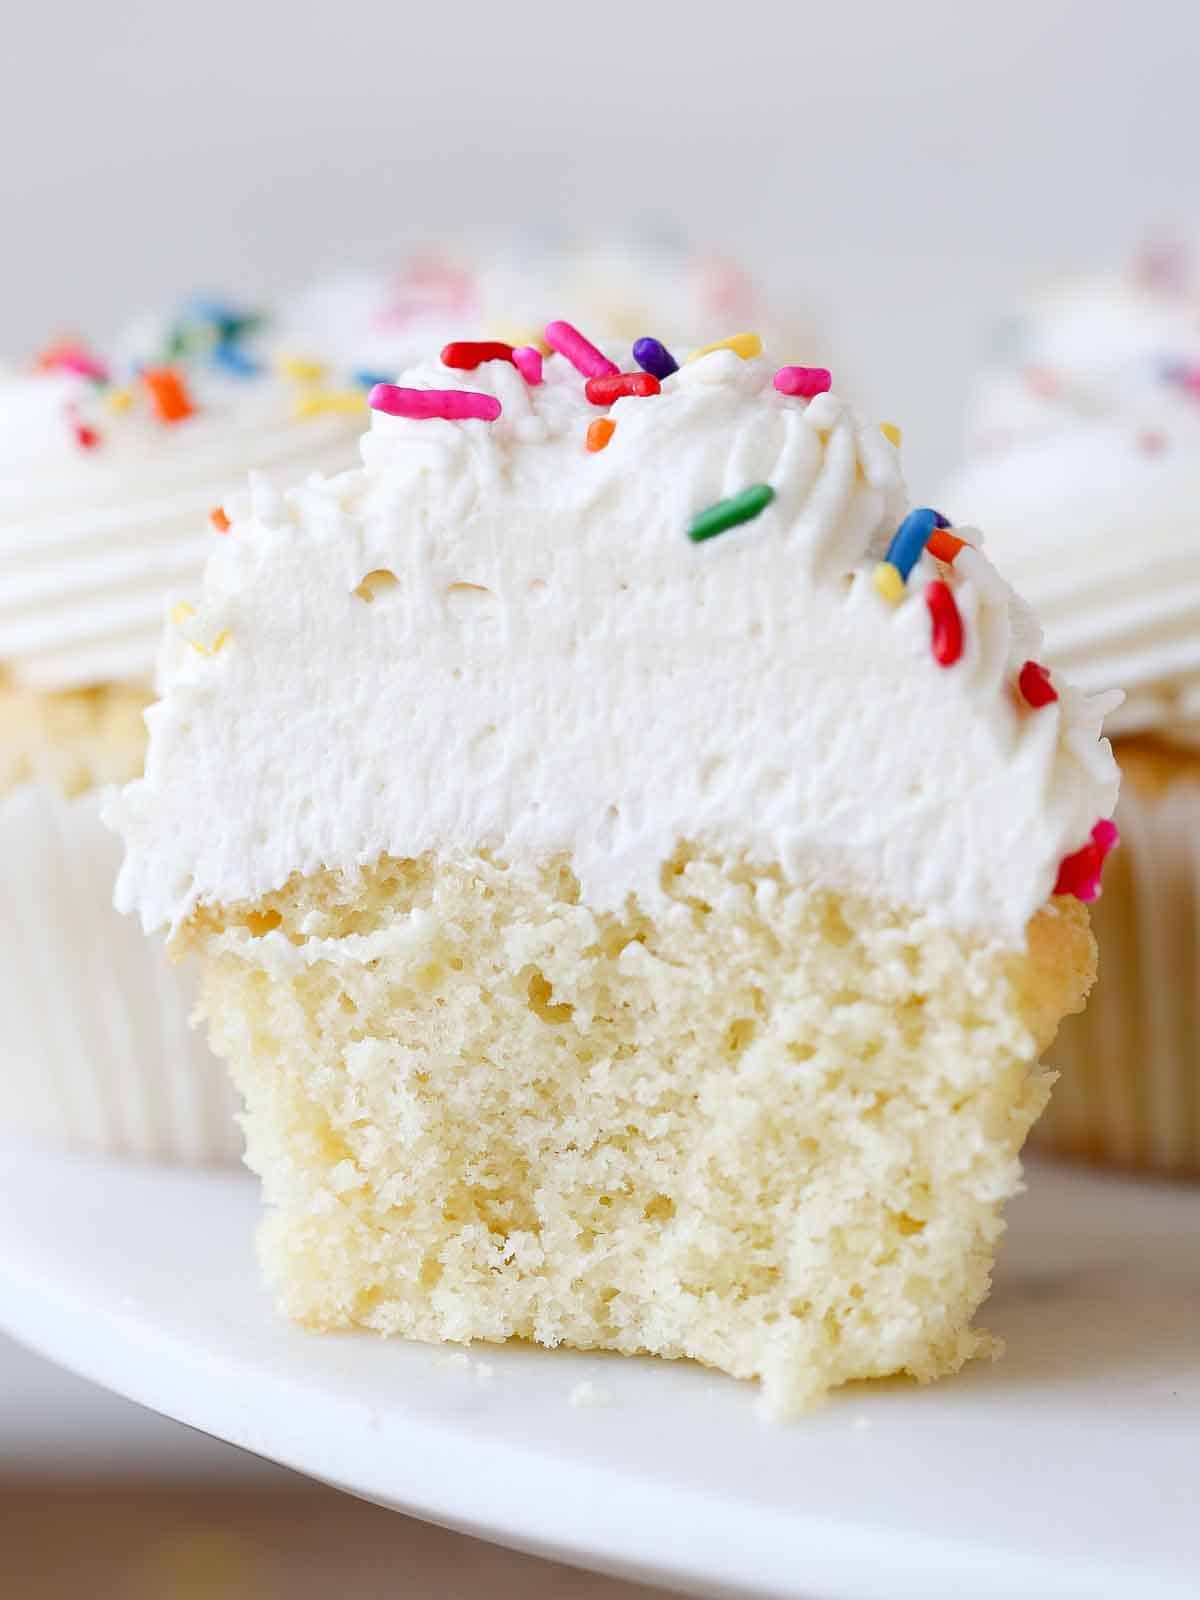
- A less sweet frosting that is perfect for cakes or cupcakes! It is less sweet than American buttercream but less buttery than IMB or SMB. I used it on my vanilla cupcakes, but it would also be delightful on this moist vanilla cake or even a red velvet cake! It actually was the original frosting on the OG red velvet cake in the 1800’s.

What does ermine frosting taste like?
Ermine frosting tastes like a less sweet American buttercream frosting, but it has a light, airy texture similar to whipped cream. It also tastes similar to a sweetened whipped cream because of the cooked milk and butter.
Professional Tips for Making Cooked Flour Frosting
- Cool but pliable butter. Use butter that is cool to the touch but will indent when pressed with your finger. If yours is too warm then it will make a soft frosting that will not hold its shape when piped. The best time to chill it is BEFORE you mix in the flour.
- The flour is cooked but it is not a roux. The former savory cook in me feels the need to correct the internet. The base of this frosting is not a roux. A roux is a fat (like butter) cooked with flour and then milk is slowly added to create a thickened milky base for sauces like gravy or dishes like white cheddar mac and cheese!
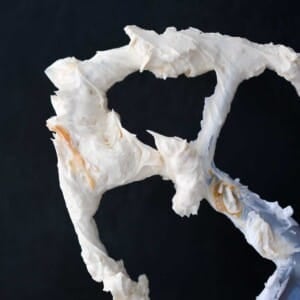
- Cook until it plops off your spoon. It is tough to know when to stop cooking the flour milk mixture. Take a breath because there is a range of thicknesses that will yield a pipeable frosting. You will notice that there is a point when the mixture stops flowing off the spoon or spatula and, instead, plops off in pieces. This is ideal.
Ingredients & Substitutions

- All-Purpose Flour: The only drawback of ermine frosting is that it does rely on the thickening powers of all-purpose flour. You could use a gluten-free all-purpose flour, but the rice flour will make it grainy. If you must have a gluten-free frosting, I would recommend going with American buttercream frosting or Swiss meringue buttercream instead.
- Whole Milk: I have not tried any alternative milks, but I think they will work well. They will alter the flavor of your frosting, so you might consider coconut milk over almond milk.
- Granulated Sugar: I used the full cup of granulated sugar, which put the sweetness right between American buttercream and Italian Meringue buttercream. You can reduced the sugar down to ½ cup (or anywhere in between) for a very lightly sweetened frosting.
- Vanilla Extract: Vanilla is a large part of the flavor, so choose a vanilla extract that you enjoy like Nielson Massey vanilla extract.
- Kosher Salt
- Unsalted Butter: There is less butter than IMB and SMB but still a substantial quantity. I would not recommend using salted butter.
See the recipe card for full information on ingredients and quantities.
Variations
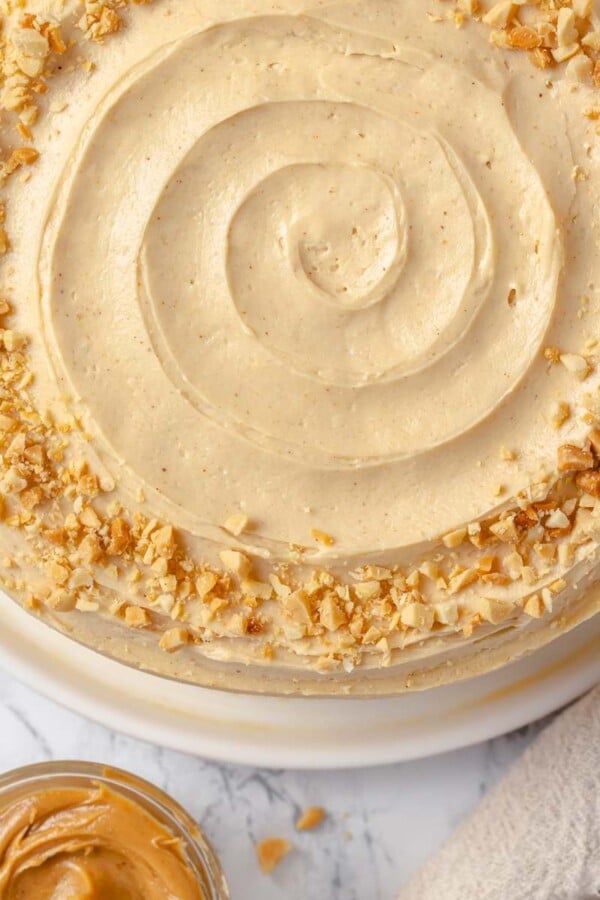
- Changing the flavor with extracts and oils: You can use lemon extract, coffee extract or even peppermint extract (like I do in my peppermint frosting!) to change the flavor. You could also use flavor oils to make topping cupcakes extra fun! Try any of these LorAnn fruit flavors!
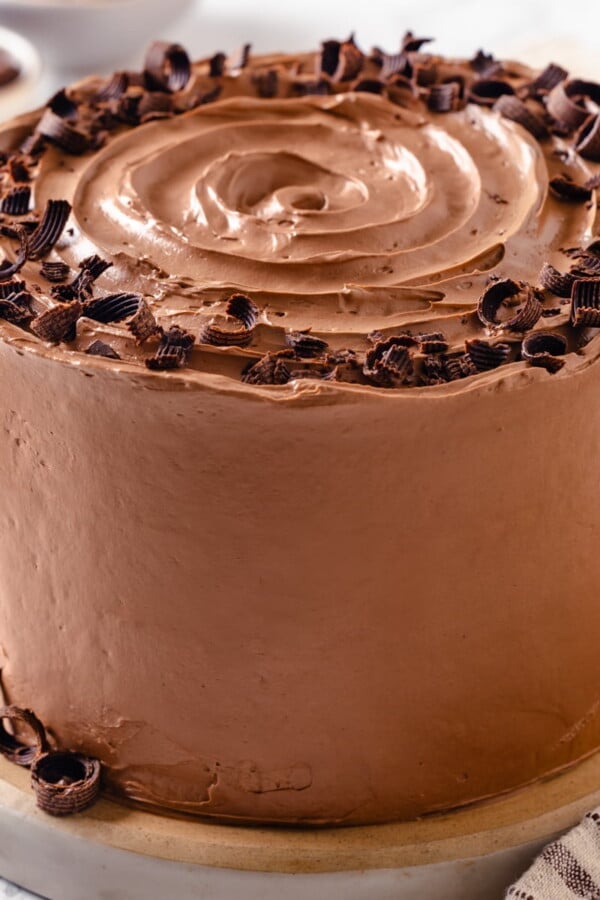
- Make it chocolate: Add ¼ cup cocoa powder in after you add the flour mixture for a chocolate variation.
- Color ermine frosting: Ermine frosting takes color well. Use a gel food coloring as you would IMB or royal icing for a rich, saturated color. Liquid food coloring will work for pastels. I have not tried powdered food coloring in this frosting, but I imagine it would work well.

How to Make Ermine Frosting
Use these instructions to make the perfect cooked flour frosting every time! Further details and measurements can be found in the recipe card below.
Make the flour base:
Step 1: In a large saucepan combine the flour, sugar and salt. Stir to combine. Toast over medium heat for 30 seconds to 1 minute.
Step 2: Slowly whisk in the milk, adding just a little at a time making sure it is completely incorporated before adding more. This will keep the frosting lump free just like with a roux.
Step 3: Switch from the whisk to a silicone spatula and stir constantly over medium heat.
I like to use a zig-zag pattern across the pot and then around the edges. I repeat this same pattern to ensure that I am scraping the whole bottom and none will burn. It is the same technique that I use for vanilla pudding, crème anglaise or lemon curd!
Step 4: Continue cooking until the flour mixture has thickened and will drop off a spoon in clumps rather than pour off in a stream. You can also tell when it will hold a line on the bottom of the pot without running back in. You can see this in the photo for this step.


This thickness will determine the consistency of your final frosting. A thicker base will make a pipeable frosting that holds beautiful lines and details even in high heat and humidity.
Step 5: Remove from the heat and stir in the vanilla. Scrape into a bowl with the spatula. Cover the top with plastic wrap that is touching the surface, and allow to cool at room temperature until it is no longer warm to the touch. You can speed this up by cooling it in 20 minute intervals in the refrigerator, stirring and repeating until it is body temperature.


Make the frosting:
Step 6: In the bowl of a stand mixer fitted with the whisk attachment, beat the butter on medium-high speed until fluffy and almost white in color.
Step 7: With the mixer running, add a spoonful of the flour mixture and allow it to beat in fully before adding the next. Stop the mixer to scrape in the last of the flour mixture and scrape down the sides and bottom of the bowl.
Step 8: Add the vanilla extract and continue to whisk on high until it holds stiff peaks.
Step 9: Transfer to a piping bag or spread on cakes.


How to use Ermine Frosting
- Use it to frost cupcakes. If you want frosting piled-high on your cupcakes, I prefer to use ermine frosting. It is still light and airy, so what would be “too much” ABC is “just right” with ermine! Try this with red velvet cupcakes, lemon cupcakes, vanilla cupcakes or yellow cupcakes.
- Layer cakes with swirled or piped frosting details. The light airy quality of ermine buttercream makes it less suitable for getting those perfectly smooth edges on layer cakes. The texture and flavor are perfect, so I encourage you to use it on layer cakes like the best carrot cake, classic white cake, one bowl chocolate cake and chocolate fudge cake, but make decorative swirled sides and top like I did with my classic yellow cake with chocolate frosting. Swirl it on sheet cakes like this funfetti cake or old fashioned gingerbread for Christmas!
- A delicious frosting for topping brownies & bars. American buttercream can be too sweet when spread on brownies and bars, but ermine frosting (especially if made with ½ cup sugar) makes an excellent topping for this blondies recipe, these one bowl brownies or these butterscotch brownies. Try it on these lemon blondies! It would also be a delightful alternative filling in this oatmeal cream pie recipe.

FAQs & Troubleshooting
Store in an airtight container in the refrigerator for up to 2 weeks or in the freezer for up to 2 months. Ermine frosting is best used at the time it is made but you can rewhip it from the refrigerator if you want to make it in advance. You can also make the flour base in advance and allow it to come to room temperature before adding it to softened butter.
Ermine frosting hardens beautifully in the refrigerator! It sets strong due to the butter and the cooked starches (flour) in the base. Even though it sets hard in the fridge it retains its light texture even when cold.
Ermine buttercream is less sweet than American buttercream frosting as written. You can also reduce the sugar down to ½ cup and then it will also be much less sweet than Swiss meringue buttercream and Italian meringue buttercream.
If your ermine frosting looks curdled or grainy, most likely the butter was too cold when added to the cooked flour mixture. Try to continue beating it and it should come together.
There are three reasons ermine frosting can be runny. The first is that that flour mixture was not cooked long enough to thicken it properly. The second is that the flour mixture wasn’t cooled enough when added to the butter, so it melted it. Lastly, the third reason ermine frosting can be runny is when the butter is too soft. The butter should be cool but pliable not room temperature. In all cases, try to chill the butter or the frosting in 20 minute intervals to try to fix it.
If you tried this recipe and loved it please leave a 🌟 star rating and let me know how it goes in the comments below. I love hearing from you; your comments make my day!
Ermine Frosting (Boiled Milk Frosting)
Ingredients
- 5 tablespoons all-purpose flour
- 1 cup granulated sugar
- 1/8 teaspoon kosher salt
- 1 cup whole milk
- 1 teaspoon vanilla extract
- 1 cup unsalted butter cool but pliable
Instructions
- In a large saucepan combine the flour, sugar and salt. Stir to combine. Toast over medium heat for 30 seconds to 1 minute.
- Slowly whisk in the milk, adding just a little at a time making sure it is completely incorporated before adding more. This will keep the frosting lump free just like with a roux.
- Switch from the whisk to a silicone spatula and stir constantly over medium heat. I like to use a zig-zag pattern across the pot and then around the edges. I repeat this same pattern to ensure that I am scraping the whole bottom and none will burn. It is the same technique that I use for vanilla pudding or lemon curd!
- Continue cooking until the flour mixture has thickened and will drop off a spoon in clumps rather than pour off in a stream. This thickness will determine the consistency of your final frosting. A thicker base will make a pipeable frosting that holds beautiful lines and details even in high heat and humidity.
- Remove from the heat and scrape into a bowl with the spatula. Cover the top with plastic wrap that is touching the surface, and allow to cool at room temperature until it is no longer warm to the touch. You can speed this up by cooling it in 20 minute intervals in the refrigerator, stirring and repeating until it is body temperature.
- In the bowl of a stand mixer fitted with the whisk attachment, beat the butter on medium-high speed until fluffy and almost white in color.
- With the mixer running, add a spoonful of the flour mixture and allow it to beat in fully before adding the next. Stop the mixer to scrape in the last of the flour mixture and scrape down the sides and bottom of the bowl.
- Add the vanilla extract and continue to whisk on high until it holds stiff peaks.
- Transfer to a piping bag or spread on cakes.
Notes
Presentation – For a whiter frosting be sure to properly whip up the butter and use clear vanilla extract.
Variations – Add cocoa powder at the end for a chocolate variation or use various extracts to flavor.
Storage – Store in an airtight container in the refrigerator for up to 2 weeks or in the freezer for up to 2 months. It is best used at the time it is made but you can rewhip it from the refrigerator if you want to make it in advance.
Origins –The recipe is adapted from Mrs. Elsie Ramey of Winchester, Virginia via the Southern Living Cookbook Desserts 1968 edition. The method is from Recipe Tin Eats. Her recipe, which she attributes to The New York Times is pretty much identical.
Nutrition
Before You Go
I hope you enjoyed this professional chef tested recipe. Check out our other frostings & buttercreams recipes, or jump into all our cake recipes and cupcake recipes to use with this perfect fluffy frosting!


Hi I’m making a half sheet cake but I’m traveling with it in my car for about 9 hours I need a frosting that will last in the car that won’t melt I was thinking a Ermine frosting what frosting would you suggest that’s tasty and stable enough for the ride
Great instinct! Ermine frosting is actually a fantastic choice. The key for a long car trip is keeping it cold: refrigerate the frosted cake thoroughly overnight before you leave, then transport it in a cooler with ice packs to keep it as cold as possible throughout the drive. I have also done when I have the AC blasting on the cake and that worked well for me but it was a 4 hour drive. Any butter-based frosting will start to soften if it gets warm, so keeping the temperature down is the most important factor regardless of which frosting you choose.
If you can’t guarantee a cooler for the full 9 hours or a cold car, an American buttercream would actually be the most road-trip-proof option since the high sugar content makes it more stable at room temperature — though it is sweeter than ermine. If you do have a cooler, ermine is a wonderful choice and will travel beautifully! 🎂 I hope this helps and please let us know how the cake turns out! ~CLF team
Did you mean to say let it cool to room temperature, not body temperature?? Need to know before I make it. Thanks
Hi Kay, I meant body temperature meaning when you put your finger in it or on it, it doesn’t feel hot or cold. I just feels like the same temperature as your body. ~Lindsey
I ran out of white sugar and used brown sugar it came out a fluffy caramel favored frosting light and airy. Thank you for the recipe and for all the comments that helped guide me. God bless you all. Highly recommend this recipe. With love …☀️
This made my day, this frosting is my favorite too! ☀️ What a beautiful happy accident with the brown sugar! That caramel flavor sounds absolutely dreamy I will have to try it! So glad the comments were helpful too, that’s exactly what this community is all about. Happy baking! 🧁 ~CLF team
How can I make this chocolate.