This post may contain affiliate links. Please read our disclosure policy.
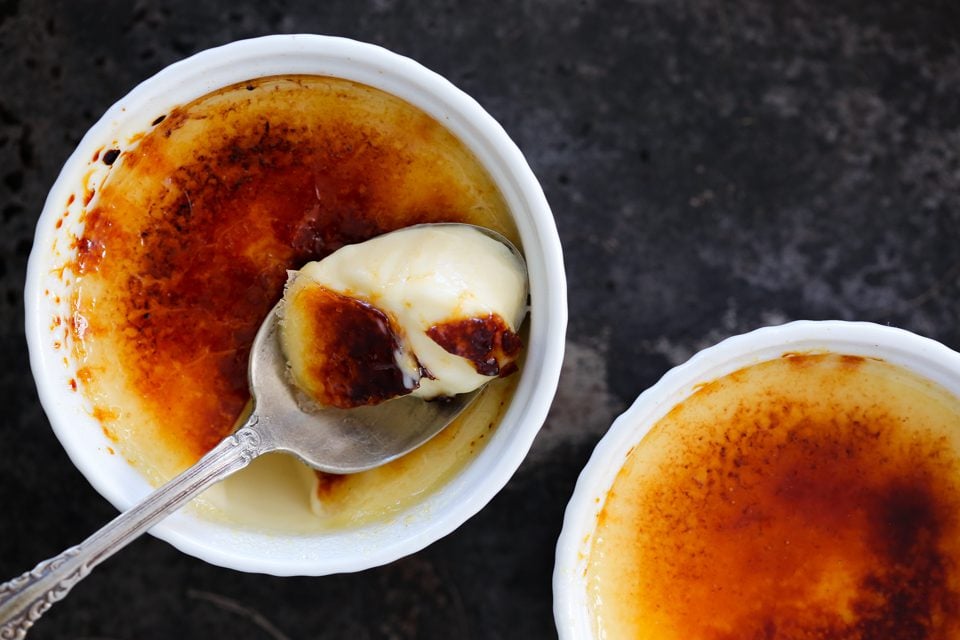
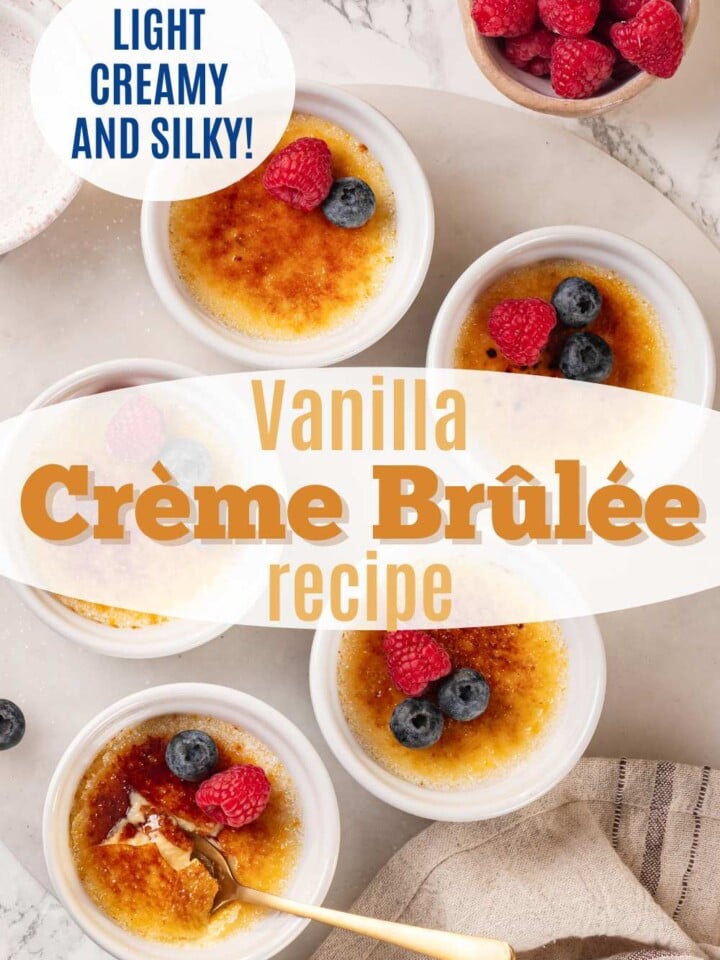
This is the best Vanilla Crème Brûlée recipe because the custard is light, creamy, and silky—with that satisfying crack from the caramel top! An easy fine-dining-level crème brûlée you can make at home!


A Quick Look At The Recipe
This is a brief summary of the recipe. Jump to the recipe to get the full details.
Jump to RecipePrep Time
15 minutes
Cook Time
30 minutes
Chill
2 hours
Total Time
45 minutes
Servings
6 people
Difficulty
Easy
Calories *
370 kcal per serving
Technique
Make vanilla custard, divide and bake in water bath, cool, brulee sugar and serve.
Flavor Profile
Creamy vanilla custard with caramelized sugar topping.
* Based on nutrition panel
Ahhh that creme brulee is perfection! ⭐⭐⭐⭐⭐
Kayle
This crème brûlée recipe is perfectly rich, sweet, and flavored with real vanilla beans for a complex vanilla flavor! Like my pots de crème, the creamy custard base has just enough eggs to set without making the dessert taste eggy. Combined with the delightful contrast from the dark, crispy caramel top, and with only 7 ingredients, this dessert will surely impress!
You know me: I love to dive deep and obsess over making the perfect version of whatever dessert I’m currently obsessing over! (We all remember the one-bowl chocolate cake.) I spent months in restaurants perfecting the ratios of the ingredients to ensure the perfect vanilla custard flavor and light creamy texture for this that we all desire in a crème brûlée!
Why You Will Love This Vanilla Creme Brulee Recipe!
- A combination of whole egg and egg yolk makes the perfect flavor and texture. All the other recipes on the internet use at least 4 egg yolks for 2 cups of cream! My recipe gives you a light, yet set, custard that uses a combination of 1 egg and an egg yolk. This way the vanilla flavor can really shine.
- An easy dessert with only 5 ingredients. Professional crème brûlée is easier than you think and it is simple to customize. I give you variation ideas below.
- Step by step instructions and tips from a pastry chef. I had some variation of a crème brûlée on the menu at least once a year. I’ve taught this French dessert to different pastry cooks and sous chefs, so now I will give you all the tips and tricks for a perfectly silky crème brûlée every time!
Professional Tips for Making Crème Brûlée
- Skim all the foam off the top of the custard base. The foam or bubbles won’t go away when you bake. They will solidify and create a texture on top of the crème brûlée. This can be done with a spoon, ladle, or plastic wrap. Once divided between the ramekins, quickly run a kitchen torch over the top to fully pop the rest of the bubbles.
- Divide the sugar between the heavy cream and the eggs. The sugar helps keep the heavy cream from scorching and protects the eggs when tempering. You can just measure once and then eyeball half in each—it won’t make a difference, I promise!
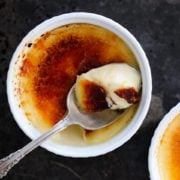
- Be careful not to over or underbake the crème brûlée. Baking is the most important part of a crème brûlée. Underbake, you will have a soupy, unset custard base; overbake, and you will have sweetened baked eggs. The crème brûlée, when done, will jiggle cohesively like jello. And if you really aren’t sure, you can use the spoon test: If the custard holds the weight of a small spoon, it is done!
- Torch cold custard right before serving. The sugar on crème brûlée should be caramelized right before serving. It will soften after only 10 minutes. Do not believe the lies elsewhere! You know from my caramel pudding that 2 hours is an eternity when it comes to custard.
Ingredients
- Heavy Cream: Heavy cream adds richness and a little natural sweetness to the creme brulee. The fat in it makes for a thicker custard with a smooth texture.
- Granulated Sugar: Sugar is used here for sweetness, but it also adds a little leavening when beaten with the eggs and protects them from the heat of baking.
- Kosher Salt: Kosher salt helps enhance the flavor without having to add more sweetness.
- Vanilla Bean: Split and scraped vanilla beans add fullness to the vanilla flavor. You can use the whole vanilla bean pods in the heavy cream or only the seeds and save the pod for another vanilla bean recipe.
- Egg Yolk: The additional egg yolk is also a thickener like the whole eggs but they add more fat than the whole egg without the added moisture from the whites. I use this technique in my chocolate mousse recipe and it also makes a thick, rich crème brûlée. Too many yolks will make it taste “eggy.”
- Whole Egg: The egg in a baked custard is integral to thickening the custard. Whisking it first with the sugar helps add a layer of protection from the heat in the oven. Not into eggs but you are into custard texture? Try a lemon posset instead!!!
- Vanilla Extract
See the recipe card for full information on ingredients and quantities.
Variations
- Flavor with additions: Think easy pumpkin pie, pistachio paste, Nutella, or melted chocolate like my chocolate cheesecake recipe! Immersion blend or whisk in additional flavorings after tempering in the eggs! As with most additions, start small and add slowly. Things like Nutella and pistachio paste will add sweetness, so keep that in mind when sweetening your custard base.
- Flavor with extracts: Replace the vanilla extract with almond, cherry, mint, or coffee. There are so many fun extracts out there! Just be aware that extracts come with different strengths. Start small and add more to taste. You can always make the flavor stronger, but you won’t be able to take it away.
- Flavor with Infusions: When heating the heavy cream, add spices, bananas, or toasted nuts. Allow to sit for an hour or two before straining.
- Add some fun toppings: Add macerated berries, pepita brittle, cinnamon streusel, or top with some cherry pie filling! When adding a “wet” topping, I would either serve it on the side or place it on top right before serving so the crunch from the bruleed top isn’t lost. Use my raspberry pound cake tiramisu as inspiration!
How to Make Creme Brulee
Use these instructions to make a perfectly creamy crème brûlée every time! Further details and measurements can be found in the recipe card below.
Crème Brûlée Base:
Step 1: Preheat the oven to 325°F.
Step 2: In a saucepan, combine cream, half the sugar(not including the sugar set aside for the topping), salt, and split and scraped vanilla bean. Cook on medium heat until the mixture boils.
You know from my pastry cream recipe that when scraping a vanilla bean, use a paring knife and place the vanilla bean on the counter. Holding one end of the bean and using the tip of the knife, place the blade halfway through the bean and slice until it reaches the end of the bean. Fold the two ends of the pod open and still hold one end, using the back of the paring knife to scrape the open pod. This will help you scrape the most out of the vanilla bean.
Step 3: When the cream mixture is close to boiling, in a large bowl whisk together the egg, egg yolk, and the remainder of the sugar (not including the sugar set aside for the topping) until the mixture is lightened slightly. This technique is called blanchir, which means “to whiten” in French.
Place a kitchen towel or pot holder under the bowl with the egg mixture. It will help keep the bowl in place, causing less of a mess and making it easier to pour and whisk at the same time.
Step 4: Once the cream mixture has come to a boil, slowly add the cream into the egg mixture while you continue to whisk. Continue to add the cream slowly until all of the cream has been added. This is how you temper your eggs. This process is found in most stirred and baked custard recipes.
If the cream was added too fast or the eggs weren’t whisked enough, there might be some cooked or coagulated pieces of egg. Not to worry; just strain the mixture through a fine mesh sieve or chinoise before adding it to the ramekins.
Step 5: Whisk in the vanilla extract and skim off the foam. This can be done with a spoon or plastic wrap. This will prevent a weird texture when the crème brûlée is baked.
Step 6: Divide between your choice of ramekins. Make sure they are all at an equal level so they all bake at the same rate.
Baking Crème Brûlée:
Step 7: Place the filled ramekins in a large, deep oven-safe dish or roasting pan. To get the last bit of bubbles off the top, quickly torch the top, moving quickly, this will pop them instantly.
Step 8: Cover the entire large dish with aluminum foil. There should be an overhang to keep too much air from coming in. Pull pack one corner so you can see.
Step 9: Holding the baking dish level transfer to the middle rack of the preheated oven, you don’t want it next to the broiler. Through the corner, pour hot water into the dish. The water level should be halfway up the sides of the ramekins. Replace the corner of the foil, making sure it’s fully sealed.
Be very careful when pouring the water for your water bath. I treat it like I’m pouring hot sugar into my egg whites for a meringue. Have the water pour down the corner of the dish. As an extra layer of insurance, be sure there are no ramekins in the corner.
Step 10: Bake for about 20-30 minutes until the center jiggles like jello and is no longer liquid. Another test is using a small spoon and placing it on top. If it can hold the weight, it is done. I am partial to the jiggle test, though.
The bake time will differ by the size and shape of your chosen ramekins. Also, on the heat of the oven, the more you open the oven and check the more the heat is being released and will increase the bake time.
Step 11: Once baked, remove the ramekins carefully using kitchen tongs and towels. Place them on a baking dish or a sturdy cooling rack.
Step 12: Allow to cool at room temperature, then cover with plastic wrap and refrigerate for at least 2 hours, but ideally overnight.
Step 13: When ready to serve, sprinkle about ½ a teaspoon of sugar on top of the custard. The amount will depend on the surface area of the ramekin you choose. Then tilt the ramekin to coat the top evenly.
You want a thick coating where you can see the sugar, but not too much sugar that you can’t see the custard. Too little sugar and you end up burning the top of the custard and creating a skin, resulting in an unpleasant mouth feel. Too much sugar and it won’t all melt and give you that famous crunchy caramelized sugar top.
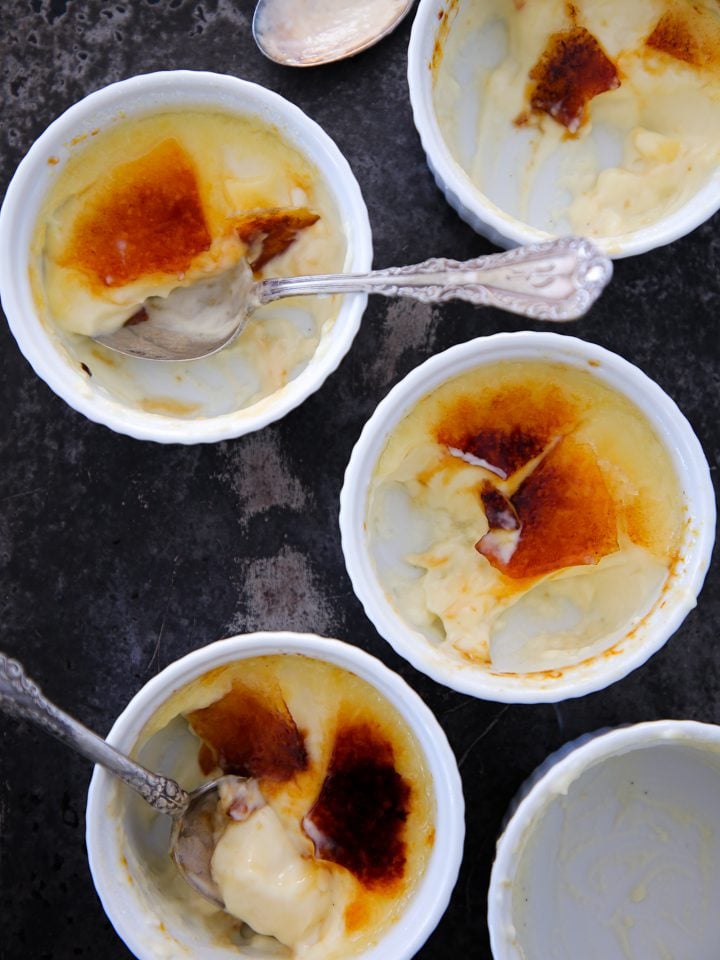
Step 14: Start melting the sugar with the kitchen torch on low and a little further away. Gradually move the torch closer and increase the speed until a nice dark caramel is formed on the surface. Allowing the caramel to set should only take about 3 minutes, depending on the temperature of your room. Serve immediately!
Chef Lindsey’s Recipe Tip
The seal on the aluminum foil when baking is essential, especially if you have a convection oven at home. Even if a little bit of air gets through the foil, it can cause bubbling or a skin on the crème brûlée. Not the end of the world. They will still be delicious. I just want you to have restaurant level desserts at home. ❤️
Frequently Asked Questions
Store baked crème brûlées wrapped in the refrigerator. They will keep for up to 7 days. Once the caramel has been added, serve within 10-15 minutes. The sugar will absorb moisture from the custard below and will liquify and soften. I do not recommend freezing crème brûlée.
You can pour a dry caramel you made in a pot on top to get almost the same effect! Put about 1 cup of sugar in a pot and heat over medium high heat until it starts to melt. You can gently stir it with a spoon to make sure it melts evenly. Take the caramel to a medium amber, remove it from the heat, and then pour it carefully over the top of the set, cold custards. This will be a thicker top because the caramel will begin to set as you pour, as the custard is cold.
Of course, if you have enough ramekins, you can make as many crème brûlées as you desire.
They are delightful on their own, but you can also have some fun with them! Add some roasted peaches, candied nuts, or hot fudge sauce on the side!
If you tried this recipe and loved it please leave a 🌟 star rating and let me know how it goes in the comments below. I love hearing from you; your comments make my day!
Vanilla Crème Brûlée
Ingredients
- 2 cups heavy cream
- 6 tablespoons sugar divided
- ¼ teaspoon kosher salt
- ½ vanilla bean scraped
- 1 whole egg large
- 1 egg yolk large
- 1 teaspoon vanilla extract
- ¼ cup granulated sugar for topping, will be the part that you brûlée
Instructions
Crème Brûlée Base:
- Preheat the oven to 325°F.
- In a saucepan, combine cream, half the sugar(not including the sugar set aside for the topping), salt, and split and scraped vanilla bean. Cook on medium heat until the mixture boils.
- When the cream mixture is close to boiling, in a large bowl whisk together the egg, egg yolk, and the remainder of the sugar (not including the sugar set aside for the topping) until the mixture is lightened slightly. This technique is called blanchir, which means “to whiten” in French.
- Once the cream mixture has come to a boil, slowly add the cream into the egg mixture while you continue to whisk. Continue to add the cream slowly until all of the cream has been added. This is how you temper your eggs. This process is found in most stirred and baked custard recipes.
- Whisk in the vanilla extract and skim off the foam. This can be done with a spoon or plastic wrap. This will prevent a weird texture when the crème brûlée is baked.
- Divide between your choice of ramekins. Make sure they are all at an equal level so they all bake at the same rate.
Baking Crème Brûlée:
- Place the filled ramekins in a large, deep oven-safe dish or roasting pan. To get the last bit of bubbles off the top, quickly torch the top, moving quickly, this will pop them instantly.
- Cover the entire large dish with aluminum foil. There should be an overhang to keep too much air from coming in. Pull pack one corner so you can see.
- Holding the baking dish level transfer to the middle rack of the preheated oven, you don’t want it next to the broiler. Through the corner, pour hot water into the dish. The water level should be halfway up the sides of the ramekins. Replace the corner of the foil, making sure it’s fully sealed.
- Bake for about 20-30 minutes until the center jiggles like jello and is no longer liquid. Another test is using a small spoon and placing it on top. If it can hold the weight, it is done. I am partial to the jiggle test, though.
- Once baked, remove the ramekins carefully using kitchen tongs and towels. Place them on a baking dish or a sturdy cooling rack.
- Allow to cool at room temperature, then cover with plastic wrap and refrigerate for at least 2 hours, but ideally overnight.
- When ready to serve, sprinkle about ½ a teaspoon of sugar on top of the custard. The amount will depend on the surface area of the ramekin you choose. Then tilt the ramekin to coat the top evenly.
- Start melting the sugar with the kitchen torch on low and a little further away. Gradually move the torch closer and increase the speed until a nice dark caramel is formed on the surface. Allowing the caramel to set should only take about 3 minutes, depending on the temperature of your room. Serve immediately!
Video
Notes
Nutrition
Before You Go
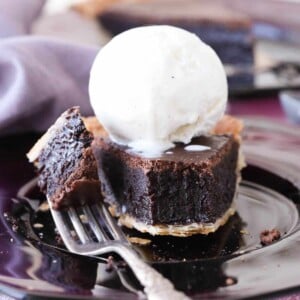
I hope you enjoyed this professional chef tested recipe. Check out our other delicious, chef-developed custard recipes, or make a custard tart like my buttermilk pie next!


This vanilla creme brulee is the best, even better than what I can get at a steakhouse! I was trying to figure out what to serve with the steak for date night, and I’m so glad I chose this dessert!
Ahhh that creme brulee is perfection!
Aww thanks, girl! xoxo