This post may contain affiliate links. Please read our disclosure policy.
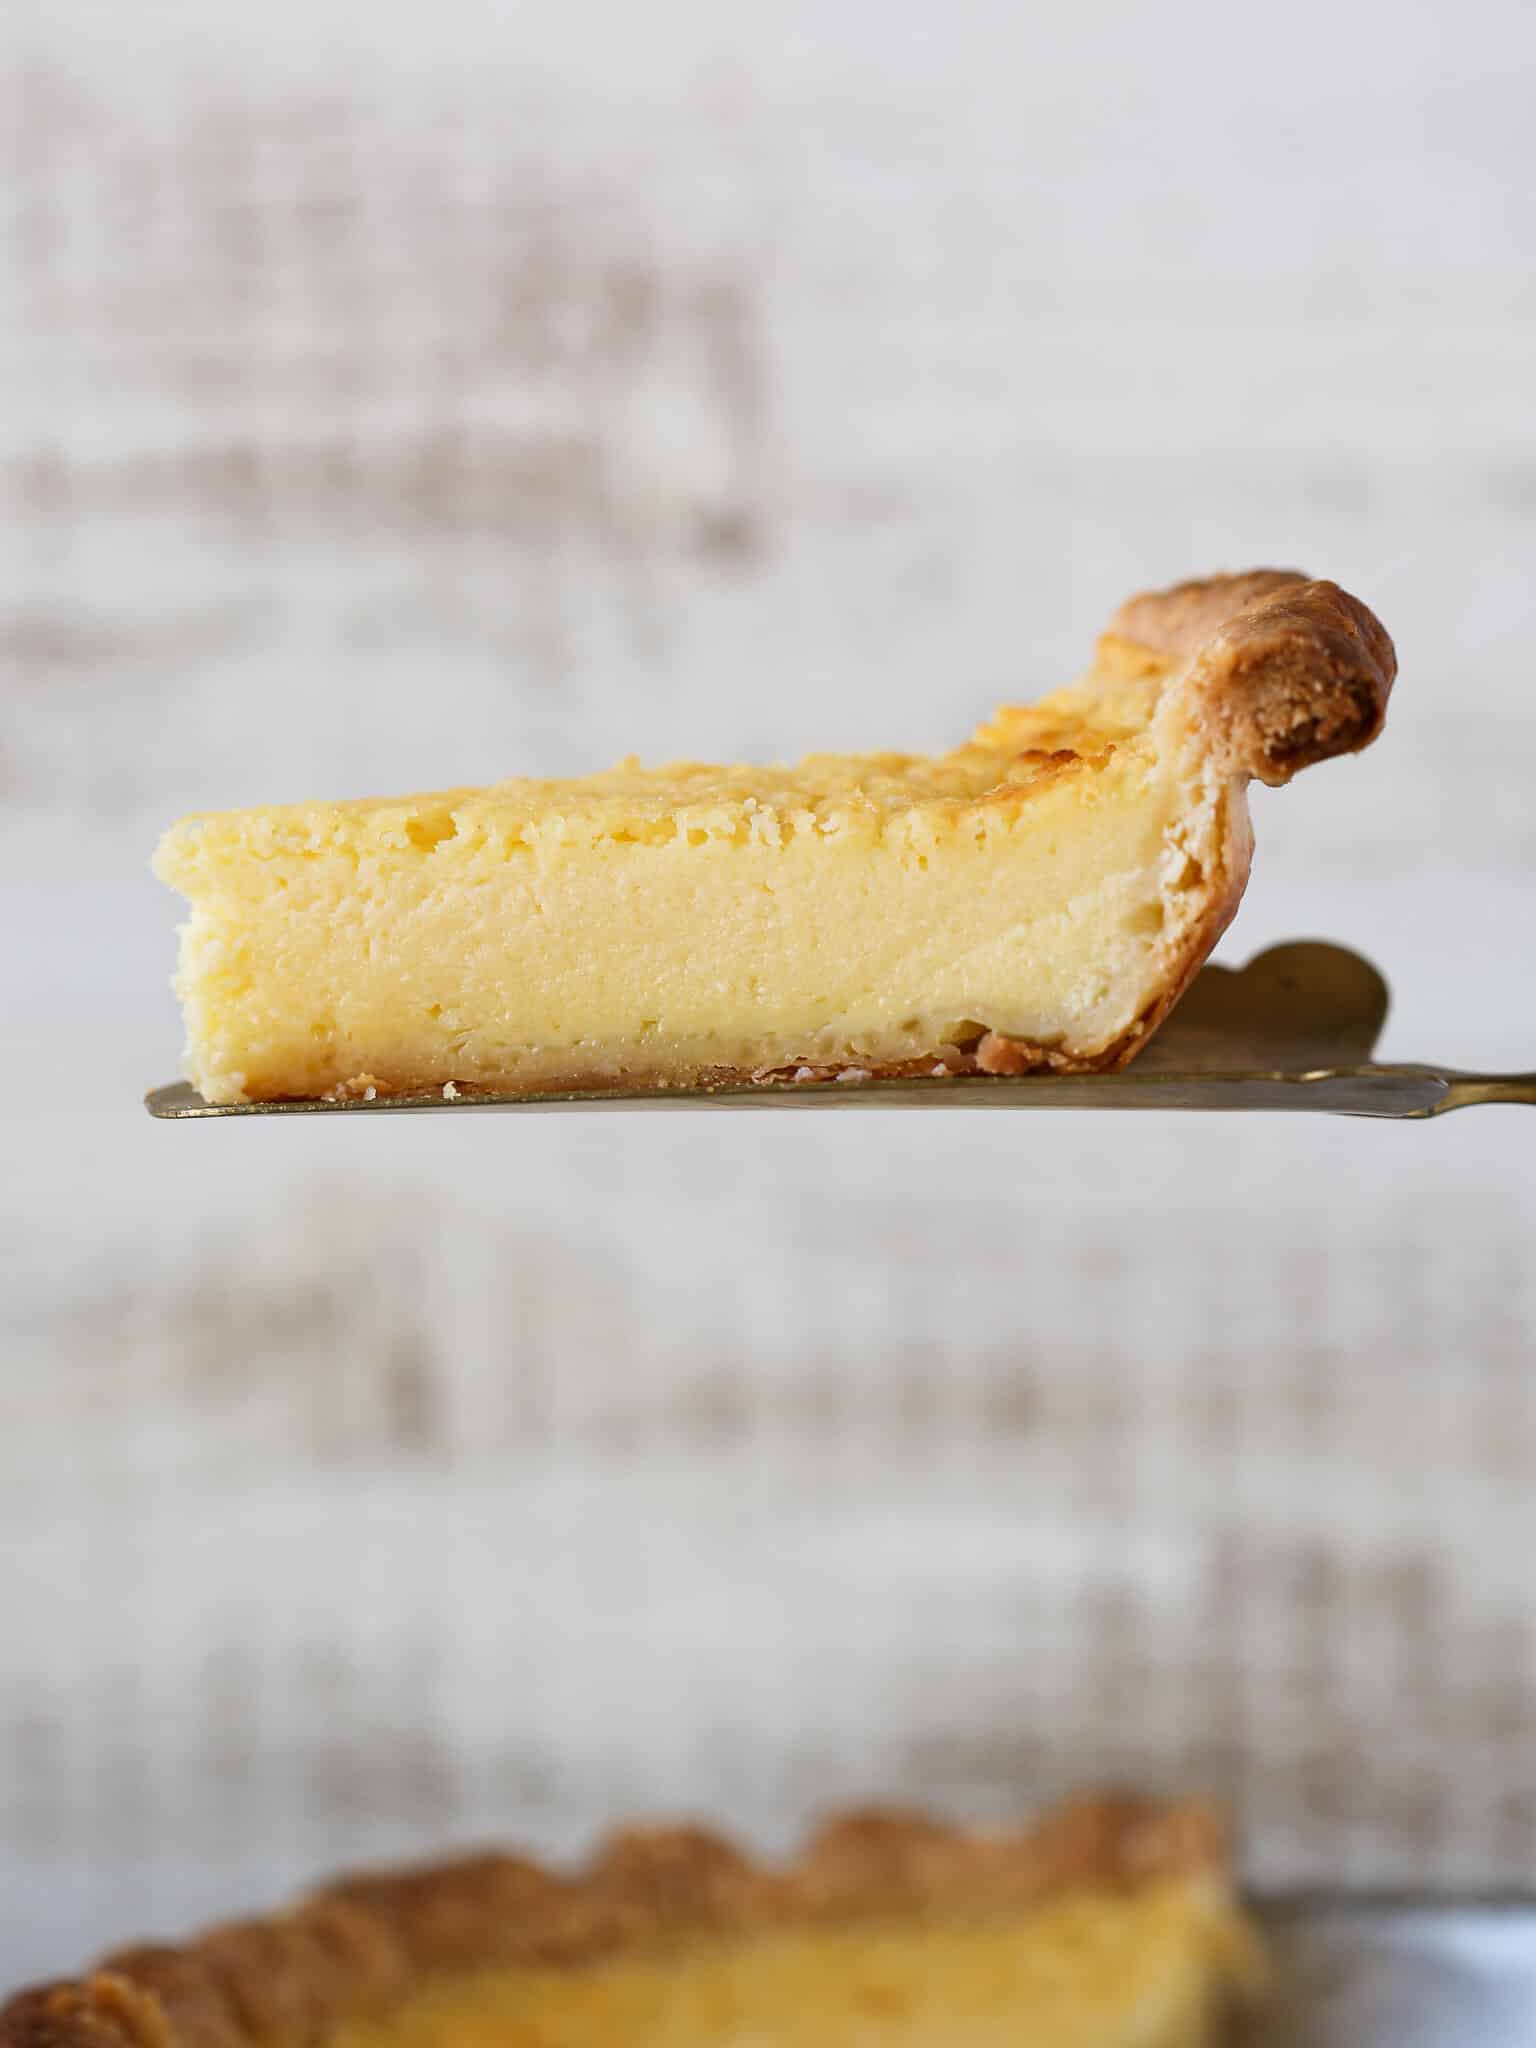
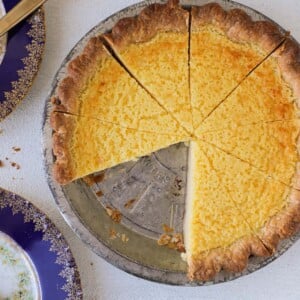
This old fashioned Buttermilk Pie uses full-fat buttermilk for a thick, rich custard filling! The flakey, all-butter pie crust balances the flavors and texture of the creamy, slightly tart filling. This is an easy pie all year round!
This easy buttermilk pie uses full-fat buttermilk for its thick consistency and rich flavor. The added lemon juice enhances the acidity of the buttermilk, and there is just enough sugar to make a perfectly sweetened, thick custard.
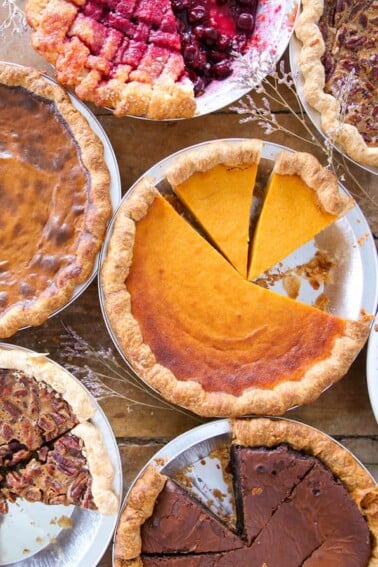
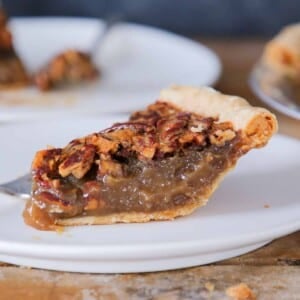
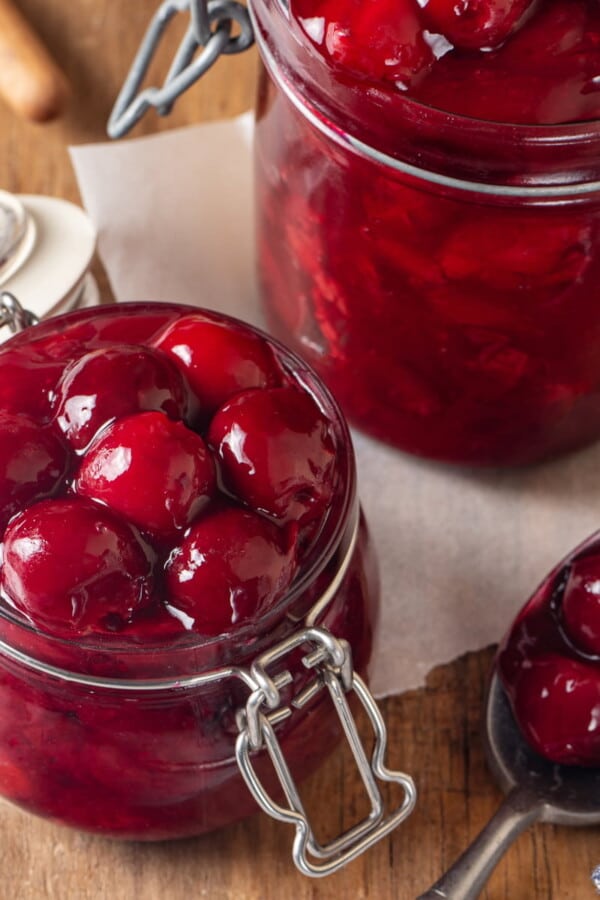
I promise you won’t be disappointed by this simple, easy old-fashioned pie. It is the perfect pie to balance out the traditional pumpkin pie and the best pecan pie on your Thanksgiving table. Though a buttermilk pie deserves a place on the dessert table all year round!
Why This is the Best
- An easy pie. Simply whisk together all the ingredients for the filling and bake.
- Balanced flavors & texture. Tart buttermilk and lemon juice are perfectly in balance with sugar for a lightly sweetened custard. The flakey all butter vodka pie crust provides a crisp contrast.
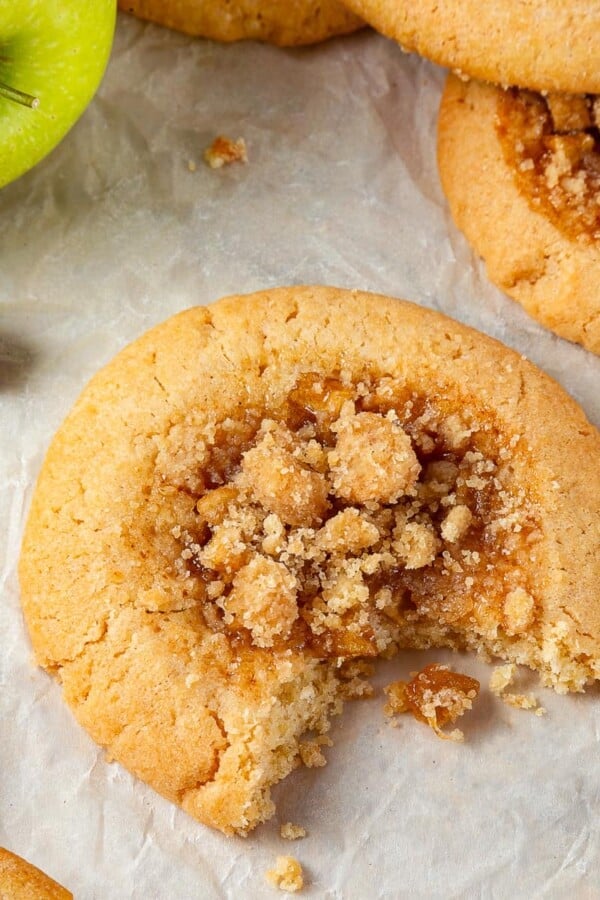
- The perfect pie for all seasons. Serve buttermilk pie in the Summer with fresh berries and homemade whipped cream, or in the Fall with a generous dollop of warm apple compote and vanilla bean ice cream.
- Professionally tested. I baked every buttermilk pie recipe in my extensive vintage cookbook collection before creating my own recipe. This combines the best of all the recipes: tart, sweet, and creamy.
Ingredients
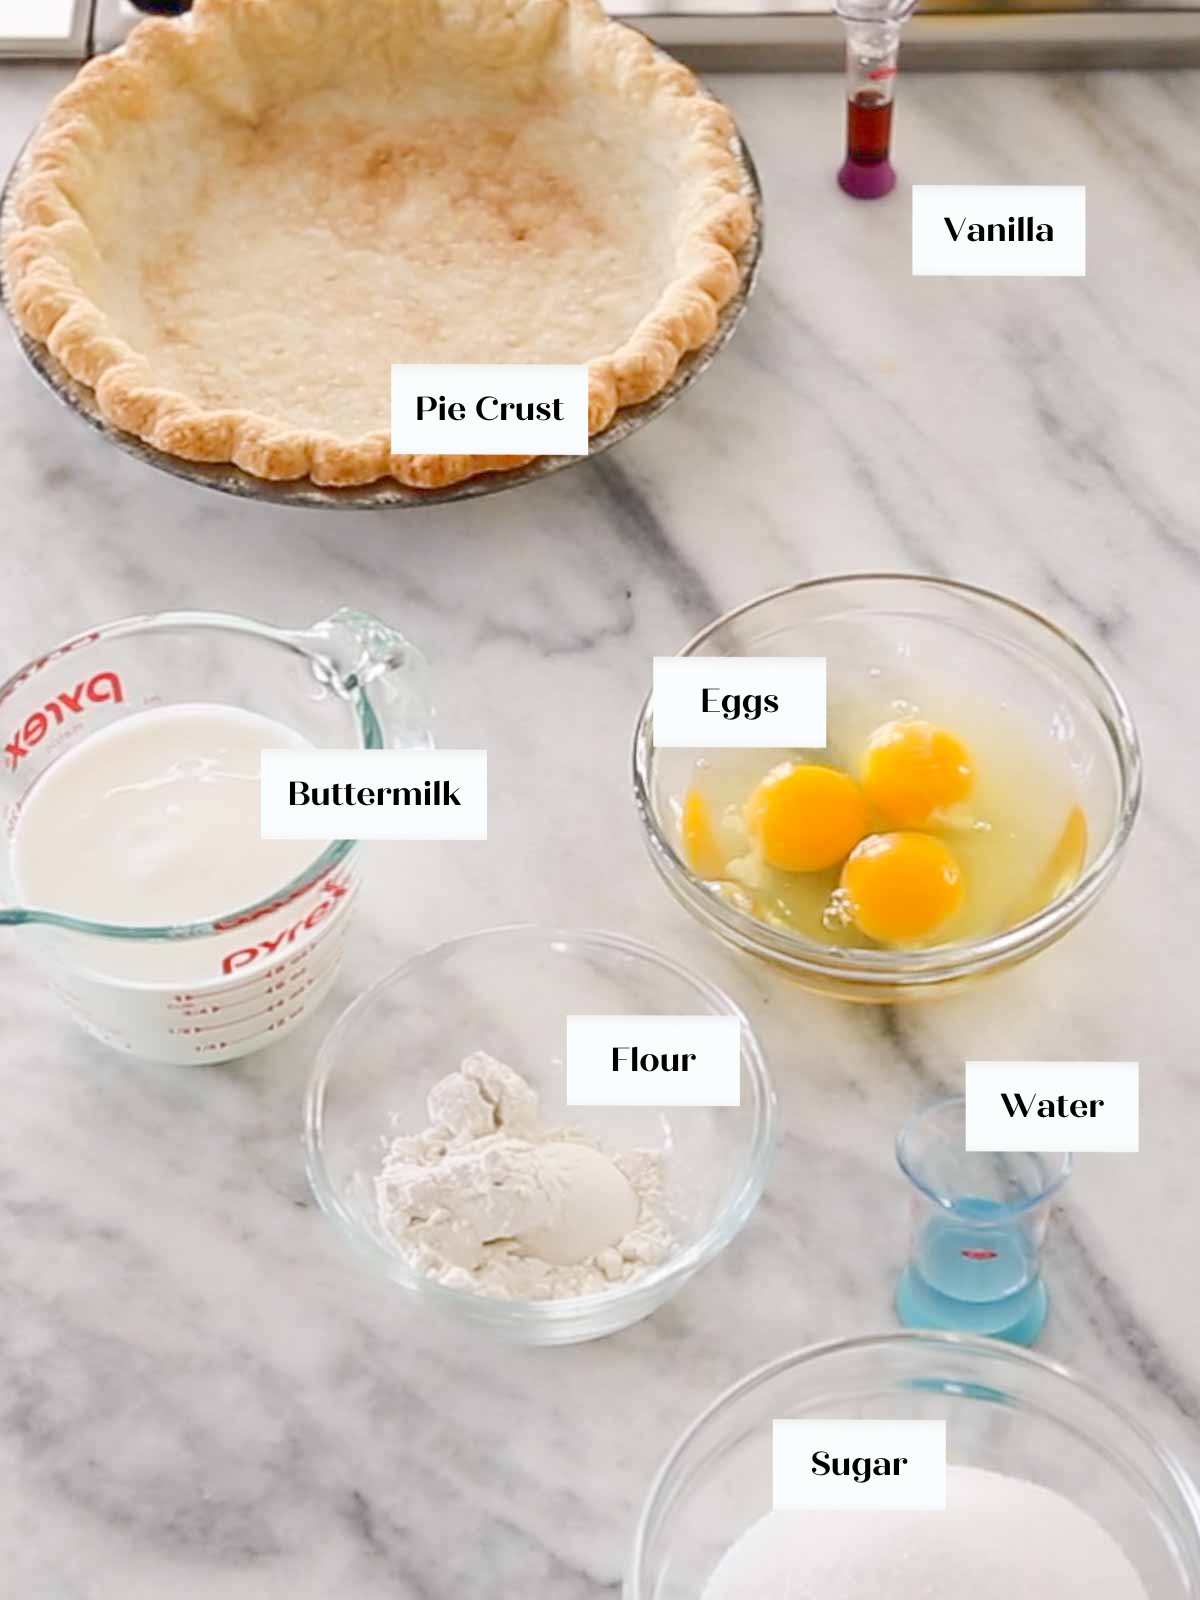
- Lemon Juice: Lemon juice augments the acidity in buttermilk here! My motto for citrus juices is that fresh is always best. If you must use store-bought, try to find a frozen option that is frozen fresh lemon juice.
- All-Purpose Flour: I use All-Purpose flour in this baked custard as a thickener. It has a lighter hold than cornstarch or tapioca. It will absorb some moisture and thicken the filling without changing the flavor.
- Butter: I use unsalted butter for baking because you want to control the amount of salt you are adding. The fat and dairy in the butter will round out the flavor and create a smoothness in this baked custard.
- Granulated Sugar: Sugar is here for sweetness and to add a little leavening when beaten with the eggs. Granulated sugar protects the eggs from the heat of baking and additional acidic ingredients like lemon juice.
- Large Eggs: The egg in a baked custard is integral to thickening the custard. Whisking it first with the sugar protects it from the heat and also acidic ingredients like lemon juice.
- Full Fat Buttermilk: Whole Buttermilk is thicker and richer than 1.5% or 2% buttermilk. It is not as prevalent in grocery stores, but the extra fat and thick texture really make this pie special.
- Water: Water loosens the custard just enough.
- Vanilla Extract:: Vanilla extract adds a gentle and beautiful flavor.
Substitutions
- All-Purpose Flour: All-purpose flour acts as a thickening agent, so you could substitute any flour you choose. You can also use gluten-free all-purpose flour.
- Buttermilk: The old-fashioned buttermilk pie recipe calls for full-fat buttermilk, but you could substitute low-fat buttermilk. Correspondingly, eliminate the water if you do use a lower-fat variety.
- Pie Crust: This pie would also be delicious in a pâte sucrée pie crust, this old-fashioned almond flour pie crust, Crisco pie crust, or in a baked graham cracker crust.
- Twist the flavor. Try adding lemon zest or orange zest to the sugar before mixing for another layer of flavor. You could also add different extracts to change it up.
What is Southerners’ Old Fashioned Buttermilk Pie?
Buttermilk Pie is an easy baked custard pie, like chess pie. The flavorful custard is whisked together in one bowl and then baked inside a flakey, vodka pie crust. It is an easy, no-fuss dessert. It has a slightly tart, creamy filling.
Professional Tips
- Use full-fat buttermilk for the best taste. For the thickest, richest custard use real, full-fat buttermilk. Homemade “buttermilk” isn’t as thick and creamy as commercially packaged buttermilk.
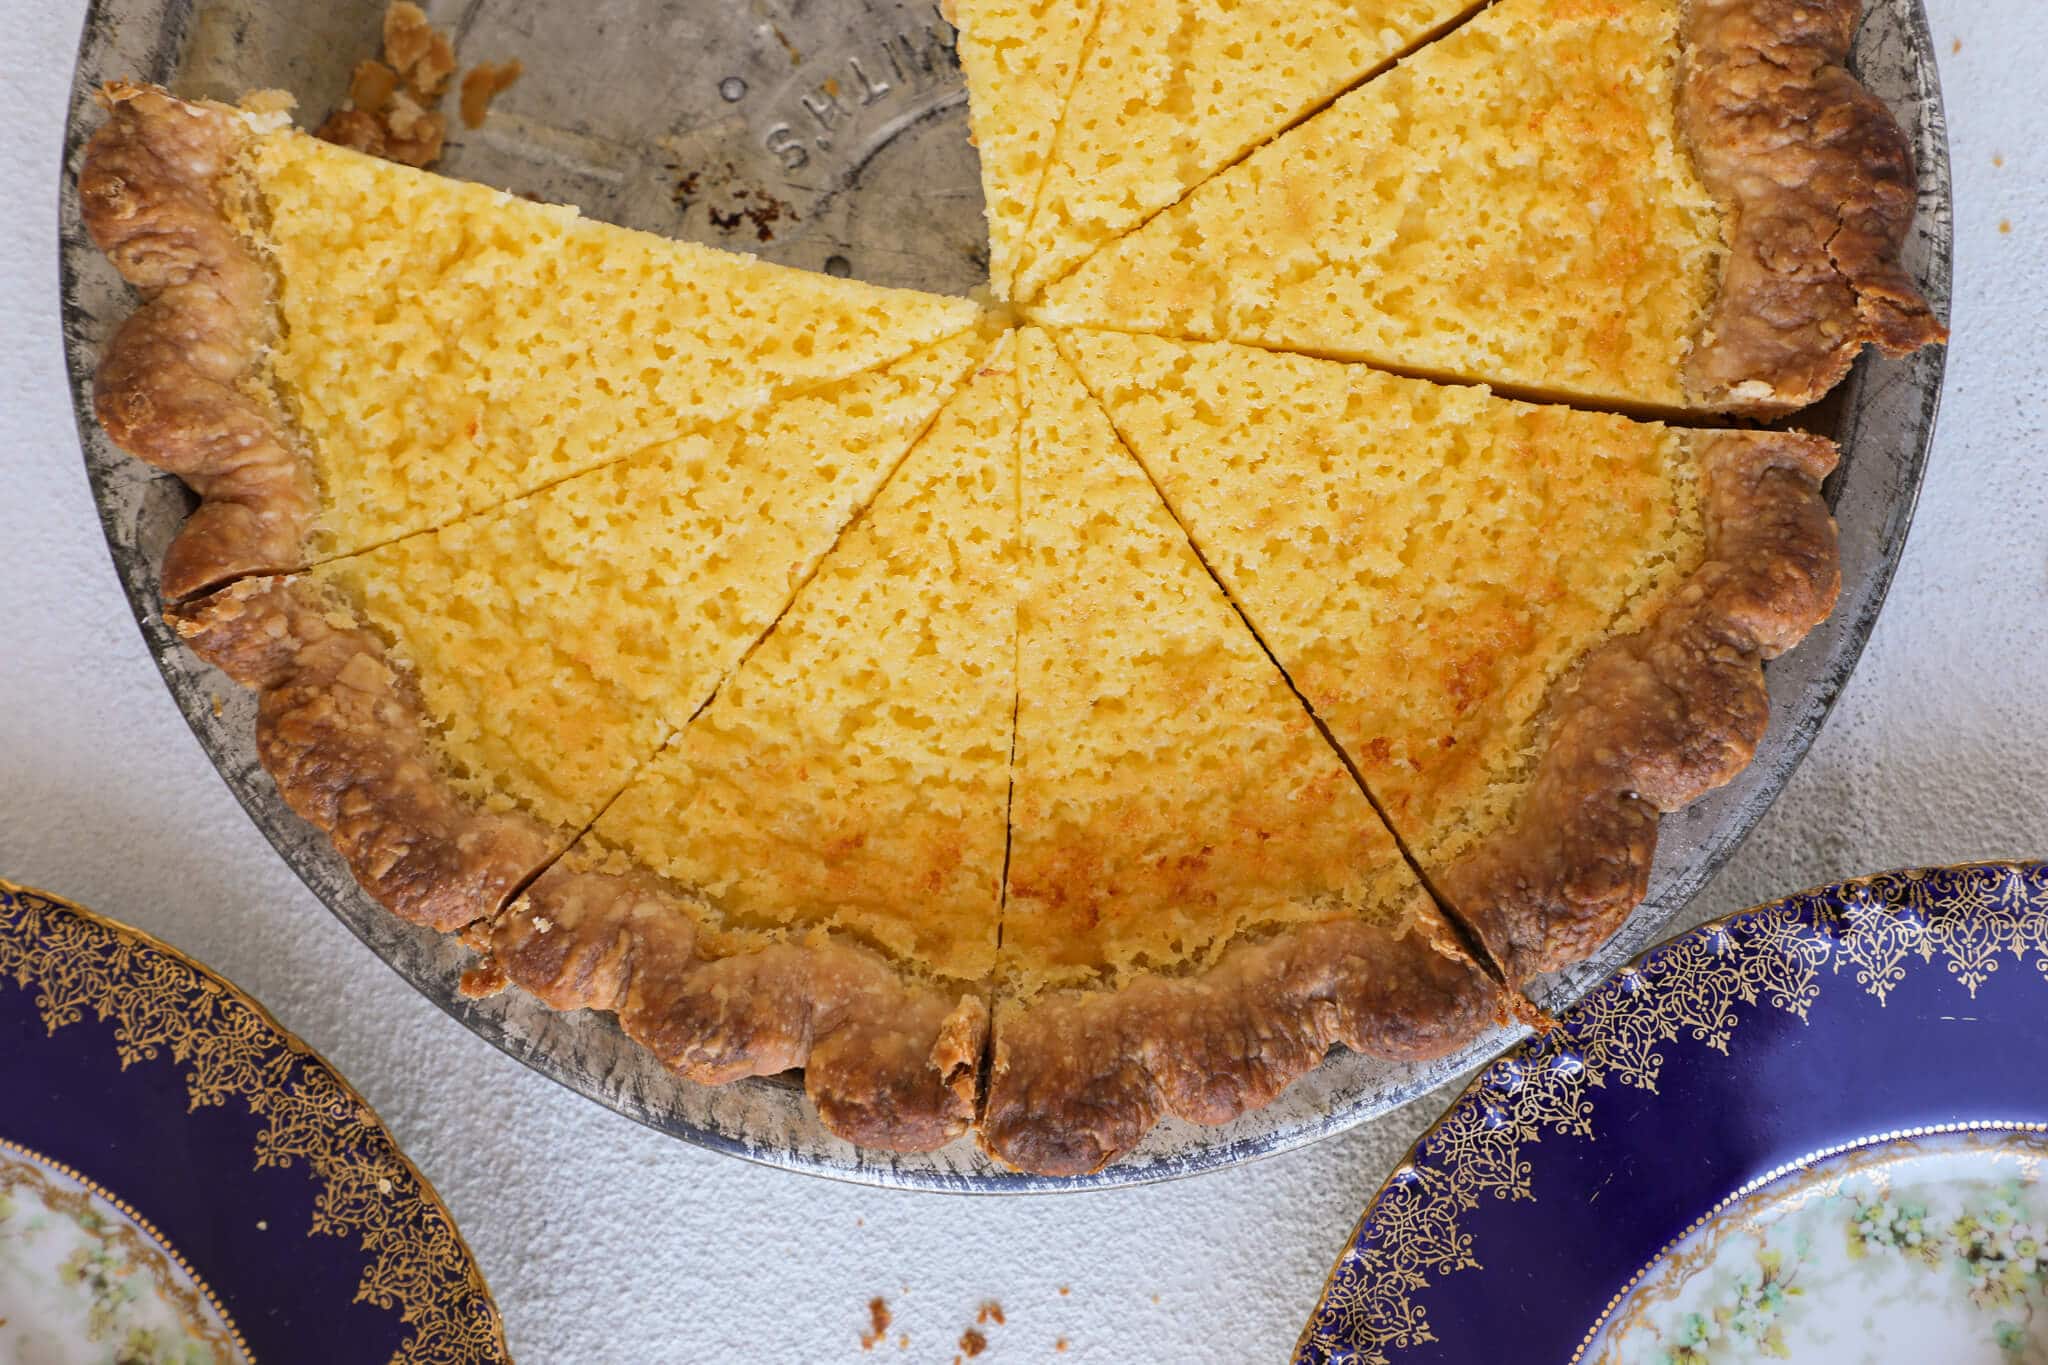
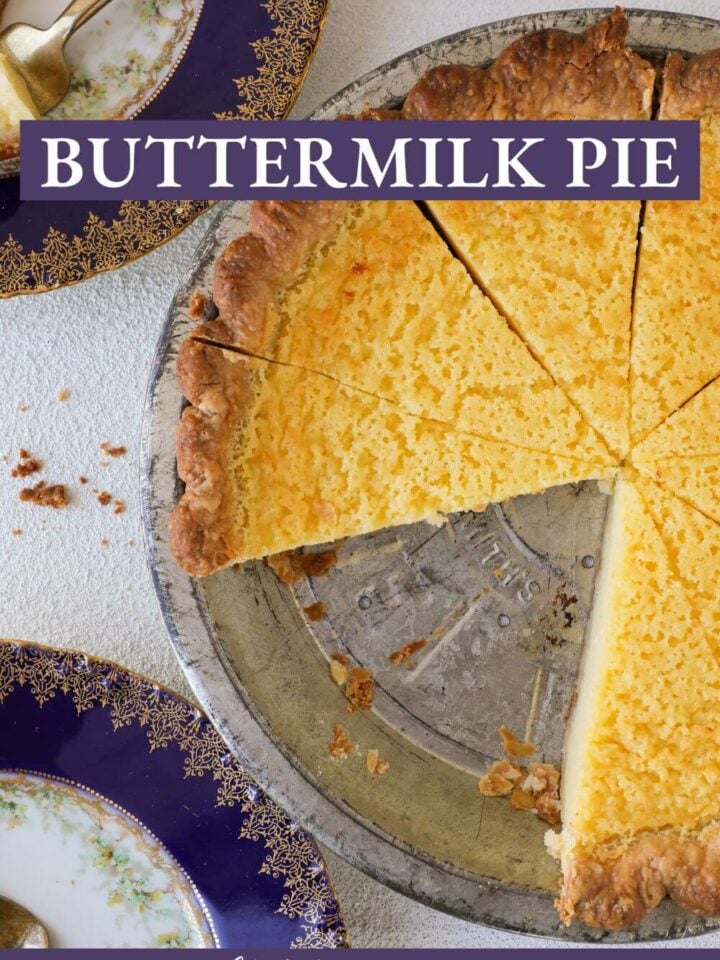
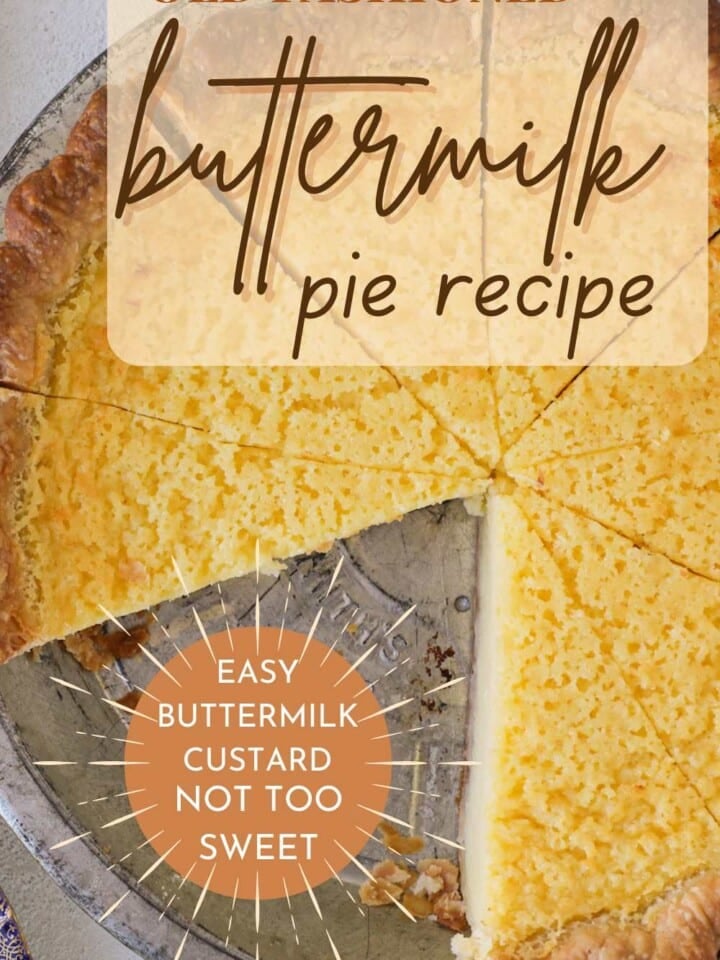
- Whisk all the ingredients together in one bowl. Whisking the ingredients separately creates too many little bubbles that rise to the surface during baking. You can see this on the top of my pie in the photos. Whisking everything together at once will limit the bubbles and will create a smooth top.
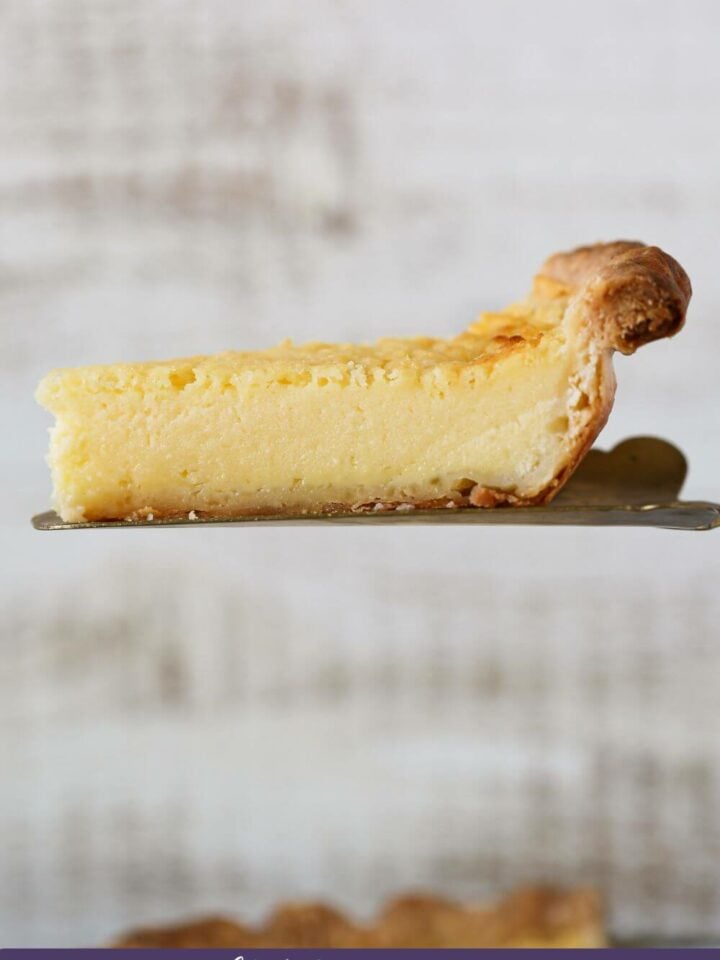
- Cool completely before slicing. The pie will slice best when cooled completely and refrigerated. If sliced when still warm, the filling will appear underbaked.
How to Make Buttermilk Pie
Use these instructions for the easiest buttermilk pie! Further details and measurements can be found in the recipe card below.
Par-Bake your pie crust:
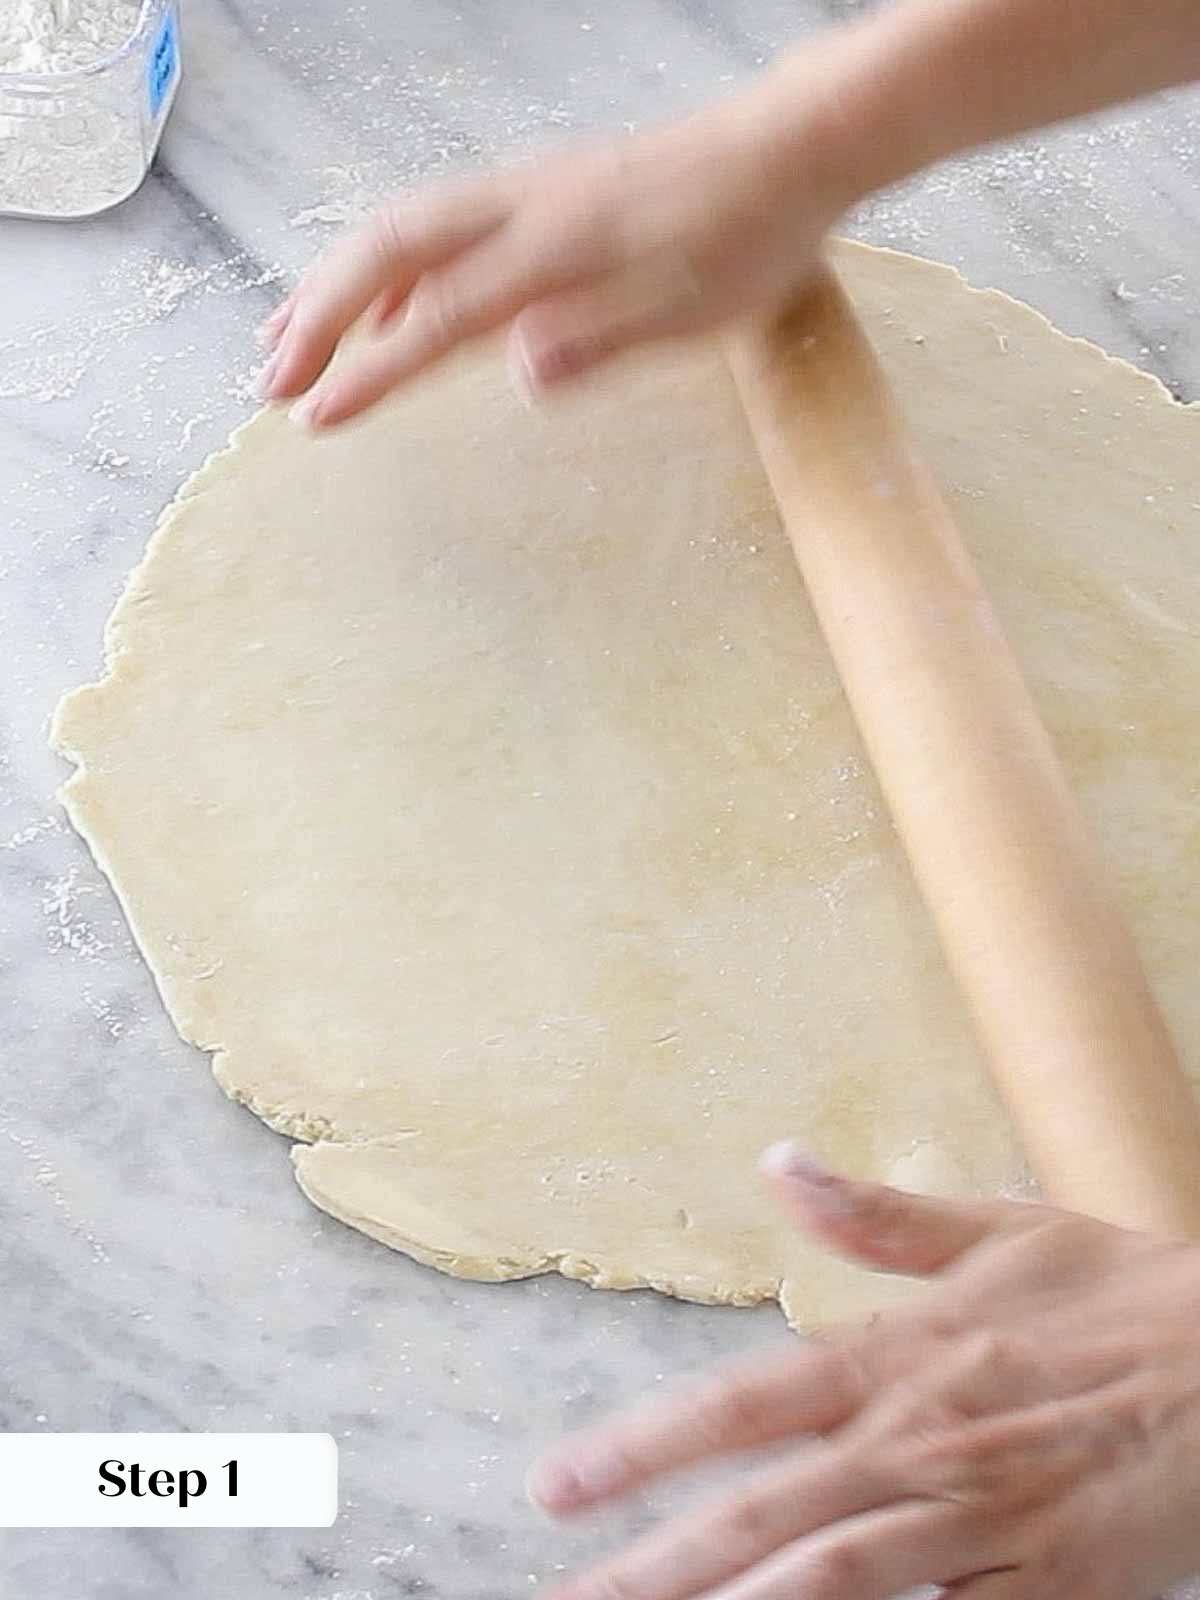

Step 1: Preheat the oven to 350°F convection or 375°F conventional. If using homemade pie dough, roll out one portion of pie dough on a lightly floured surface until about 1/8th inch thick. Chill 30 minutes flat on a baking sheet. This allows the gluten to relax and the butter to re-solidify.
Step 2: Place chilled dough on top of a 9 inch pie dish or tin. Allow to warm up just enough to be workable. Lift up the edges and allow it to settle on the bottom. Gently press the sides to fit the dish allowing the edges to overhang the dish. Start on one side and roll the edges under towards the dish. Roll until you reach the dish then gently press it down on the dish to seal. Repeat with the rest of the crust.
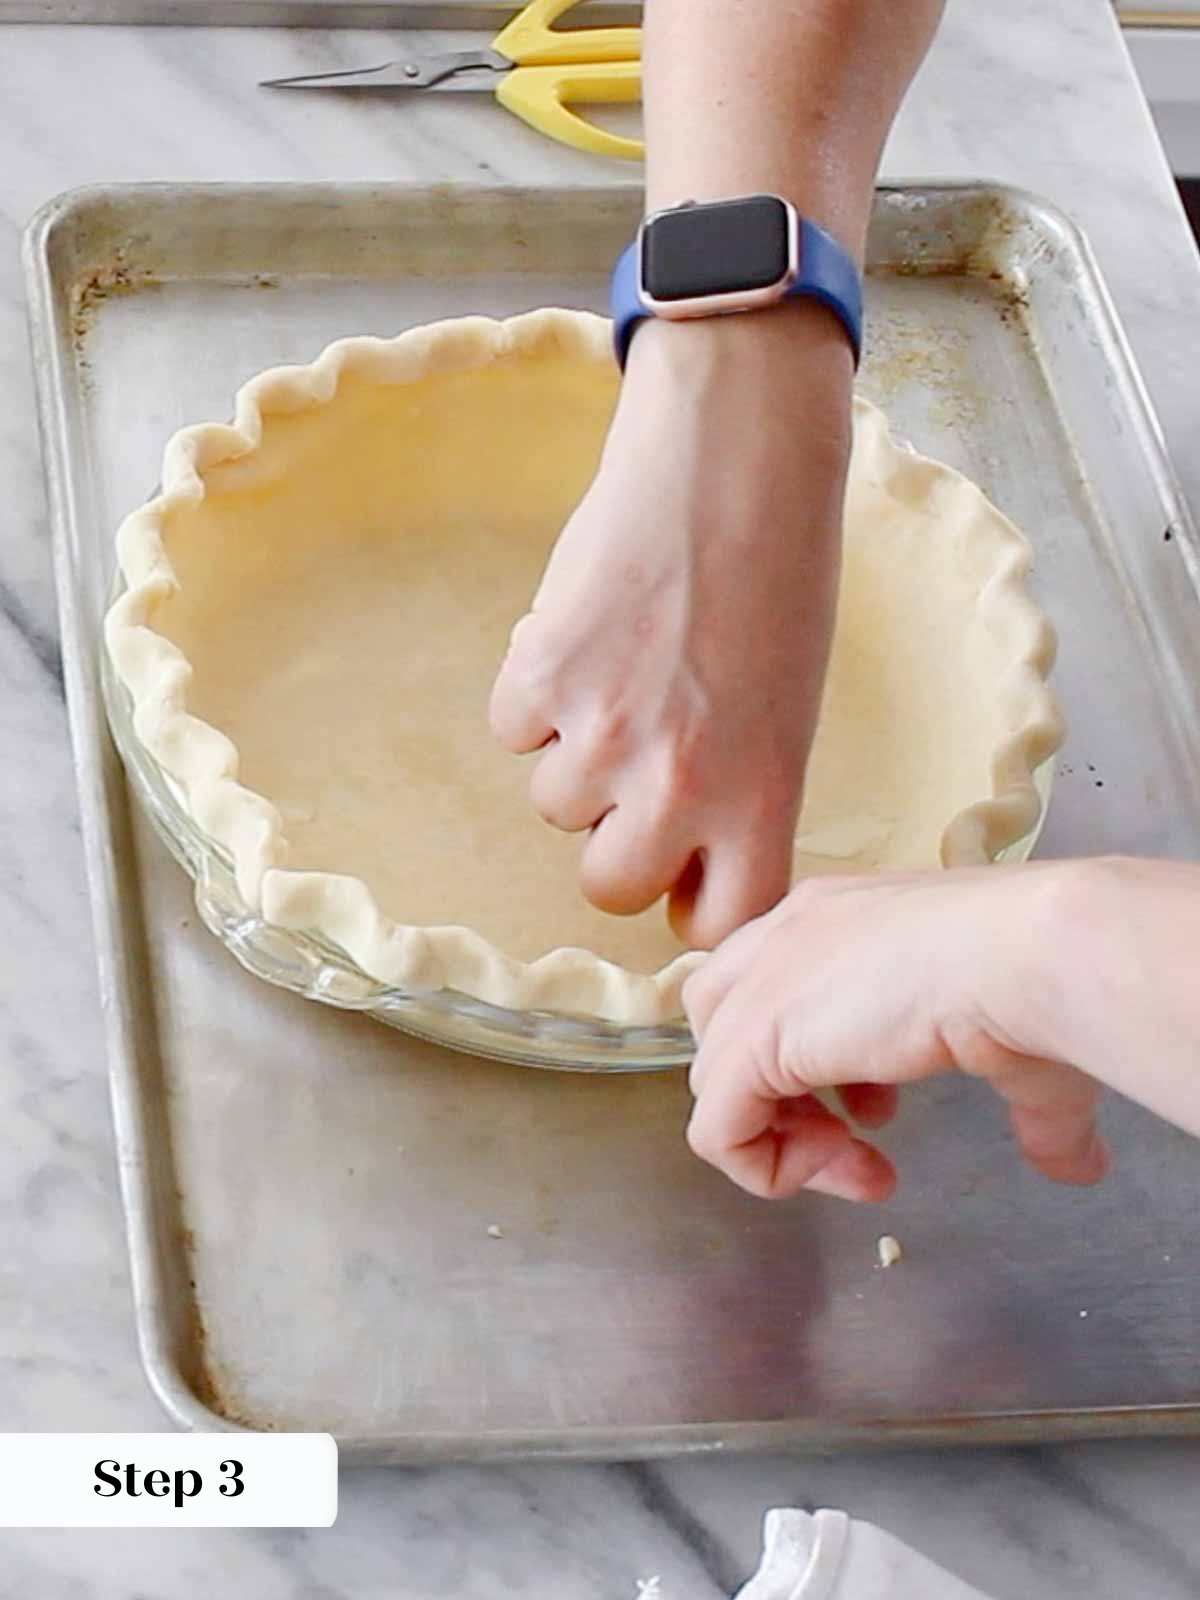
Step 3: Flute the edges by pressing one knuckle on the outside and two knuckles around it from the inside of the crust. I prefer using my knuckles but you could also use your finger tips. Chill for 10-30 minutes depending on how warm it got. If it is still cold, just 10 minutes will do.
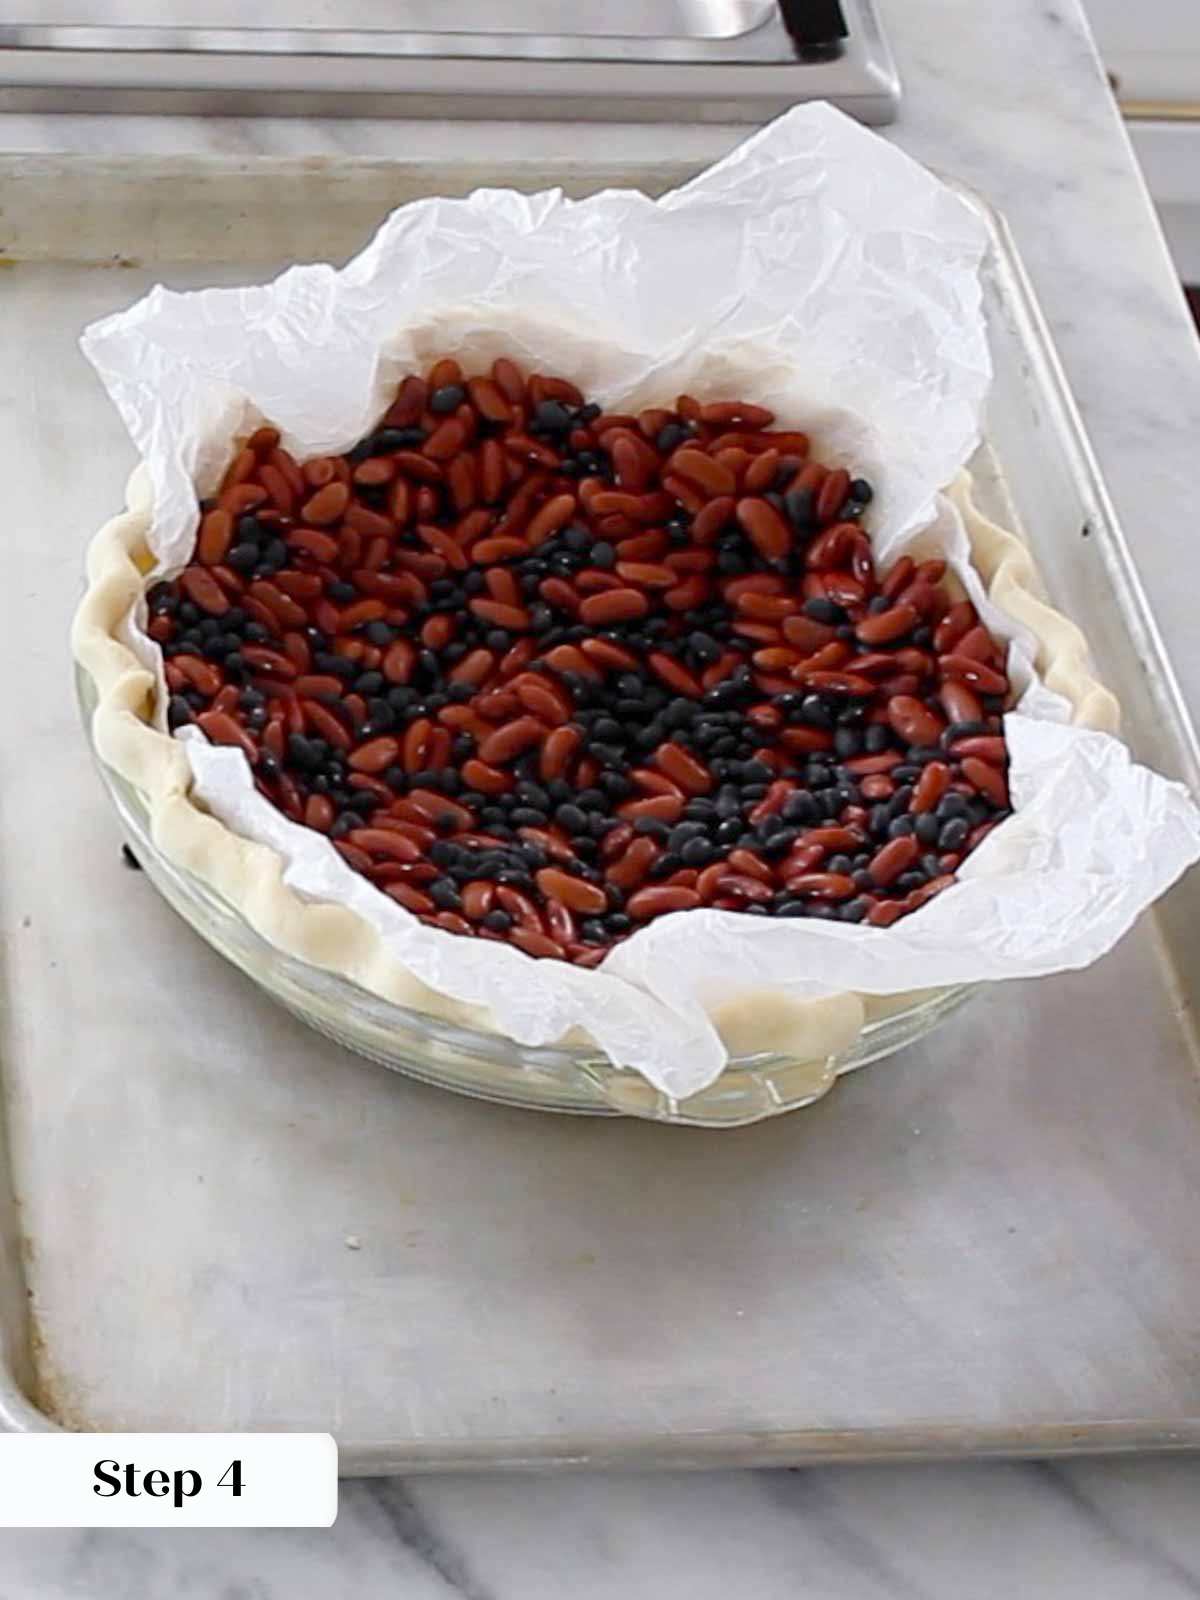
Step 4: Crumple a piece of parchment paper and line the inside of the chilled crust. Fill with pie weights, beans or rice. I find beans work best.
Do not dock the dough. And, if you’re curious about the nitty-gritty of par-baking, I unpack it in my How to Partially Blind Bake a Pie tutorial!
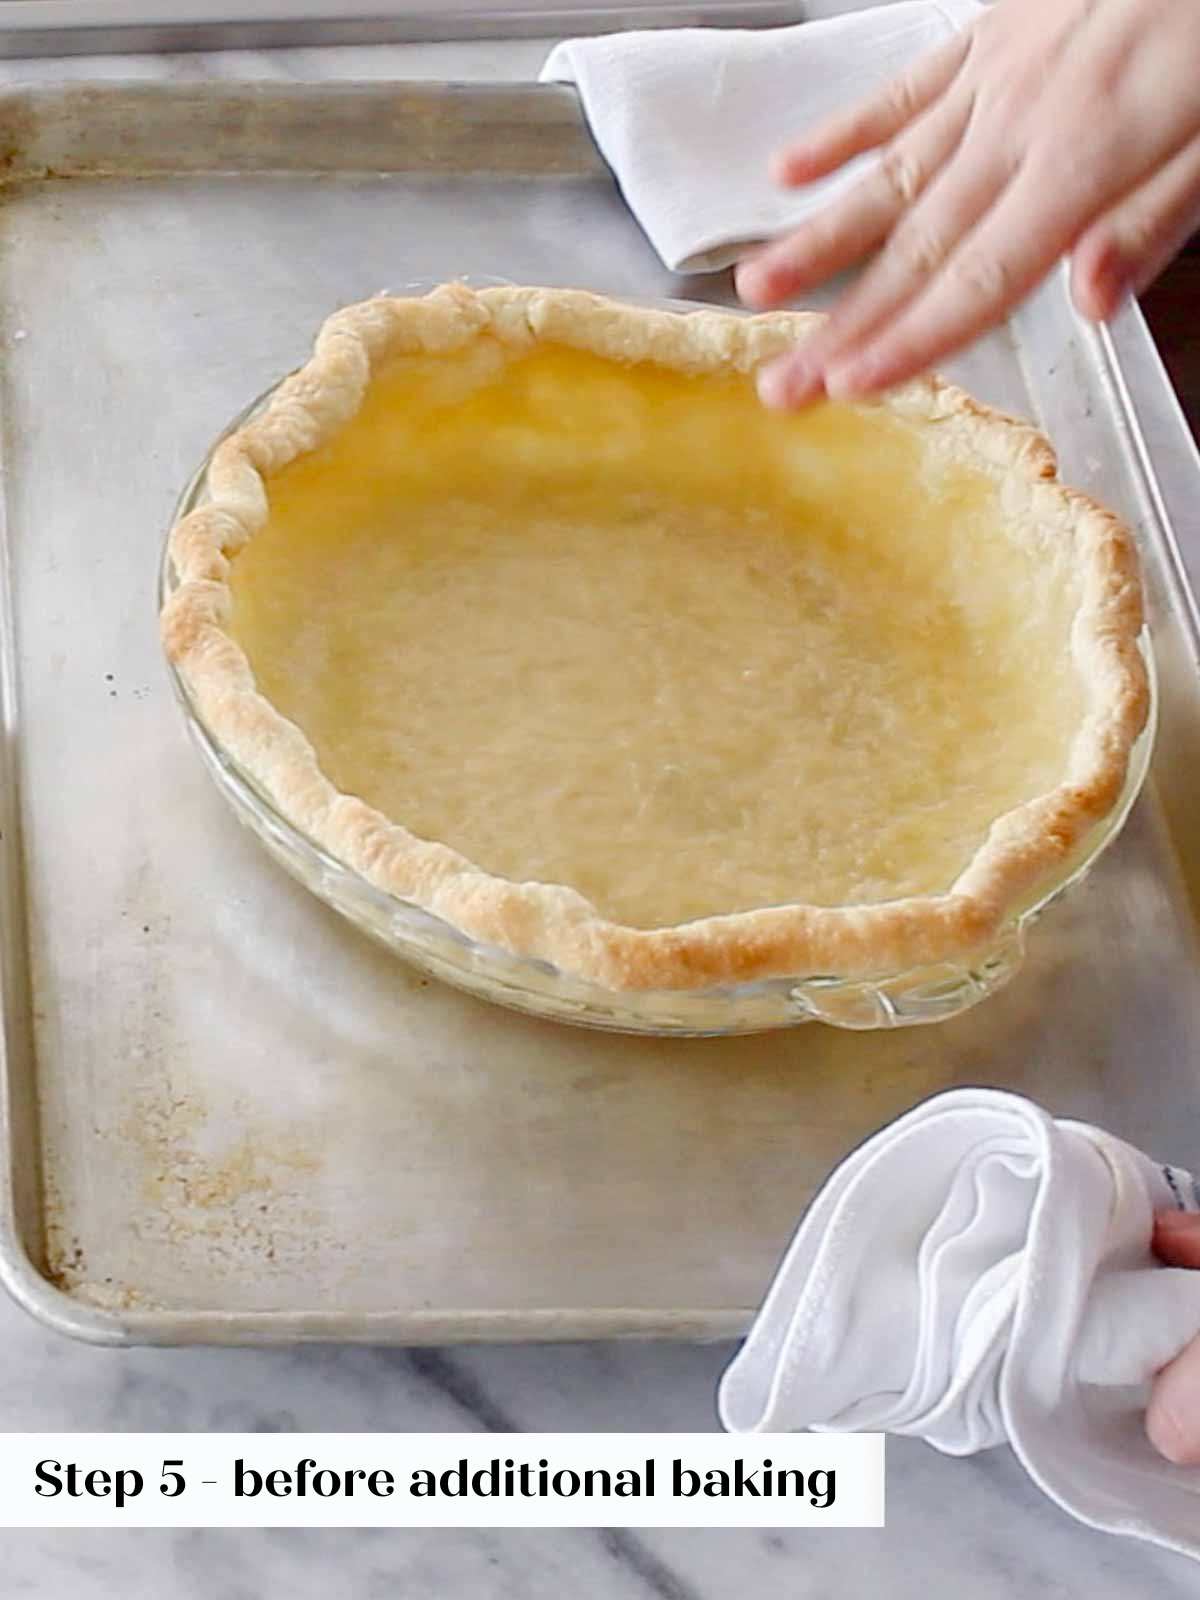
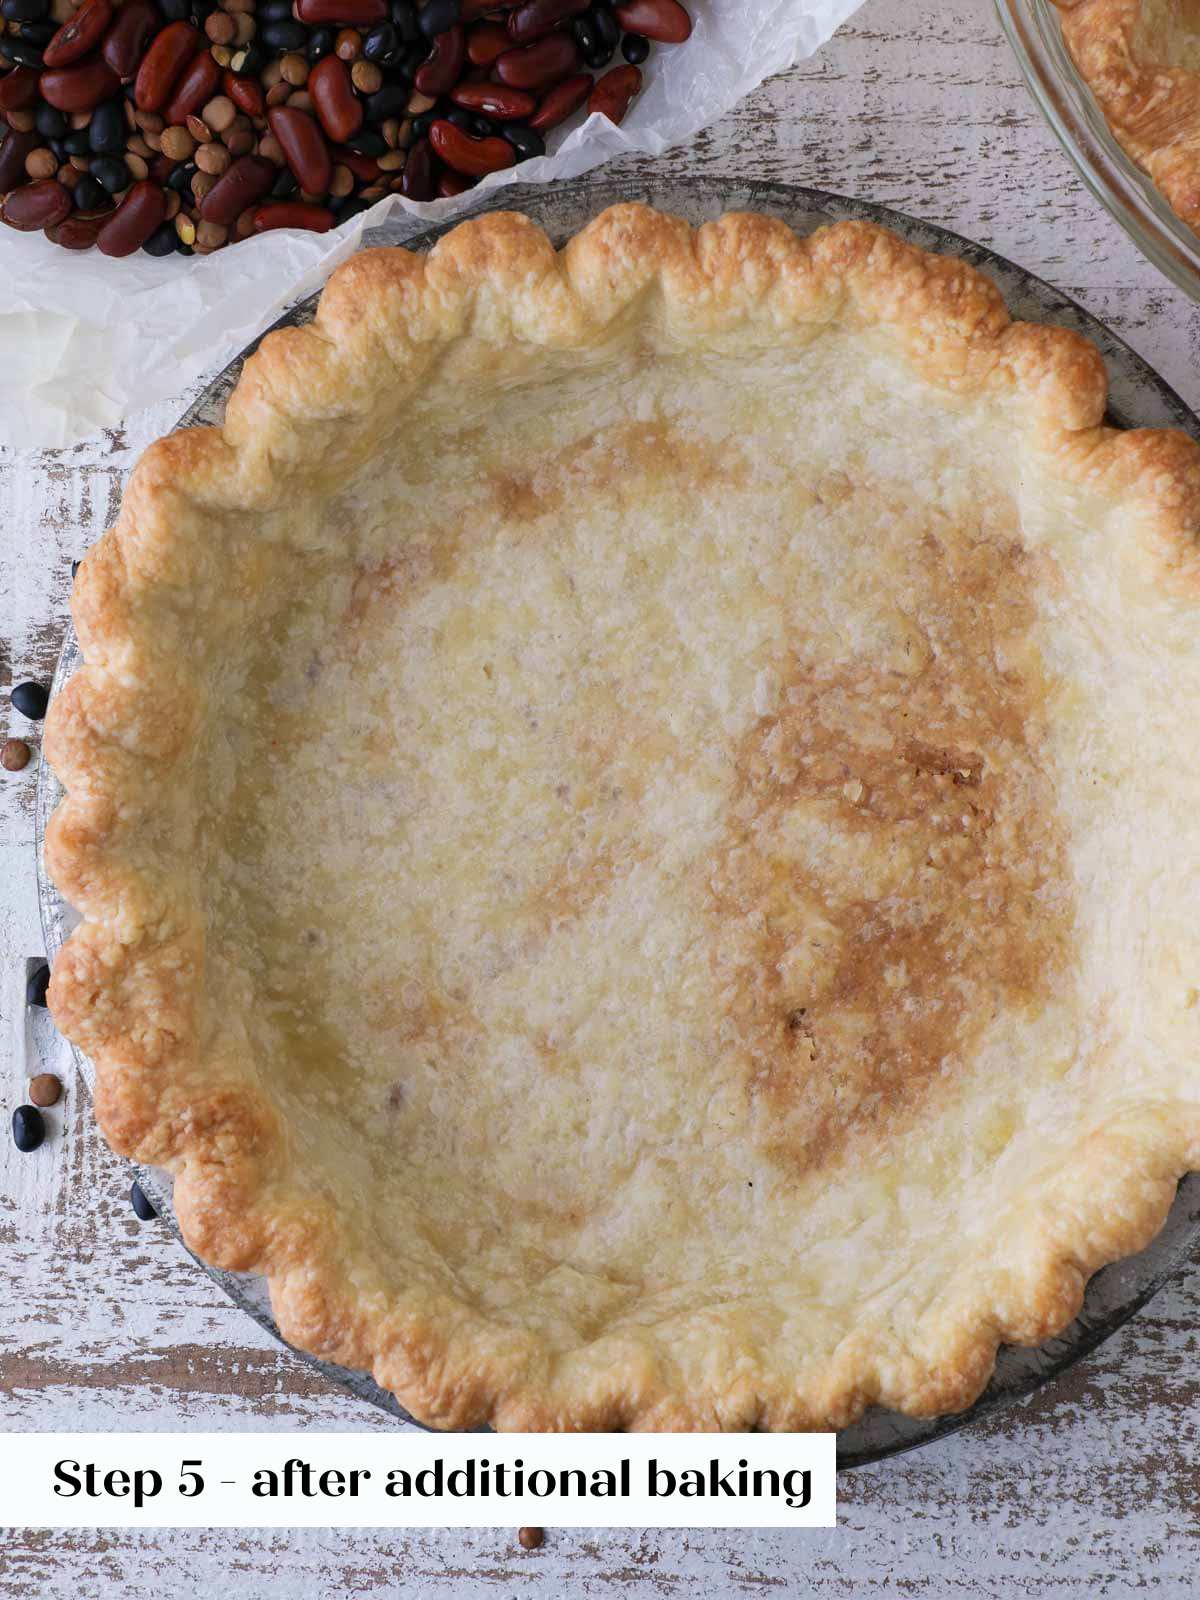
Step 5: Bake crust for 15-20 minutes and then remove the weights and parchment. I remove the parchment and weights when the crust has just begun to brown and doesn’t look raw anymore. This is the par-baked stage. The crust will bake again with the chocolate filling.
At the par-baked stage, you can use your crust immediately while it is still warm or you can cool it completely, wrap and freeze it for a later date. Store at room temperature for up to 3 days.
Make & bake the pie:
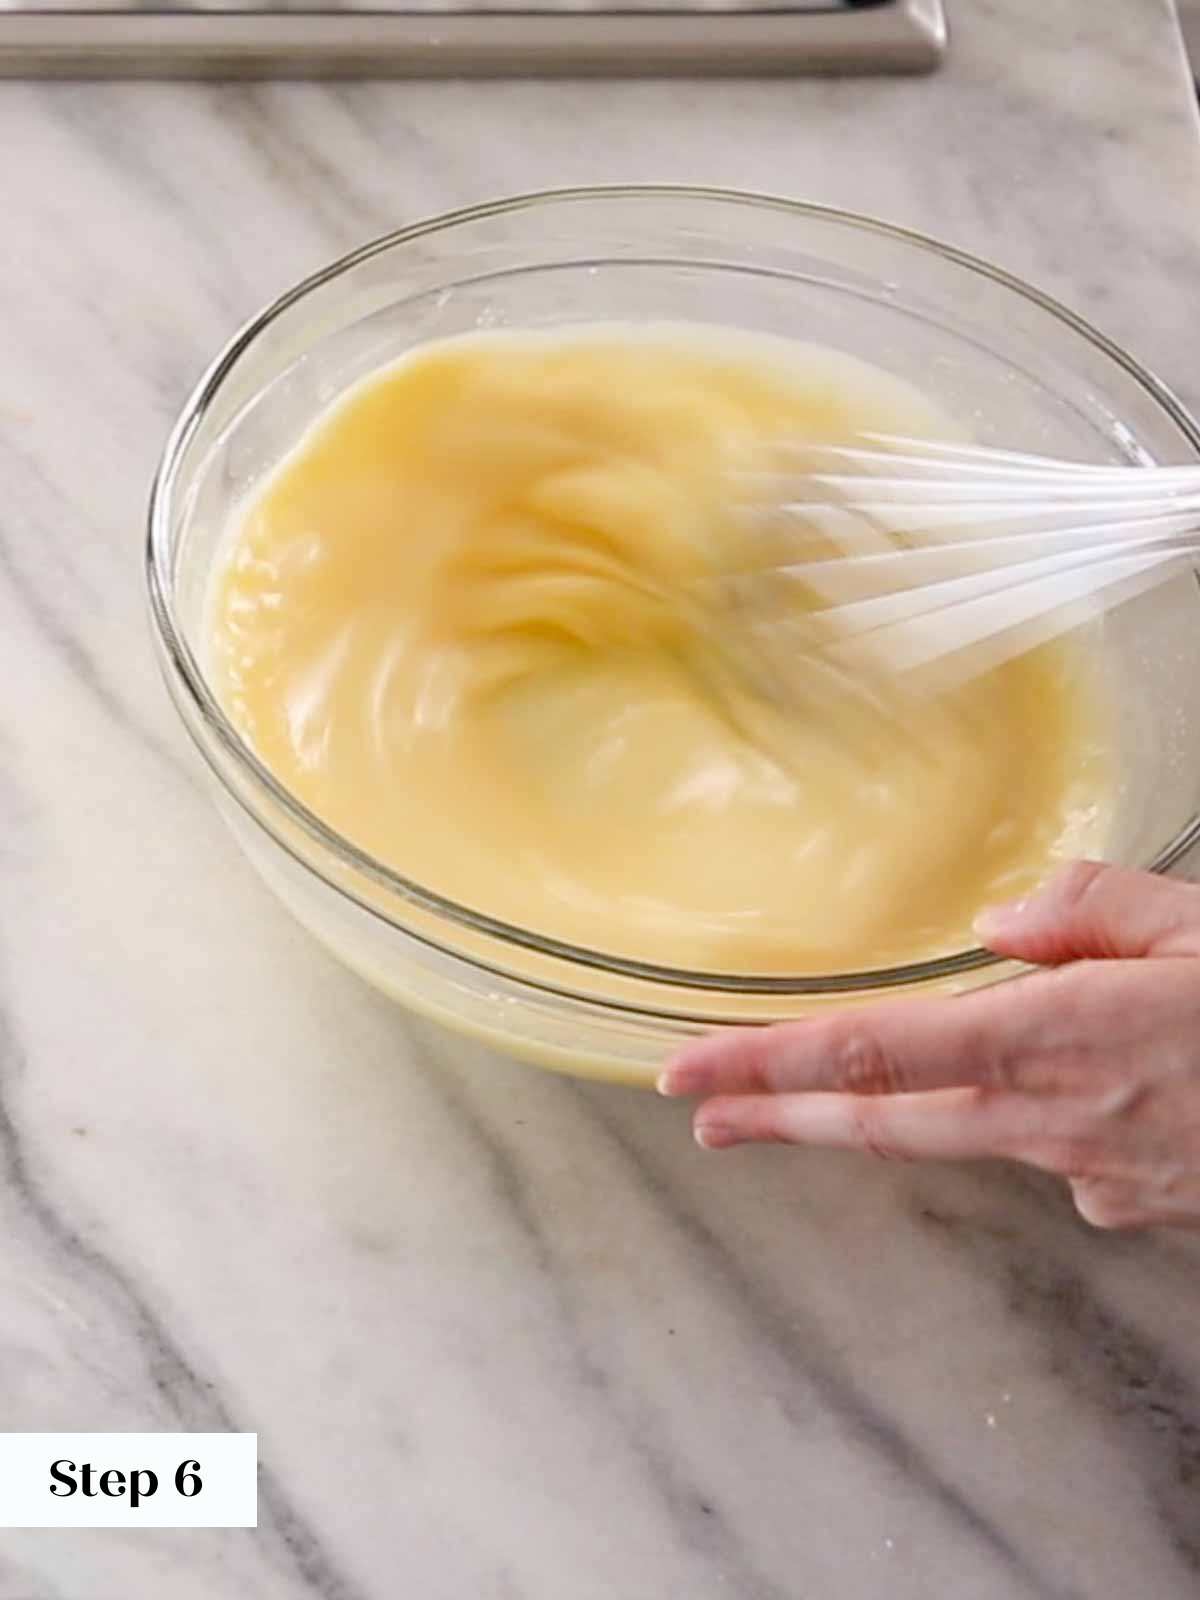
Step 6: In a medium bowl, whisk all the ingredients together. This will reduce the number of bubbles in the filling and the top of the custard will be smooth after baking
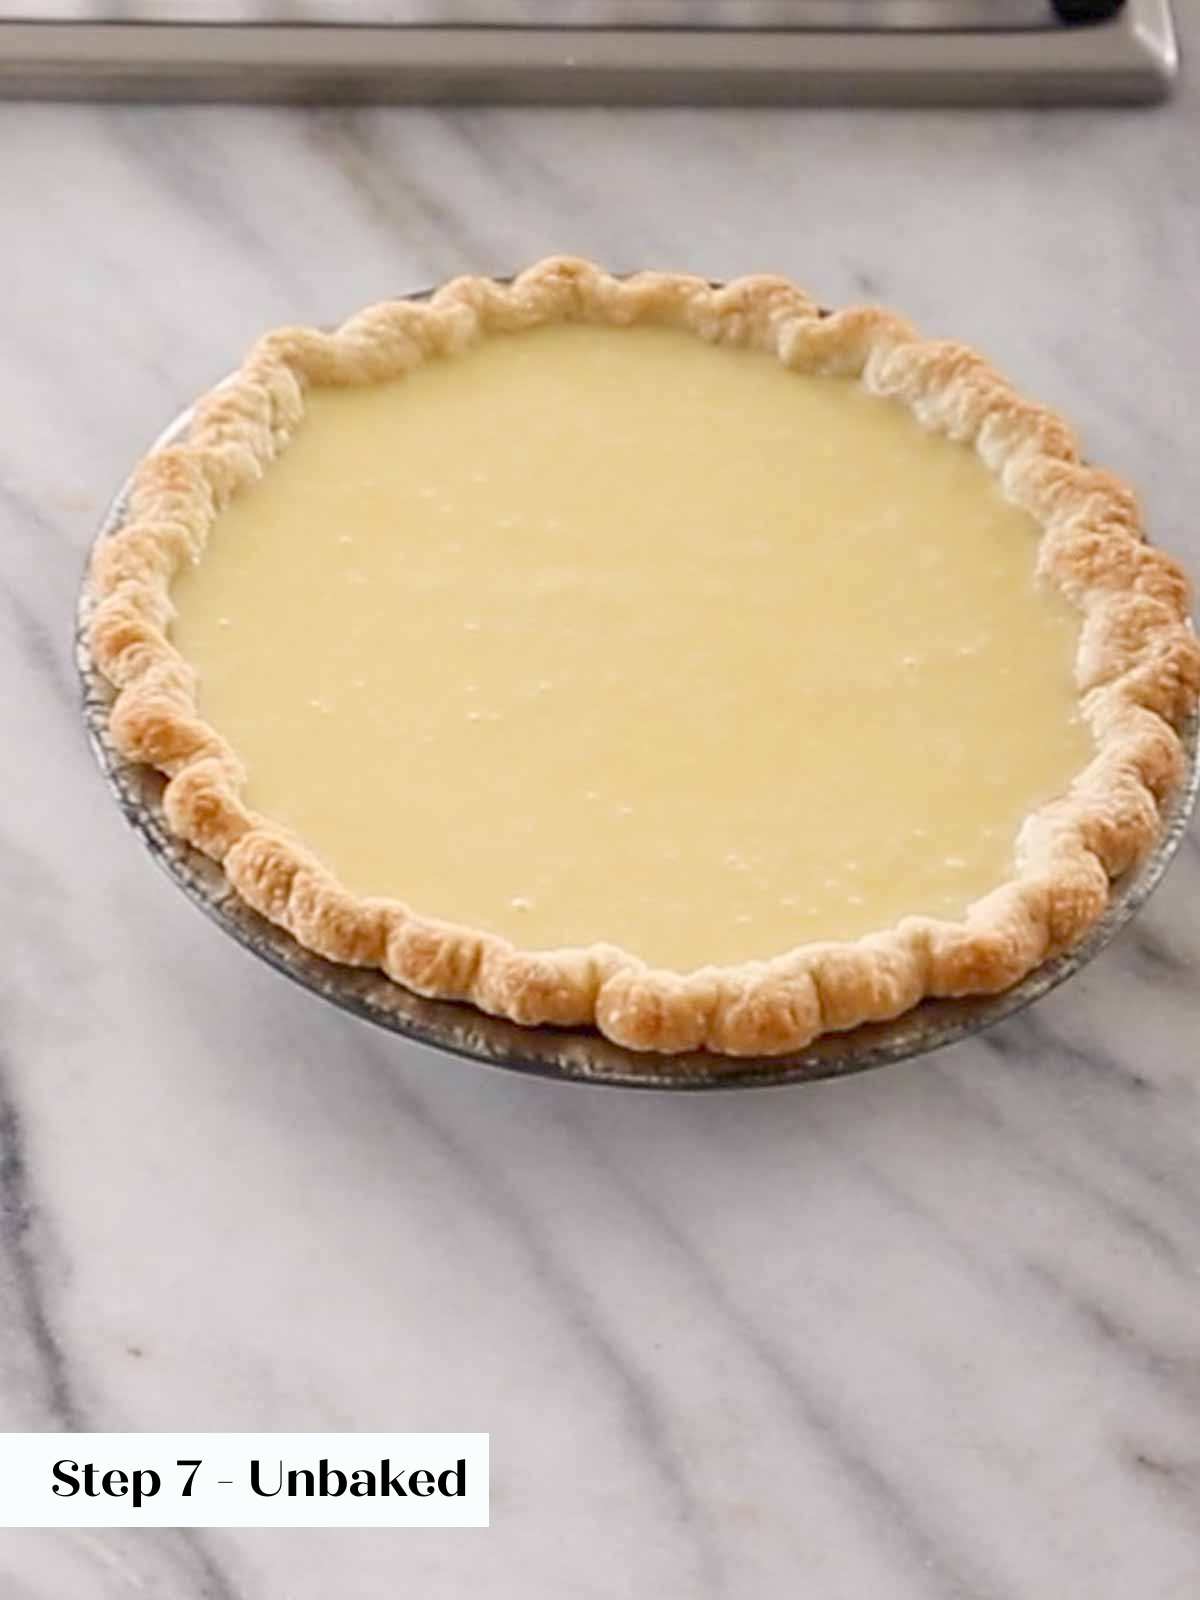
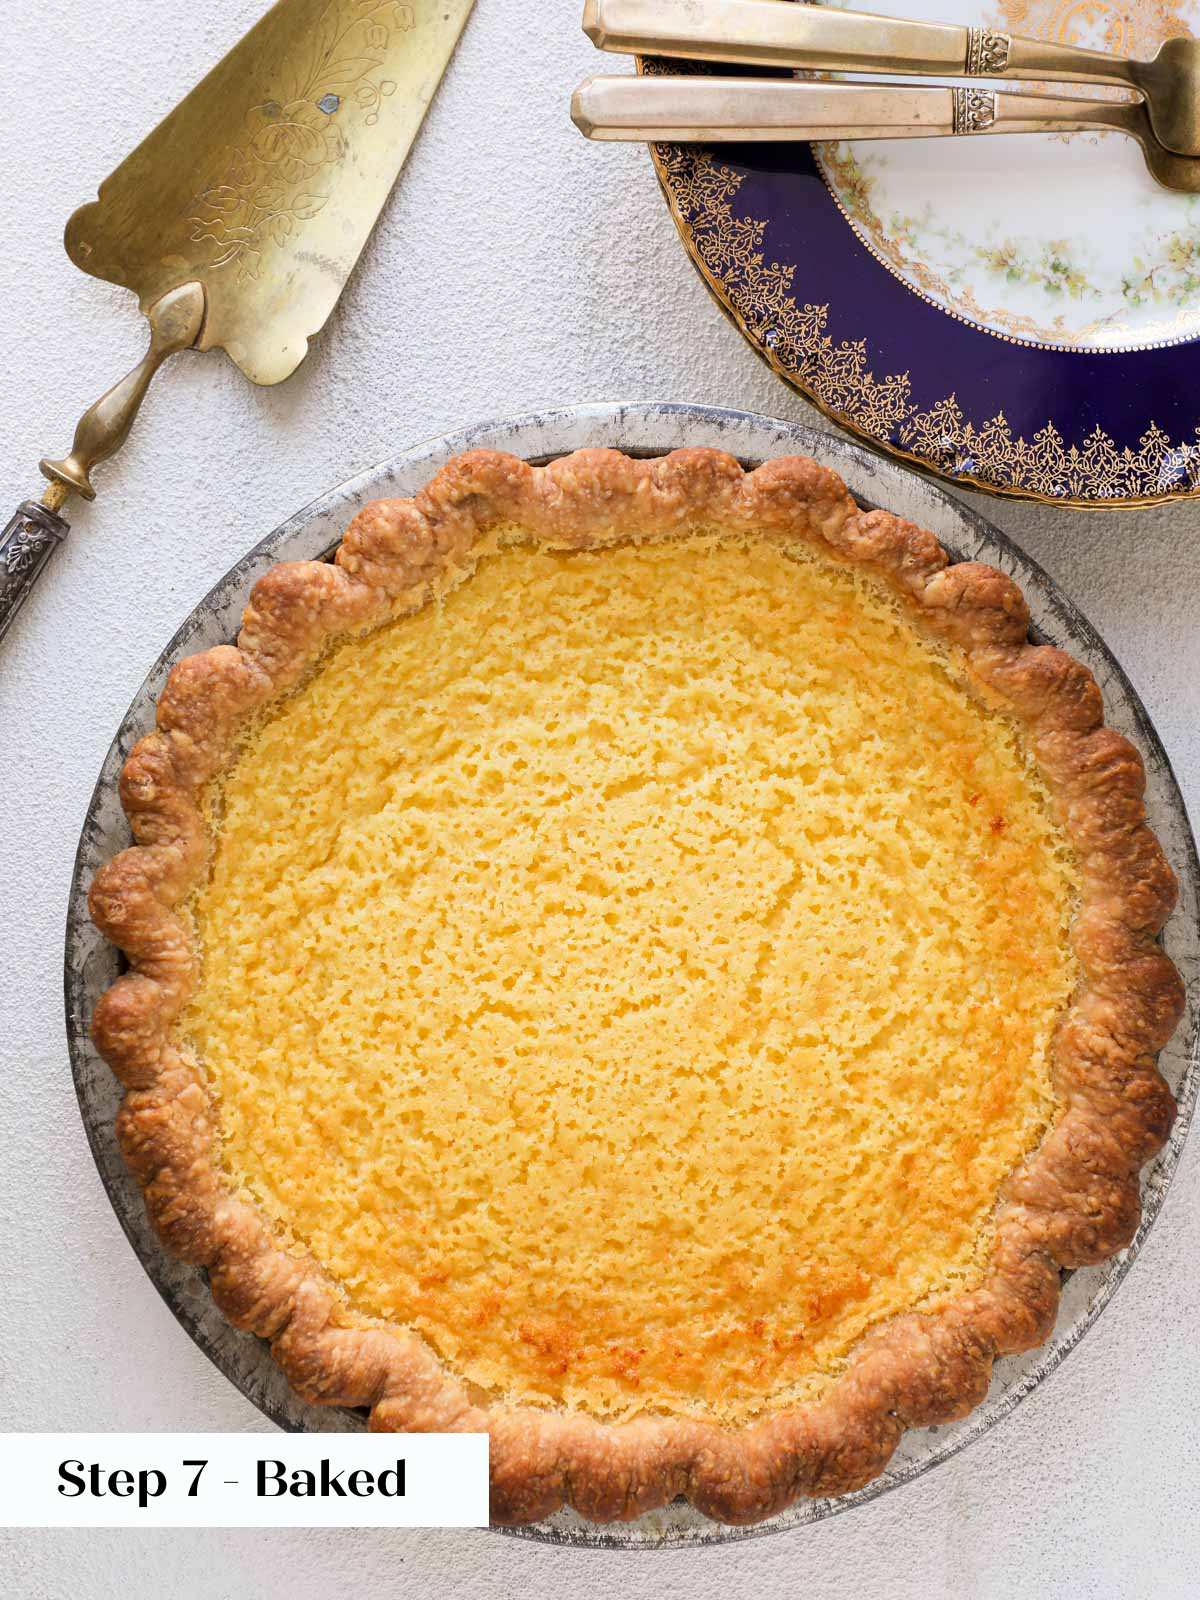
Step 7: Pour into prepared crust and bake in preheated oven for 35-45 minutes or until the filling has puffed and jiggles cohesively like Jell-O when gently shaken. The top may brown a bit, which I think improves the flavor.
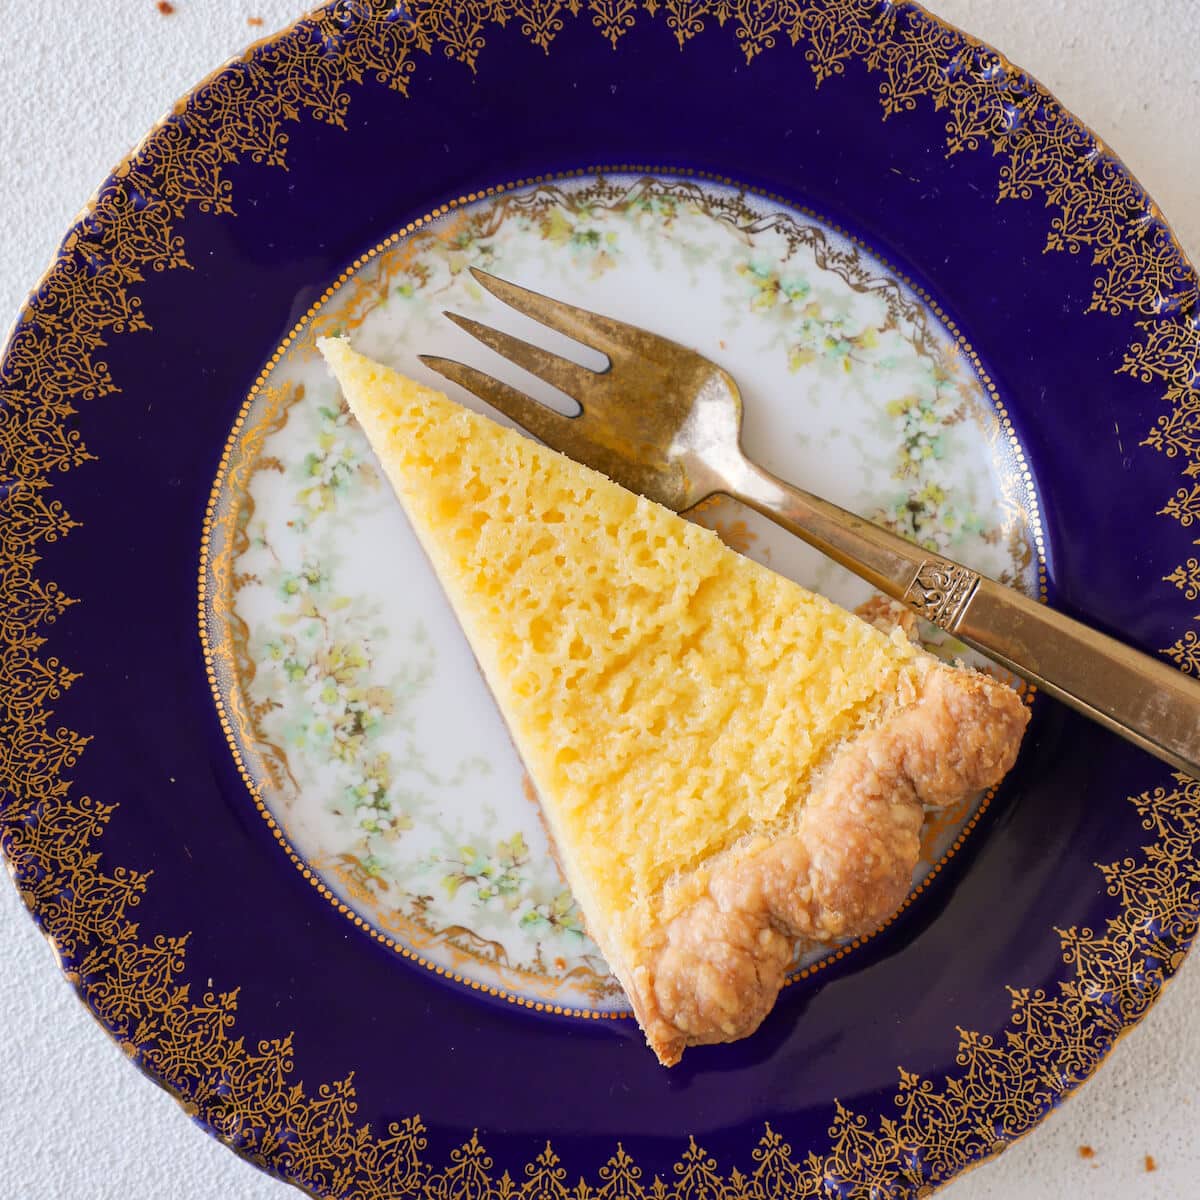
Cool completely before slicing. The pie slices best when well chilled. Serve room temperature or cold.
Chef Lindsey’s Recipe Tip
To make this pie even easier, you can use a store-bought pie crust or even a graham cracker pie crust! Store-bought pie crust is thinner than homemade and will bake faster, so just keep an eye on it!
Recipe FAQs
Store at room temperature for 2 days or refrigerate for 1 week. It can also be frozen for up to 2 months. Wrap the cooled pie in plastic wrap before storing it.
You do not need to dock the crust for buttermilk pie. (I wrote a whole blog post on when to dock pie crusts, for the curious!) The baked custard filling is very loose and could seep into the holes created by docking. This could cause the filling to leave the pie crust and burn on the pie tin or just make the bottom soggy.
The most likely reason a custard pie is runny, is that it is underbaked. Using low-fat buttermilk or a homemade buttermilk will also make a looser pie filling.
Buttermilk Pie is best served cold or room temperature. It is delightful with a generous dollop of whipped cream and a large spoonful of salted caramel sauce. The luscious caramel sauce brings a little extra sweetness and decadence to this otherwise simple dessert. In the Summer I love serving buttermilk pie with lemon whipped cream and fresh berries or this easy blueberry sauce. It’s also delicious with quick strawberry jam and lemon curd.
Recommended Dessert Recipes
Recipe Roundups
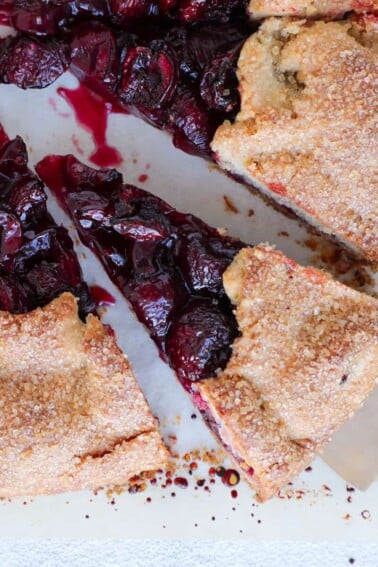
25 Best Thanksgiving Pie Recipes
Date Night
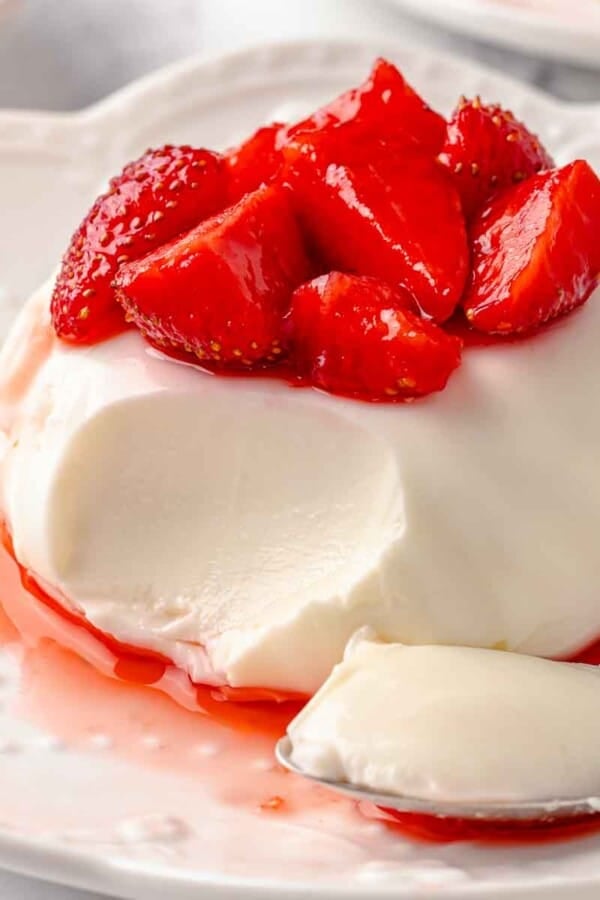
Buttermilk Panna Cotta
Date Night
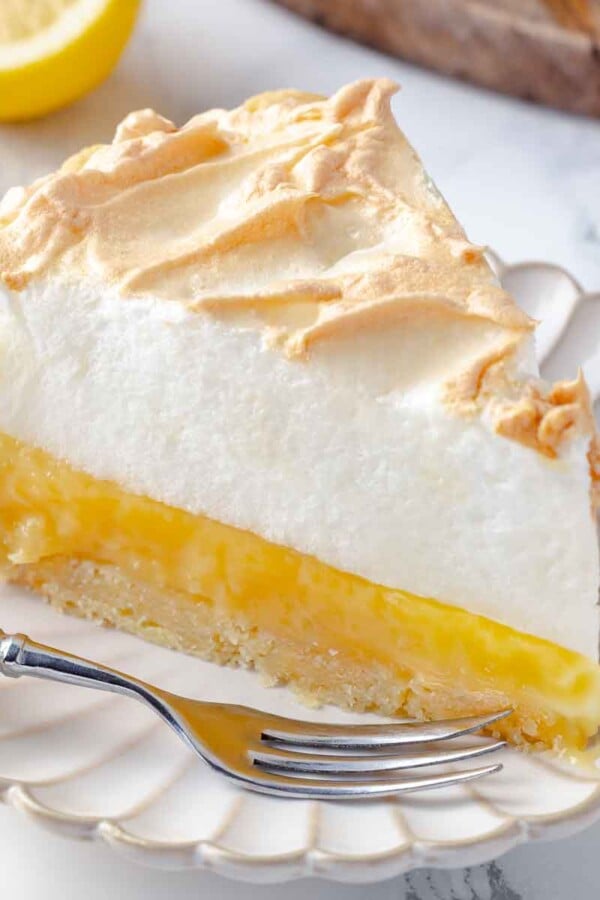
Lemon Meringue Pie
If you tried this recipe and loved it please leave a 🌟 star rating and let me know how it goes in the comments below. I love hearing from you; your comments make my day!
Buttermilk Pie
Ingredients
Filling
- 3 tablespoons all-purpose flour
- ½ cup unsalted butter melted
- ¾ cup granulated sugar
- 3 whole eggs
- 1 cup full fat buttermilk
- 1 tablespoon water
- ½ teaspoon vanilla extract
- 1 teaspoon lemon juice
1 All-Butter Pie Crust, par baked
- 1 cup all-purpose flour measured by fluffing the flour then spooning it in
- ½ teaspoon kosher salt
- ½ teaspoon sugar
- 4 ½ tablespoon cold butter cubed into ½ inch cubes
- 1 ⅛ oz cold water or as much or as little as needed
Instructions
Make the all-butter pie crust:
- Whisk together pastry flour, salt and sugar. Using your preferred method cut in the butter until you have pea sized pieces. If you are using a bench scraper, pastry blender or two knives, you will chop the butter into the flour using an up and down motion, corralling the flour back into the center occasionally. If you are using the stand mixer or food processor, leave slightly larger pieces.
- Slowly begin to add your ice water a tablespoon at a time. If making it by hand, pour into the center of the flour and gently toss the flour into the water with the bench scraper, knife or a fork until you have a crumbly mixture. At this point be very careful with the amount of water that you add because it only needs a few teaspoons more.
- When your dough is shaggy, which means it looks like shards or strands of pastry, and there is still some loose flour, turn out your dough from the mixer or food processor and work the dough together by gathering it and pressing away from you with the heal of your hand. Do this JUST until it comes together. If it is crumbling, then dip your hand in a little ice water and pat it on the pastry dough.
- Press into a disk. Wrap in plastic wrap and chill for 2 hours or overnight. If you chill your dough overnight, you will need to let it rest a bit before rolling or it will be too cold and it will crack.
- Roll the dough out to ⅛ inch thick.
Par bake the pie crust:
- Preheat the oven to 350°F convection or 375°F conventional (no fan).
- Line a pie tin with your pie crust. Do not dock the dough. Chill the dough thoroughly before baking.
- When ready to bake line the inside of the crust with parchment paper and then fill with pie weights or beans. Bake 20 minutes with the weight and then remove the weight and continue baking until the bottom crust has started to brown but is not yet fully baked.
- While the pie crust cools, prepare the filling.
Prepare the Buttermilk Filling:
- In a medium bowl, whisk all the ingredients together. This will reduce the number of bubbles in the filling and the top of the custard will be smooth after baking. I whisked the ingredients individually when preparing the pie in the photos and you can see the bubbles that rose to the surface while baking. The texture is the same but it is prettier when smooth.
- Pour into prepared crust and bake in preheated oven for 35-45 minutes or until the filling has puffed and jiggles cohesively like Jell-O when gently shaken. The top may brown a bit, which I think improves the flavor.
- Cool completely before slicing. The pie slices best when well chilled.
- Serve room temperature or cold.
Video
Notes
Nutrition
Before You Go!
I hope you enjoyed this professional chef tested recipe. Check out our other delicious, chef-developed pie recipes or the 20 Best Thanksgiving Pies!


I’ve tried other similar recipes, but this one is the best — I always want another piece because it’s not overly sweet. I think you’ve nailed it with *unsalted* butter and minimal lemon juice so that the buttermilk note comes through. I love it with sliced strawberries and a little whipped cream on top. Thank you! One tip for those using store-bought crust: this recipe for me makes a bit too much filling for a standard 9” crust, but it’s perfect for a deep dish crust such as Pillsbury’s 9” deep dish.
Hi CC! Your comment made me smile, I’m so glad you noticed the balance. I love the idea of serving it with strawberries and whipped cream, that sounds dreamy. And thank you for sharing the tip about the deep dish crust, that will be super helpful for other bakers!