This post may contain affiliate links. Please read our disclosure policy.
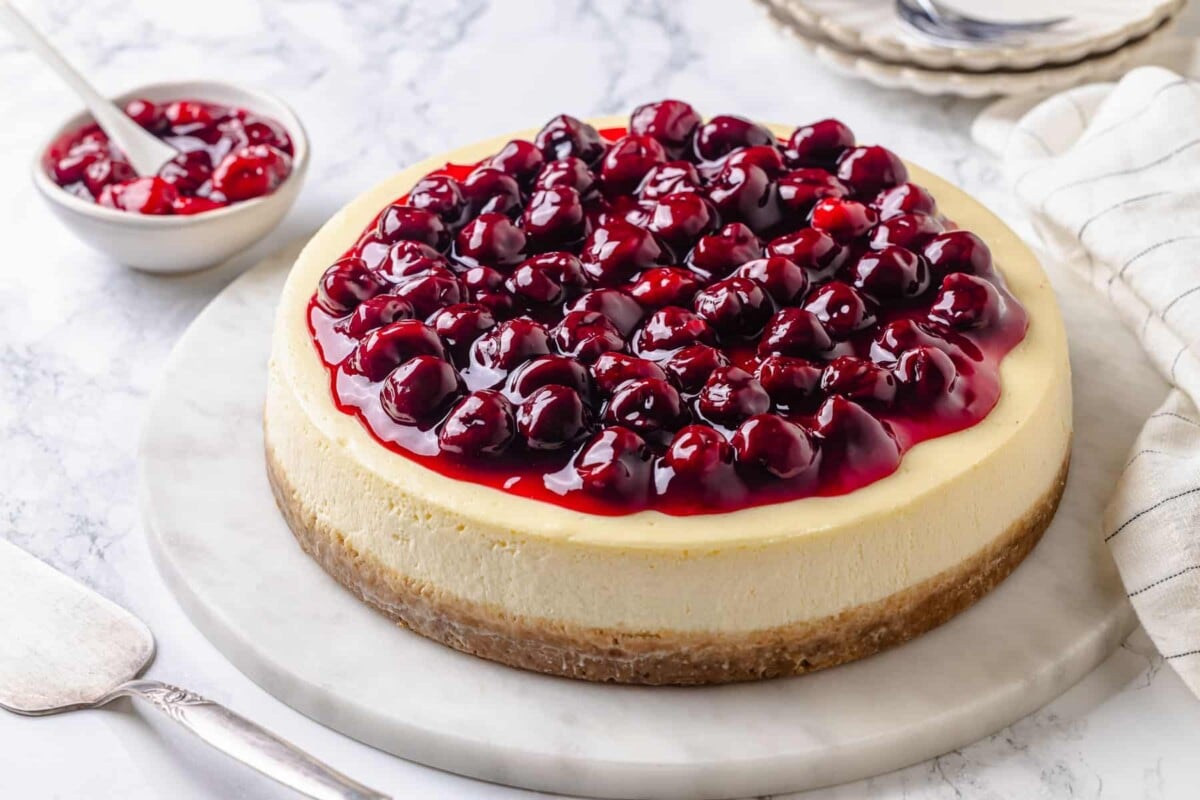
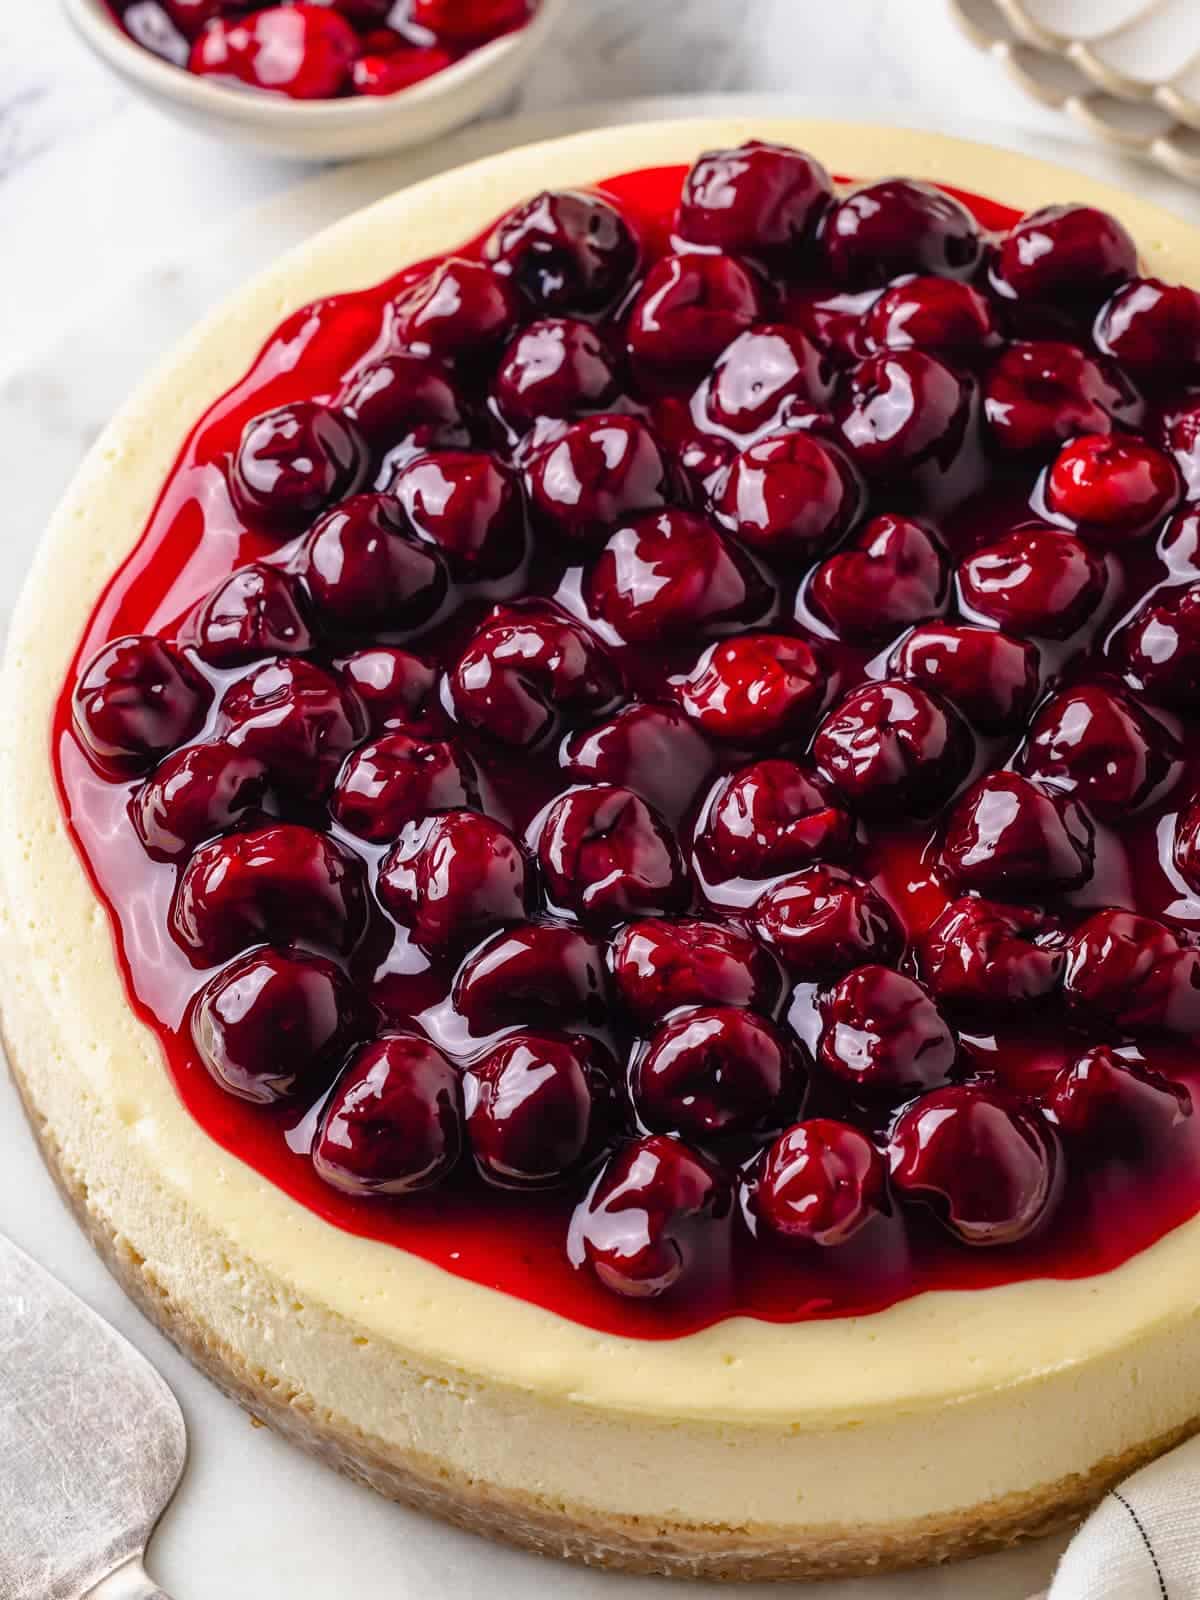
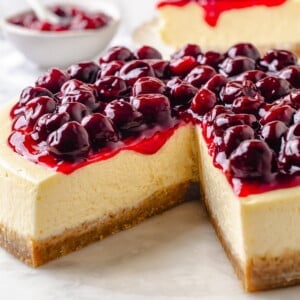
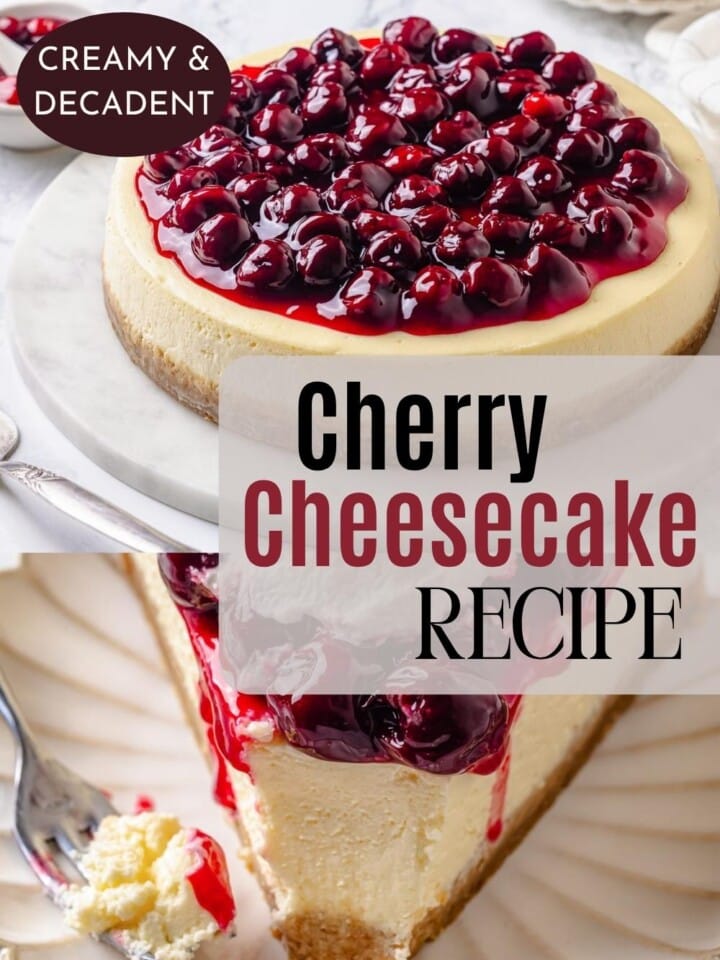
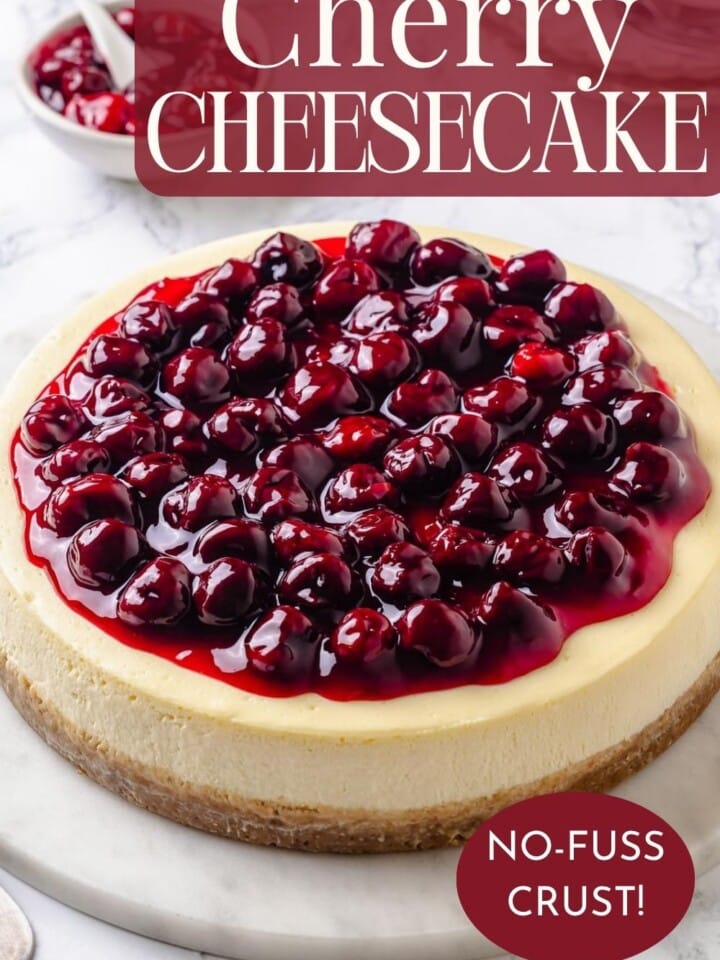
This cherry cheesecake is a rich New York-style cheesecake baked on a classic graham cracker crust, topped with homemade cherry pie filling!
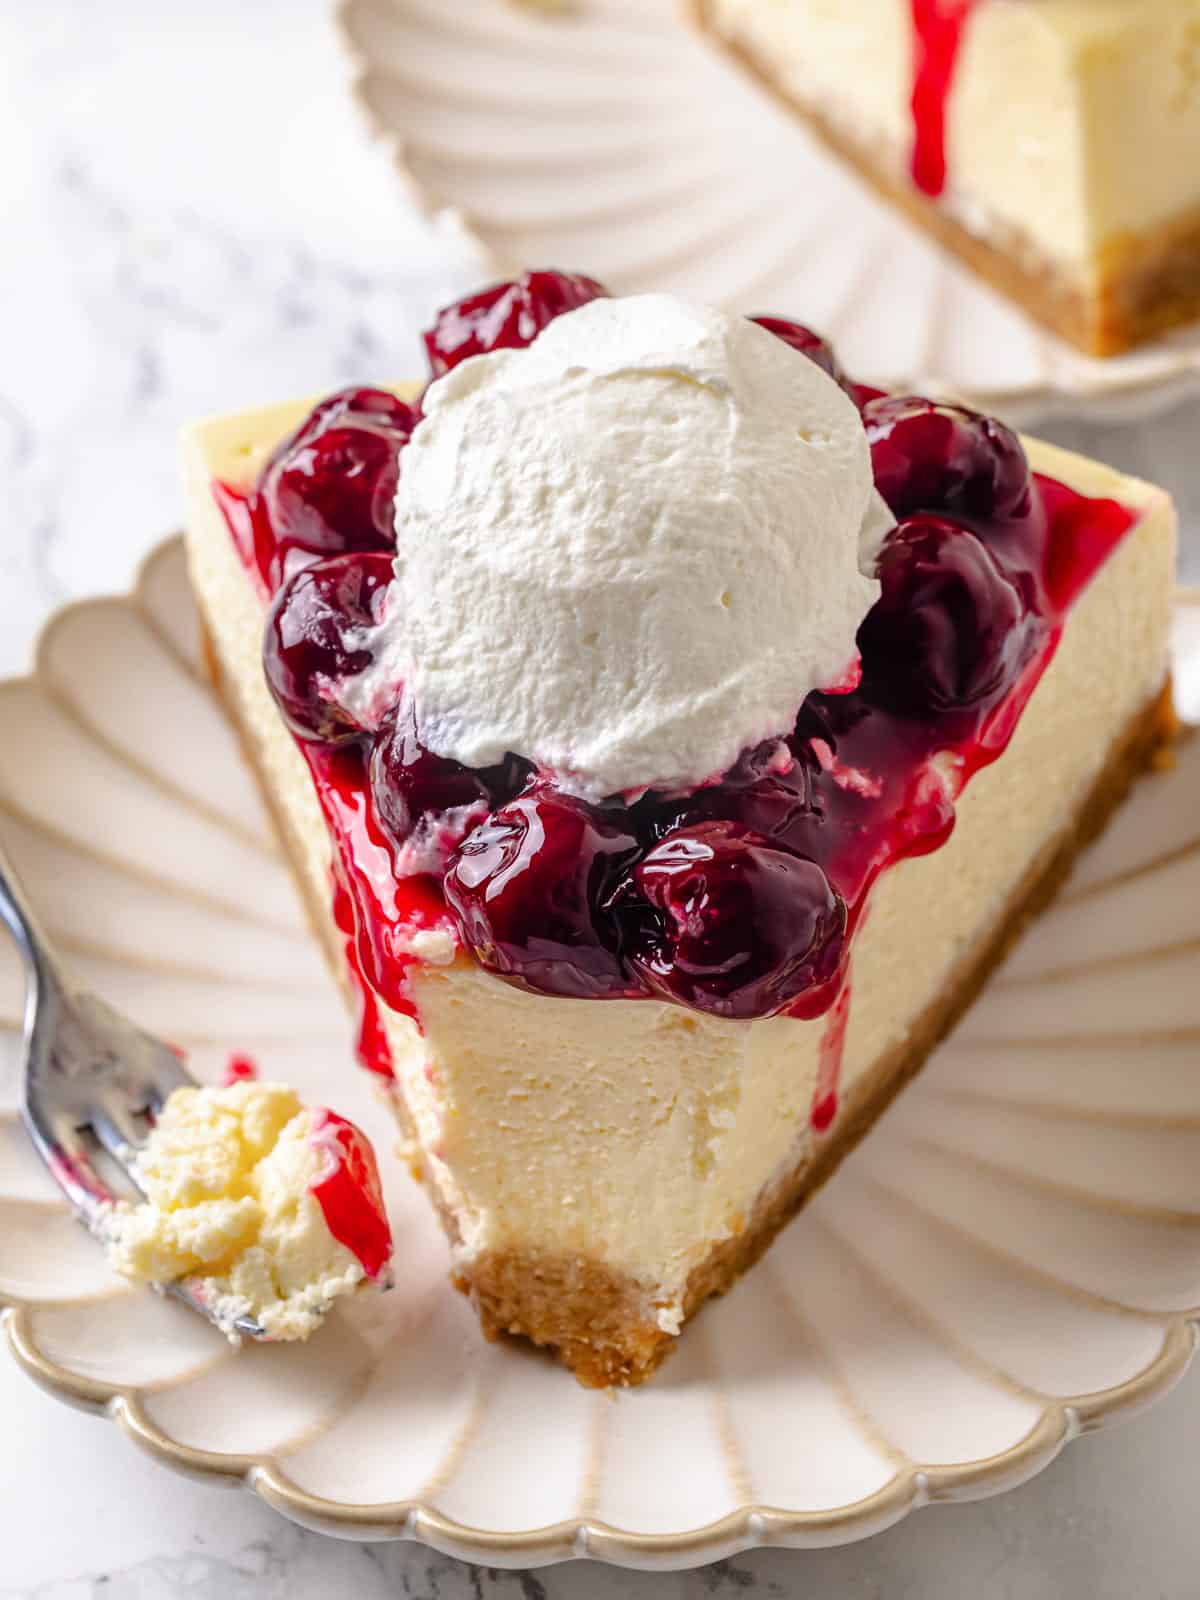
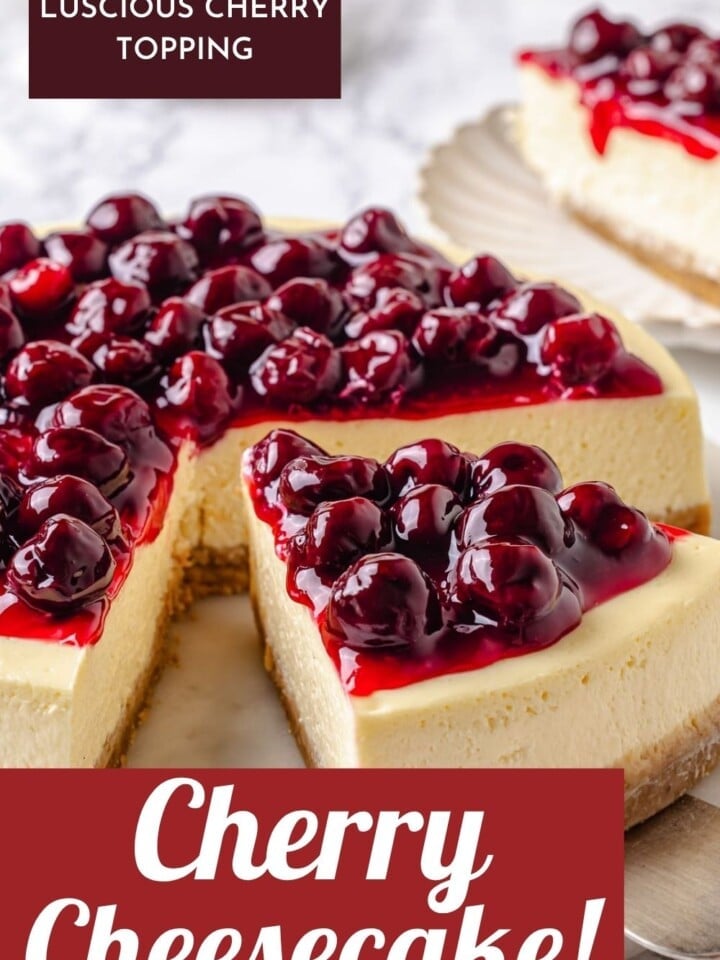
Cherry cheesecake is the perfect summer dessert! It is made with a creamy and perfectly dense vanilla cheesecake, a crisp buttery graham cracker crust, and a luscious cherry pie topping. It is an excellent make-ahead dessert for special occasions like birthdays, potlucks, or the Fourth of July!
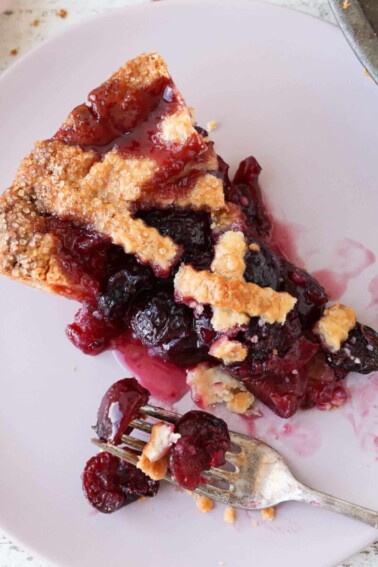
If you need more summer dessert inspiration, try this cherry pie recipe or my strawberry rhubarb crumble. They are perfect for a cookout! If the heat is getting to you and you need a no-bake dessert, try this no-bake whiskey s’mores pie or this homemade banana pudding.
Why You Will Love This
- Classic New York cheesecake texture and flavor. I have spent years in restaurants perfecting this recipe! I’ve made many variations of this cake, but there is something about a classic that never goes out of style.
- Perfectly crisp and buttery graham cracker crust. Easy three-ingredient crust is buttery and baked to crisp perfection.
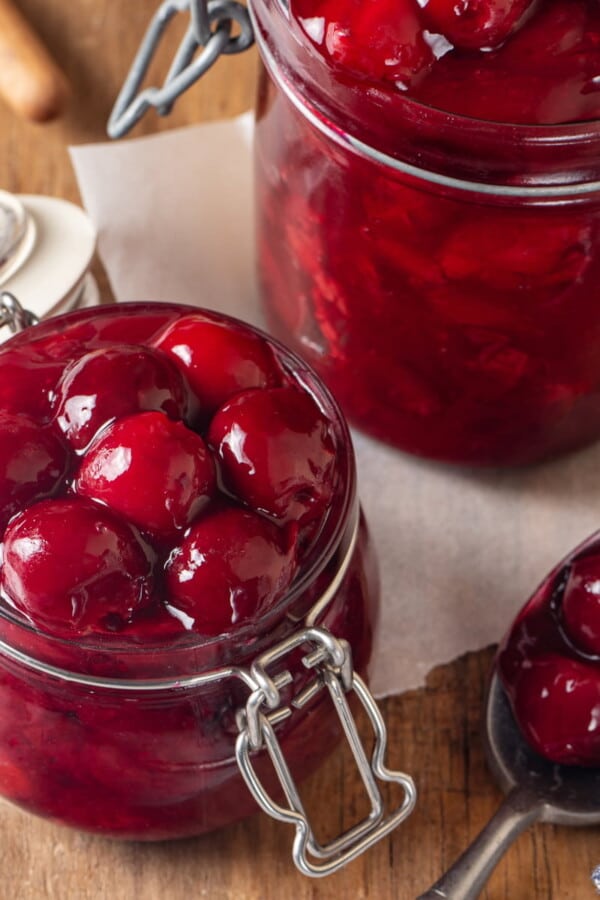
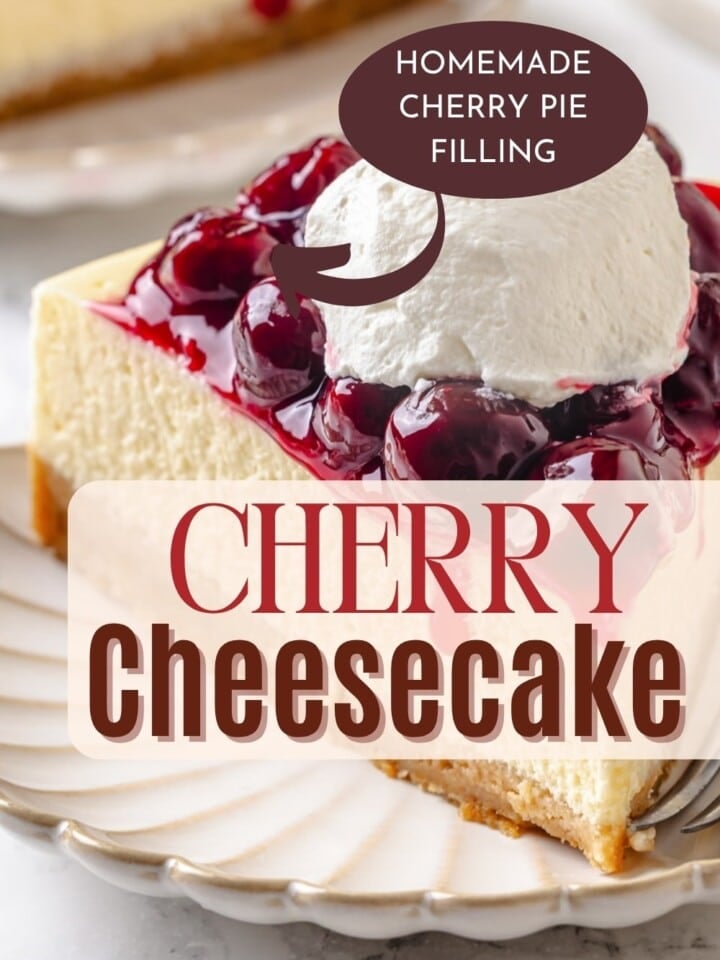
- Easy cherry pie filling. Topping this creamy cheesecake with this easy pie filling really makes you think of a quintessential cheesecake. Make sure you make a double batch because you can make this cherry cobbler recipe next!
Ingredients & Substitutions

- Cream Cheese: I use original Philadelphia Cream Cheese for all my cheesecakes. I use full fat cream cheese, though reduced fat can be substituted. Just ensure that it is not whipped. For a dense, set cheesecake, you need the texture of regular cream cheese to help stabilize the rest of the ingredients.
- Egg and Egg Yolk: Cheesecake is a baked custard and the eggs and egg yolk are essential for thickening and setting the custard just like in my vanilla crème brûlée or lemon bread pudding.
- Sour Cream: Just like cream cheese, full-fat sour cream will produce the best cheesecake. The fat helps the batter not break, especially while baking. It also adds a nice tanginess that plays up the cream cheese flavor. You can substitute full-fat Greek yogurt or crème fraiche.
- Heavy Cream: Heavy cream adds moisture and fat to the texture and lightens the flavor.
- Graham Cracker Crumbs: Once I learned that you could buy graham cracker crumbs, I’ve never looked back. You can also buy graham crackers and crush or pulse them in your food processor.
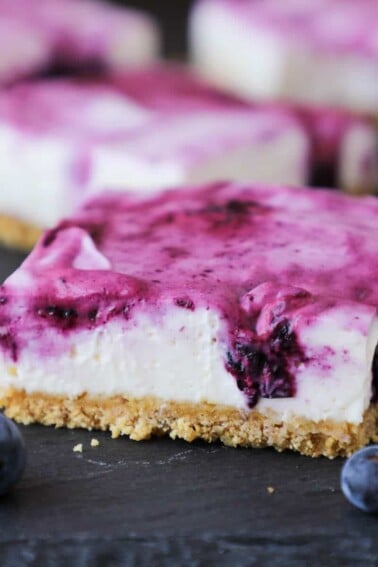
- Cherry Pie Filling: This recipe uses a half batch of my cherry pie filling. Make a full batch and save the rest to serve over this chocolate ice cream recipe or replace the blueberries in these blueberry cheesecake bars!
See the recipe card for full information on ingredients and quantities.
Variations
- Change the crust. Swap out the graham cracker crust for an Oreo crust from my chocolate chip cheesecake! Try crushing up some Biscoff cookies or cinnamon graham crackers to make the crust.
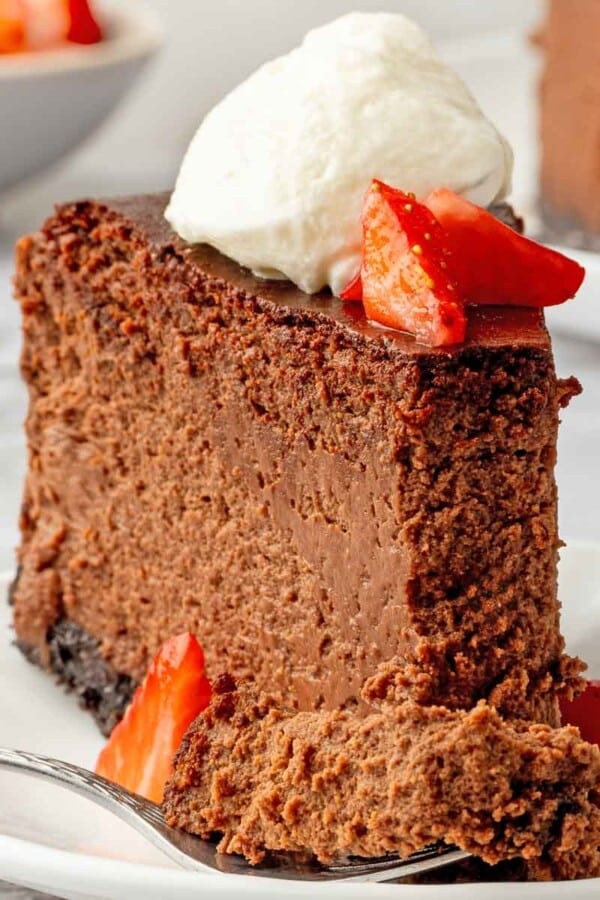
- Make it chocolate! Make my chocolate cheesecake recipe and top it with the cherry pie filling for a delicious and decadent dessert.
- Use different toppings. Top this traditional NY cheesecake with my apple pie filling recipe, the filling from this blueberry pie recipe, or the strawberry filling from this no bake strawberry pie! You can also top it with salted caramel sauce or easy lemon curd.
- Add in some flavor. Mix some chocolate chips or lemon zest. You can also switch out the vanilla extract for almond extract or a bit of bourbon.
Professional Tips
- Use room-temperature ingredients! This is an absolute must! Scale your ingredients and let them sit out at room temperature for 2 hours or so. You can even place them over the warming oven to speed this along. If you use cold ingredients, the cheesecake won’t come together properly, and the texture will be off.
- Let the cheesecake cool overnight. For the best texture and cleanest slice, let the cheesecake cool overnight! Like with crème caramel, this allows the custard to set properly.
- Beat the eggs for a minute each. Beating the eggs helps create an emulsion in your cheesecake and whips in some air, helping create that light but dense texture you love with a New York cheesecake.
How to Make Cherry Cheesecake
Use these instructions to make this classic New York cheesecake! Further details and measurements can be found in the recipe card below.
Prepare the pan and crust:
Step 1: Preheat the oven to 325°F. Wrap a 9-inch springform pan with aluminum foil to create a watertight seal. Large sheets are best, but you can also fold the edges of two smaller pieces together to create an impermeable seal.


Step 2: Make the crust. Combine all ingredients for the crust and press into the bottom of the springform pan.
Step 3: Bake and cool. Bake in the preheated oven for 10 minutes. Cool completely on a cooling rack.
Make the filling:


Step 4: Beat cream cheese with vanilla extract and vanilla bean seeds (from one pod) in the bowl of a stand mixer fitted with the paddle attachment on medium-high speed until silky, creamy, and smooth.
Step 5: Add sugar to the mixer bowl and beat until no granules are visible. This will take several minutes.
Scrape the sides and bottom of your stand mixer bowl. Cream cheese likes to hang out at the bottom of the bowl and not incorporate, causing small lumps in your cheesecake that won’t come out.
Step 6: Add the eggs one at a time to the cream cheese mixture and beat for 1 minute after each addition, scraping down the sides of the bowl between each addition.


Step 7: Mix in sour cream and heavy cream to the stand mixer bowl and beat just to combine. I recommend starting to mix on low so it doesn’t slosh around. You can gradually turn up the speed.
I like to whisk the heavy cream and sour cream together before adding them to the cheesecake base. Whisking or immersion blending them together will help prevent unmixed clumps of sour cream.
Step 8: Fill the crust. Pour the cheesecake filling into the prepared crust and either shake gently or spread out with a small offset spatula.
Bake and Cool:
Step 9: Prepare the water bath. Place the lined pan into a larger baking dish or roasting pan and place both in the oven. Pour hot water into the larger pan until it is halfway up the sides, being careful not to get any water in the cheesecake batter.
To add a swirl, dollop up to ¾ cup cherry filling onto the batter in several places and swirl the filling into the cheesecake batter using a small spoon or small offset spatula.
Step 10: Bake cheesecake. Bake for approximately 1 hour and 40 minutes or until set but still wobbly. I like to start checking after an hour. When gently shaken, the cheesecake will move in one cohesive mass like Jell-O.
Step 11: Cool at room temp. Carefully remove the cheesecake from the water bath and place it on a wire cooling rack to cool completely at room temperature. Carefully remove the hot pan with the water from the oven and pour out the water.
Step 12: Chill overnight. Wrap cooled cheesecake and refrigerate at least 4 hours, but ideally overnight.
Step 13: Top and serve. Either spoon the cherry pie filling onto the center of the cheesecake before cutting or onto the top of each piece. Serve with lightly sweetened whipped cream.
Chef Lindsey’s Recipe Tip
Make sure the seal on the aluminum foil is tight! If there is even a slight crack or hole, water will get into the springform pan and will cause a soggy bottom. If you are in doubt, double up the foil!
Recipe FAQs
Store cooled cheesecake well wrapped in plastic wrap in the refrigerator for up to 10 days or frozen for up to 3 months. Cheesecake freezes very well, so the freezer is the best option for keeping cheesecake fresh. Store the cherry filling in an airtight container in the refrigerator for a week or in the freezer for 3 months.
The cheesecake is done baking when it reaches an internal temperature of 150˚F. However, poking the center of your cheesecake with a probe thermometer can encourage a crack. The top and center of the cheesecake should jiggle together slightly when gently shaken. If ever in doubt, bake for five more minutes.
Cheesecake cracks for a number of reasons, the main one being overbaking. It can also be caused by mixing too much air into the cheesecake or rapid temperature changes. That’s why we let cheesecake cool at room temperature before placing it in the fridge. /
Recommended Dessert Recipes
Pies and Tart Recipes
Cherry Pie
Date Night
Chocolate Cheesecake Recipe
Pies and Tart Recipes
Cherry Pie Filling Recipe
Brownies & Bars Recipes
Blueberry Cheesecake Bars (No Bake)
If you tried this recipe and loved it please leave a 🌟 star rating and let me know how it goes in the comments below. I love hearing from you; your comments make my day!
Cherry Cheesecake
Ingredients
Filling:
- 32 ounces full-fat brick-style cream cheese room temperature; 4, 8 oz boxes
- 1 ½ teaspoons vanilla extract
- 1 vanilla bean pod seeds from one pod, save pod for later use
- 1 ¼ cups granulated sugar
- 3 large eggs room temperature
- 1 egg yolk
- ⅔ cup sour cream room temperature
- ½ cup heavy cream room temperature
Crust:
- 2 ¼ cups graham cracker crumbs
- ¼ teaspoon kosher salt
- ⅔ cup unsalted butter melted
Topping:
- 2 cups whipped cream sweetened or unsweetened
- 2 cups cherry pie filling half batch of my cherry pie filling recipe
Instructions
Prepare the pan and crust:
- Preheat the oven to 325°F. Wrap a 9-inch springform pan with aluminum foil to create a water-tight seal.
- Combine all ingredients for the crust and press into the bottom of the springform pan.
- Bake in the preheated oven for 10 minutes. Cool completely on a cooling rack.
Make the filling:
- To prepare the filling, beat the cream cheese, vanilla extract, and seeds in the bowl of a stand mixer fitted with the paddle attachment on medium-high speed until silky, creamy, and smooth.
- Add the sugar to the mixer bowl and beat until no granules are visible. This usually takes 3–5 minutes.
- Add the eggs to the cream cheese mixture one at a time and beat for 1 minute after each addition, scraping down the sides and bottom between each addition.
- Add the sour cream and heavy cream to the stand mixer bowl and beat just to combine. I recommend starting to mix on low so it doesn’t slosh around. You can gradually turn up the speed.
- Pour the cheesecake filling into the prepared crust and either shake gently or spread out with a small offset spatula.
Baking and Cooling:
- Place the lined pan into a larger baking dish or roasting pan and place both in the oven. Pour hot water into the larger pan until it is halfway up the sides, being careful not to splash any into the cheesecake.
- Bake for approximately 1 hour and 40 minutes or until set but still wobbly. I like to start checking after an hour. When gently shaken, the cheesecake will move in one cohesive mass like Jell-O.
- Carefully remove the cheesecake from the water bath and place it on a wire cooling rack to cool completely at room temperature. Carefully remove the hot pan with the water from the oven and pour out the water.
- Wrap cooled cheesecake and refrigerate at least 4 hours, but ideally overnight.
- Either spoon the cherry pie filling onto the center of the cheesecake before cutting or onto the top of each piece. Serve with lightly sweetened whipped cream.
Notes
Nutrition
Before You Go
I hope you enjoyed this chef-tested classic dessert recipe. Check out our other delicious summer dessert recipes, like this light lemon olive oil cake or this mixed berry pie!


This is excellent cheesecake! In the past i have hated cheese cake because it tasted like cream cheese it was nasty.
I tried this recipe because it was yours and so far all of your recipes I have tried has been amazing. I followed this recipe exactly and followed your tips. It turned out wonderful. I made it with blueberries. Everyone like it, there was only 3 slices left.
I’m so happy to hear that Abi! I made many variations of this cheesecake in the restaurants and they were always hits. I am very picky about cheesecake texture and flavor too! ~Lindsey
I made this the night before a dinner party and letting it chill overnight made a big difference because the texture was really smooth. I used the homemade cherry filling and added a little extra on top right before serving. It sliced clean and got super quiet at the table in the best way possible!