This post may contain affiliate links. Please read our disclosure policy.
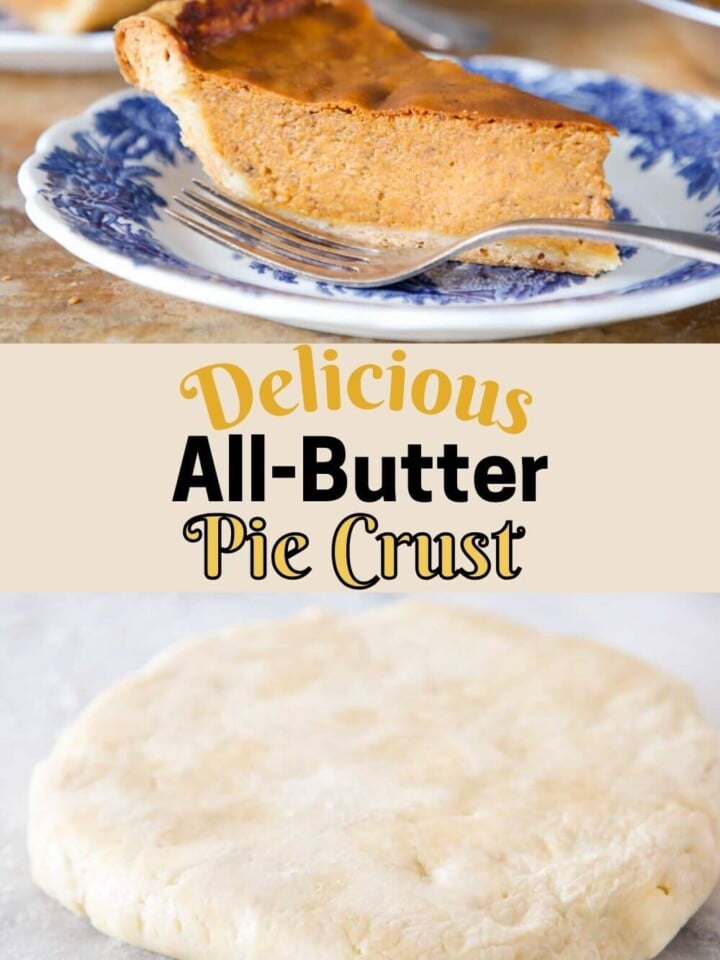
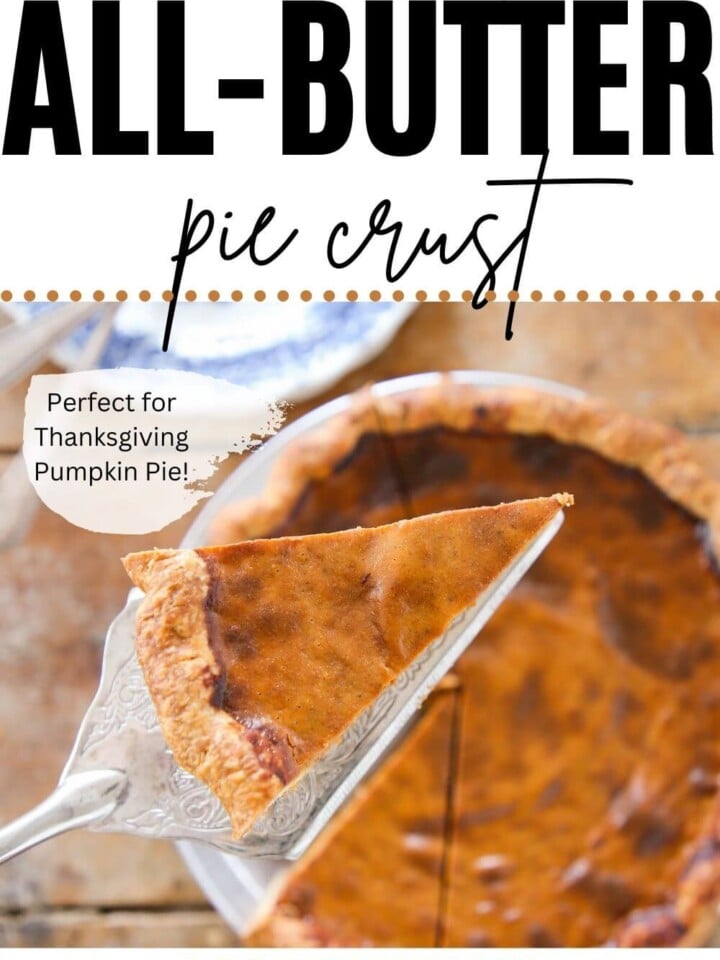
This all butter pie crust recipe is flaky, buttery and tender. Make a perfect pie crust that won’t shrink! This recipe has over 240,000 views on YouTube & can be made in under 5 minutes!

A Quick Look At The Recipe
This is a brief summary of the recipe. Jump to the recipe to get the full details.
Jump to RecipePrep Time
5 minutes
Total Time
5 minutes
Servings
12 Slices
Difficulty
Intermediate
Calories *
152 kcal per serving
Technique
Cut cold butter into flour, add ice water until shaggy, then press together by hand and chill.
Flavor Profile
: Rich, buttery, and flaky, the perfect base for sweet or savory pies.
* Based on nutrition panel
This is the best pie crust! I used this crust to make your cherry pie, and it was so good! I will be using this pie crust this year for all my Thankgiving pies!⭐⭐⭐⭐⭐
Mara
This all-butter pie crust is also called pâte brisée. A simple, easy to follow recipe for a buttery, flaky pie crust using only butter! Use it for sweet pies like pumpkin pie and banana cream pie, and for all savory pies, tarts and galettes.
I make this same recipe 5 different ways so you can find the method that works for you in your kitchen! The fastest method is with a food processor and only takes 4 minutes! I also show you how to make it by hand 3 different ways.
Not feeling up to it? Try this easy pie crust recipe instead! It uses butter and shortening. You could also make my 100% Crisco pie crust recipe!
Table of Contents
- Why You Will Love the All Butter Pie Crust
- Professional Tips for Making Pâte Brisée
- Ingredients Needed
- 5 Methods for Making Homemade Pie Crust
- How Do You Keep a Pie Crust from Shrinking?
- How to Make All Butter Pie Crust
- Chef Lindsey’s Recipe Tip
- Frequently Asked Questions
- All Butter Pie Crust Recipe
- Before You Go
Why You Will Love the All Butter Pie Crust
- All the professional tips to avoid a shrinking crust. There is nothing worse than having your beautiful pie crust shrink into nothing. I’ll show you how to avoid that fate!
- 5 different methods for making pie crust! I filmed 5 different video tutorials for this exact same recipe, so that you can find and use the method that works best for you in your kitchen.
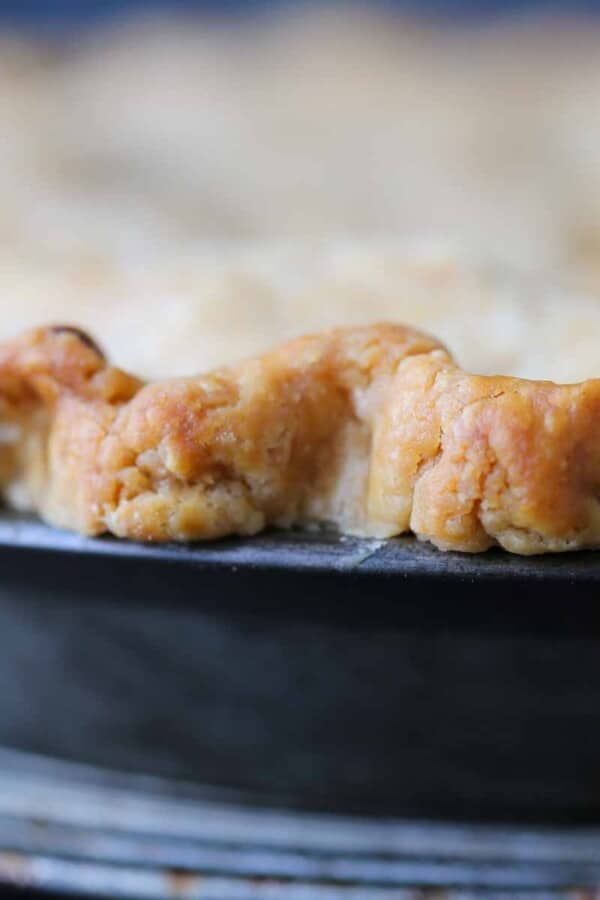
- Buttery, rich and flaky! This all-butter pie crust is buttery and the perfect balance for a sweet pie filling or base for a savory filling. It is tender and almost as flaky as classic puff pastry!
Professional Tips for Making Pâte Brisée
- Keep it cold the moment you scale your ingredients to the moment when you put the pie in the oven. This is to minimize gluten development, keep the pastry light and tender, and keep the butter from melting.
- Scale your ingredients for accuracy. Weigh your ingredients for the most consistent, best results. The different methods of measuring flour into a dry measuring cup vary by ½ cup. Measuring by weight is also much faster!
- Work quickly but treat the dough with love and tenderness. I know it sounds silly but I tell all of my cooks this (in the restaurant and bakery). Handling the dough gently will minimize gluten development and all that love you put in there will show in the final baked product! Light, flakey, buttery pastry. Working quickly keeps the dough cold.
- The magic happens when a cold pastry hits a hot oven. When you take cold pastry dough that has little pockets and sheets of cold butter, and you pop it into a screaming hot oven, the water will evaporate and the butter will melt creating flakey layers.
Ingredients Needed
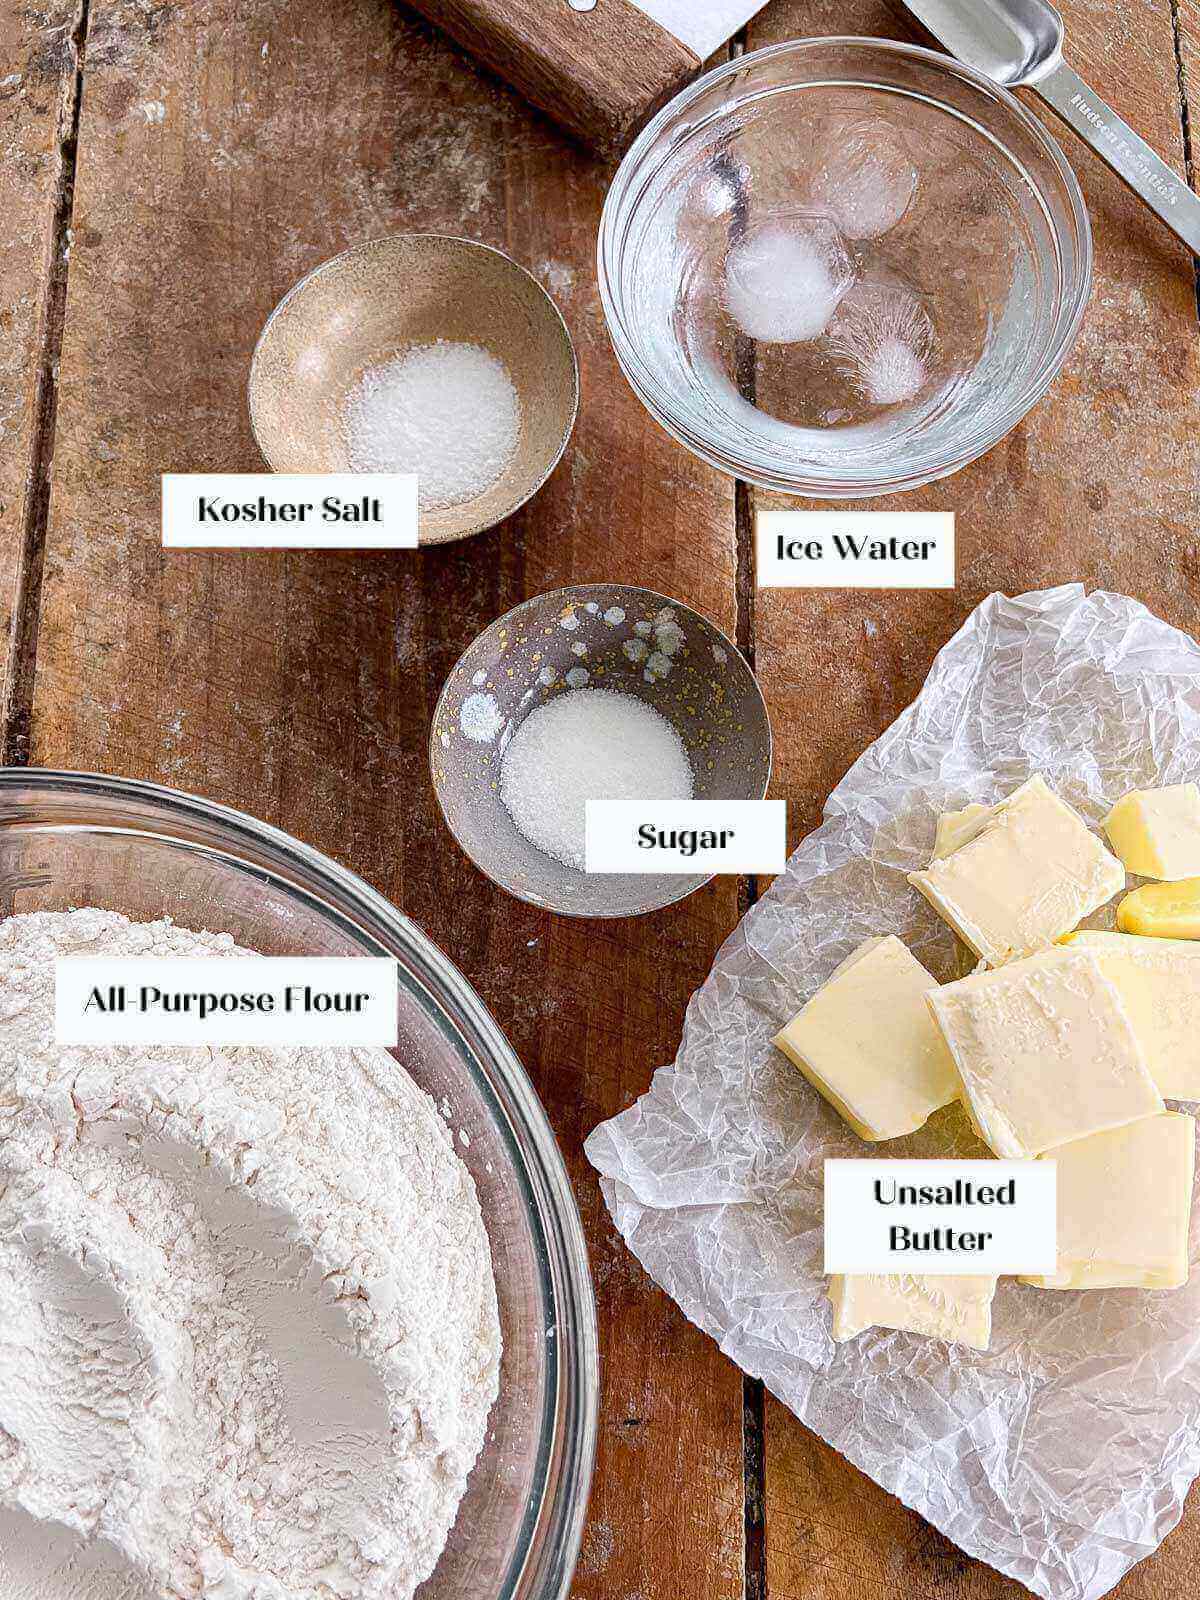
- All-purpose flour: I use all-purpose flour for pie crusts because it is the one I always have on hand. Pastry flour has a slightly lower gluten content, and thus, produces a slightly more tender and delicate pie crust. I have found that the type of flour used is less important than how the dough is handled! Just don’t use bread flour, please and thank you.
- Kosher Salt: I use kosher salt because it is less salty per teaspoon than table salt. Salt is critical in pie crust because it inhibits gluten formation and it adds flavor.
- Sugar: A little bit of granulated sugar in pie crust enhances the flavor, adds a bit of caramelization and inhibits gluten formation.
- Unsalted Butter: I use unsalted butter with 40% milkfat. Other butters can be used to similar effect. It should be cubed and cold, but not frozen.
- Ice Water: I keep my ice water in the refrigerator up until the moment I add it to the dough. Simply pull out any un-melted cubes, measure and mix! Cold water inhibits gluten formation and also keeps the butter cold, which will result in a flakier crust.
5 Methods for Making Homemade Pie Crust
Here are 5 different ways to make pie crust and when to use each! You can make pastry anywhere and anytime with whatever tools you have on hand! The best method is the one that works best for you. I have filmed a video tutorial for each and every method below. I will link to it in each.
- Bench Scraper: This method is when you cut the butter into the flour using a metal bench scraper or a pastry blender. This method gives you the most control. Hands on time is 10 minutes. Bench Scraper YouTube Tutorial.
- Pastry Blender or Pastry Knife: A pastry blender is that tool that looks like a bear claw: it has metal blades all attached to a handle. OXO makes the most comfortable one. It is just as good, and even faster, than the bench scraper. Hands on time is 7 minutes. Pastry Blender YouTube Tutorial.
- Two-Knives: You can use two knifes to cut the butter into the flour for pie crust. This is a “break in case of emergency” tool to have in your repertoire. It takes forever; it will cramp your hands; it should be a last resort, but it totally works! Hands on time is 12 minutes. Two Knives Method YouTube Tutorial.
- Stand Mixer: If I am making more than one recipe of pie dough or if I need to just get it done and need to multi-task, then the stand mixer is my preferred method. I let the stand mixer do all the hard work at the beginning but I always finish the dough by hand. If it comes together in the mixer bowl, then you worked it too much or added too much water and it will be tough and not flakey. Total time is 7 minutes. Stand Mixer YouTube Tutorial.
- Food Processor: This is the fastest method for making pie crust, but it is very easy to over cut in the butter and/or add too much water. Be sure to pulse the food processor to cut in the butter, leaving larger pieces of butter than you normally would, and finish it by hand. I also love this method because it is the fastest and it will keep your butter and dough cold. Total time is 4 minutes. Food Processor YouTube Tutorial.
How Do You Keep a Pie Crust from Shrinking?
- Keep the dough cold at every step. Keeping the dough cold will limit gluten formation because the gluten proteins need heat (and agitation) to form a strong network. Pie dough with overly developed gluten will shrink.
- Refrigerate the dough each time you work with it. This includes after you roll it out and before you line your dish. It seems excessive but each step makes a difference. In my bakery I freeze the sheets of pie dough overnight before lining, chilling and baking.
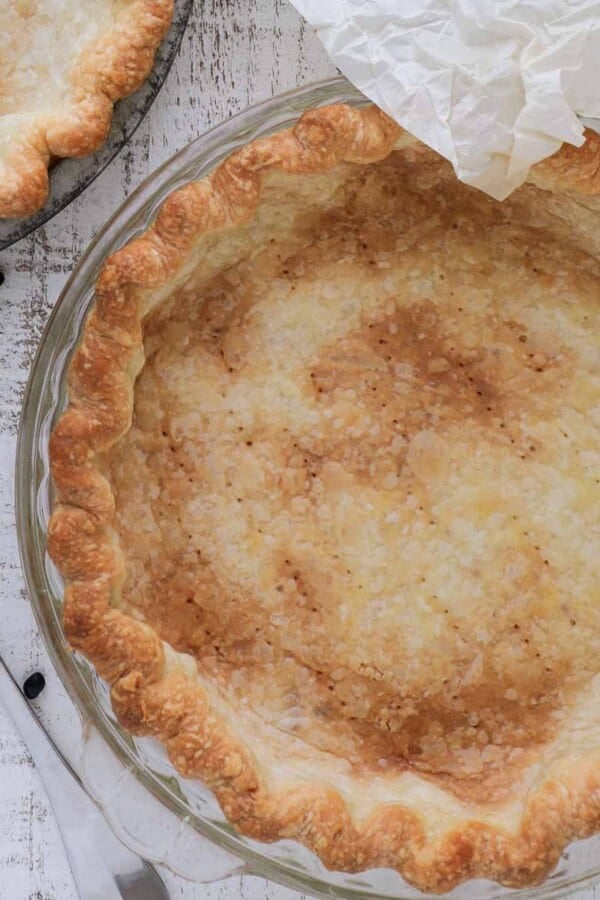
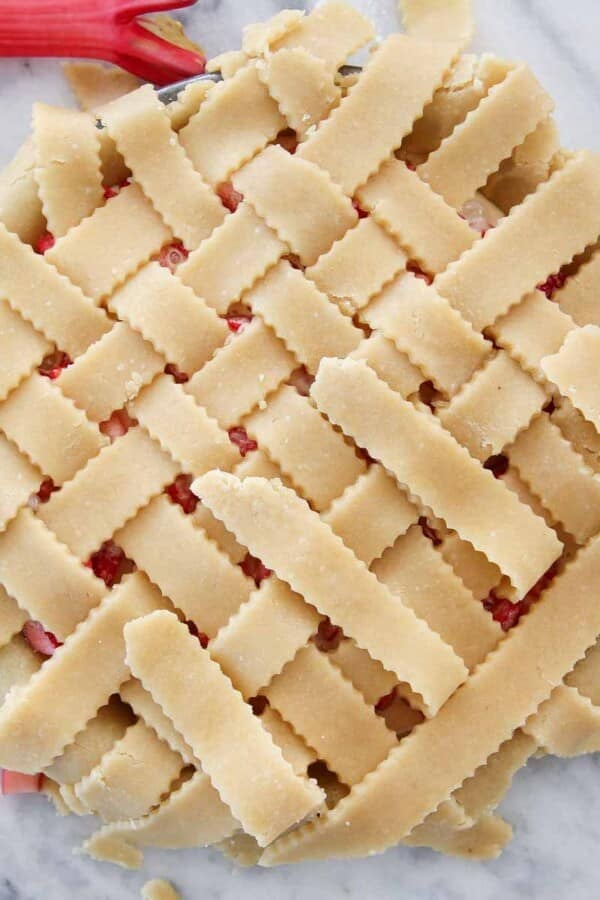
- Use a metal pie tin or glass pie dish. Those pretty ceramic dishes are actually keeping you from having a perfectly baked pie crust! You can use ceramic pie weights, but I avoid the ceramic dishes. The dough will slip down the sides as it bakes even with a filling. It also does not conduct heat as readily as metal or glass, so your crust will never be as flaky or crispy. If you don’t like the look of glass, choose a vintage metal pie plate like I did in this strawberry rhubarb pie or cherry pie. I buy them on etsy.
How to Make All Butter Pie Crust
In this recipe I will show you how to make pâte brisée using a stand mixer, because that is the most popular method. You can also make it using any of the 5 methods I mentioned above. I have filmed a video for every possible method, which you can find in this YouTube Pie Crust Tutorial Playlist. Further details and measurements can be found in the recipe card below.
Make the pie dough:
Step 1: In the bowl of a stand mixer fitted with the paddle attachment, combine the flour, salt, sugar and cubed butter. On low speed, cut the butter into the flour until you have some larger pieces but most of the butter has worked into the flour. You will notice that the flour will change color and be slightly darker.
Step 2: Stop the mixer and remove the ice cubes from your ice water. Turn the mixer back on low and slowly pour some the water over the mixing dough. Mix on low until the flour has hydrated but a cohesive dough has not yet formed.
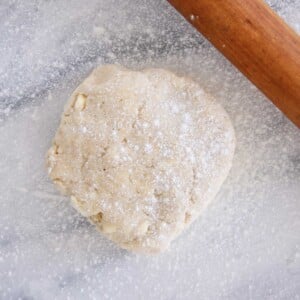
You will see shards of dough and then some unincorporated flour. This is the “shaggy” dough stage. Perfect.
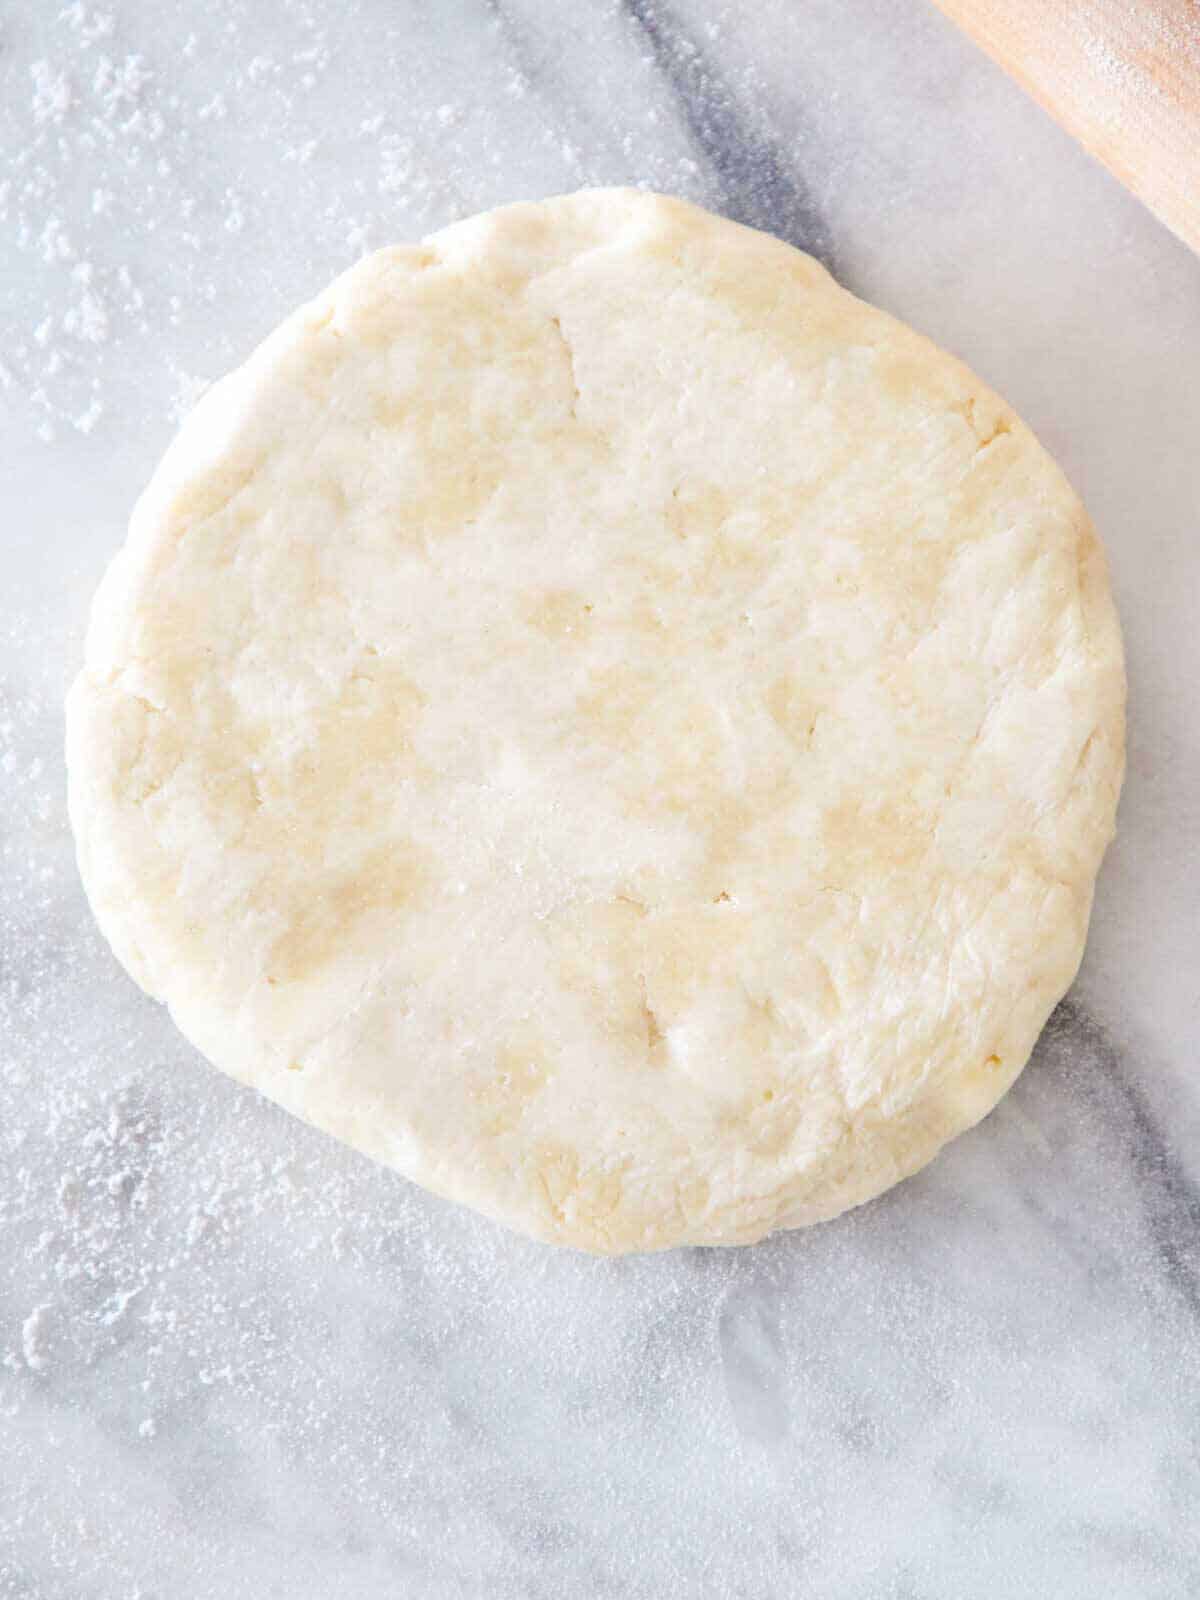
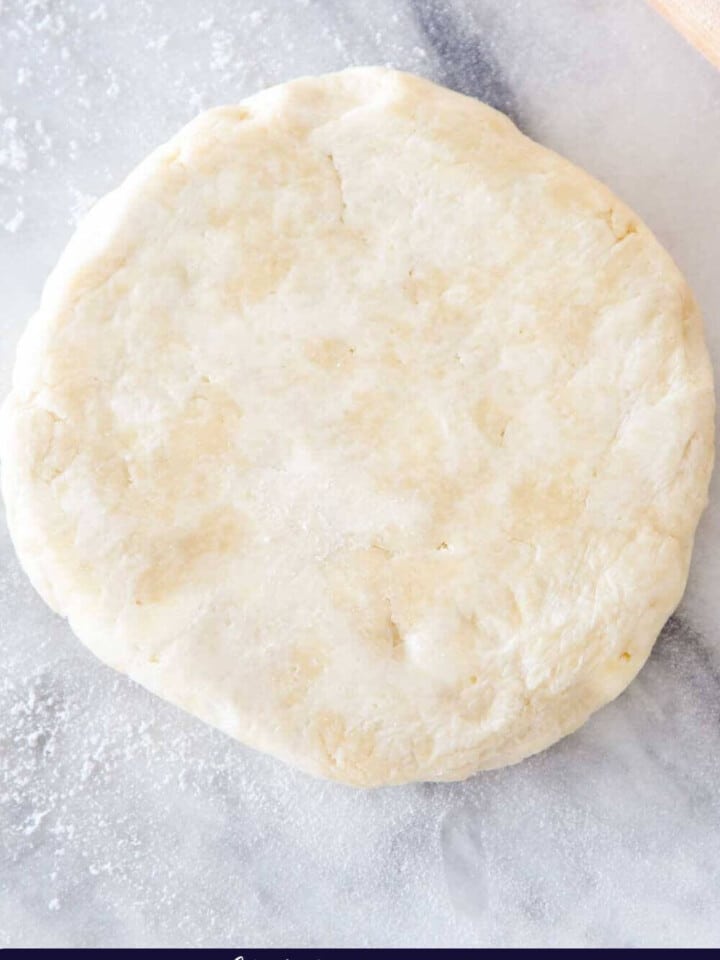
Step 3: Turn all the contents of the mixer out onto a countertop and press gently until a dough forms adding water by sprinkling it over the dough as needed. You should add water only to the parts of the dough that are still dry. Gently working the dough into a log shape.
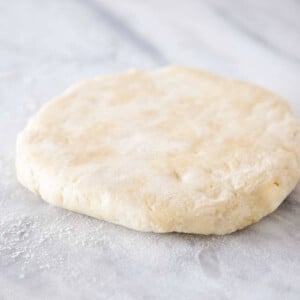
Step 4: Divide the dough in half. Press out into 1 ½ inch thick disks and wrap in plastic wrap.
Step 5: Refrigerate until cold, at least 2 hours and up to 3 days. Alternatively you can freeze it for up to 2 months. Thaw it in the refrigerator before using.
Roll out pie dough:
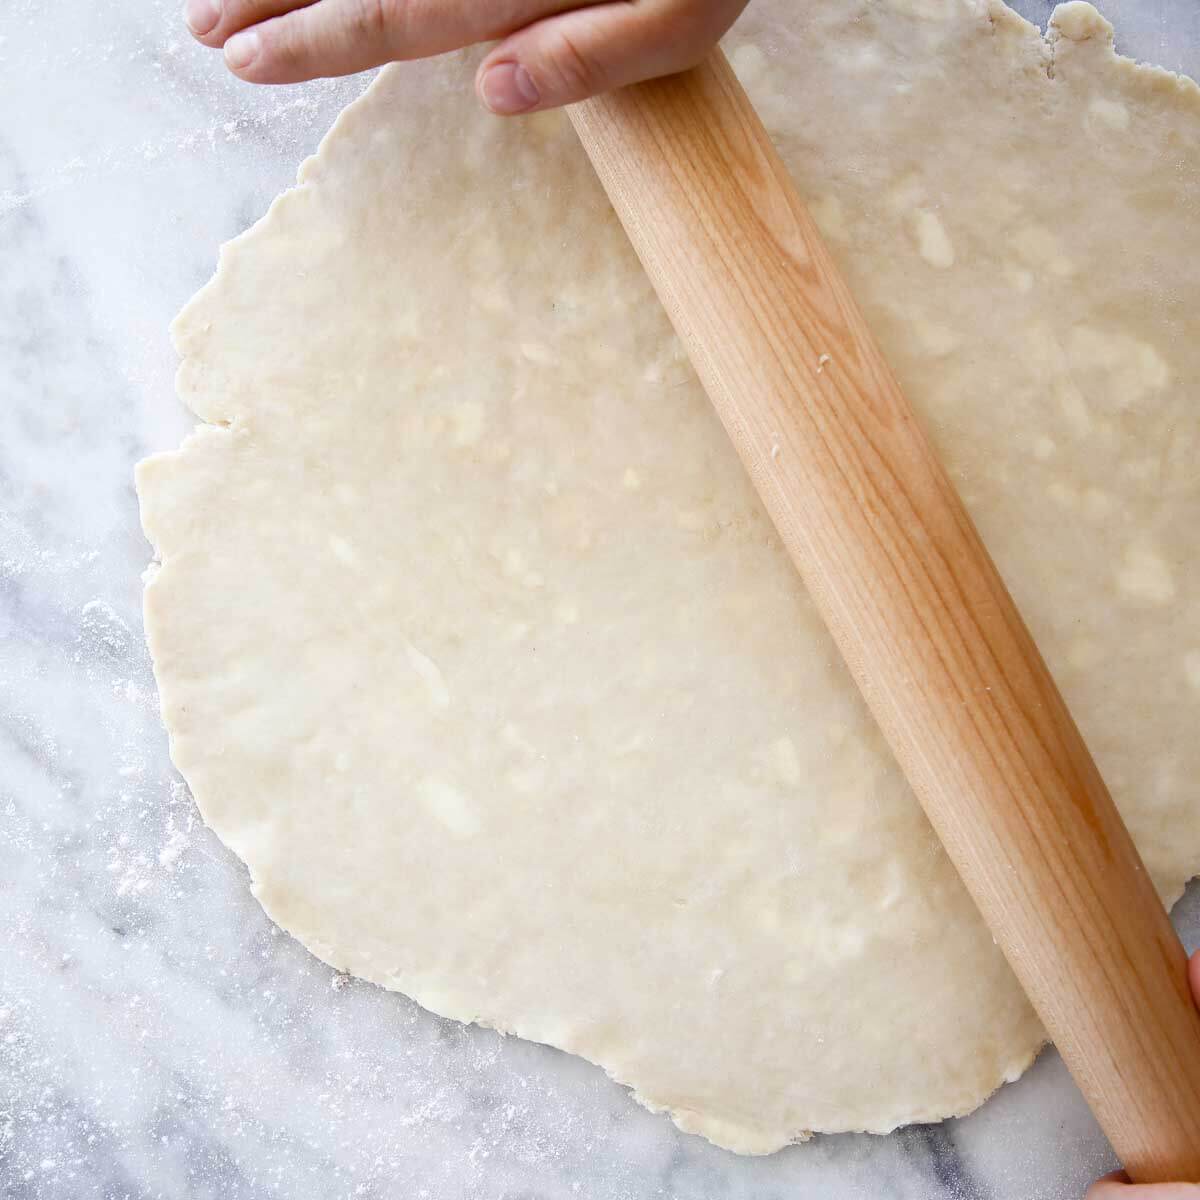
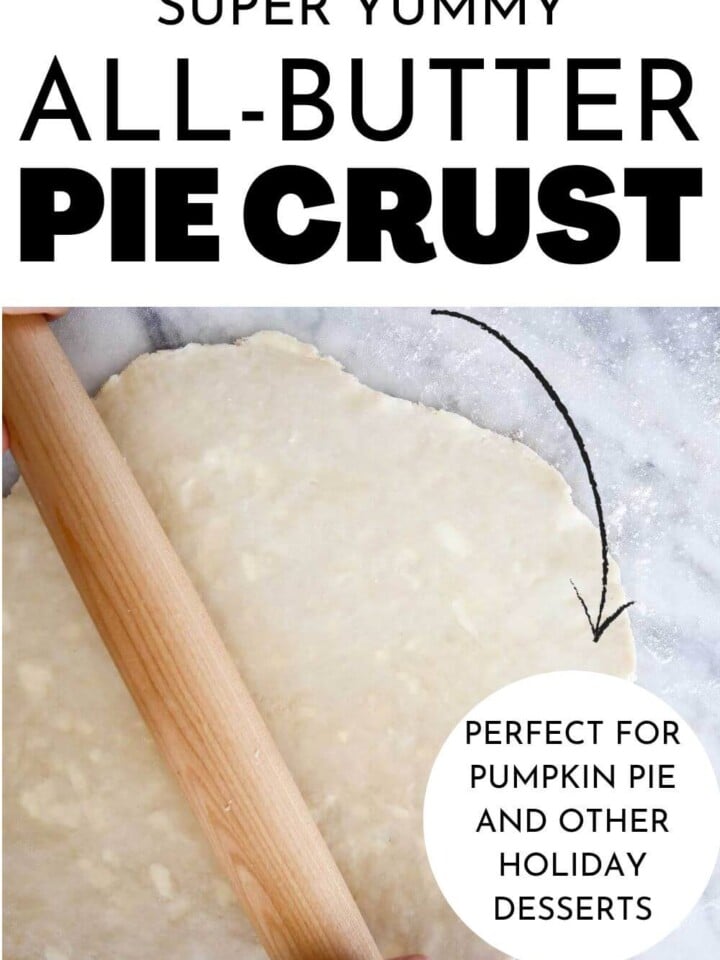
Step 6: Lightly flour a smooth work surface with flour. Place the dough on the floured surface and lightly flour the top of the dough and a rolling pin.
I prefer either a French rolling pin or a straight wooden rolling pin because you can control the pressure better than one with handles. If the dough cracks as you roll, then it is still too cold. Give it 5 more minutes and then try again.
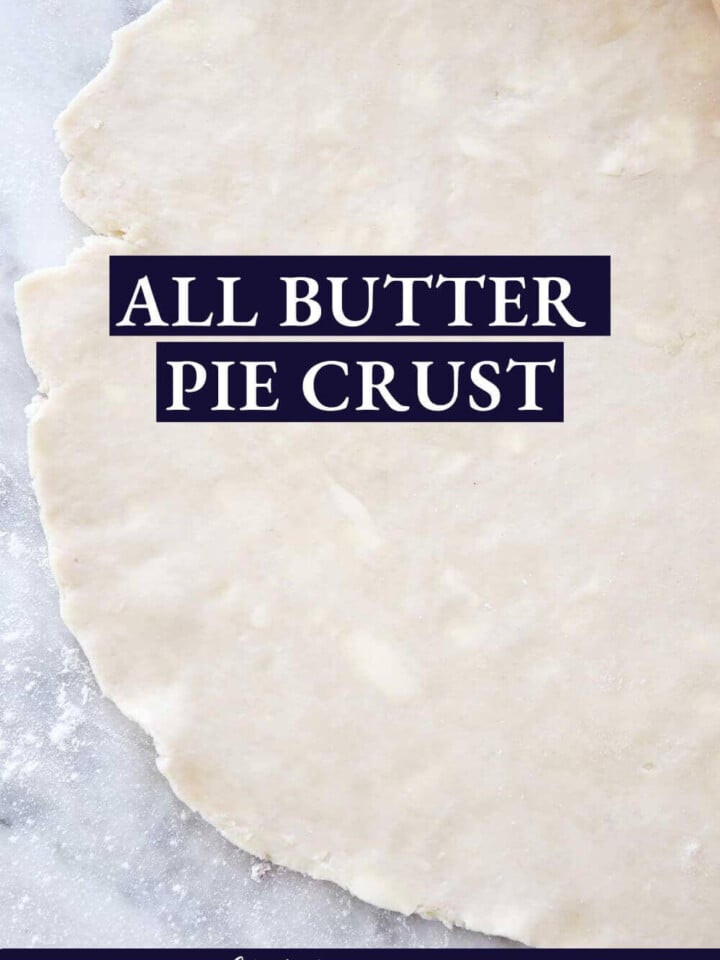
Step 7: Working quickly and efficiently with firm pressure, roll out the dough starting from the center, pressing away from you and then rolling back towards you. Add more flour as needed under or over the dough, rotate it a quarter turn and repeat. Gently working the dough to 1/8th inch thick or slightly thinner.
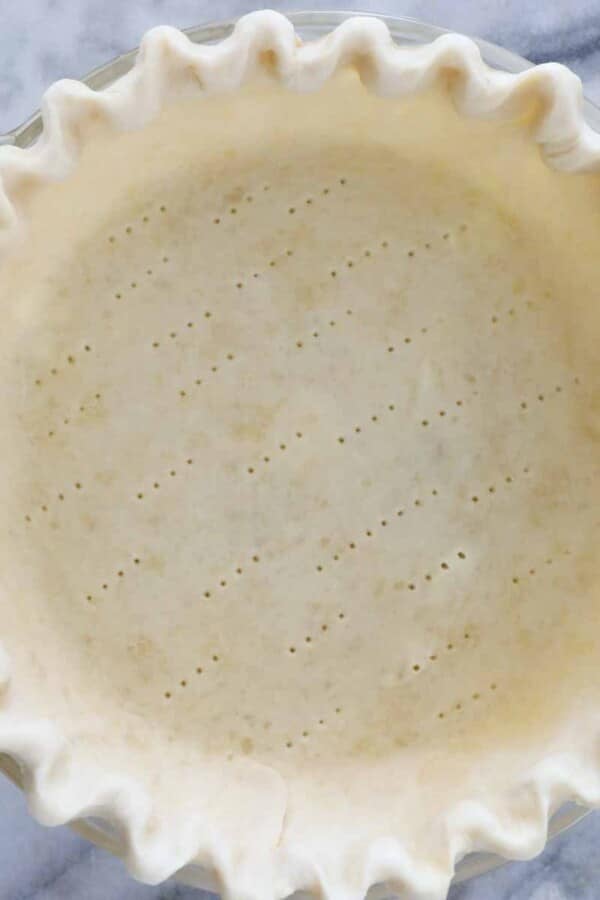
If the dough starts to shrink back while you are rolling, place it on a parchment paper lined baking sheet, cover with another sheet of parchment to keep it from drying out, and refrigerate it for 15-30 minutes.
Step 8: Place the dough on a parchment lined baking sheet and refrigerate for 30 minutes.
You can also refrigerate first and then wrap and freeze between sheets of parchment paper for longer storage at this stage!
Step 9: You are now ready to line a pie tin or tart mold of your choice! Makes enough for 2 single-crust pies or 1 double crust pie.
Chef Lindsey’s Recipe Tip
I have made thousands and supervised the making of thousands more pie crusts. Just know that there is almost nothing you can’t come back from. The end result will be impacted to varying degrees, but the pie crust will still be delicious. Work with a light hand and keep it cold, and you’ll be fine!
Frequently Asked Questions
Store prepared, wrapped dough in the refrigerator for up to 3 days or in the freezer for up to 2 months. The dough can also be rolled out, refrigerated and then frozen between parchment paper for frozen homemade dough that is as convenient as store bought.
Alternatively you can blind bake or par bake the crust, cool, wrap and freeze the baked shells for up to 3 months.
You can make as large a batch as your equipment can handle. I do recommend making larger batches in a stand mixer, so keep in mind the capacity of your mixer. Also remember that you might want to work in batches in order to keep the dough cold and consistent.
This all butter pie crust is perfect for sweet and savory pies and tarts. Use it to make hand pies like these apple hand pies or cut out with cookie cutters and baked as decoration for cupcakes or pies. It is also delicious as a cobbler or pot pie topping.
If you tried this recipe and loved it please leave a 🌟 star rating and let me know how it goes in the comments below. I love hearing from you; your comments make my day!
All Butter Pie Crust
Ingredients
- 2 cups all-purpose flour measured by fluffing the flour then spooning it in
- 1 teaspoon kosher salt
- 1 teaspoon granulated sugar
- 9 tablespoons unsalted butter cold, cut into 1/2 inch cubes
- 2 ½ oz cold water or as much or as little as needed
Instructions
- Whisk together pastry flour, salt and sugar. Using your preferred method cut in the butter until you have pea sized pieces.
- If you are using a bench scraper, pastry blender or two knives, you will chop the butter into the flour using an up and down motion, corralling the flour back into the center occasionally. If you are using the stand mixer or food processor, leave slightly larger pieces. When using a food processor to cut in butter using the pulse option and watch it like a hawk. Leave slightly larger pieces then you would for other methods.
- Remove the ice cubes from your water. Slowly begin to add your ice water a tablespoon at a time. If making it by hand, pour into the center of the flour and gently toss the flour into the water with the bench scraper, knife or a fork until you have a crumbly mixture. At this point be very careful with the amount of water that you add because it only needs a few teaspoons more.
- When your dough is shaggy, which means it looks like shards or strands of pastry, and there is still some loose flour, turn out your dough from the mixer or food processor and work the dough together by gathering it and pressing away from you with the heal of your hand. Do this JUST until it comes together. If it is crumbling, then dip your hand in a little ice water and pat it on the pastry dough. Seriously, that’s it. Remember the gluten!
- Divide the dough in half and press each half into a disk. Wrap in plastic wrap and chill for 2 hours or overnight. If you chill your dough overnight, you will need to let it rest a bit before rolling or it will be too cold and it will crack.
- Roll and do whatever your little heart desires with that gorgeous, buttery dough!
Video
Notes
Stand Mixer- 7 minutes
Pastry Blender- 7 minutes
Bench Scraper- 10 minutes
Two Knives- 12 minutes
Nutrition
Before You Go
I hope you enjoyed this professional chef tested recipe. Check out our other delicious, chef-developed pie crust recipes or find your future favorite apple pie in our pie recipes catalogue!


This is the best pie crust! I used this crust to make your cherry pie, and it was so good! I will be using this pie crust this year for all my Thankgiving pies!
Love this pie crust. Made 1/2 of it for your pumpkin pie recipe. Went together beautifully and was a dream to roll out!
Hi Kim! That sounds so totally perfect! Happy baking!
No measurements listed for flour ?
Hi Janet! If you scroll down to the recipe block, there is a measurement listed for all-purpose flour (both in volume and by weight!). Happy baking!
I’ve make this and the vodka crust. Can you tell me why the butter content is so different? Both came out ok as I am a novice but I think I try rolling too soon out of the frig. How long do you let your dough sit before rolling? Your videos are so helpful, thanks
Hi Mary,
You have a great eye! Basically I wanted to see how much butter I could get into a pie crust while maintaining structure. A lot of testing went into both recipes 🙂 They both taste fantastic though. I use the vodka one in my shop because the water amount isn’t variable, which makes it easier to train staff to make in large batches. It is also easier to roll right out of the frige because of the extra moisture. I let my all-butter dough sit about 10-15 minutes before rolling. It depends on how cold your room is. You want the dough to be cold but you can press your finger in it.
Happy baking!
Have you ever tried this with whole wheat pastry flour?
I have not! But I bet it would be delightful. It will just take a little more water than All Purpose flour.
I’ve used the stand mixer method thinking that if the only pressure point is adding too much water, I can probably just manage it.
I get it now – literally a teaspoon makes a big difference …
I think I did well but did I nail it? Nope – i reckon i’ve added just tad bit too.much water.
Did it ruin my bake? Absolutely no, the pie turned out delicious, the pastry is really tasty and flaky and yummy.
Will definitely do it again.
I’m so glad you worked it out and that the pie turned out delicious! Happy Baking!????
FWIW, I think this recipe should say 1 cup (2 sticks) of butter, not 1/2 cup (1 stick). With so much flour, the crust will be tough with only one stick of butter.
Hi Jen, I meant what I typed. Most of my recipes are by weight so that is a 2:1 ratio of flour to butter. If you do what you suggest, that would be a 1:1 ratio of flour to butter and that is too much butter. At that point you are going to make a short crust. It will be tender and lovely but not flakey. Happy baking!
Thank you for the insight into one of my biggest fears…. pastry!!!! You mentioned I the post that you weighed your flour- amazing idea!!!! But in the recipe it’s not noted in weight. Is there a weight to the amount of flour? Thank you for the help!
Hi Erin! The weight measurements are listed first in the recipe. They are in grams so don’t let the “g” throw you! Happy baking!
OMG- that’s so great!!!! Thank you! I am gonna give it a go this afternoon! Im terrified…..
Haha! Don’t be terrified! You’ve got this!