This post may contain affiliate links. Please read our disclosure policy.
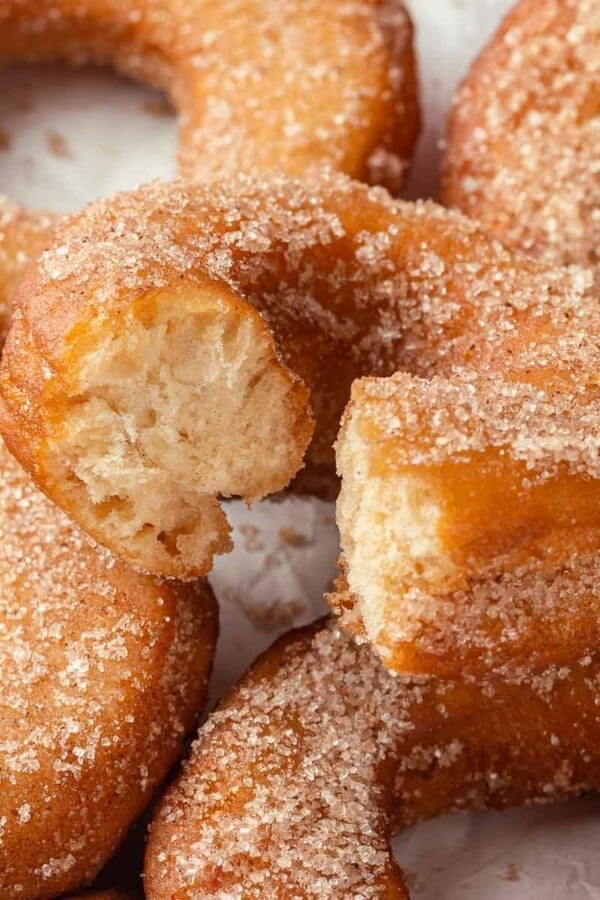
This Krispy Kreme Donut recipe makes doughnuts that are light and airy! Little fried pillows that melt in your mouth!
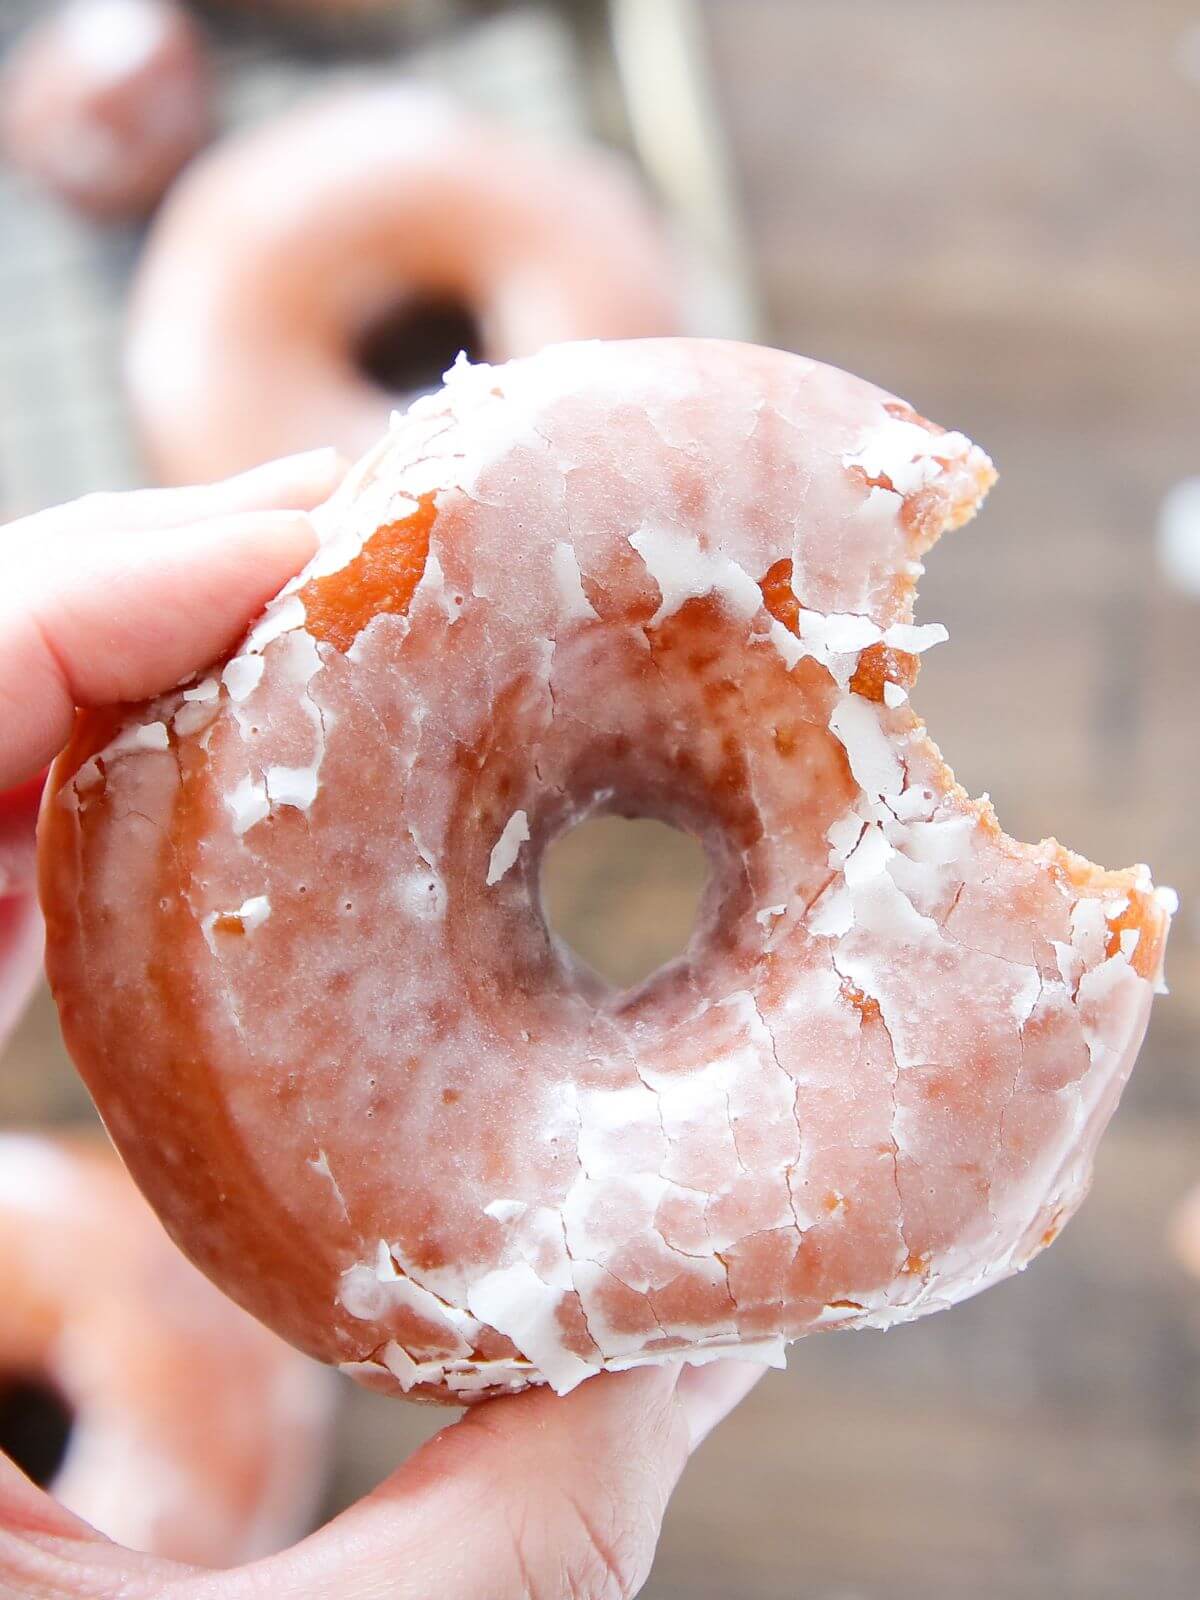
Yes, you can make these iconic donuts right from your own kitchen. And, you’ve landed on the exact site to help you through it. These krispy kremes are perfectly sweet, tender, and unbelievably satisfying. Like I was telling you in my recent donut glaze post, as a pro chef I’ve developed more donut recipes than is altogether normal. This recipe was constantly under development so I could present you with perfection!
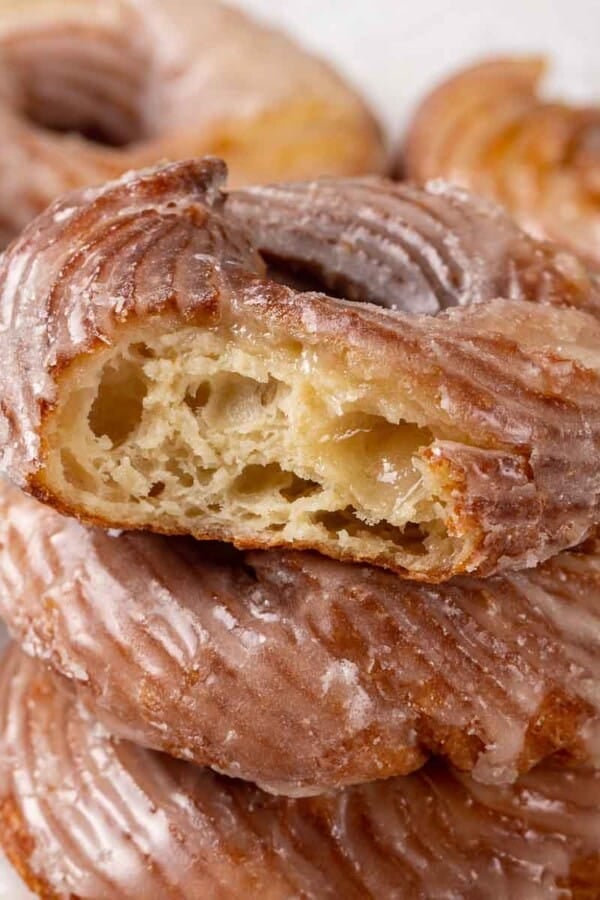
Yeasted donuts bring their own challenges and rewards. If you’re looking for a more beginner-friendly recipe with a similar flavor profile, I got you. You can head over to my sour cream donuts or French crullers instead and circle back when you’re ready!
Table of Contents
Why these are the BEST Krispy Kreme Doughnuts:
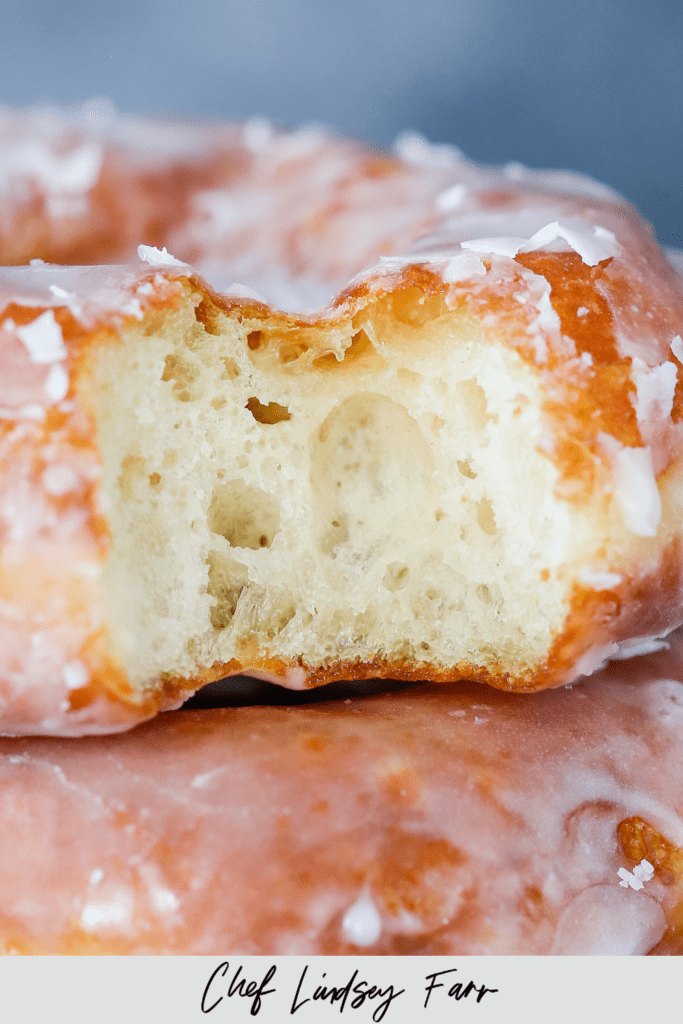
- Light and airy texture from perfect gluten development. This recipe uses a combination of cake flour and all-purpose flour, which controls how much gluten is available from the get-go. A pro pastry chef guides you through working with the dough gently so it stays fluffy!
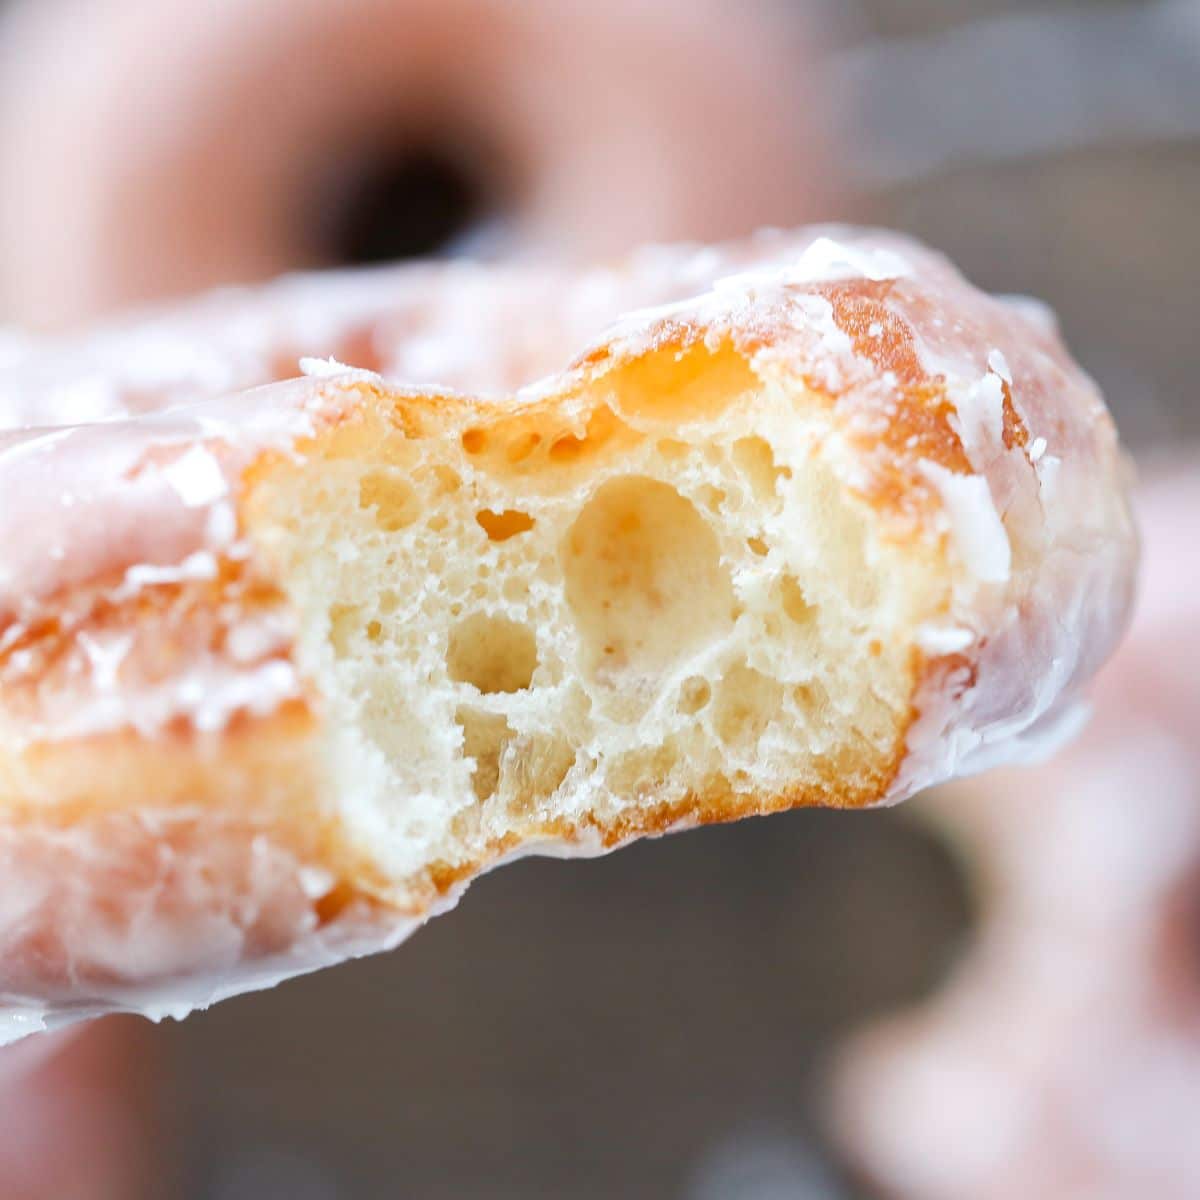
- Soft, tender bakery-quality donuts. These doughnuts have high moisture content so their texture is light and luxurious.
- Rich, decadent flavor. The high enrichment in this dough from butter, oil, milk and eggs makes it indulgent and satisfying. Absolutely a special treat for you and those you love!
Professional Tips for Doughnut Recipes and the Deep Fryer
- Keep the dough cold. All the resting and chilling really are necessary for the best results! Cold dough will have a smaller risk of absorbing too much oil. You only need to temp your dough 6 minutes prior to frying.
- Monitor your oil temperature. 340° F is too cold – that is to say your donuts will be greasy. 380° F is too damn hot. The outside will be dark and awful while the inside is still gooey. 350°-360° F is your target range. Adjust your heat as it approaches the boundaries. Don’t be afraid to turn off the stove.
- Gently handle your donuts. Making the most tender donut requires a bit of patience. Using a light touch rolling out the dough and gently handling will keep the donuts tender. If you see them starting to shrink back at any point, cover them with plastic wrap and let them have a little siesta in the refrigerator.
What are the ingredients in Krispy Kreme donuts?
- Granulated Sugar: Sugar is here for sweetness and a little bit of caramelization.
- All-Purpose Flour & Cake Flour: The gluten in all-purpose flour allows the dough to develop a strong network but remain tender and soft. Cake flour is essential in this donut recipe. You can use solely all-purpose flour but the texture will be less tender and fluffy.
- Butter: Unsalted butter allows you to control the saltiness of the dough while still adding all the buttery goodness!
- Whole Egg: The egg is here to add fat, moisture and inhibit gluten development. The fat from the yolk adds richness and shortens some of the gluten strands to keep the donuts soft and tender.
- Dry Active Yeast: Dry active yeast requires the added step of hydration in this copycat recipe, but they are fast yet controllable. See substitutions for more options you can use.
- Canola Oil: I use canola oil for frying but another neutral-flavored oil with a high smoke point will do, like crisco shortening.
- Milk
- Vanilla Extract
- Kosher Salt
See the recipe card for full information on ingredients and quantities.
Variations & Substitutions
- Yeast substitution. If you don’t have dry active yeast, you can substitute double the weight of fresh yeast or half the weight in instant yeast. If using either fresh or instant yeast, add them to the dry ingredients. Do not continue heating the mixture after incorporating. A kickstart to the fermentation process would be unwelcome in this instance.
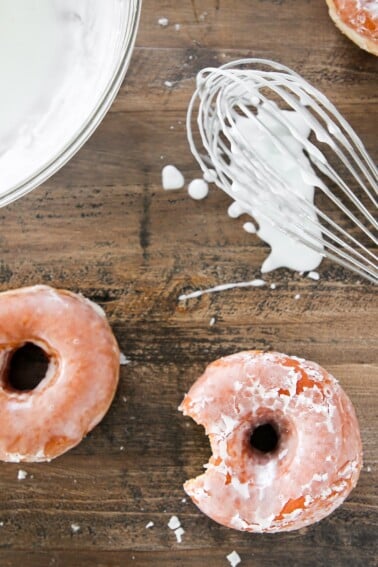
- Use a chocolate glaze. I’m a sucker for my classic donut glaze, but you know from my devotion to chocolate recipes that chocolate fudge glaze would be a winner in my book.
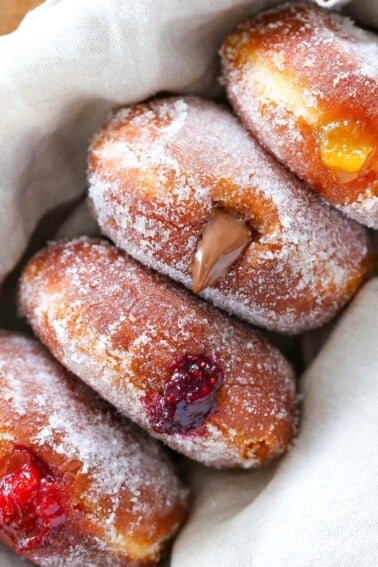
- Make filled donuts. If you cut out larger rounds and don’t make a center hole, you could fill these with your favorite lemon curd, strawberry jam, or pastry cream. Check out my jelly donuts recipe to learn the best approach!
How to Make Krispy Kreme Donuts
Further details and measurements can be found in the recipe card below!
Make the dough:
Step 1: Whisk together flours, sugar and kosher salt in a bowl and set aside. In another small bowl, beat the egg until smooth and no streaks of white remain.
Step 2: In a small pot, melt butter over low heat. Whisk in oil followed by the milk and finally the beaten egg and vanilla. Cook over low heat, stirring constantly, until 106°F.
If your butter mixture was too hot when you added the egg and it scrambled, start over. Whisking the egg into the pot in a steady stream will help prevent this.
Step 3: Pour into the bowl of a stand mixer and whisk yeast into milk mixture. Set it aside and allow it to bloom for 10 minutes.
Step 4: Fit mixer with paddle attachment and add half the flour to the bowl with the yeast/milk mixture. Mix on low to combine, then add the remaining flour and mix on low until flour is incorporated.
Step 5: Switch to the dough hook and turn speed to medium high and continue to mix until you can see strands pulling from the sides of the bowl into the center when it is mixing, approximately 12 minutes. It will not completely form a smooth dough ball. There isn’t enough gluten for that!
This is not a beginner’s dough. That doesn’t mean you should shy away from attempting it. Just don’t get frustrated. Be patient with yourself and the dough. Accept that she is going to be sticky and not form a smooth dough. I highly suggest you watch my video on making krispy kreme donuts, because nothing beats showing someone how to handle a yeasted dough.
Proofing the dough:
Step 6: Spray a large bowl with nonstick cooking spray. Spray hands and bowl scraper with the spray and scrape out the dough into your hands and form into a ball. Place in an oiled bowl. Cover with plastic wrap and bulk proof in the refrigerator for 30 minutes.
My best professional advice is to let the dough guide you. If it isn’t light and airy when the timer says it “should” be, then give it the time it needs or proof it in a warmer environment.
Rolling and cutting the dough:
Step 7: Lightly flour your work surface. Using a bowl scraper or silicone spatula, scrape the dough onto the surface. Sprinkle it with a bit more flour. Flour your rolling pin. Gently roll out to approximately ½ inch thickness.
Step 8: Line a baking sheet with parchment paper and lightly spray with cooking spray. Cut doughnuts with ring molds, biscuit cutters (3”), or a doughnut cutter, and place on a parchment lined baking sheet. Cut out the holes with a 1” cutter while they are on the baking sheet. This will keep them from misshaping. Spray surface of doughnuts, wrap with plastic wrap and refrigerate 2 hours.
Alternative, to cook immediately: Instead of chilling doughnuts in the refrigerator a second time, allow them to sit out 30 minutes until doubled in size and then fry.
Frying yeasted donuts:
Step 9: Pour oil into a fryer or a Dutch oven, making sure the oil is at least 2 inches deep. Heat your oil to 355°F. Adjust your heat to keep the temperature between 350°- 360°F while frying. You will need a clip-on fry/candy thermometer for this. I heat my oil up to 360°F before adding a batch of donuts, because the cold dough will lower the temperature of the fryer oil.
Step 10: Allow the donuts to sit at room temperature 6 minutes prior to frying.
Step 11: Gently place 3-5 donuts in the fryer, while keeping the remaining donuts in the fridge. The number you can fry at once depends on the size of your pot. You want the donuts to have room to move around and space to puff.
Step 12: Once they rise to the surface, cook for 60 seconds and then flip them with a slotted spoon. Fry until the bottom develops a nice golden brown color, about 45 seconds. Flip it again and then fry for another 10-30 seconds or until the color is a nice even golden brown. I usually test mine with a cake tester. Pull the donut out of the oil with a spider or slotted spoon, poke it and then pull the cake tester out. It should not have any streaks of dough or crumbs.
Step 13: Transfer to a wire rack set over a sheet pan or paper towels.
The fry time is not only dependent on oil temperature but also the temperature of the dough and how well proofed it is. The easiest thing to do is to check it intermittently with a cake tester. If it comes out clean through the center, it’s done!
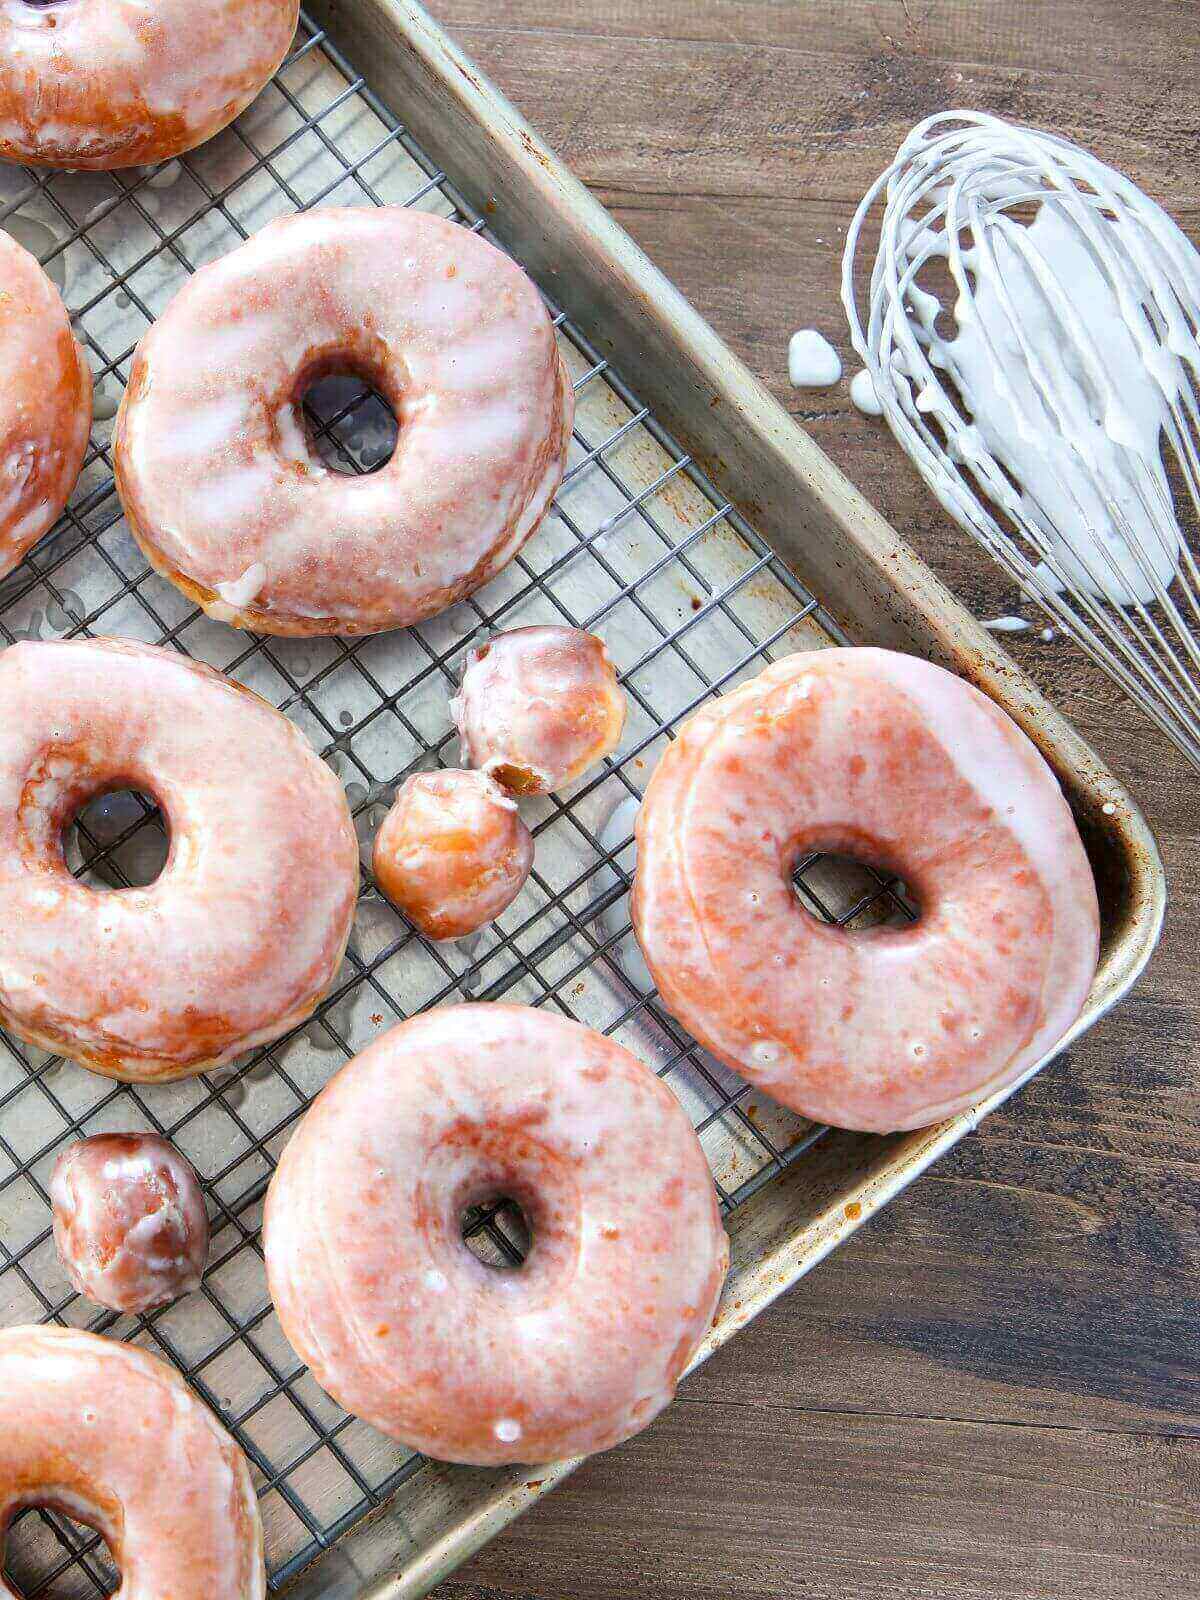
Step 14: Allow oil to drip off doughnut 10 seconds then roll in granulated sugar or dip in a simple powdered sugar glaze.
Chef Lindsey’s Recipe Tip
You can re-roll scraps one time with at least 20 minutes of bench rest. Knead the scraps together into a ball, cover with plastic wrap and allow to sit 20 minutes before trying to roll them out again. If they shrink back, give them a little more time to rest! You can also rest them in the refrigerator well wrapped in plastic wrap for up to 24 hours.
Frequently Asked Questions
Donuts are best the day they are made and should be stored at room temperature uncovered. When stored in an airtight container they begin to taste a bit like oil. If storing longer than a day, store in a container with the corner slightly cracked as a vent for up to three days. They will slowly begin to dry out but they will still taste delicious! I do not recommend refrigerating or freezing fried donuts.
The cut, raw dough can be stored in the freezer for a week. The exact length of time will depend on your particular freezer and how proofed the donuts were when frozen. The freezer will retard (slow) the proofing process but it will not stop it. When they feel light and airy, they are fully proofed and can be fried straight from frozen. Allowing them to proof additional time at room temperature could lead to over proofed and flat donuts.
Perfectly proofing your donuts before they hit the oil will keep them light and fluffy. The dough, even when cold, should feel light and airy. It should give when touched but retain its shape. The recipe for krispy kreme donuts also has high moisture content and high enrichment, both of which contribute to hindering gluten development and keeping the doughnuts airy!
Krispy Kreme fries their donuts to perfection.
If you tried this recipe and loved it please leave a 🌟 star rating and let me know how it goes in the comments below. I love hearing from you; your comments make my day!


Krispy Kreme Donuts
Ingredients
- 3 tablespoons unsalted butter
- 3 tablespoons vegetable oil
- 1 ¼ cups milk
- 1 egg beaten
- 1 teaspoon vanilla extract
- 1 ½ tablespoons dry active yeast
- 2 cups cake flour
- 2 cups all purpose flour
- ½ cup sugar
- 1 teaspoon Kosher salt
Instructions
Make the dough:
- Whisk together flours, sugar and kosher salt in a bowl and set aside. In another small bowl, beat the egg until smooth and no streaks of white remain.
- In a small pot, melt butter over low heat. Whisk in oil followed by the milk and finally the beaten egg and vanilla. Cook over low heat, stirring constantly, until 106°F.
- Pour into the bowl of a stand mixer and whisk yeast into milk mixture. Set it aside and allow it to bloom for 10 minutes.
- Fit mixer with paddle attachment and add half the flour to the bowl with the yeast/milk mixture. Mix on low to combine, then add the remaining flour and mix on low until flour is incorporated.
- Switch to the dough hook and turn speed to medium high and continue to mix until you can see strands pulling from the sides of the bowl into the center when it is mixing, approximately 12 minutes. It will not completely form a smooth dough ball. There isn’t enough gluten for that!
Proofing the dough:
- Spray a large bowl with nonstick cooking spray. Spray hands and bowl scraper with the spray and scrape out the dough into your hands and form into a ball. Place in an oiled bowl. Cover with plastic wrap and bulk proof in the refrigerator for 30 minutes.
Rolling and cutting the dough:
- Lightly flour your work surface. Using a bowl scraper or silicone spatula, scrape the dough onto the surface. Sprinkle it with a bit more flour. Flour your rolling pin. Gently roll out to approximately ½ inch thickness.
- Line a baking sheet with parchment paper and lightly spray with cooking spray. Cut doughnuts with ring molds, biscuit cutters (3”), or a doughnut cutter, and place on a parchment lined baking sheet. Cut out the holes with a 1” cutter while they are on the baking sheet. This will keep them from misshaping. Spray surface of doughnuts, wrap with plastic wrap and refrigerate 2 hours.
- Alternative, to cook immediately: Instead of chilling doughnuts in the refrigerator a second time, allow them to sit out 30 minutes until doubled in size and then fry.
Frying yeasted donuts:
- Pour oil into a fryer or a Dutch oven, making sure the oil is at least 2 inches deep. Heat your oil to 355°F. Adjust your heat to keep the temperature between 350°- 360°F while frying. You will need a clip-on fry/candy thermometer for this. I heat my oil up to 360°F before adding a batch of donuts, because the cold dough will lower the temperature of the fryer oil.
- Allow the donuts to sit at room temperature 6 minutes prior to frying.
- Gently place 3-5 donuts in the fryer, while keeping the remaining donuts in the fridge. The number you can fry at once depends on the size of your pot. You want the donuts to have room to move around and space to puff.
- Once they rise to the surface, cook for 60 seconds and then flip them with a slotted spoon. Fry until the bottom develops a nice golden brown color, about 45 seconds. Flip it again and then fry for another 10-30 seconds or until the color is a nice even golden brown. I usually test mine with a cake tester. Pull the donut out of the oil with a spider or slotted spoon, poke it and then pull the cake tester out. It should not have any streaks of dough or crumbs.
- Transfer to a wire rack set over a sheet pan or paper towels.
- Allow oil to drip off doughnut 10 seconds then roll in granulated sugar or dip in a simple powdered sugar glaze.
Video
Notes
Nutrition
Before You Go
I hope you enjoyed this professional chef tested recipe. Check out our other delicious, chef-developed donut recipes!


I guess I’m confused. In the instructions you’re talking about double acting baking powder and sour cream. But that is not in the recipe.
These rise by yeast, am I not correct?I love making doughnuts. So I will be making these.
Hi Donna! That’s an excellent point! The instructions in the recipe block are accurate, as well as the ingredients. I updated the body of the post (the baking powder reference was a tip from from my sour cream donuts!). There are more useful yeasted donut tips also in my jelly donut recipe. Happy frying!
Pretty darn good start if you like light airy, fluffy donuts. Although I might go a little more sweet in the dough next time. Nice details on proofing, although amateurs might not know what retarding is. I did a final warm proof in a moist oven cooling through 100-85 degrees (put a shallow ban of boiling water in oven, set oven to 200, turn it off as it gets to 125, wait for temp to spool down, then proof), then re-cooled them so they would handle well into the oil. You were right, temperature WAS everything while frying. I like a cast iron dutch oven with more oil than I think I’ll need–the more mass of oil there is, the less fluctuation you get when dropping in cold dough.
Hey Shawn! I’m glad you enjoyed them. You are certainly right, I think the recipe could use an update for the everyday baker. Sometimes I forget to roll it all back. The tricky thing with this donut recipe is that it is super easy to overproof and then you end up with a good but not dissolve-in your-mouth light donut. I would worry someone less experienced than you would overproof in a cooling oven. I will also say that creating a lighter dough that you can still work with and retains it’s structure when fried would be a challenge. It took me years of tweaking this recipe and it’s predecessor “even lighter donut” to arrive here. It’s all in the melted butter/shortening combo and the ratio of cake flour to AP flour. It gives you just enough structure to trap the air. ~lindsey
Hi Lindsay! Thanks for another thorough donut recipe. 🙂
I like to serve donuts for breakfast when I have company, so I wondered if you can suggest how this dough could be set up in advance so that the donuts could be ready within 1-2 hours of getting up.
My first idea would be doing the first (bulk) proof overnight in the fridge instead of for just the two hours. But is there a risk of overproofing at this stage?
If that isn’t recommended, what about freezing the dough after it’s *almost* fully proofed at the second rise so that the freezer can retard the final stages of the proof, then frying from frozen the following day?
Or let me know if there’s another way I haven’t thought of! Thanks in advance for your thoughts.
You pretty much nailed the concept of yes, you can make the dough ahead, but it is a yeasted dough and will continue to proof. This isn’t a cause for concern but it does limit your advanced prep timeline. I suggest preparing them no more than three days in advance when refrigerating and no more than a week in advance if freezing. Alternatively, you could reduce the yeast by half and they will proof slower and will give you more time. I love that you have these for breakfast when you have guests! Save me a couple 😉
Thank you so much, that will offer a lot more flexibility! My *last* question about this then… if I froze them, would you let them sit at room temperature until they defrost, or would you fry from frozen?
Hi Amanda! That’s an excellent question! The freezer will retard (slow) the proofing process but it will not stop it. When they feel light and airy, they are fully proofed and can be fried straight from frozen. Allowing them to proof additional time at room temperature could lead to over proofed and flat donuts.
I tried this this morning and the results were incredible! I also noticed the dough was a lot easier to work with since it was better chilled, so I got away with using a lot less flour when rolling out. I thought I’d list what I did here if anyone else wants to try.
1. Instead of the 30 min bulk proof the recipe calls for, I let it rise for 2 hours in the fridge to ensure the dough was well chilled before punching down
2. I punched down the dough to prevent it from overproofing overnight, reformed into a ball, sprayed lightly to keep from drying out, and then covered with a lid before returning to the fridge overnight (9 hours)
3. In the morning, I proceeded as written, but extended the final proof by 10-15 mins since the dough was chilled. I did this in my oven while turned off with a mug of boiled water to produce a little bit of warmth and steam.
Finally, I should mention that since my family is vegan, I used soy milk, plant based butter, and a powdered egg replacer. Thanks for the recipe and the help Lindsay, you’re incredible!
Hi Amanda! Those are the results we like to hear! Thank you so much for taking the time to write out exactly what worked for you, especially with a vegan version of this recipe. Your family is so lucky to have you, what a treat!
Craving satisfied with this copycat recipe of Krispy Kreme Doughnut! We had these tasty doughnuts for afternoon snacks and we enjoyed them! We are all addicted to them!
Hi Sharina! Satisfying cravings is the business we are in–so glad you enjoyed!
I never knew making donuts would be so easy! These were delicious! I’m making a second batch for a party this weekend!
Hi Darcey! That sounds awesome, I hope everyone at the party enjoys!
These were so good! And honestly, they were better than Krispy Kreme. Will definitely be making these again for mother’s day brunch.
Hi Elizabeth! Better than Krispy Kreme! Thank you so much. ❤️
These really, truly taste like krispy kreme doughnuts! I’m not sure whether knowing how to make krispy kremes at home is a good or a bad thing because I’m telling you right now – we are going to make these doughnuts way too often! 🙂 So good!
Hi Rebecca! 🤣 It’s a good thing, for sure!!
Omg these were ABSOLUTELY DELICIOUS! I’ve never made donuts like this at home, so I was a little nervous, but these turned out perfectly. Going to make them again this weekend!
Hi Sara! I’m so happy to hear they worked out!