
This post may contain affiliate links. Please read our disclosure policy.
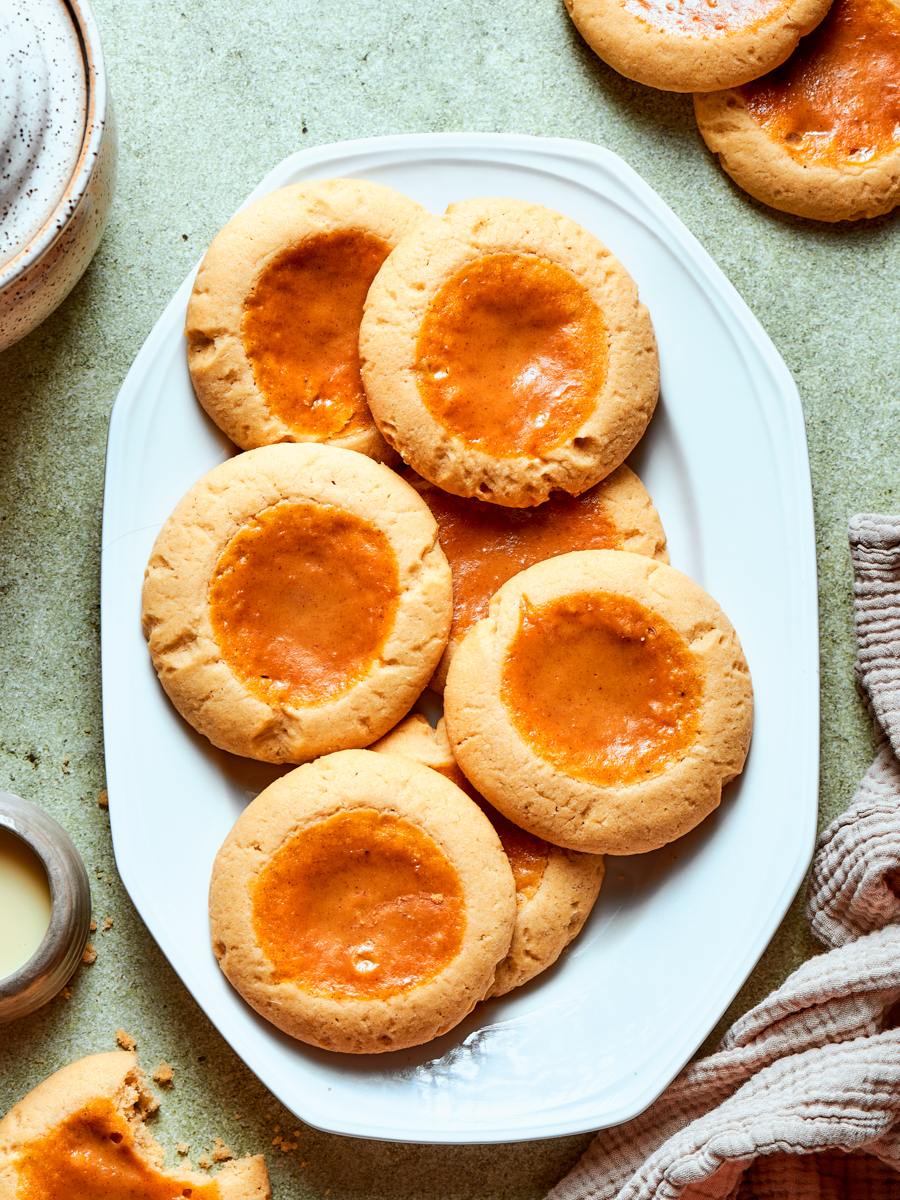
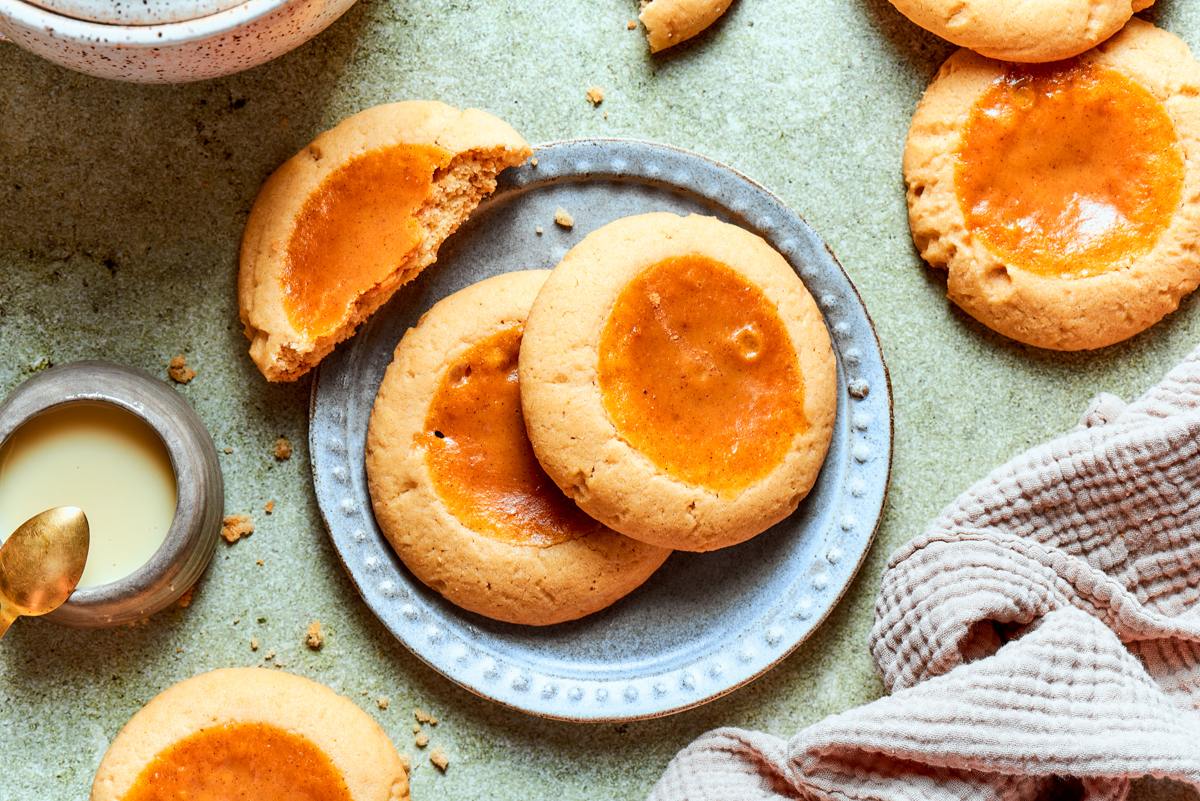
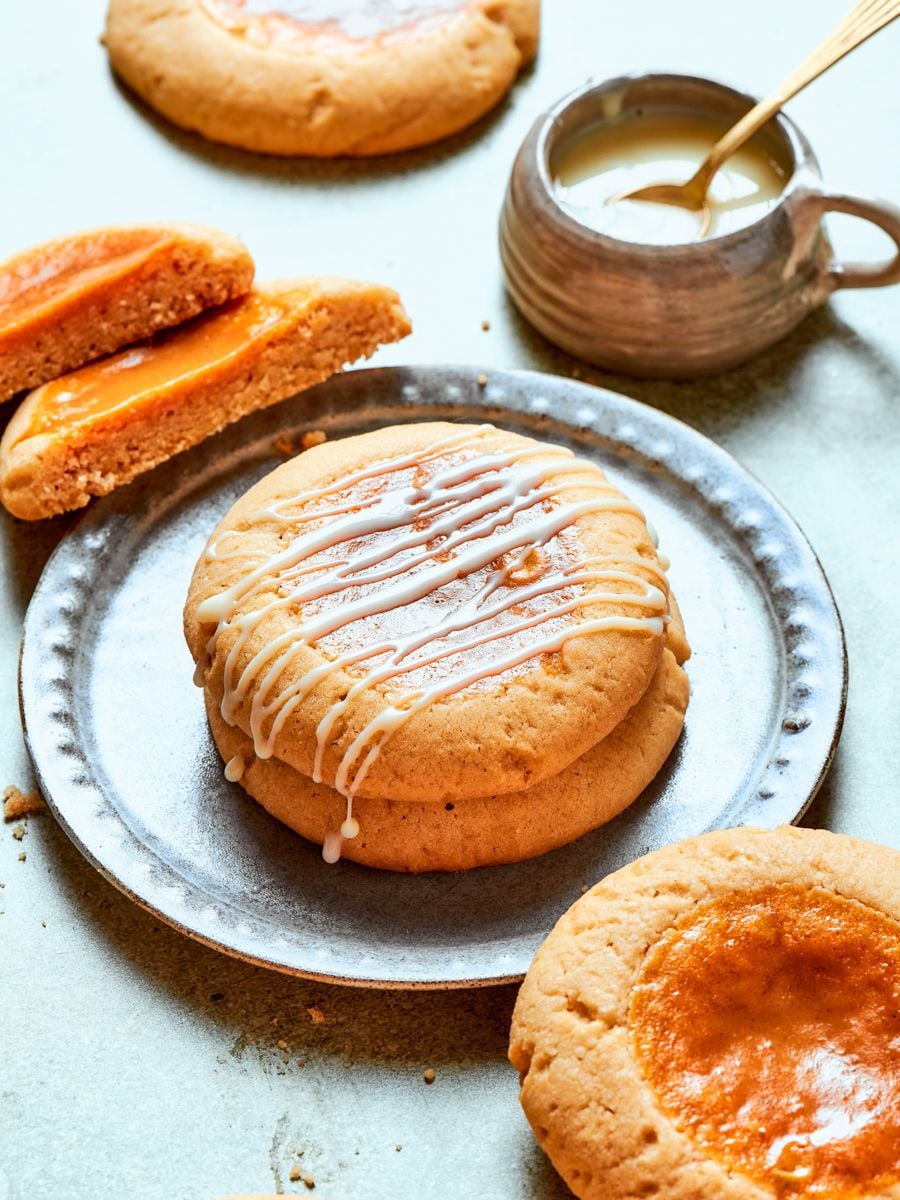
Pumpkin pie cookies bring together everything you love about the classic holiday dessert in a handheld, chewy cookie with a real pumpkin pie filling baked right in.
A Quick Look At The Recipe
This is a brief summary of the recipe. Jump to the recipe to get the full details.
Jump to RecipePrep Time
15 minutes
Cook Time
20 minutes
Chill Time
2 hours
Total Time
2 hours 35 minutes
Servings
24 cookies
Difficulty
Intermediate
Calories *
290 kcal per serving
Technique
Creaming method with brown sugar; dough chilled before portioning, indented, and filled with pumpkin pie filling before baking.
Flavor Profile
Warm spices, rich pumpkin, deep brown sugar, buttery vanilla.
* Based on nutrition panel
I made these because I had some pumpkin puree and I didn’t know what to make for dessert. The trick of chilling the dough first made a huge difference — the cookies held their shape perfectly and the edges stayed crisp while the filling set up beautifully. I used store-bought pumpkin spice. These are absolutely going into my regular fall rotation. ⭐⭐⭐⭐⭐
Sarah
Why This Recipe Works
- A chewy brown sugar cookie base. The high ratio of brown sugar creates a deeply caramel-flavored, chewy cookie that holds its structure even after the filling is added. For more delicious brown sugar-forward cookies, check out these brown sugar cookies!
- A real pumpkin pie filling. The filling is a scaled-down version of a classic custard: pumpkin puree, sweetened condensed milk, egg, and warm spices cooked directly in the cookie. You get the flavor of a slice of pie in every bite.
- A make-ahead structure that actually works. The dough can be frozen with the indent already pressed in, and the filling can be made up to a week in advance. That flexibility makes these far easier to manage during the holiday baking rush than most filled cookies.
Table of Contents
If you love pumpkin pie but don’t want to do all the work, these Pumpkin Pie Cookies are for you! Each cookie has a soft, chewy brown sugar base filled with my easy pumpkin pie filling—so you get the best of both worlds in every bite. The brown sugar cookie is the perfect complement to that classic, spiced pumpkin flavor.
The filling here comes directly from my easy pumpkin pie — scaled to a quarter batch, so every cookie gets a full, custardy layer of spiced pumpkin without any of the fuss of making a whole pie. For a full pie cookie spread, check out these apple pie cookies!
Ingredients & Substitutions
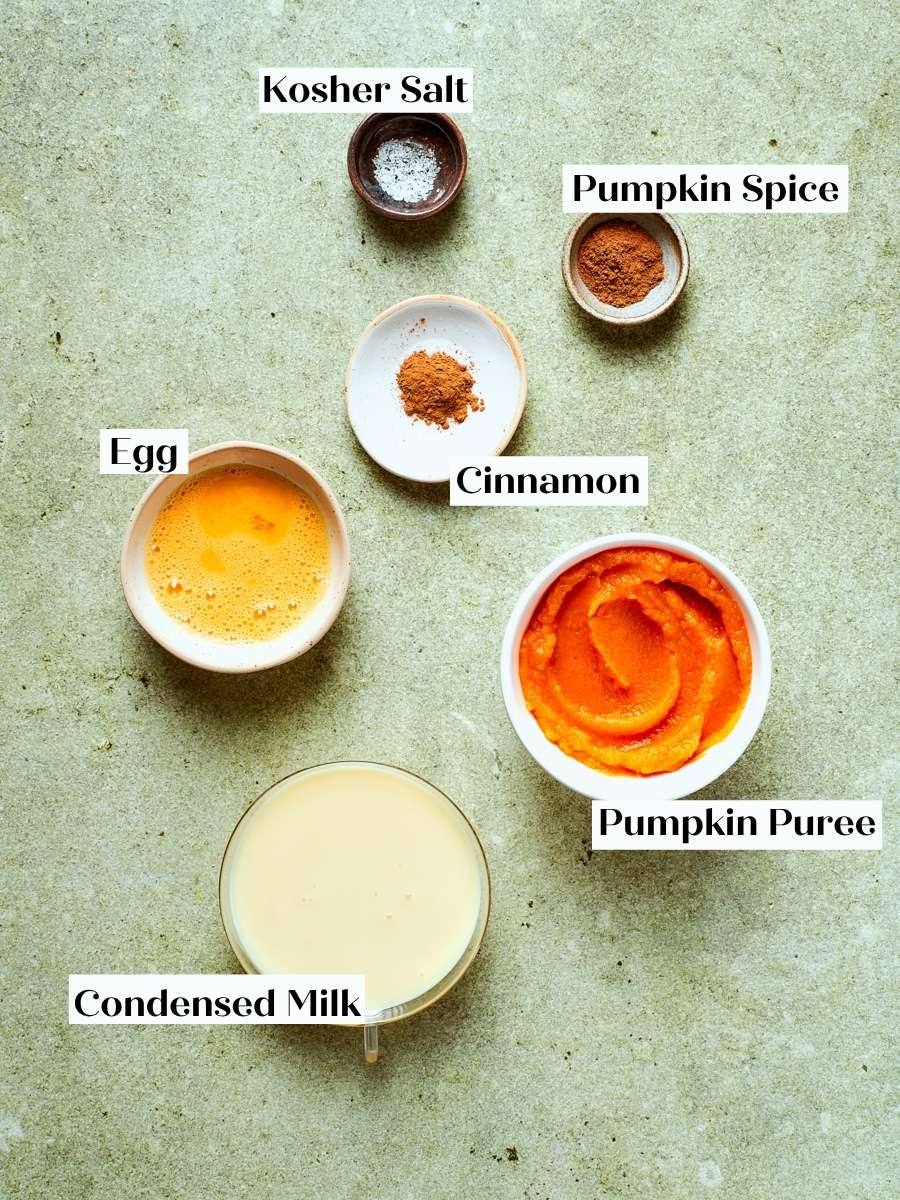
- Pumpkin Puree: Pumpkin puree adds moisture, tenderness, and the core pumpkin flavor that makes these cookies taste like actual pie. Use a scant measure rather than a full half cup; too much puree makes the dough wet and cakey instead of chewy.
- Pumpkin Spice: The pumpkin spice carries the classic pie aroma through both the filling and the dough. I use my homemade pumpkin spice recipe, which you can make in minutes and keep on hand all season.
- Egg (half): Half an egg sets and enriches the filling without over-thinning it. Whisk a full egg well and use half by weight to keep the liquid ratio precise.
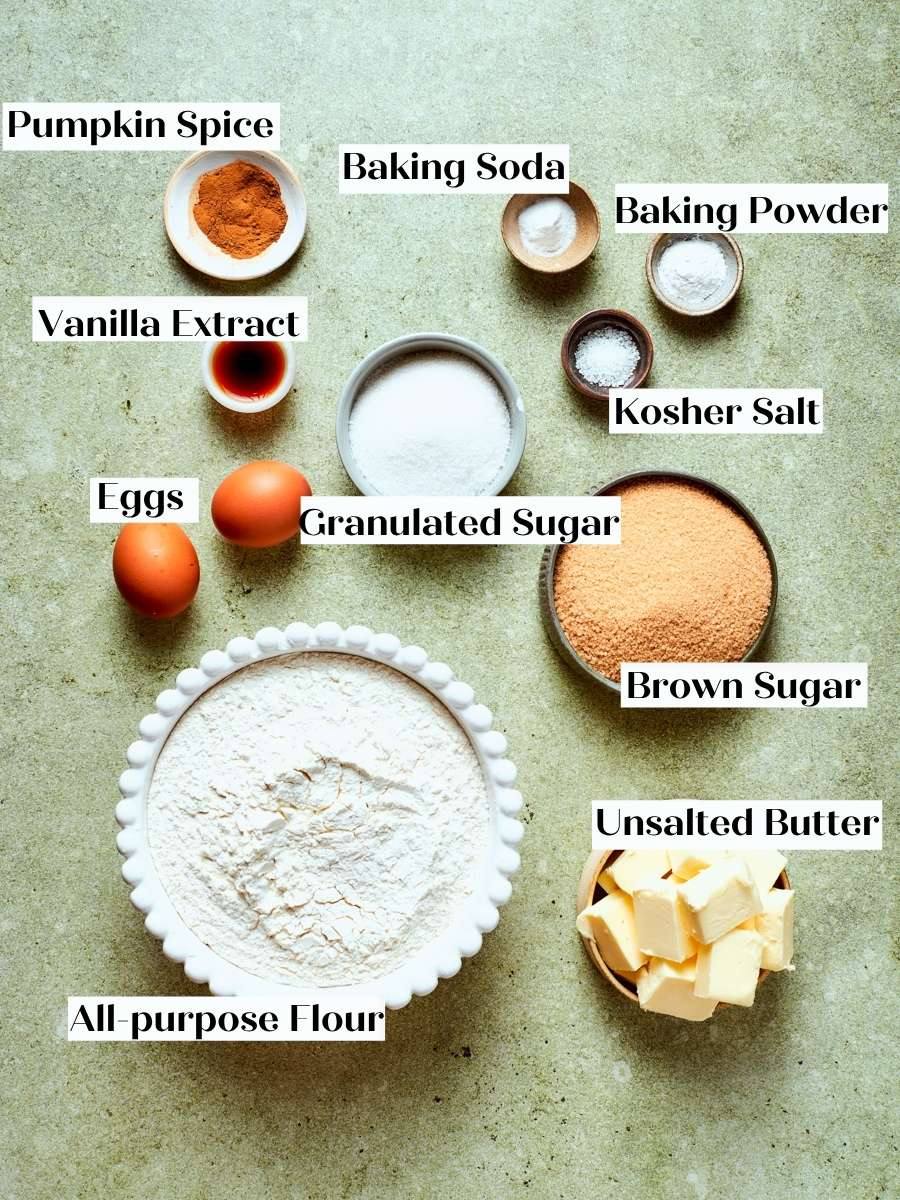
- Baking Powder and Baking Soda: These two leaveners work together to give the cookies a gentle lift and deep golden color. Baking powder prevents a dense, stodgy texture, while baking soda reacts with the brown sugar and pumpkin to encourage spread and caramelized edges.
- Granulated Sugar: Granulated sugar provides sweetness and helps create crisp edges by drawing moisture to the surface during baking. It works with the brown sugar to control spread so the cookies stay chewy rather than cakey.
- Light Brown Sugar: The molasses content in brown sugar delivers moisture, chew, and caramel depth that mimics the flavor of pumpkin pie filling. It is essential here because the high flour ratio needed to support all the wet ingredients requires that extra moisture to stay tender.
See the recipe card for full information on ingredients and quantities.
Variations on This Pumpkin Pie Cookies
- Store-Bought Pumpkin Pie Filling. You can substitute all the filling ingredients except the egg with canned pumpkin pie filling; I would still taste it and adjust the seasoning before filling the cookies, which is just the pro chef in me.
- Half Batch. This recipe halves easily to yield about 12 cookies, though the filling is a bit tricky to scale down without a kitchen scale, so I recommend having a scale on hand if you go that route. You can always make the full amount of filling and bake any extras into mini pumpkin pies using my mini apple pies as a guide, or make a full pumpkin pie recipe and “borrow” some of the filling.
- Roll the cookie in sugar. Like a thumbprint cookie or these pumpkin snickerdoodle cookies you can roll the cookie dough in sugar and then indent it for more crunch or flavor. Use cinnamon sugar! If you do roll in sugar, you can’t freeze the cookie dough; the sugar will just melt in the freezer.
Professional Tips
- Chill the dough fully before baking. Skipping or shortening the chill time is the most common reason these cookies spread and lose their shape. Two hours in the refrigerator give the butter time to firm up, so the cookies hold their indent and bake with defined edges.
- Press the indent before chilling, not after. Once the dough is cold, it is much harder to press a deep, clean well without cracking the sides. If cracks form, seal them before adding the filling; the liquid filling will leak straight through any gap and pool on the pan.
- Do not overfill. Each cookie holds about 10g of filling. Overfilling causes the custard to overflow during baking, which sticks to the pan and makes the cookies difficult to remove cleanly. Fill to just below the rim of the well.
- Keep the dough cold through every stage. If the dough softens significantly while you are portioning and indenting, return it to the refrigerator for 15 minutes before continuing.
How to Make Pumpkin Pie Cookies
This recipe moves in two parallel tracks: the pumpkin filling and the cookie dough. Both can be made ahead, which makes assembly straightforward. Further details and measurements can be found in the recipe card below.
Make the Pumpkin Pie Filling
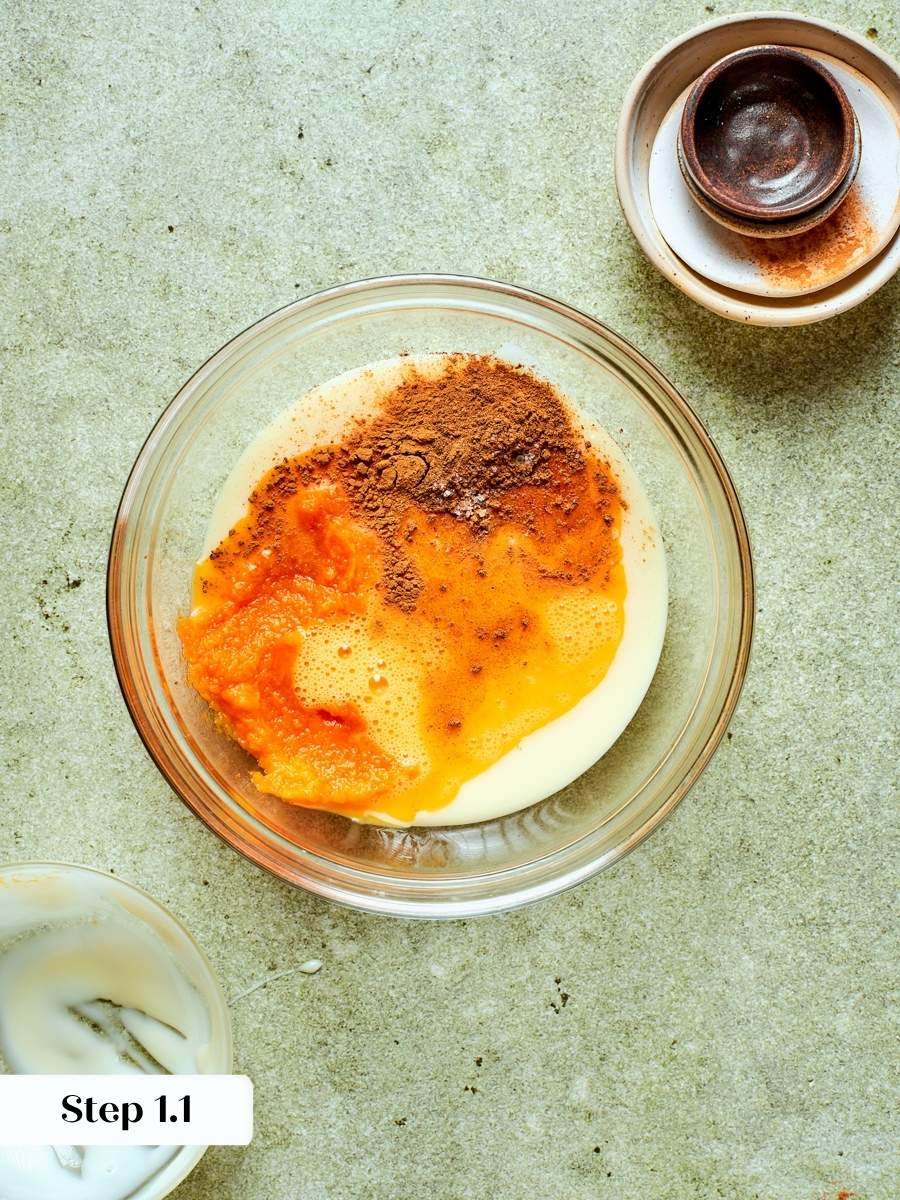
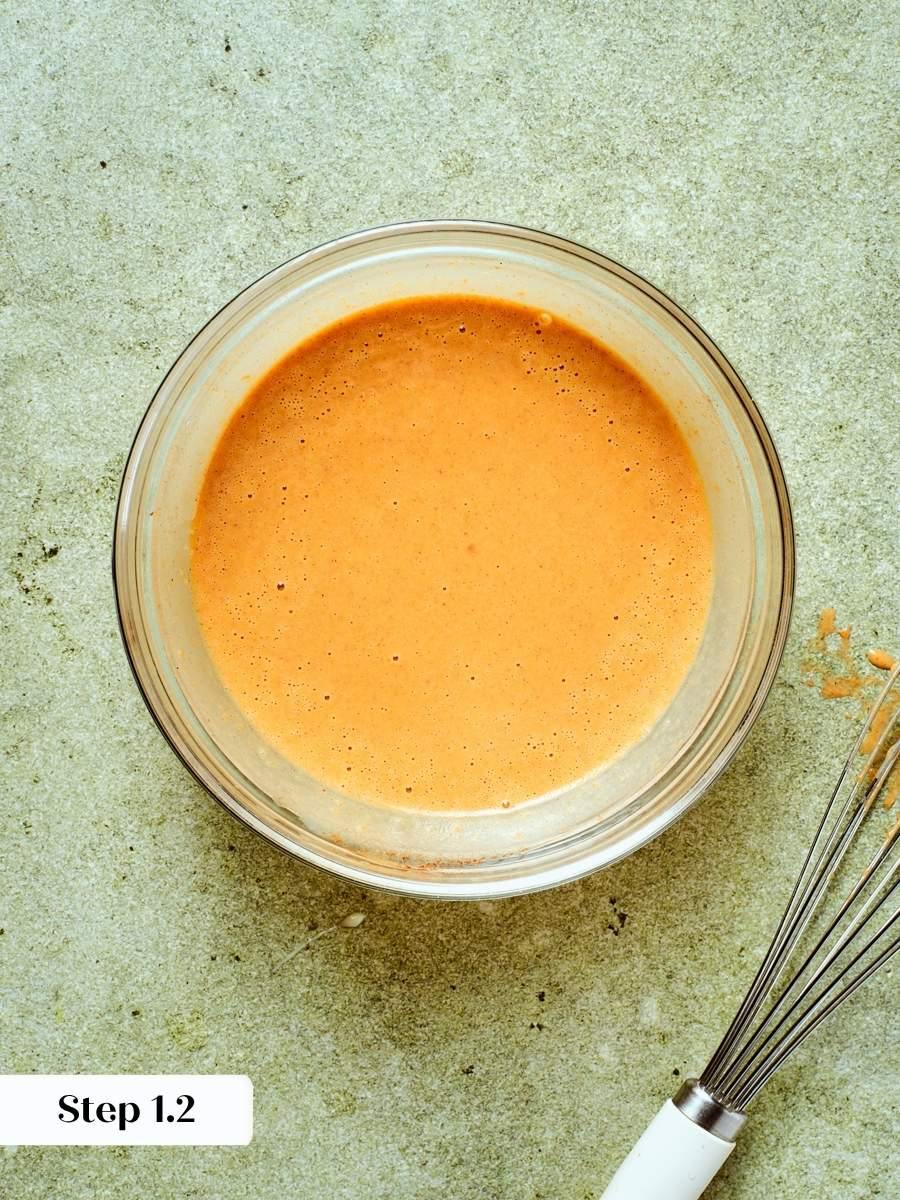
Step 1: In a medium bowl, whisk together the pumpkin puree, sweetened condensed milk, ground cinnamon, pumpkin pie spice, salt, and egg until the mixture is completely smooth and uniform in color. It should look like a loose, pourable custard with no streaks of egg or unmixed spice. (photos 1 & 2).
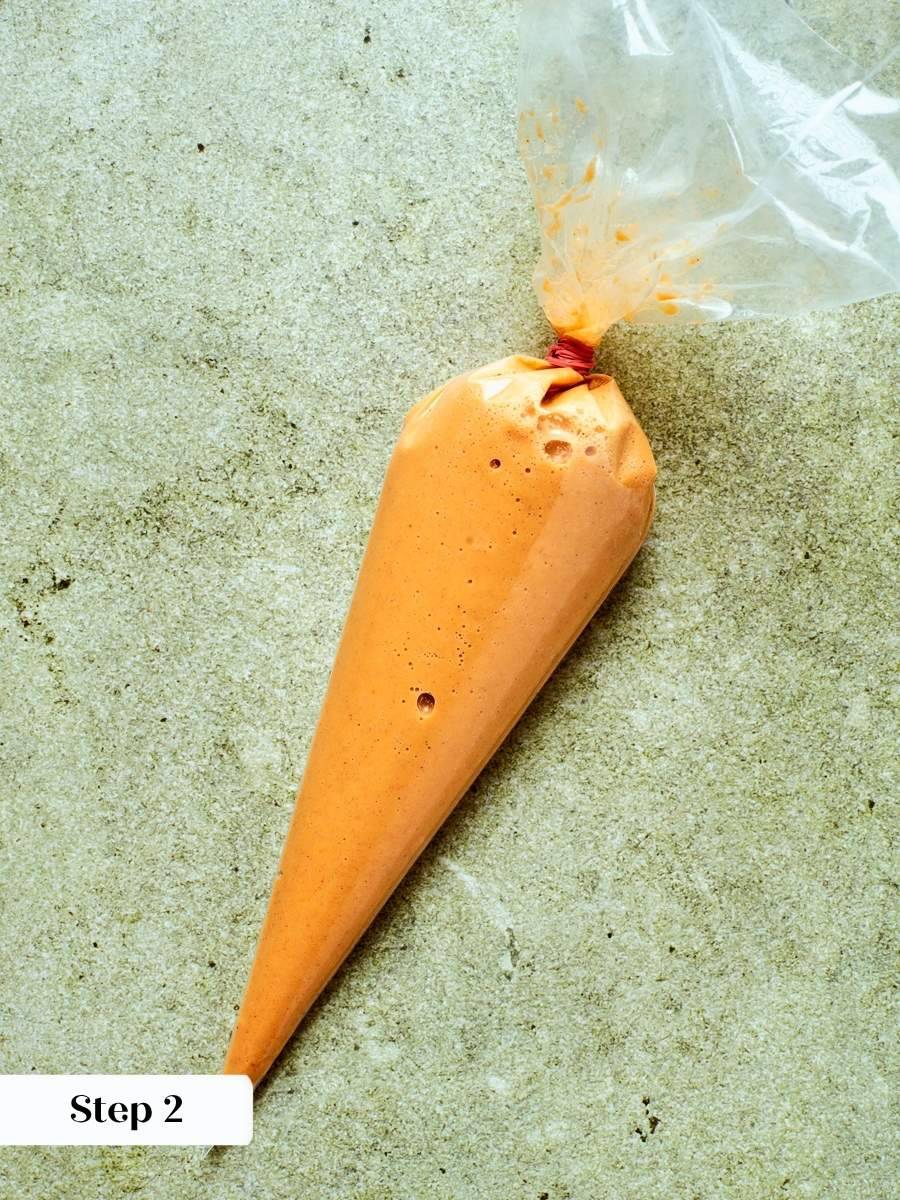
Step 2: Transfer the filling for easy pouring. Pour the filling into a liquid measuring cup or piping bag without a tip. Set aside until ready to use.
The measuring cup’s spout gives you good control when filling the cookie wells later; the piping bag gives you even more precision, which I love for keeping things tidy. (photo 3).
Make the Cookies
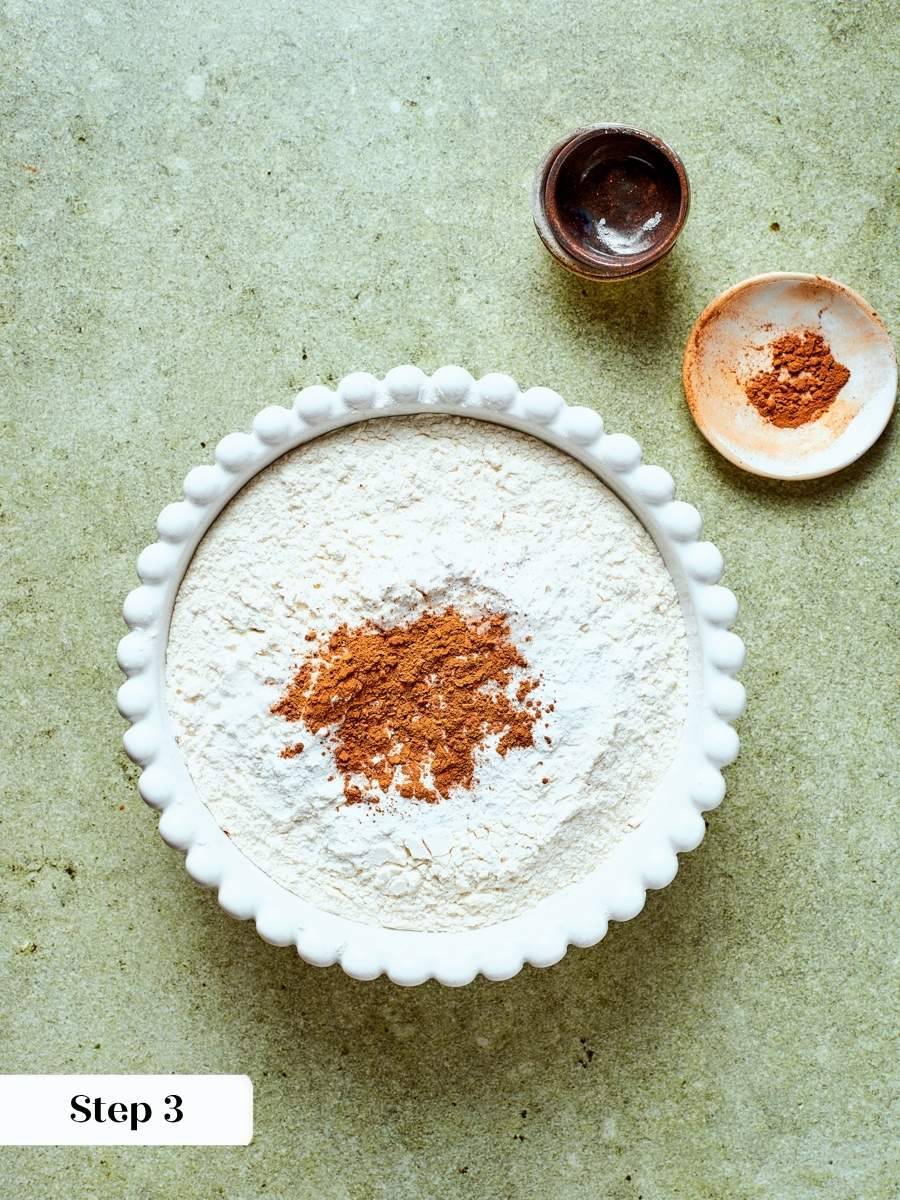
Step 3: Whisk the dry ingredients. In a medium bowl, whisk together the all-purpose flour, baking powder, baking soda, pumpkin spice and kosher salt until evenly combined. Set aside. (photo 4).
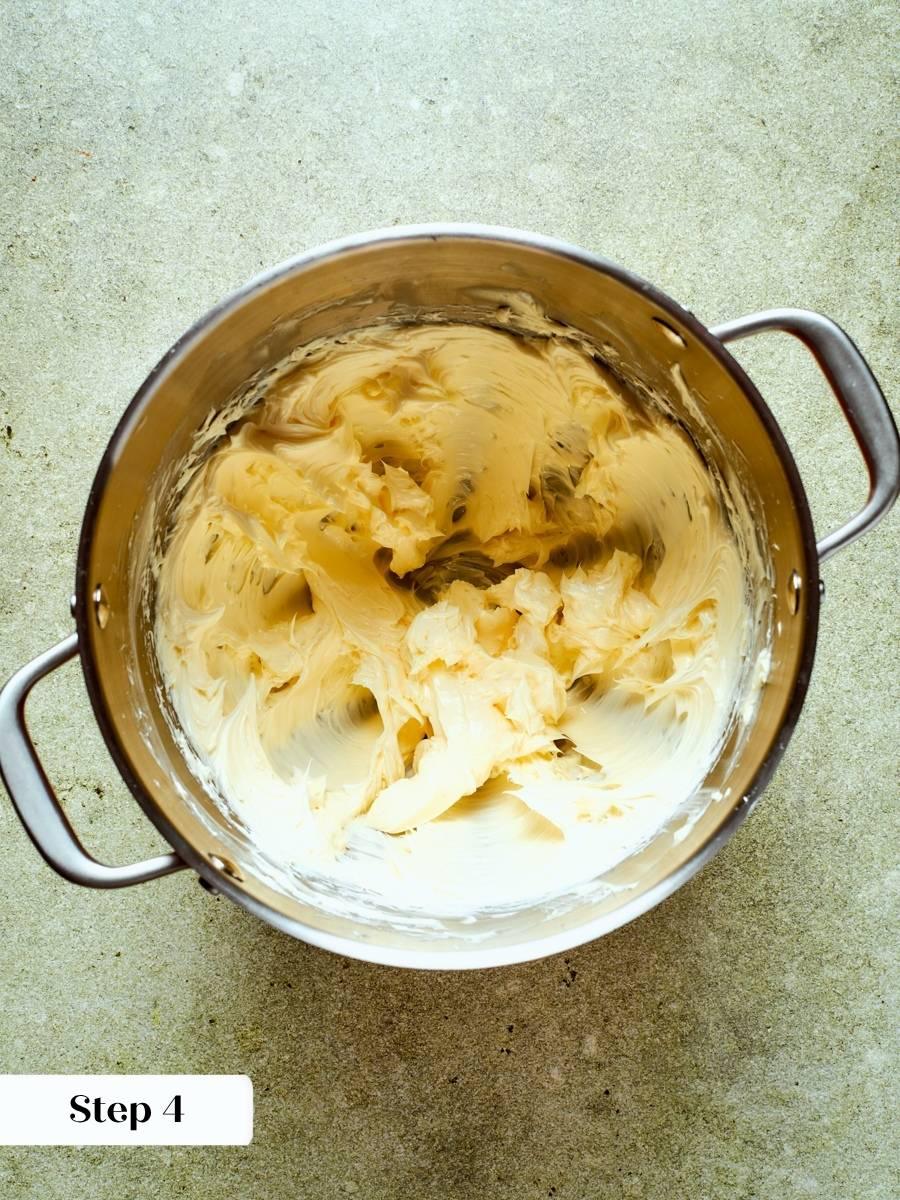
Step 4: Prepare the butter. In the bowl of a stand mixer fitted with the paddle attachment, finish softening the butter if needed. The heat of your hands pressed against the outside of the bowl is usually enough, along with the friction of the paddle as it begins to move. The butter should give when pressed but hold its shape, not smear. (photo 5).
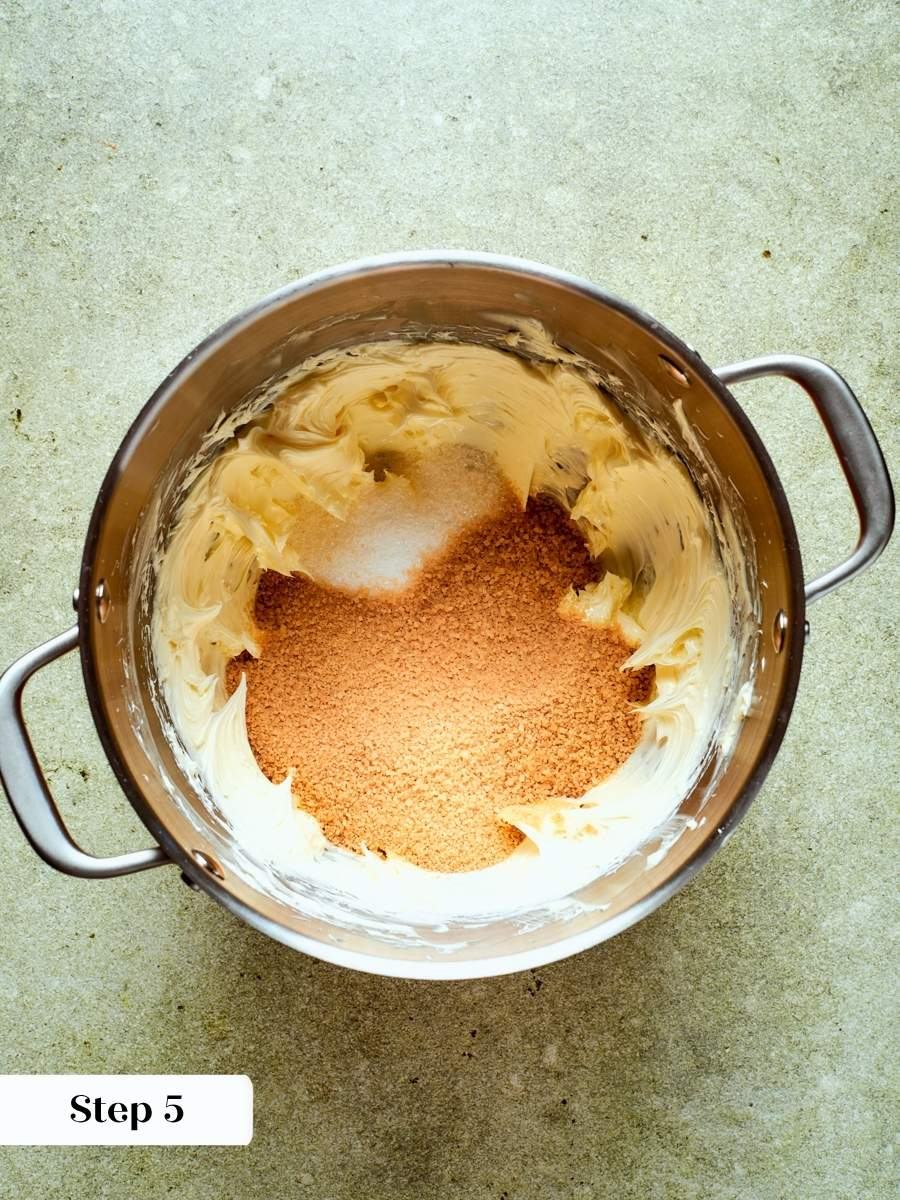
Step 5: Cream the butter and sugars. Add the granulated sugar and light brown sugar to the butter and mix on medium-low until a smooth, cohesive paste forms. Scrape down the sides of the bowl and the paddle, then mix briefly again. (photo 6).
You are not looking for the pale, fluffy result you would get with a longer creaming time here — just a uniform, glossy paste with no streaks of dry sugar.
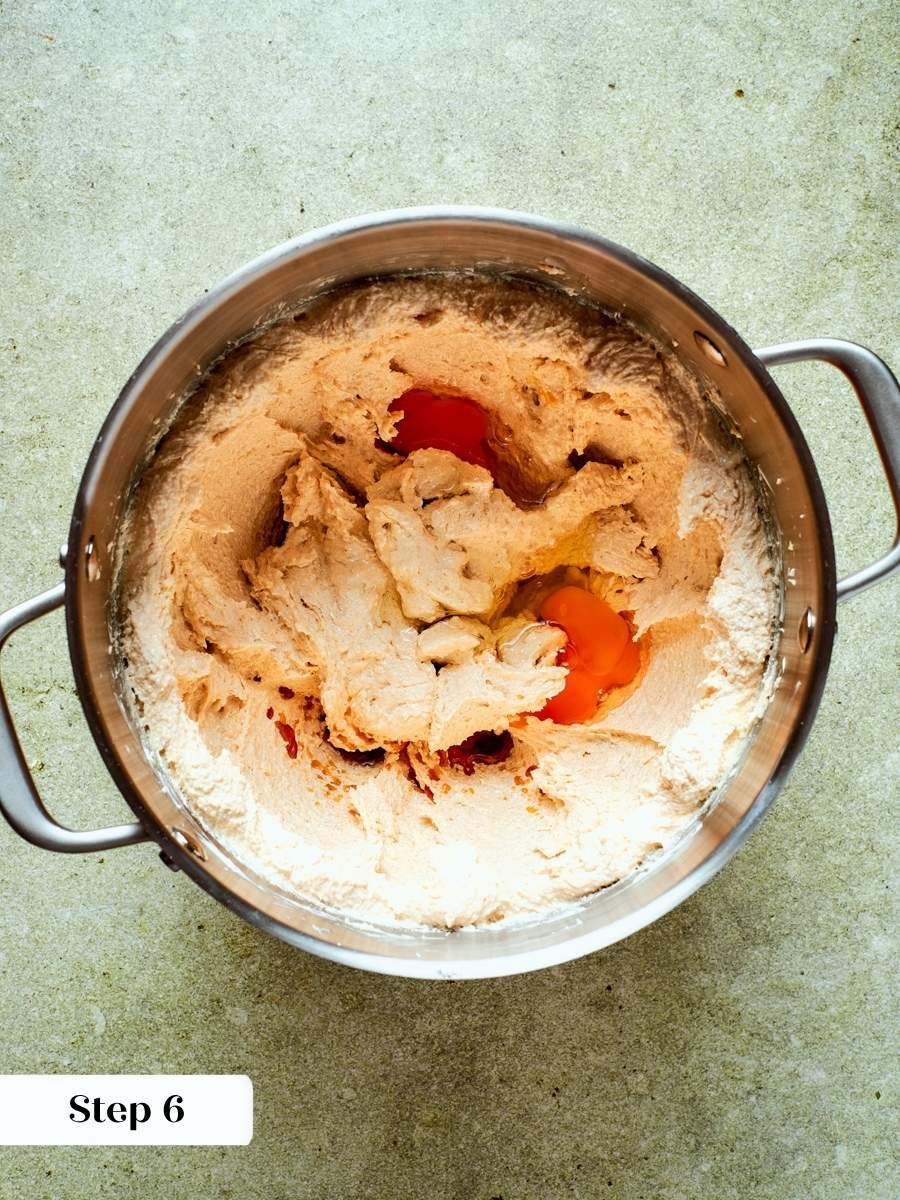
Step 6: Add the eggs and vanilla. Add the eggs and vanilla extract and mix on medium until the mixture looks lightened and slightly increased in volume. Because the butter and eggs are often cold, the mixture may look broken or curdled at first, and that is completely normal. Scrape down the bowl several times during this step to encourage even incorporation — cold fat needs the extra attention to come together smoothly. (photo 7).
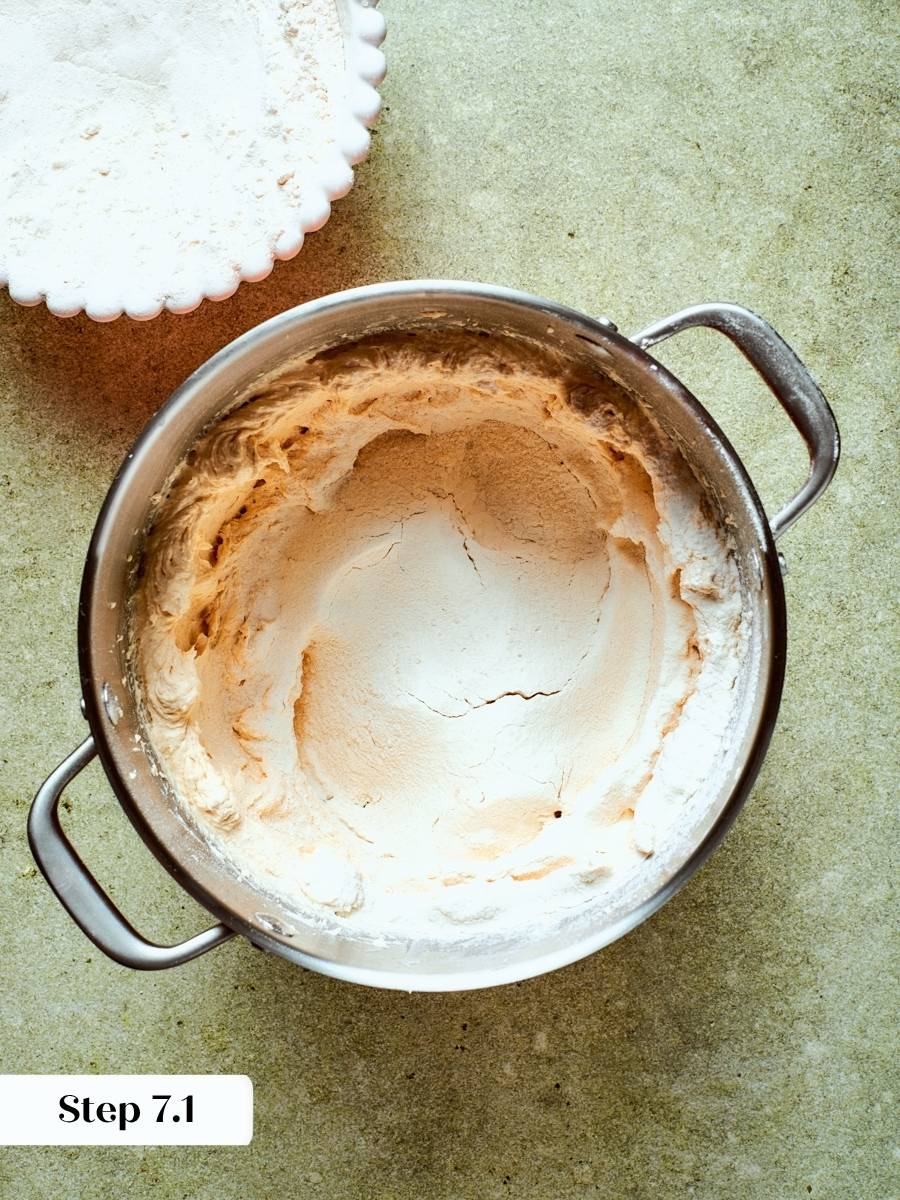
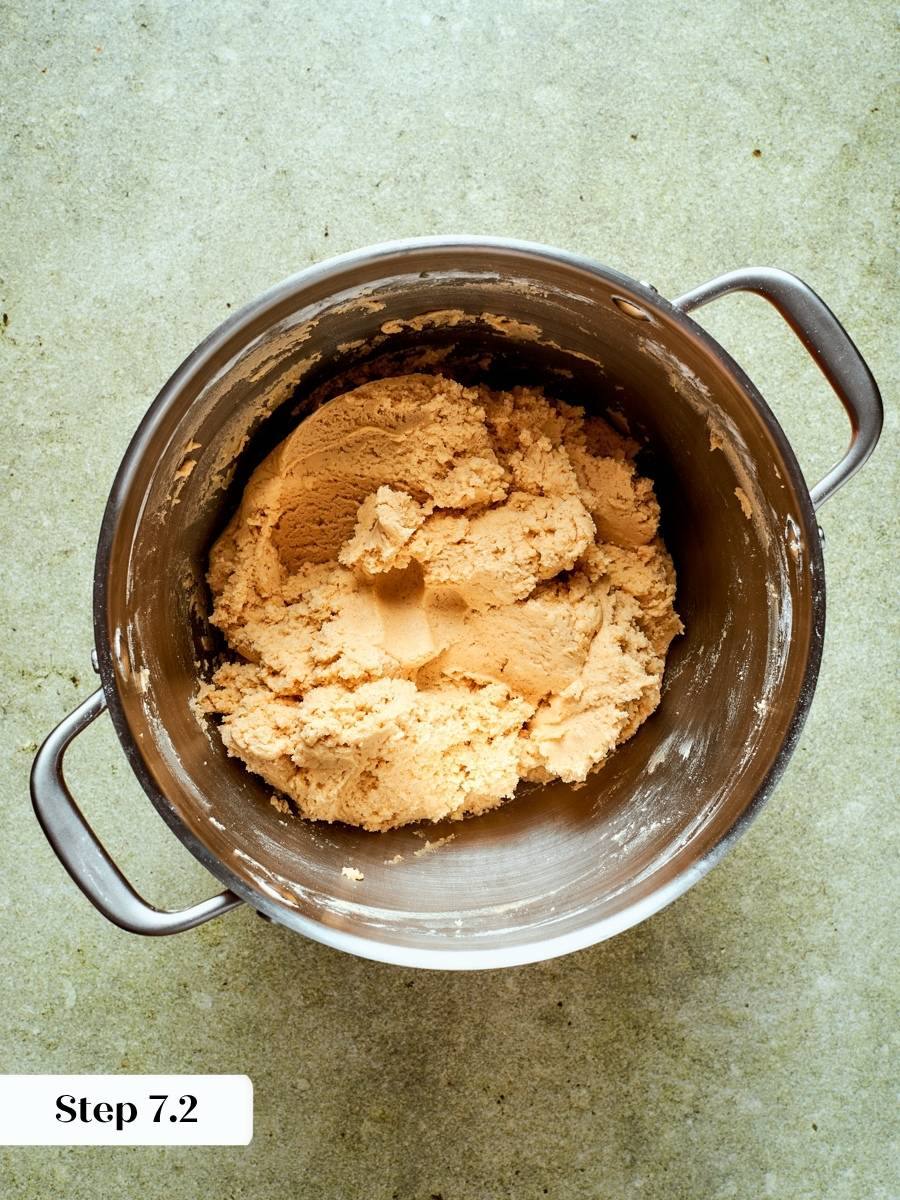
Step 7: Add the flour mixture. Reduce the mixer to low speed and add the flour mixture one large scoop at a time, letting each addition almost fully disappear before adding the next. The dough will be thick and slightly stiff. (photos 8 & 9).
Cold butter doughs resist flour more than room-temperature doughs do, so rushing this step can leave dry pockets in the finished dough just like when making these [thick chocolate chip cookies!] Stop mixing the moment the last of the flour is incorporated.
Divide and Chill
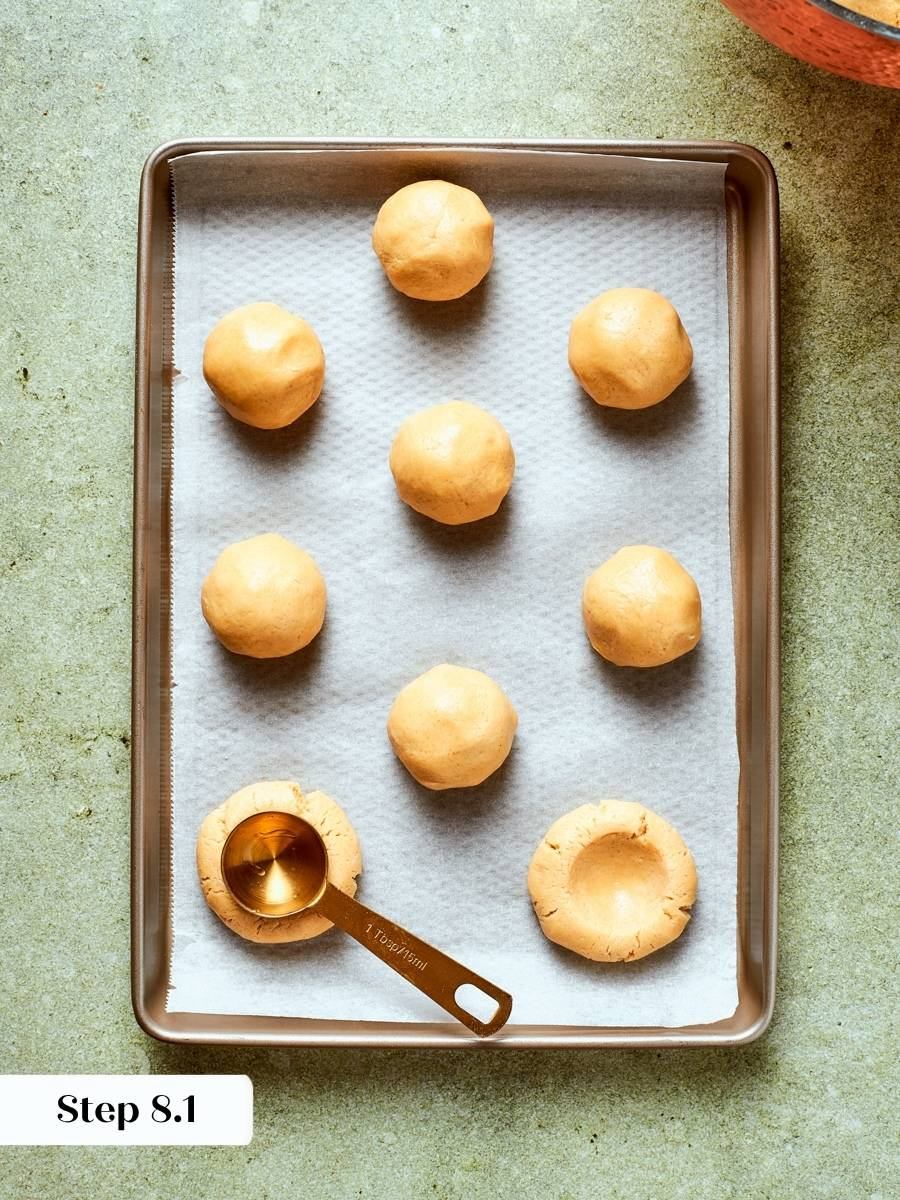
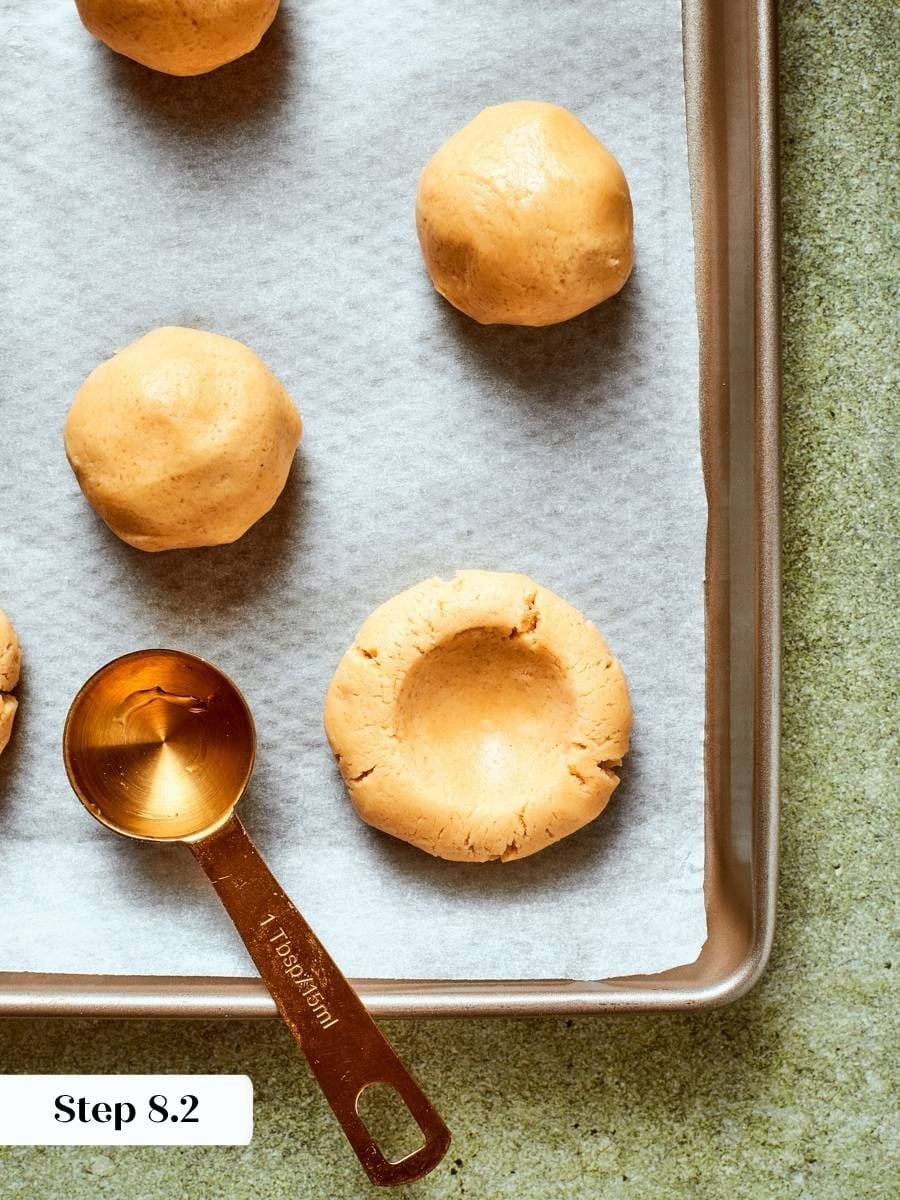
Step 8: Scoop and shape the dough. Using a ¼ cup cookie scoop, portion the dough directly onto parchment-lined baking sheets, spacing the mounds about 2 inches apart. Roll each portion into a smooth ball, then use the back of a round tablespoon measure, a smaller cookie scoop, or a melon baller to press a well into the top of each ball. Press firmly enough to create a deep indentation without pushing all the way through the dough. A thin layer at the bottom is all you need — the pumpkin filling sets as it bakes and will not fall through the way a heavier fruit filling would. (photos 10 & 11).
Each cookie holds about 10g of filling, so press the well as deep as you can without cracking through the base. The deeper the well, the thicker the filling layer in the finished cookie.
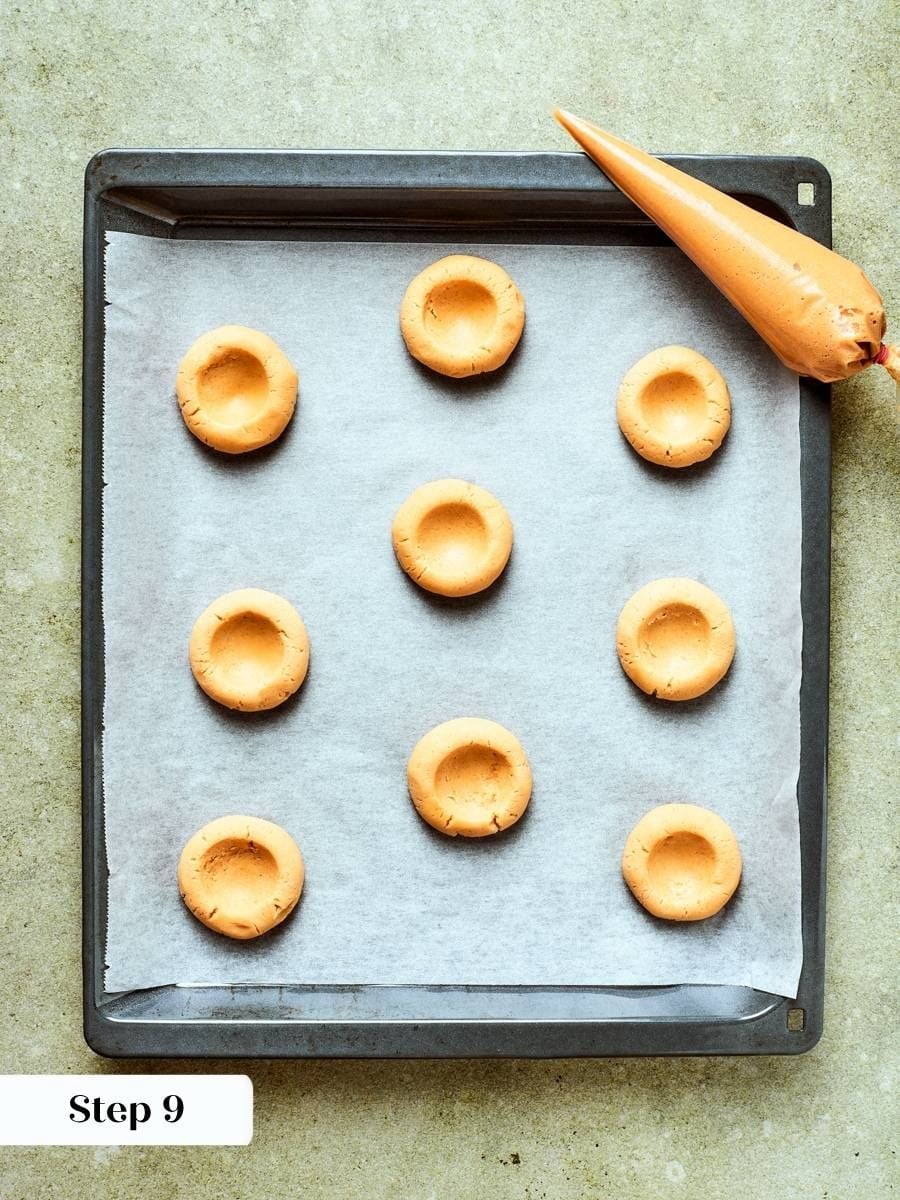
Step 9: Chill the dough. Transfer the baking sheets to the refrigerator and chill for at least 1 hour, or until ready to bake. Do not skip this step. Cold dough holds its shape during baking, keeps the indentation crisp, and gives you the cleanest results. If the indent cracks during chilling, reshape the balls and smooth any fissures before adding the filling — liquid filling will find any gap and leak onto the pan. (photo 12).
The filling can be made up to 1 week in advance and stored covered in the refrigerator. The raw shaped dough (with indentations) can be frozen for up to 1 month.
Fill and Bake
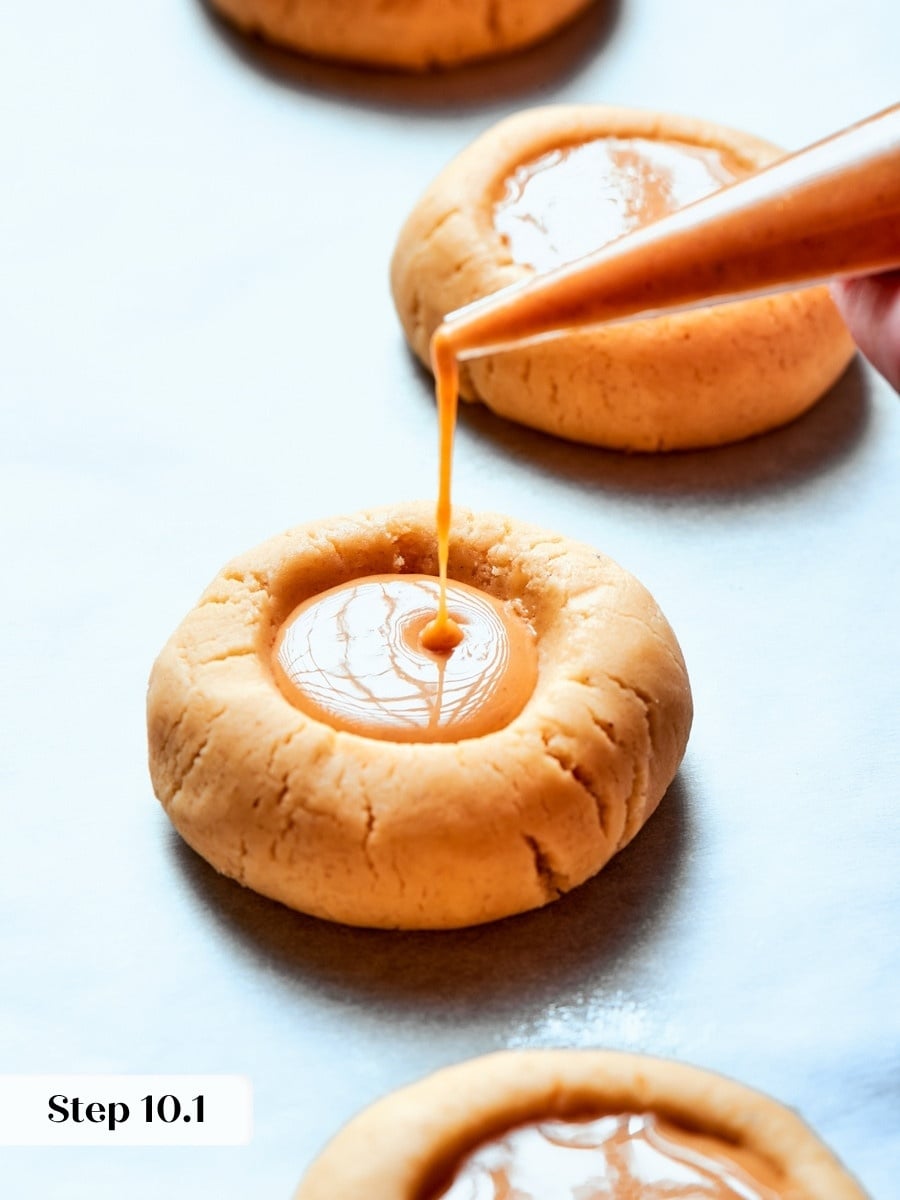
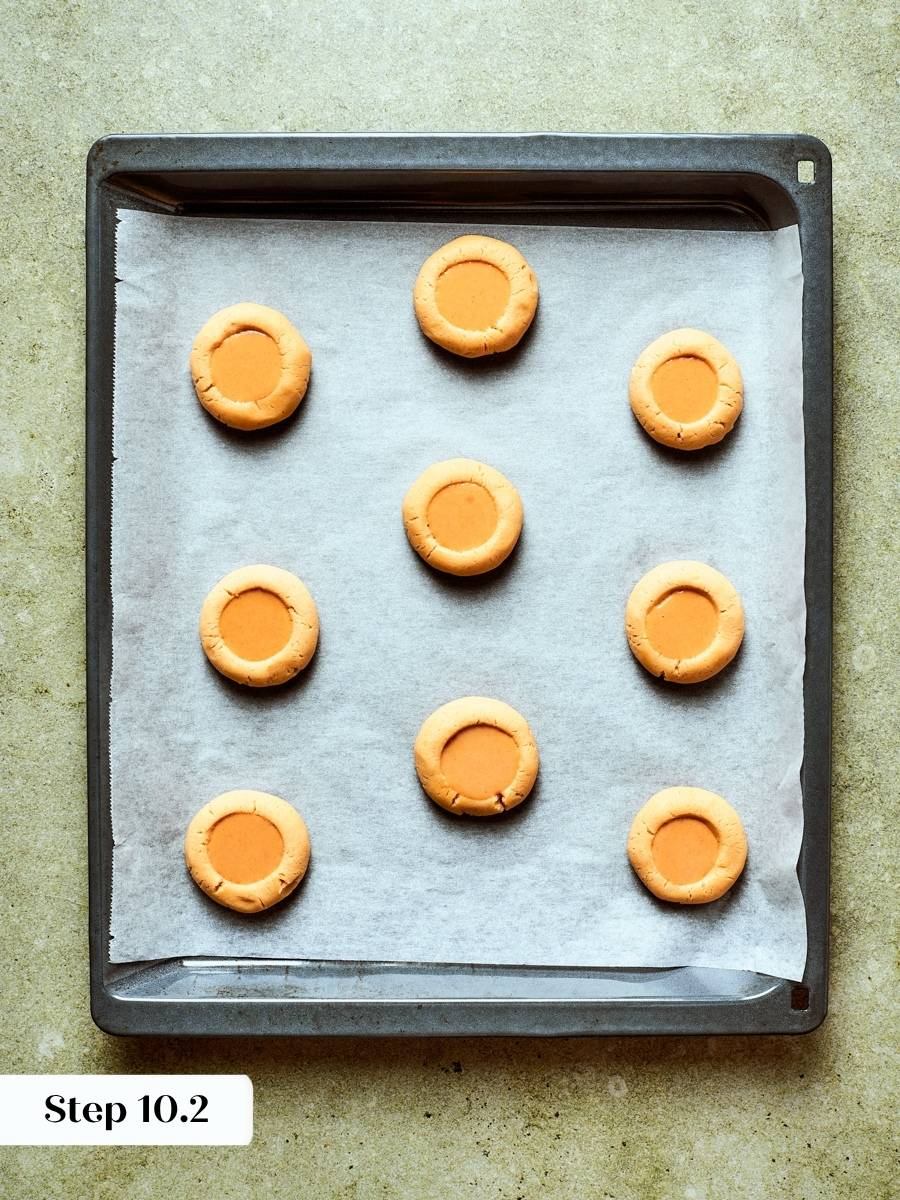
Step 10: Preheat the oven and fill the cookies. Preheat your oven to 350°F conventional (no fan). When the dough is thoroughly chilled and you are ready to bake, pour or pipe the pumpkin filling into the center of each well, right up to the top edge. The filling should sit level with the rim of the indentation. (photo 13 & 14).
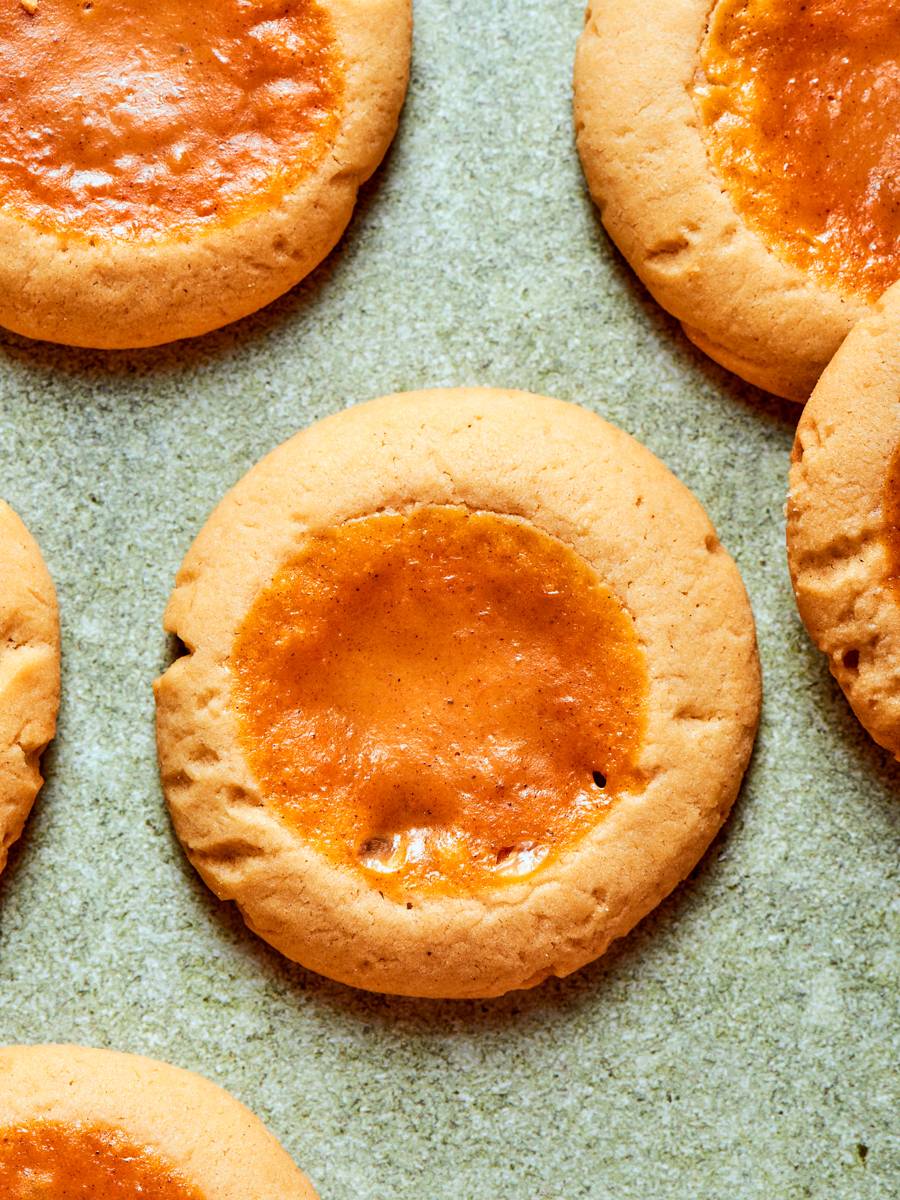
Step 11: Bake until the edges are golden. Bake for 20 minutes, or until the edges of the cookies are a deep golden brown. The filling will look set and slightly matte across the surface when done. Keep in mind that if the dough has warmed up at all before going into the oven, the cookies will spread more — another reason the chill in Step 9 matters. (photo 15).
Step 12: Cool on the pan. Let the cookies cool on the baking sheet for at least 10 minutes before transferring them. The filling continues to firm up as it cools, so moving them too soon risks cracking the set custard. Once they are stable, transfer to a wire rack to cool completely.
Chef Lindsey’s Recipe Tip
The single biggest thing that separates a pumpkin pie cookie with a clean, defined well from one that leaks and spreads is the order of operations: press the indent before chilling, not after. Once the dough is cold and firm, pressing a well creates cracks in the sides, and even a hairline crack is enough to let the liquid filling escape onto the pan. If you forget and press after chilling, take a moment to pinch any cracks completely closed before adding the filling. The dough is forgiving if you catch it early, but there is no fixing a leak once the cookies are in the oven.
Recipe FAQs
Chilling the dough for a full two hours before baking is the most important step. Cold butter holds its structure in the oven long enough for the cookies to set before they spread, which keeps the edges defined and the filling contained. Skipping or shortening the chill is the most common reason these cookies lose their shape.
Yes, and this recipe is particularly well suited to it. The raw cookie dough can be frozen with the indent already pressed in for up to 1 month, and the filling can be made up to 1 week in advance and stored in the refrigerator. That makes these easy to prep in stages during a busy holiday week.
These cookies stay fresh at room temperature for up to 5 days, in the refrigerator for up to 2 weeks, or frozen for up to 2 months. For another cookie that stores equally well, my Chocolate Chip Shortbread Cookies follow a similar make-ahead approach.
If you want to keep baking with pumpkin, my Pumpkin Bundt Cake is one of my favorite showstoppers for the season: deeply spiced, tender, and finished with a glaze that sets beautifully. You can also check out my Pumpkin Olive Oil Cake if you want something a little lighter in texture with a moist, open crumb.
Filling leaks when there are cracks in the dough wall around the well, or when the well was not pressed deep enough before chilling. Check each cookie before filling and seal any visible cracks by pressing the dough firmly together. Filling only to just below the rim of the well also helps, since overfilling increases the pressure on the sides as the custard expands in the oven.
Reccomended Pumpkin Recipes
Easy Quick Bread Recipes
Pumpkin Banana Bread
Muffin Recipes
Pumpkin Cream Cheese Muffins

Cake Recipes
Easy Pumpkin Dump Cake Recipe
Cake Recipes
Pumpkin Cake
If you tried this recipe and loved it please leave a 🌟 star rating and let me know how it goes in the comments below. I love hearing from you; your comments make my day!
Pumpkin Pie Cookies
Ingredients
For the Pumpkin Pie Filling:
- ½ cup pumpkin puree Scant
- ¼ can sweetened condensed milk
- 1 teaspoon ground cinnamon
- 1½ teaspoons pumpkin spice
- ½ teaspoon salt
- 1/2 large egg
For the Cookie Dough:
- 5 cups all-purpose flour fluffed, scooped, and leveled
- 1½ teaspoons baking powder
- ½ teaspoon baking soda
- 2 teaspoons kosher salt
- 2 teaspoons pumpkin spice
- 1½ cups unsalted butter softened
- ½ cup granulated sugar
- 1½ cups light brown sugar
- 2 large eggs
- 2 teaspoons vanilla extract
Instructions
Make Pumpkin Pie Filling
- Whisk together all filling ingredients — pumpkin puree, sweetened condensed milk, cinnamon, pumpkin spice, salt, and egg — until smooth. Transfer to a liquid measuring cup or piping bag without a tip for easy filling.
Make Cookie Dough
- Whisk together the flour, baking powder, baking soda, kosher salt, and pumpkin spice in a medium bowl. Set aside.
- In a stand mixer fitted with the paddle attachment, beat the butter on medium-low until smooth. Add both sugars and mix until a smooth paste forms. Scrape down the bowl and paddle, then mix again.
- Add the eggs and vanilla extract. Mix on medium, scraping the bowl several times, until the mixture is lightened and evenly combined.
- With the mixer on low, add the flour mixture one large scoop at a time, waiting until each addition is nearly incorporated before adding the next.
Scoop and Chill
- Scoop the dough using a ¼ cup cookie scoop onto parchment-lined baking sheets. Roll each portion into a ball, then press a well into the center of each using the back of a round tablespoon measure, a small cookie scoop, or a melon baller. Press deep but do not push through the bottom.
- Refrigerate the shaped dough for at least 1 hour, or until fully chilled and firm.
Fill and Bake
- Preheat the oven to 350°F conventional. Pour the pumpkin filling into the center of each chilled cookie, filling just to the top edge of the well.
- Bake for 20 minutes, or until the edges are golden brown. Let cool on the pan before transferring.
Notes
Chilling: Do not skip the refrigeration step. Chilled dough holds its shape and keeps the filling contained during baking. Press the well before chilling — pressing after chilling can crack the dough walls and cause the filling to leak.
Doneness: The cookies are ready when the edges are golden brown. The filling will look set but still have a slight wobble at the center — it firms up as the cookies cool.
Storage: Store in an airtight container at room temperature for up to 5 days, in the refrigerator for up to 2 weeks, or freeze in a zip-top bag for up to 2 months. Raw cookie dough (with the indent pressed) can be frozen for up to 1 month. The filling can be made up to 1 week in advance and stored in the refrigerator.
Nutrition
Before You Go
If these pumpkin pie cookies disappear faster than expected, that is completely normal. Browse more inspiration in Cookie Recipes or Pie & Tart Recipes. Or check out these 30 best pumpkin recipes for fall!








These were my first pumpkin bake of the Season! They are the perfect balance between pie and cookie! Cookies were super chewy, which I expected based on other cookie recipes of yours that I’ve made, and the pumpkin filling was awesome! Overall really easy but impressive cookies. Thank you!