This post may contain affiliate links. Please read our disclosure policy.
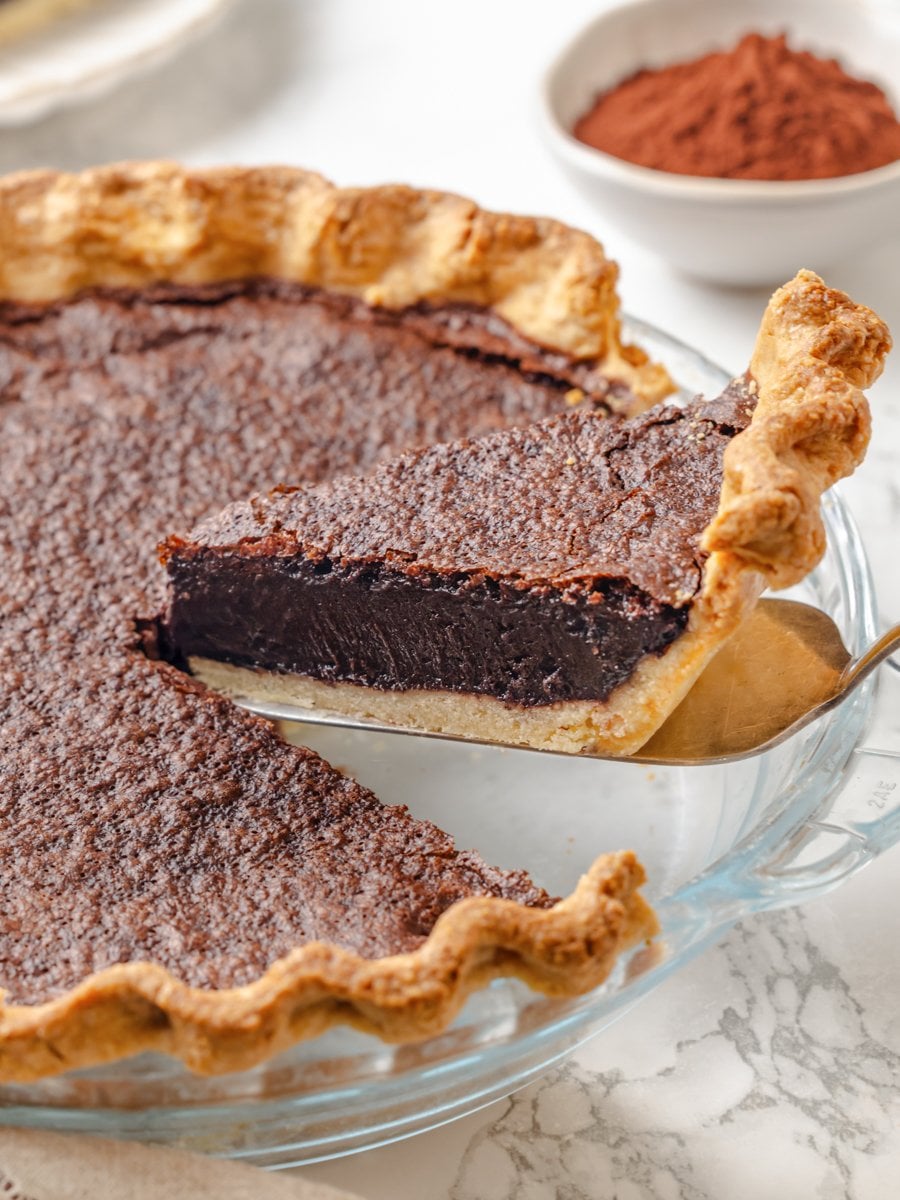
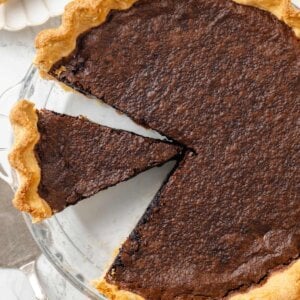
Chocolate chess pie made with a crisp pâte sablée crust and a cocoa custard filling that bakes into a smooth, sliceable texture. This is a Southern classic done with the precision it deserves.
A Quick Look At The Recipe
This is a brief summary of the recipe. Jump to the recipe to get the full details.
Jump to RecipePrep Time
20 minutes
Cook Time
40 minutes
Cooling / Rest Time
2 hours
Total Time
3 hours
Servings
10 slices
Difficulty
Intermediate
Calories *
434 kcal per serving
Technique
Parbaked pâte sablée crust filled with a whisked cocoa custard and baked until set with puffed edges and a smooth center.
Flavor Profile
Rich chocolate, buttery, balanced sweetness, hint of coffee.
* Based on nutrition panel
I remember this pie from my childhood but this version is so much better! The par baked crust and the chocolate filling are paired perfectly. I was worried I didn’t bake the crust enough but it turned out nice and crispy with no soggy bottoms here. ⭐⭐⭐⭐⭐
Maire
Why This Recipe Works
- Crisp, fully baked crust every time. Parbaking the pâte sablée shell before adding the filling solves the single biggest problem with custard pies: a pale, underdone bottom. The shell bakes blind, sets properly, and holds its structure once you add the filling.
- Smooth custard without lumps. Whisk the cocoa, sugar, and salt together thoroughly before adding any wet ingredients to ensure the cocoa disperses evenly. The result is a silky, uniform custard with no dry pockets or gritty texture.
- Classic Southern heritage, simple pantry ingredients. Chocolate chess pie has the same honest, from-the-pantry character as a shoofly pie: a short ingredient list, no specialty equipment, and a filling you whisk together. Cocoa powder keeps the custard light and the chocolate flavor present without tipping into dense or overly rich territory.
Table of Contents
Chocolate Chess pie is one of those Southern classics I kept coming back to while testing, and the crust was always the variable that made or broke the final result. This recipe keeps the old-fashioned, simple filling exactly as it should be, but fixes what every heritage recipe gets wrong: the crust. With a crisp, buttery pâte sablée shell and a chocolate custard filling, this pie is as easy as it is irresistible.
If you want to compare this filling approach to a more traditional version, my chocolate pie recipe uses a different method and gives you a useful side-by-side view of how cocoa-based custards can vary. You can also make this French silk pie!
Ingredients & Substitutions
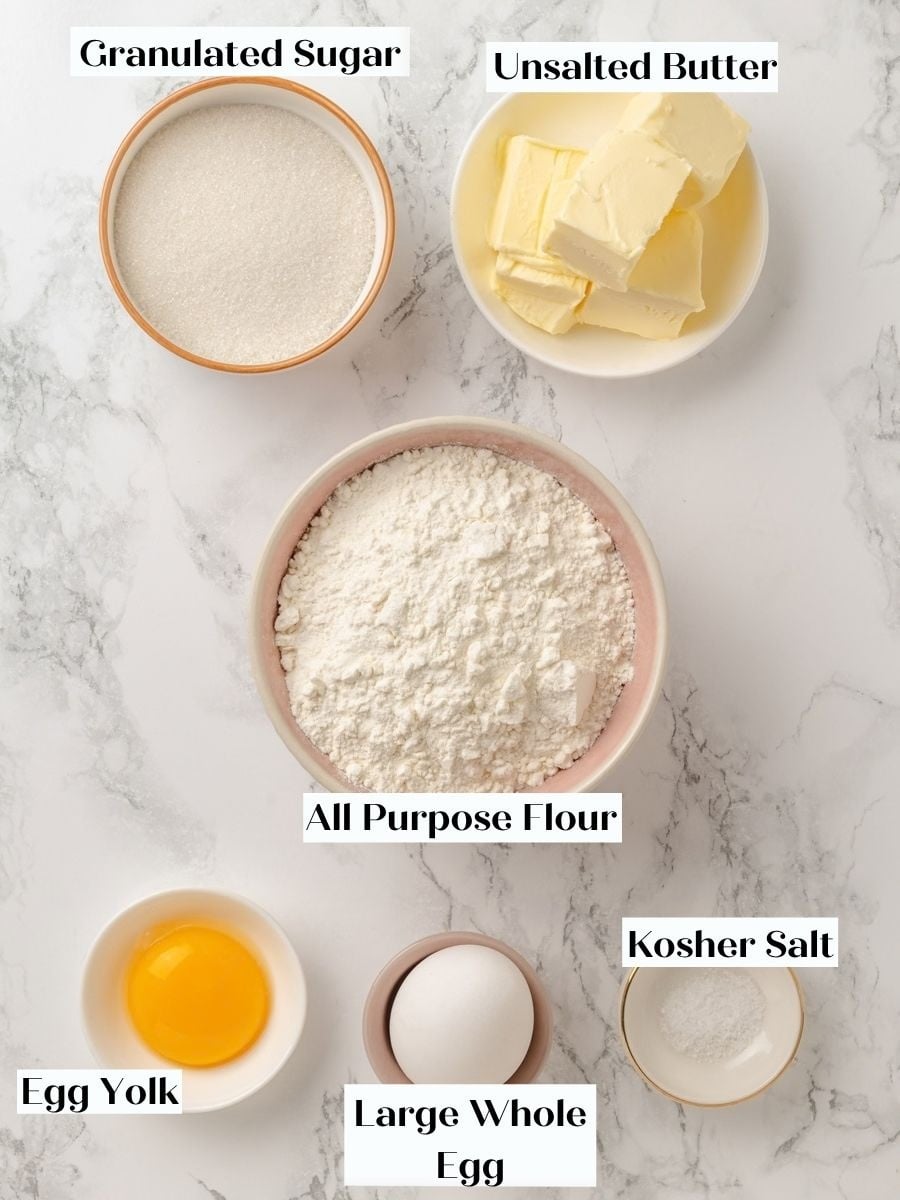
- Granulated Sugar (crust): Sugar tenderizes the crust by interfering with gluten development and adds just enough sweetness to complement the chocolate filling.
- Whole Egg and Egg Yolk (crust): The whole egg hydrates the dough and adds protein that helps the crust hold together cleanly when sliced. The extra yolk boosts fat and emulsifiers, making the dough more pliable to roll and the finished shell richer and more tender.
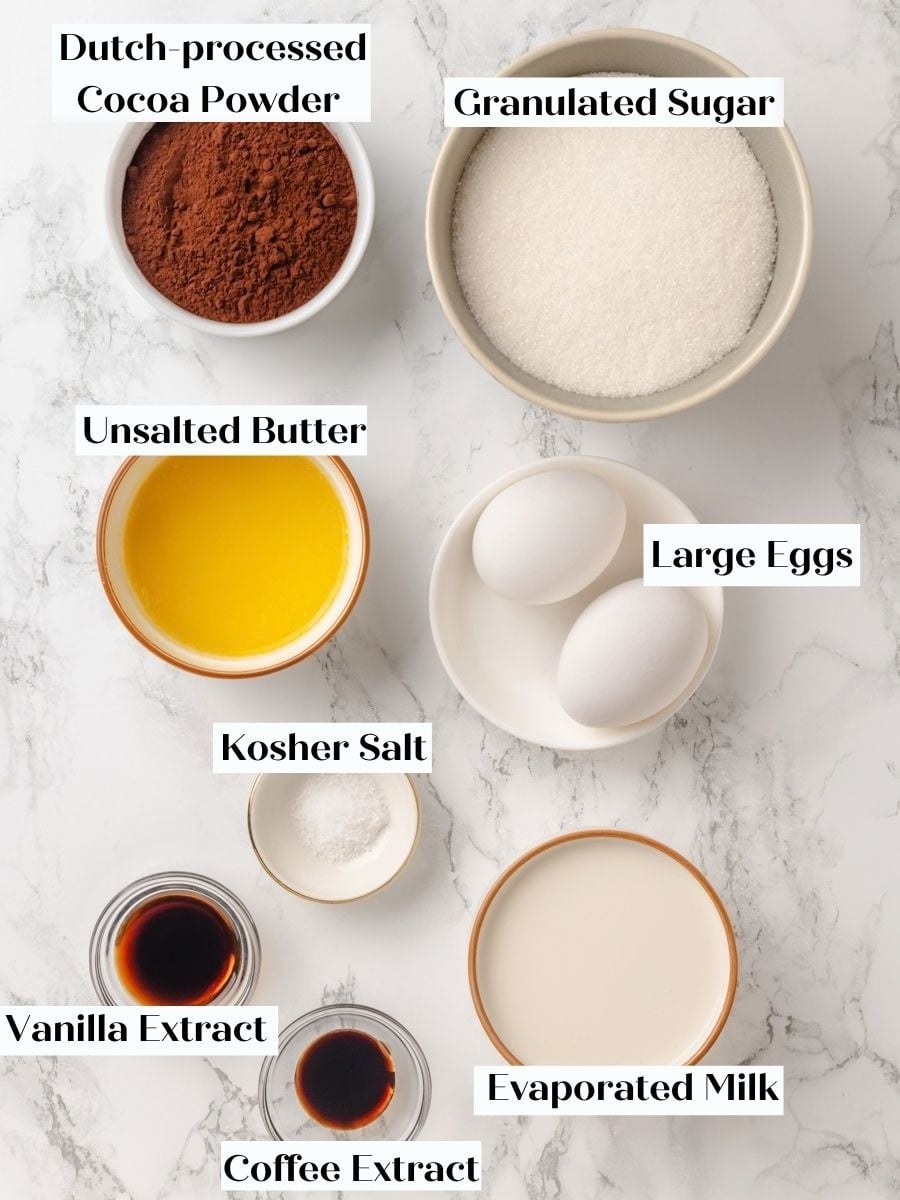
- Granulated Sugar (filling): Sugar is essential to the classic chess texture, helping the filling set into a glossy, custardy interior rather than a soft, loose custard. Reducing the sugar significantly will change both the texture and the set.
- Dutch-Processed Cocoa Powder: Dutch-processed cocoa gives a deep, smooth chocolate flavor and a darker color without the sharp acidity of natural cocoa. You can use natural cocoa in a pinch, but it will affect both the flavor and the appearance of the finished pie.
- Eggs, beaten (filling): Eggs are the primary structure builder in the filling, transforming the sugar-cocoa mixture into a custard that sets firm but silky as it bakes. Beating them before adding ensures they incorporate evenly, with no streaks in the finished slice.
- Butter, melted (filling): Melted butter enriches the filling and gives it a velvety, almost truffle-like mouthfeel once cooled. It also carries the cocoa flavor and helps create that thin, shiny, slightly crackly top characteristic of chess-style pies.
- Evaporated Milk: Evaporated milk adds dairy richness and body without making the filling too loose, thanks to its reduced water content. Use the 5.33 oz small can exactly — a full-size can adds too much liquid and the filling will not set properly. The same custard logic applies in my old fashioned buttermilk pie, where controlling the dairy ratio is equally important to the final set.
- Coffee Extract: Coffee extract is not here to make the pie taste like coffee. It deepens and rounds out the cocoa the same way salt does, reading as “more chocolate” in the finished slice just like with this chocolate angel food cake!
See the recipe card for full information on ingredients and quantities.
Variations on This Chocolate Chess Pie
- Crust Swap: Flaky Pie Crust or Pâte Sucrée. An all butter pie crust works beautifully, adding a buttery, layered texture that helps tame the filling’s sweetness. A pâte sucrée shell, slightly sweeter and more structured than the sablée, pushes the finished pie into richer, more decadent territory — just be sure to parbake it the same way you would the sablée.
- Add some mix-ins. Sprinkle some peanuts, hazelnuts, or frozen raspberries on top of the pie before baking.
- Add a layer of caramel sauce. Just like you would with my Snickers pie, you can add a layer of salted caramel before adding the chocolate mixture.
Professional Tips
- Do not pull the pie weights too early. The sablée has a high butter content, and if you remove the weights before the sides look matte and set, they will slump inward. Bake with parchment and weights for a full 10 minutes, then remove the weights and continue baking for another 5 minutes, until the bottom just begins to color.
- Whisk the dry ingredients completely before adding anything wet. Cocoa powder does not break up easily once liquid hits it. Combining the cocoa, sugar, and salt first — and whisking until the mixture is uniform — is the only way to guarantee a smooth, lump-free custard. If you love deep cocoa flavor in baked form, my best chocolate pound cake recipe uses the same approach.
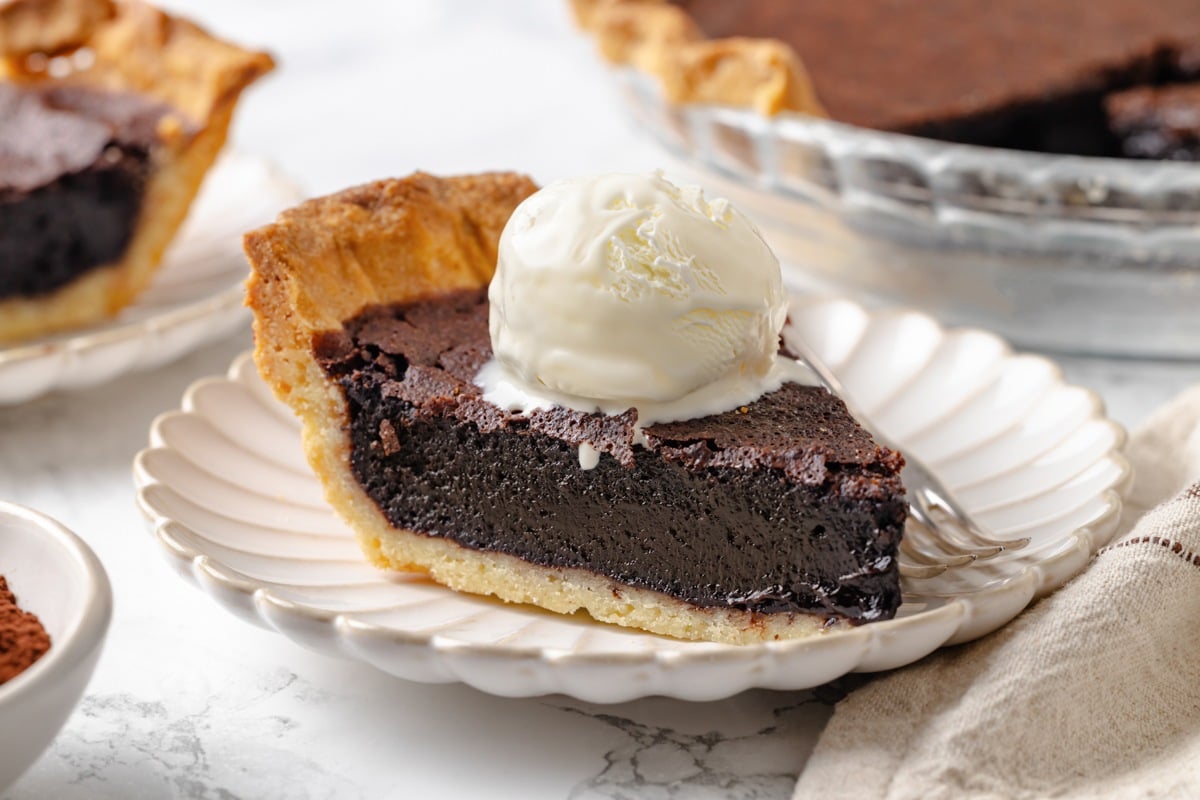
- Cool the pie completely before slicing. The chess filling firms as it cools, and cutting too early will give you a runny slice. Two hours at room temperature is the minimum — I usually let mine go longer if I can manage it.
How to Make Chocolate Chess Pie
This recipe has two components: the sablée crust and the chocolate filling. Start the crust at least two hours before you plan to bake, or make it the day before.
Make the Pâte Sablée
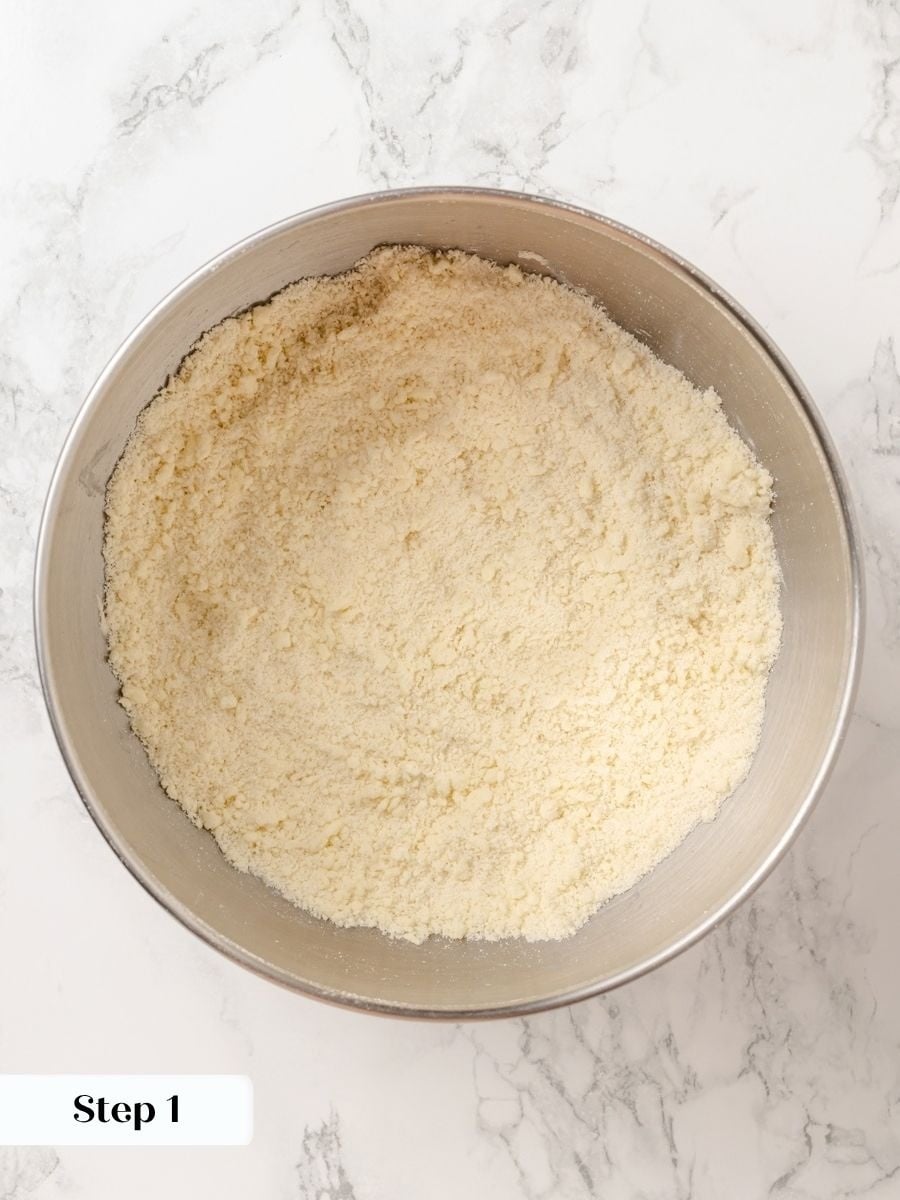
Step 1: Cut the butter into the dry ingredients. In the bowl of a stand mixer fitted with the paddle attachment, combine the flour, sugar, salt, and cold butter. Mix on low speed, breaking the butter down into the dry ingredients until no visible pieces remain and the mixture looks like fine sand. Press a small amount between your fingers — if it holds together and you cannot feel distinct butter chunks, you are ready to move on. (photo 1).
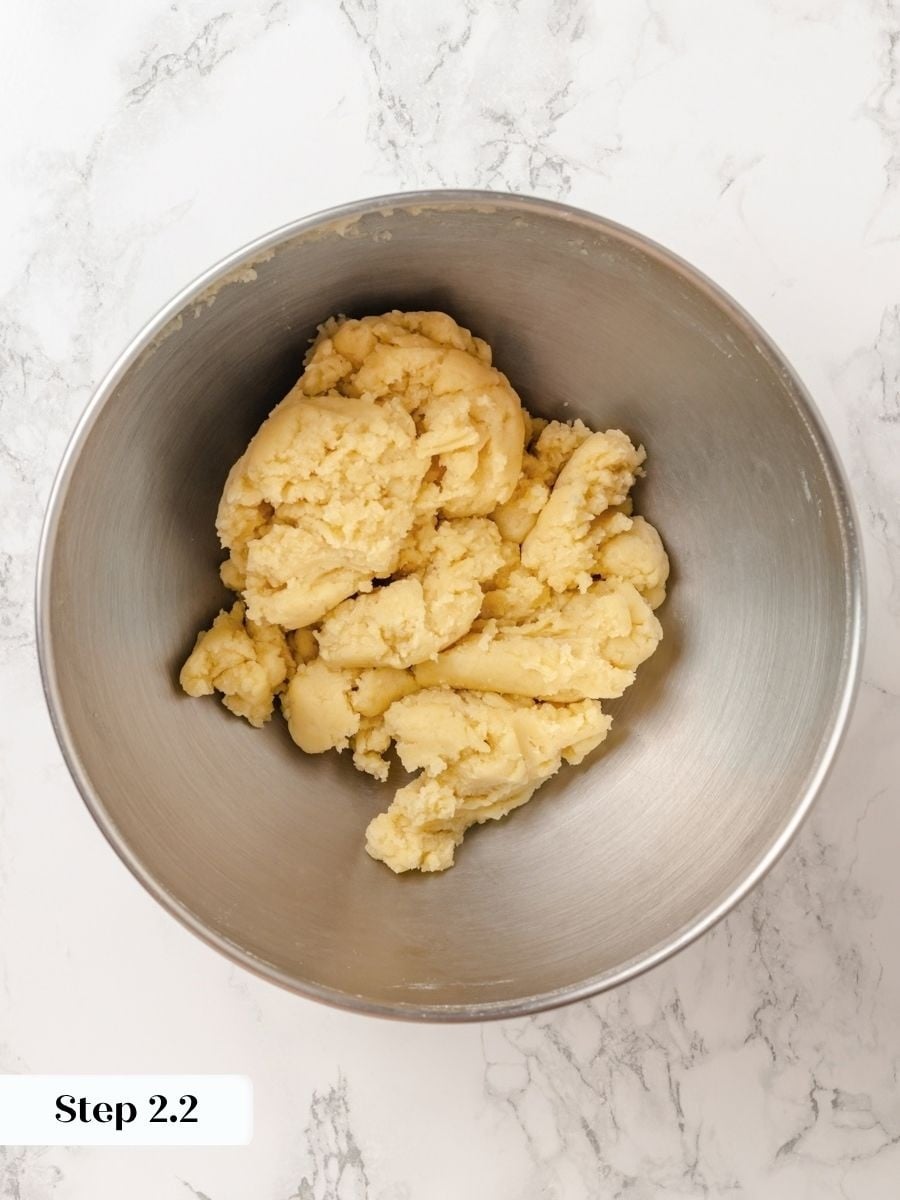
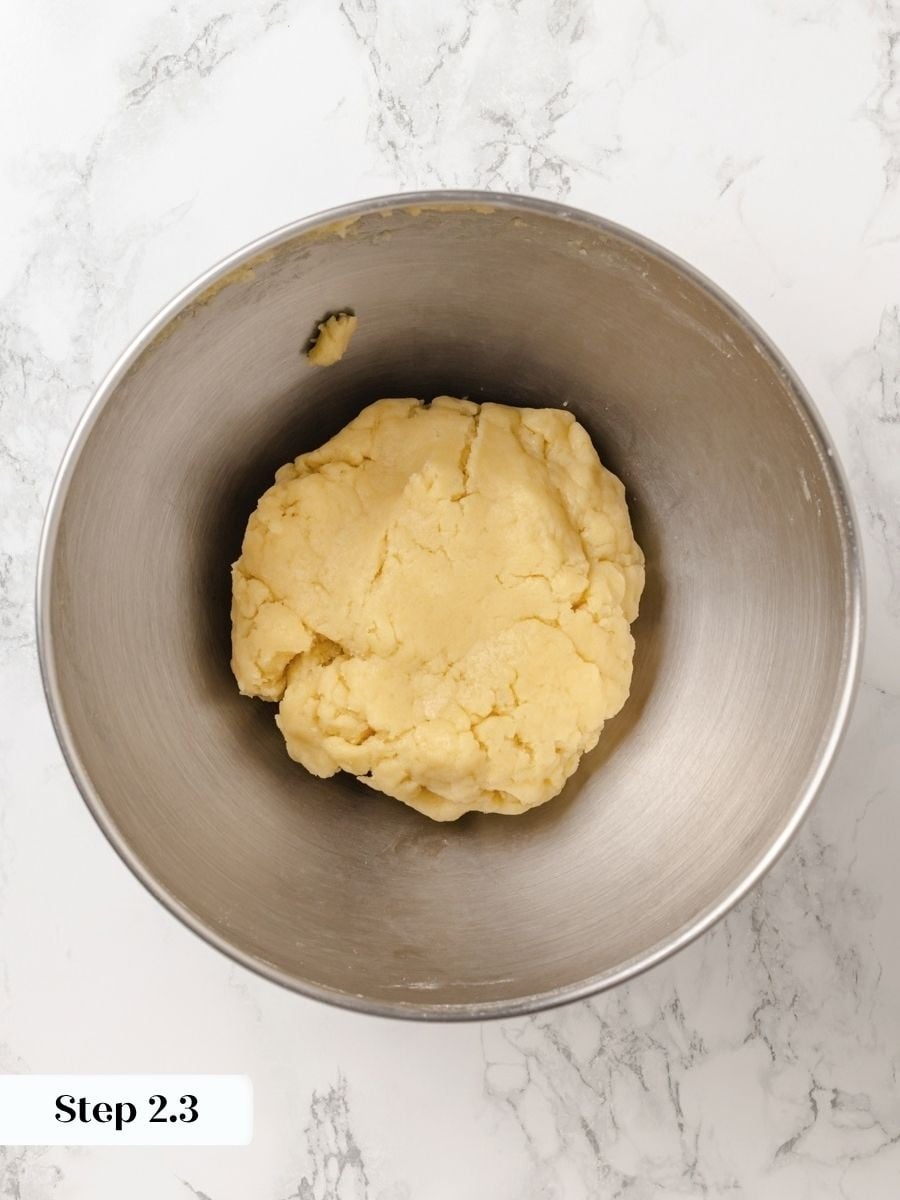
Step 2: Add the eggs and bring the dough together. In a separate bowl, whisk the whole egg and egg yolk together until fully combined with no streaks of white or yolk visible. Add the beaten eggs to the mixer and mix on low speed just until a smooth, cohesive dough forms. It will look like cookie dough. Stop mixing immediately — the dough should just come together, and working it further will tighten the gluten and compromise the crumbly texture that makes a sablée worth using. (photos 2-4).

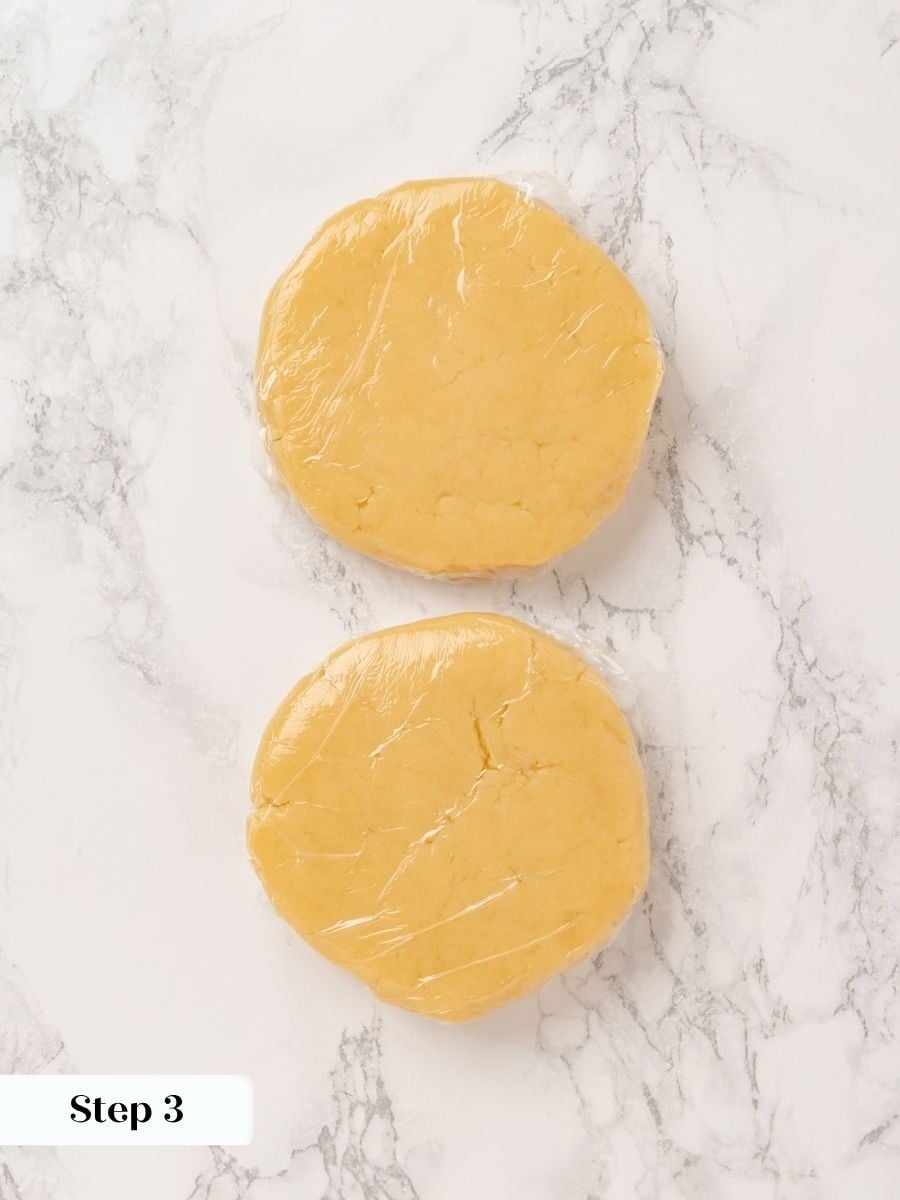
Step 3: Divide and chill the dough. Divide the dough into two equal pieces (approximately 275 g each), flatten each into a disc on a sheet of plastic wrap, and wrap tightly. Refrigerate for at least 2 hours or overnight. The dough needs this rest to firm up so you can roll it without sticking or tearing. (photo 5).
This recipe makes two dough discs. You will only need one for the pie. Wrap the second tightly and freeze it for another pie like this creme brulee pie! (coming soon!)
Roll and Line the Pan
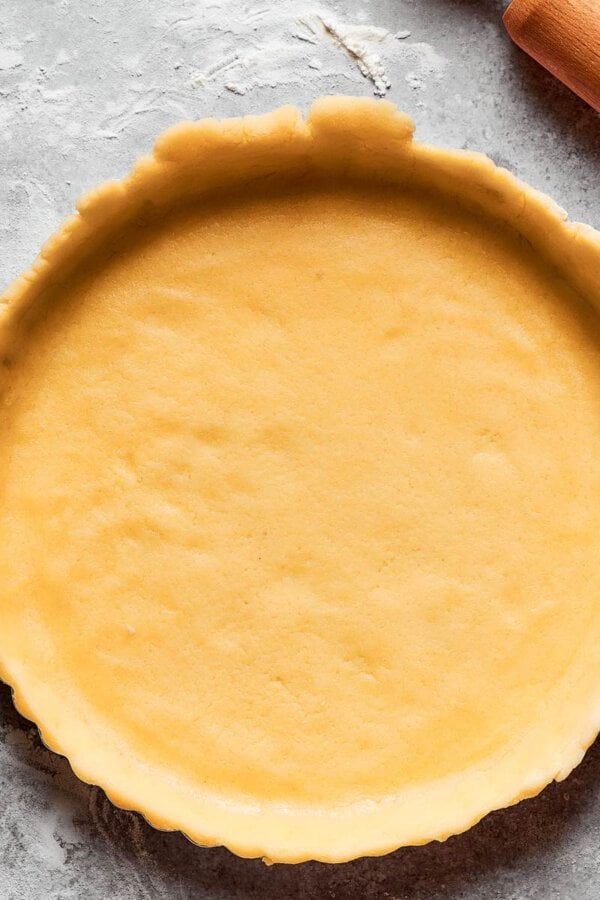
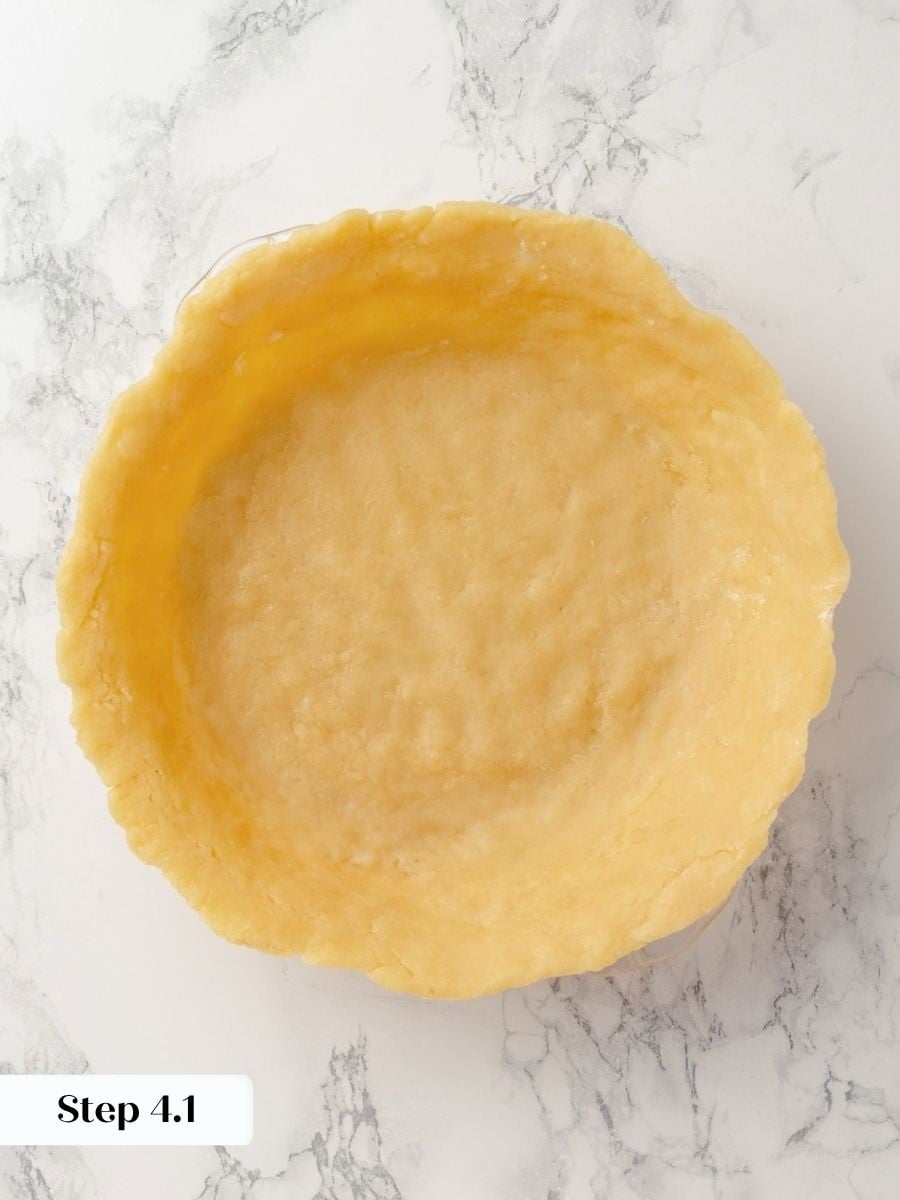
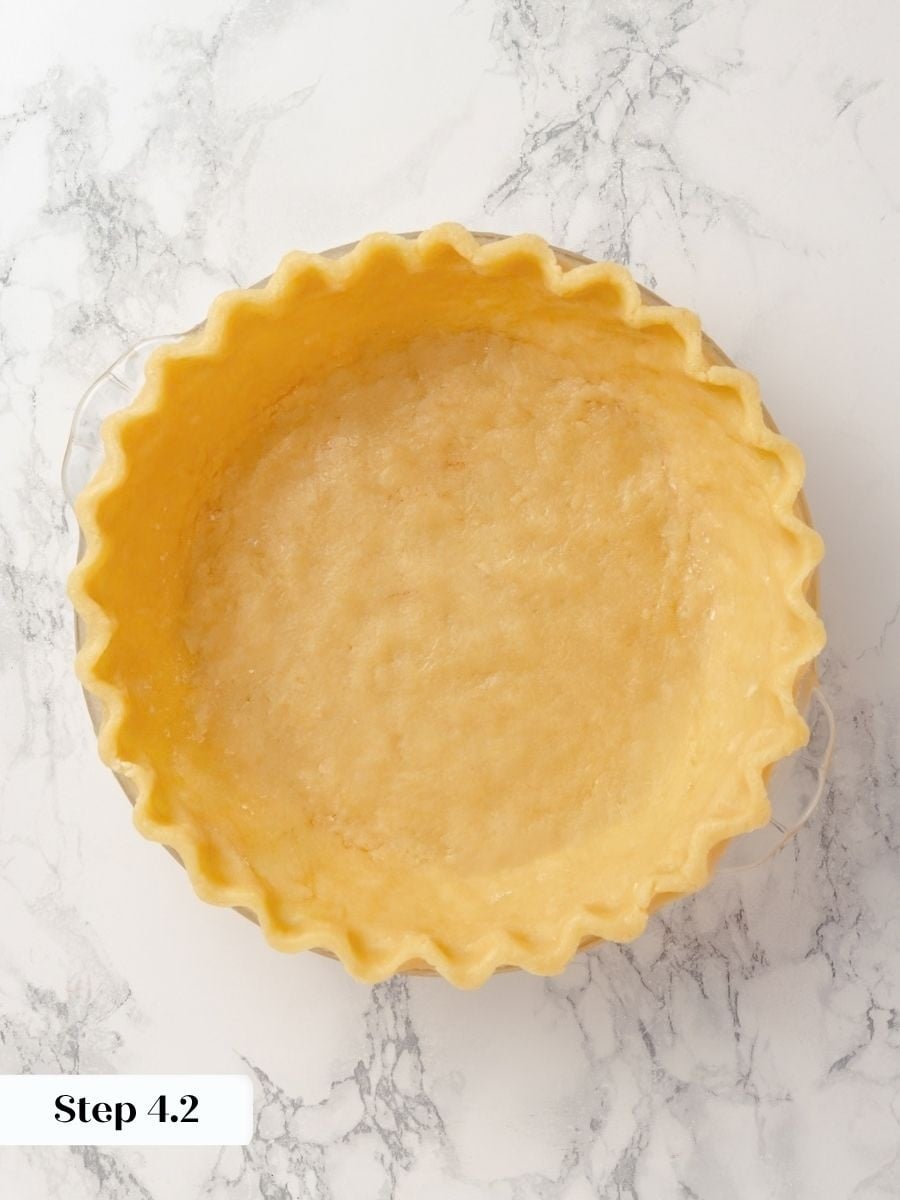
Step 4: Remove one disc from the refrigerator and let it sit at room temperature until just pliable enough to roll without cracking — it should bend slightly when flexed but still feel cold. Roll it out on a lightly floured surface, then refrigerate the rolled sheet until firm again before transferring it to a 9-inch pie pan. Line the pan, pressing gently into the corners, and refrigerate the lined shell while the oven preheats. A cold crust holds its shape under the weights and resists shrinkage. (photos 6&7).
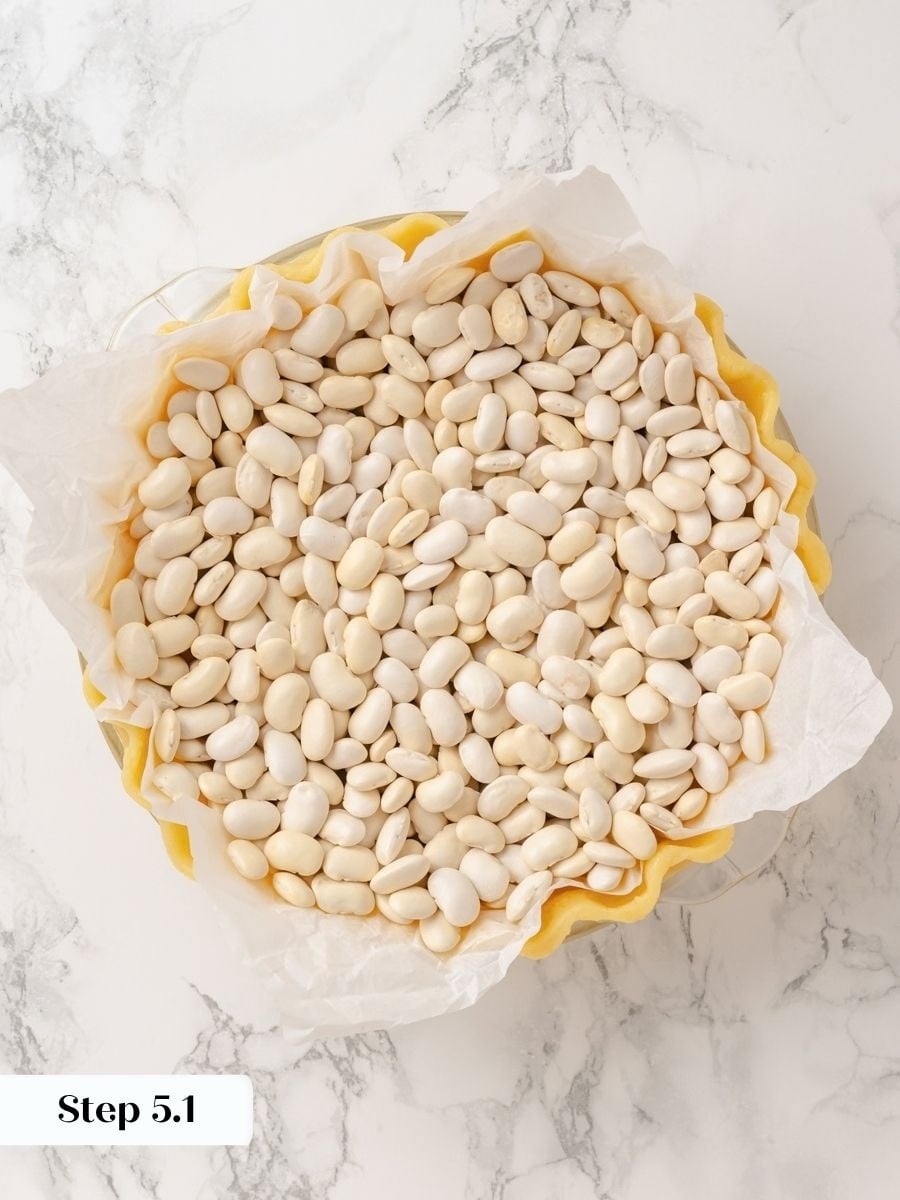
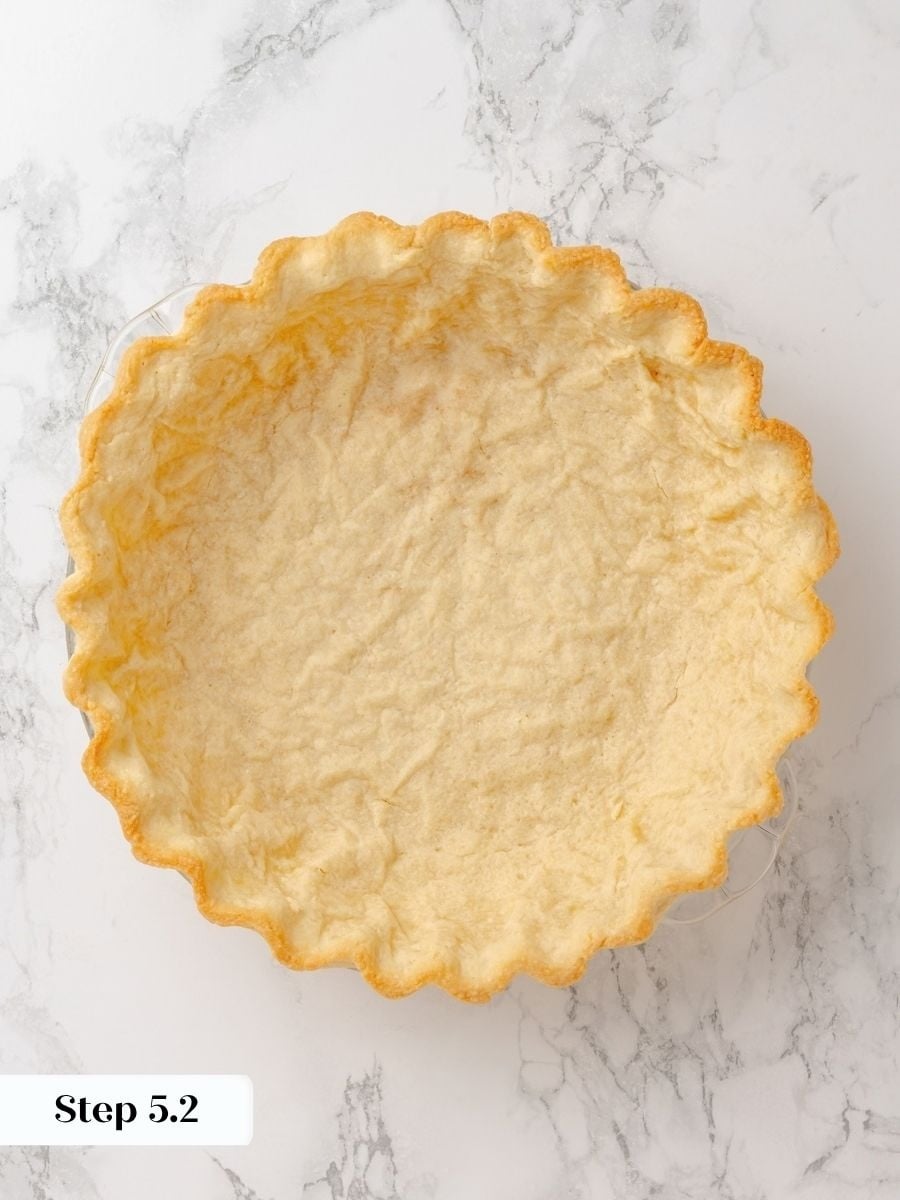
Step 5: Blind bake the crust. Preheat the oven to 350°F convection or 375°F conventional. Crumple a sheet of parchment paper, smooth it out, and press it into the chilled crust, fitting it snugly against the sides. Fill with baking beans or pie weights. Bake for about 10 minutes, until both the sides and the bottom of the crust look matte rather than shiny and raw. Once you see that matte finish throughout, remove the parchment and weights and continue baking for an additional 5 minutes, or until the bottom just begins to take on color. (photos 8 & 9).
The matte surface tells you the dough has set enough to hold its shape without the support of the weights. Removing them too early — before both the sides and bottom are fully matte — is the most common reason a sablée sinks on the sides.
Make the Filling
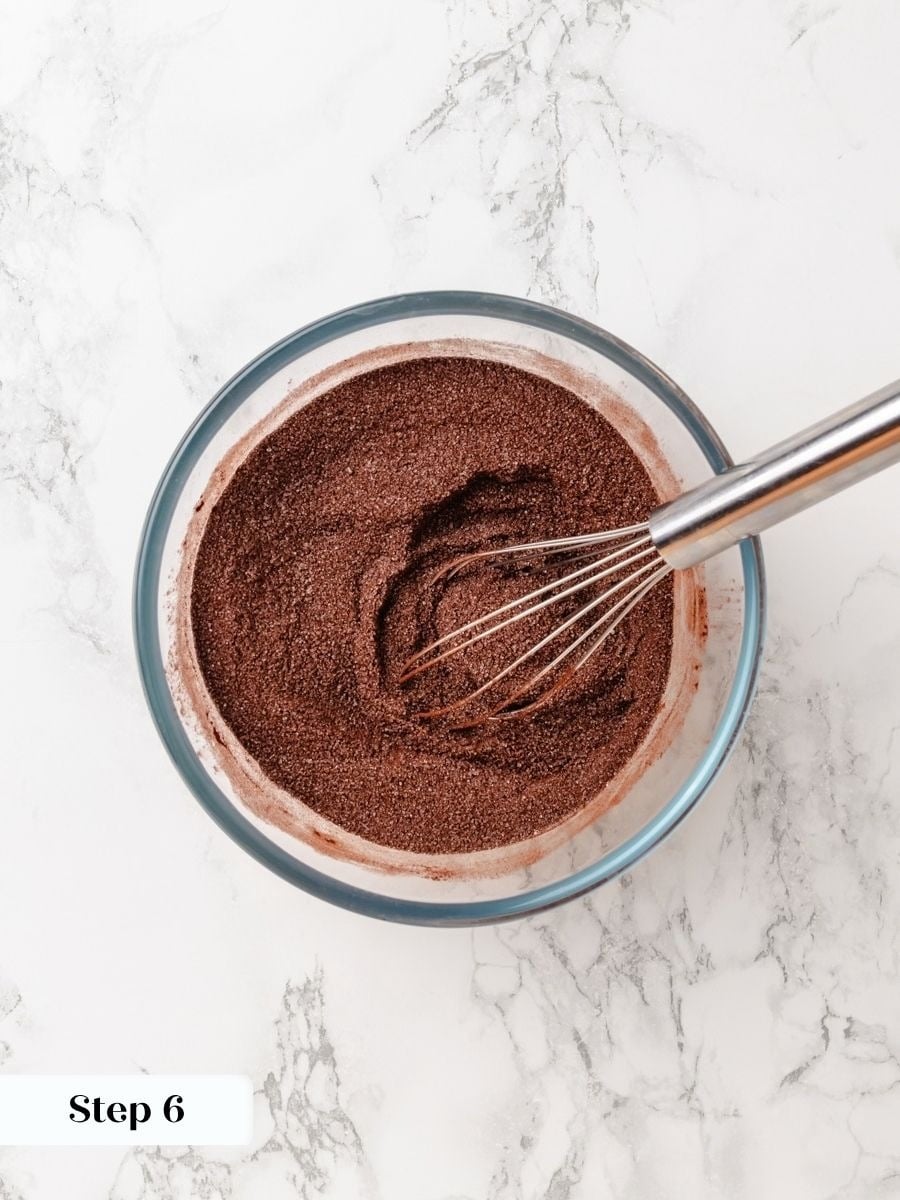
Step 6: Whisk the dry filling ingredients together. Reduce the oven to 350°F conventional (no fan). In a bowl, combine the sugar, cocoa powder, and salt and whisk thoroughly until the mixture is uniform and no cocoa clumps remain. Set aside. (photo 10).
This step matters more than it might seem: cocoa powder resists incorporating into liquid, and whisking it with the sugar now is the simplest way to prevent lumps in a custard this straightforward.
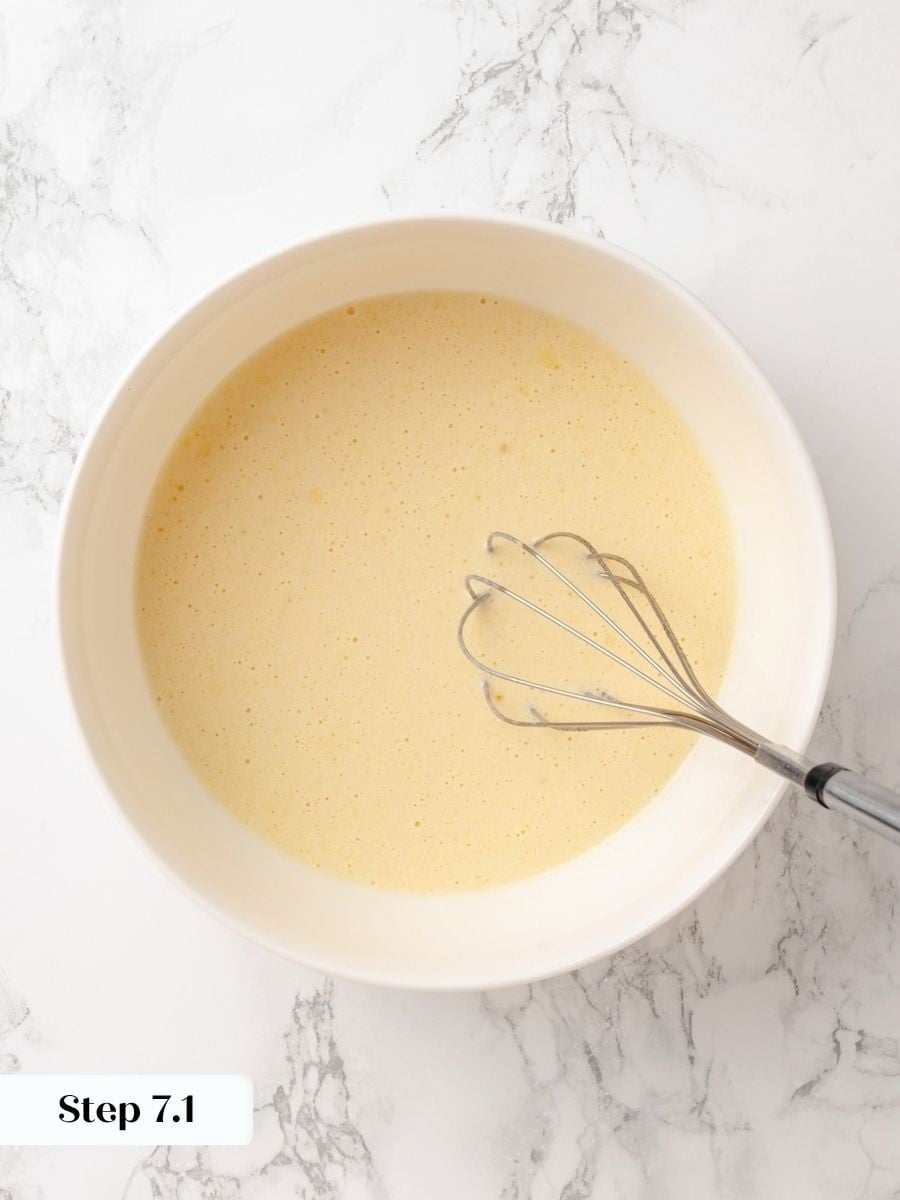
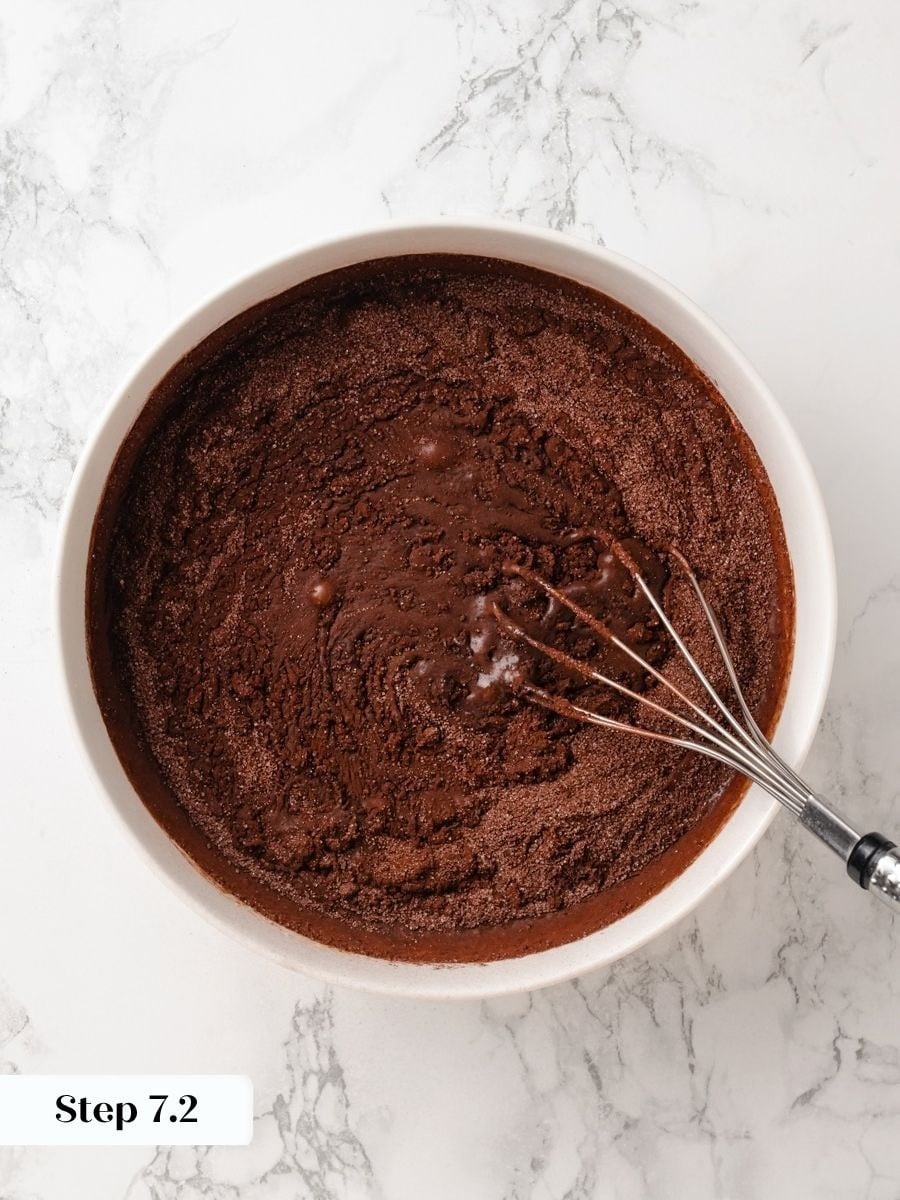
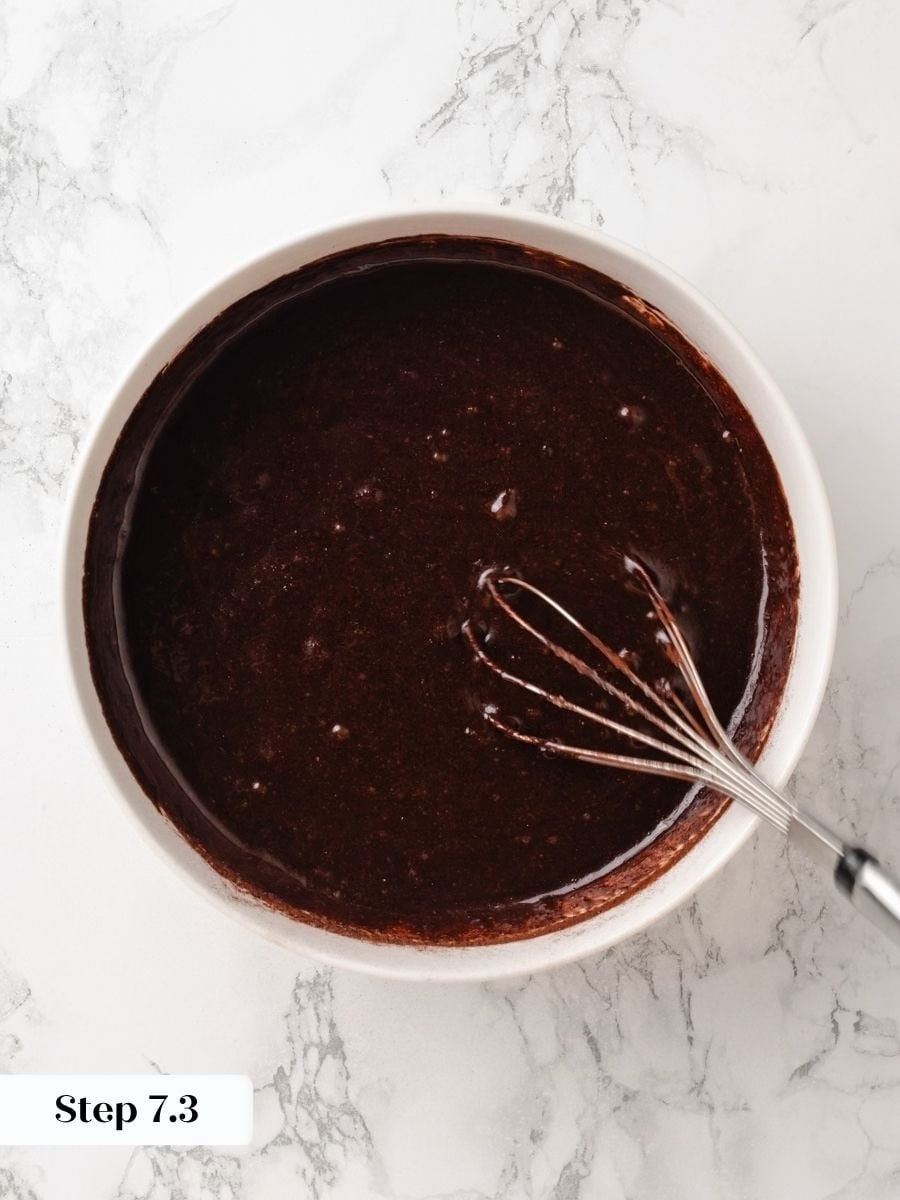
Step 7: Combine the wet ingredients to make the filling. In a large bowl, combine the eggs, melted butter, evaporated milk, vanilla, and coffee extract. Beat well with a whisk until fully combined. Add the sugar-cocoa mixture and whisk until smooth and glossy, with no lumps remaining. (photos 11-13).
Bake
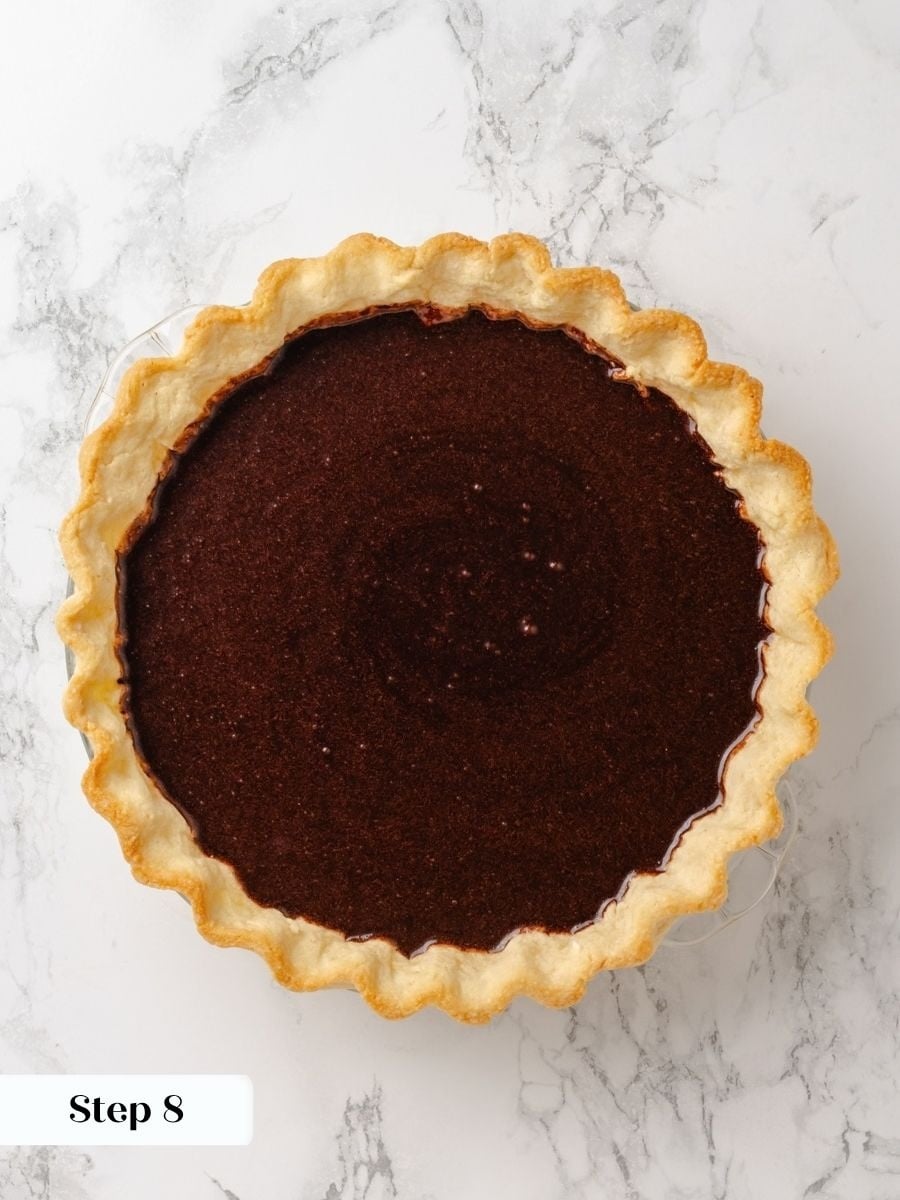
Step 8: Pour the filling and bake. Pour the filling into the parbaked pastry shell. Bake at 350°F conventional for 20 minutes, then reduce the oven temperature to 325°F and continue baking for another 25 to 40 minutes. The total bake time will land somewhere between 45 and 60 minutes — mine baked for 49. (photo 14).
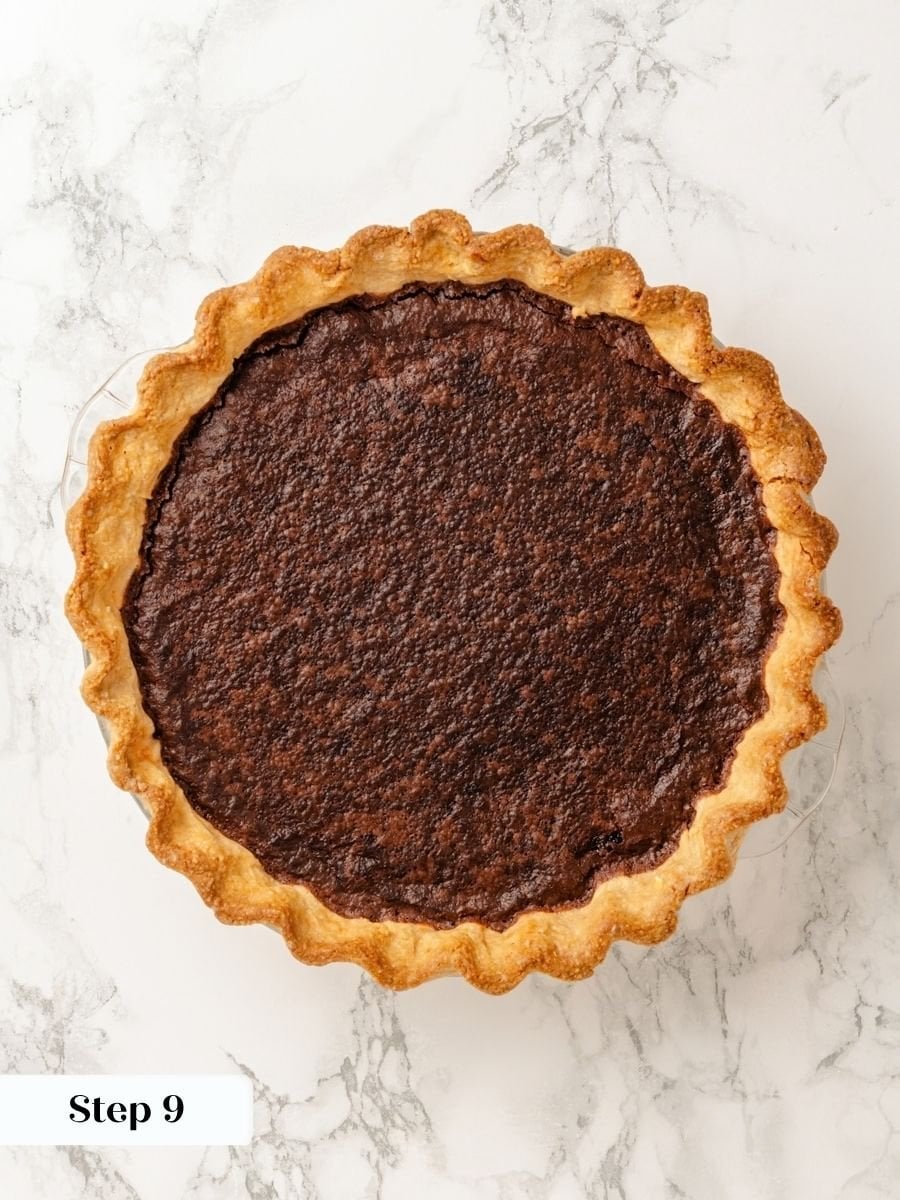
Watch the edges first: they should look fully set and slightly pulled. The center should be puffed and no longer liquid when you gently nudge the pan. It will still have a very slight wobble at the very center.
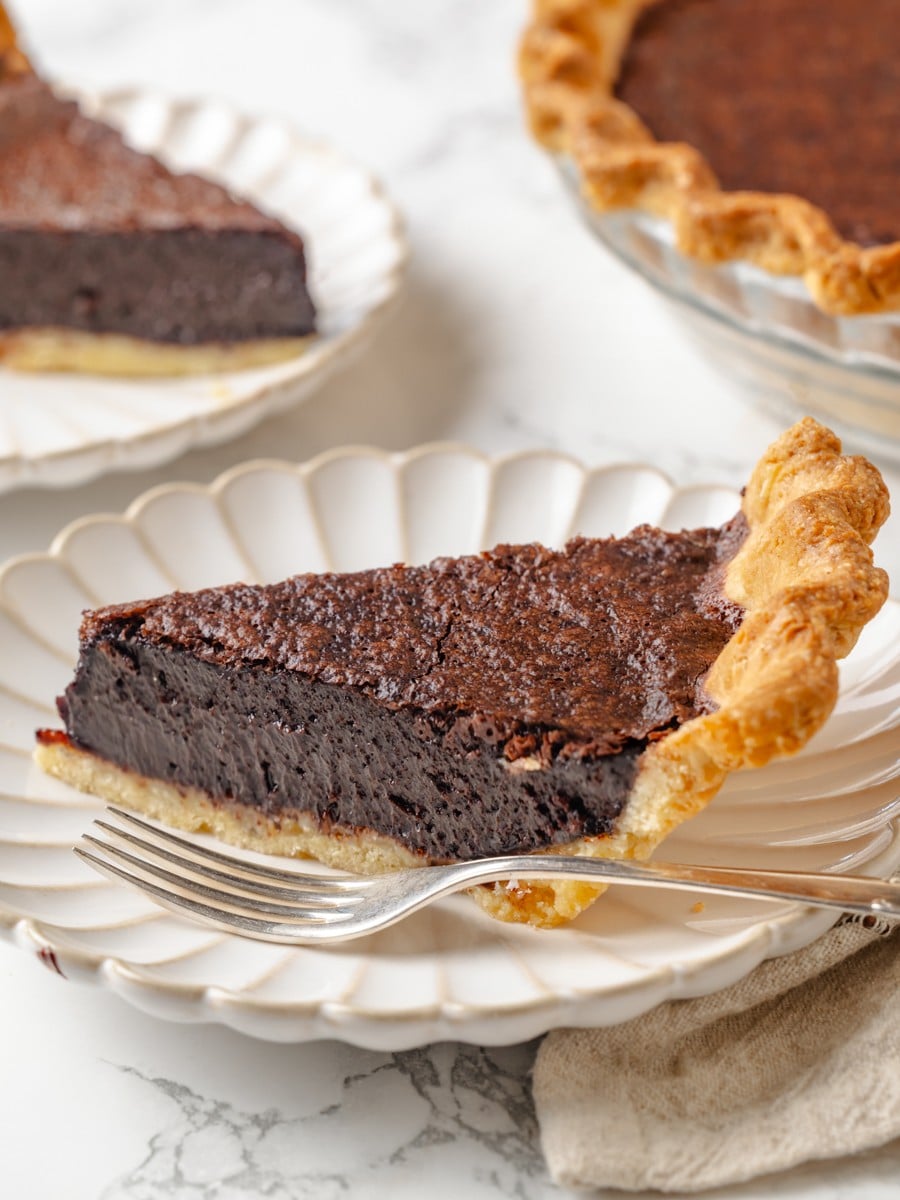
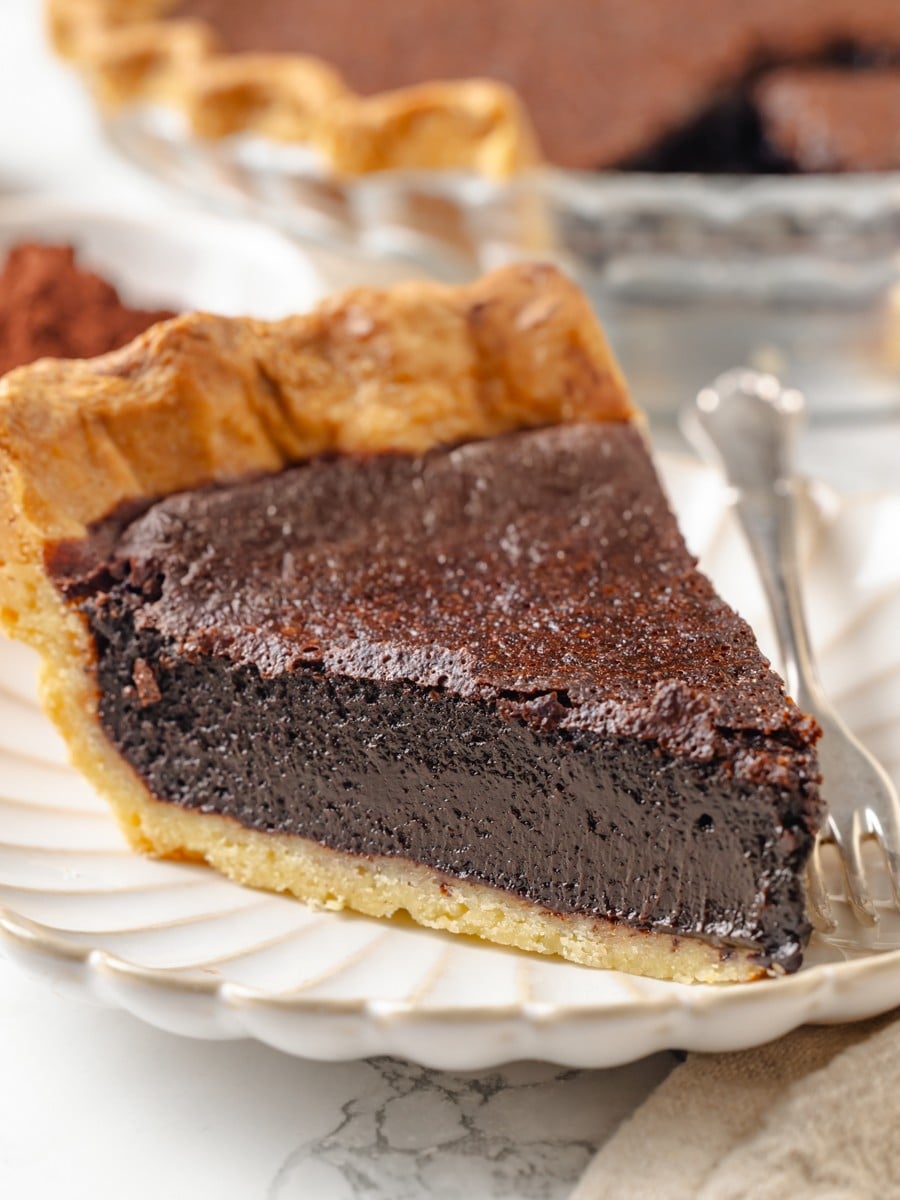
Step 9: Cool completely before slicing. Transfer the pie to a wire rack and let it cool at room temperature until fully set, which I know takes patience. The chess filling firms significantly as it cools, and cutting into a warm pie will give you a runny slice that does not hold its shape. Once cooled, serve at room temperature or refrigerate and serve cold — both are excellent, and it is entirely a matter of preference. (photo 15 & 16).
Chef Lindsey’s Recipe Tip
The two-temperature bake, 350°F for the first 20 minutes, then 325°F for the remaining 25 to 40 minutes, gives the filling that distinct chess-pie character: edges that are fully set and slightly puffed, with a smooth, glossy center that firms as it cools.
Recipe FAQs
The edges should look fully set, and the filling should be puffed but not liquid in the center. A significant jiggle in the middle is normal and will resolve as the pie cools. My pie was done at 49 minutes, but start checking at 45 and go up to 60 if needed depending on your oven.
The two most likely causes are cutting the pie before it has cooled completely or underbaking. The chess filling firms significantly as it cools, and slicing while the pie is still warm will give you a runny, custard-like slice. Let the pie cool at room temperature for at least two full hours before cutting.
Wrap the baked pie well in plastic and refrigerate for up to 2 weeks. For longer storage, it freezes beautifully for up to 2 months with no texture loss—the sablée crust holds up well after thawing, unlike flaky-style crusts. Thaw overnight in the refrigerator before serving.
Yes, it’s a good make-ahead option. Bake the pie, cool it completely, then wrap and refrigerate or freeze until needed. If you are looking for more easy make-ahead options in the same flavor family, Easy Chocolate Desserts has several recipes that store and travel equally well.
If you tried this recipe and loved it please leave a 🌟 star rating and let me know how it goes in the comments below. I love hearing from you; your comments make my day!
Chocolate Chess Pie
Ingredients
Pâte Sablée Crust
- 2 cups all-purpose flour
- ½ cup granulated sugar
- ¼ teaspoon kosher salt
- 9 tablespoons unsalted butter cold
- 1 large whole egg
- 1 large egg yolk
Chocolate Chess Filling
- 1½ cups granulated sugar
- ½ cup Dutch-processed cocoa powder
- ½ teaspoon kosher salt
- 2 large eggs beaten
- ¼ cup unsalted butter melted
- 5.33 oz evaporated milk 1 small can
- 1 teaspoon vanilla extract
- ½ teaspoon coffee extract
Instructions
- In the bowl of a stand mixer fitted with the paddle attachment, combine flour, sugar, salt, and cold butter. Mix on low until no visible butter pieces remain and the mixture resembles fine sand.
- Whisk the whole egg and yolk together until fully combined. Add to the mixer and mix on low just until a smooth dough forms. Divide into two equal portions (approximately 275 g each), flatten into discs, wrap tightly, and refrigerate at least 2 hours or overnight.
- Roll out one disc, line a 9-inch pie pan, and refrigerate until firm.
- Preheat the oven to 350°F convection or 375°F conventional. Line the chilled shell with crumpled parchment and fill with baking weights. Bake 10 minutes until the sides and bottom look matte. Remove the parchment and weights and bake another 5 minutes until the bottom just begins to color.
- Reduce the oven to 350°F conventional. Whisk together the sugar, cocoa, and salt in a bowl. In a separate large bowl, beat the eggs, melted butter, evaporated milk, vanilla, and coffee extract. Add the sugar mixture and whisk until smooth with no lumps.
- Pour the filling into the parbaked shell. Bake at 350°F for 20 minutes, then reduce to 325°F and continue baking 25 to 40 minutes more, until the edges are set and puffed and the center is no longer liquid. Total bake time is 45 to 60 minutes.
- Cool completely at room temperature before slicing, at least 2 hours. Serve at room temperature or cold.
Notes
Weights: Do not remove the pie weights until the sides and bottom of the crust look fully matte. Pulling them early causes the sides of a butter-rich sablée to slump inward.
Storage: Wrap well in plastic and refrigerate for up to 2 weeks, or freeze for up to 2 months. The sablée crust holds its texture after thawing. Thaw overnight in the refrigerator before serving.
Evaporated milk: Use the 5.33 oz small can. A full-size can adds too much liquid, and the filling will not set. If working from a larger can, weigh the milk on a kitchen scale.
Nutrition
Before You Go
If this chocolate chess pie has you craving more, you will find everything you need in my Pie & Tart Recipes or Dessert Recipes.