This post may contain affiliate links. Please read our disclosure policy.
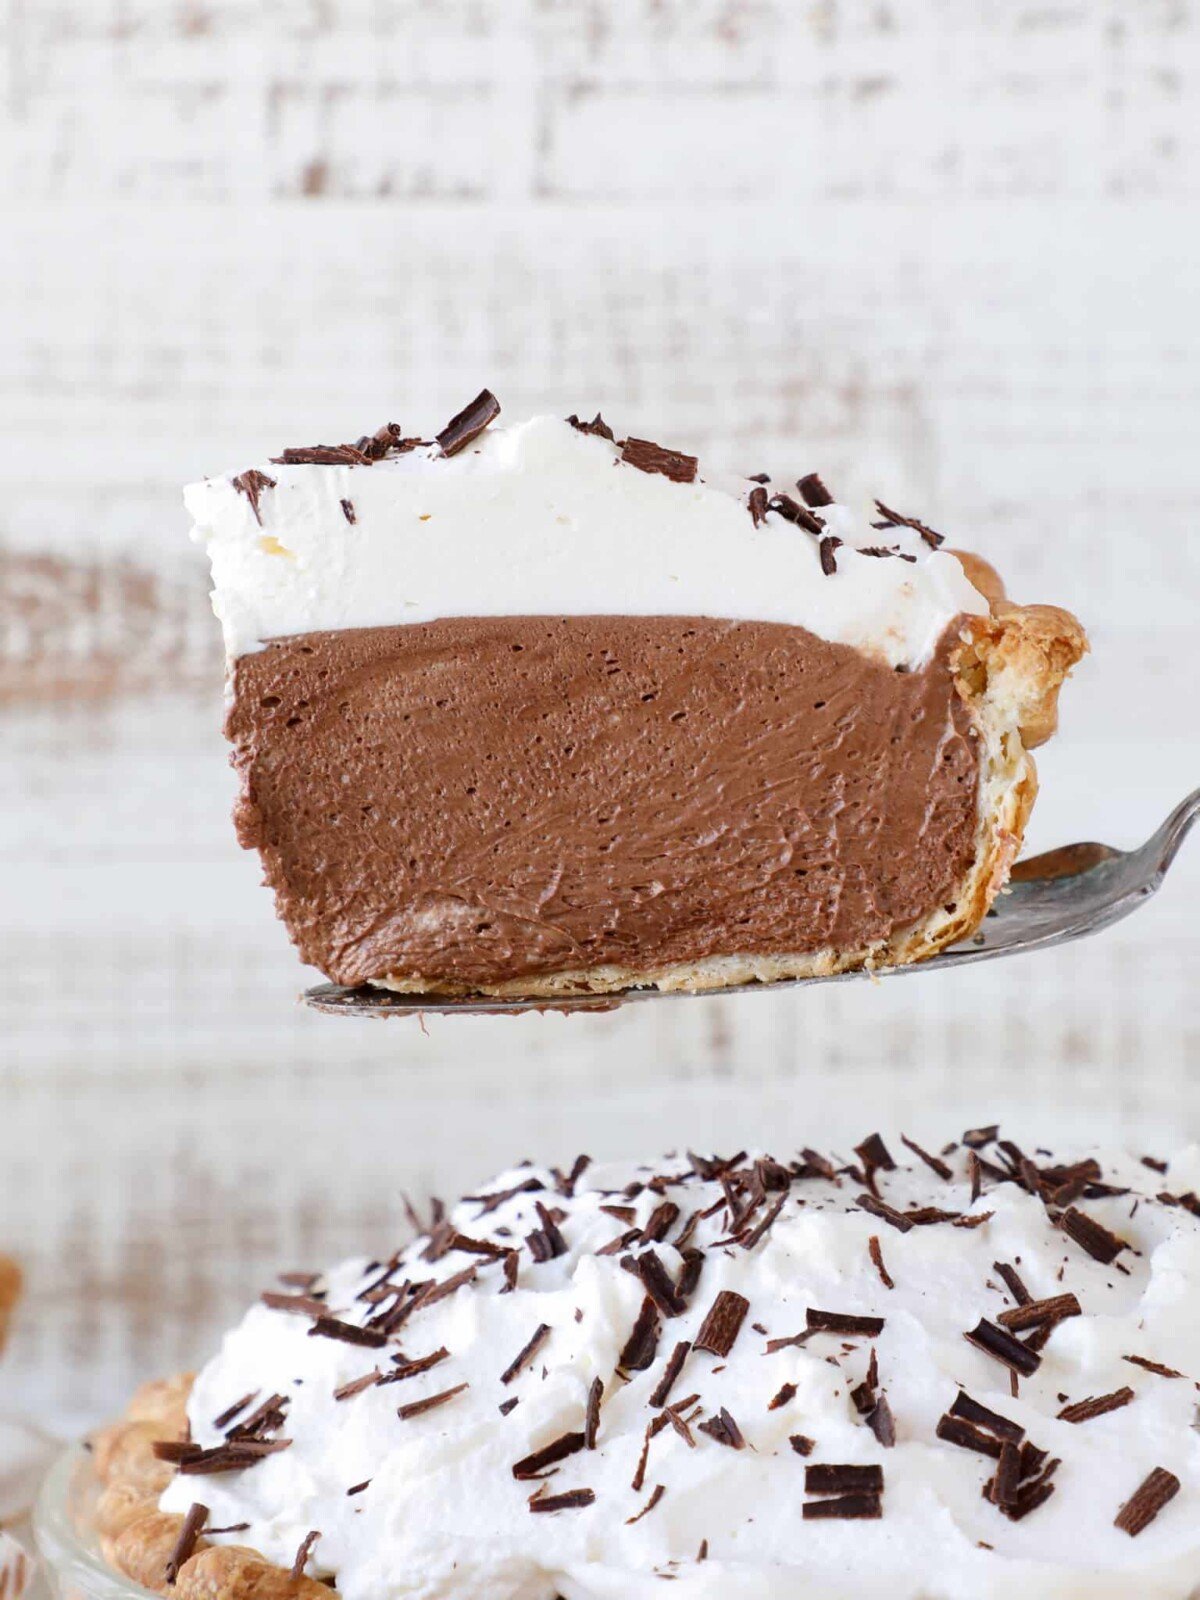
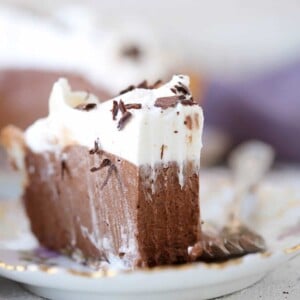
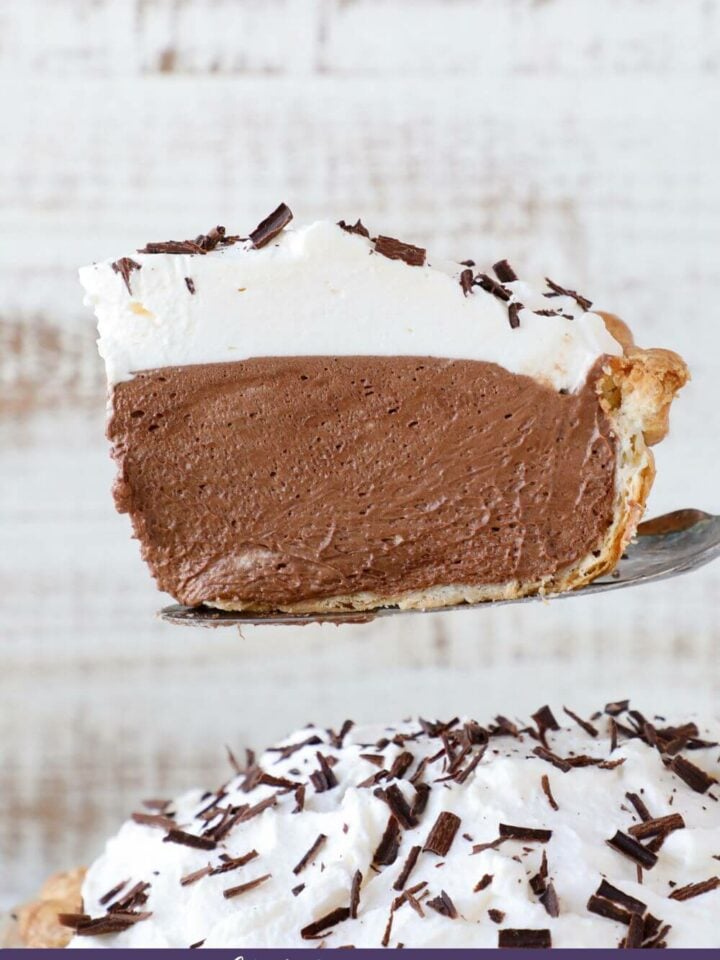
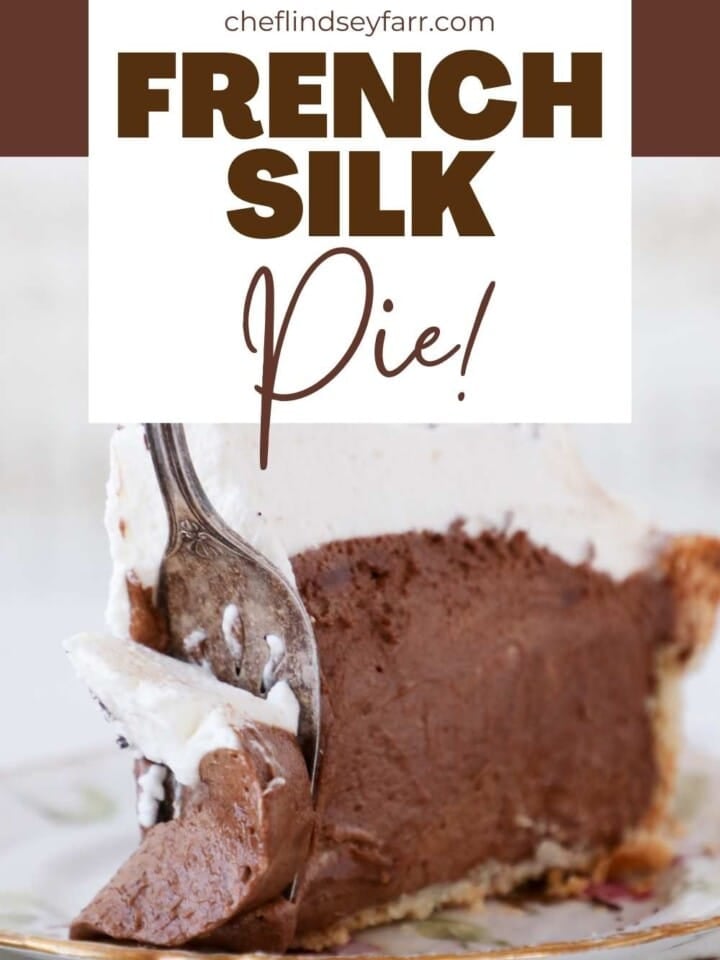
This light, airy French Silk Pie has a flakey pie crust, a decadent chocolate filling and a lightly sweetened whipped cream on top. The chocolate mousse filling is cooked so it is safe for everyone!
You know I don’t mess around with my chocolate desserts. I work to perfect that balance of sweet and salty, like in my dark chocolate pudding, and I will not rest until the flavor is impactfully chocolate. Look for no more proof than my triple chocolate chip cookies, the best hot chocolate, or the best chocolate ice cream.
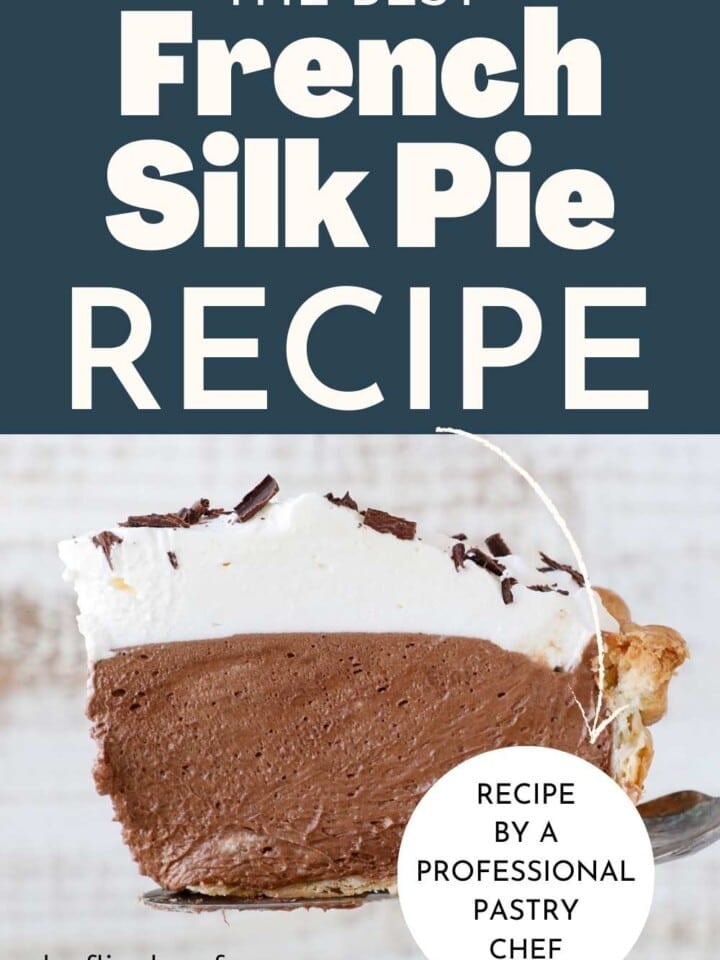
I tested and retested this chocolate silk pie until the chocolate mousse was deeply chocolatey but not too sweet. To achieve this I use 100% unsweetened chocolate, top it with a lightly sweetened whipped cream and use a savory all-butter pie crust.
Table of Contents
- What is French Silk Pie?
- Why This is the Best French Silk Pie Recipe
- Professional Tips for Making French Silk Pie
- Ingredients Needed
- Variations & Substitutions
- How to Make French Silk Pie
- Chef Lindsey’s Recipe Tip
- Frequently Asked Questions
- What to eat with French Silk Pie?
- French Silk Pie Recipe
- Before You Go!
What is French Silk Pie?
This pie starts with a flakey, all-butter pie crust blind-baked to perfection. The crust is filled with a thick layer of dark chocolate mousse and finished with a lightly sweetened homemade whipped cream.
Why This is the Best French Silk Pie Recipe
- A subtle sweetness and a rich chocolate taste. I use 100% unsweetened chocolate, which give the pie a deep chocolate flavor without being overpoweringly sweet.
- It is safe for everyone to eat. The eggs are cooked to 160°F in the chocolate mousse filling, which both makes it safe to eat and also creates extra volume. No raw eggs!
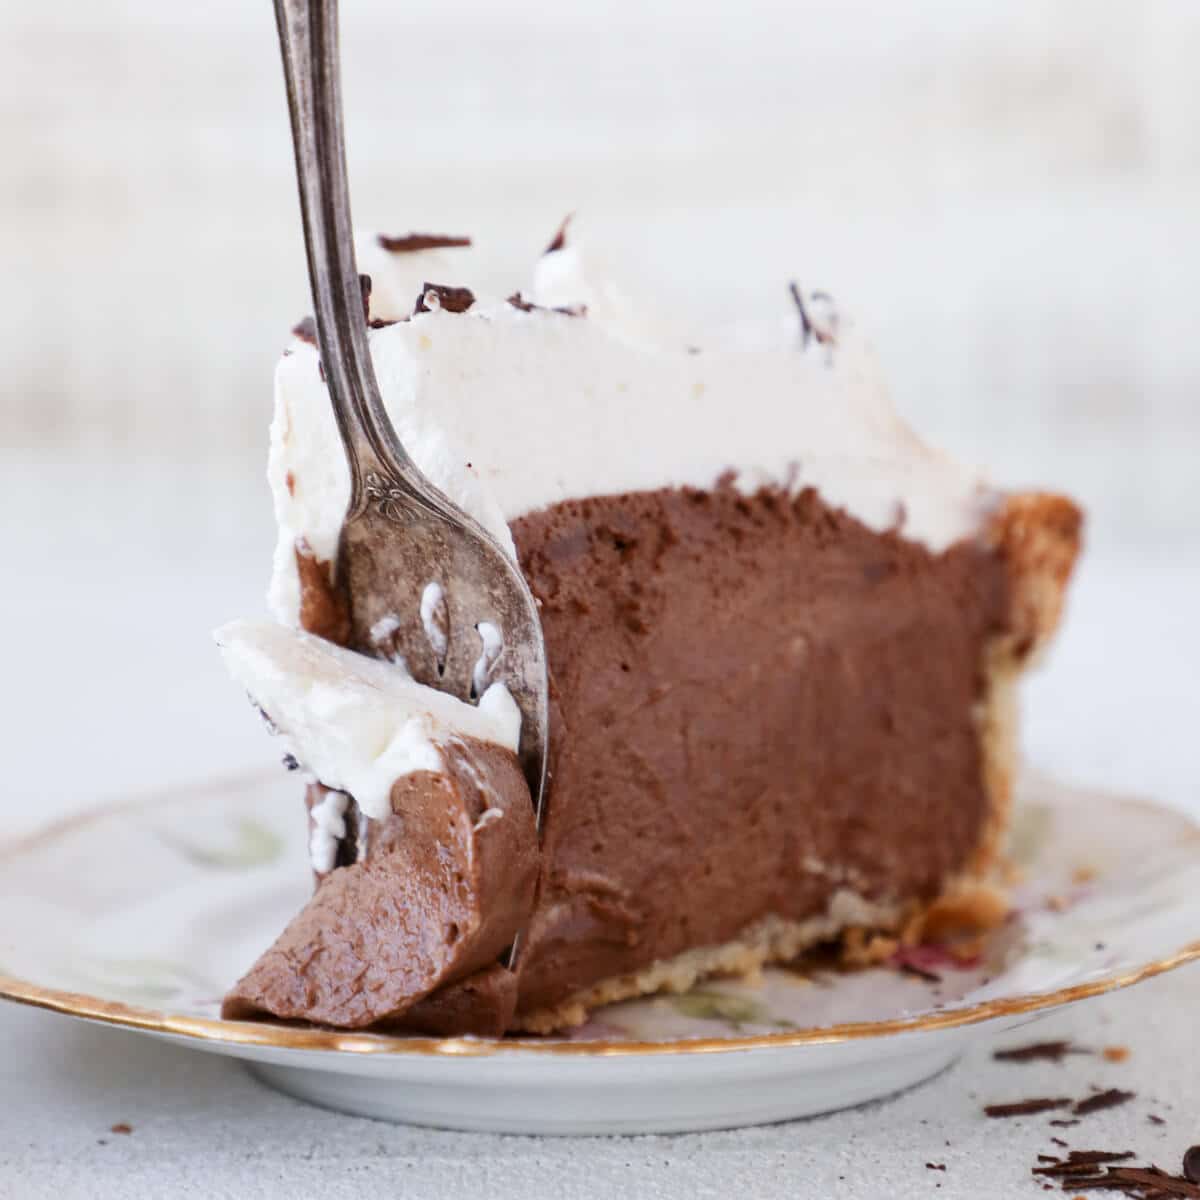
- Professional technique for the lightest, silkiest filling. When lightening the mousse, I sacrifice a little of the whipped cream by folding it aggressively into the chocolate mixture. This helps loosen the chocolate mixture thereby making it easier to fold in the remaining whipped cream and achieve the lightest texture.
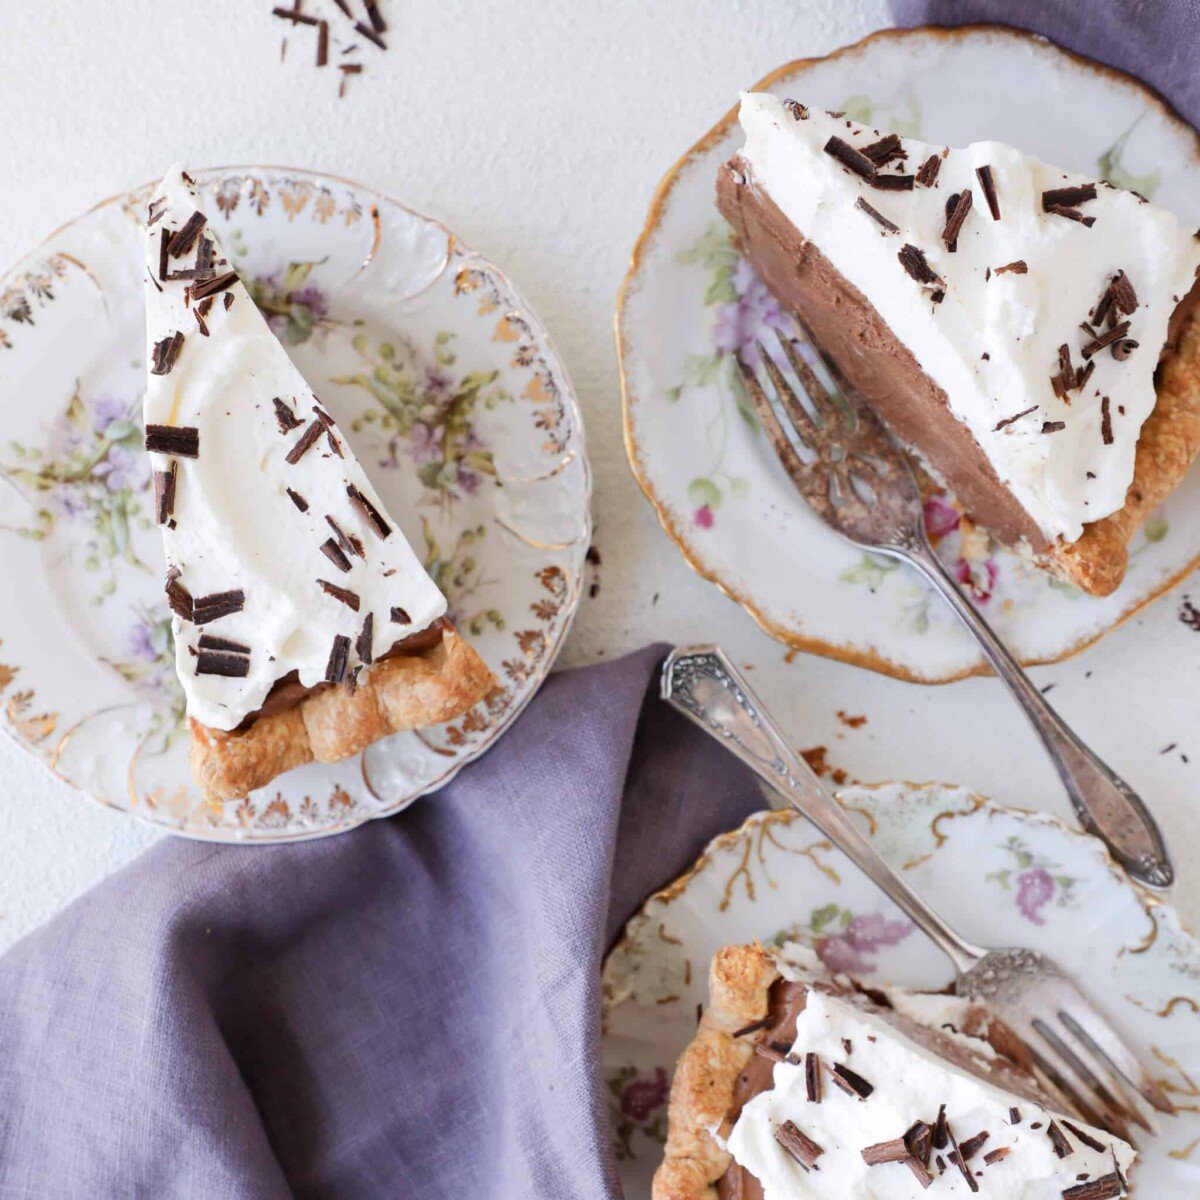
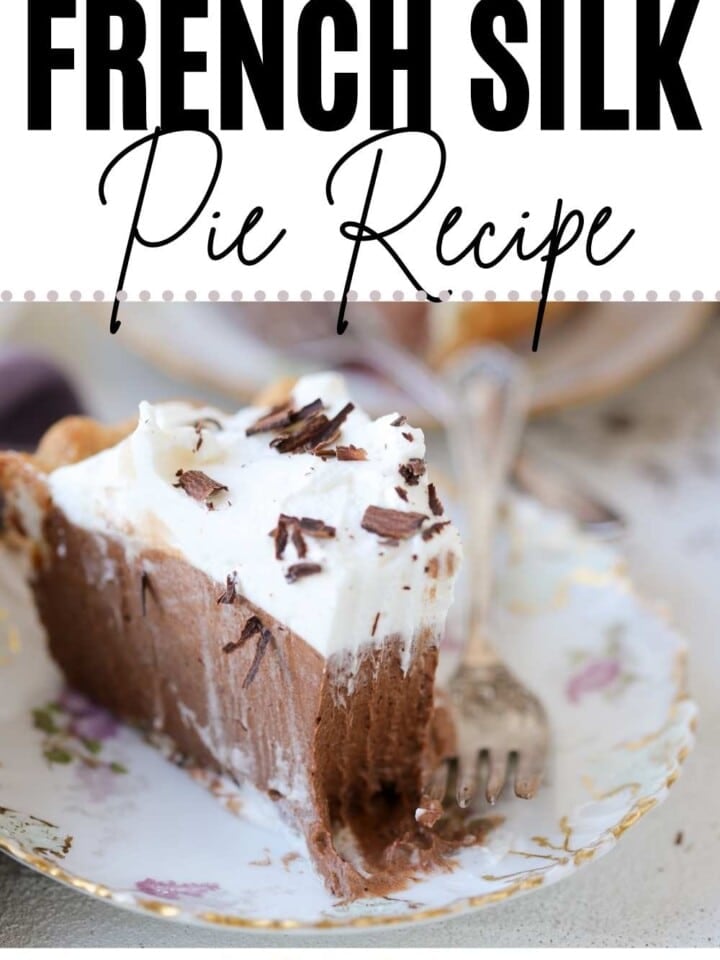
- The whole pie is a balance of flavor and texture. The texture of the flakey, all butter pie crust contrasts the soft filling and it balances the sweetness and richness of the chocolate mousse.
Professional Tips for Making French Silk Pie
- Don’t skip whisking the eggs while they heat. This French technique is called a heated whole egg foam. An egg foam is when sugar and whole eggs are whipped together until tripled in volume. It is most typically seen in cake recipes. The heat further stabilizes the foam.
- Sacrifice a little whipped cream for the greatest volume. It seems counterintuitive, but aggressively fold in about ¼ of the whipped cream into the chocolate filling to loosen it. This will allow you to preserve more of the volume when folding in the rest. I use the same tactic for my white chocolate mousse!
- Whipping cream by hand makes a more stable whipped cream. The alternative is to whip the cream in the bowl of a stand mixer fitted with the whisk attachment on low or medium-low. It will take forever, but it will not weep for a week! Hand mixers are the worst option.
- Let the pie chill thoroughly before slicing. Let the pie chill at least 3 hours before slicing. The egg foam and chocolate are what gives this pie its structure and they need time to set.
Ingredients Needed
- Whole Egg: You know from my Chocolate Mousse Recipe, that the egg in a stirred custard is integral to thickening the mousse. Whisking it first with the sugar protects it from the heat.
- Granulated Sugar: Sugar is here for sweetness but also to add a little leavening when beaten with the eggs and to protect the eggs from the heat.
- Unsweetened Chocolate: I prefer to use 100% unsweetened chocolate to control the sweetness of the mousse. It gives it a deep, rich flavor.
- Vanilla Extract: Vanilla Extract adds a beautiful flavor itself and together with the heavy cream is reminiscent of ice cream.
- Kosher Salt: Kosher salt is less salty than table salt and a teaspoon weighs less than other finer ground varieties. It also heightens the flavor here.
- Butter: Unsalted butter allows you to control the flavor of the mousse while still adding all the buttery goodness! It makes for a very silky, luscious chocolate mousse.
- Heavy Cream: Be sure to use full fat heavy cream, a synonym for this is ‘heavy whipping cream’. Light whipping cream will not whip the same. It will over-whip easily and not be as smooth.
- Confectioner’s Sugar: I use Powdered sugar or confectioner’s sugar to add sweetness, but it also incorporates easily into homemade whipped creams for a silky, smooth texture.
- Single Pie Crust: I used a pâte brisée but you could also use this vodka pie crust, pâte sucrée, Crisco pie crust, or a baked graham cracker crust!
See the recipe card for full information on ingredients and quantities.
Variations & Substitutions
- Make it in an oreo cookie crust instead. For even more chocolate, try making this pie in an oreo crust instead.
- For a sweeter pie more akin to the Bakers Square pie, substitute all or part of the unsweetened chocolate for semi-sweet chocolate bars or chocolate chips.
- Cool whip topping. You can use cool whip topping in place of the whipped cream on top. You can also use it in the filling, but I prefer the flavor and texture of freshly whipped cream.
How to Make French Silk Pie
Use these instructions to make the perfect French Silk Pie every time! Further details and measurements can be found in the recipe card below.
Blind bake the pie crust:
Step 1: Preheat the oven to 350°F convection or 375°F conventional.
Step 2: Line a pie tin with your favorite pie crust. Dock the dough by pressing a fork into the dough about 1 inch apart across the whole bottom. Chill the dough thoroughly before baking.
Step 3: When ready to bake line the inside of the crust with parchment paper and then fill with pie weights or beans. Bake 20 minutes with the weight and then remove the weight and continue baking until the bottom crust has browned.
Allow to cool before assembling the pie. Read more tips and tricks for how to blind bake pie crust in this post.
To make the chocolate mousse filling:
Step 4: In a large heat-proof bowl, whisk together the eggs and sugar. Place bowl over a pot of simmering water being sure that the water does not touch the bottom of the bowl. Whisk constantly until the mixture reaches 160°F.
This will take a little time. Try switching hands, switching directions or calling in a friend. If you aren’t concerned about the eggs, then you can stop at 130°F.
Step 5: Remove from heat and add chopped chocolate and vanilla extract. Cool, stirring occasionally to 90°F. When not stirring, keep a piece of plastic wrap on the surface to prevent a skin from forming.
Step 6: Once the melted chocolate mixture has cooled, beat butter in the bowl of a stand mixer fitted with the paddle attachment until smooth. Add the chocolate mixture and beat until smooth and incorporated.
Step 7: Whisk heavy cream (for the filling) to medium soft peaks either in the bowl of a stand mixer fitted with the whisk attachment or in a large bowl by hand.
Medium soft peaks are when the whisk is removed from the cream and inverted and the peak formed flops over considerably. Not just the tip but about half of the peak falls to one side.
Step 8: Add no more than ¼ of the whipped cream to the chocolate mixture and mix it in aggressively. This is called sacrificing because you are sacrificing all of the volume in a small portion of the cream to get the chocolate mixture to a lighter consistency. This will make it easier to fold the remaining cream into the chocolate.
Step 9: Fold remaining cream into the chocolate mixture. Pour into baked crust. Chill 3 hours of overnight.
Make the whipped cream topping:
Step 10: In the bowl of a stand mixer or a large bowl, combine heavy cream (for the topping), confectioner’s sugar, and vanilla extract. Whip to stiff peaks either in the stand mixer fitted with the whisk attachment or by hand with a whisk or hand mixer.
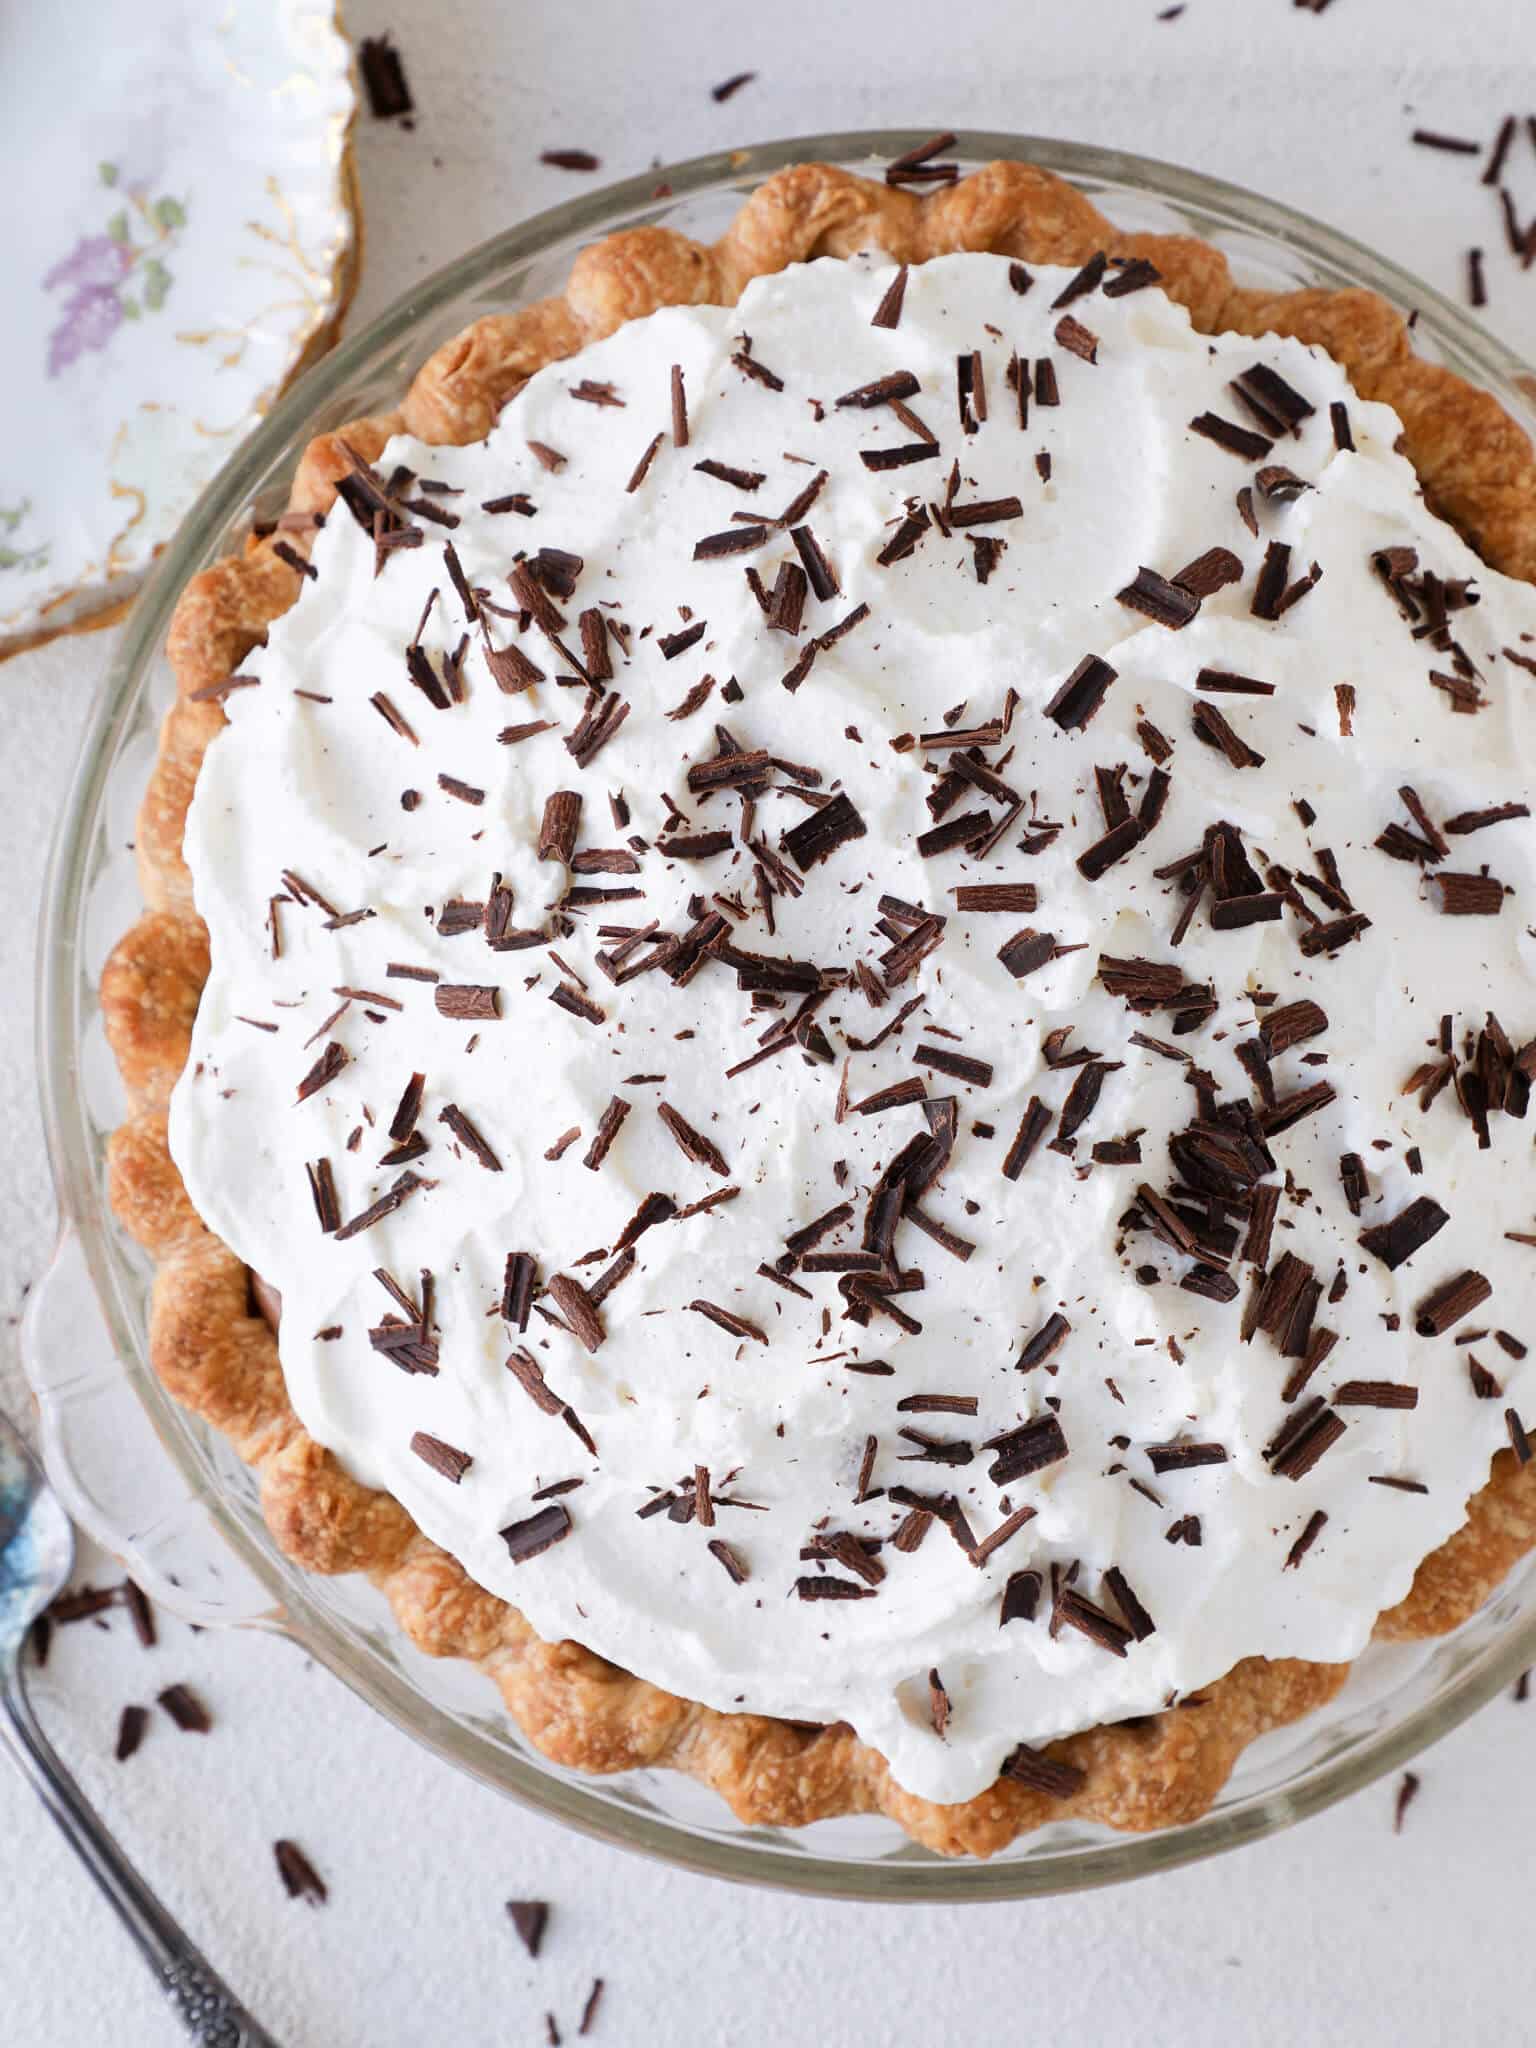
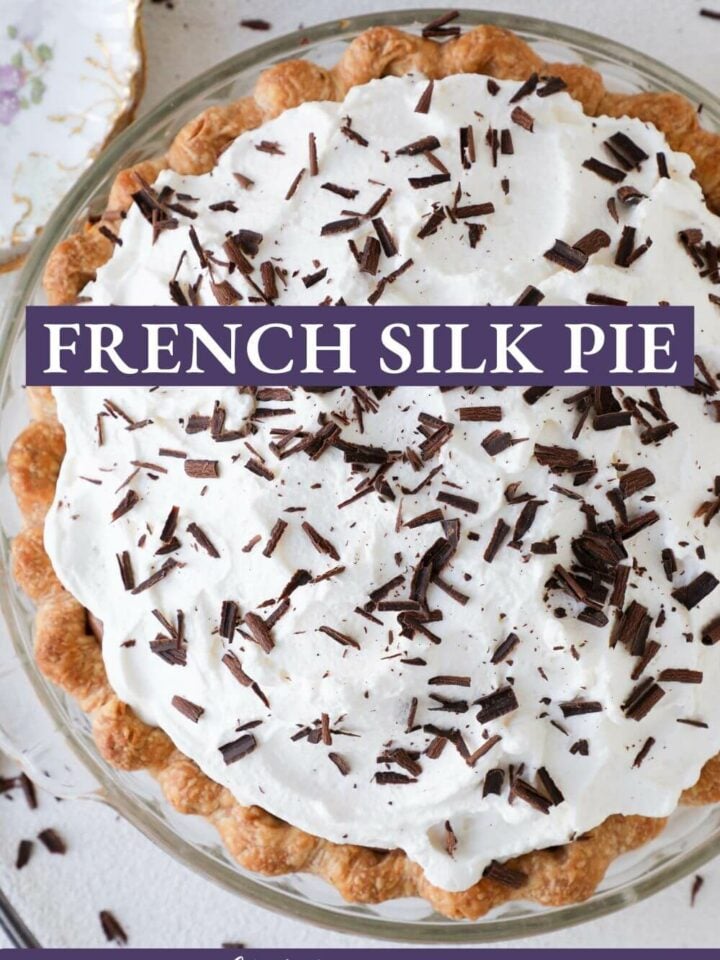
Step 11: Mound the whipped cream on top of the chocolate filling and finish with decorative swooshes or swirls. I used the back of a spoon to make the ones pictured.
Top with shaved chocolate or decorate with décor that you can make by tempering chocolate using the ice bath method.
Chef Lindsey’s Recipe Tip
This is one of those desserts that requires a bit of patience and a lot of dishes! If rushed, it will fall a little short (still delicious), but if each step is performed with intention, it will be exceptional.
Frequently Asked Questions
This French Silk Pie is safe to eat during pregnancy because the eggs are cooked to 160°F. If you are at all concerned, simply use pasteurized eggs.
Store French Silk Pie in the refrigerator covered with plastic wrap for up to a week or 2 months frozen.
This pie freezes magnificently. I would suggest freezing just the chocolate mousse in the crust and then adding the whipped cream before serving. You could also use cool whip topping instead of the whipped cream, which does freeze and thaw well.
Thaw French Silk pie uncovered in the refrigerator. This will keep the condensation from making the crust soggy and accumulating moisture on the filling.
For the most even baking, you should dock the crust for this French Silk Pie. See my tutorial about how and when to dock a pie crust for more details!
What to eat with French Silk Pie?
French Silk Pie is a complete and satisfying dessert on its own, but a bit of chocolate fudge sauce never hurt anyone! We came for the chocolate after all! You could also be a rebel and bake this streusel topping to crumble on top instead of the whipped cream.
If you tried this recipe and loved it please leave a 🌟 star rating and let me know how it goes in the comments below. I love hearing from you; your comments make my day!
French Silk Pie
Ingredients
Filling:
- 4 whole eggs
- 1 ½ cups granulated sugar
- 6 oz unsweetened chocolate chopped
- 1 ½ teaspoons vanilla extract
- ½ teaspoon kosher salt
- ½ cup unsalted butter
- 1 ½ cups heavy cream
Topping:
- 1 cup heavy cream
- 2 tablespoons confectioner’s sugar
- 1 teaspoon vanilla extract
1 All-Butter Pie Crust, blind baked:
- 1 ⅛ cups all-purpose flour measured by fluffing the flour then spooning it in, ⅛ cup = 2 Tablespoons
- ½ teaspoon kosher salt
- ½ teaspoon sugar
- 4 ½ tbsp unsalted butter cubed into ½ inch cubes
- 1 ⅛ oz cold water or as much or as little as needed
Instructions
Make the all-butter pie crust:
- Whisk together flour, salt and sugar. Using your preferred method cut in the butter until you have pea sized pieces. If you are using the stand mixer or food processor, leave slightly larger pieces.
- Slowly begin to add your ice water a tablespoon at a time.
- When your dough is shaggy, which means it looks like shards or strands of pastry, and there is still some loose flour, turn out your dough from the mixer or food processor and work the dough together by gathering it and pressing away from you with the heal of your hand. Do this JUST until it comes together. If it is crumbling, then dip your hand in a little ice water and pat it on the pastry dough.
- Press into a disk. Wrap in plastic wrap and chill for 2 hours or overnight. If you chill your dough overnight, you will need to let it rest a bit before rolling or it will be too cold and it will crack.
- Roll the dough out to ⅛ inch thick.
Blind bake the pie crust:
- Preheat the oven to 350°F convection or 375°F conventional.
- Line a pie tin with the pie dough, rolling the edges under and them crimping decoratively or pressing a fork tines to create a design. Dock the dough by pressing a fork into the bottom of the dough about 1 inch apart.
- Chill the dough thoroughly before baking.
- When ready to bake line the inside of the crust with parchment paper and then fill with pie weights or beans. Bake 20 minutes with the weight and then remove the weight and continue baking until the bottom crust has browned.
- Allow to cool before assembling the pie.
To make the filling:
- In a large heat-proof bowl, whisk together the eggs and sugar. Place bowl over a pot of simmering water being sure that the water does not touch the bottom of the bowl. Whisk constantly until the mixture reaches 160°F.
- Remove from heat and add chopped chocolate, vanilla extract, and kosher salt. Cool, stirring occasionally to 90°F. When not stirring, keep a piece of plastic wrap on the surface to prevent a skin from forming.
- Once chocolate mixture has cooled, beat butter in the bowl of a stand mixer fitted with the paddle attachment until smooth. Add the chocolate mixture and beat until smooth and incorporated.
- Whisk heavy cream (for the filling) to medium soft peaks either in the bowl of a stand mixer fitted with the whisk attachment or in a large bowl by hand. Medium soft peaks are when the whisk is removed from the cream and inverted and the peak formed flops over considerably. Not just the tip but about half of the peak falls to one side.
- Add no more than ¼ of the whipped cream to the chocolate mixture and mix it in aggressively. This is called sacrificing because you are sacrificing all of the volume whipped into the cream to get the chocolate mixture to a lighter consistency. This will make it easier to fold the remaining cream into the chocolate.
- Fold remaining cream into the chocolate mixture.
- Pour into baked crust. Chill 3 hours.
Make the Topping:
- In the bowl of a stand mixer or a large bowl, combine heavy cream (for the topping), confectioner’s sugar, and vanilla extract. Whip to stiff peaks either in the stand mixer fitted with the whisk attachment or by hand with a whisk or hand mixer.
- Mound the whipped cream on top of the chocolate filling and finish with decorative swooshes or swirls. I used the back of a spoon to make the ones pictured.
- Top with shaved chocolate or decorate with chocolate décor.
Video
Notes
Nutrition
Before You Go!
Check out our other delicious, chef-developed Pie Recipes or perhaps more chocolate recipes!


This pie was definitely worth all that whisking. The chocolate mouse filling is the best I’ve ever had. I love that the pie isn’t too sweet and that I, being pregnant, could enjoy this pie without worry. Thank you!
This is NOT French silk pie.
French Silk Pie does have lots of regional variations, and not every version looks the same. I know some recipes use semi-sweet chocolate or even uncooked eggs, but I wanted to make a deeply chocolatey pie with a cooked filling that’s safe for everyone. That’s the version I tested and perfected here. Enjoy!
Always someone with something negative to share. Are you the French silk pie police?
Hi Beth! Thank you for the support! Happy baking!
I bet you’re a delight at parties
Hello, I made this for the first time today! My family hasn’t tried any yet but will very soon. I noticed the filling called for kosher salt but I didn’t see when to add it, in the directions. I added it at the end just before folding in the whipping cream. I’m thinking I could’ve added it in the beginning when the filling was still warm?
Hi Alicia! Great question! You didn’t hurt anything by adding the salt at the end, but I usually take it off heat and add chocolate, salt, and vanilla. Adding it at that stage helps it dissolve fully while the mixture is still warm. Either way your pie will be delicious, and I’ll update the recipe right away!
It’s a easy to follow step by step recipe
Good flavor
Hi Greg! Glad you enjoyed!