This post may contain affiliate links. Please read our disclosure policy.
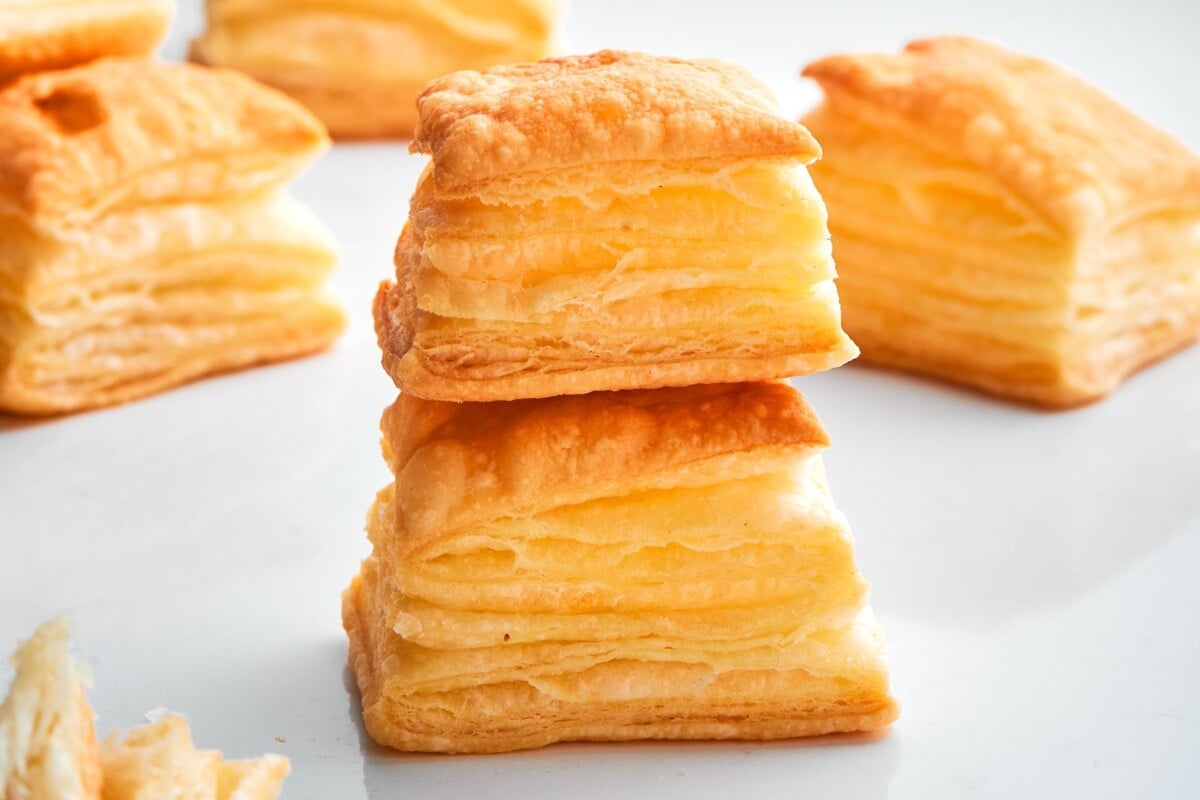
This puff pastry recipe builds crisp, flaky layers with pure butter flavor! Careful lamination and professional technique ensure reliable rise and delicate texture.


A Quick Look At The Recipe
This is a brief summary of the recipe. Jump to the recipe to get the full details.
Jump to RecipePrep Time
2 hours
Chill Time
1 hour 30 minutes
Total Time
3 hours 30 minutes
Servings
12 servings
Difficulty
Intermediate but very manageable with patience and cold butter.
Calories *
355 kcal per serving
Technique
Create a détrempe and beurrage, enclose the butter, and perform 6 single folds with chilling between turns.
Flavor Profile
Deeply buttery, crisp, delicately flaky layers.
* Based on nutrition panel
I followed your note about keeping the butter cold but pliable and that changed everything. I slowed down between turns like you suggested and the layers baked up beautifully. I used half for a tart and froze the rest. So flaky! Thanks, Chef! ⭐⭐⭐⭐⭐
Lauren
Why You Will Love This Recipe
- Six single turns build structure. Proper lamination creates dozens of distinct butter layers that separate dramatically in the oven.
- Balanced flour blend. Cake flour keeps it tender while AP flour provides enough strength to hold those layers.
- Cold, pliable butter. This ensures clean layers instead of streaking or blending into the dough.The end result tastes richer than anything from the grocery store!
- Professional method at home. This is the same foundation I use for tarts, twists, and savory pastry. Simple ingredients and careful lamination create consistently flaky pastry.
Table of Contents
When my culinary school closed, I was fortunate enough to buy their old dough sheeter. It’s not glamorous, but it rolled hundreds of pie crusts and laminated doughs. Even without a sheeter, this dough behaves beautifully by hand — you just have to respect it.
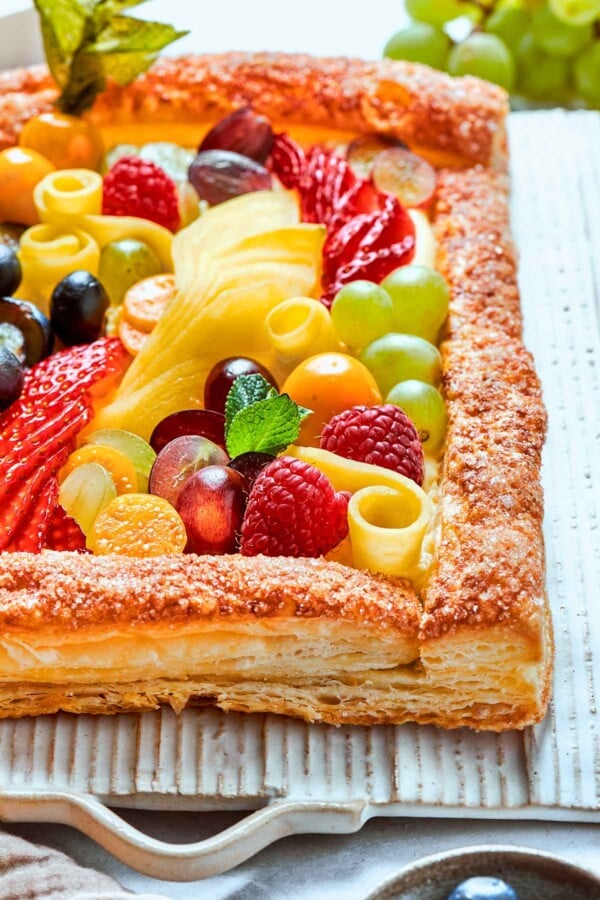
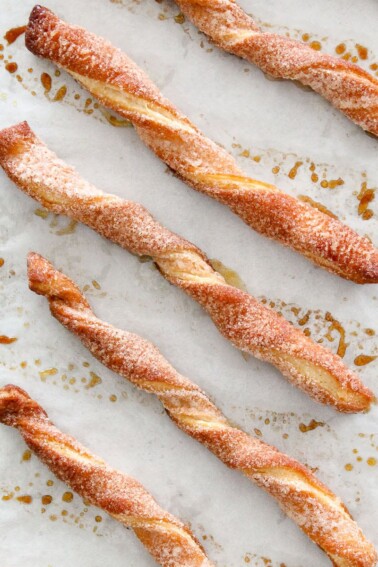
Mastering puff pastry dough at home gives you control over the end result, and that’s when the fun begins! You can use it for a stunning puff pastry fruit tart, crisp cinnamon sugar twists, serve it with brown sugar pecan stuffed pears, or wrap it around tenderloin for this beef wellington recipe. It’s one dough, endless possibilities.
Ingredients & Substitutions
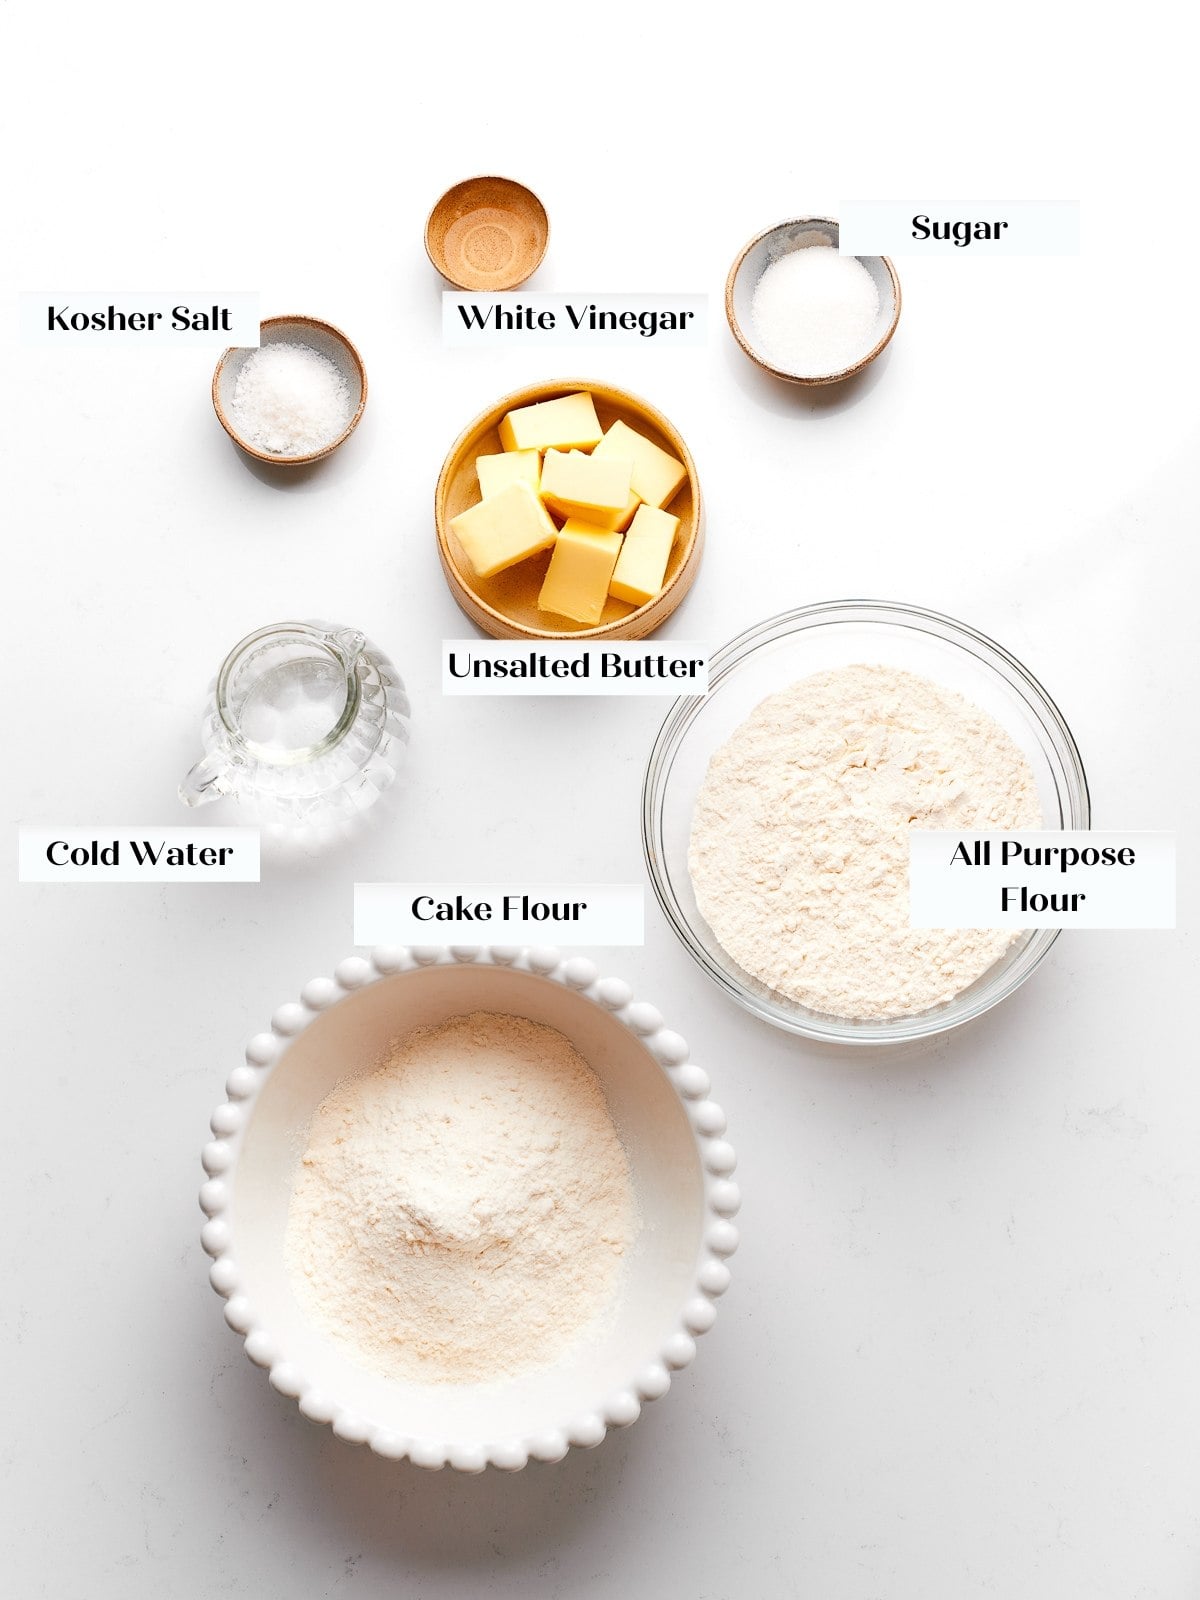
- Water (cold): Keeps the dough cool from the start and slows gluten development.
- White Vinegar: A touch of acidity helps tenderize the dough.
- Kosher Salt: Essential for flavor and strengthening gluten structure.
- Beurre en pomade (softened butter): Incorporated into the détrempe for flavor and slight tenderness.
- Sugar: Just enough to round out the flavor.
- Cake Flour: Low protein keeps the pastry delicate.
- All-Purpose Flour: Adds enough strength for structure.
- Butter (cold but pliable): The beurrage. This is what creates the layers. Use high-quality unsalted butter, preferably European butter, for richer flavor.
See the recipe card below for full ingredients and quantities.
Variations on My Professional Puff Pastry
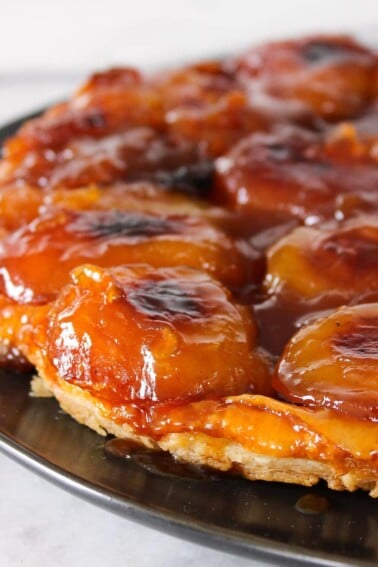
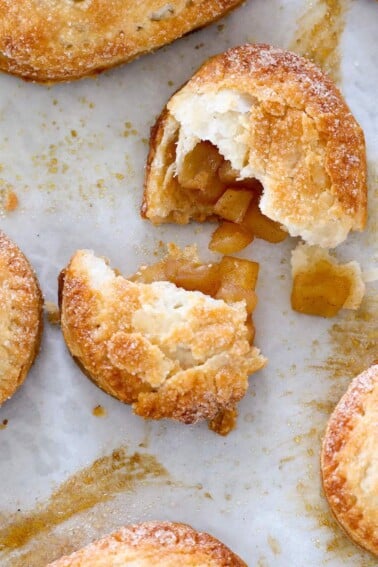
- Make your puff sweet! For a dramatic French dessert, bake this dough into an apple tarte tatin with caramelized apples. You could cut it into squares and fold into apple turnovers with the cinnamon filling from my apple hand pies. Or, sprinkle it with sugar and twist into exceptional palmiers cookies (coming soon!) with deep caramel flavor (stay tuned for more details!).
- Layer it with cream. Fill baked layers with my silky vanilla bean pastry cream recipe for a simple mille-feuille style dessert. Another option is to layer baked rectangles into classic napoleons and fill with crème légère (a lightend pastry cream) like cream puffs.
- Try inverse lamination. For even more dramatic lift, explore inverse puff pastry, where the butter wraps the dough instead.
Professional Tips
While store-bought puff pastry from the grocery store is convenient, homemade gives you superior lift just like with homemade pâte à choux!
- Never rush the turns. Two folds at a time, then chill. More than that and the butter softens too much.
- Keep butter pliable, not hard. If it cracks while rolling, it’s too cold. If it squishes out, it’s too warm.
- Roll evenly. Uneven thickness creates uneven lift.
- Always chill before baking. Cold dough equals maximum lift.
How to Make This Puff Pastry Recipe
Use these instructions to make perfect puff pastry every time. Full measurements are in the recipe card below.
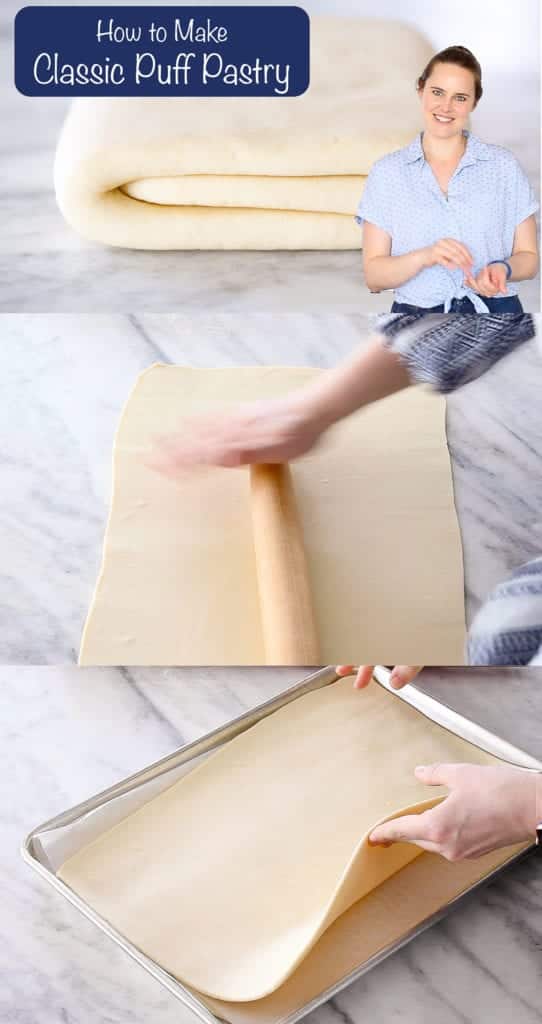
Step 1: Prepare parchment square. Fold parchment into a 6.5-inch square and set aside.
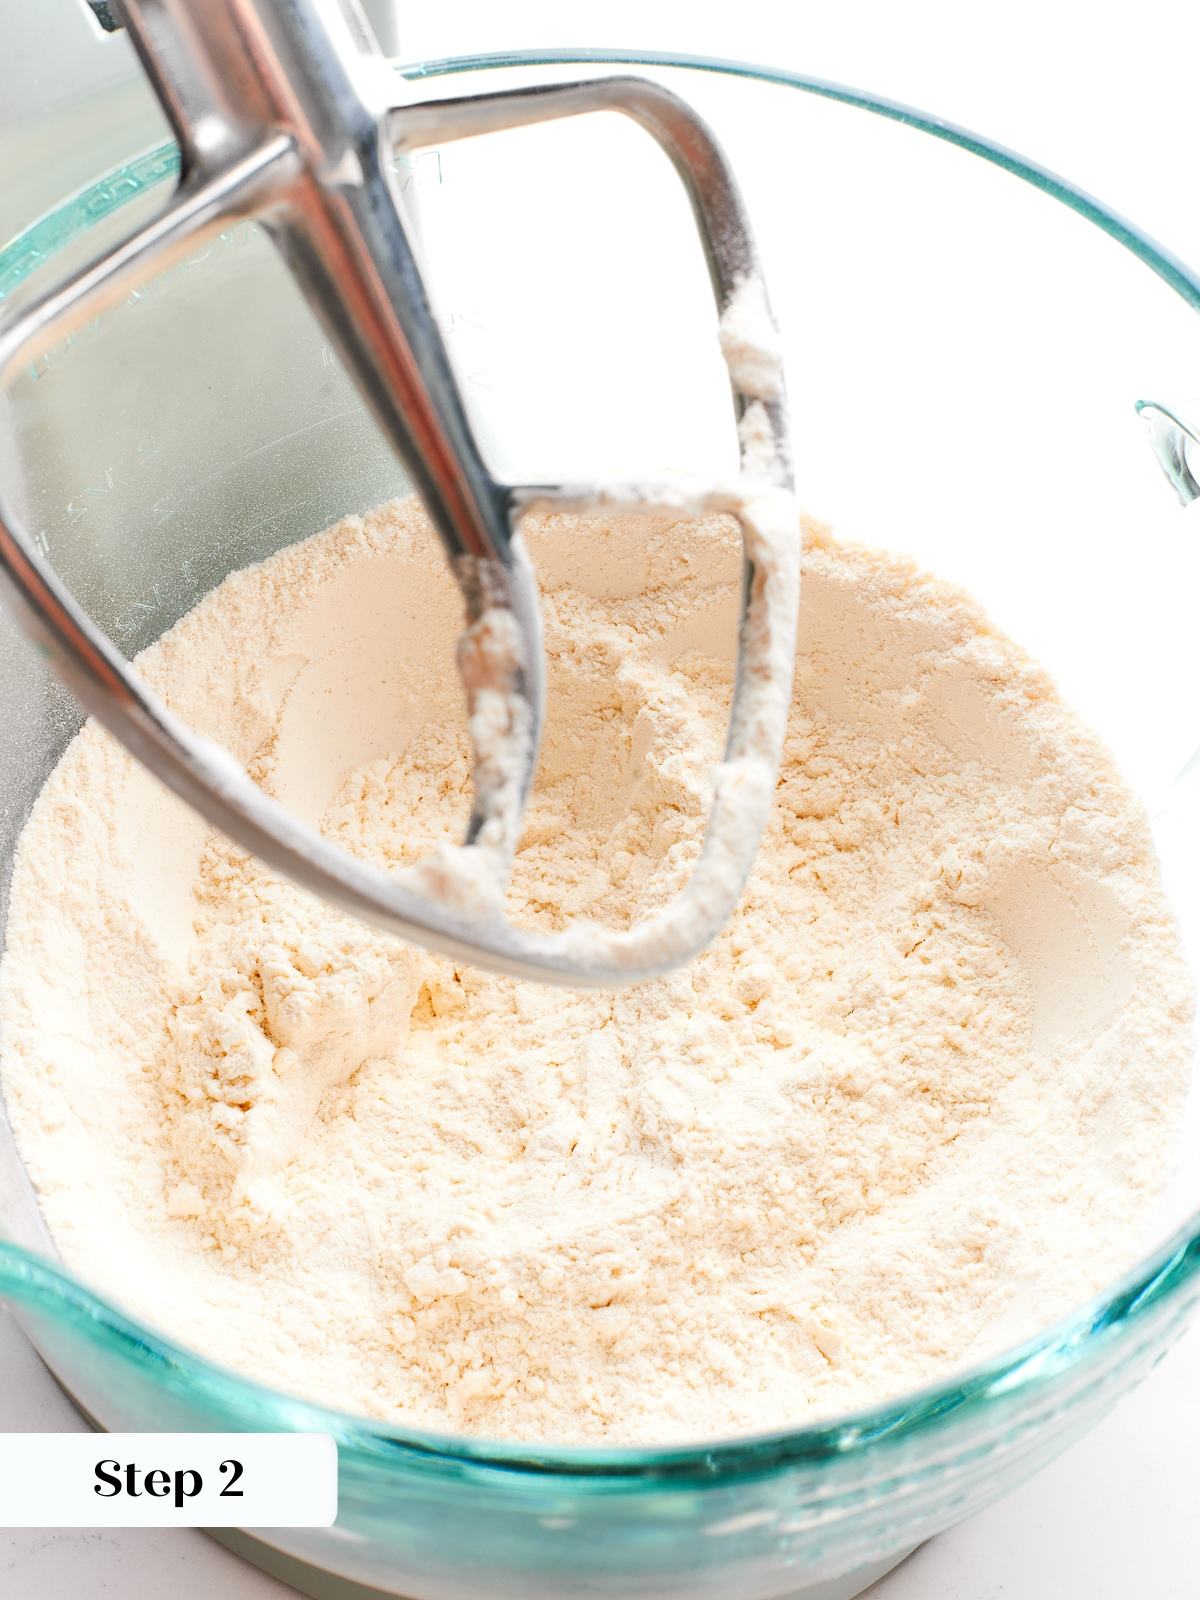


Step 2: Mix dry ingredients. Combine cake flour, AP flour, salt, and sugar in a stand mixer fitted with the paddle attachment (photo 1).
If not using a stand mixer, combine ingredients in a large mixing bowl.
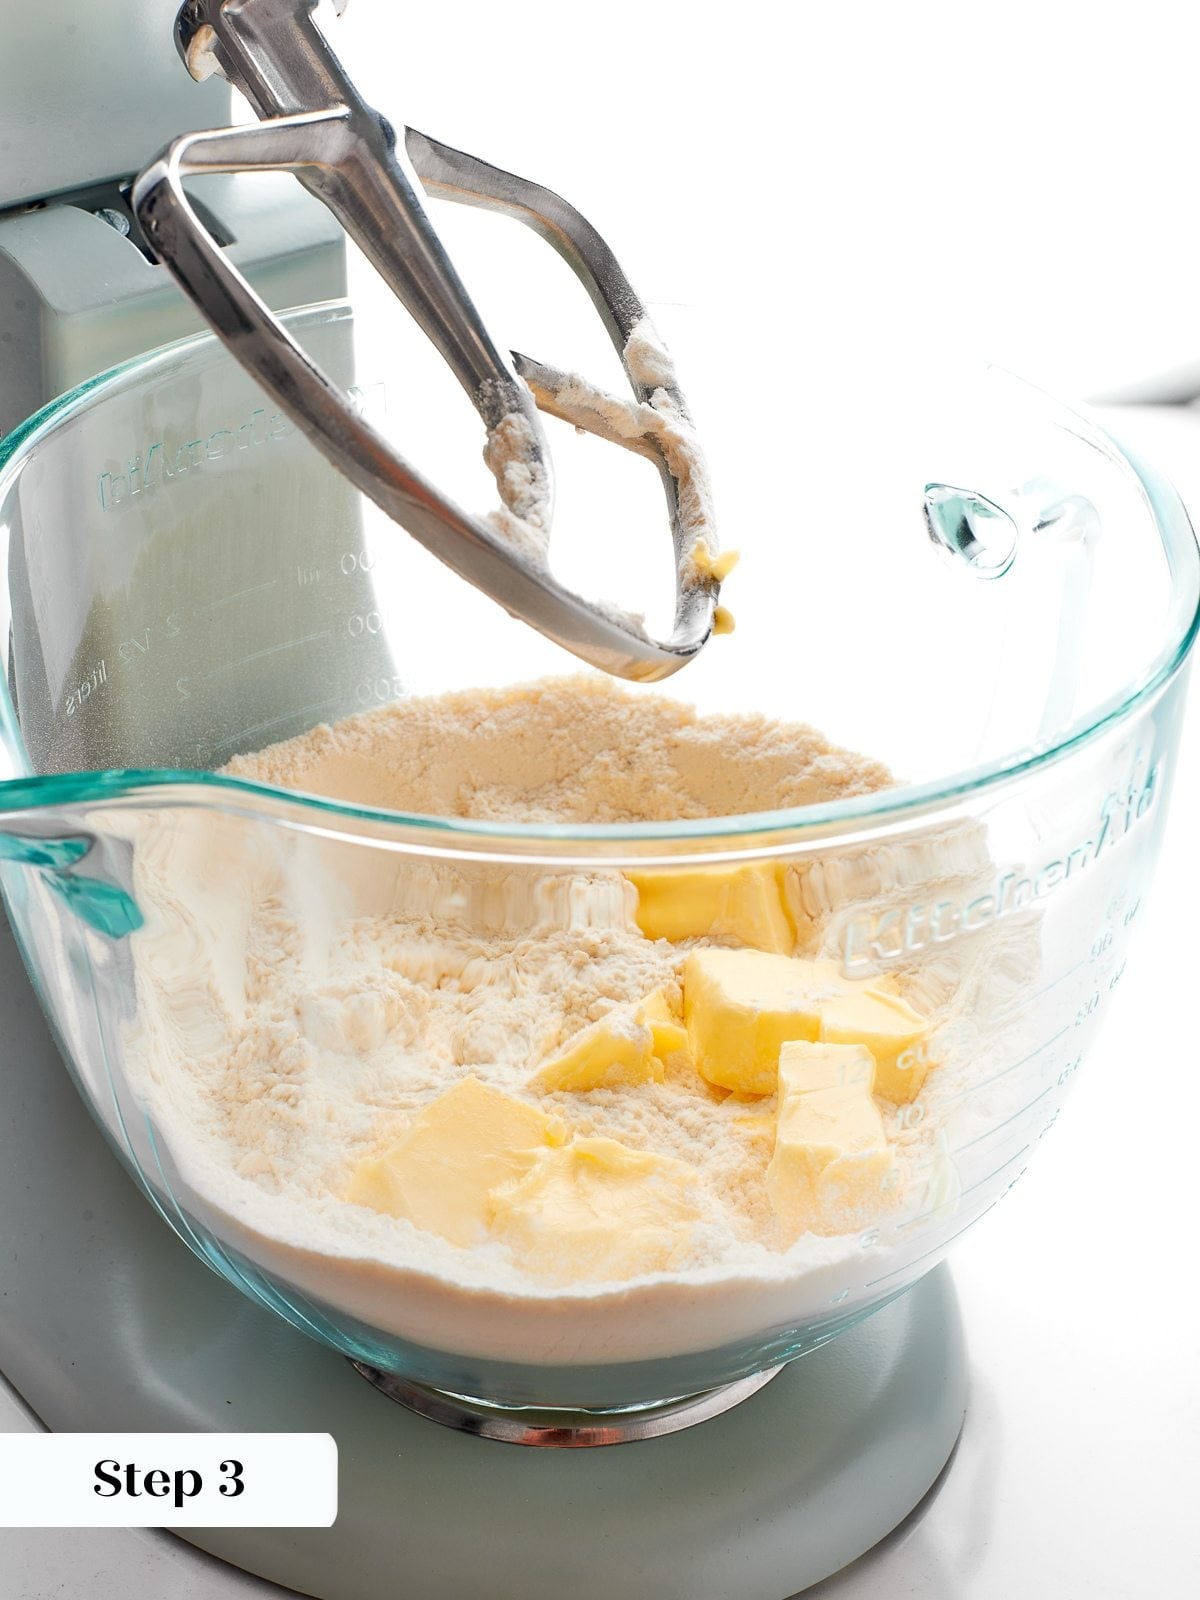
Step 3: Cut in butter. Add the softened butter and mix until no visible butter remains (photo 2).
A food processor can mix the détrempe quickly without warming the butter.
Step 4: Add liquids. Combine cold water and vinegar. With the mixer on low, pour into the flour mixture and mix until dough forms (photos 3 & 4).


Step 5: Knead gently. Turn onto an unfloored surface and knead lightly until no dry bits remain (photo 5).
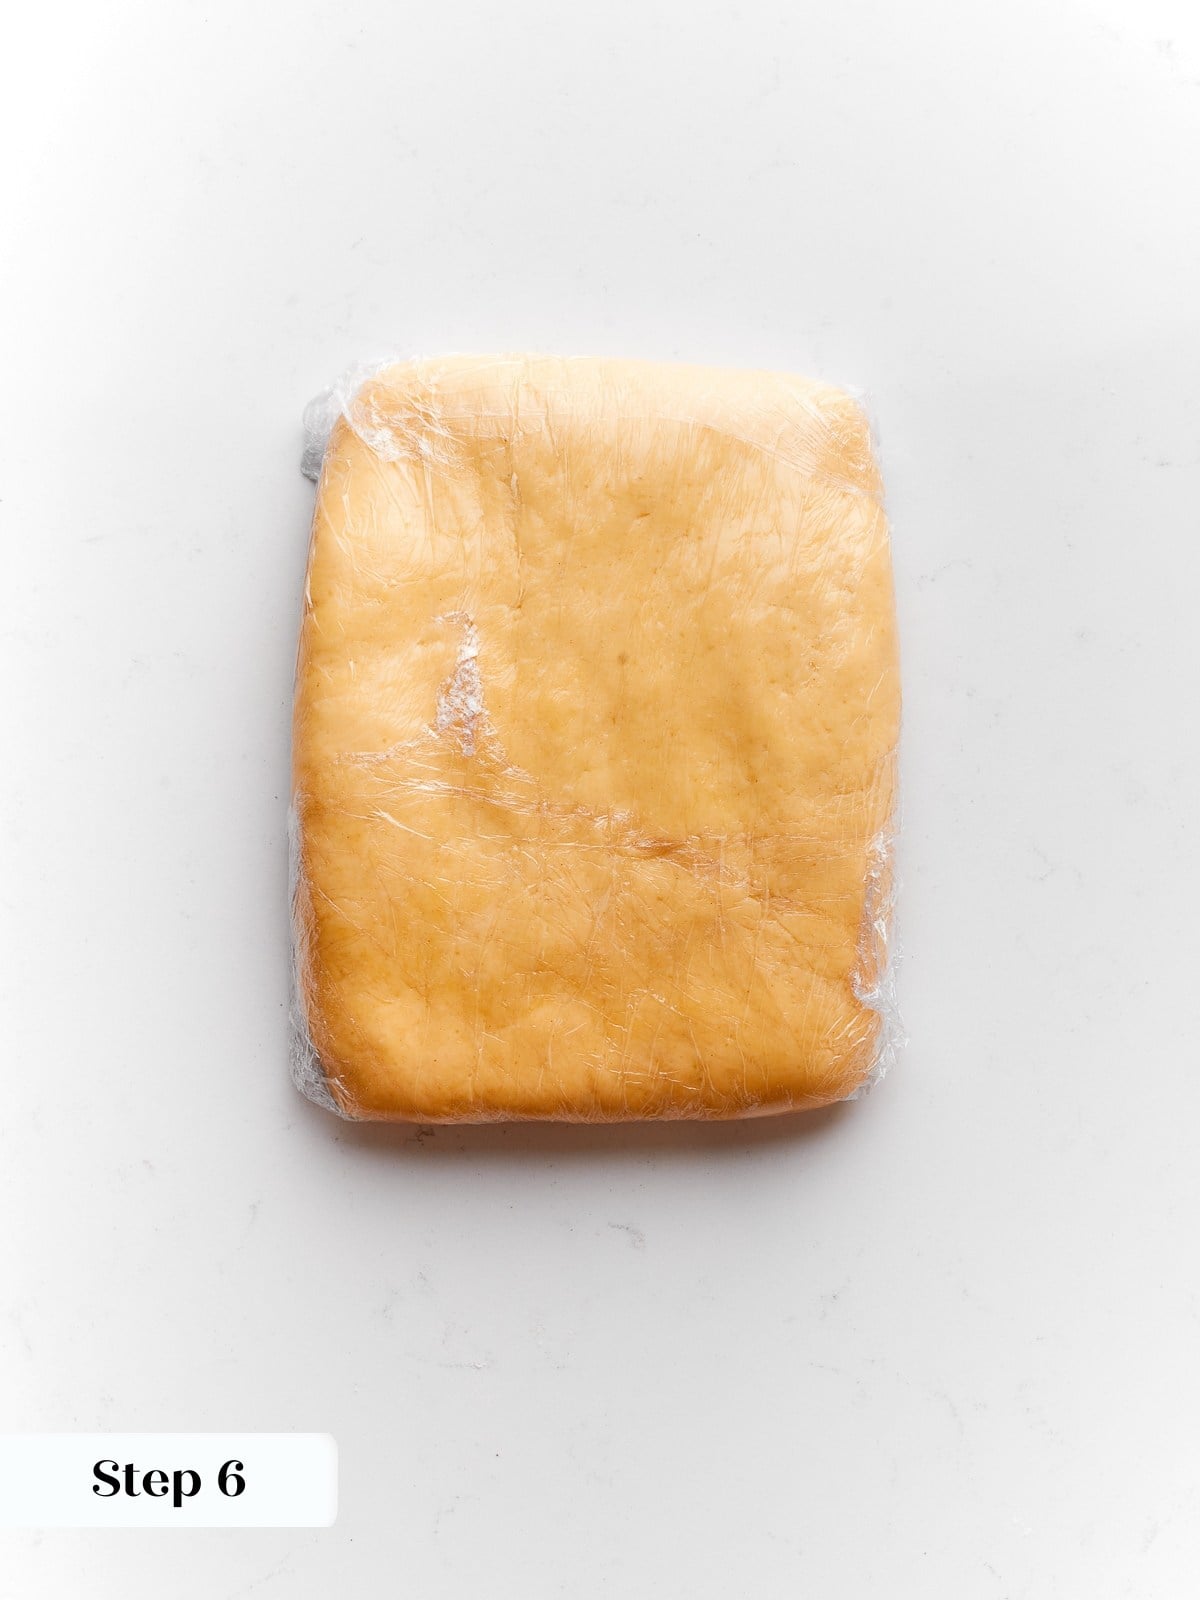
Step 6: Chill détrempe. Press into a 10-inch square, wrap, and chill for 30 minutes (photo 6).
Step 7: Prepare beurrage. Beat butter with a rolling pin until cold but pliable. Roll inside parchment into a 6.5-inch square (photos 7 & 8).


Step 8: Enclose butter. Roll dough to ⅛ inch thick. Place butter inside dough and fold corners over to seal (photos 9-11).


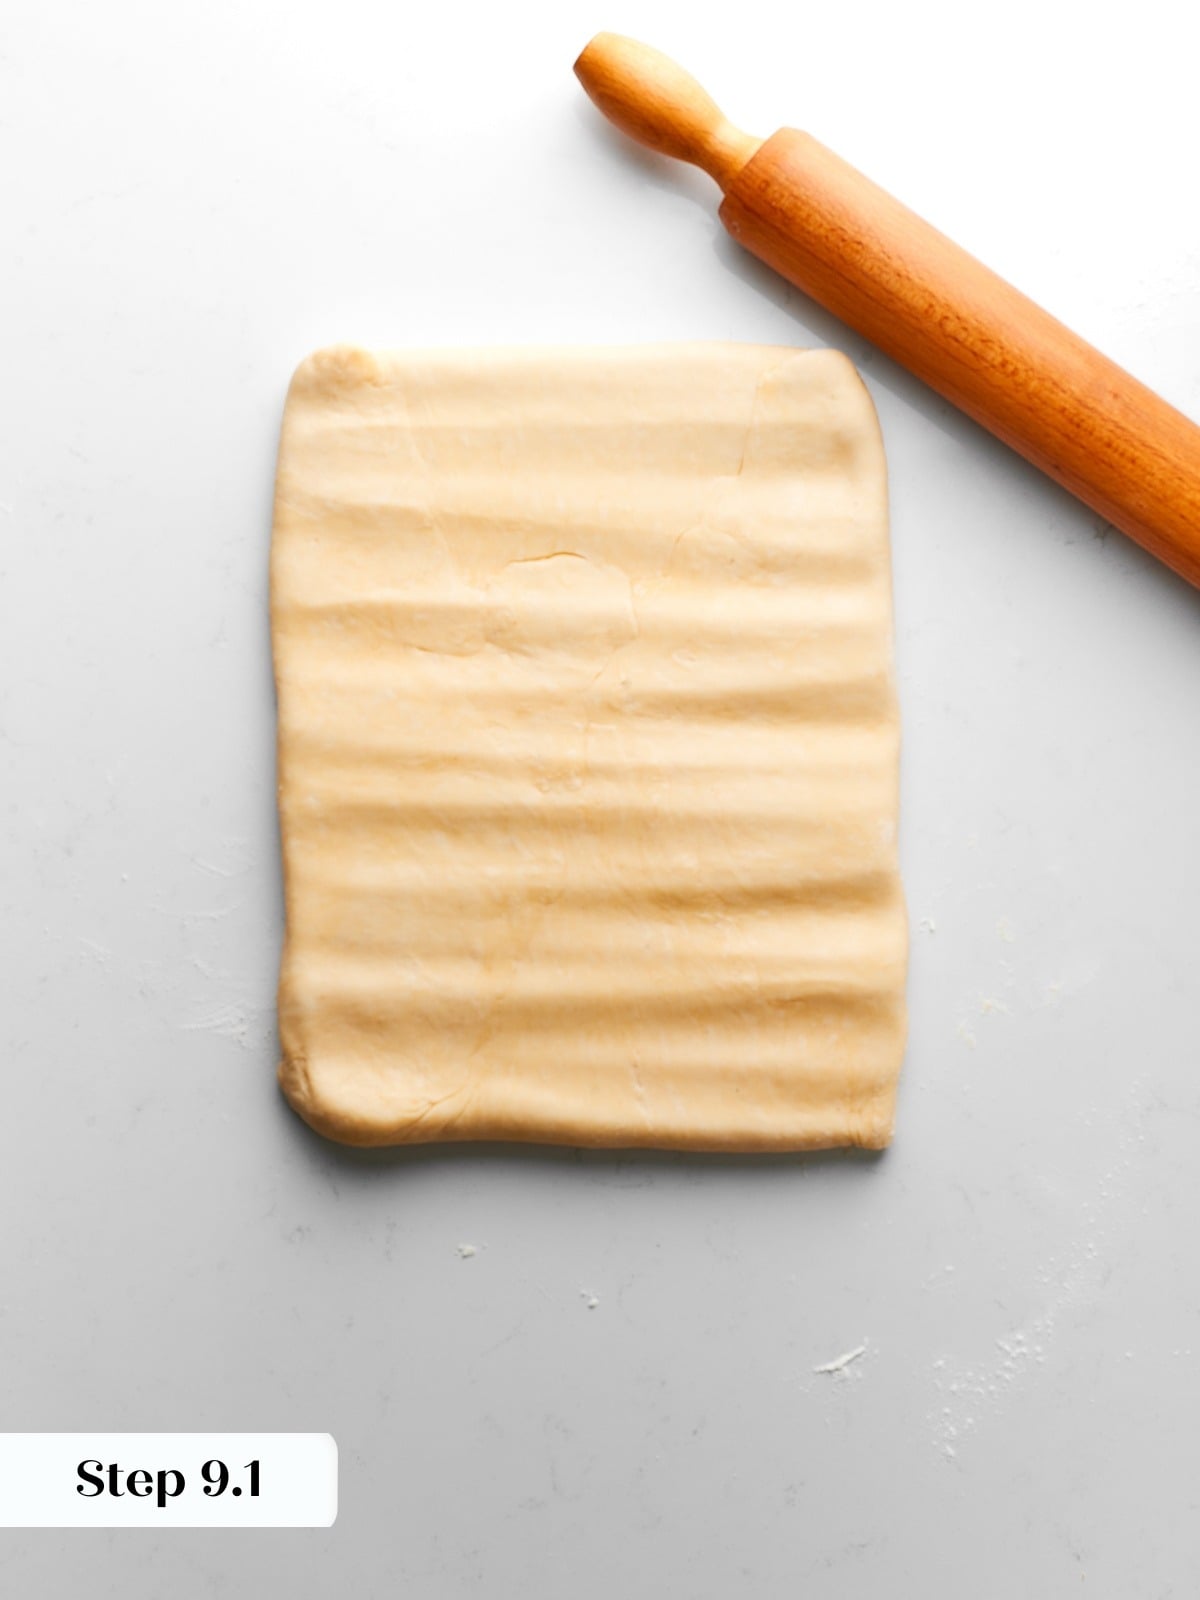
Step 9: First envelope fold. Roll dough to 18 x 7 inches. Fold like a letter. This is one single turn (photos 12-14).
Always roll on a lightly floured surface to prevent sticking. Keep the short edges squared for even lamination.
Step 10: Second envelope fold. Roll again and repeat the envelope fold. Wrap and chill for 30 minutes (photos 15 & 16).
Step 11: Repeat turns. Perform two more sets of two single folds, chilling 30 minutes between sets (6 total single turns).


Step 12: Final chill. Chill at least 2 hours or overnight (overnight is best) (photo 17).
Step 13: Roll to thickness. Roll to 1/8 inch thick, chilling as needed to prevent shrinking (photos 18 & 19).
Use a very sharp knife to cut clean edges. These puff pastry sheets can be trimmed to fit any tart pan!
Step 14: Chill before baking. Chill at least 30 minutes after shaping. Bake at 375°F (preferably convection) until deeply golden (photo 20).
Chef Lindsey’s Recipe Tip
If I could distill this puff pastry recipe into one rule: keep it cold and keep it flat. Lamination only works if the butter stays distinct from the dough. Don’t rush it. You can also watch the full lamination technique in my classic puff pastry video tutorial!
Recipe FAQs
If this puff pastry recipe didn’t rise, the most common causes are warm butter, over-handling during rolling, or skipping the final chill before baking. Puff pastry rises because cold butter turns to steam in a hot oven, separating the laminated layers. If the butter melts into the dough before baking, those steam pockets cannot form, and lift is reduced.
Yes you can! Overnight chilling improves flavor and performance. You can actually freeze it if you need to. Wrap tightly and freeze for up to 2 months. Thaw overnight in the refrigerator before using.
Yes! Wrap it tightly and refrigerate for up to 3 days.

Recommended Uses of Homemade Puff Pastry
Pies and Tart Recipes
Puff Pastry Fruit Tart
Cookie Recipes
Cinnamon Twist Recipe
Pies and Tart Recipes
Apple Tarte Tatin
Summer Dessert Recipes
Apple Hand Pies
Puff Pastry
Ingredients
Détrempe (the dough part):
- ⅔ cups water cold
- 1 teaspoon white vinegar
- 1 tablespoon kosher salt
- 8 ½ tablespons beurre en pomade softened butter
- 1 tablespoon sugar
- 1 ⅔ cups cake flour
- 1 ½ cups all purpose flour
Beurrage (the butter part):
- 1 ⅔ cups unsalted butter cold but pliable
Instructions
- Fold parchment into a 6.5-inch square and set aside.
- Combine cake flour, AP flour, salt, and sugar in a stand mixer. Add softened butter and mix until evenly incorporated.
- Combine water and vinegar. With the mixer on low, add to the flour mixture and mix until a dough forms.
- Turn out and knead gently until no dry bits remain. Shape into a 10-inch square. Wrap and chill for 30 minutes.
- Beat butter lightly and roll into the 6.5-inch parchment square.
- Enclose butter in dough and seal.
- Roll to 18 x 7 inches. Perform one envelope fold.
- Roll again and perform a second envelope fold. Chill for 30 minutes.
- Repeat two more sets of two folds, chilling 30 minutes between sets (6 total single folds).
- Chill at least 2 hours or overnight.
- Roll to 1/8 inch thick. Chill before baking.
- Bake at 375°F until golden and puffed.
Video
Notes
- Yield – One 18 x 24 inch sheet
- Technique – Keep butter cold but pliable
- Variations – Sweet or savory applications
- Storage – Refrigerate 3 days or freeze 2 months
Nutrition
Before You Go
If butter is your love language, you’ll love French desserts. Try this beautiful mille crepe cake next or head the savory direction and make these cheesy gougères.


I followed your note about keeping the butter cold but pliable and that changed everything. I slowed down between turns like you suggested and the layers baked up beautifully. I used half for a tart and froze the rest. So flaky! Thanks, Chef!
I found your video very helpful! I had it on repeat as I made my puff pastry and I have to say I’m pretty proud of how it turned out! I used it to make a mille-feuille, which is my father-in-law’s favorite dessert, and everyone loved it! Thank you for all the tips and tricks.
Hi, are you able to freeze the dough to use at a later time?
Hi Elora! Yes, you can always have perfect puff at the ready!
Step 1: Freeze it in sheets between parchment paper and wrap it really, really well.
Step 2: Pull out one sheet at a time whenever a need arises.
Happy baking!
Worked perfectly! Used this to make a Wellington and it was a delight!
Wow! Props to you! Beef wellington with homemade puff pastry! You are amazing!
Loved the video–so informative, but a couple of questions:
You speak of “temping” the dough. Is that to let it warm up slightly after removing it from frig before rolling so it doesn’t tear?
Previously, when making the Beurrage, I have mixed the room temp butter with a small amount of flour. Not sure of purpose, but you do not, so maybe there is no purpose??
FLOUR: some recipes call for at least part bread flour. Since it seems to me that gluten development should be restricted, I have always used AP, but I see you are using about half cake flour. That seems to me to be a great idea, so I will be doing that.
Thanks for the recipe; I am looking forward to trying it.
Hi Sandra! Fabulous questions! You nailed it on temping the dough. I do add some four to my butter during beurrage in my inverse puff pastry, which is just a slightly different approach, so that might have been the style you were following before! I definitely recommend the AP + Cake Flour lifestyle, it’s worked wonders for my puff. Can’t wait to hear what you bake up!
I don’t have a stand mixer. Can I do it all by hand.
Thanks
Hi David! Yes, you can absolutely do it all by hand. Though this video is for pie crust, this would be useful to give a look over as a way to approach mixing by hand: https://youtu.be/_kZJe2IwV2A.