This post may contain affiliate links. Please read our disclosure policy.
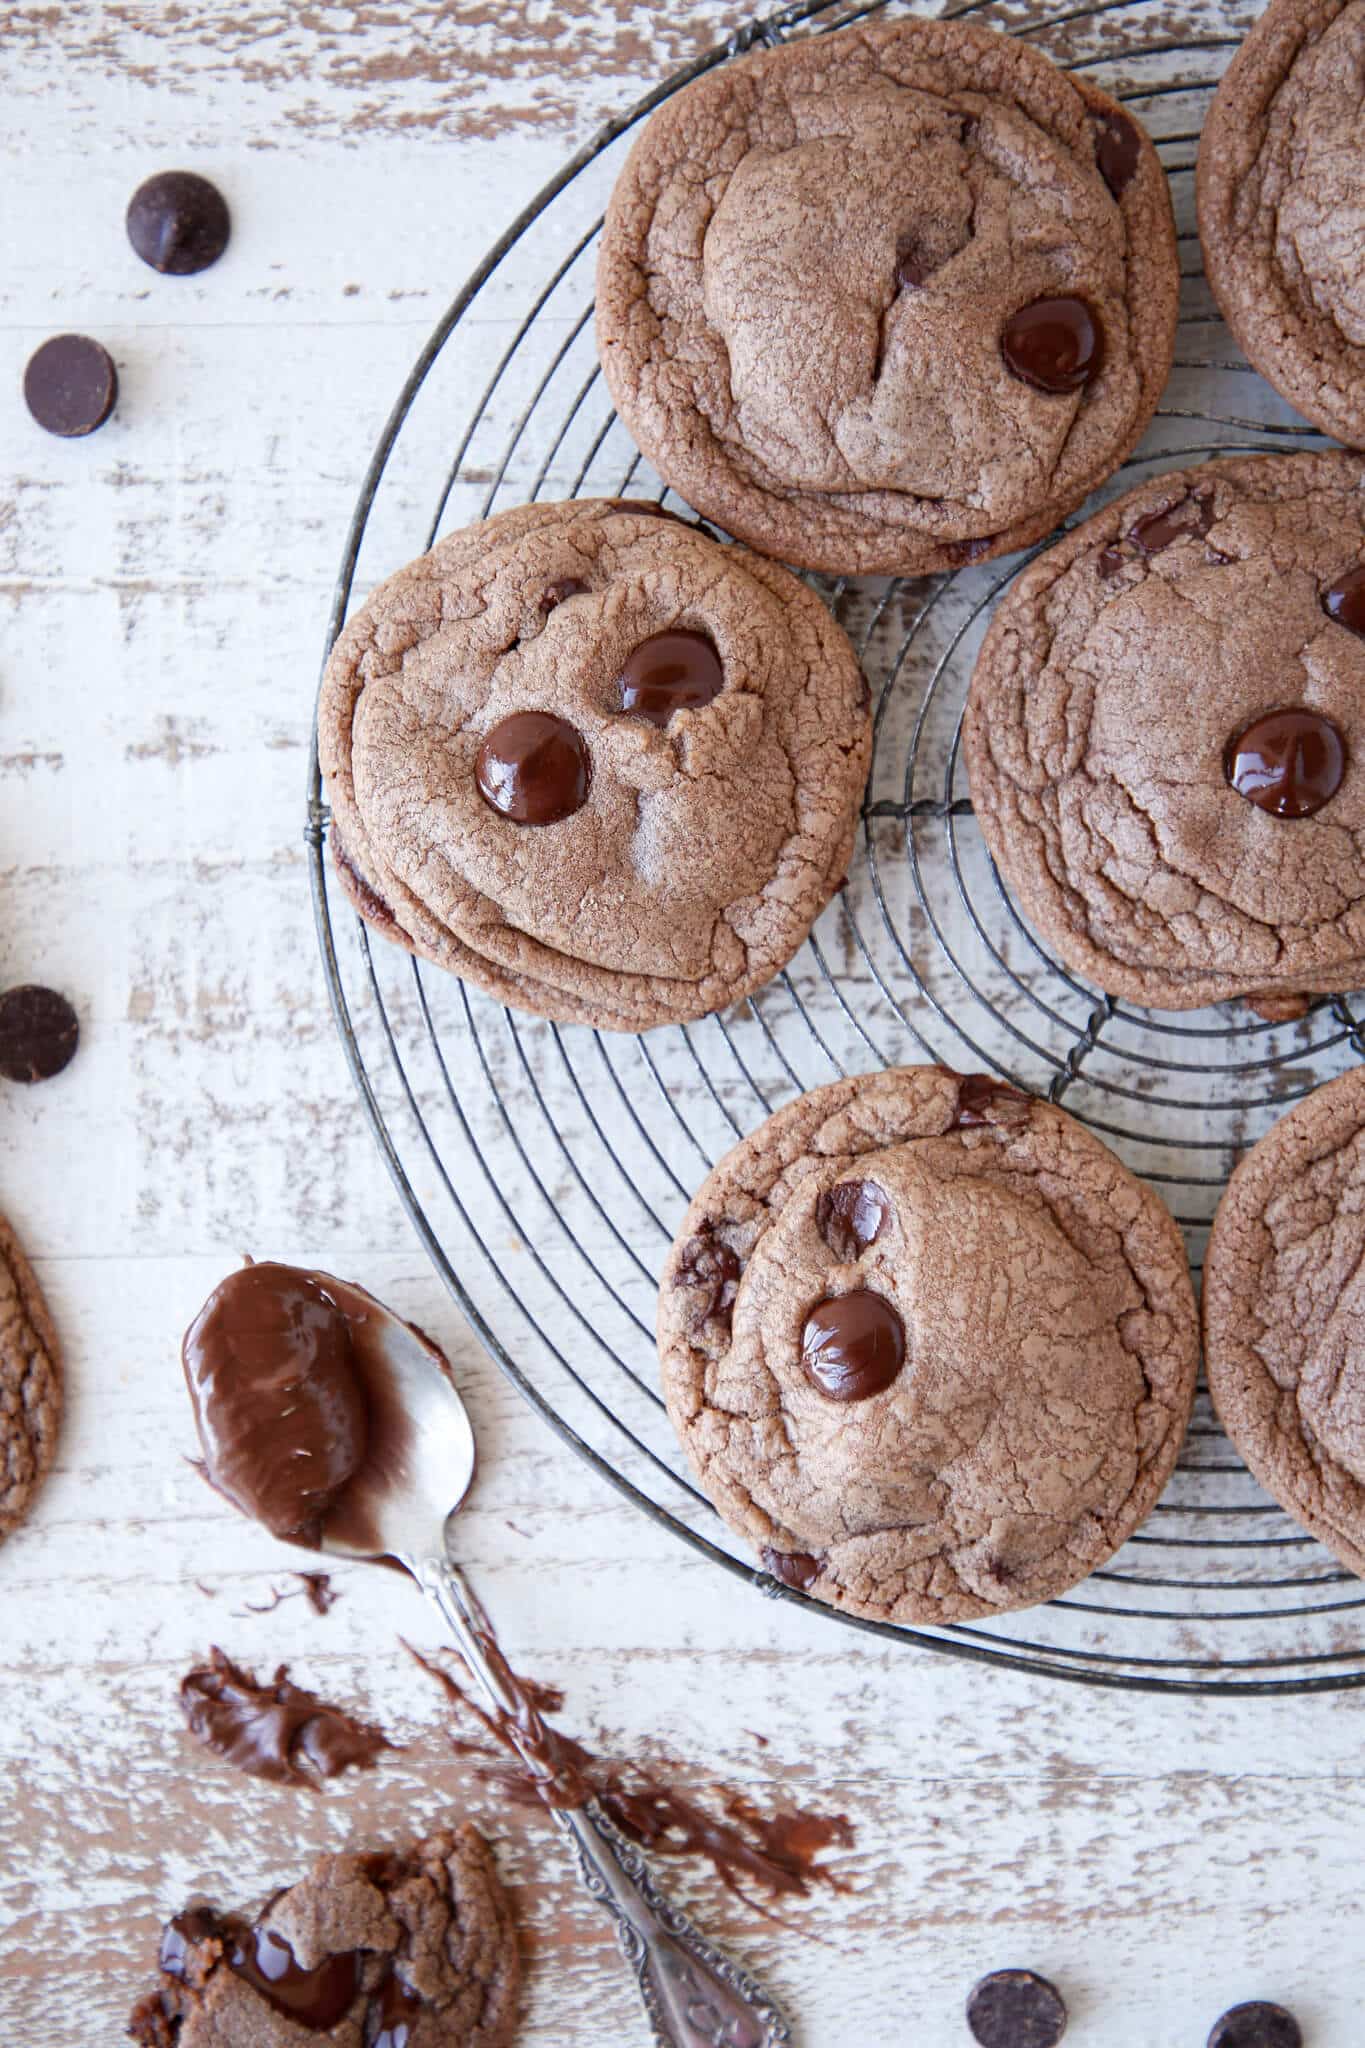
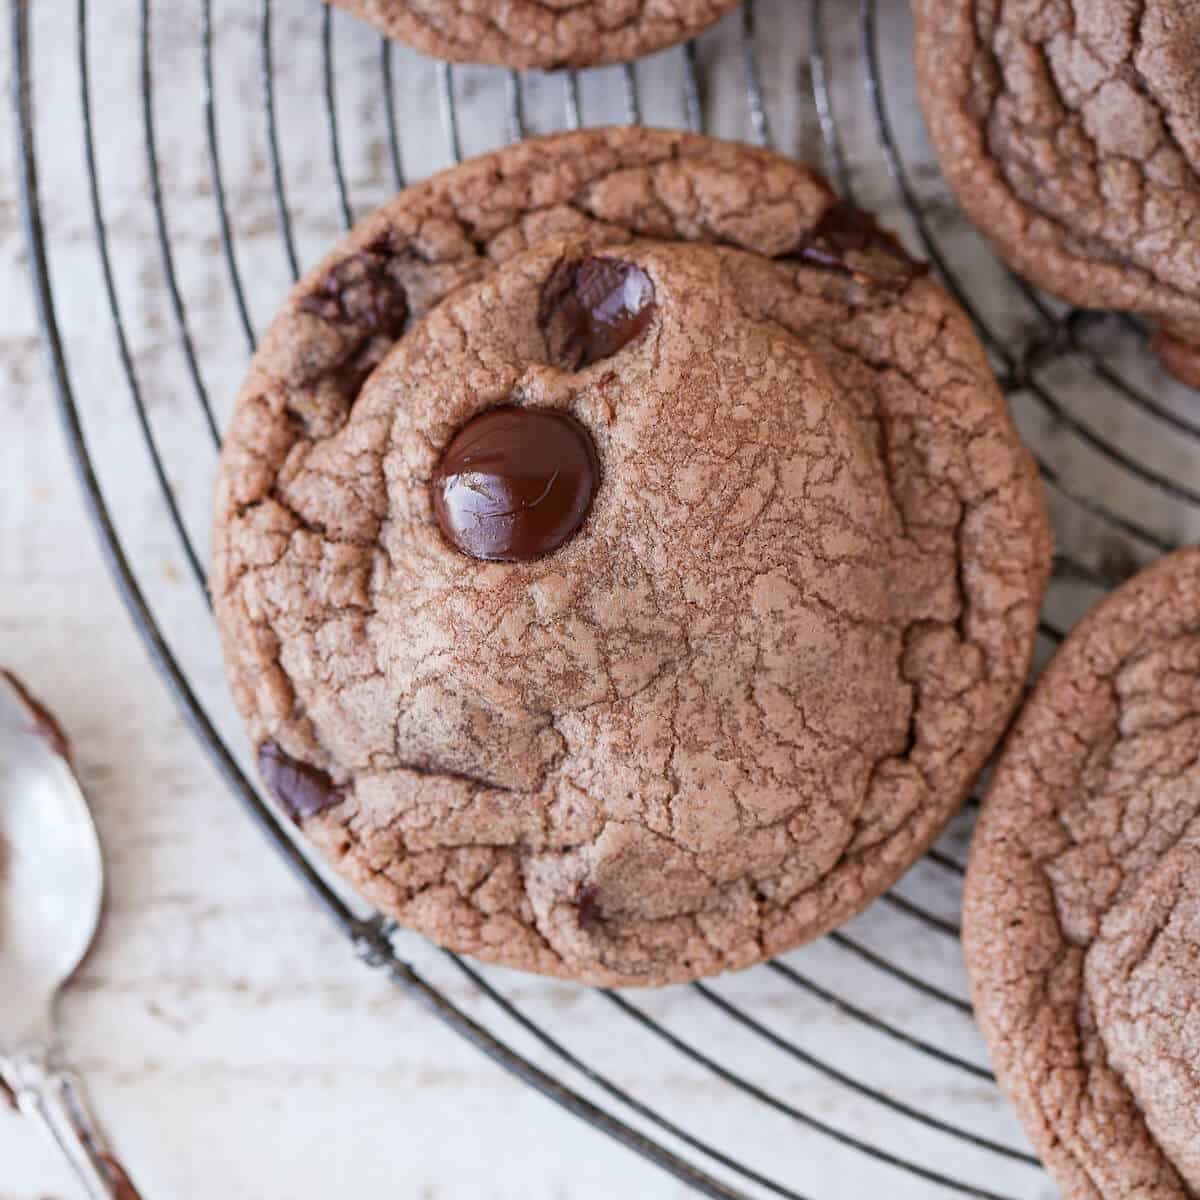
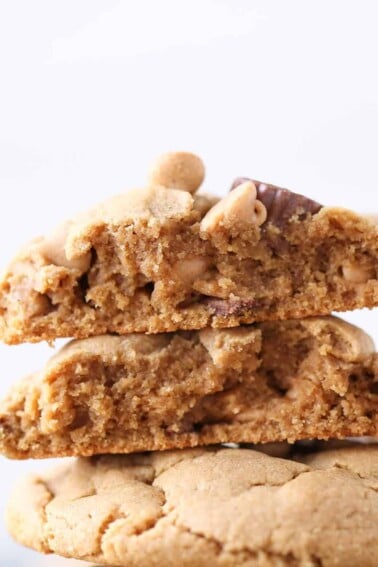
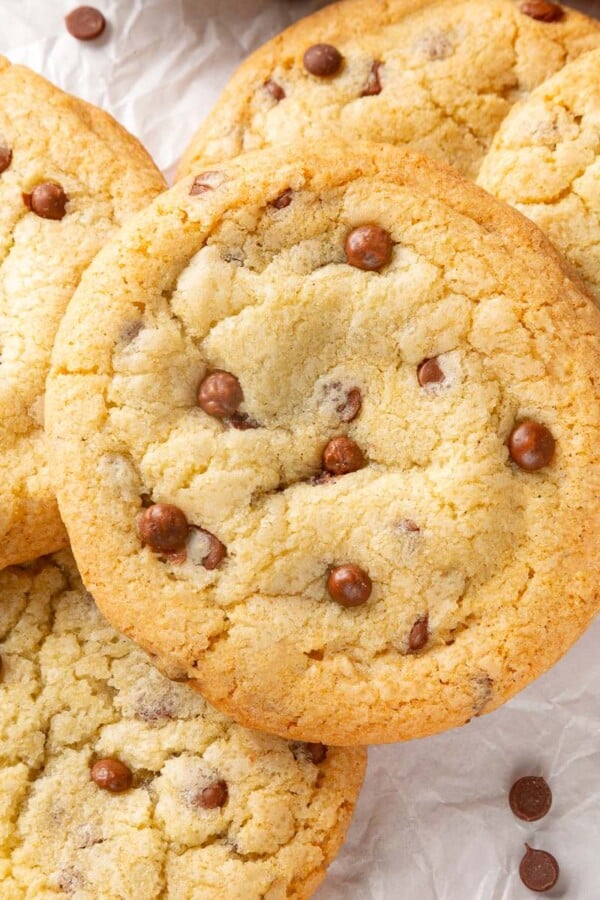
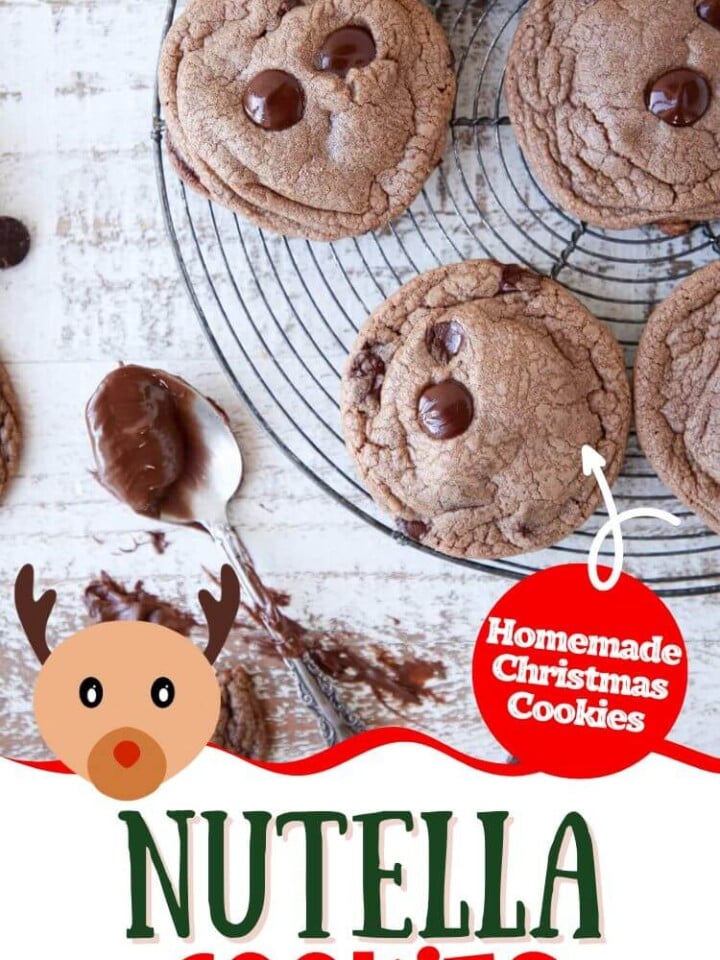
Nutella Cookies are subtly chocolaty with a hint of hazelnut. Perfectly soft and chewy, with bittersweet chocolate scattered throughout.

A Quick Look At The Recipe
This is a brief summary of the recipe. Jump to the recipe to get the full details.
Jump to RecipePrep Time
10 minutes
Cook Time
10 minutes
Total Time
20 minutes
Servings
10 cookies
Difficulty
Easy
Calories *
384 kcal per serving
Technique
Make the dough, divide and bake immediately for thick, chewy,cookies.
Flavor Profile
Hazelnut and bittersweet chocolate chips.
* Based on nutrition panel
I didn’t know a no-chill cookie could bake up so thick and chewy! I followed the tip about not overbaking and pulled them right at 10 minutes — they set up perfectly as they cooled. The hazelnut flavor comes through beautifully without being overpowering. These are going into my regular rotation. ⭐⭐⭐⭐⭐
Travis
Why This Recipe Works
- Thick, chewy texture by design. Cornstarch slows gluten development and helps the cookies stay tender, while the ratio of brown sugar to granulated sugar retains moisture and limits spread.
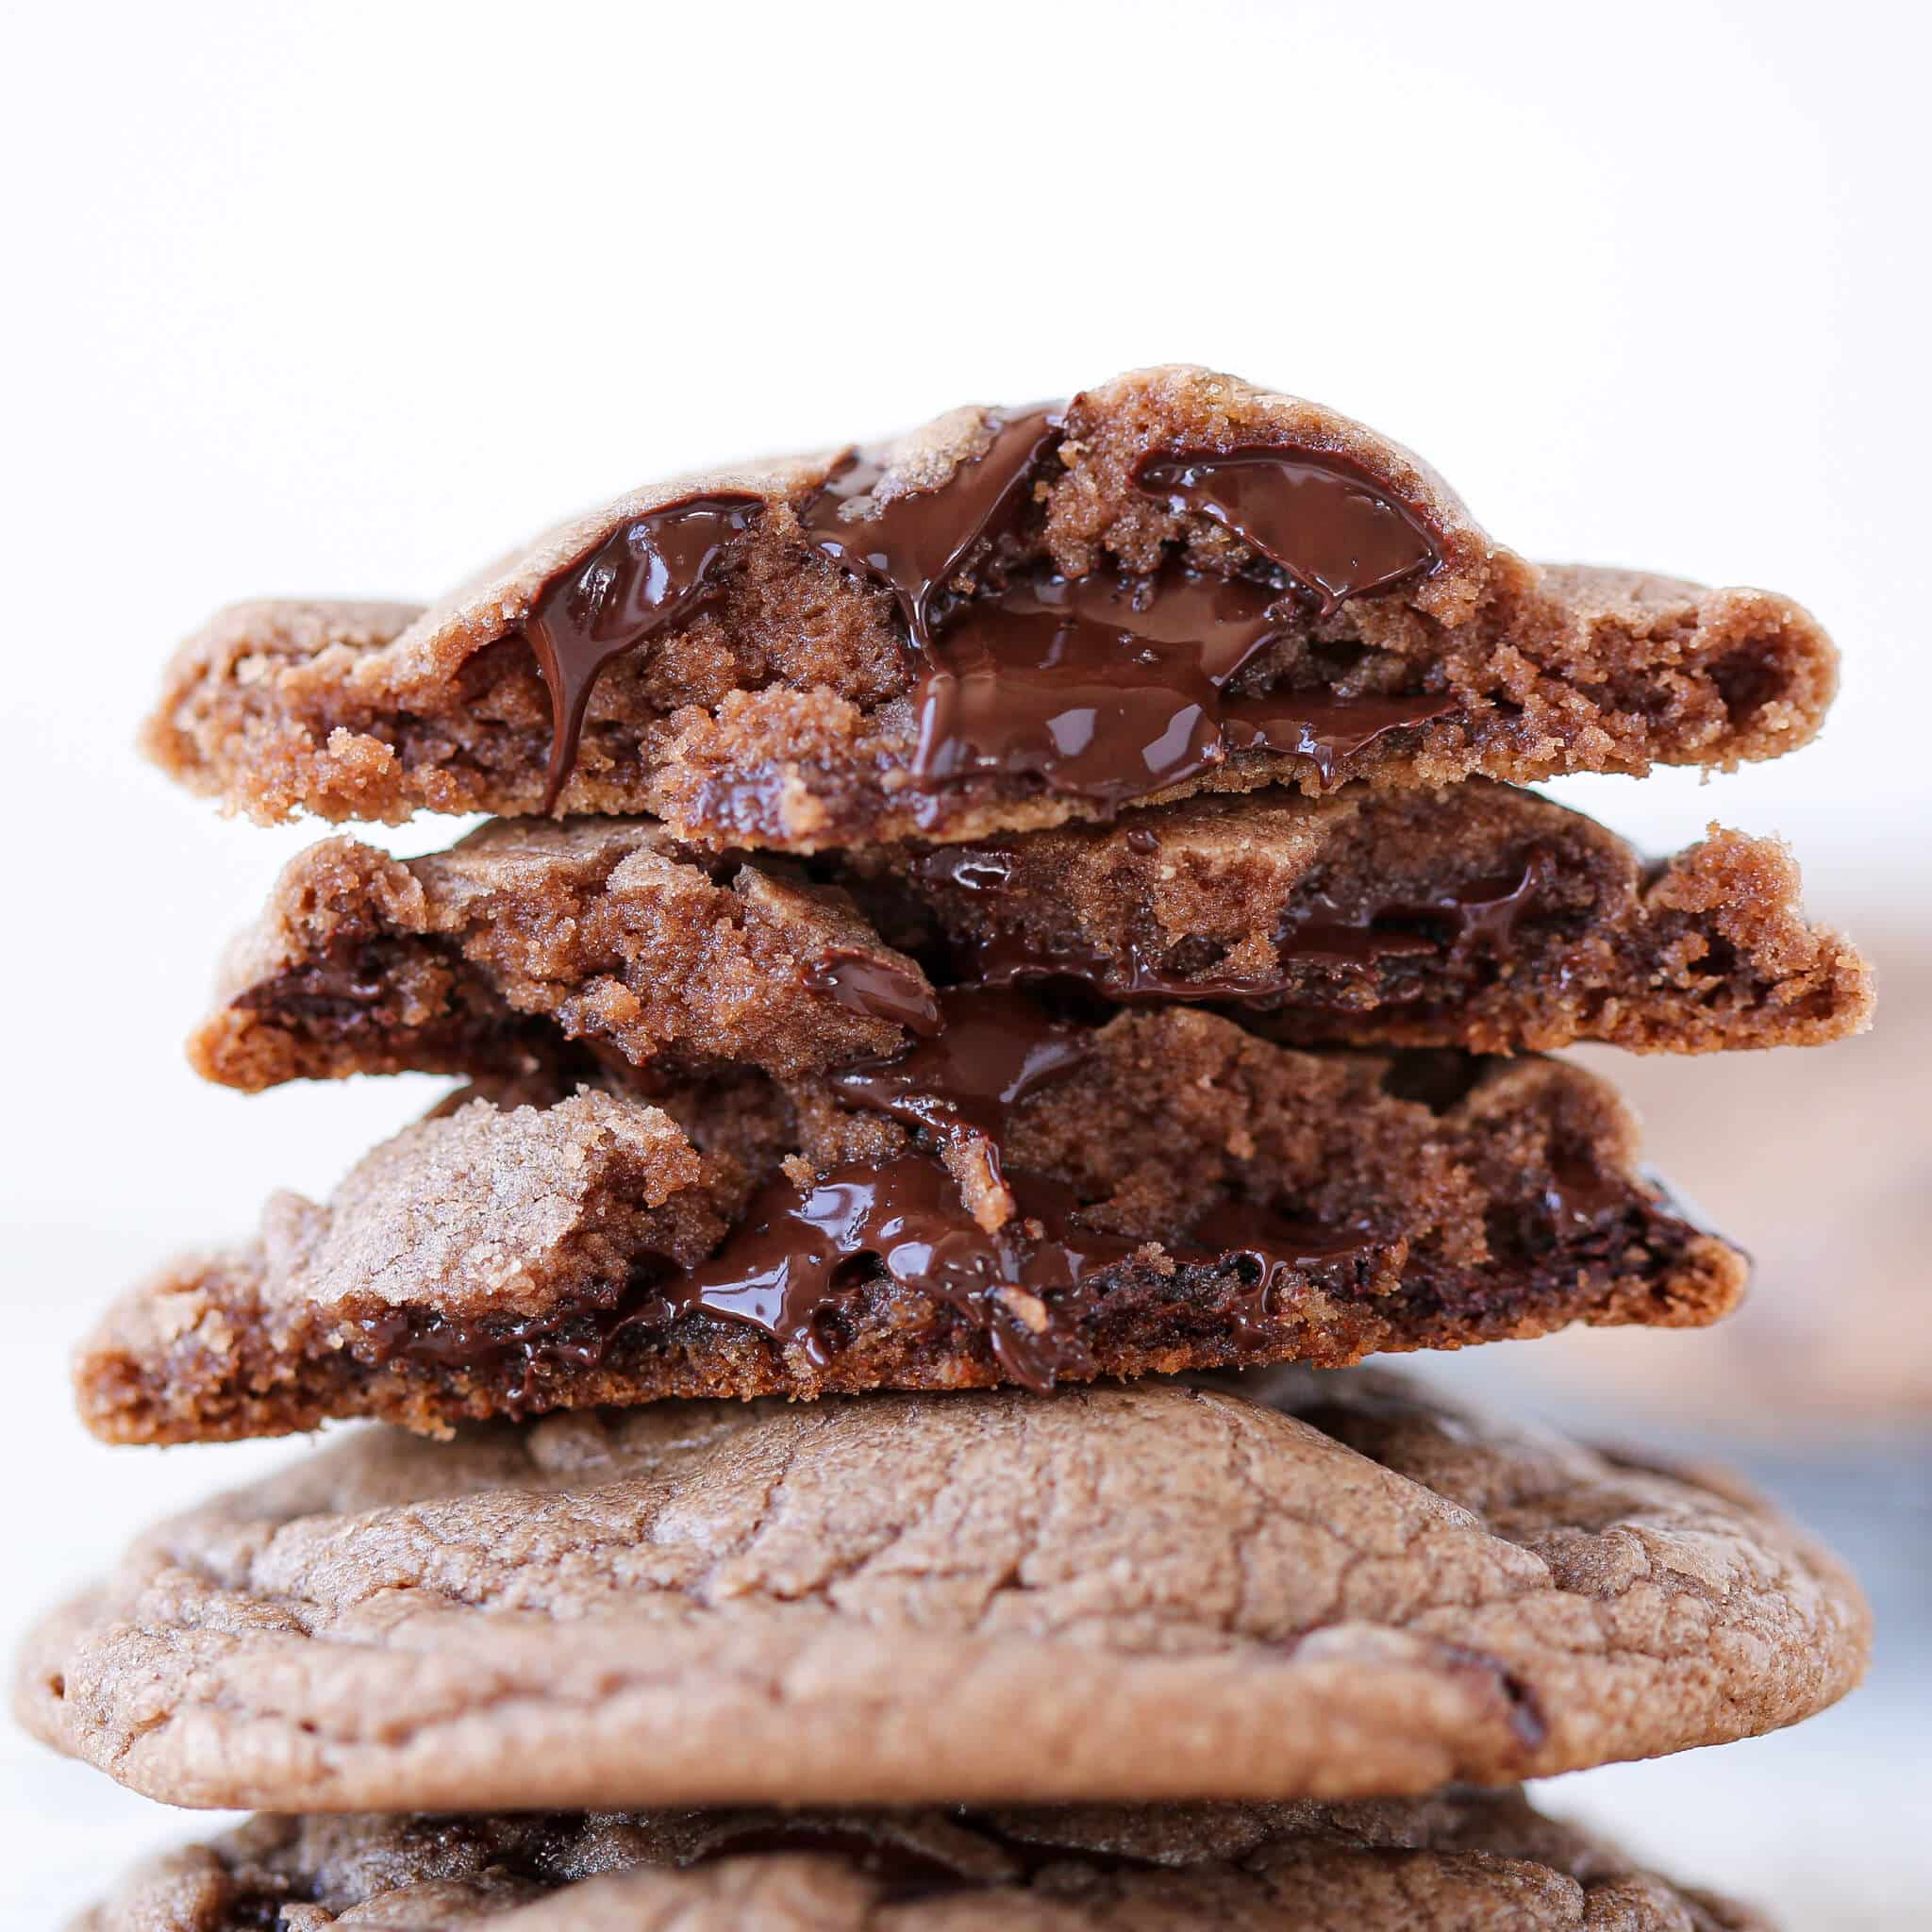
- Distinct hazelnut chocolate flavor. Nutella gives your cookies added richness, softness, and a small hint of hazelnut that sets them apart from other chocolate chip cookies in the most delightful way.
- Controlled creaming for chew, not cake. Starting with cold but pliable butter limits air uptake during the creaming stage. Too much air at this point pushes the cookies toward a cakey texture. The gradual flour incorporation protects the same goal: gluten builds slowly so the crumb stays tender instead of tough.
- Straightforward pantry ingredients. Flour, butter, eggs, brown sugar, granulated sugar, and a jar of Nutella are all you need. These chewy chocolate chip cookies follow the same pantry-friendly logic, which makes both easy to bake back to back.
Table of Contents
- Why This Recipe Works
- Ingredients & Substitutions
- Variations on This Chewy Nutella Chocolate Chip Cookies
- Professional Tips
- How to Make Chewy Nutella Chocolate Chip Cookies
- Chef Lindsey’s Recipe Tip
- Recipe FAQs
- Recommended Cookie Recipes!
- Recommended Nutella Cookies Recipes
- Nutella Cookies Recipe
- Before You Go
Mouthwatering and simple Nutella cookies are a dynamite reason to open (or finish) your cupboard’s coveted jar of Nutella! In this recipe, the bittersweet chips give a welcome burst of rich chocolate that beautifully complements the smooth and creamy Nutella dough. I tested and retested the ratio of ingredients, so that everything is perfect in this easy to make cookie!
If you prefer extra-chocolate cookies, my chocolate pudding cookies or chocolate biscotti will satisfy even the most intense chocolate craving!
Ingredients & Substitutions
- Unsalted Butter
- Nutella: Nutella adds fat, cocoa solids, and hazelnut flavor all at once, giving the cookies their soft, almost brownie-like texture. You can use another brand of chocolate hazelnut spread if you prefer, though the flavor will vary. Have extra? Make this nutella banana bread next!
- Light Brown Sugar: Brown sugar provides moisture and chew from its molasses content, which keeps these cookies soft for days. Do not swap it out entirely for white sugar; the cookies will spread more and lose that slight caramel depth. Dark brown sugar works in a pinch if that is what you have.
- Granulated Sugar: Granulated sugar helps the cookies spread just enough and contributes to slightly crisper edges that contrast the soft centers.
- Egg
- Vanilla Extract: Two teaspoons of vanilla rounds out the chocolate and hazelnut notes so the flavor does not taste flat.
- All-Purpose Flour: Flour provides the structure that holds everything together. Looking for a gluten-free cookie? Check out these almond flour chocolate chip cookies.
- Cornstarch: Cornstarch interrupts gluten formation, which keeps the centers soft and plush and helps the cookies hold their shape without excessive spread. If you do not have cornstarch, tapioca starch works as a substitute in equal amounts.
- Baking Soda
- Kosher Salt
- Bittersweet Chocolate Chips: Bittersweet chips add pockets of intense chocolate that contrast the sweeter Nutella base, which is what keeps these cookies from tasting one-note. Ghirardelli is what I use here, and it is the same quality chip I rely on in my White Chocolate Cranberry Cookies for the same reason: they melt cleanly while still holding distinct pieces in the finished cookie.
See the recipe card for full information on ingredients and quantities.
Variations on This Chewy Nutella Chocolate Chip Cookies
- Stuffed Nutella Cookies. Flatten each dough ball into a disk and wrap it around a frozen scoop of peanut butter, caramel candy, or additional Nutella before rolling it back into a ball. The filling stays molten at the center while the cookie bakes up around it, which is a serious upgrade for a dinner party or cookie box.
- Ice cream sandwiches. These Nutella cookies are delicious with a scoop of chocolate ice cream or vanilla bean ice cream between them.
- Mix-In Swap. Replace the bittersweet chocolate chips with white chocolate chips, chopped toasted hazelnuts, or double chocolate chip cookies-style layered chips for a more intense chocolate experience.
Professional Tips
- Use cold but pliable butter. Butter that is too warm will take on too much air during creaming and push the cookies toward a cakey texture. Aim for 65 to 68°F: firm enough to hold its shape but soft enough to leave an indent when pressed.
- Add flour gradually and stop early. Incorporate the dry ingredients in small additions and stop mixing the moment the last bit of flour disappears. Overworked dough builds gluten quickly, and the difference between tender and tough shows up in the very first bite.
- Do not overbake. Pull the cookies at 9 to 11 minutes at 325°F convection or 350°F conventional, when the edges are set, and the tops have just started to color. They will look underdone in the center, and that is correct. They firm up as they cool, and if you wait for them to look fully done in the oven, the bottoms will burn. I learned that the hard way.
- Scoop before you chill. Portion the dough into balls with a 1-inch cookie scoop before refrigerating. Scooping first means your dough balls are ready to go straight from the fridge to the oven. If you love having cookie dough on hand for baking on demand, the same freeze-and-bake approach works beautifully for thick chocolate chip cookies as well.
How to Make Chewy Nutella Chocolate Chip Cookies
The dry ingredients come together separately before being added to the creamed base, so have both bowls ready before you start.
Step 1: Whisk the dry ingredients. Combine the flour, cornstarch, baking soda, and salt in a medium bowl and whisk until evenly distributed.
Step 2: Cream the butter, Nutella, and sugars. Add the butter, Nutella, brown sugar, and granulated sugar to the bowl of a stand mixer fitted with the paddle attachment. Mix on medium-high speed until the mixture is combined and looks uniform.
You want the butter cold but soft and pliable here, not room-temperature-soft. Butter that is too warm takes on too much air during creaming, which pushes the cookies toward cakey rather than chewy. The mixture will look dense and fudgy at this stage, which is correct.
Step 3: Add the egg and vanilla, beat until light. Add the egg and vanilla and continue mixing on medium-high with the paddle attachment. Scrape down the bowl once with a spatula partway through. After about 4 minutes total from when you started creaming, the mixture will look noticeably lighter in color and slightly fluffy.
Step 4: Add the flour mixture gradually. Reduce the mixer speed to low. Add the flour mixture in 2-3 small additions, waiting until each is barely incorporated before adding the next. Scrape down the sides of the bowl several times throughout. Stop mixing the moment the last addition disappears into the dough.
Step 5: Fold in the chocolate chips. Add the chocolate chips and mix briefly on low just until they are evenly distributed throughout the dough.
I always reserve a small handful to press onto the tops of the dough balls before baking, which I love for both looks and that extra hit of chocolate in every bite.
Step 6: Scoop the dough. Use a 1-inch cookie scoop to portion the dough into balls. Scoop now, before chilling, because portioning cold dough is frustrating and the balls will be uneven. If you are chilling the dough, place the scooped balls on a parchment-lined sheet or plate, cover well with plastic wrap, and refrigerate for at least 2 hours or up to 3 days.
Chilling the dough is optional, but the flavors deepen noticeably and the cookies bake up thicker. Two hours is the minimum; overnight is better.
Step 7: Preheat the oven and prep your pans. Set the oven to 350°F conventional. Line a baking sheet with parchment paper. The dough balls go onto the sheet 2 inches apart to give them room to spread without merging.
Step 8: Bake until the edges are set. Slide the sheet into the oven and bake for 9 to 11 minutes. At the 6-minute mark, rotate the pan. The residual heat from the pan will finish the centers as they cool. Do not wait for the tops to look fully baked or the bottoms will overbake and the centers will be dry rather than fudgy.
Frozen dough balls bake at 350°F for 12 to 14 minutes straight from the freezer with no thawing required.
Step 9: Cool on the pan, then transfer. Let the cookies rest on the hot baking sheet for 5 minutes before moving them. Transfer to a wire rack and let them cool completely, though I will admit they are very difficult to leave alone at the 10-minute mark.
Chef Lindsey’s Recipe Tip
I like to scoop my dough using a 1” cookie scoop prior to chilling so that the dough balls are ready-to-bake! There is nothing more frustrating than portioning chilled dough.
Recipe FAQs
Yes, and chilling actually improves the outcome. Refrigerate the portioned dough balls for at least 2 hours or up to overnight, or in the freezer for 2 months. Which gives the flavors time to meld and produces a thicker, chewier baked cookie.
Keep them in an airtight container at room temperature and they will stay chewy for up to 10 days. For longer storage, freeze the unbaked dough balls and bake them straight from frozen at 350°F for 12 to 14 minutes.
Tough cookies almost always come from overmixing after the flour goes in. Gluten develops quickly once the dry ingredients hit the dough, so stop the mixer the moment the flour disappears and do not work the dough further. Adding all the flour at once rather than in gradual passes is the other common trigger for the same problem.
Baked cookies freeze well for several months in an airtight container. That said, freezing the raw dough balls is the better approach if you want fresh-baked results on demand. If you enjoy keeping a stash of ready-to-bake cookie dough in the freezer, my peanut butter blossoms use the same freeze-and-bake method and are worth adding to the rotation alongside these.
Recommended Cookie Recipes!
Cookie Recipes
Pumpkin Chocolate Chip Cookies
Cookie Recipes
Reese’s Peanut Butter Cookies

Cookie Recipes
Soft Sugar Cookie Recipe
Cookie Recipes
Cranberry Orange Shortbread Cookies
If you tried this recipe and loved it please leave a 🌟 star rating and let me know how it goes in the comments below. I love hearing from you; your comments make my day!
Nutella Cookies
Ingredients
- ½ cup unsalted butter softened
- ⅓ cup Nutella heaping, stirred before scooping
- ½ cup light brown sugar packed
- ¼ cup granulated sugar
- 1 large egg
- 2 teaspoons vanilla extract
- 1 ¾ cups all-purpose flour
- 2 teaspoons cornstarch
- 1 teaspoon baking soda
- ½ teaspoon kosher salt
- 1 cup bittersweet chocolate chips
Instructions
- Whisk together flour, cornstarch, baking soda, and salt in a medium bowl. Set aside.
- Cream butter, Nutella, and both sugars on medium-high speed until combined, about 2 minutes.
- Add the egg and vanilla. Beat on medium-high until light and fluffy, about 4 minutes total, be sure to scrape down the sides of the bowl once.
- Reduce to low speed. Add the flour mixture in 2-3 small additions, mixing each until just incorporated. Scrape the bowl several times. Add chocolate chips and mix briefly to distribute.
- Scoop dough into 1-inch balls. Chill in the refrigerator on a parchment-lined tray, covered, for 2 hours or up to 3 days.
- Preheat the oven to 350°F. Arrange dough balls 2 inches apart on a parchment-lined baking sheet.
- Bake 9 to 11 minutes, rotating the pan at 6 minutes, until edges are set and tops are just beginning to brown. Cool 5 minutes on the pan before transferring to a wire rack.
Video
Notes
Doneness cue: Pull the cookies when the edges are set and the tops have just started to brown. They will look slightly underdone in the center, which is correct. They firm up as they cool on the pan.
Brown sugar: Do not substitute 100% granulated white sugar. Brown sugar retains moisture and keeps the cookies thick. Light or dark brown sugar both work.
Storage: Store in an airtight container at room temperature for up to 10 days, or freeze unbaked dough balls for several months and bake straight from frozen at 350°F for 12 to 14 minutes.
Nutrition
Before You Go
These fudgy, Nutella-filled cookies are the kind of thing that disappears from the counter faster than you can plate them. If you want to keep baking, browse more Cookie Recipes or just make these cherry chocolate chip cookies next!


Hi!
I am a nutcase (ha!) when it comes to those cookies and have been making them regularly since i first saw this reciper a month ago.They are perfection and the answer to most of daily hassles and world conflicts but in my case, they inevitably always come out flat. This isnt a deal breaker in itself and there are bigger problems in life but I swung by your page today to see if i had missed some crucial instruction the first time around. It doesnt look like it so i have to ask: how do you get your cookies to have this perfect mounted shape with the thick middle??
I bake mine straight out of the fridge (i read your answer to a comment about that) and even as they spread out and puff up in the oven, they do so “flatly”. And then of course they flatten completely even more while cooling and turn out to be the opposite of yours i.e thin middle, thick sides. I tried different, longer, baking times but to no avail… I havent gotten so far as to experience with different temperatures but I wouldnt know to turn the heat up or down to get a better result. I will keep making them anyway but would love your insight on this extremely important matter! 🙂
Thanks!
LOL. I agree that baking big puffy cookies is an extremely important matter! Without baking with you it is hard to give you a definitely answer but I can think of a few things. 1) What is the protein content of your flour? Even AP flour varies in it’s protein content by 100%, which is kinda crazy. I use Bob’s Red Mill most frequently and it has 4g of protein in 1/4 c. Gluten (the protein in flour) creates structure and will help keep them from spreading like crazy. 2) Don’t skip the cornstarch! 3) I made the dough rounds and chilled them overnight so they were very, very cold. 4) Sometimes I get lazy and make my dough rounds more like 1.5 inches in diameter. Bigger rounds that you roll into a tall cylinder instead of a ball will give you a fatter cookie, so you could try rolling them more like a small can and less like a round ball. I also don’t flatten the rounds before I bake them, which is why the tops are so domed on mine.
As for temperature, try 325 F. If you bake them hotter, especially straight from the fridge, the outside will cook and brown faster than the inside can cook, so you will get a crispy outside and a raw inside. These crispy raw cookies probably won’t spread as much but they won’t be cooked either! Your oven could also run hot. Invest in an inexpensive oven thermometer so that you know exactly what temperature your cookies are baking at.
Thank you so much for taking the time to reply and it is perfect timing! To help fight off procrastination as avoidance of actual work I made a batch of the dough earlier today. Does the trick too. 🙂
The flour i use has about the same amount of protein as yours (and i put in heaping amounts this time), i definitely use the cornstarch since i got it especially to make this recipe in the first place and im undefeated at anticipating the craving and preparing the dough in advanc so it does spend the night and most of a day in the fridge. However because my baking dish is too big, i have to refrigerate the whole bunch of dough in a bowl and do the rolling thing just before sticking them into the oven. So ill give the cylinder shape a try and turn the heat down slightly and report back to you on the results!
Cookies are my favorite method of procrastination too! My baking dish doesn’t fit in my fridge either so I make the balls/cylanders and line them up in square metal cake pans (round would work too), cover with plastic wrap and stack them in the fridge! Easy peasy. If you are short on time or you are impatient, like me, you can put them in the freezer for several hours instead of the fridge overnight. I look forward to hearing your results! [On a side note, this troubleshooting is interesting because I am having the opposite problem with a triple chocolate chip cookie recipe that Im developing, and it’s driving me crazy! Going to make another batch tomorrow!)
Practice makes perfect…or so they say! In my case, it might very well earn me perfectly clogged arteries and elastic waistband jeans but on the plus side i wont be needing scented candles in my house for a very long time. The good news is, i believe i am almost done with the trial part of the program!
Verdict: the cylinder shape and lower temperature definitely helped. The cookies were a lot thicker. Unfortunately, it wasnt enough and they still flattened a lot more than yours (even though i let them bake longer despite the fact that i like my cookies very underdone)
So for the next time: i will try rolling the dough balls before refrigerating it as it seems it is the only thing i did differently. I also think i need a lighter hand when mixing the ingredients together. I tend to get zealous over clumps and, despite knowing better, overbeat the whole thing (that might be a solution for that triple chocolate chip cookie recipe though…). I end up with a nice and smooth dough that gets runny when it bakes. Lastly, i will use a bit more flour and keep the lower temperature.
Such a simple recipe with so few ingredients and it feels like im trying to crack the Rosetta stone! 🙂 Thanks for the support through it all!
Hooray for little successes! I am a habitual underbaker much to my husband’s disgust! The cookies pictures were most certainly under baked because that is how I like them. I bake a second batch for him. 🙂
I think rolling them into balls pre baking will absolutely help. So would freezing them preshaped.
As for my triple chocolate cookies, I need to take out the cornstarch! I think I’m also going to increase the butter by a little. Sugar helps cookies spread too, so maybe I’ll change that. Ugh so many options! I am less concerned about over mixing cookies than cakes, for example, because there is usually so much sugar and fat that it inhibits too much gluten formation anyways. I do mix just to combine after adding the dry ingredients. So many things to try! High five to elastic band pants! lol
In the name of experience only (and certainly not gluttony) I have dutifully kept on working on this cookie dough in the past week. I am happy to report that the many attempts at obtaining nice mountain shaped cookies will not have been in vain as I finally reached this ultimate goal in life with my last trial! Yay me!
I added a bit more flour, closer to 2 cups, which showed me how right you were about different flours within the same type being completely different, and i followed your trick of freezing the pre-made balls of dough. That was a slightly longer process: because the dough was too sticky to roll right after mixing it, i stuck it in the fridge as is for about an hour, or until i remembered to tend to it, then i rolled it into cylinders and back in the fridge. I only put them in the freezer a half hour before baking them so they wouldnt be completely frozen. I kept the lower temperature and voila! Nice thick cookies, still not quite as perfect as yours and different in color as well (ive been wondering how you get that whitish color on the outside) but im thinking the flour here is the culprit and not much i can do about that where I am.
Now the final verdict: after all this, the trials, the questions, the forced binging on cookies… I think Im going back to my flat cookies! 😀 The nice thick cookies are beautiful but also much more cakey and I really love the almost-caramel-like-chewiness of the flat ones.
Nevertheless, it has been a super fun and educative experience! Thank you for sharing it!
Oh my goodness, Eva!!! Your dedication is remarkable! 🙂 I am glad you finally achieved the cookie heights you desired!
The amount of flour is one reason why I really wish Americans would hop on board the weighted measurement train, because there is inevitably a different between how I scoop 1 cup of flour and how everyone else does it. I read that the difference can be over 1/4 a cup for each cup of flour! And then there is the different protein content – the bag of AP flour in my cupboard with 4g of protein per 1/4 cup is going to provide a chewier, stronger cookie than the one with only 2g. This is why baking is a combination of art and science!
I looked at my before and after photos in Lightroom and the whitish color is partially from adjusting the exposure, so don’t stress too much about that. The camera also dulls colors, which leads to a totally different kind of frustration! They were never dark on the outside but they were like a light brown.
This is definitely the only cookie that I pre-roll and refrigerate before baking. It’s too much effort and I am way too lazy for that! Your description of the flat ones sounds amazing! I will need to try them flat 🙂 Thank you so much for coming back and reporting your results! Happy baking!
I’m prepping these tonight to make them for my workplace tomorrow. Super excited to see how they turn out. Here’s a question for you – do they spread when baking? I found that I ended up with closer to 30 cookies than 20, and even the 20 on the pan are a snug fit. Alsooo I don’t have any parchment paper because it’s the one thing I forgot, so I lightly greased the pan… Hopefully that won’t hurt anything?
Hi Carly! They don’t spread that much but they do spread a little (the colder your dough, the less they spread). I bake mine in batches on two cookie pans, so while one sheet is in the oven I am rolling the cookie dough balls for the next sheet. If you don’t have two sheets then you can bake one batch (the number that will fit depends on the size of your pan) and then when that pan cools keep the rest of the dough in the refrigerator. I hope greasing the pan worked and your coworkers enjoyed them!
I guessed that the refrigerating might help with potential spreading, and it ended up working out pretty great in spite of not having parchment paper, too. ^_^ They were really delicious – I was a little nervous about cooking them too long and might have undercooked them but honestly no complaints either way; who doesn’t like a melt-in-your-mouth cookie?
Thanks for getting back to me – I’ll definitely be using this recipe again!
I’m so glad they worked out, Carly! I underbake my cookies too because I love a soft and chewy center! You can also freeze the dough in balls and bake them as you want them – they just need to bake a few minutes longer. I have some in my freezer in Atlanta right now!
These are on my 2014 holiday cookie list. I can’t wait for this deliciousness to happen. Pinned!
I made the list! Thanks, Jennie!
I made these cookies about a week ago, and OH MY GOSH! These are heaven in my mouth! They’re so moist, it’s amazing. My husband said they were too rich, he could only eat two. Fine by me! My toddler and I devoured the rest. lol your site is now my go-to for all cookie recipes! I actually just whipped up some cream cheese chocolate chip dough (it’s in the fridge right now). I can’t wait to see how those blow me away!
Hi Kayla! I am soooo happy to hear that! I do love cookies and I take them very seriously! 🙂 I still have some dough of the Nutella ones in my freezer (I have them stashed in the back so my husband can’t find them.) Let me know what you think of the Cream Cheese C.C. I absolutely LOVE those. The dough freezes well for those too. Enjoy!
Oh wow! The cream cheese cookies were delicious too! I’ll admit, I was nervous making them because I’ve never heard of using cream cheese in cookies. But my oh my, they are good! I had them done right as my husband was walking in from work. He literally ate a plate full lol needless to say, they’re a hit here!
Haha! I am thrilled that you loved those too! I think the cream cheese ones taste like the Soft Batch kind you buy at the supermarket (except better because they are homemade!). I gave some to the concierge and the postman, and they were fighting over that last few. I need to make them again soon…I think my freezer stock is running low! Enjoy!
I LOVE how gorgeously thick these cookies are!! And this…. “I use Ghirardelli, in case you’re new around here”… is perfection. Ghirardelli is my thing too. 😀
Haha! I wish they would pay me to say it, but, sadly, right now it is just my firm opinion!
I really need to try these. Was looking for cocoa or dark chocolate chip cookies recipe, this seems very nice.
It is delicious but it isn’t overwhelmingly chocolatey. If that is what you want, you should try these Quadruple Chocolate Pudding Cookies
Glad you were able to try my recipe! Your cookies look great!
Thanks for the fabulous recipe, Averie!
I looove hazelnuts and it’s all thanks to Nutella! THESE COOKIES LOOK SO FRACKING GOOD! All soft and chewy and gooooooey
I’ll have to keep trying hazelnuts just to make sure! These cookies are so right up your alley!