This post may contain affiliate links. Please read our disclosure policy.
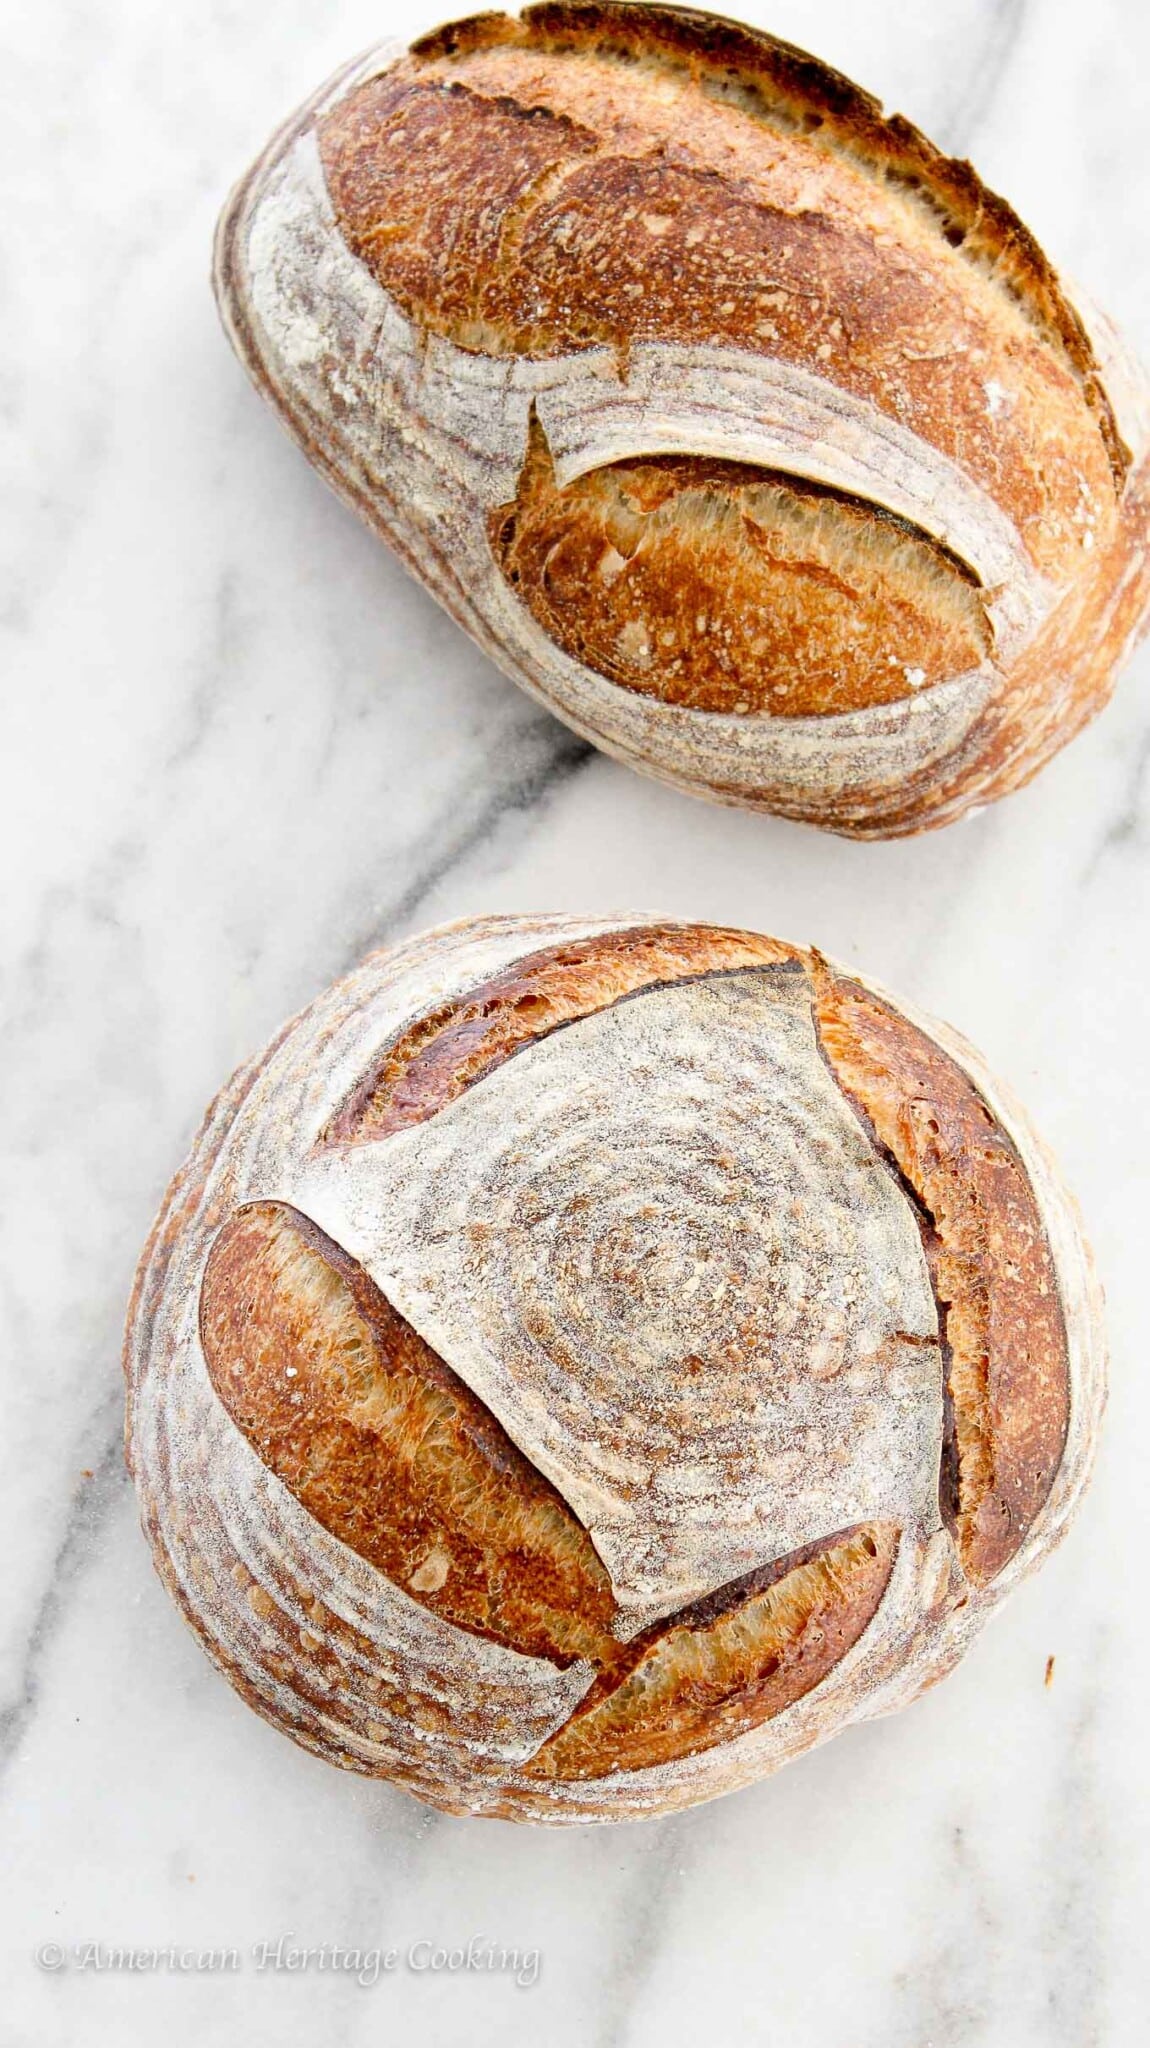
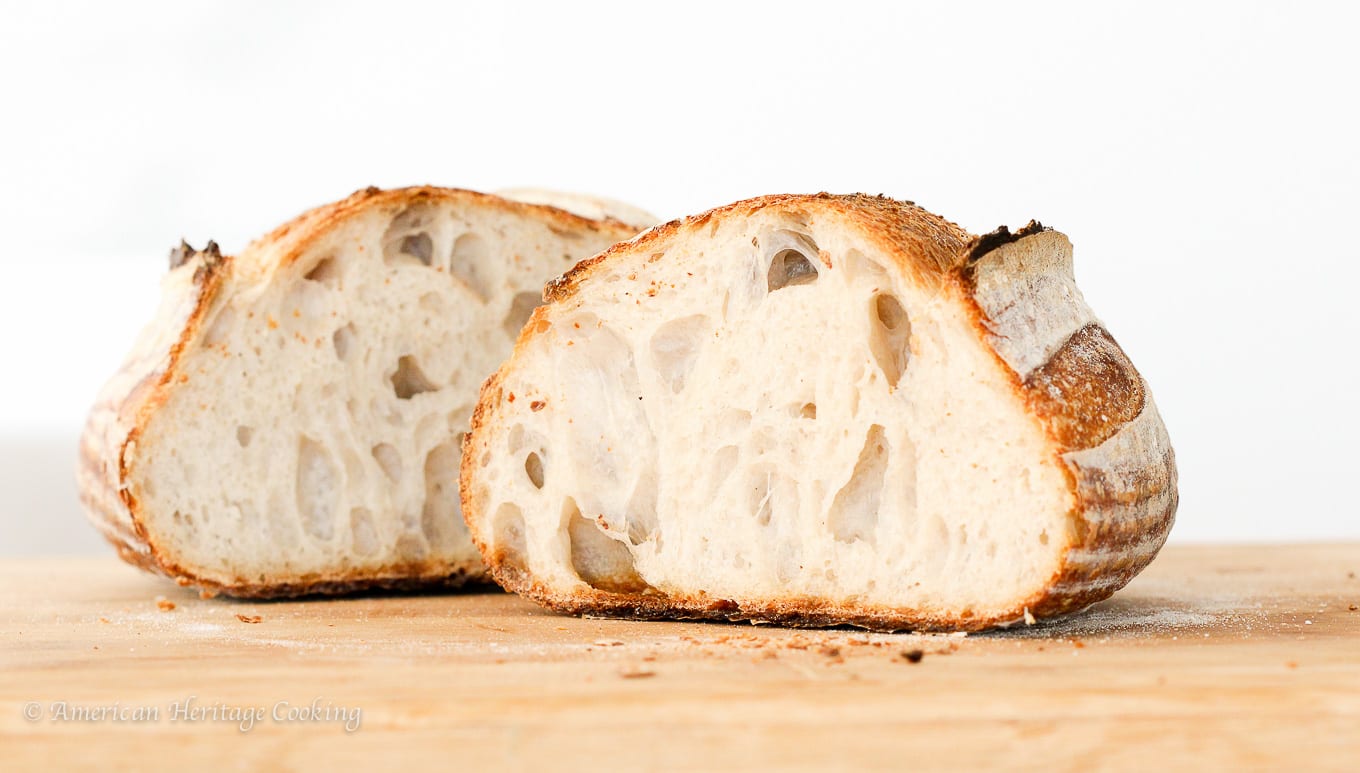
This easy sourdough bread recipe is simple to make and has a crisp crust and soft middle, making it anything but basic! Made with only 5 ingredients, this bread is the perfect beginner sourdough.
A Quick Look At The Recipe
This is a brief summary of the recipe. Jump to the recipe to get the full details.
Jump to RecipePrep Time
20 minutes
Cook Time
45 minutes
Proof
3 hours
Total Time
4 hours 5 minutes
Servings
12 slices
Difficulty
Beginner-friendly with clear steps, flexible timing, and an optional overnight proof.
Calories *
139 kcal per serving
Technique
Build levain, mix dough, fold, shape, and bake in a hot Dutch oven.
Flavor Profile
Crisp crust, open chewy crumb, and a mild, balanced sourdough tang.
* Based on nutrition panel
First time I have ever made sour dough bread and it came out perfect very good instructions. And tasty too!! ⭐⭐⭐⭐⭐
Bob
Why You Will Love This Recipe
- Exceptional bread with only 5 ingredients. This bread is light, airy, and has a crisp crust! It is made with only five ingredients, and it is perfect as a sandwich bread or just for snacking!
- Perfect introduction to sourdough baking. Guided step-by-step instructions and a full video tutorial for an easy sourdough loaf. It is a great bread to start off your sourdough journey.
- Easy straight forward recipe with no excessive temperature checking. Yes, controlling the temperature of your water and final dough creates the most consistent and accurate bread. But I am here to tell you that you can make sourdough bread at home at any temperature with time, patience, and observation.
Table of Contents
Sourdough is a labor of love. The whole process starts several days before you even want to eat your sourdough bread.
But that moment when you cut into the crisp crust and bury your nose deep into its pillowy center, inhaling the comforting scent of fresh bread, that moment makes it all worth it.
And, once you’ve got your crispy, naturally leavened bread ready, you’ve opened yourself up to a billion possibilities, including some apple sausage stuffing from scratch! As a side for some dutch oven pot roast! Or using your discard for some fun sourdough discard recipes like this sourdough pizza dough recipe or sourdough pancakes!
Ingredients & Substitutions
- All-Purpose Flour: I use all-purpose flour to feed my starter and also to make this sourdough bread recipe. Bread flour can be used, and the gluten will develop faster due to its higher protein content.
- Water: I use tap water for this sourdough bread, but you can use filtered water if you prefer or if you know your water is hard. Gluten develops faster in warm conditions, in addition to giving the yeast a jump start. Starting with a warmer dough means faster gluten development and more rise in less time.
- Rye Flour: Rye flour adds a nutty flavor to this bread but does not contribute to gluten structure. I would not recommend increasing the amount without swapping out the all-purpose flour for bread flour. You can also omit the rye flour and replace it 1 to 1 with the AP.
- Kosher Salt
- Liquid Levain: You will need an active sourdough starter that consistently doubles in volume within 12-14 hours, depending on the temperature of your room. If you don’t have a starter, start here with my sourdough starter recipe, or if yours is simply uncooperative, begin with my how to feed sourdough starter post, which covers all aspects of feeding, storing, and troubleshooting.
- Rice Flour: I use rice flour to prepare the proofing basket for this and my same-day sourdough bread. Additionally, I use it to flour the bottom of my shaped and proofed loaf so it doesn’t stick to the parchment. You could also use cornmeal.
See the recipe card for full information on ingredients and quantities.
Variations for Easy Sourdough Bread
- Add some herbs. After the gluten is developed, mix in or fold in some fresh or dried herbs, such as rosemary, thyme, or oregano. Try adding some spice mixes, like Italian seasoning or Cajun seasoning.
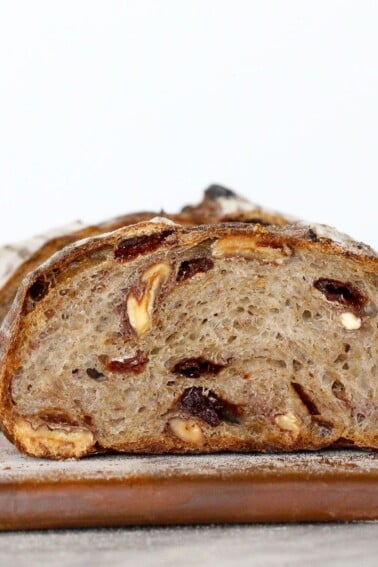
- Mix in some flavor! During the folds or while the dough is in the mixer, add some olives, toasted nuts, chopped jalapenos, and cheddar (yum!) or even some dried fruit like in this cherry sourdough bread or this cinnamon raisin sourdough bread!
- Change the shape. You choose the shape for your final loaf according to your needs. This same recipe can be shaped into dinner rolls, tiny bâtards, a loaf, or a large boule (round). For rolls, you can divide and shape the sourdough following the steps in my sourdough rolls.
Professional Tips
- Preheat the Dutch oven! For the best oven spring and most open crumb and crust, bake in a preheated Dutch oven or Challenger bread pan. A cold Dutch oven will take time to heat up in the oven, stealing all the heat from your loaf. This will result in a slow rise, and the crust will form before the bread is fully risen.
- Control the steam. This is more complicated and important than it seems! The first part involves controlling how the steam escapes from your bread, which you do by scoring. Cutting the dough in several places dictates where the steam escapes from your bread and allows for maximum volume in your loaf. The score needs to be deep enough and not too close to the top or bottom of the loaf. This continues with controlling the steam in the oven.
- Steam in the first half of the baking process keeps the crust soft and allows the bread to rise as much as possible in the oven before the yeast dies. If the crust forms too soon, then the loaf will never reach its full potential.
- Don’t skip the preshape! A successful crumb is dependent on ensuring the dough retains the desired shape while proofing and baking. You need to organize the gluten strands to trap as much steam and gas as possible, resulting in large, beautiful holes in the crumb. This begins with the preshape. The preshape allows the gluten to become accustomed to its final shape. Think of it like easing the bread into its final home. Then the bench rest allows the gluten to relax so that you can final shape without tearing or aggravating the gluten.
- Use a kitchen scale. Bread is a delicate balance of flour, water, salt, and natural yeast. Adding just an extra tablespoon of one will change the whole recipe. Even when it comes to feeding your starter, always use a kitchen scale!
How to Make This Easy Sourdough Bread Recipe
Use these instructions to make a perfect sourdough loaf every time! Further details and measurements can be found in the recipe card below.
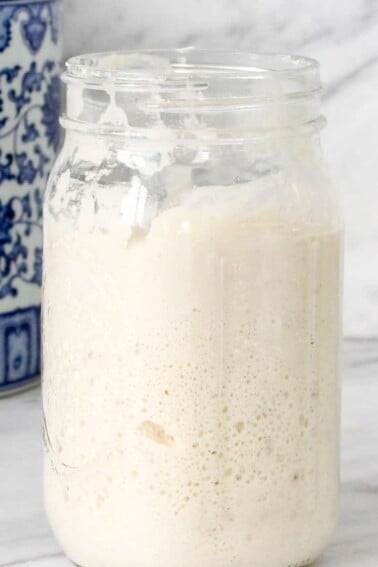
Mix the Liquid Levain:
Step 1: The 12 to 14 hours before you want to mix your dough, build the levain. In a clean container, mix the flour, water, and starter. Stir with a small spatula until the water has hydrated the flour. With this small quantity, it is easier to double the amount of the levain build; you have enough to make your dough and feed the levain. Here is a whole tutorial on building a liquid levain.
If you haven’t been maintaining your sourdough starter daily, then take it out of the fridge at least 2 days before you want to make your loaf. Let it sit at room temperature for 12 hours before you feed the starter. Then start feeding it nightly. You want an active starter for this recipe.
Make the Final Dough:
Step 2: Combine all ingredients for the final dough in the bowl of a stand mixer fitted with a paddle attachment and mix until the flour is fully incorporated.
Step 3: Once the flour has been completely incorporated, let the dough sit for 15 minutes (autolyze) to develop gluten.
Step 4: Switch to the dough hook and increase the mixer speed to medium to develop the gluten.
With a dough that has this amount of water, it will be difficult to develop the gluten in a home stand mixer. Mix until you see strands forming on top and the dough looks like it is pulling away from the sides of the bowl. This dough will not form a ball around the hook because it is too wet of a dough.
Proofing and folds:
Step 5: Scoop the dough into an oiled large bowl and cover with plastic wrap or a kitchen towel. Place in a warm spot for 30 minutes. I like to use the proof setting on my oven.
Step 6: First set of folds: Fold each of the four sides into the center, pulling the dough up and allowing it to smack down on top of the remaining dough in the bowl. Repeat on all four sides until you have a nice packet. This is developing more gluten! Cover and proof for an additional 15 minutes.
Step 7: Final set of folds: Repeat the process as with the first set of folds. By this point, the dough should hold together very well and stay in a ball in the center after you’ve completed your folds.
If it immediately relaxes out to the sides of the bowl, you don’t have enough gluten, and you should repeat this process. It just means that you didn’t develop as much gluten in the mixer. This isn’t a bad thing! It’s just a process! You need just enough gluten to create a structure that will support the ingredients of the dough and also trap the gas that is released by the yeast. The perfect balance will yield a tender crumb.
Step 8: Bulk Ferment: Cover the dough and return it to the warm spot to proof. Check the dough every 45 minutes. This will take about 2.5 hours. You want to oil or flour your hand and feel the dough. It should feel light and airy and not stiff or dense.
Shaping:
Step 9: Pre-shape: Dust the top of the dough in the bowl with flour. Turn the dough out onto a lightly floured surface. Fold each of the four sides towards you into the center, turning the dough after each fold. This will create a little packet. Flip the dough so the seam is on the counter. Shape it into a round by using both hands to pull the dough towards you. Once you have a round ball with a smooth top, allow it to sit and bench rest for 15 minutes.
Step 10: Final Shape: Repeat the same process as with the pre-shape until you have a tight round ball. Place the dough on a piece of parchment paper or flip it seam-side up into a proof basket that has been dusted with rice flour. Cover with plastic wrap.
To bake the same day: Place the basket back into the warm spot and allow to rise another 2.5 to 3 hours or until it feels light and airy and has doubled in volume in the basket. The volume will be tough to tell if you are proofing it on parchment because it doesn’t contain or control the shape of the sourdough. Proceed to the baking step below.
Step 11: To bake the next day: Place the covered basket into the refrigerator to retard or cold proof the dough overnight. This will slow the proofing of the yeast, allowing you to bake 12-18 hours later.
Baking:
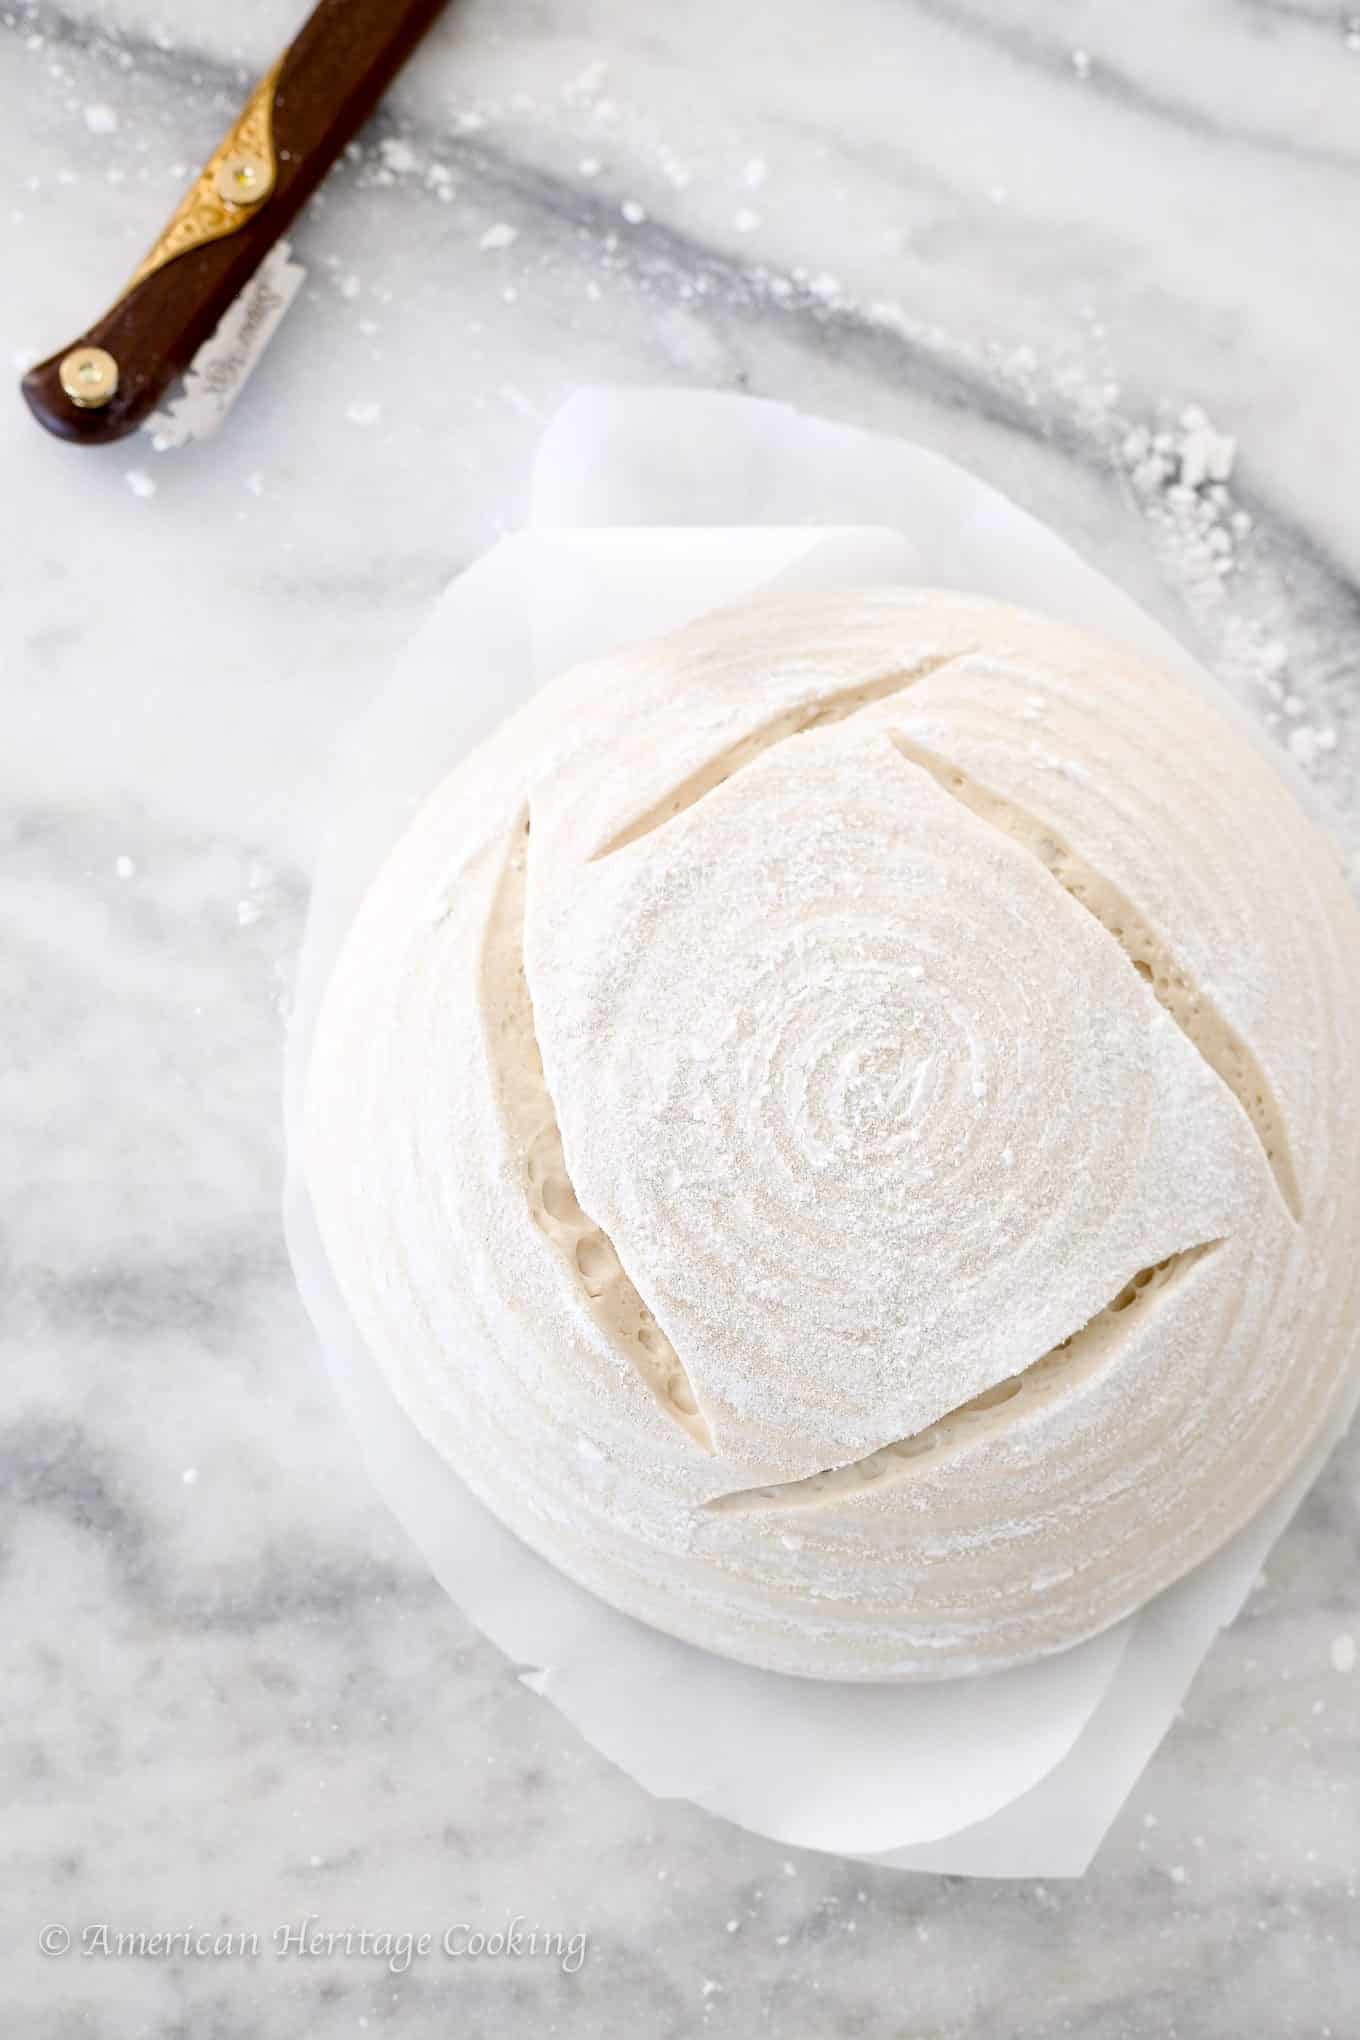
Step 12: Preheat the oven to 450°F convection or 470°F non-convection with the Dutch oven or baking pan inside. Meanwhile, cut a piece of parchment a little larger than the loaf.
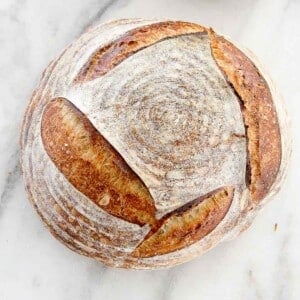
Step 13: Covered bake. When your oven is ready, toss a little flour onto the dough, then turn the dough out of the basket onto the parchment paper. [If you proofed your dough on parchment, skip this step] Score the dough using a lame, razor blade, or paring knife. You want to score midway between the bottom and the top. With this bread in a round shape, I prefer to make it square so that it rises straight up and maintains its original round shape.
Step 14: Finish baking. Take the preheated Dutch oven from the oven, gently lower the dough into the pot, and cover it with the lid. Place in the oven and bake for 20 minutes.
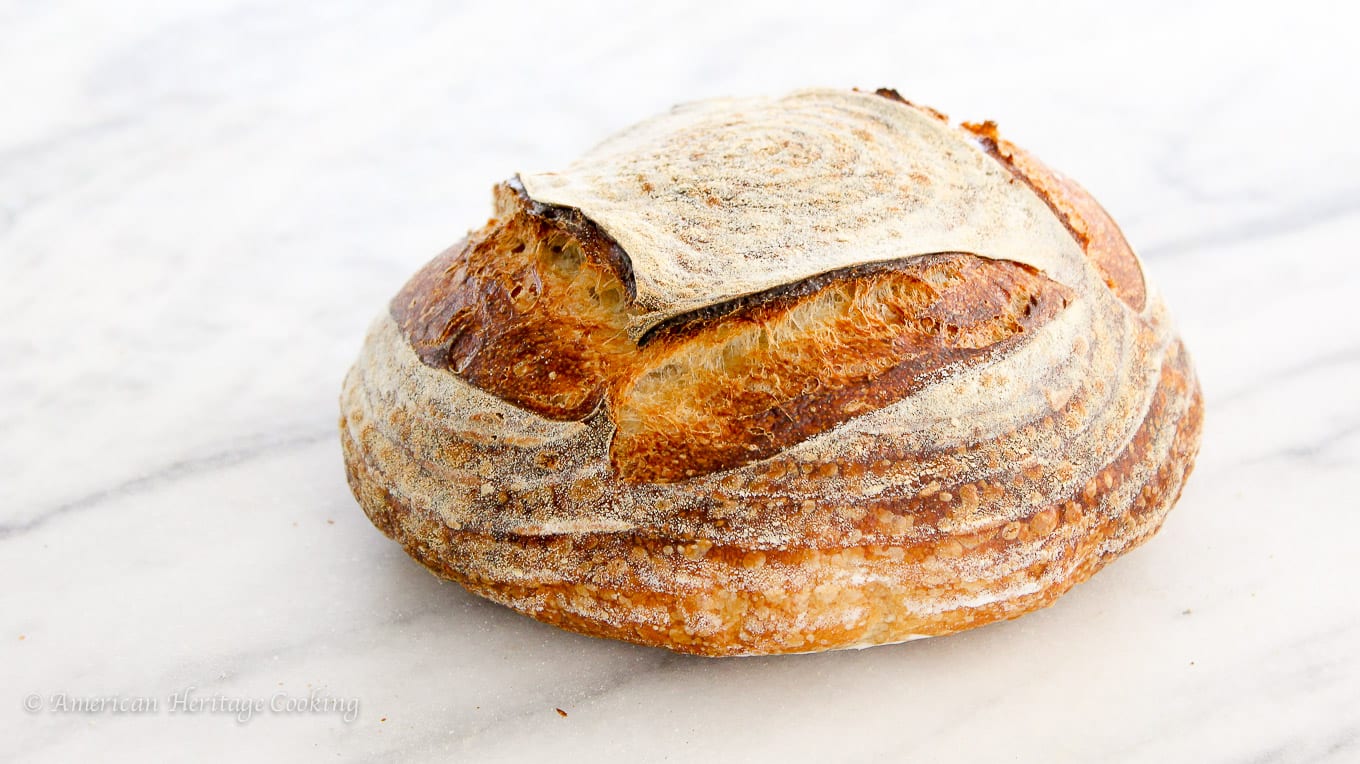
Step 15: Remove the lid and continue baking for 25 minutes or until the loaf is a dark golden brown and the internal temperature reads 210°F.
Step 16: Remove the loaf from the Dutch oven, carefully remove the parchment, and then cool completely. This allows the crumb to set.
Chef Lindsey’s Recipe Tip
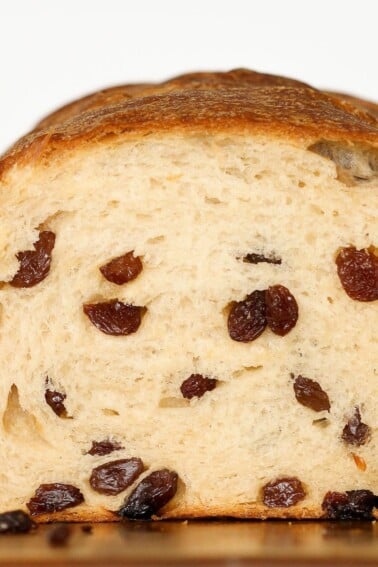
You want a slow and controlled rise with sourdough, so that it has a chance to develop flavor and the gluten needed to support the structure. You can add a bit of commercial yeast, as I do with my sourdough raisin bread, and it will rise faster; however, you will sacrifice some flavor and some of those large pockets.
Sample Baker’s Schedule
There is no wrong time to make sourdough, so use a little math to adjust the schedule to fit your needs!
Also, note that since we aren’t controlling the temperature, this is another variable that might cause your dough to rise faster or slower than mine. Not wrong, just different.
Day 1:
9:30 PM: Prepare the liquid levain and store it in a warm spot for 10-12 hours.
Day 2:
9:30 AM: Combine all the ingredients and autolyse the dough.
10:00 AM: Finish mixing and developing the dough, and place it in an oiled bowl in a warm spot for 30 minutes
10:30 AM: Perform the 1st set of turns. Cover and return to its warm spot.
10:45 AM: Perform the 2nd set of turns. Cover and return to its warm spot.
11:45 AM: Check the dough to see if it is ready; cover it and return to the warm spot.
12:00 PM: Check the dough; if it is not ready, cover it and return to the warm spot.
1:00 PM: Once the dough is light and airy, preshape the dough—cover and bench rest. Prepare the basket with white rice flour.
1:15 PM: Final shape the loaf, turn it into the prepared basket. Cover and transfer the basket to the refrigerator to proof overnight.
Day 3:
7:30 AM: Preheat the oven to 450°F with the Dutch oven or baking vessel inside.
8:00 AM: Transfer the loaf to parchment paper, score it, and then place it carefully in the bottom of your chosen baking vessel. Replace the lid and place it inside the oven. Bake for 20 minutes.
8:30 AM: Carefully remove the lid from the baking vessel and either remove it from the oven or leave it inside to stay warm for the next loaf. Continue baking the uncovered loaf for an additional 25-30 minutes. Cool completely!

Recipe FAQs
To maintain the crunchy crust, store the sourdough bread at room temperature, cut-side down, on a cutting board. It will gradually lose moisture, but it will store well at room temperature for up to a week.
You can also store it in a plastic baggie or an airtight container at room temperature, but the crust will soften almost immediately. You can also store well-wrapped in the freezer for up to 3 months.
There are several benefits to making and consuming sourdough bread. First, making bread at home allows you to control and know exactly what ingredients are in your bread. Second, the fermentation process of sourdough helps break down complex carbohydrates and gluten, making the bread easier to digest.
Yes, you can preheat a baking sheet on the center rack and a large roasting pan on the bottom of the oven. When ready to bake, place the parchment paper with the scored loaf directly on the hot baking sheet and pour at least 2 quarts of hot water into the baking pan on the bottom. Close the door as quickly as possible. Release the steam after 30 minutes by opening the door.
Yes, this recipe was developed to be made with the help of a stand mixer, but you can follow this sourdough bread recipe for beginners to create a great sourdough loaf without a mixer.
This bread is perfect for a cheese board or used to make a roast beef melt, deviled egg salad sandwich, or the best tuna melt recipe!
Recommended Sourdough Recipes
Sourdough Bread Recipes
Sourdough Starter Recipe
Sourdough Bread Recipes
Cherry Sourdough Bread
Sourdough Bread Recipes
Sourdough Raisin Bread

Dinner Roll Recipes
Sourdough Rolls
If you tried this recipe and loved it please leave a 🌟 star rating and let me know how it goes in the comments below. I love hearing from you; your comments make my day!
Easy Sourdough Bread
Ingredients
Levain Build:
- ½ cup all purpose flour
- 3 oz water
- ½ tablespoon yesterday’s starter Recipe Here
Final Dough:
- 2 ¾ cups all purpose flour
- ½ cup rye flour
- 8 oz water
- ⅓ oz kosher salt
- 5 ½ oz liquid levain above
Additional Ingredients:
- rice flour for dusting the proof basket if using
Instructions
Mix the Liquid Levain:
- The 12 to 14 hours before you want to mix your dough, build the levain. In a clean container, mix the flour, water, and starter. Stir with a small spatula until the water has hydrated the flour. With this small quantity, I find it easier to double the amount of the levain build. You have enough to make your dough and feed the levain. Here is a whole tutorial on building a liquid levain.
Make the Final Dough:
- Combine all ingredients for the final dough in the bowl of a stand mixer fitted with a paddle attachment and mix until the flour is fully incorporated.
- Once the flour has been completely incorporated, let the dough sit for 15 minutes (autolyze) to develop gluten.
- Switch to the dough hook and increase the mixer speed to medium to develop the gluten. This dough will not form a ball around the hook because it is too wet of a dough.
Proofing and folds:
- Scoop the dough into an oiled bowl and cover with plastic wrap. Place in a warm spot for 30 minutes. I like to use the proof setting on my oven.
- First set of folds: Fold each of the four sides into the center, pulling the dough up and allowing it to smack down on top of the remaining dough in the bowl. Repeat on all four sides until you have a nice packet. This is developing more gluten! Cover and proof for an additional 15 minutes.
- Final set of folds: Repeat the process as with the first set of folds. By this point, the dough should hold together very well and stay in a ball in the center after you’ve completed your folds. If your dough immediately relaxes, rest for another 15 minutes and perform another set of folds.
- Bulk Proof: Cover the dough and return it to the warm spot to proof. Check the dough every 45 minutes. This will take about 2.5 hours. You want to oil or flour your hand and feel the dough. It should feel light and airy and not stiff or dense.
Shaping:
- Pre-shape: Dust the top of the dough in the bowl with flour. Turn the dough out onto a lightly floured surface. Fold each of the four sides towards you into the center, turning the dough after each fold. This will create a little packet. Flip the dough so the seam is on the counter. Shape it into a round by using both hands to pull the dough towards you. Once you have a round ball with a smooth top, allow it to sit and bench rest for 15 minutes.
- Final Shape: Repeat the same process as with the pre-shape until you have a tight round ball. Place the dough on a piece of parchment or flip it upside down into a proof basket that has been dusted with rice flour. Cover with plastic wrap.
- To bake the next day: Place the covered basket into the refrigerator to retard the dough overnight. This will slow the proofing of the yeast, allowing you to bake 12-18 hours later. To bake the same day: Place the basket back into the warm spot and allow to rise another 2.5 to 3 hours or until it feels light and airy and has doubled in volume in the basket. The volume will be tough to tell if you are proofing it on parchment because it doesn’t contain or control the shape of the sourdough. Proceed to the baking step below.
Baking:
- Preheat the oven to 450°F convection or 470°F non-convection with the Dutch oven or baking pan inside. Meanwhile, cut a piece of parchment a little larger than the loaf.
- When your oven is ready, toss a little flour onto the dough, then turn the dough out of the basket onto the parchment. [If you proofed your dough on parchment, skip this step] Score the dough using a lame, razor blade or paring knife. You want to score midway between the bottom and the top. With this bread in a round shape, I prefer to make it square so that it rises straight up and maintains its original round shape.
- Take the preheated Dutch oven from the oven, gently lower the dough into the pot and cover it with the lid. Place in the oven and bake for 20 minutes.
- Remove the lid and continue baking for 25 minutes or until the loaf is a dark amber brown and the internal temperature reads 210°F.
- Remove the loaf from the Dutch oven, carefully remove the parchment, and then cool completely. This allows the crumb to set.
Video
Notes
Nutrition
Before You Go
I hope you enjoyed this basic homemade sourdough recipe. Check out our other sourdough bread recipes, like these sourdough cinnamon rolls or sourdough hot cross buns!


I don’t have stand mixer and proofing basket? do I need both? Thanks
I don’t have rye flour? Can I use AP flour instead of rye flour?
Awesome. That is so helpful!! I am so happy to have a solution where I I don’t have to wait to bake.
Have a great day and thanks again!!
Here for you and all the bread baking!! Enjoy! You have a lovely day as well 🙂
Thanks Lindsey. I do maintain a stiff starter and it doubles easily at a room temp between 73 and 75. My proof setting is at 85. The liquid levain has grown some and is very bubbly. It does look like it might have risen some and then fell a little. It’s very slightly over the mark where it started. I actually started two last night because I want to make two basic loaves and do the raisin bread. They behaved similarly. I fed my stiff one at the same time and it more than doubled. I think I will start again and watch it during the hours I’m awake to learn what it is doing. Perhaps I’ll make bread tomorrow. Thank you so much for responding!
You are most welcome! If your stiff starter is happy and doubling, then you probably just aren’t catching your liquid levain at the right time. I do suggest watching it during the day to see when it doubles. It’s super important you control how much old starter you are using to create your liquid levain.
Also, go ahead and use your stiff starter for your bread while you figure out your liquid levain and just make up the difference with water in the recipe. So for my raisin bread, for example, just add an extra 25g of water to the sponge and use your stiff levain.
I really love these, Thanks for the recipe.
my family will love this.
Good! Enjoy!
Lindsey!! Long time, no talk, my friend. I agree that it feels like we have more time than we know what to do with these days. But like you I’ve been baking sourdough bread, too. In fact, I’ve got another round proofing right now. I have to say that your scoring techniques are fantastic! Well done, my friend.
Hey David! Good to hear from you! It feels like everyone and their mother is baking bread right now! So much for all those gluten free people, amiright?! Stay safe!
I am having trouble with my liquid levain. It is not doubling. I use a very active starter but I’ve tried tried twice and have not gotten it to double. The first time I left it out at room temp and this time I put it in the oven on the proof setting. Lots of bubbles but not much rise. It also looks like this time there might have been some rise and it’s already fallen.. I assume this levain is trash. I did have a somewhat successful loaf last time even with a levain that didn’t look like it had doubled.
Also, a big thanks for using this time away from work to teach! You are so good at it and I love your videos. They are so helpful and I think your way of helping during this time is so appreciated by so many people. Can’t wait to get back to NYC and visit your restaurant!!
Hi Debbie! Thank you for the compliments! I really appreciate it! I do love teaching – it is one of my favorite parts about being a pastry chef.
So let me roll it back to make sure I understand. When you say you have a very active starter that you are using for your liquid levain, do you mean that your normal starter that you are maintaining and feeding every day is a stiff levain and then you are using that starter to make a liquid levain? Is your normal starter doubling? Or is your starter no longer doubling at all. A liquid levain will look a bit different than a stiff. The amount of water makes it difficult to trap large bubbles in the levain but that doesn’t mean it isn’t happy. How long are you keeping it in the oven on proof? It might be doubling and then starting to fall before you have a chance to look at it. Even the proof setting is pretty warm for a levain unless you are trying to rush it.
I am sorry about your job, but so glad to see your blog posts again! I will have to try this! First I have to make the starter.
Thanks!
Hi Josephine! It made me smile to see your comment! It has been so long. I am working on a video for a starter. I filmed the last piece yesterday but I need to edit it!
You did an amazing job Chef Lindsey. Instructions are easy to follow. Video is well done!
Thank you, love! Miss you and our time in bread school! Feels like forever ago.