This post may contain affiliate links. Please read our disclosure policy.
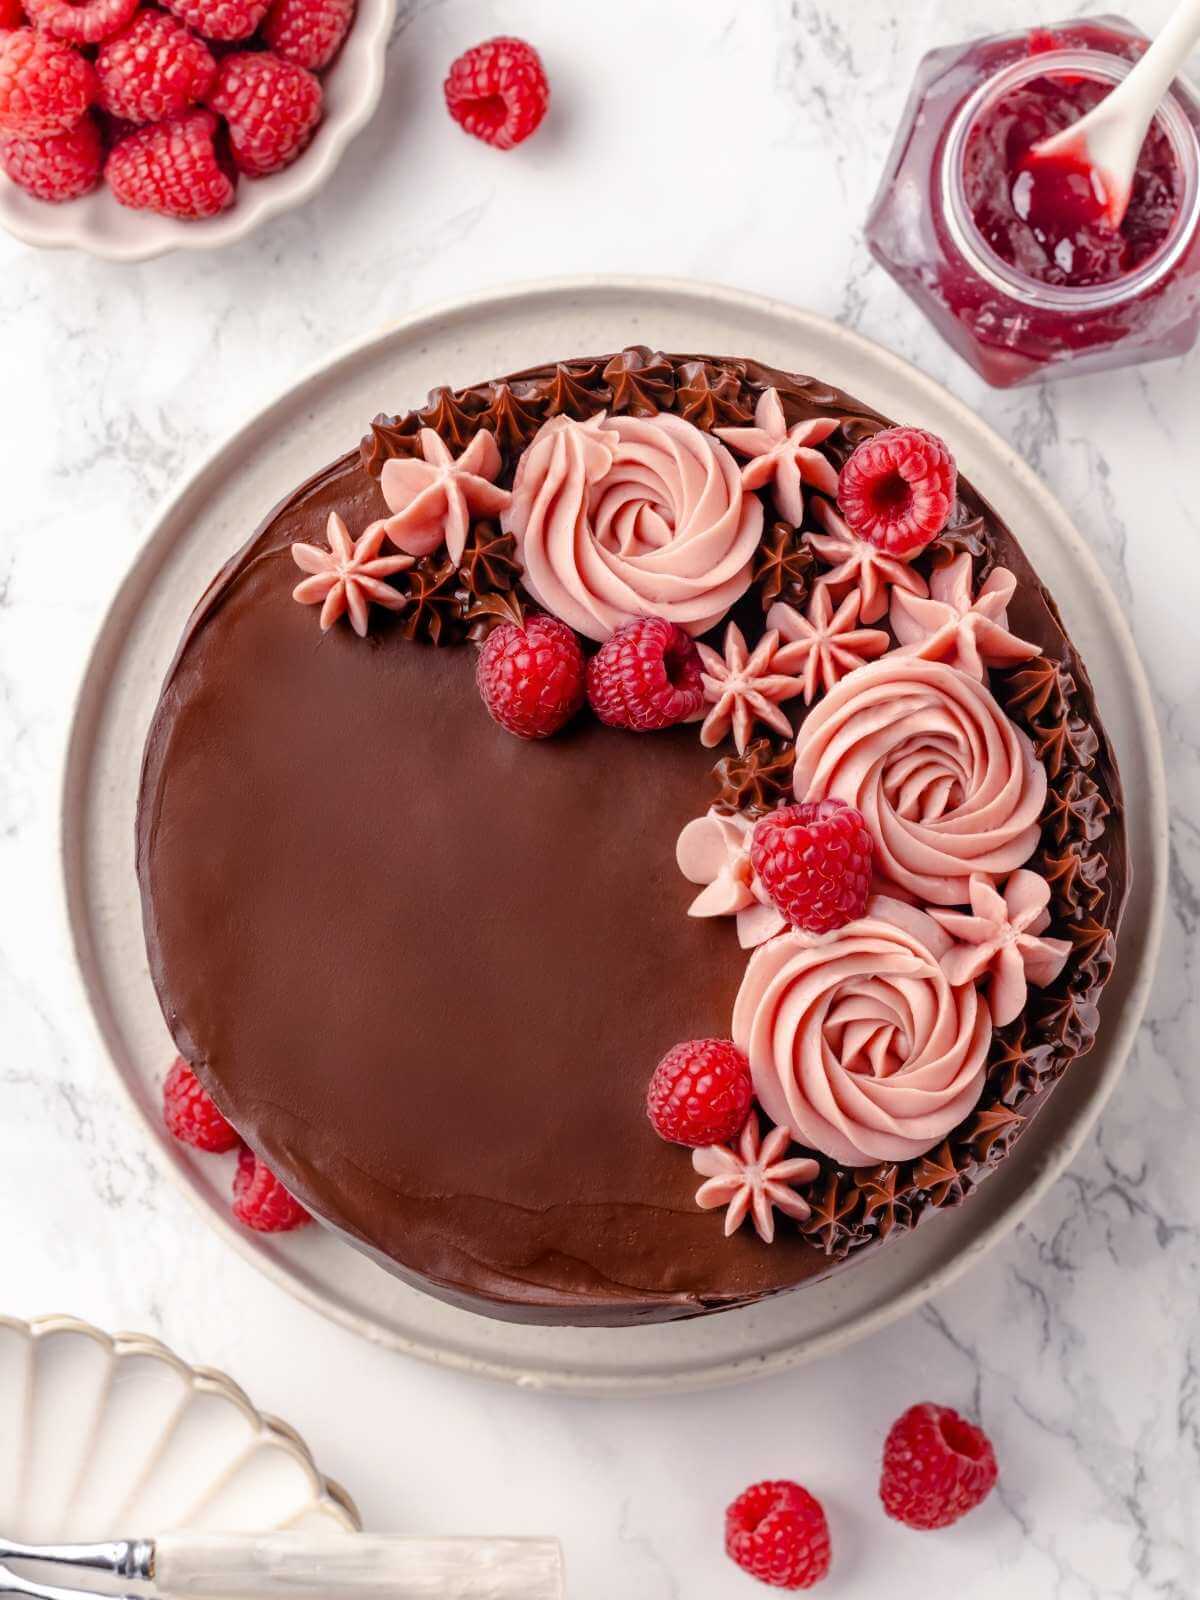
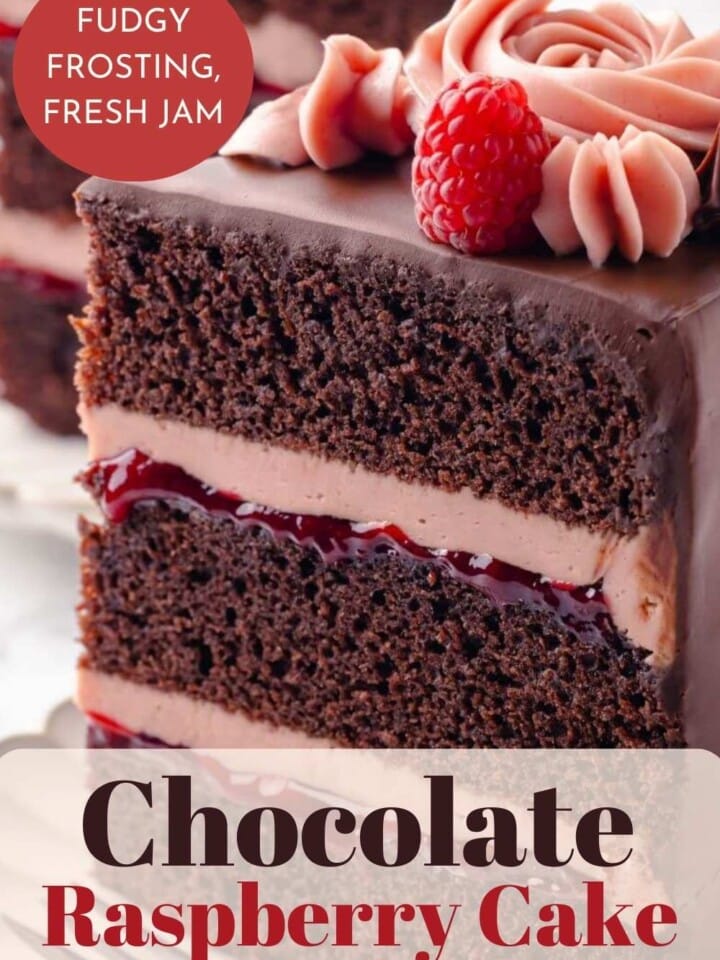
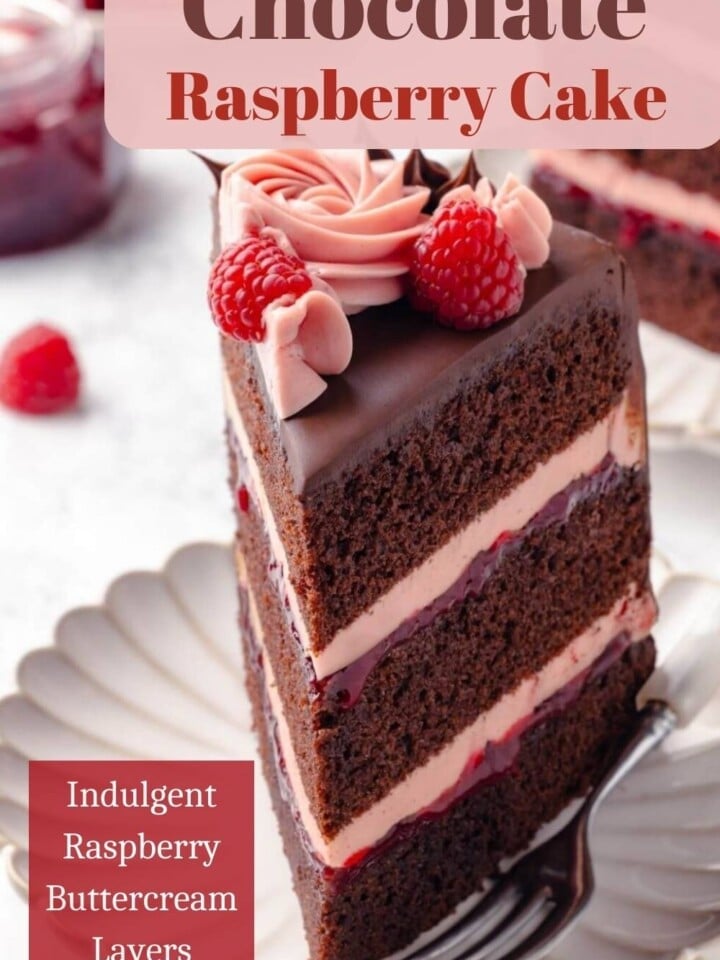
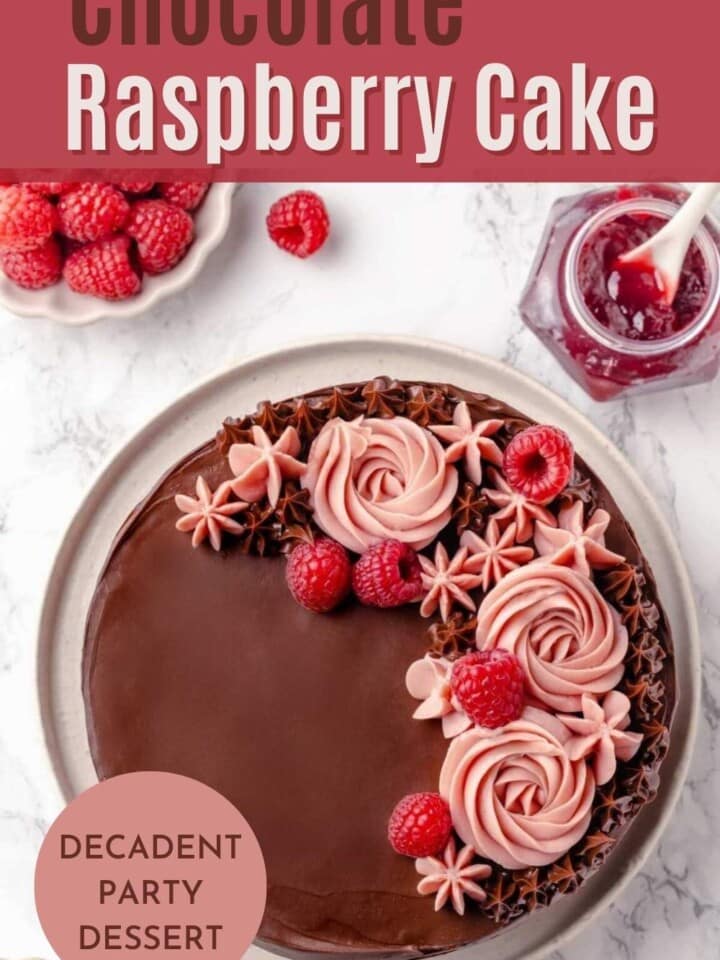
This chocolate raspberry cake recipe has layers of a soft, tender chocolate cake, raspberry buttercream made with fresh raspberries, and a rich chocolate fudge frosting! The cake is mixed in one bowl with a whisk and is almost as easy as box-mix but so much more delicious!
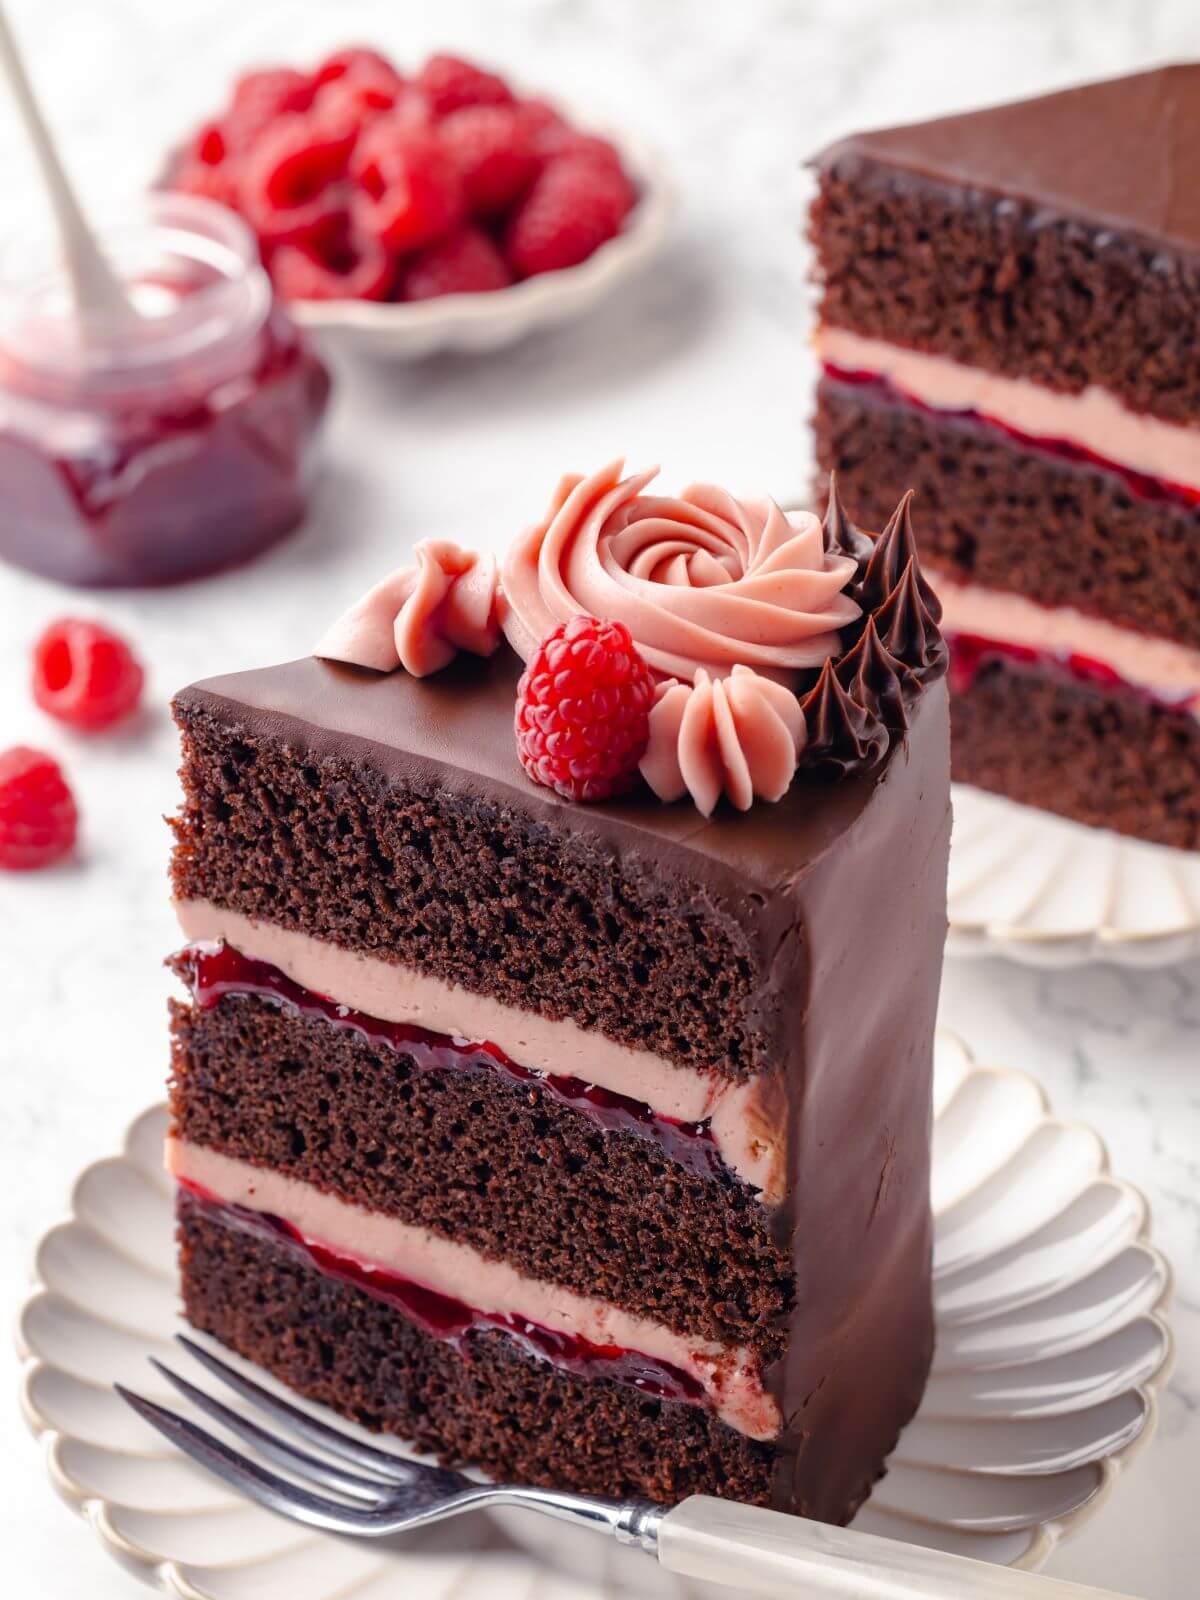
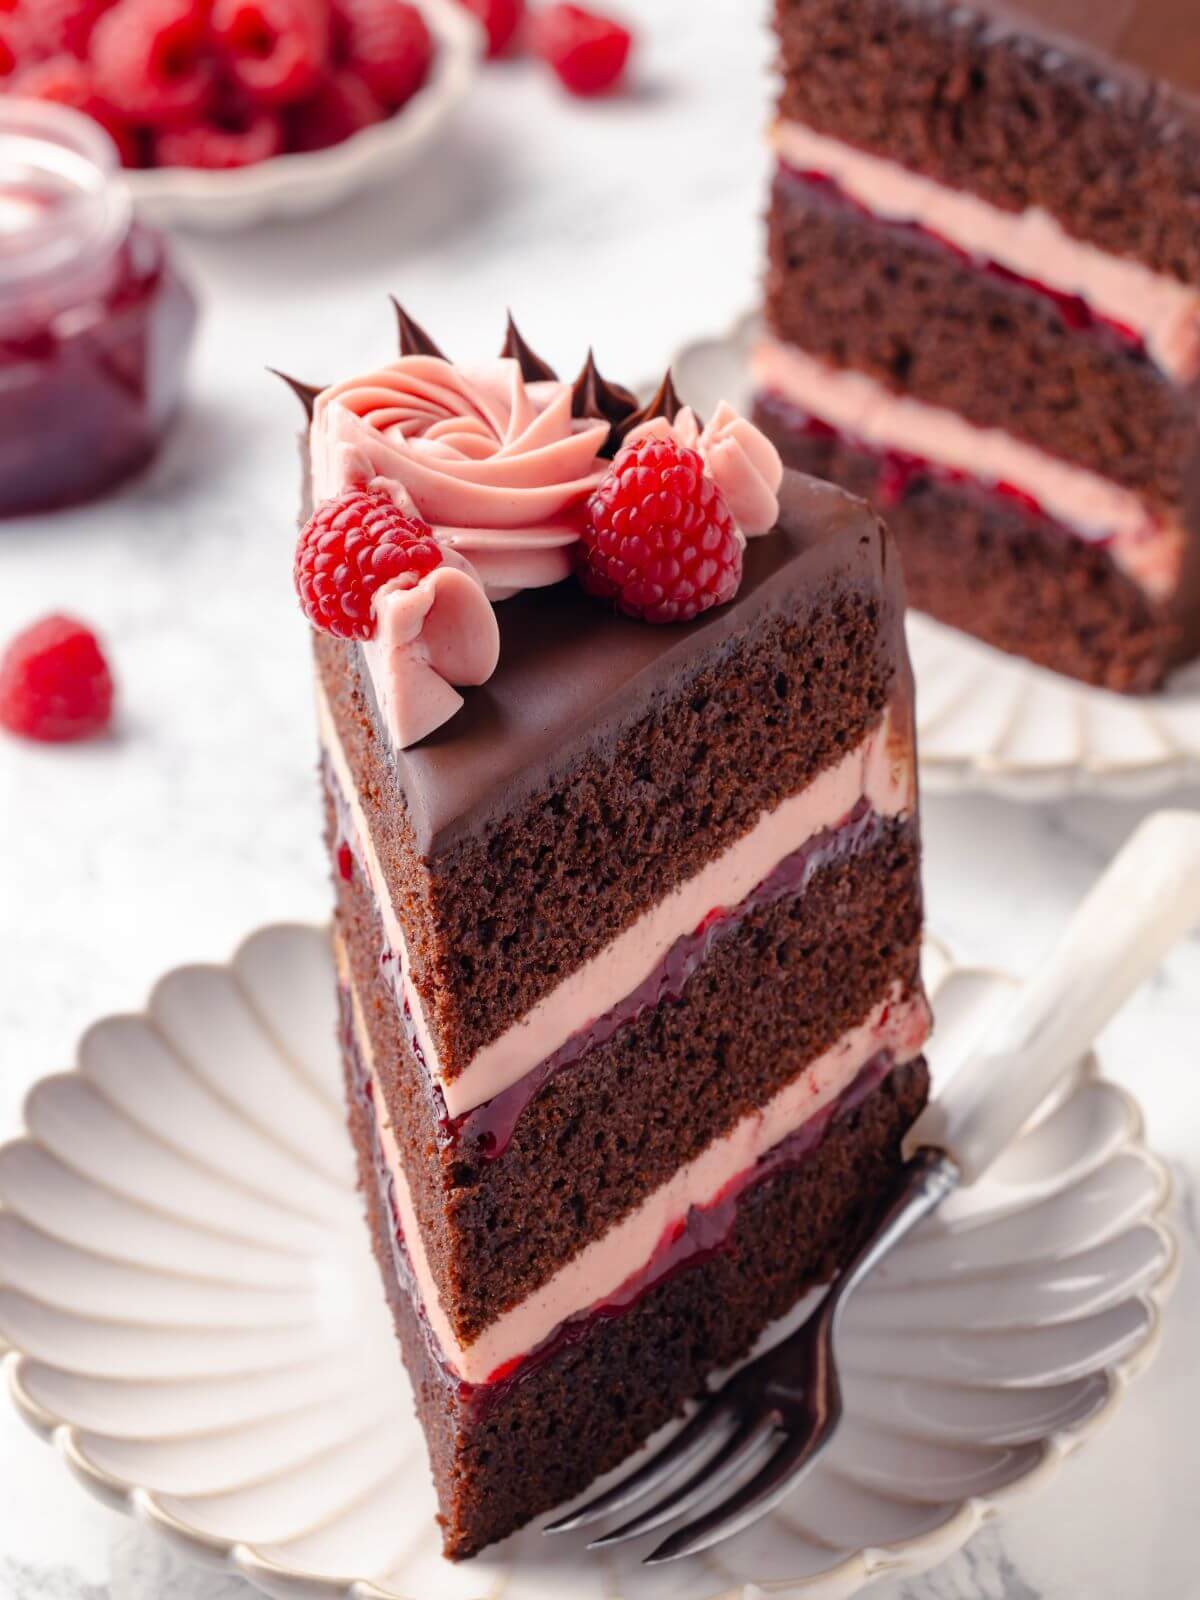
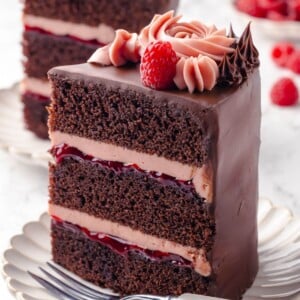
Here is a three-layered cake that is perfectly balanced. This chocolate raspberry cake is layered with a moist chocolate cake, bright, quick raspberry jam, smooth raspberry buttercream, and finished with a rich chocolate fudge frosting. All the components come together for an indulgent and show-stoppingly beautiful dessert.
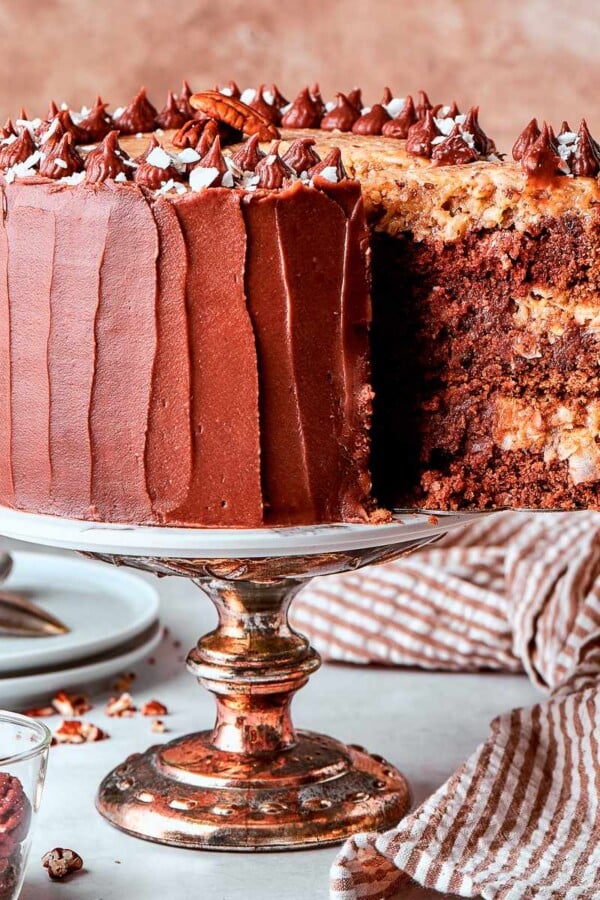
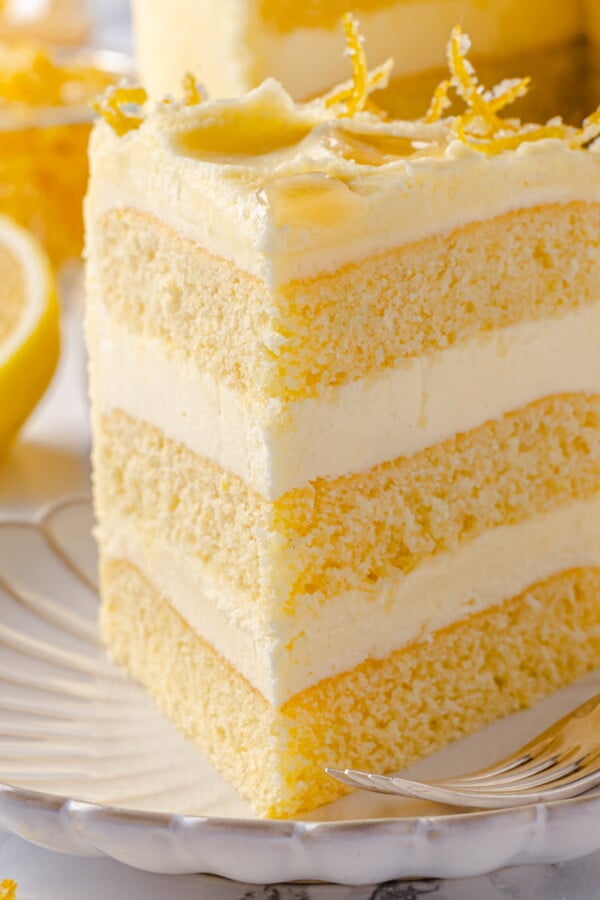
Once you are in your layered cake era, it’s hard to get out of it! Here are some more easy layered cakes to bring out for a birthday, holiday, or just a delicious end to a family dinner. Start with the best red velvet cake, easy moist chocolate cake, or a classic yellow cake for some nostalgia. And if you are ready to make a show-stopping cake like a pastry chef, check out my devil’s food cake recipe and watch my video on how to assemble a four-layered cake!
Table of Contents
Why You Will Love This Raspberry Chocolate Cake
- Beautifully balanced layered cake! Rich and moist chocolate cake layered with bright raspberry filling, raspberry buttercream, and rich fudgy chocolate frosting. Nothing overpowers each other, all coming together for a delicious layered cake.
- An easy cake that is rich and moist. This chocolate cake is made in one bow! It’s a rich and fudge-like cake with a very easy cleanup.
- Buttercream and frosting for a truly delicious and unique cake. Layered with raspberry buttercream but finished with chocolate frosting! Slice into this cake, and everyone will be in awe of the beautiful layers and colors.

Professional Tips for Making Chocolate Cake Recipes
- Make components ahead of time. If you know you want this cake for a birthday or celebration, you can make each component ahead of time. The cake can be made a few days in advance. The jam and buttercream as well. This will make assembling the cake seem like a breeze day of.
- Bake the cake in baking sheets. Baking the cake in a baking pan will allow the cake to bake faster and give you more even layers. You just need a cake ring to cut out the chocolate cake layers from the pan. There will be cake scrapes perfect for snacking or cake pops.
- Adjust the quick jam to the sweetness of the berries. Berries tend to vary in sweetness. So taste the berries and adjust the lemon and sugar to your desired flavor.
Ingredients & Substitutions
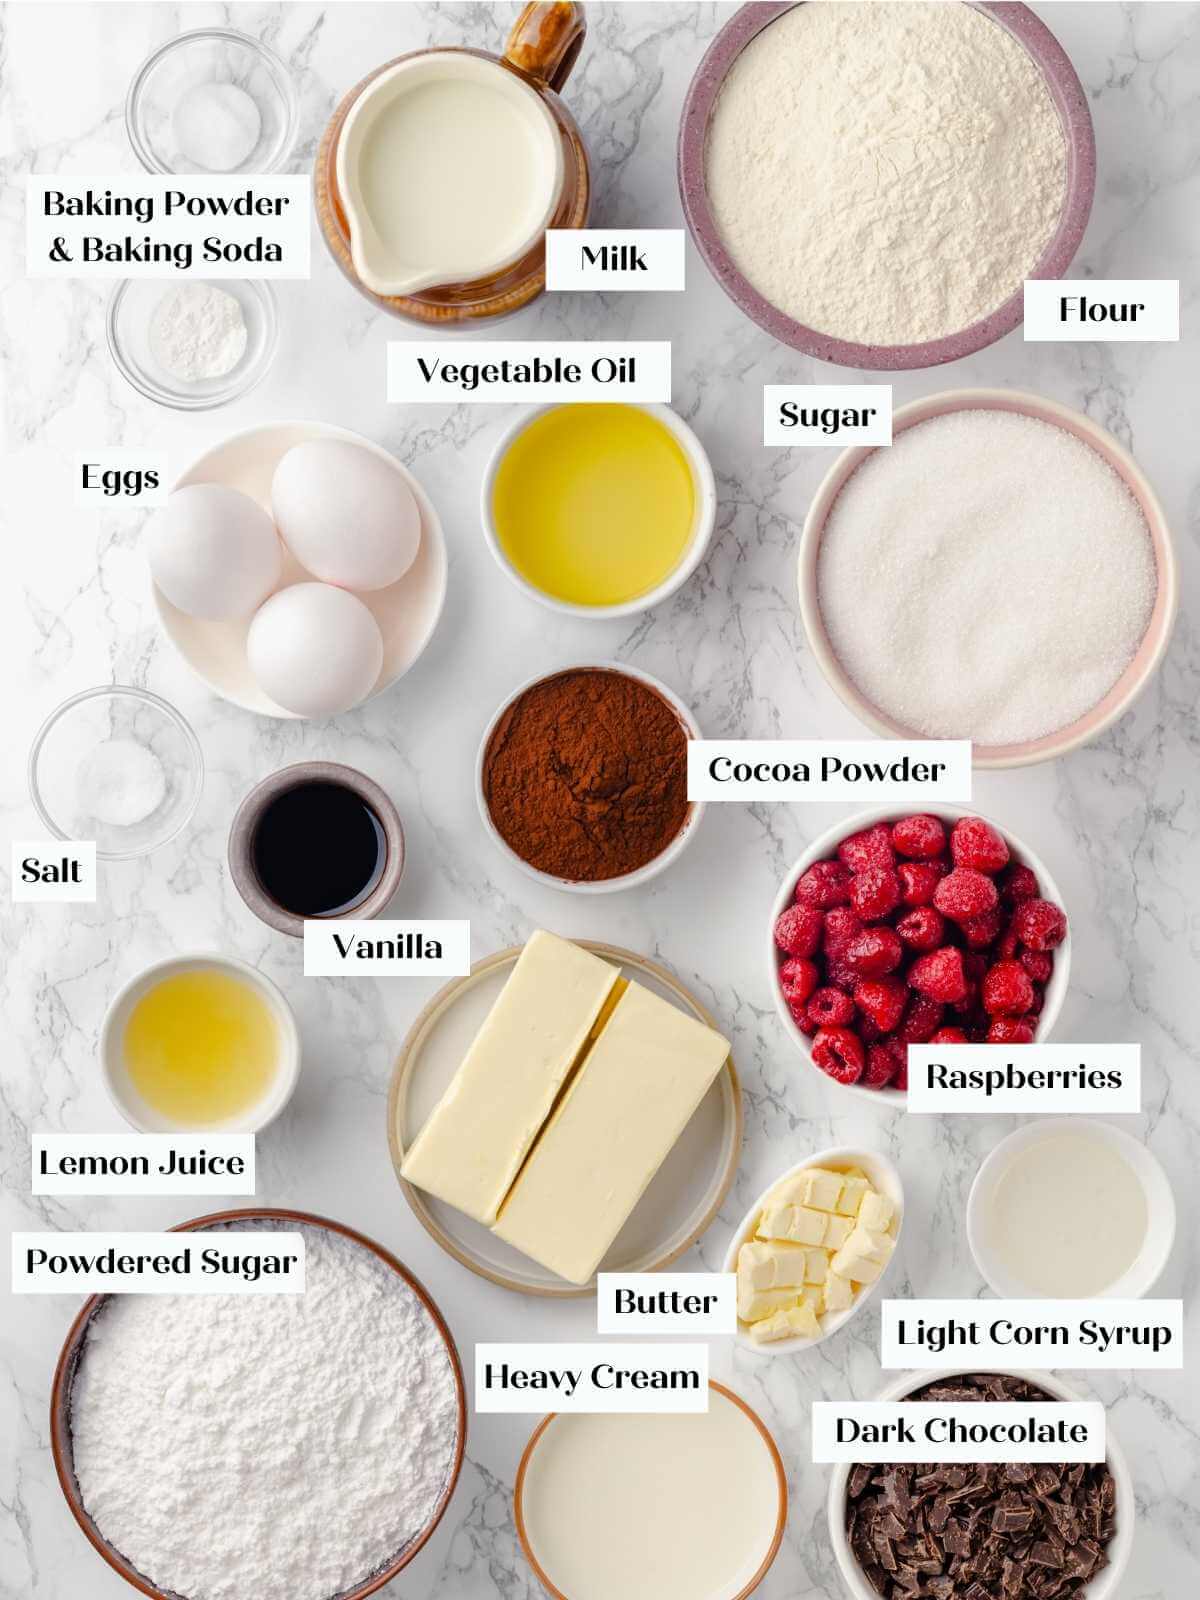
For Chocolate Cake
- Cocoa Powder: I use Dutch-processed cocoa powder, which just means it has been treated with an alkaline solution. This neutralizes the acidity, which means it will not react with baking soda or baking powder. It has a rich, deep flavor and a darker color.
- All-purpose Flour: All-purpose flour has just the right amount of gluten to make a tender, soft cake. To avoid holes and “tunnels” in your cake, be careful not to overmix the batter. Cake flour can be substituted.
- Kosher Salt
- Baking Soda & Powder: Using baking powder and baking soda allows for a stronger and more even rise in the oven.
- Large Eggs: Whole eggs allow you to emulsify all that oil into the batter, resulting in a moist, not greasy, cake.
- Vanilla Extract
- Vegetable Oil: Oil makes both this cake and my easy carrot cake recipe exceptionally moist. I emulsify it into the sugar and eggs to make the batter extra moist and not greasy. Be sure to choose a neutral oil because there is enough in this cake that you will taste it if you use olive oil or a blend.
- Granulated Sugar: I use granulated sugar in this cake. It is here for the more obvious flavor reasons but also to aid in leavening, moisture, texture, and stability.
- Whole Milk: I generally bake with whole milk for the added flavor and fat. It has a lower water content, and the extra fat helps keep the cake tender and moist.
For Raspberry Jam and Buttercream
- Fresh or Frozen Raspberries: Fresh or frozen raspberries can be used for this recipe. If making this cake in the winter, I would go with the frozen raspberries, which have a better flavor and less water content. They’re also what I use in my white chocolate raspberry cookies!
- Lemon Juice: Fresh lemon juice will brighten the jam, giving it a more well-rounded flavor. You can use store-bought but I would go for fresh to frozen juice for the best flavor.
- Granulated Sugar: The granulated sugar helps the raspberry cake filling thicken and adds sweetness.
- Butter: Use a good quality unsalted butter for the most stable buttercream. If you use salted butter, your buttercream will be salty!
- Confectioner’s Sugar: Confectioner’s sugar is used in American buttercreams because it is ground finely into a powder. This allows it to create a smooth, silky buttercream without having to be heated.
- Vanilla Extract
- Kosher Salt
Chocolate Fudge Frosting
- Heavy Cream: I would suggest using a full-fat (40%) heavy whipping cream because it doesn’t break as easily as lighter whipping creams. The fat also helps create a rich and smooth frosting.
- Light Corn Syrup: Light corn syrup thickens the frosting like sugar but isn’t as sweet. It will also create a thicker, smoother texture. You can also substitute honey.
- Dark Chocolate: I like to use a chocolate that has at least 54% cocoa solids but up to 65%. This balances the sweetness of the frosting gives the impression of a dark chocolate cake. Chopping bar chocolate is a better bet than chocolate chips because the bar will melt and incorporate better.
- Vanilla Extract
- Kosher Salt
- Cocoa Powder: Dutch-processed cocoa powder has a stronger flavor and darker color. It will help keep the frosting from being overly sweet. You can use regular cocoa powder; just know it will be sweeter and not as dark in color.
- Butter
See the recipe card for full information on ingredients and quantities.
Variations
- Change the fruit! Change the thin layer of quick jam to blueberry, strawberry, or blackberry. Adjust the sugar and lemon juice to the sweetness of the berries.
- Add a bit of alcohol to the buttercream. Add a tablespoon of raspberry liquor, brandy, or bourbon to the raspberry buttercream for a fun boozy twist. You could also make chocolate buttercream or cream cheese buttercream frosting instead of raspberry.
- Make a different flavored cake. Pair the jam, buttercream, and frosting with my moist vanilla cake, olive oil cake, or devil’s food cake. If you want to up your chocolate flavor, you could even layer it with my chocolate ganache!
How to Make Chocolate Raspberry Cake
Use these instructions to make a perfect layered chocolate raspberry cake every time! Further details and measurements can be found in the recipe card below.
Prepare the cake:
Step 1: Preheat the oven to 325°F convection (with the fan) or 350°F conventional (without the fan). Spray and line 3, 8, or 9-inch cake pans with parchment paper.
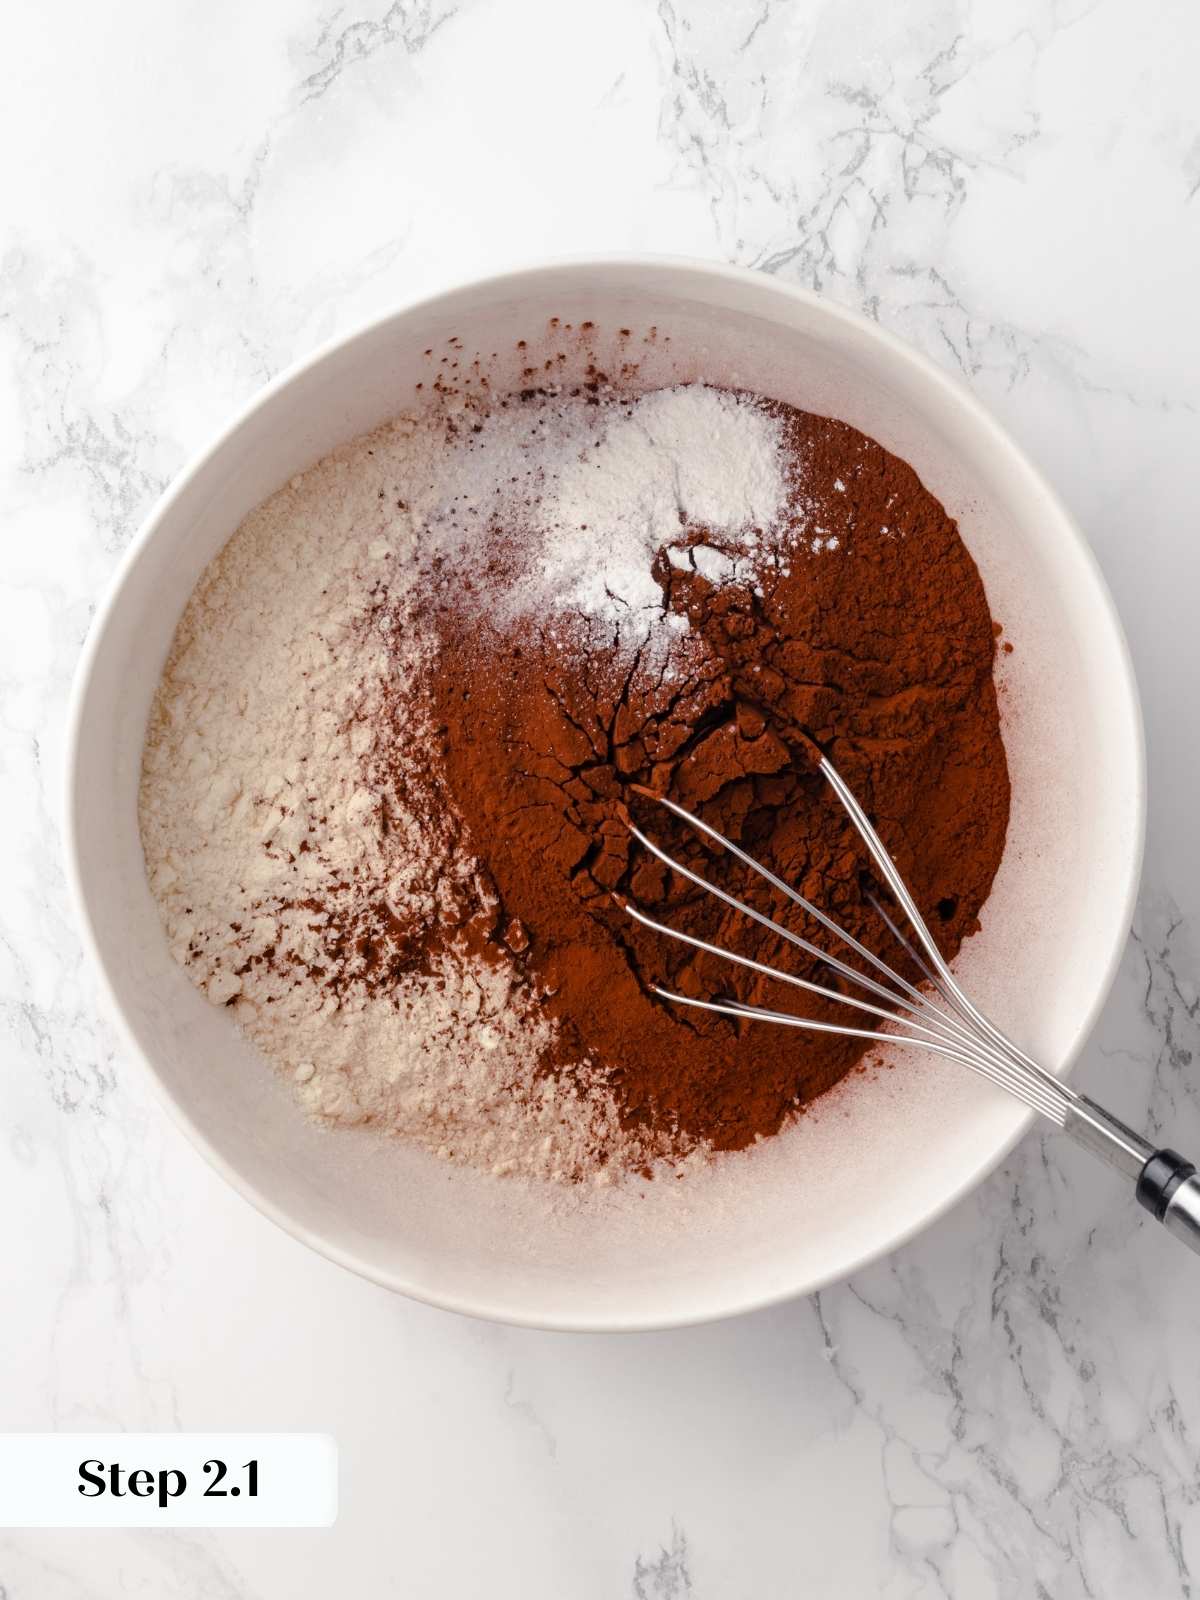
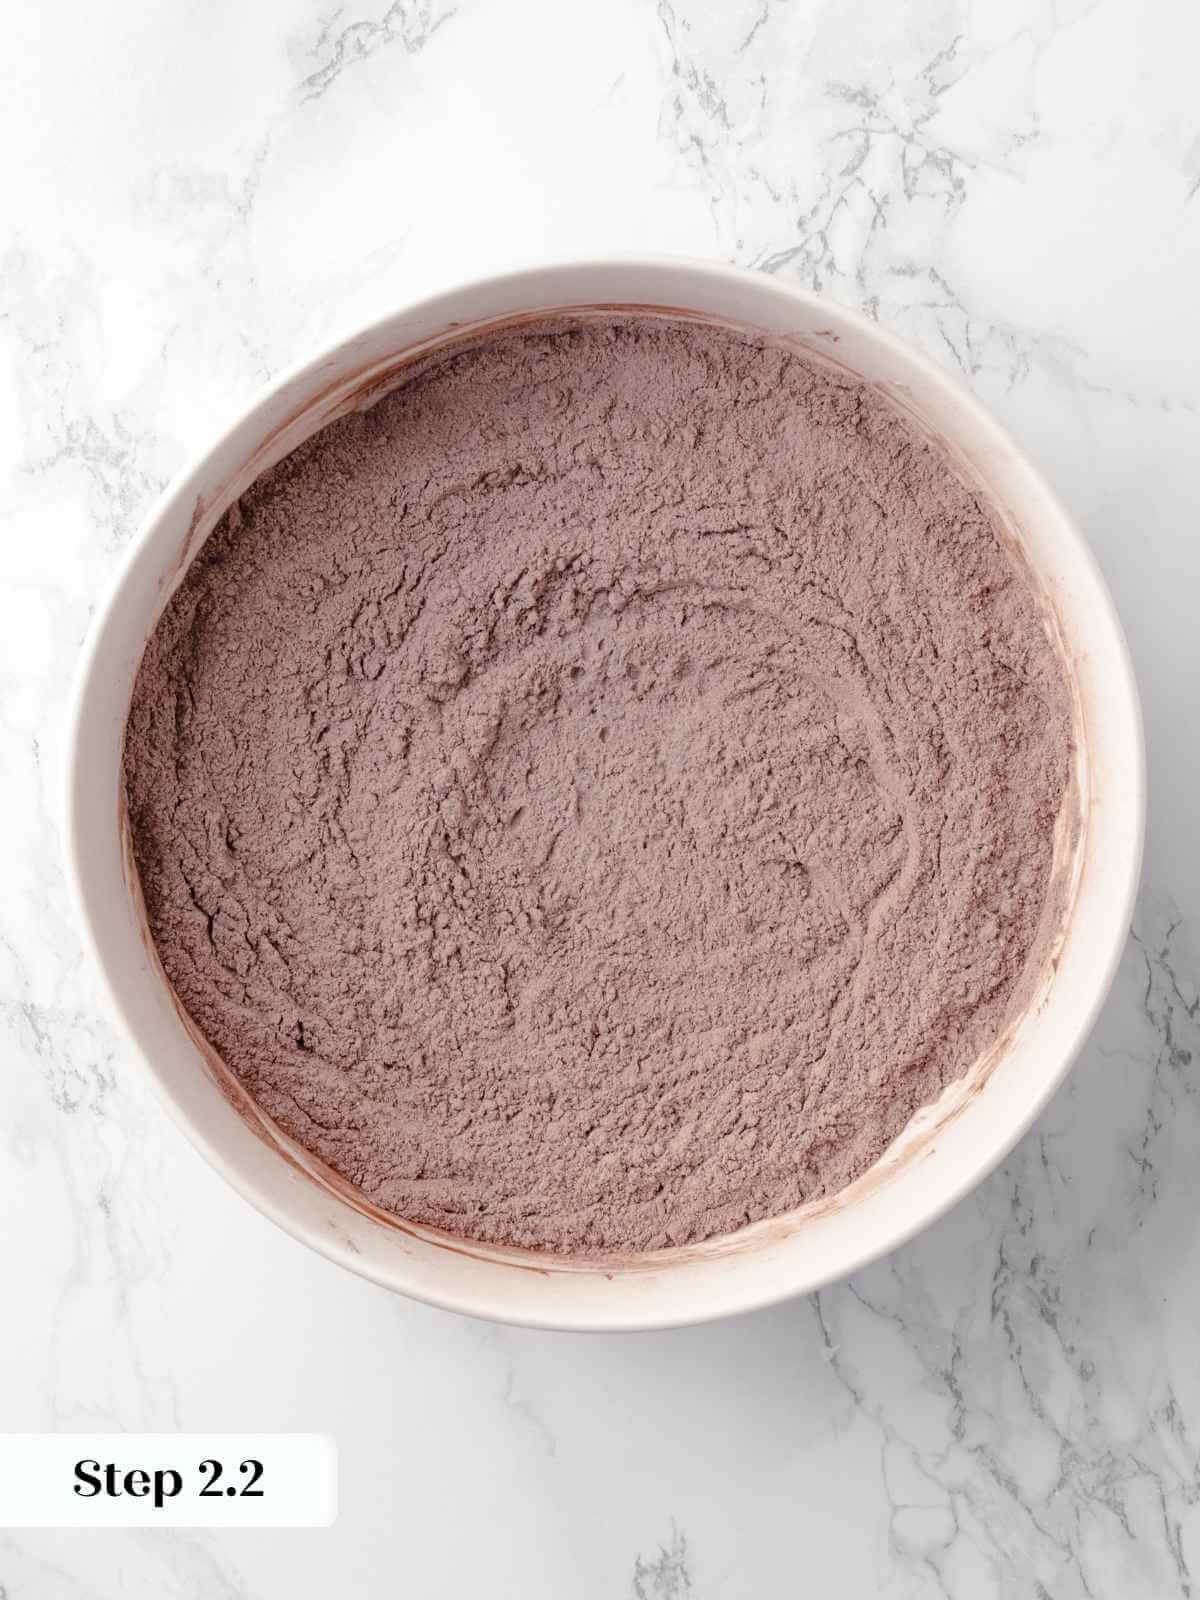
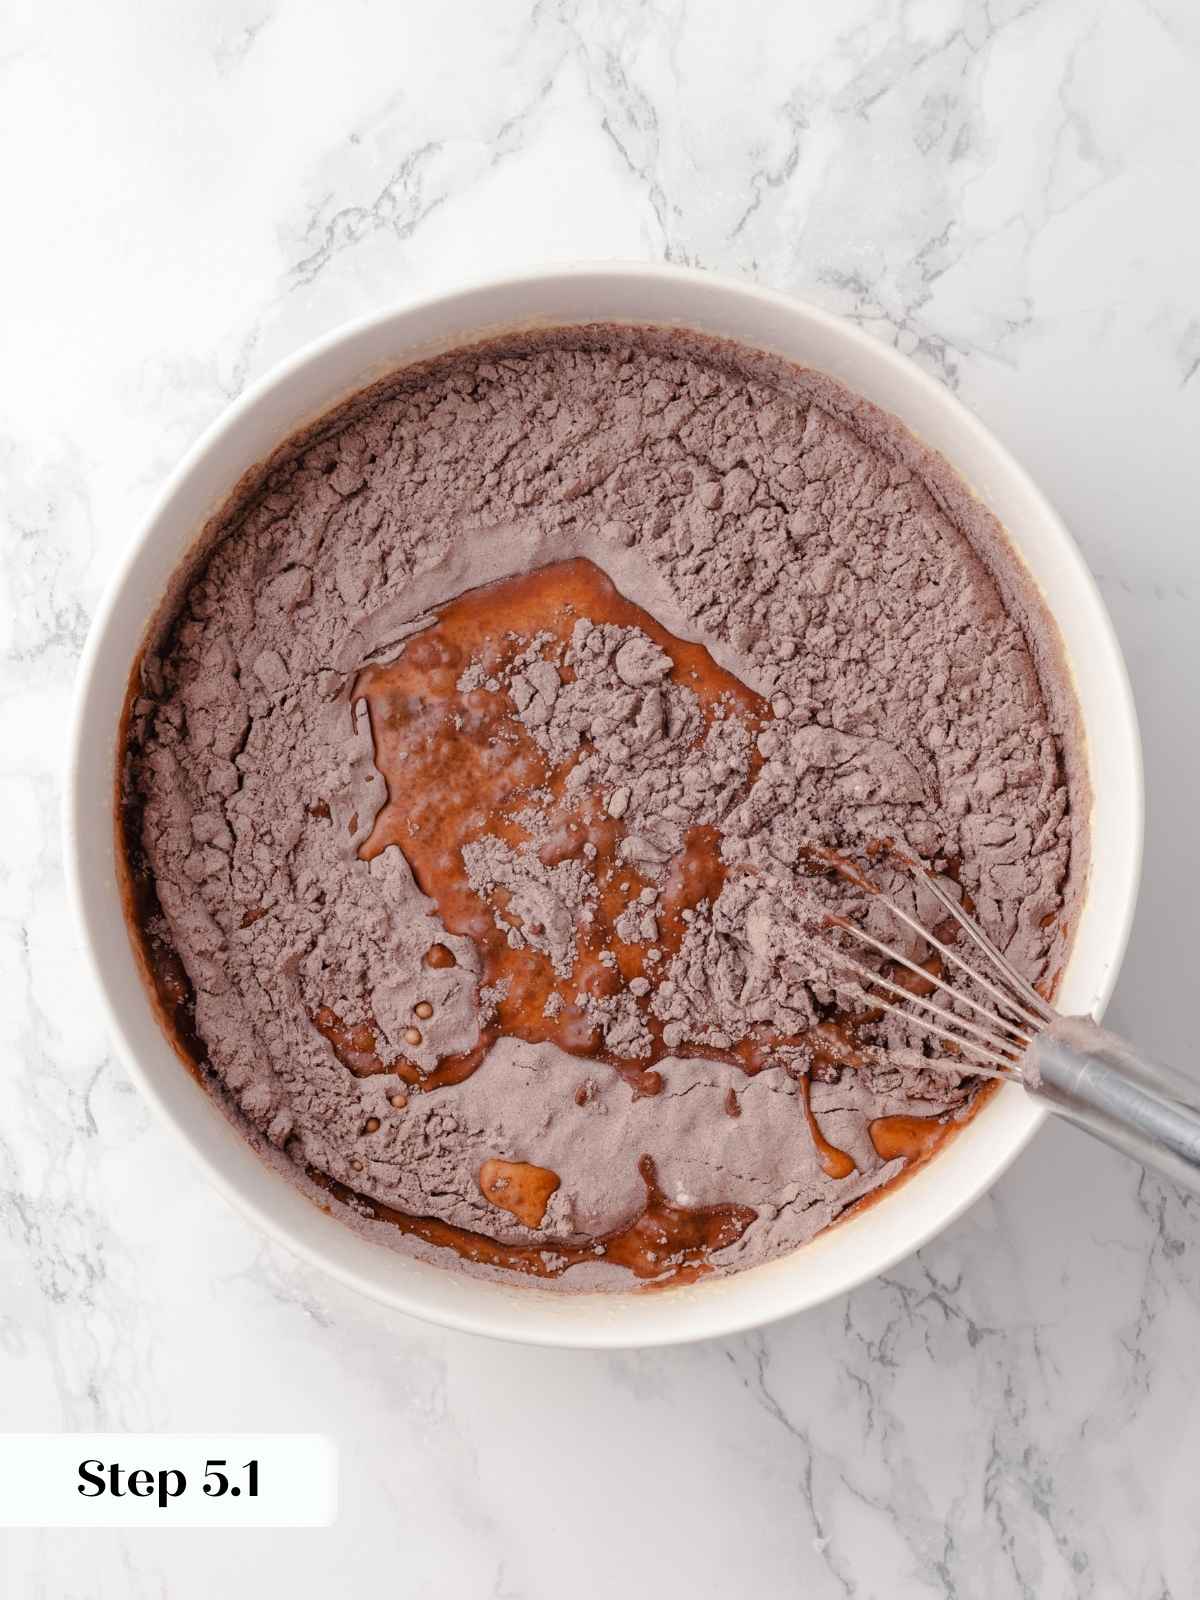
Step 2: Into a large bowl, sift together cocoa powder, all-purpose flour, salt, baking powder and baking soda. Set Aside.
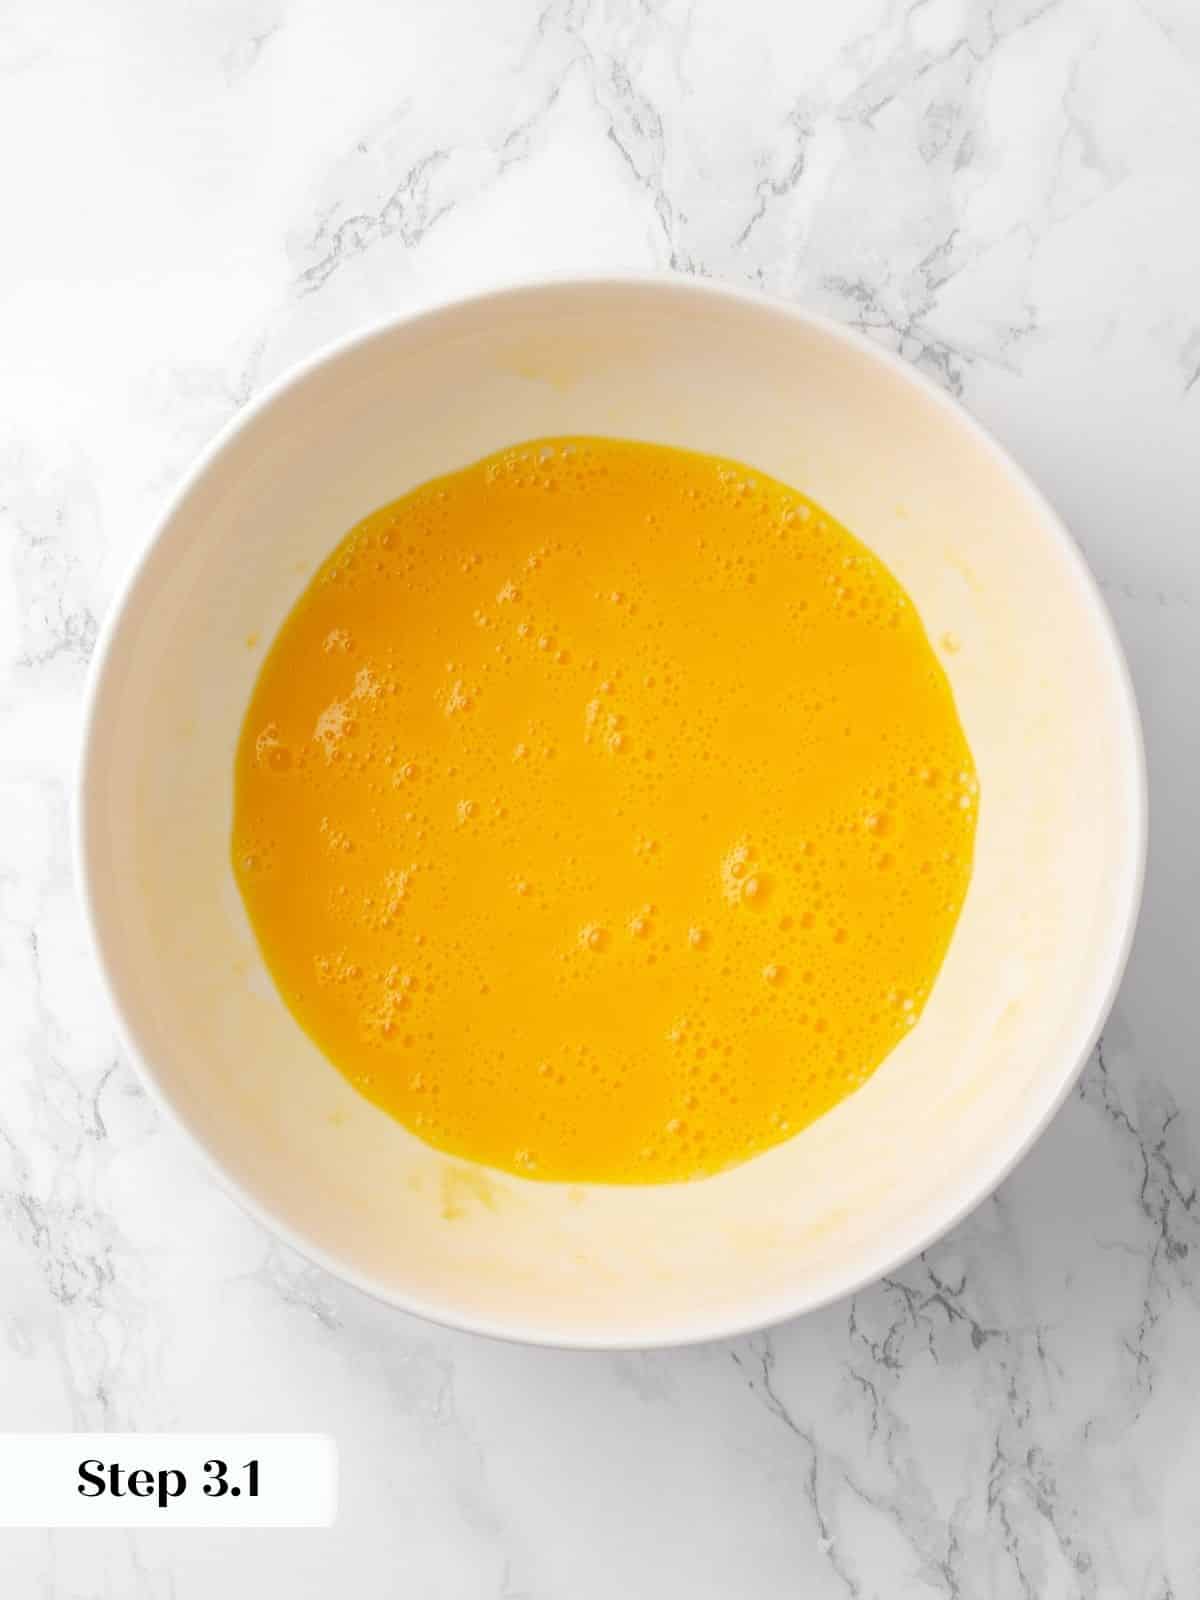
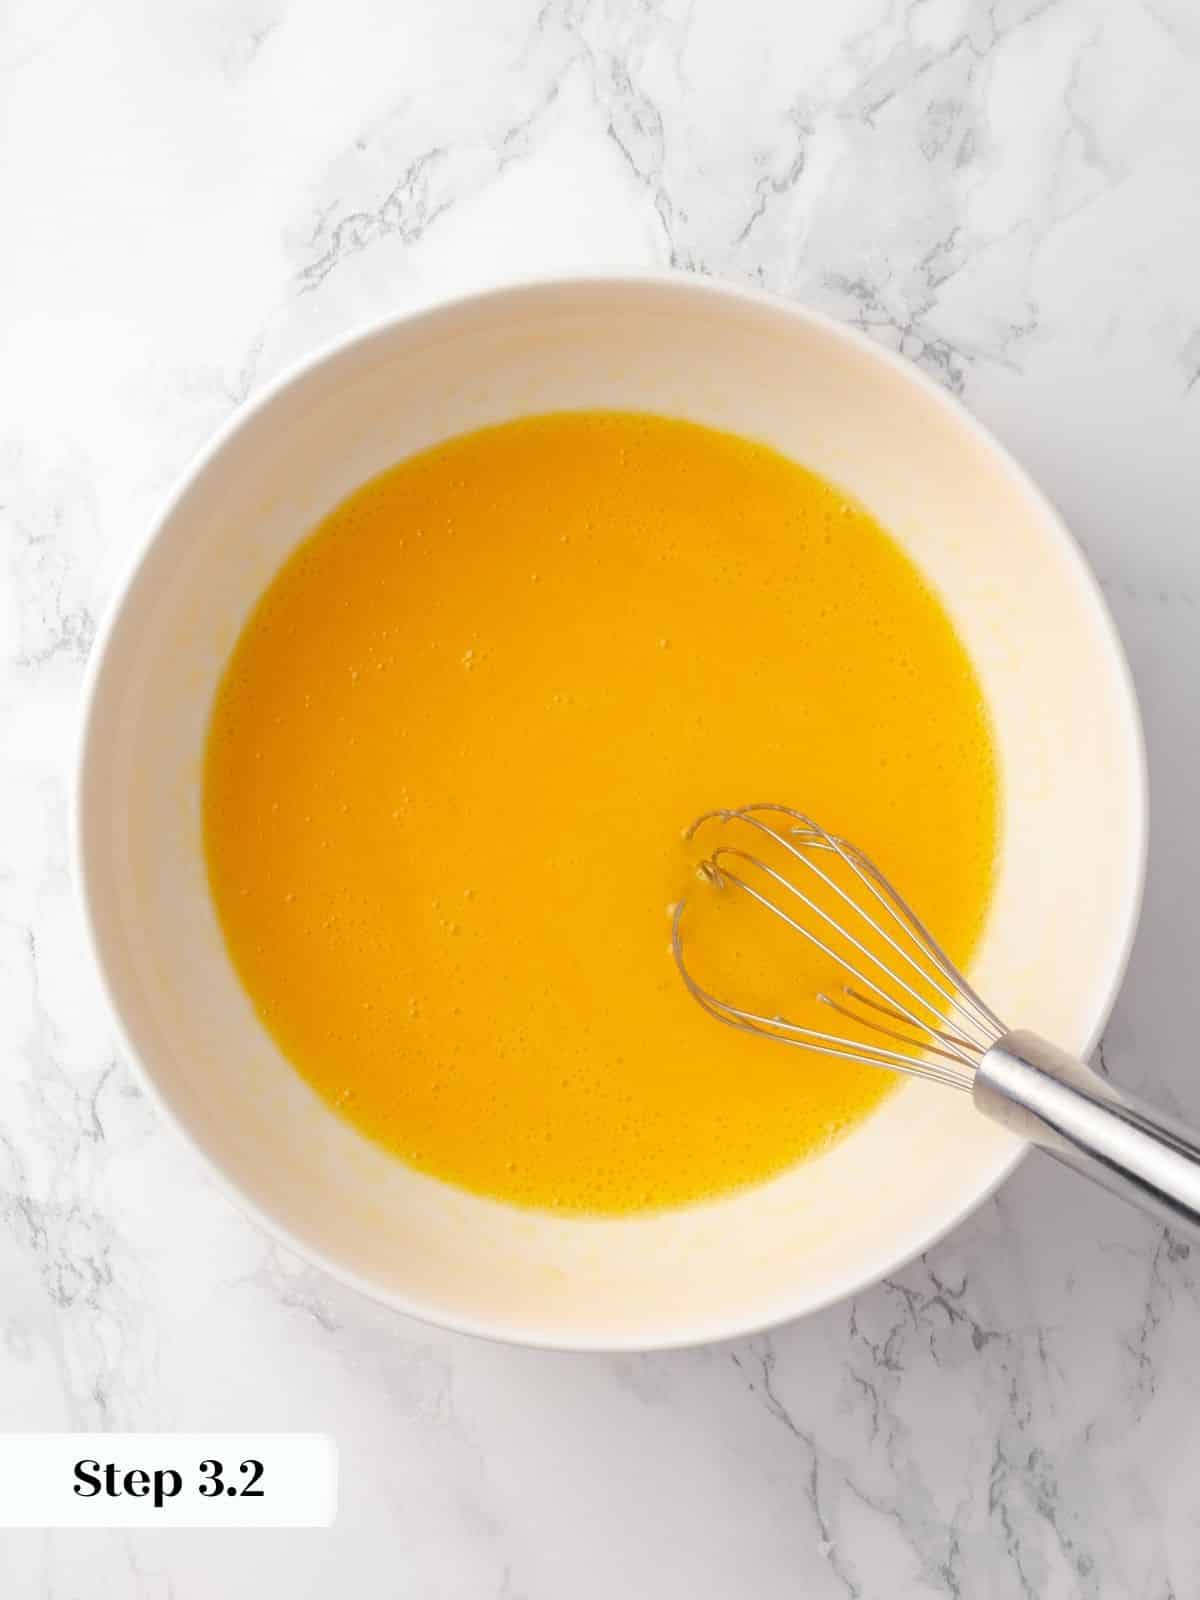
Step 3: Whisk the eggs with the vanilla extract until smooth and homogenous in a separate large bowl. Slowly pour the oil into the eggs while whisking to create an emulsion.
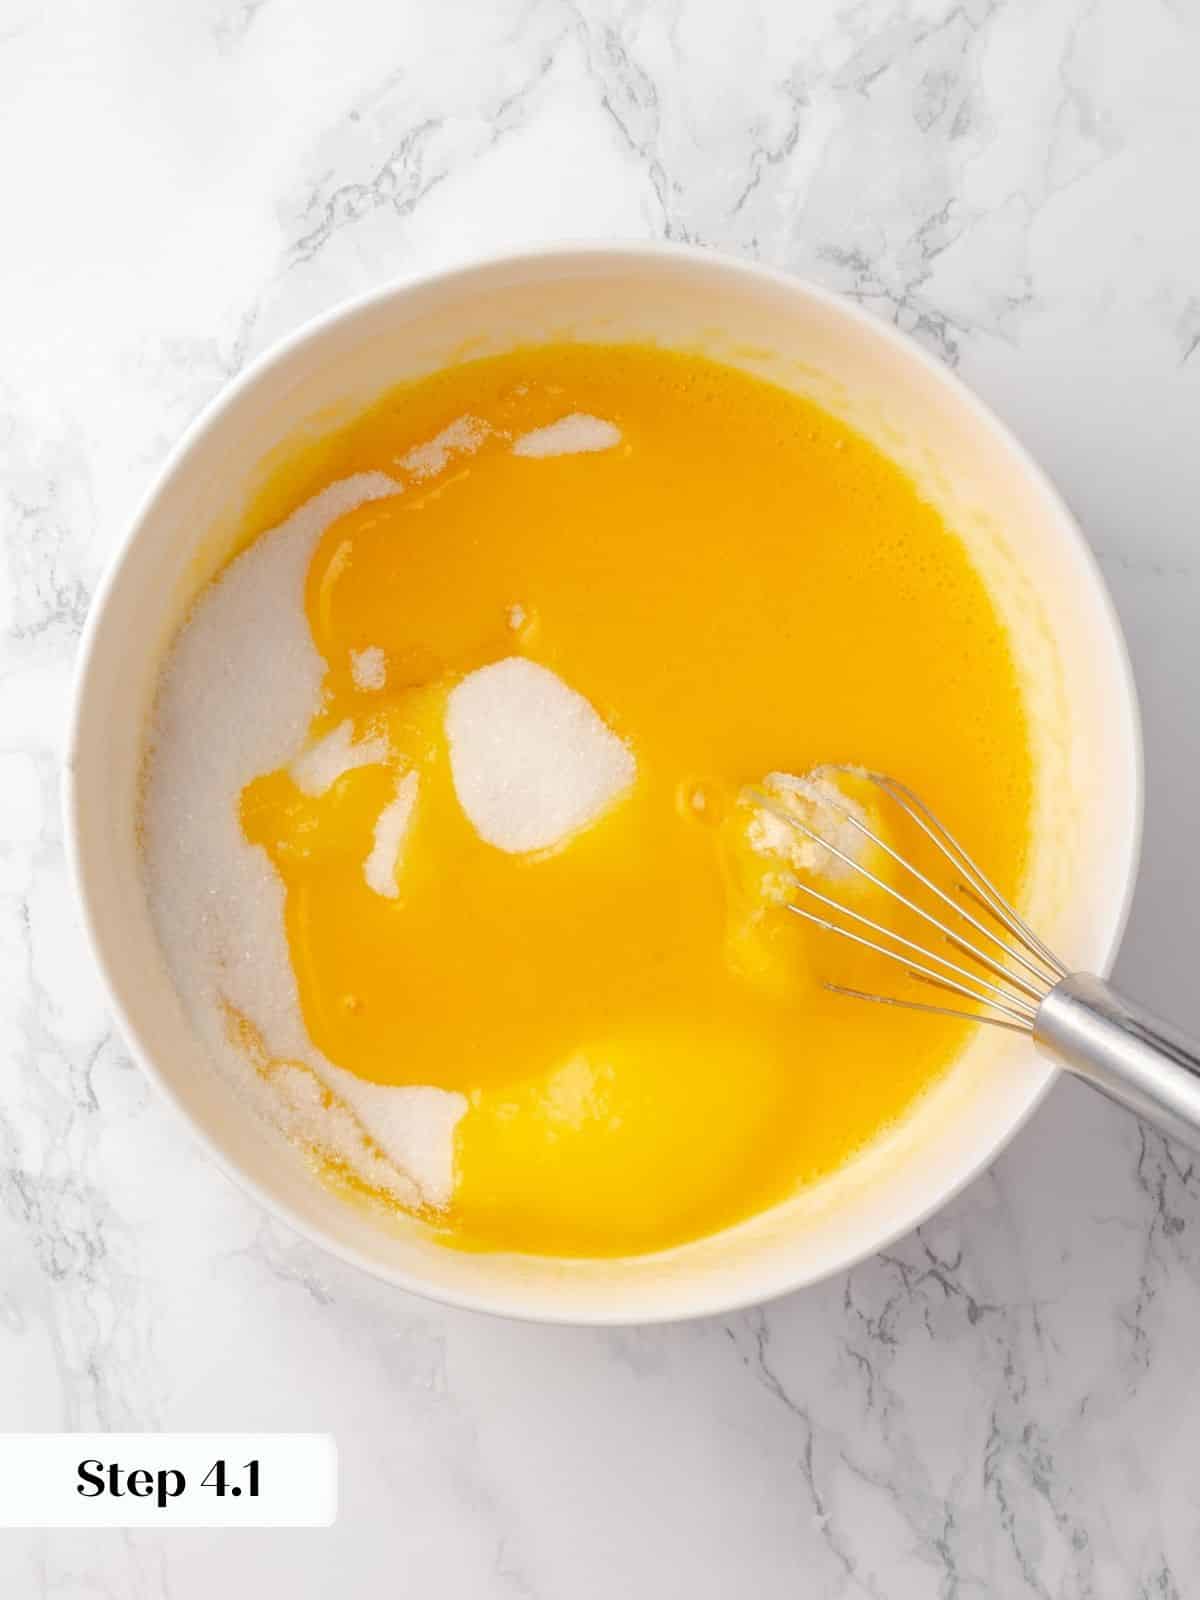
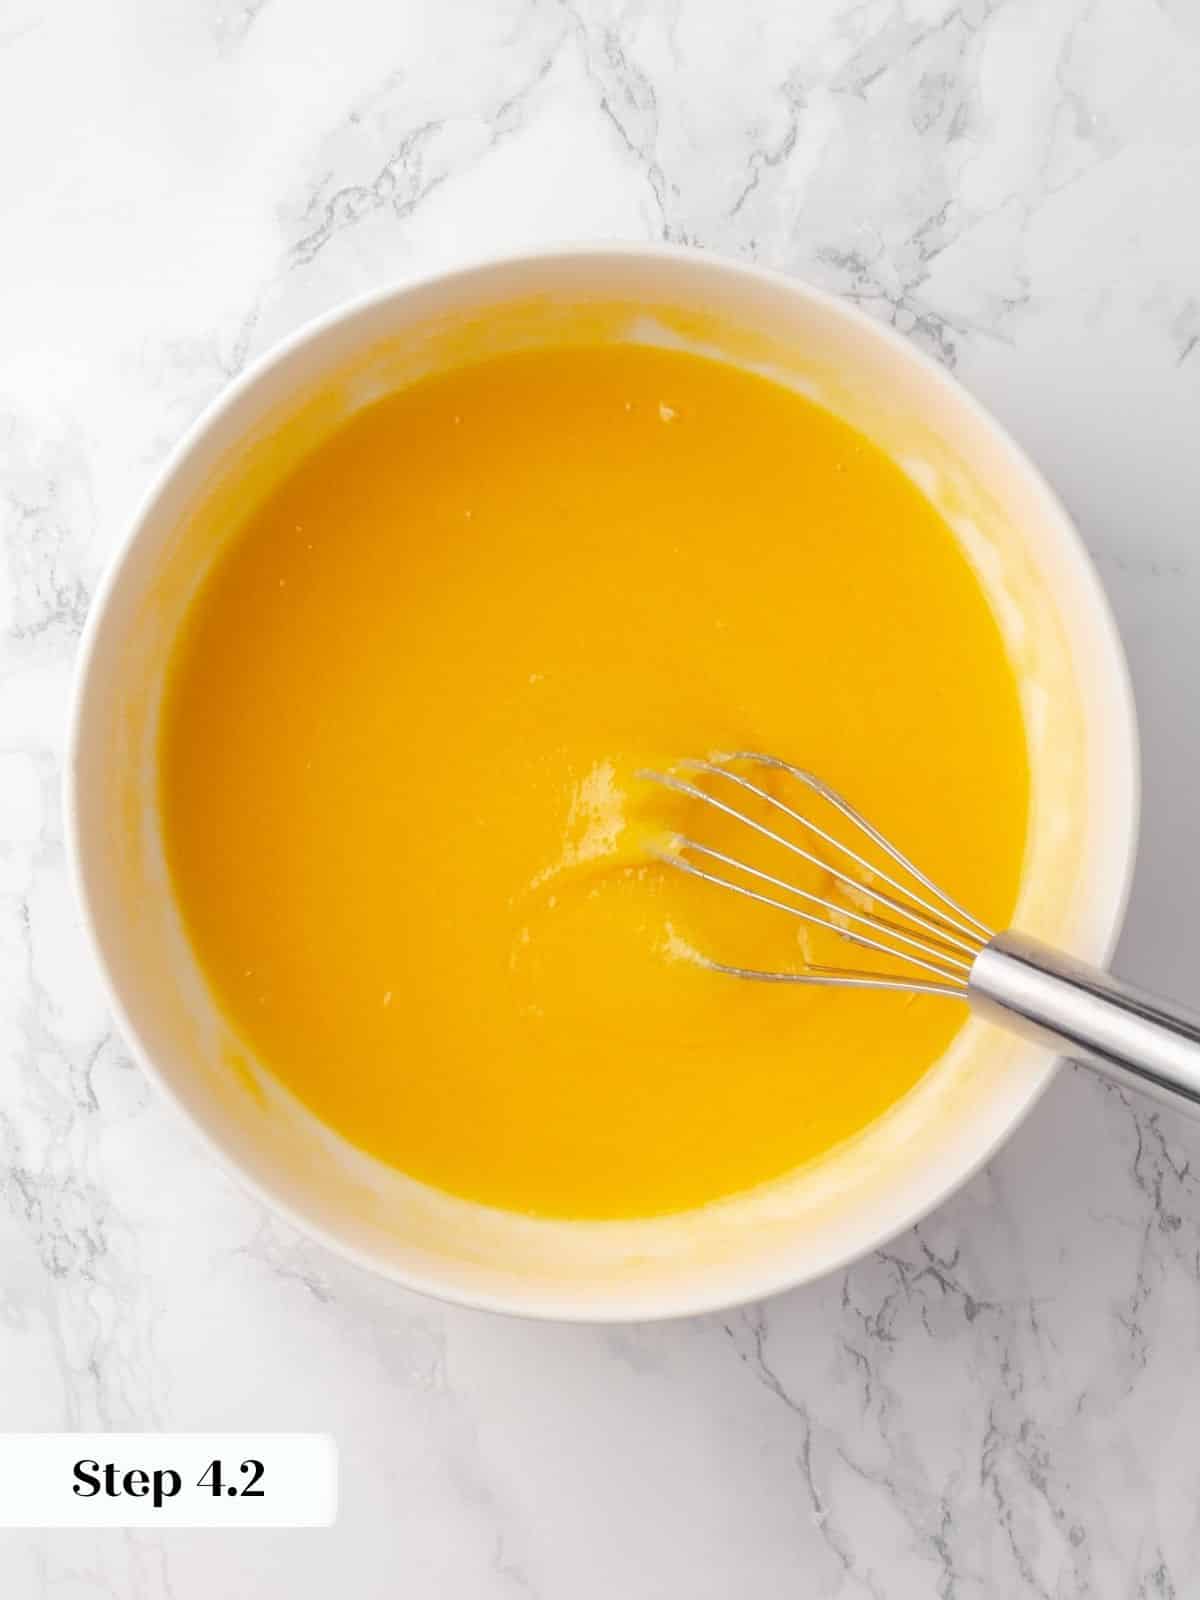
Step 4: Add the sugar to the bowl and whisk until smooth and incorporated.
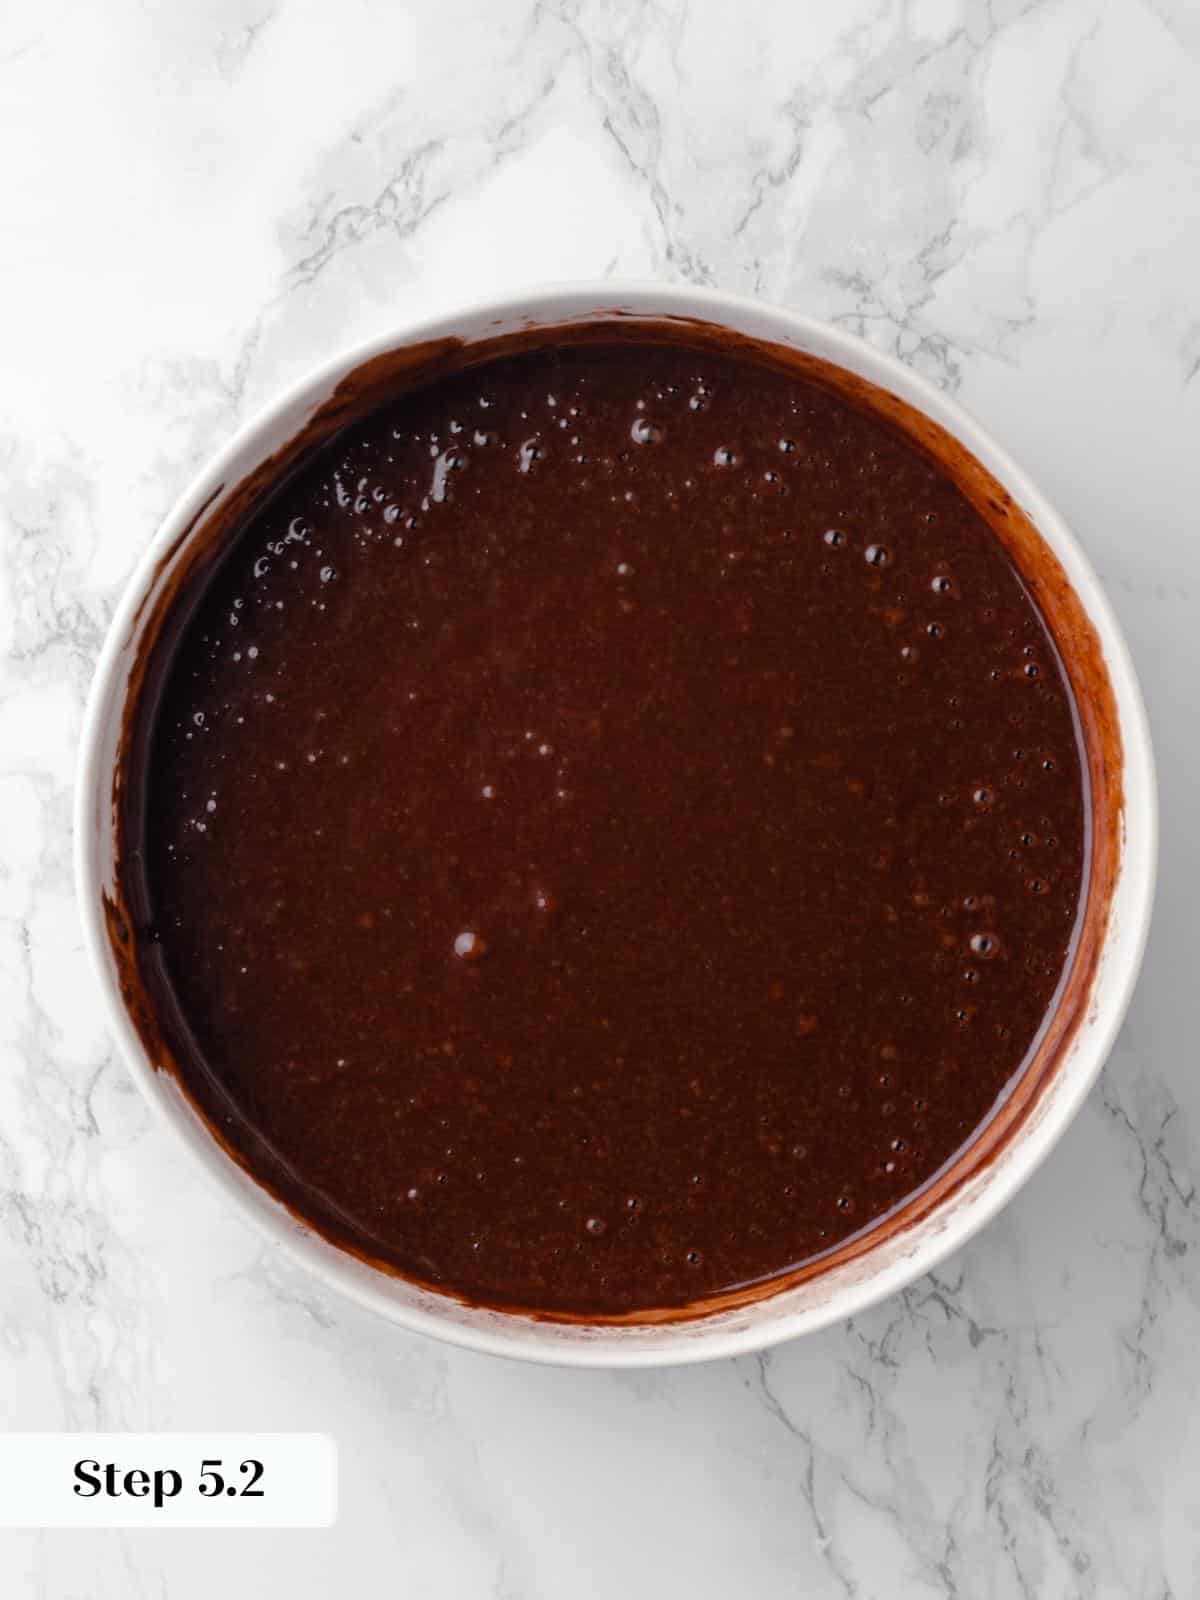
Step 5: Alternately add the dry ingredients and milk in 3 additions. I add about 1/3 of each at the same time, then whisk until no lumps remain. Repeat with the remaining flour mixture and milk.
Adding the flour and milk in 3 additions helps prevent the gluten from over-developing and gives you a more tender cake that doesn’t have “tunnels.”
Step 6: Divide the cake batter between the cake pans and bake in a preheated oven. Bake until a cake tester or toothpick comes out clean or with just a few clinging crumbs. Three layers will bake faster, so begin checking around 20 minutes. They will bake for 25-28 minutes with convection.
For two layers, each will be ~920g, and they baked for 32 minutes. For 3 layers, each layer will be approximately 615g.
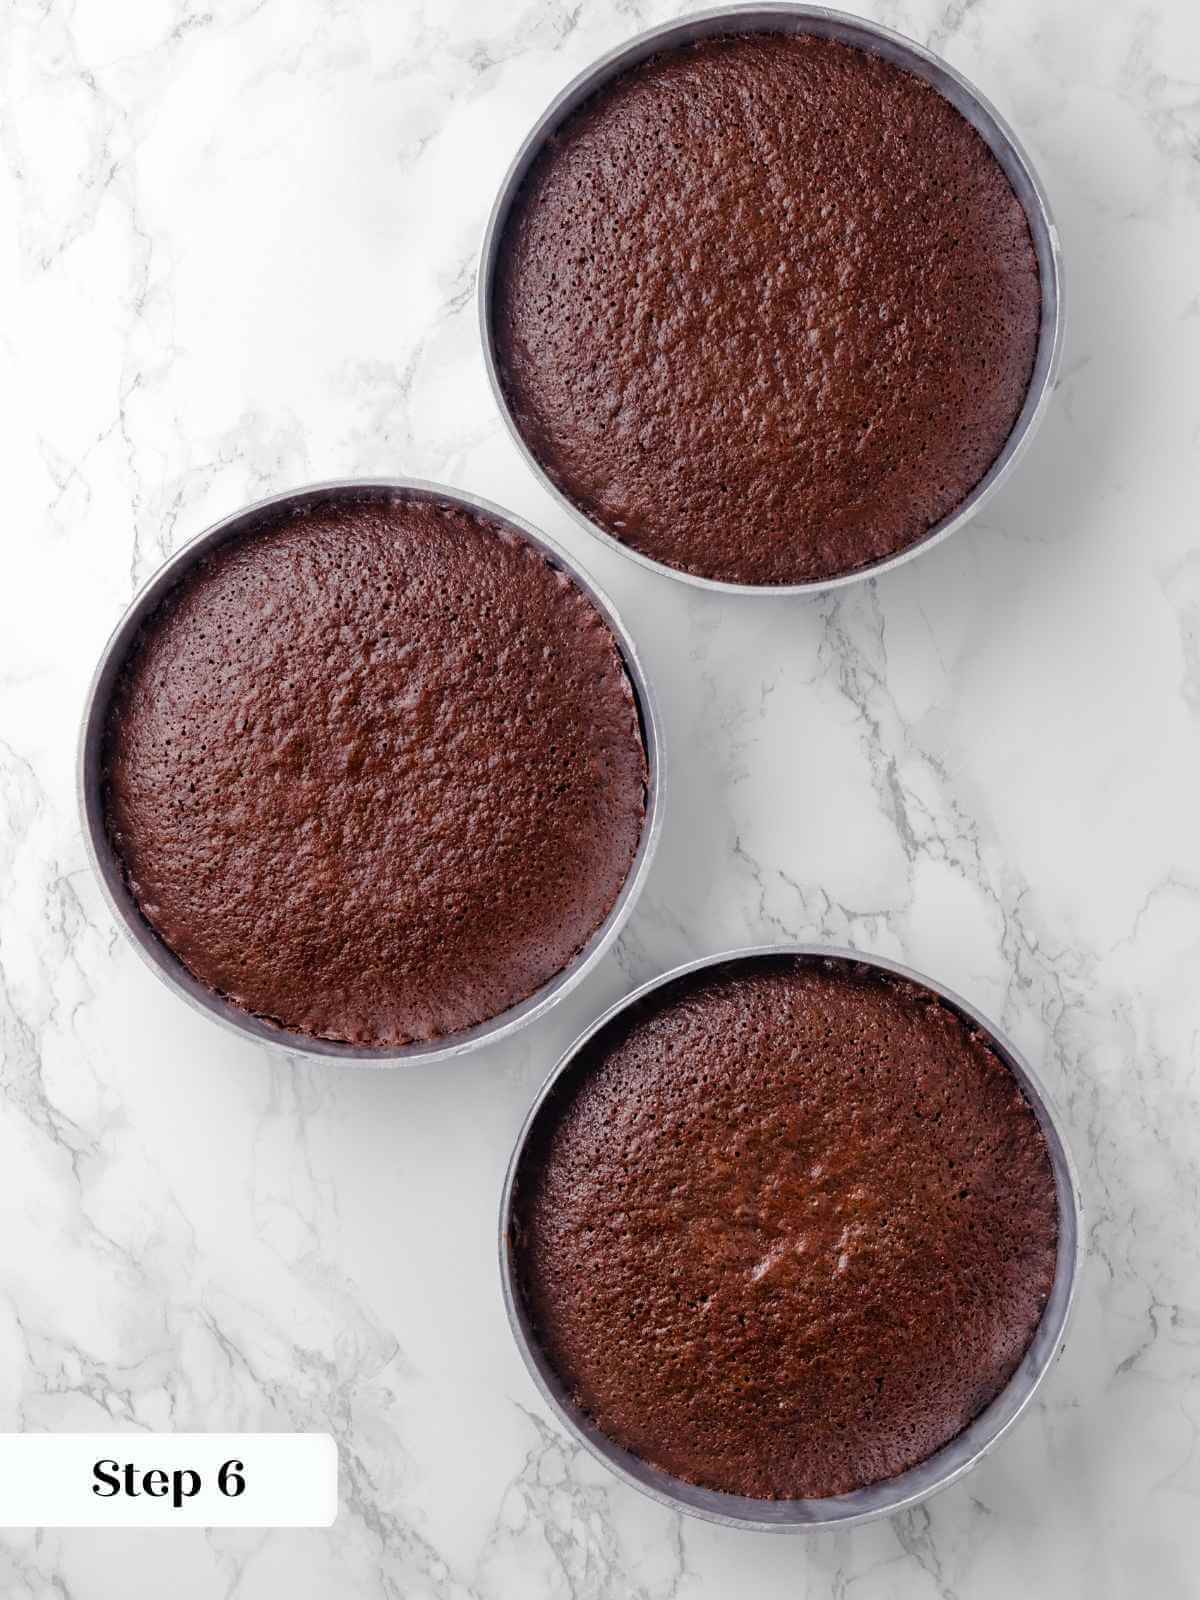
Step 7: Cool for 10 minutes on a wire rack, then run a paring knife around the edge and flip out onto the rack. You can cool them upside down or use a second wire rack to flip them back over.
Step 8: Cool completely before frosting.
Prepare the raspberry jam:
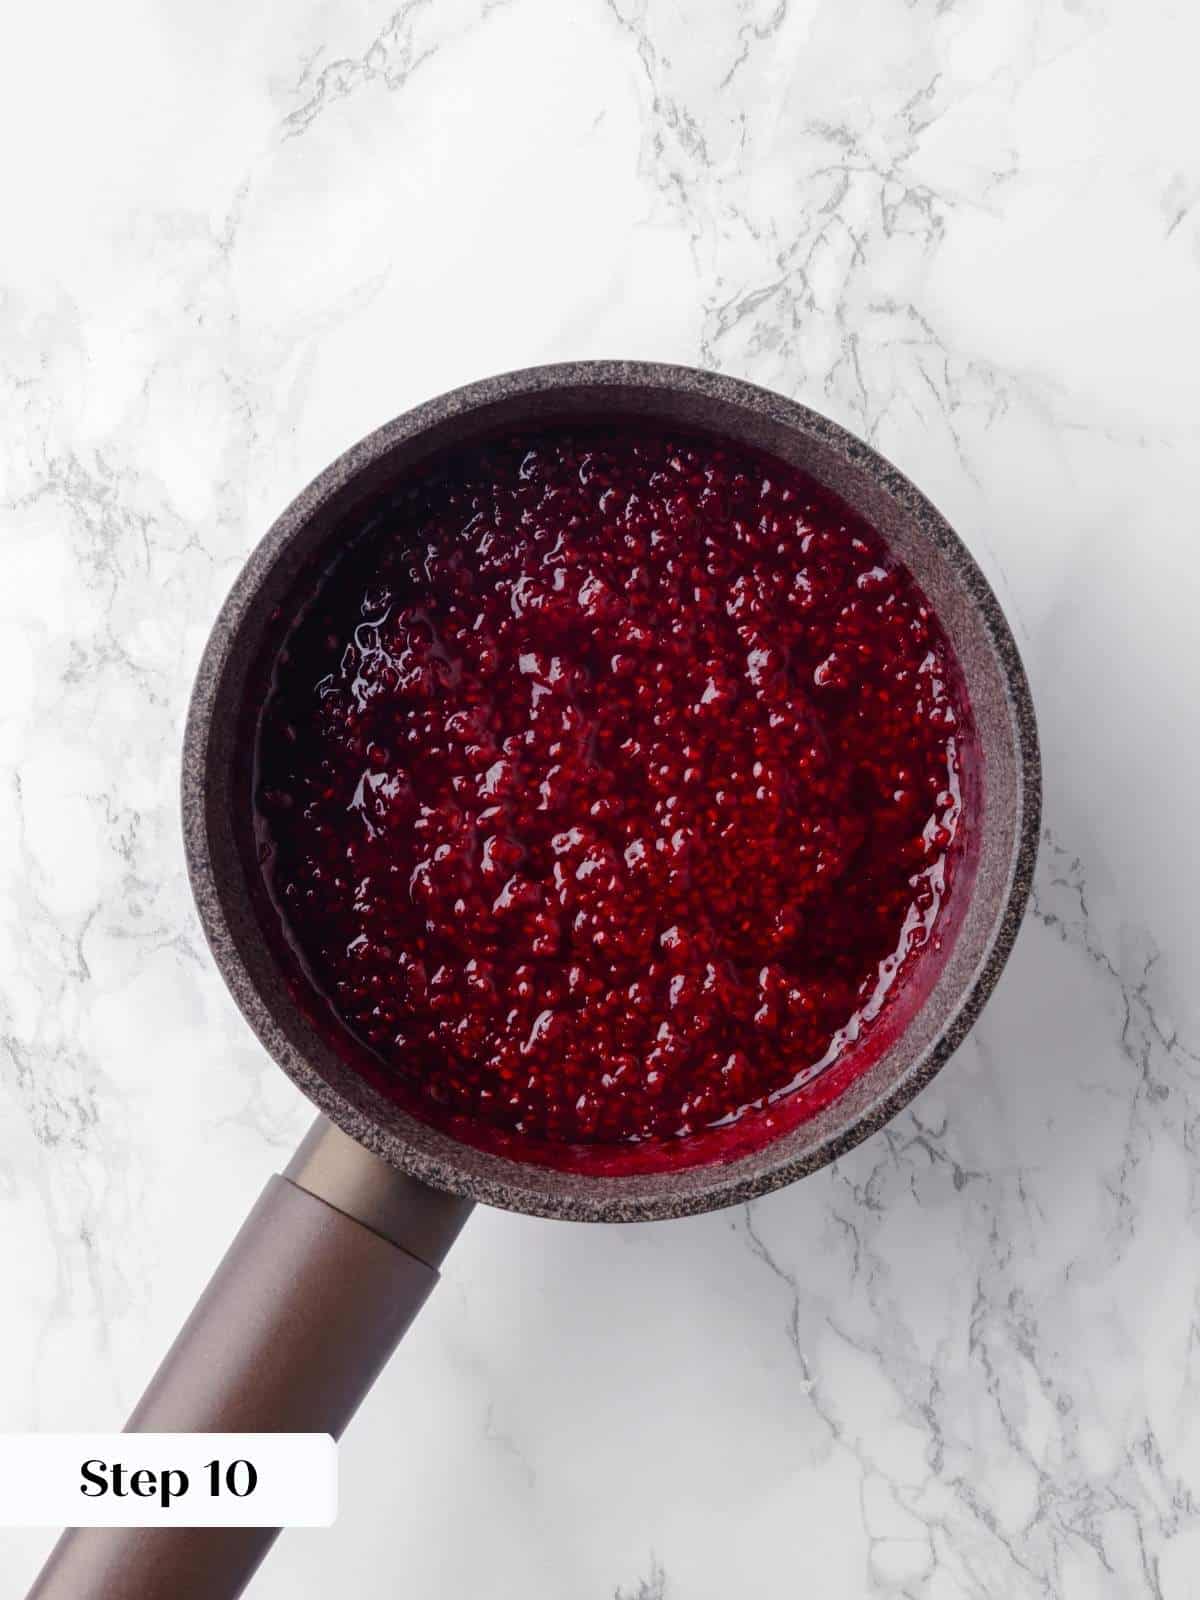
Step 9: In a small saucepan, add raspberries, lemon juice, and granulated sugar.
My raspberries were very sweet, so I did not need much sugar.
Step 10: Heat over low heat until the raspberries soften and release their juices, stirring and smashing occasionally. Increase heat to medium or medium-low and simmer until the juices evaporate and you are left with a jam that will hold a line on the back of a spoon. Reduce the heat back to low as the jam thickens to keep it from sticking to the bottom and burning.
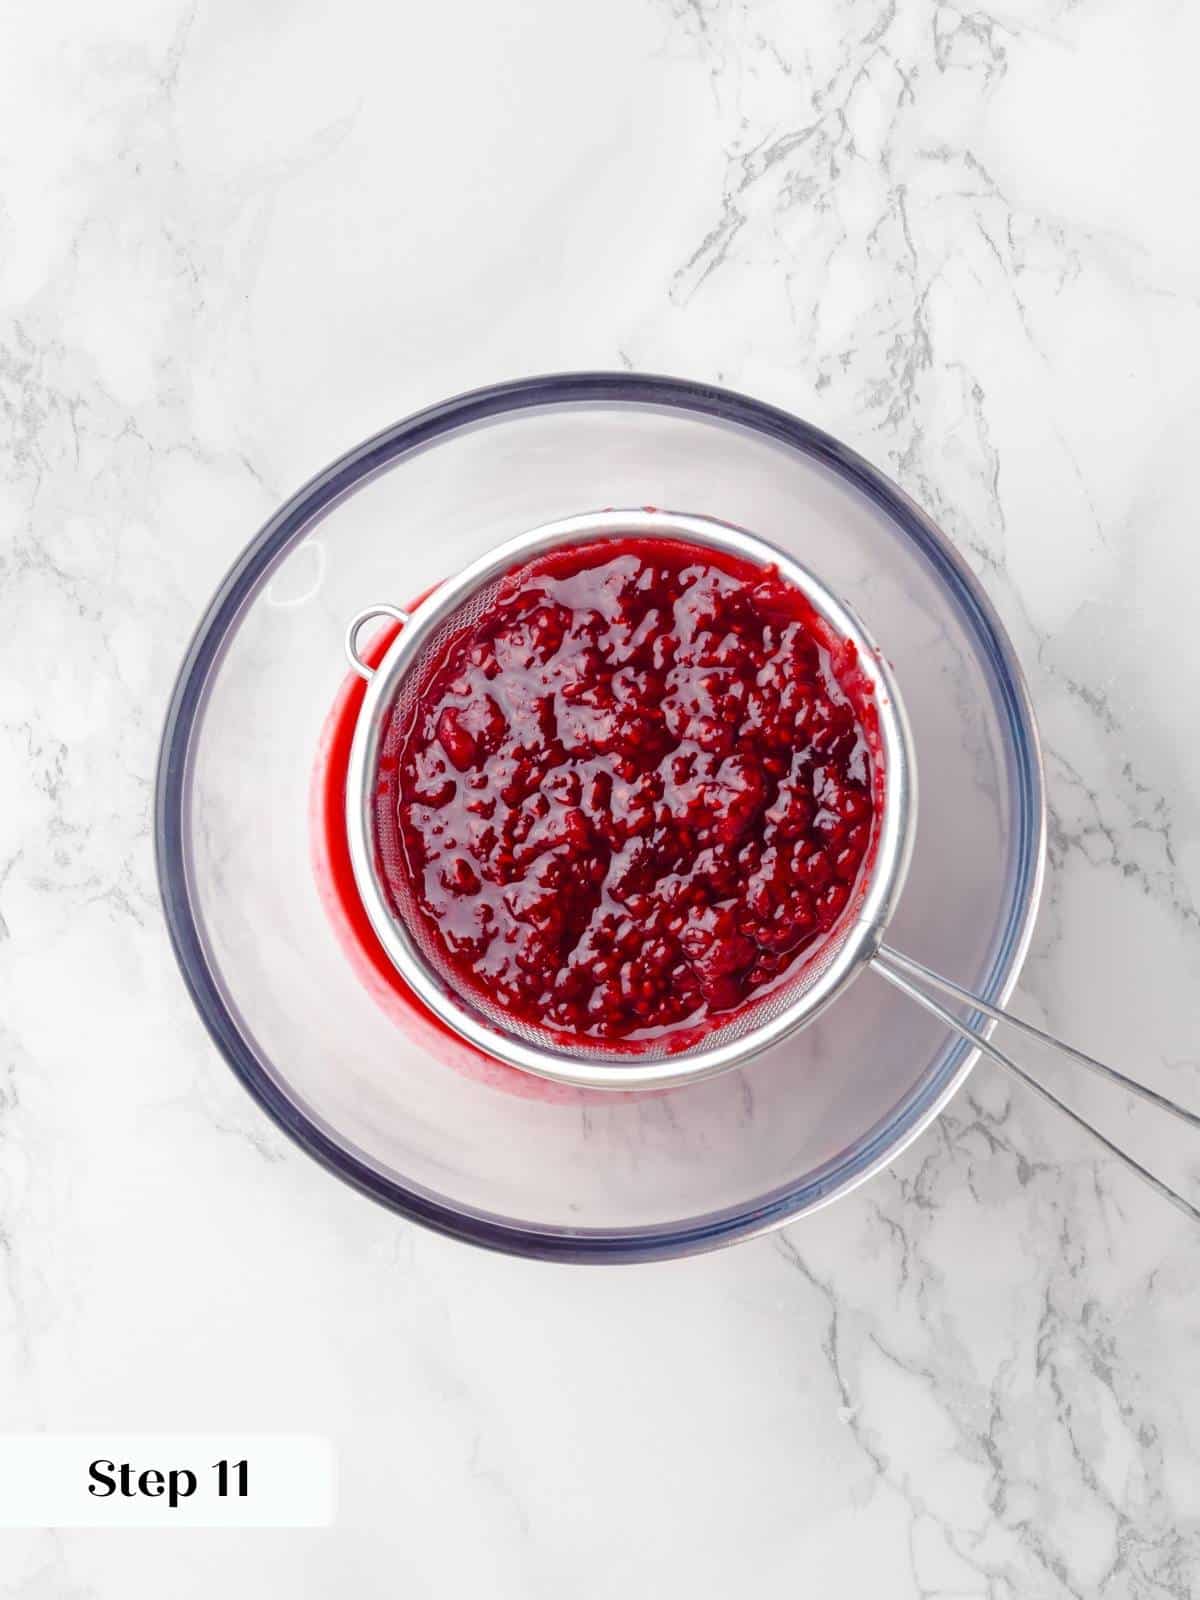
Step 11: Strain through a metal sieve to remove seeds into a frozen bowl. No one wants the crunch of raspberry seeds in their buttercream. It is unwelcome, bordering on offensive.
Step 12: Press through the sieve, then run the silicone spatula over the bottom to release the thick part of the jam. This jam will actually keep more jam from pressing through.
I repeat this three times to ensure that I remove every little bit of raspberry jam from the seeds.
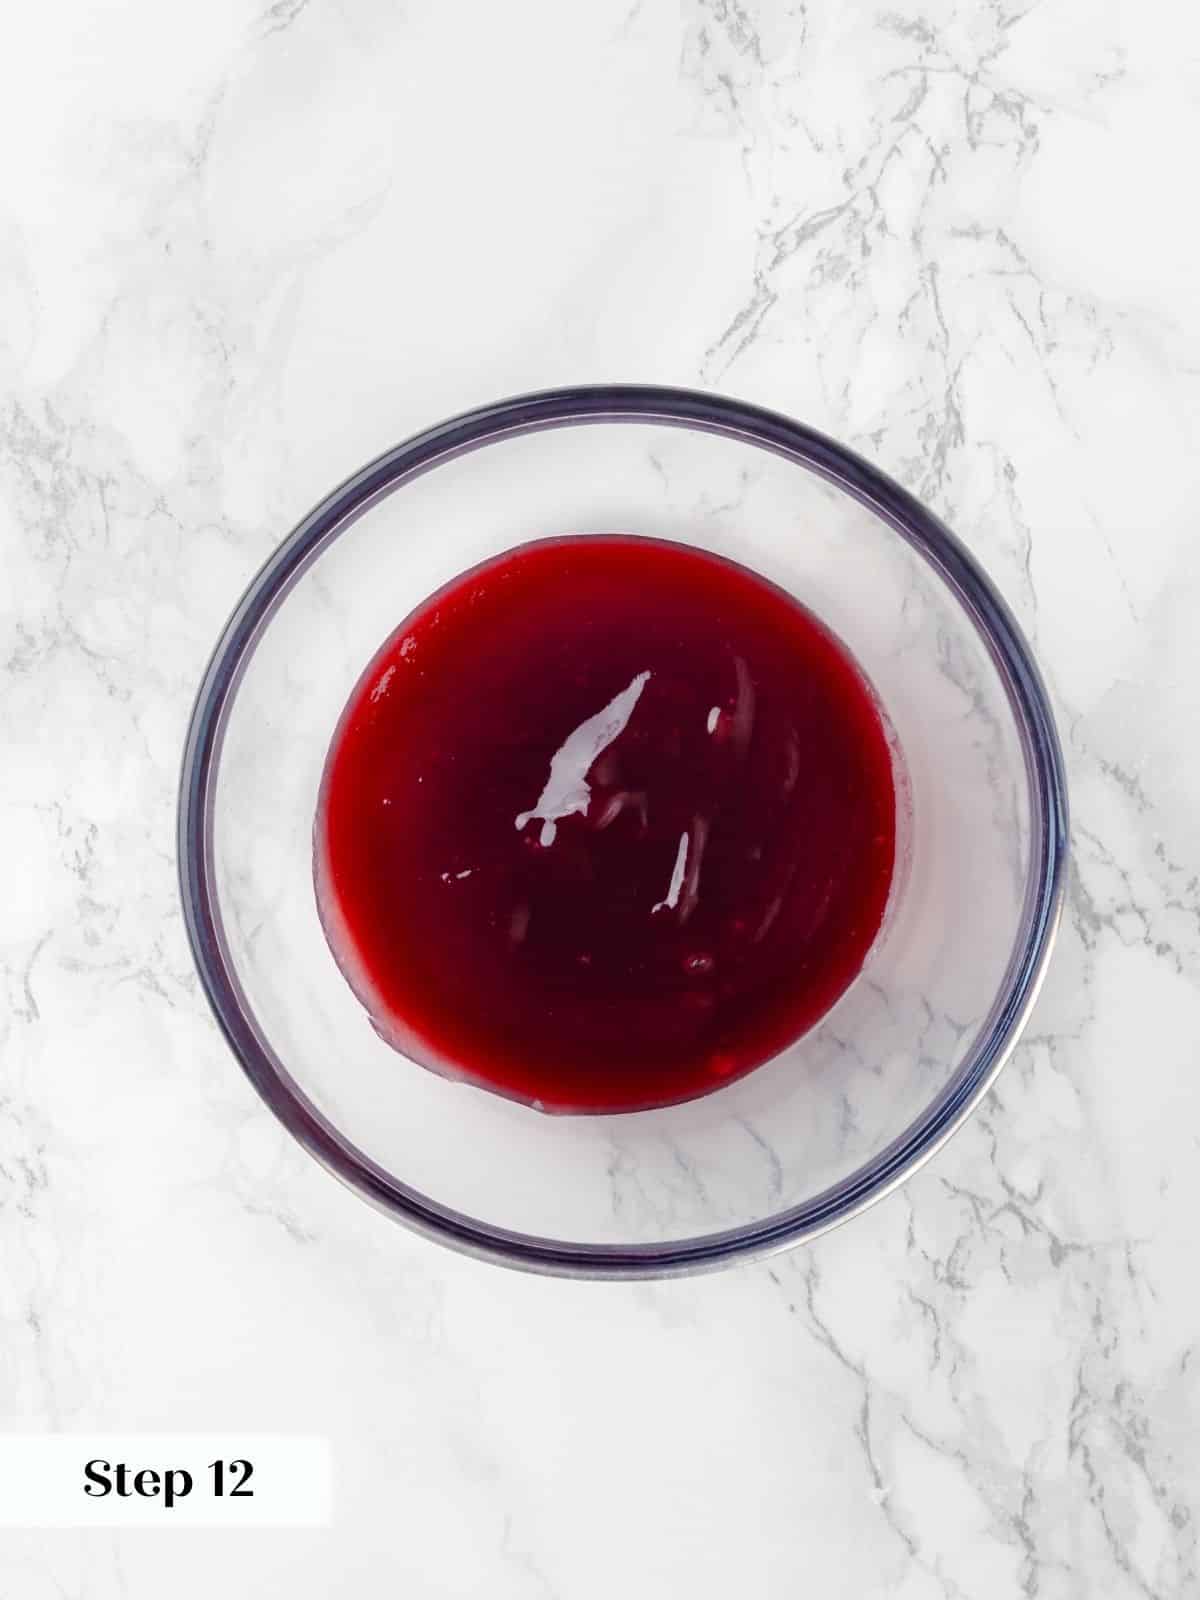
Step 13: Pour the mixture into a cold or frozen glass or Pyrex bowl and refrigerate until cold. Adding cold jam to the buttercream will keep the frosting nice and thick.
Prepare the chocolate fudge frosting:
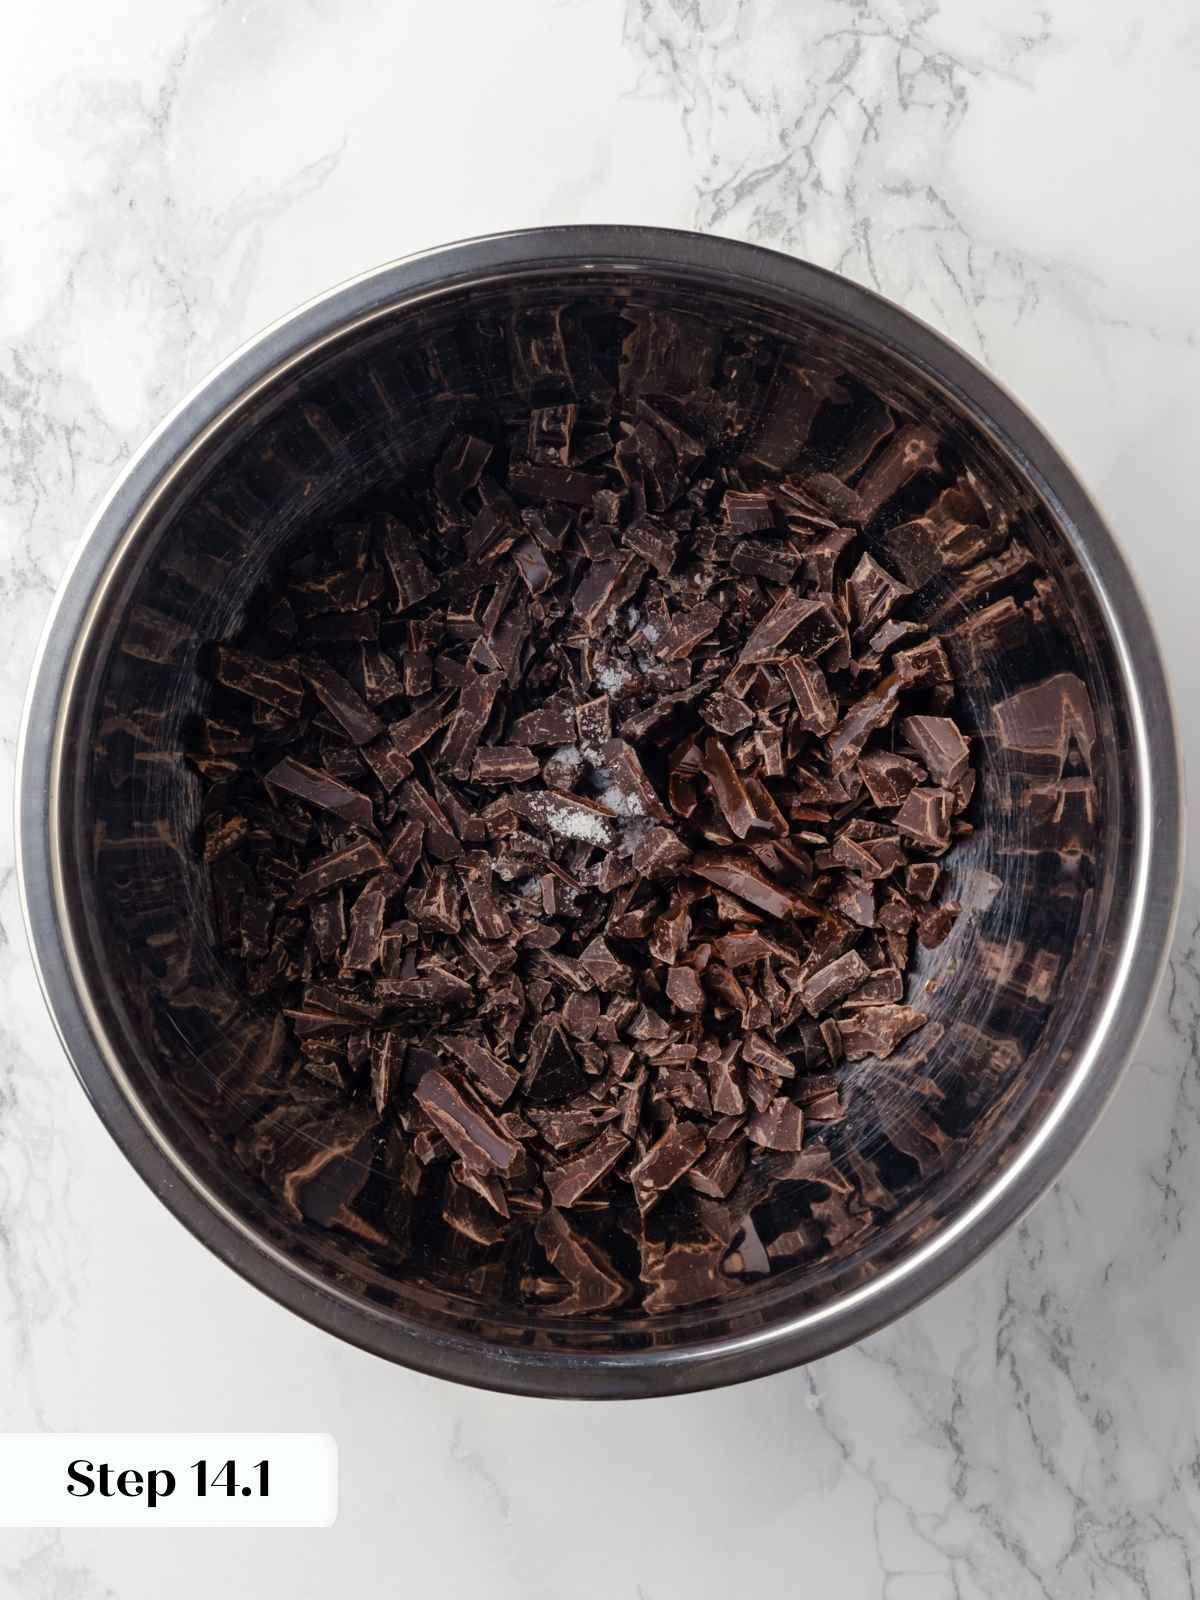
Step 14:In a large heat-proof bowl, add chopped chocolate, vanilla extract, corn syrup, and salt.
Due to the total amount of heavy cream in this recipe, I recommend chopping the chocolate even if you use chocolate pieces. The cream might cool faster than it can melt the chocolate.
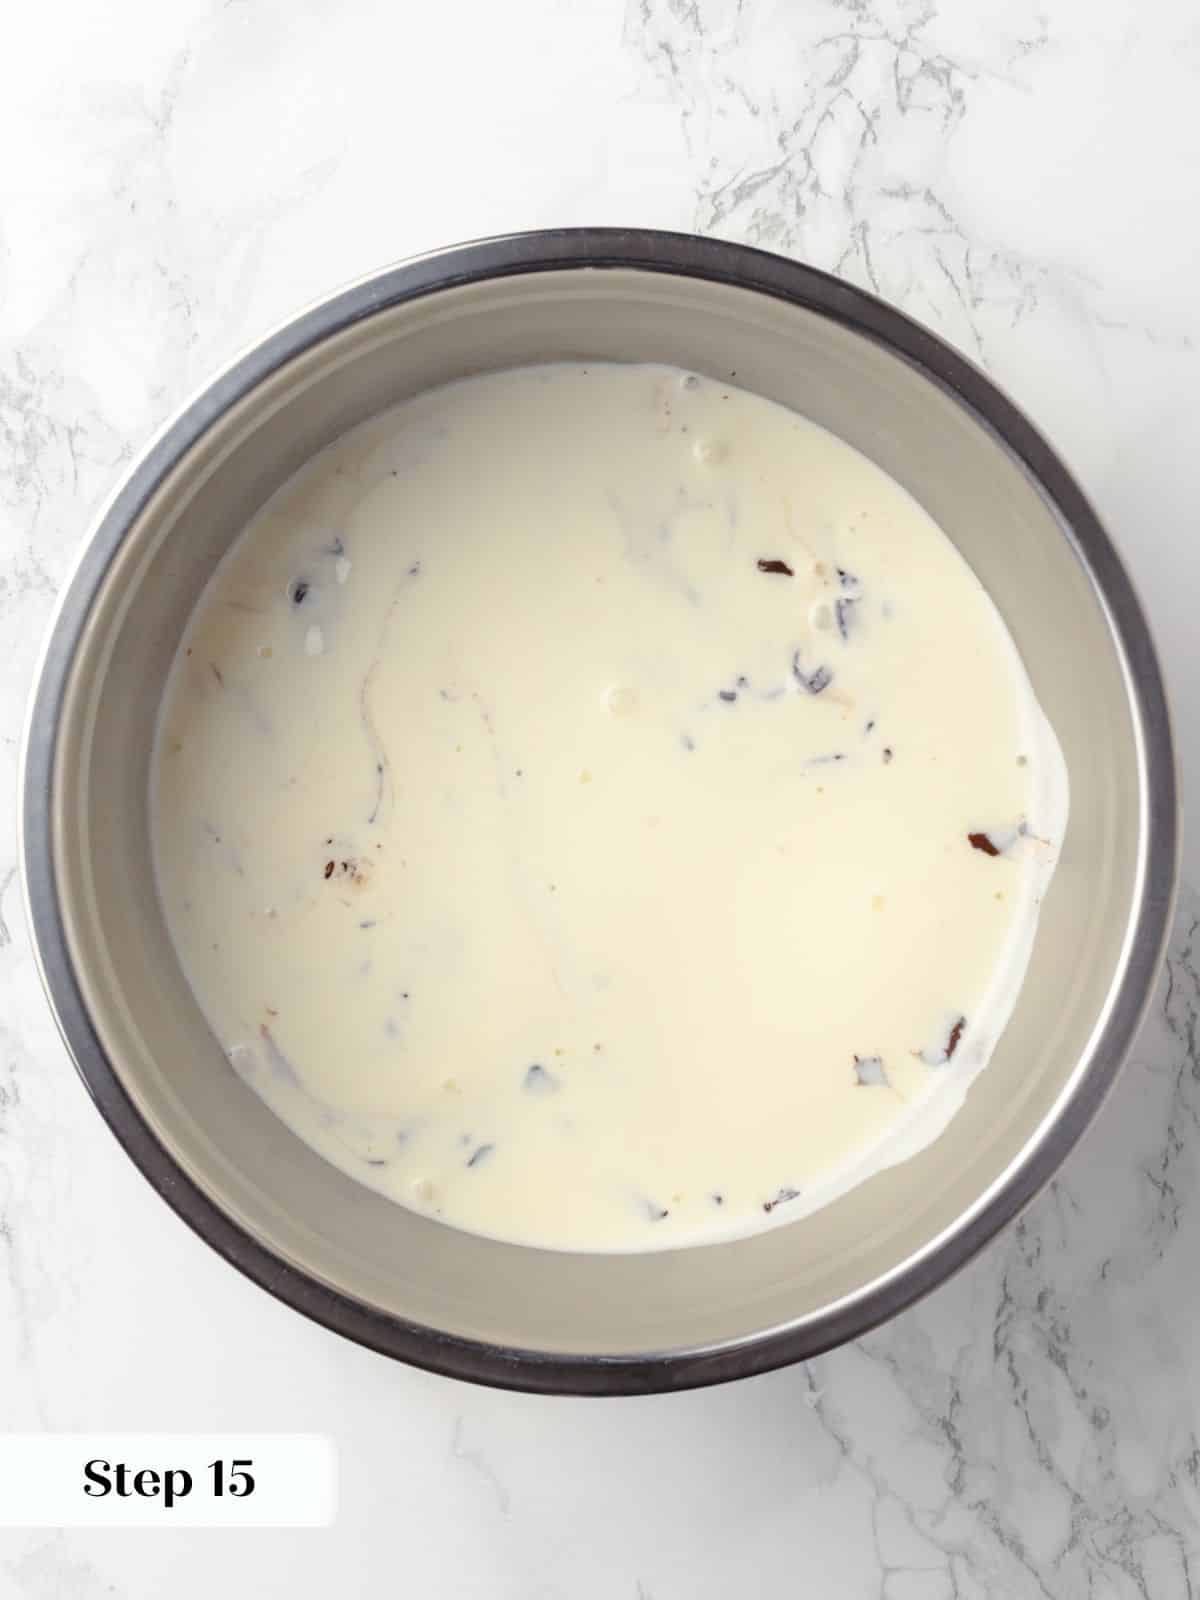
Step 15: In a small saucepan, bring whipping cream just to a boil. Pour over the chocolate, shake to distribute, and cover the chocolate. Allow to sit for 2 minutes.
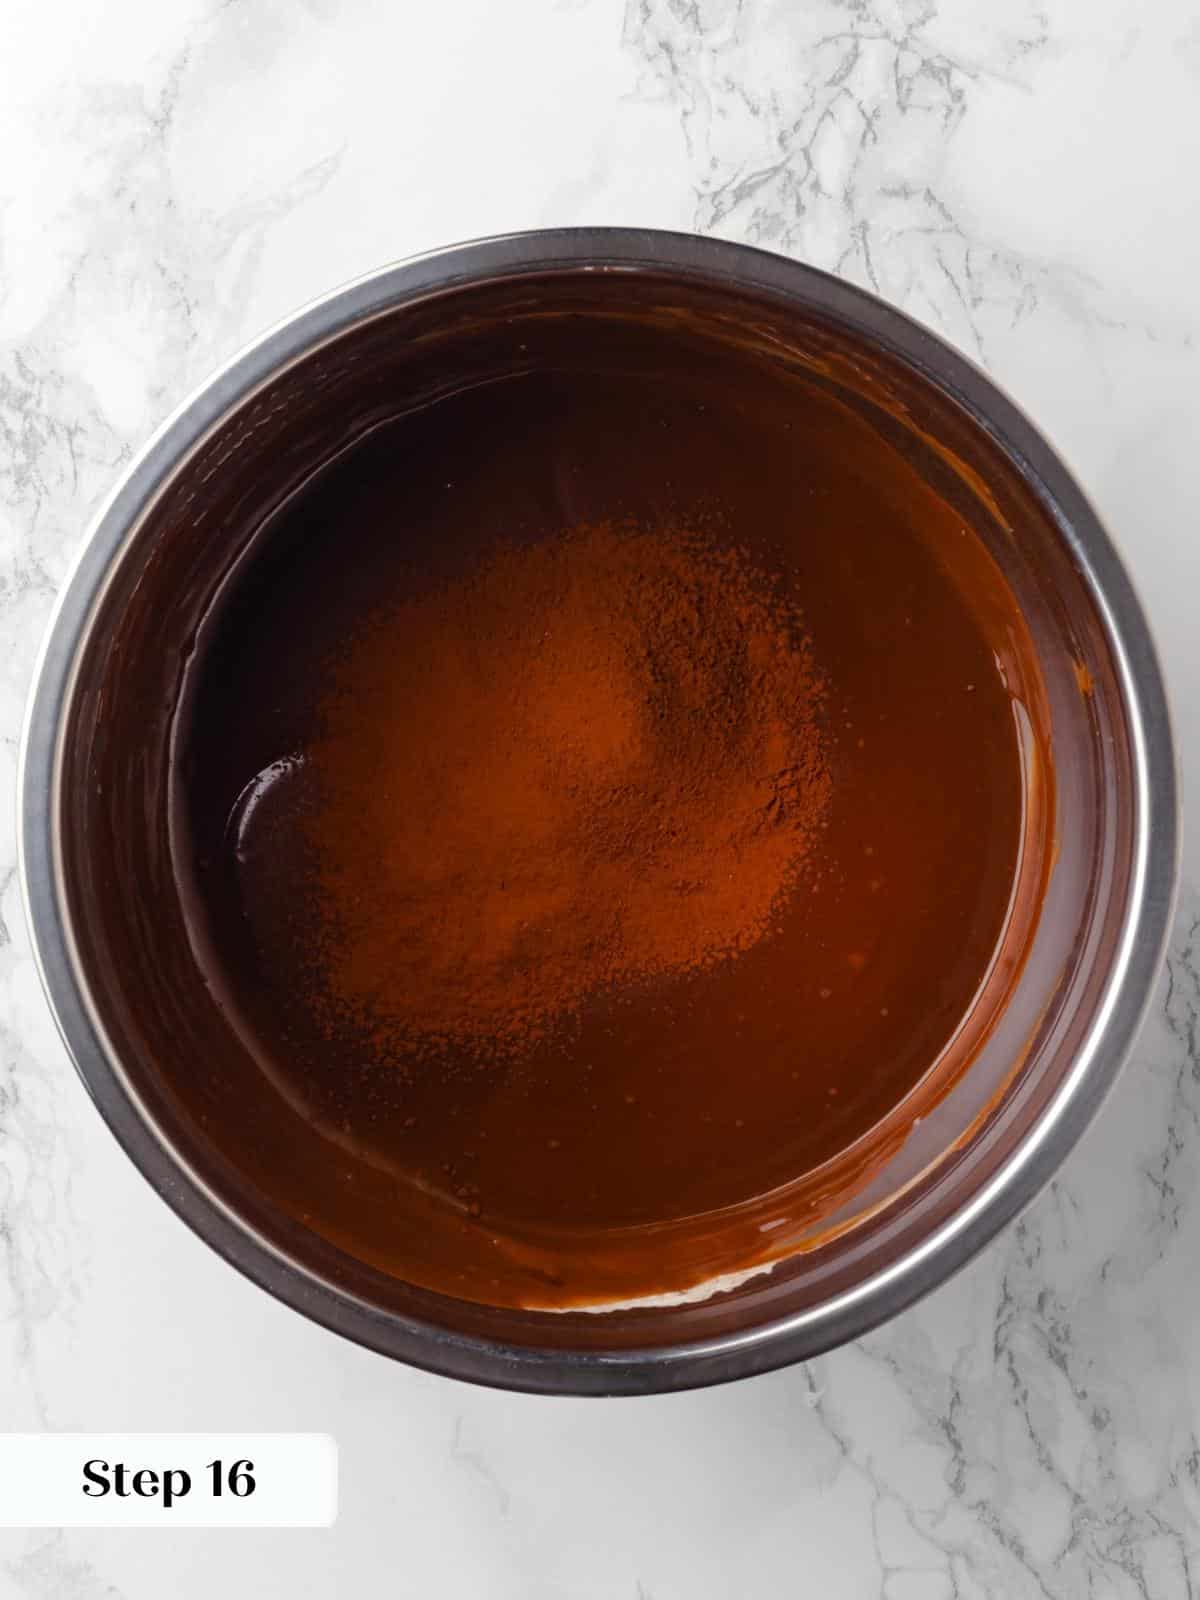
Step 16: Slowly whisk, starting from the center and working your way out to create an emulsion. Sift in the cocoa powder and whisk to incorporate. You can also put it in before the cream, but it has a tendency to clump and create lumps that will not come out.
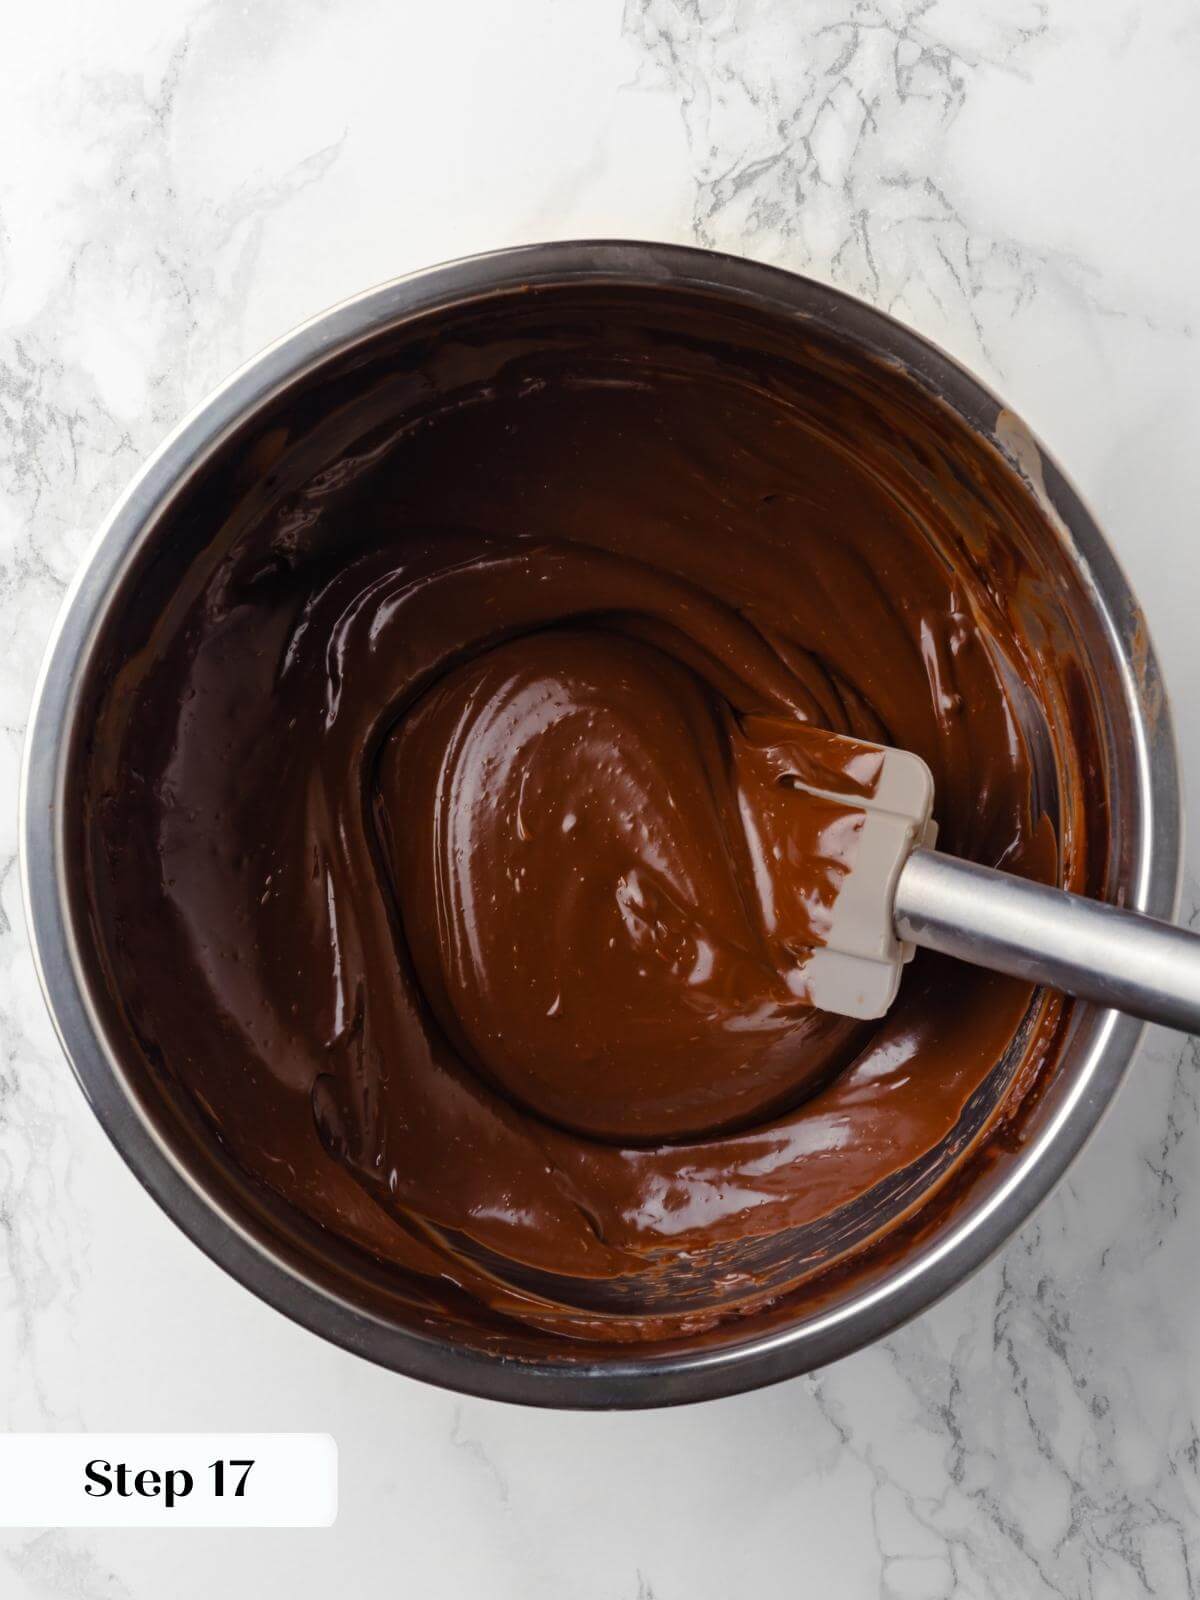
Step 17: Add butter to the still-hot ganache. Switch to a silicone spatula and gently stir in one direction until all the butter has melted and incorporated into the ganache.
Step 18: Place a piece of plastic wrap directly on the surface and allow it to cool to room temperature. You can speed it up by putting it in the fridge and stirring every 10 minutes.
I recommend doing this if your room is warm. Mine was about 70°F, so it cooled to room temperature in a little under 2 hours. This was plenty of time for the cake to cool and to prepare all the other components.
Prepare the raspberry buttercream:
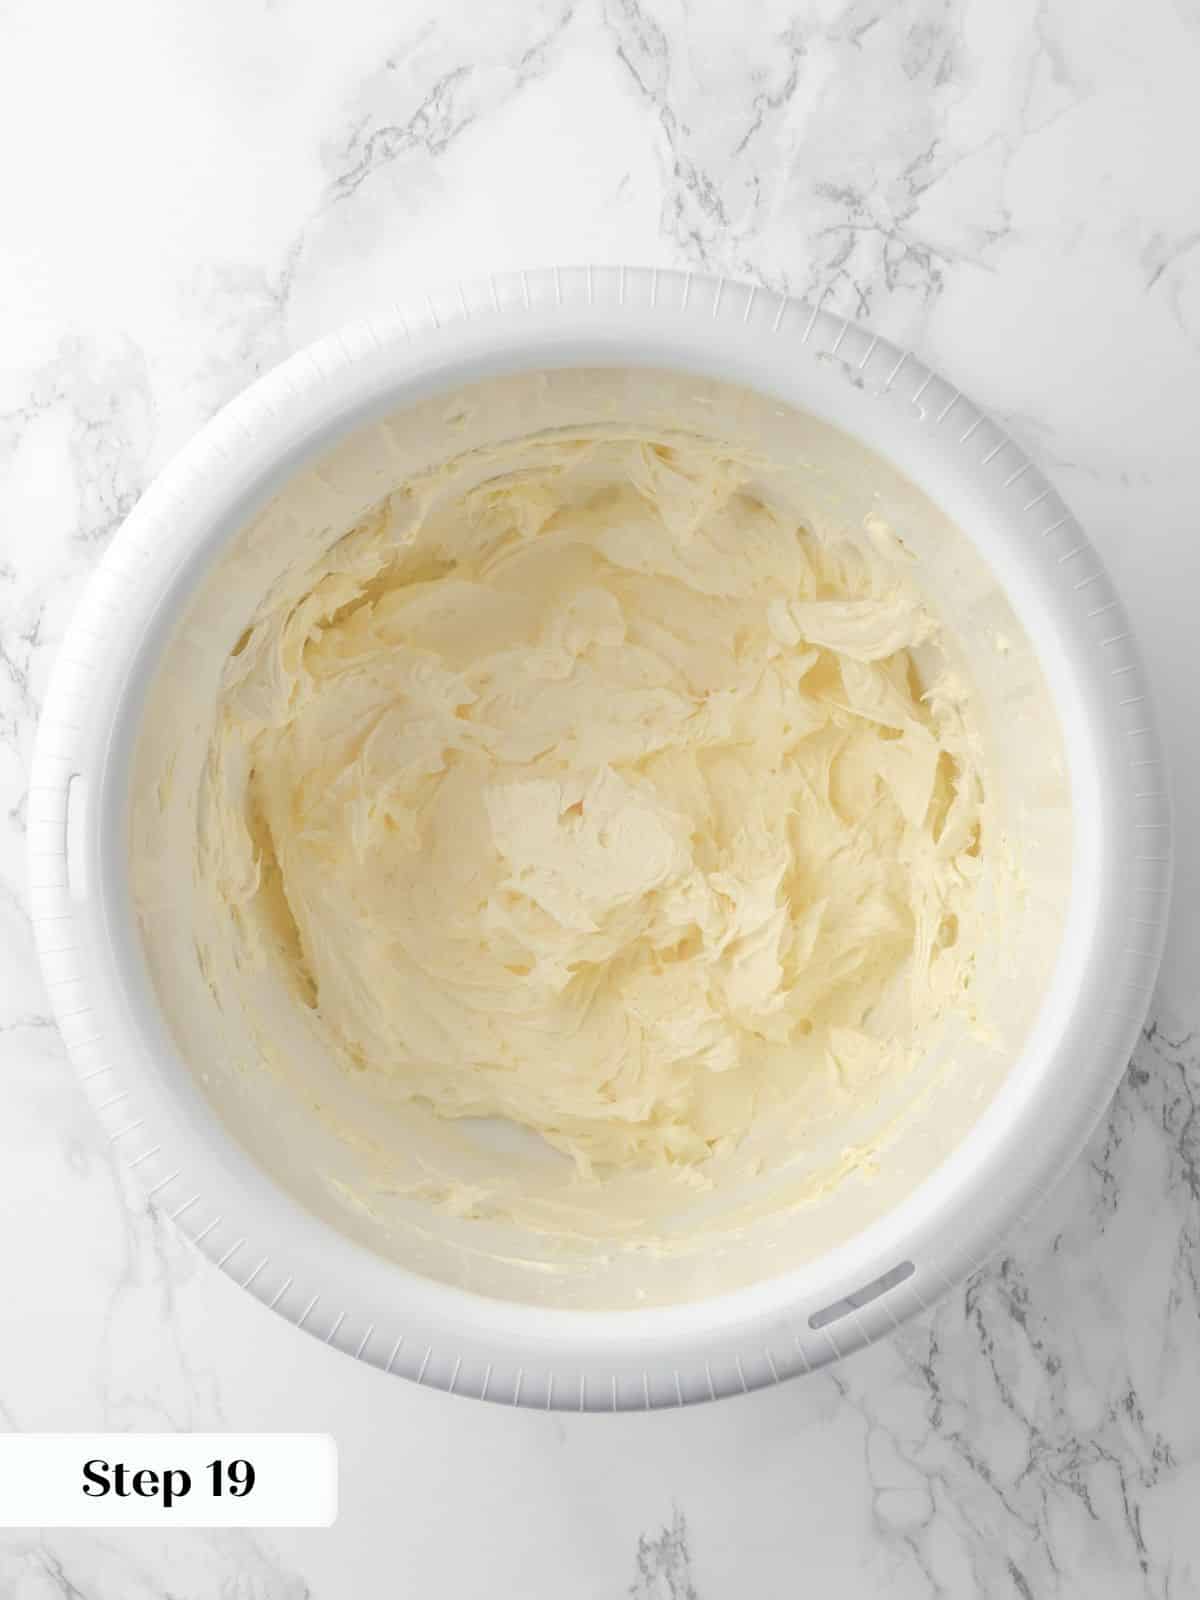
Step 19: Beat the butter in the bowl of a stand mixer fitted with the paddle attachment until lightened and soft.
Step 20: Slowly add the powdered sugar, followed by the vanilla and salt.
If your powder sugar is extra clumpy, I suggest sifting it first. Some of the clumps will not come out in the cream process.
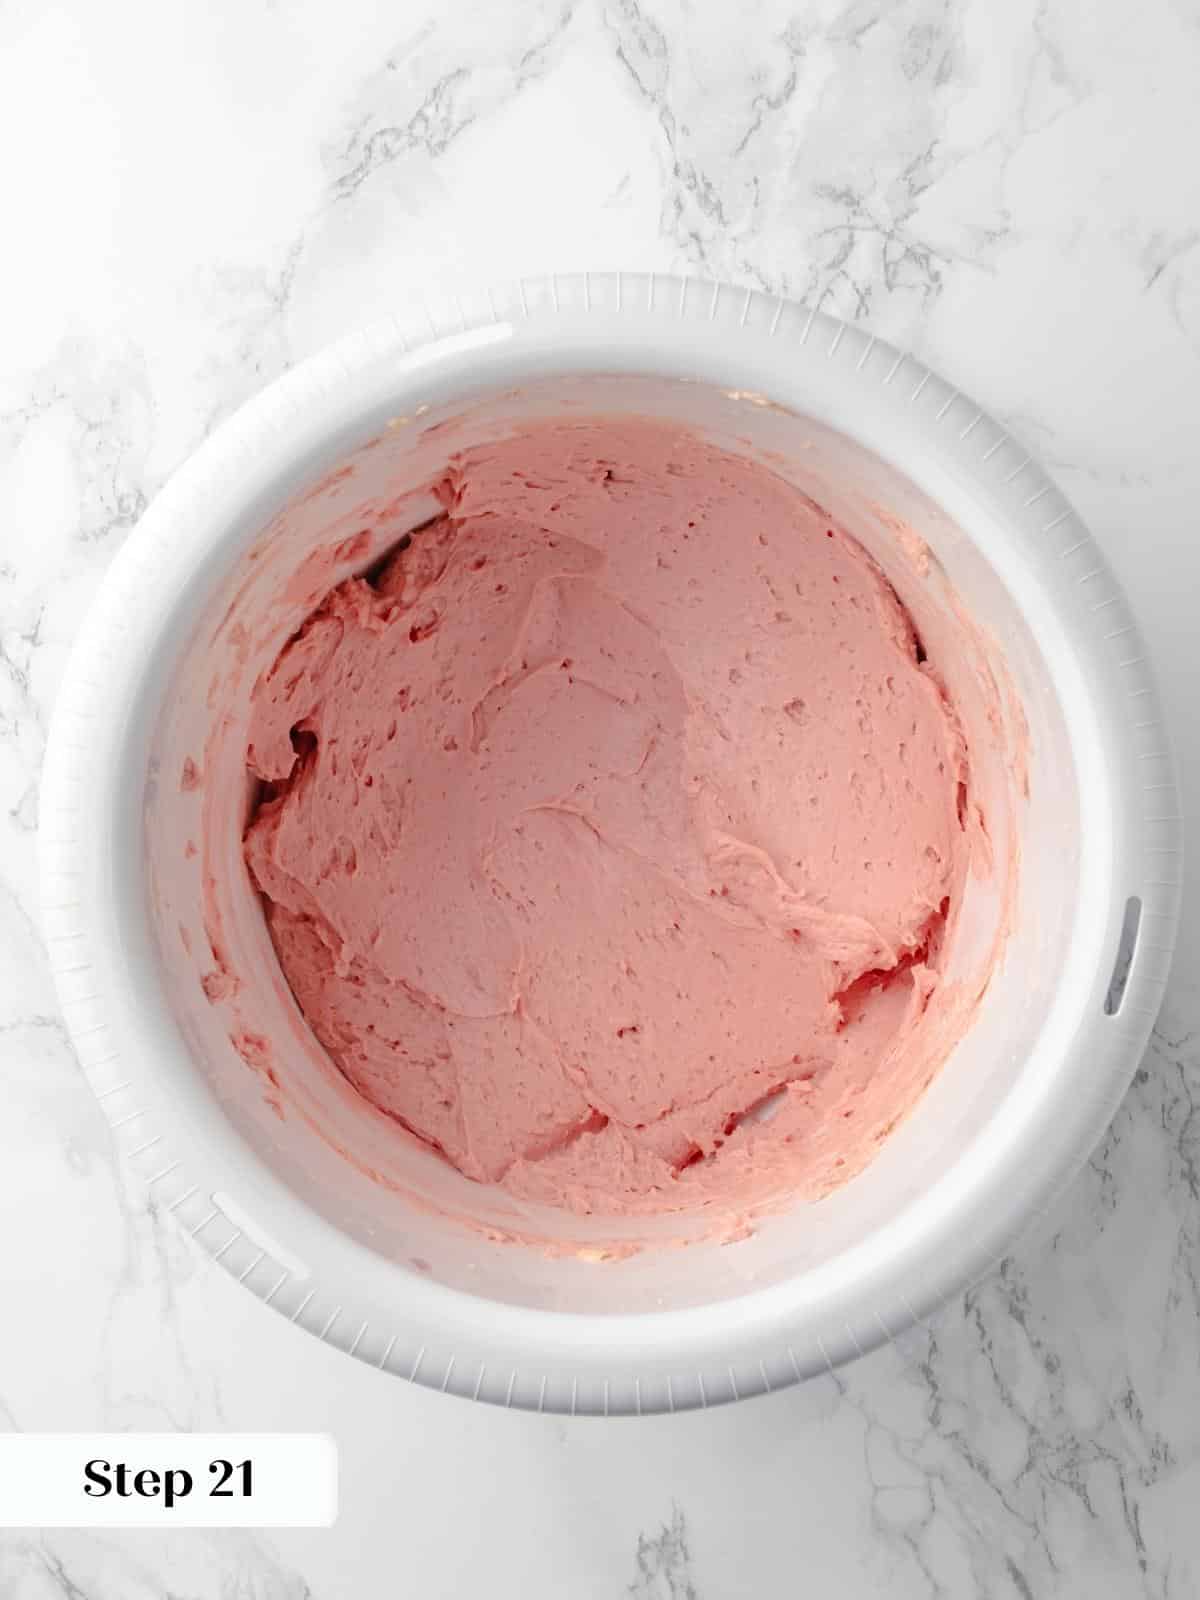
Step 21: Once the buttercream has come together, add the raspberry puree 2 tablespoons at a time, up to 1/3 cup, which is half what you made above. You can add additional lemon juice or heavy cream as desired.
I prefer to add lemon juice to contrast the sweetness! I did not need to add any additional lemon juice to achieve the right consistency, but depending on how you measure your powdered sugar, you might.
Step 22: Place about 1 cup in a piping bag fitted with a round tip. You can also just cut the piping bag because this is for creating a dam between the layers.
Time to assemble the cake:
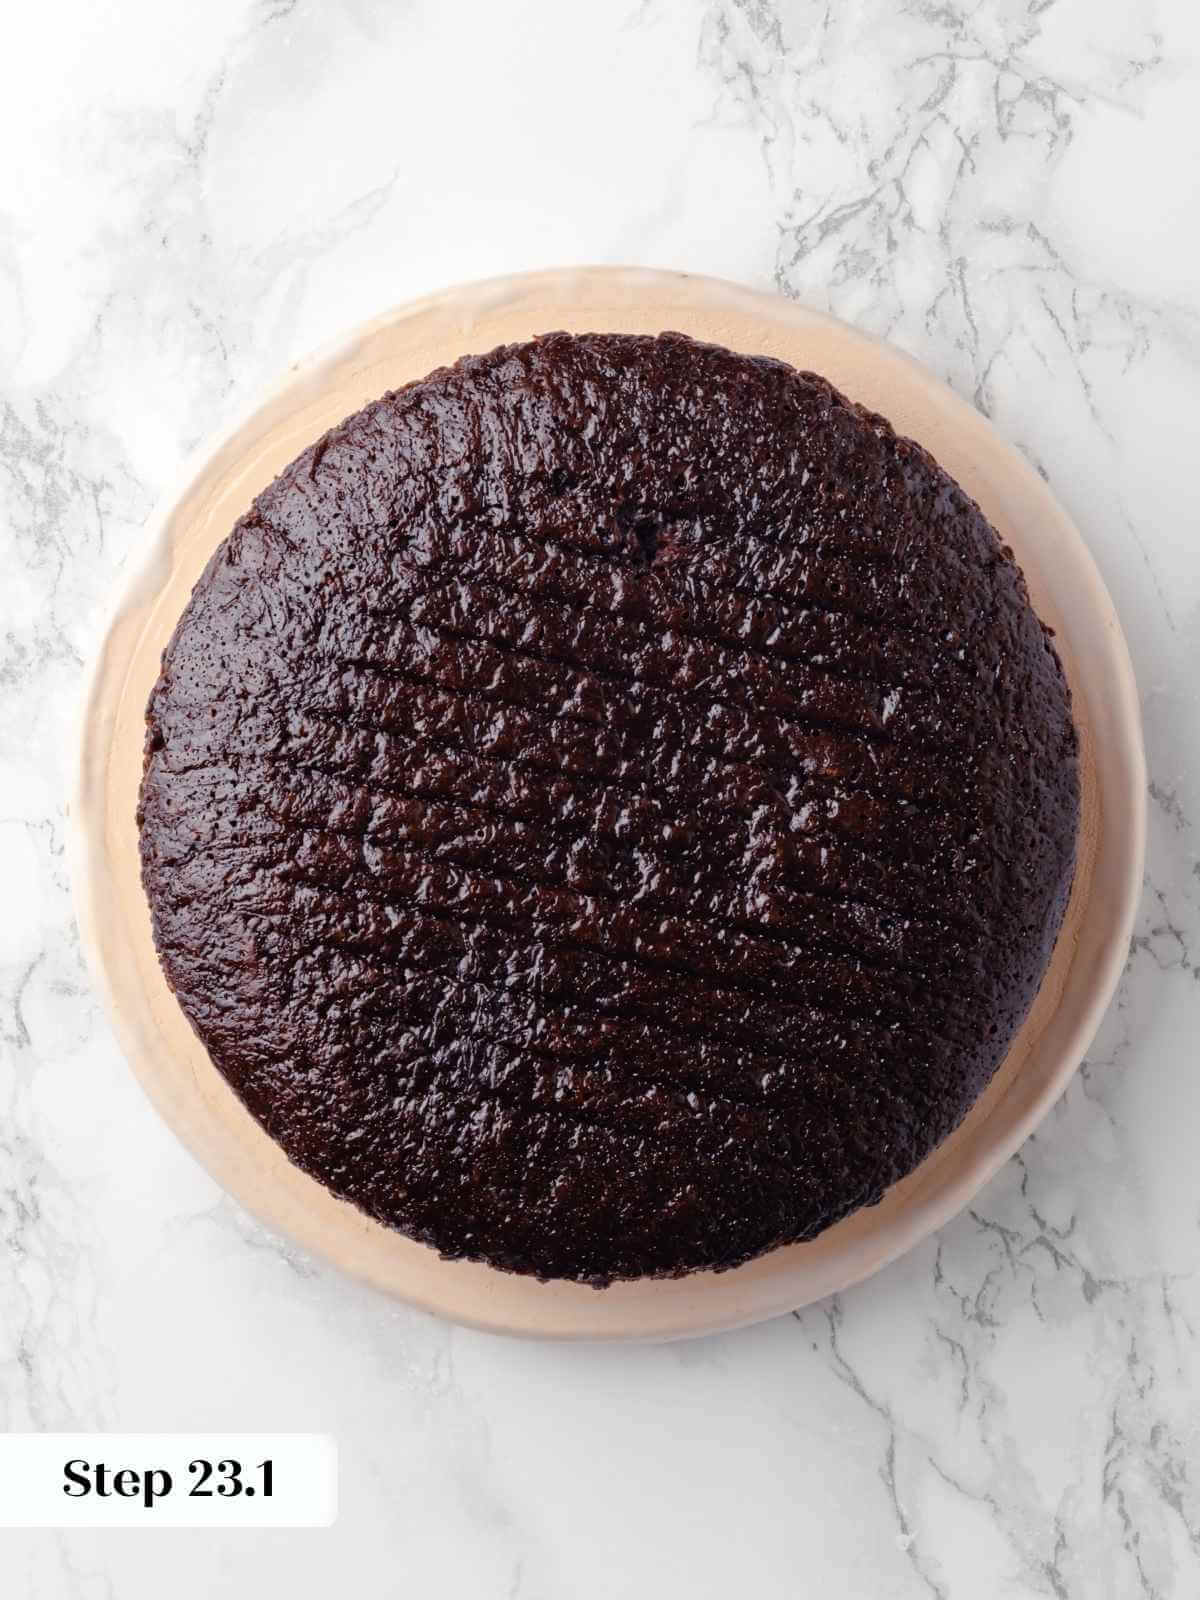
Step 23: Place the first cake layer on your favorite serving plate or cake stand. Pipe a ring of the raspberry buttercream around the outer edge of the cake layer.
Step 24: Scoop about half the remaining raspberry jam into the center and spread out with the back of a spoon. Spread raspberry buttercream on top of the jam to level out the layer. You can use the piping bag to apply the buttercream, but you find that easier to control with the jam.

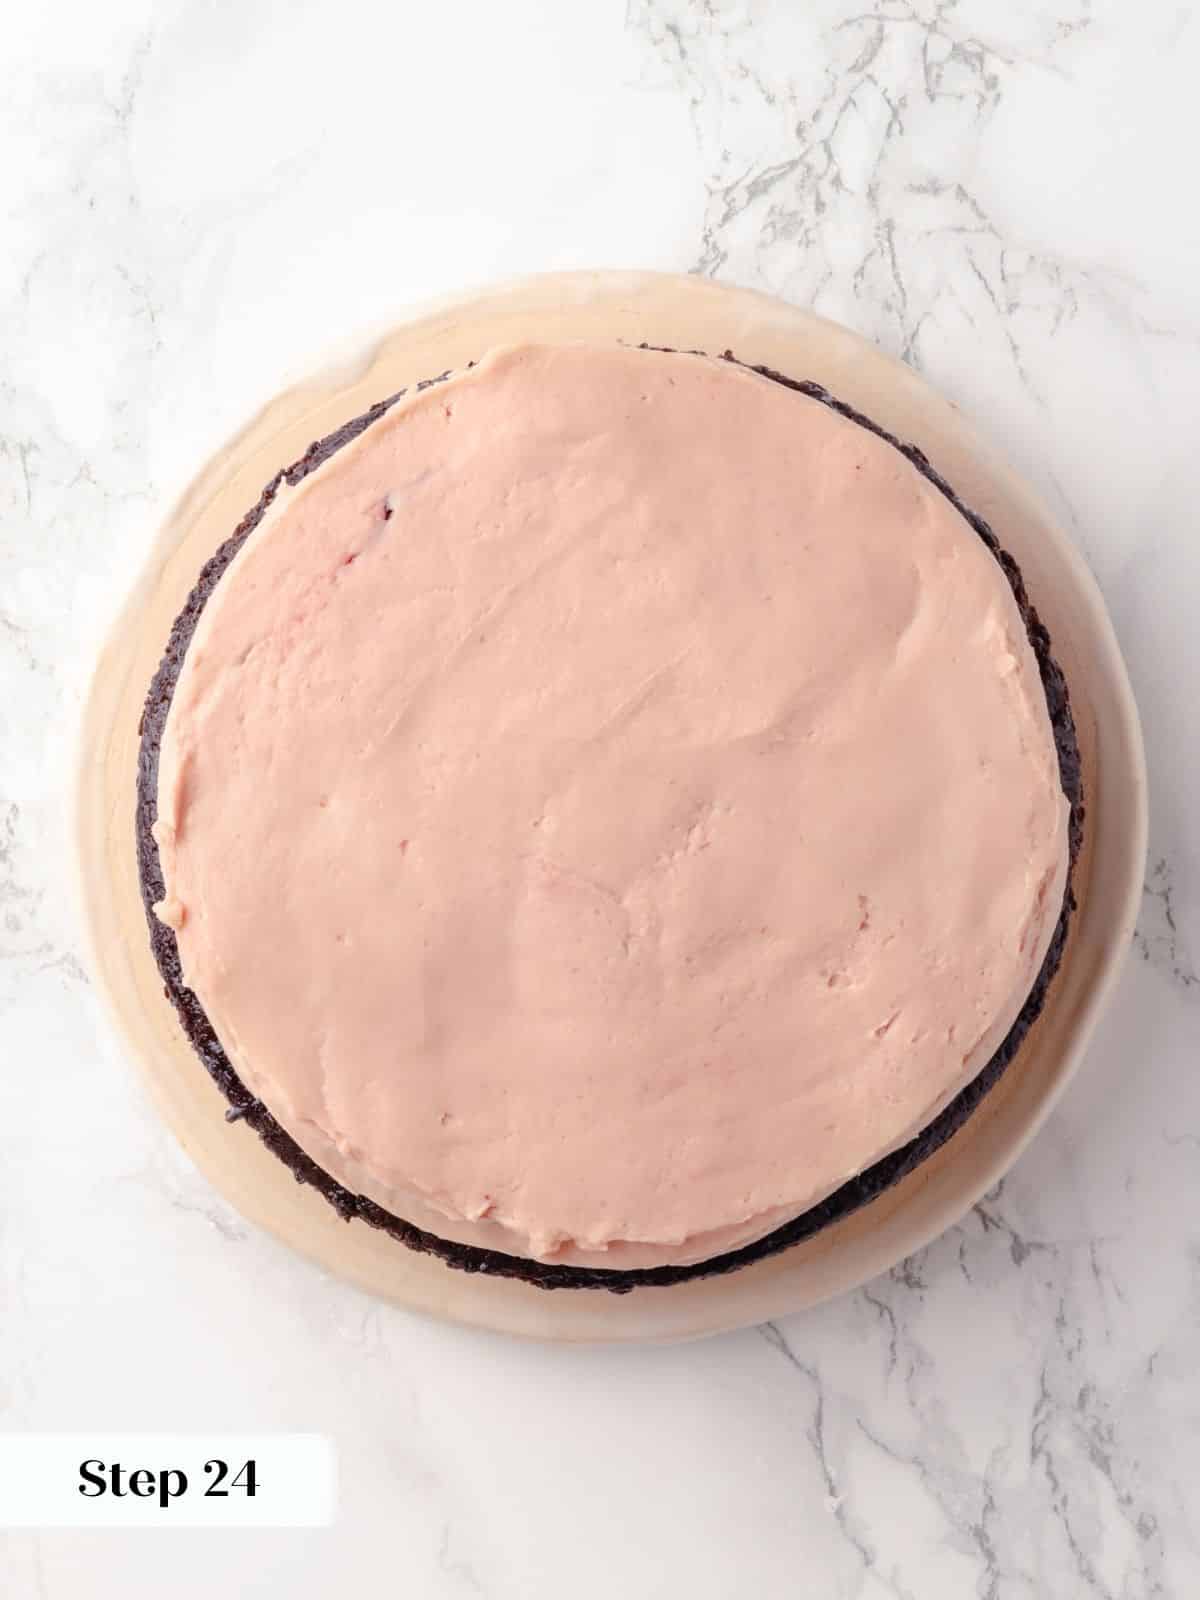
Step 25: Smooth out the surface of the raspberry buttercream and add the second layer on top. I recommend chilling it for about 20-30 minutes before adding the next layer, but that is up to you!
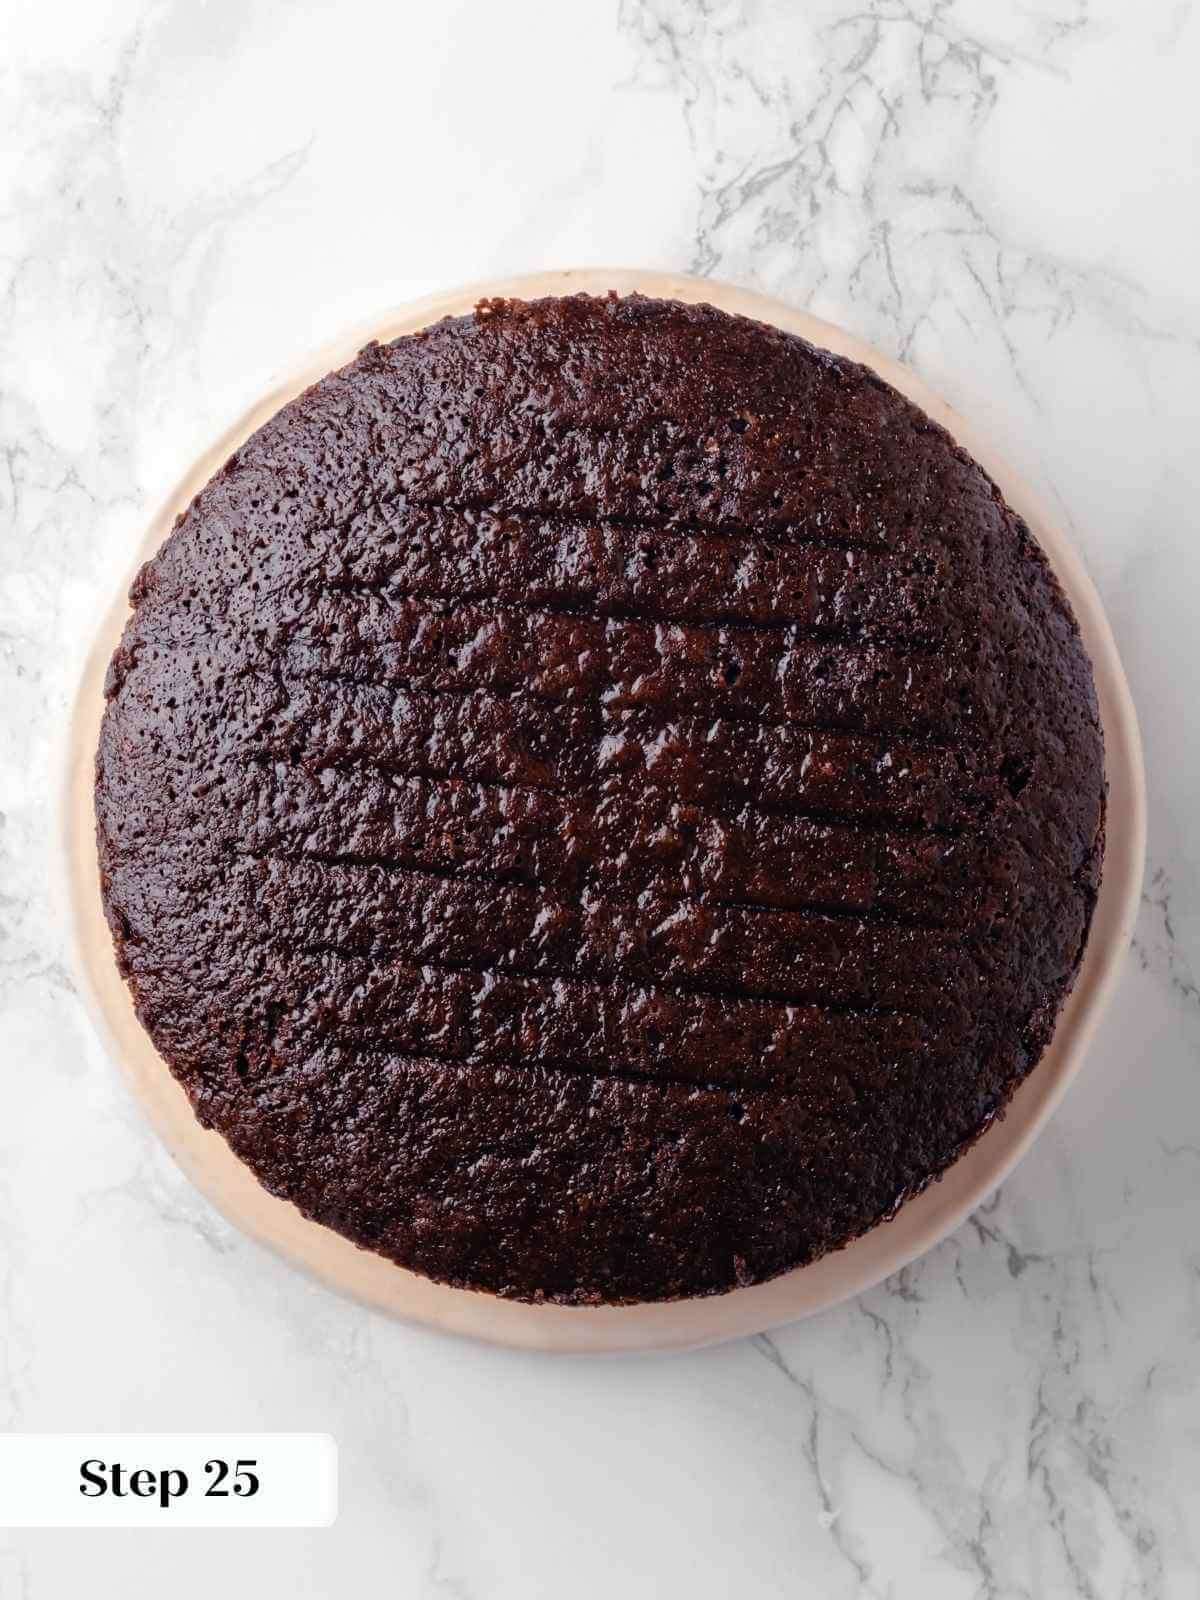
Step 26: Repeat the jam and raspberry buttercream with the second layer, placing the third and final layer on top. Chill the cake for 30 minutes (or an hour if you did not chill between the first and second layer.
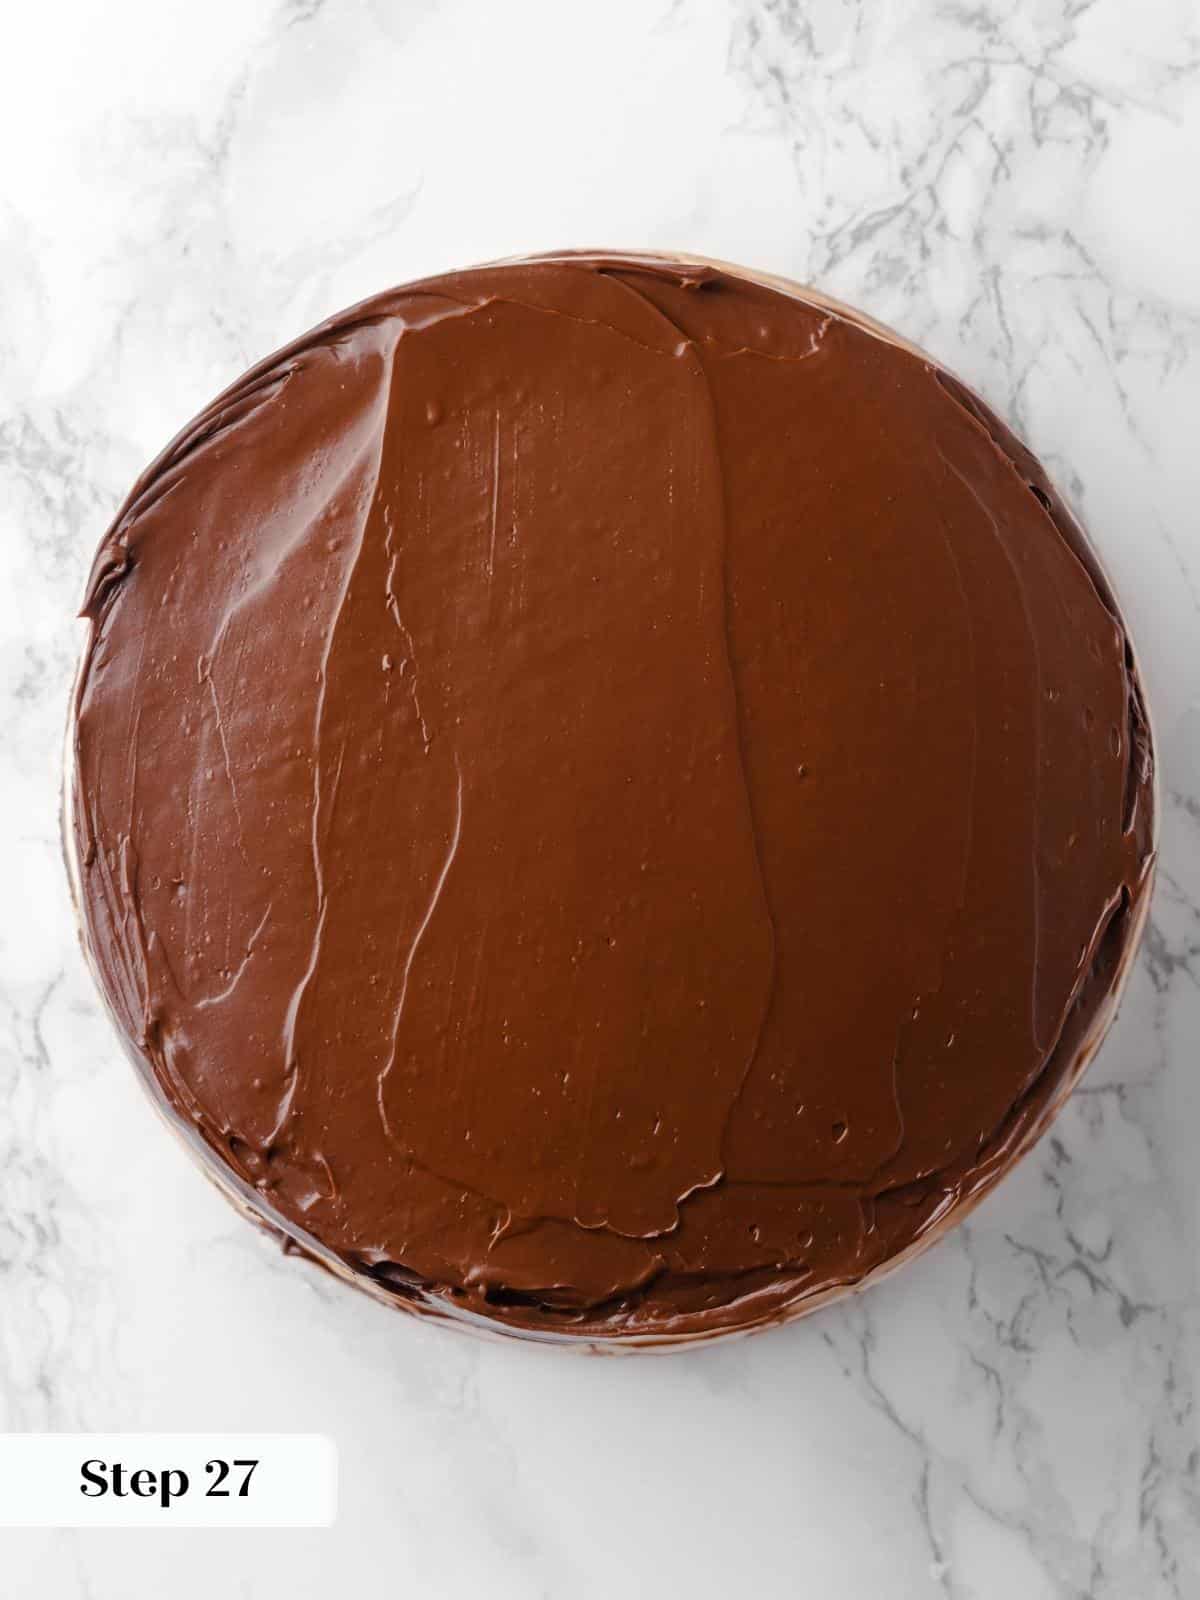
Step 27: Spread the chocolate fudge frosting over the top of the cake and its sides, smoothing out with a bench scraper or a large offset spatula, or a combination of both. However, you achieve a smooth surface!
Chef Lindsey’s Recipe Tip
I know a layered cake seems daunting, but trust yourself and give yourself grace. Make the components one at a time, even one day at a time. The chocolate fudge frosting should be made the day you assemble that cake. But know you got this! 💪
Frequently Asked Questions
Store unfrosted chocolate cake well-wrapped at room temperature or in the freezer. Unfrosted cake can be kept at room temperature for three days, in the fridge for a week, or frozen for up to two months! Store unused frosting in airtight containers in the refrigerator for up to two weeks. Once frosted, the cake can be kept at room temperature for up to three days.
Yes. Flash-freeze the cake in the freezer and then wrap it well in plastic wrap. You can freeze the cake whole or pre-slice it and freeze the slices.
I suggest making the raspberry quick jam, but you can use store-bought jam. It will be sweeter and not as bright in flavor. The jam is very easy to make and makes all the difference in the layers and the buttercream.
Dip your knife into hot water, wipe clean, and slice. Do this with every cut for the perfect slice every time. This cake is truly perfect on its own; serving with vanilla bean ice cream or homemade whipped cream wouldn’t be remiss.
If you tried this recipe and loved it please leave a 🌟 star rating and let me know how it goes in the comments below. I love hearing from you; your comments make my day!
Chocolate Raspberry Cake
Ingredients
For the Chocolate Cake:
- ¾ cup Dutch processed cocoa powder
- 2 ¾ cups all-purpose flour
- 1 ½ teaspoons kosher salt
- 1 teaspoon baking powder
- ½ teaspoon baking soda
- 3 large eggs
- 1 tablespoon vanilla extract
- 1 cup vegetable oil or another neutral oil
- 2 ½ cups granulated sugar
- 1¾ cups milk
For the Quick Raspberry Jam
- 12 ounces raspberries fresh or frozen
- ¼ cup lemon juice
- ¼ cup granulated sugar
For the Raspberry Buttercream
- 1 cup unsalted butter
- 4 cups powdered sugar
- ½ teaspoon vanilla extract
- 1 pinch kosher salt
- ⅓ cup quick raspberry jam from above
For the Chocolate Fudge Frosting
- ½ cup heavy whipping cream
- 1 ½ tablespoons light corn syrup or honey
- 5 ounces dark chocolate 50%-70% cocoa solids, chopped
- ¼ teaspoon vanilla extract
- ⅛ teaspoon kosher salt
- 2 tablespoons Dutch processed cocoa powder
- 2 tablespoons unsalted butter softened and cubed
Instructions
Prepare the cake:
- Preheat the oven to 325°F convection (with the fan) or 350°F conventional (without the fan). Spray and line 3, 8, or 9-inch cake pans with parchment paper.
- Into a large bowl, sift together cocoa powder, all-purpose flour, salt, baking powder and baking soda. Set Aside.
- Whisk the eggs with the vanilla extract until smooth and homogenous in a separate large bowl. Slowly pour the oil into the eggs while whisking to create an emulsion.
- Add the sugar to the bowl and whisk until smooth and incorporated.
- Alternately add the dry ingredients and milk in 3 additions. I add about 1/3 of each at the same time, then whisk until no lumps remain. Repeat with the remaining flour mixture and milk.
- Divide the cake batter between the cake pans and bake in a preheated oven. Bake until a cake tester or toothpick comes out clean or with just a few clinging crumbs. Three layers will bake faster, so begin checking around 20 minutes. They will bake for 25-28 minutes with convection.
- Cool for 10 minutes on a wire rack, then run a paring knife around the edge and flip out onto the rack. You can cool them upside down or use a second wire rack to flip them back over.
- Cool completely before frosting.
Prepare the raspberry jam:
- In a small saucepan, add raspberries, lemon juice, and granulated sugar.
- Heat over low heat until the raspberries soften and release their juices, stirring and smashing occasionally. Increase heat to medium or medium-low and simmer until the juices evaporate and you are left with a jam that will hold a line on the back of a spoon. Reduce the heat back to low as the jam thickens to keep it from sticking to the bottom and burning.
- Strain through a metal sieve to remove seeds into a frozen bowl. No one wants the crunch of raspberry seeds in their buttercream. It is unwelcome, bordering on offensive.
- Press through the sieve, then run the silicone spatula over the bottom to release the thick part of the jam. This jam will actually keep more jam from pressing through.
- Pour the mixture into a cold or frozen glass or Pyrex bowl and refrigerate until cold. Adding cold jam to the buttercream will keep the frosting nice and thick.
Prepare the chocolate fudge frosting:
- In a large heat-proof bowl, add chopped chocolate, vanilla extract, corn syrup, and salt.
- In a small saucepan, bring whipping cream just to a boil. Pour over the chocolate, shake to distribute, and cover the chocolate. Allow to sit for 2 minutes.
- Slowly whisk, starting from the center and working your way out to create an emulsion. Sift in the cocoa powder and whisk to incorporate. You can also put it in before the cream, but it has a tendency to clump and create lumps that will not come out.
- Add butter to the still-hot ganache. Switch to a silicone spatula and gently stir in one direction until all the butter has melted and incorporated into the ganache.
- Place a piece of plastic wrap directly on the surface and allow it to cool to room temperature. You can speed it up by putting it in the fridge and stirring every 10 minutes.
Prepare the raspberry buttercream:
- Beat the butter in the bowl of a stand mixer fitted with the paddle attachment until lightened and soft.
- Slowly add the powdered sugar, followed by the vanilla and salt.
- Once the buttercream has come together, add the raspberry puree 2 tablespoons at a time, up to 1/3 cup, which is half what you made above. You can add additional lemon juice or heavy cream as desired.
- Place about 1 cup in a piping bag fitted with a round tip. You can also just cut the piping bag because this is for creating a dam between the layers.
Time to assemble the cake:
- Place the first cake layer on your favorite serving plate or cake stand. Pipe a ring of the raspberry buttercream around the outer edge of the cake layer.
- Scoop about half the remaining raspberry jam into the center and spread out with the back of a spoon. Spread raspberry buttercream on top of the jam to level out the layer. You can use the piping bag to apply the buttercream, but you find that easier to control with the jam.
- Smooth out the surface of the raspberry buttercream and add the second layer on top. I recommend chilling it for about 20-30 minutes before adding the next layer, but that is up to you!
- Repeat the jam and raspberry buttercream with the second layer, placing the third and final layer on top. Chill the cake for 30 minutes (or an hour if you did not chill between the first and second layer.
- Spread the chocolate fudge frosting over the top of the cake and its sides, smoothing out with a bench scraper or a large offset spatula, or a combination of both. However, you achieve a smooth surface!
Notes
Nutrition
Before You Go
I hope you enjoyed this professional chef-tested layered cake recipe. Check out our other delicious, chef-developed cake recipes with fun flavors like but not limited to the best fig cake, hummingbird cake, and chocolate mayonnaise cake!


Hello
What tips did you use for the raspberry buttercream? So pretty!
Thanks Carolyn! I used closed star tips. I like Ateco 856 or 857 for the rosettes. You can use the same tips to get the star shapes or you can go a size smaller (855) Happy baking! ~Lindsey
When should the corn syrup and the vanilla be added to the fudge frosting?
Hi Laurel! Great question! Add it in with the vanilla. I’ve updated the post to reflect that, and happy baking!