This post may contain affiliate links. Please read our disclosure policy.
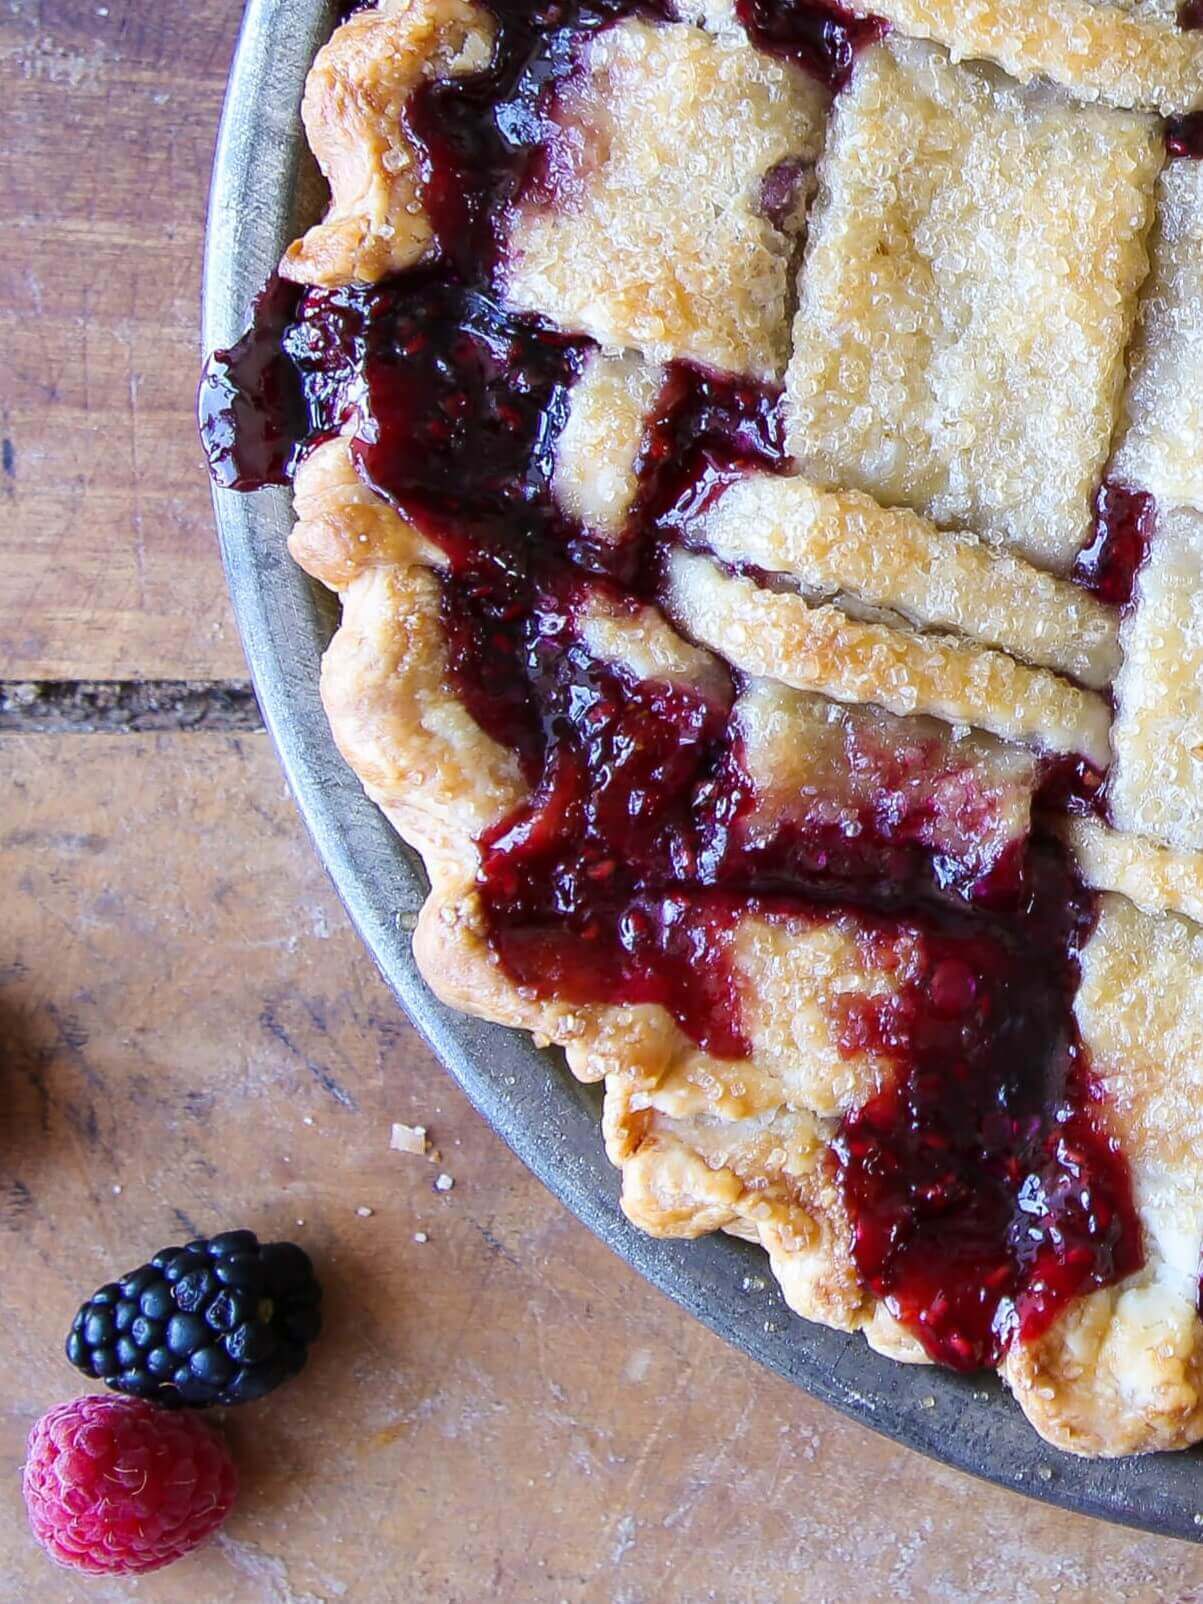
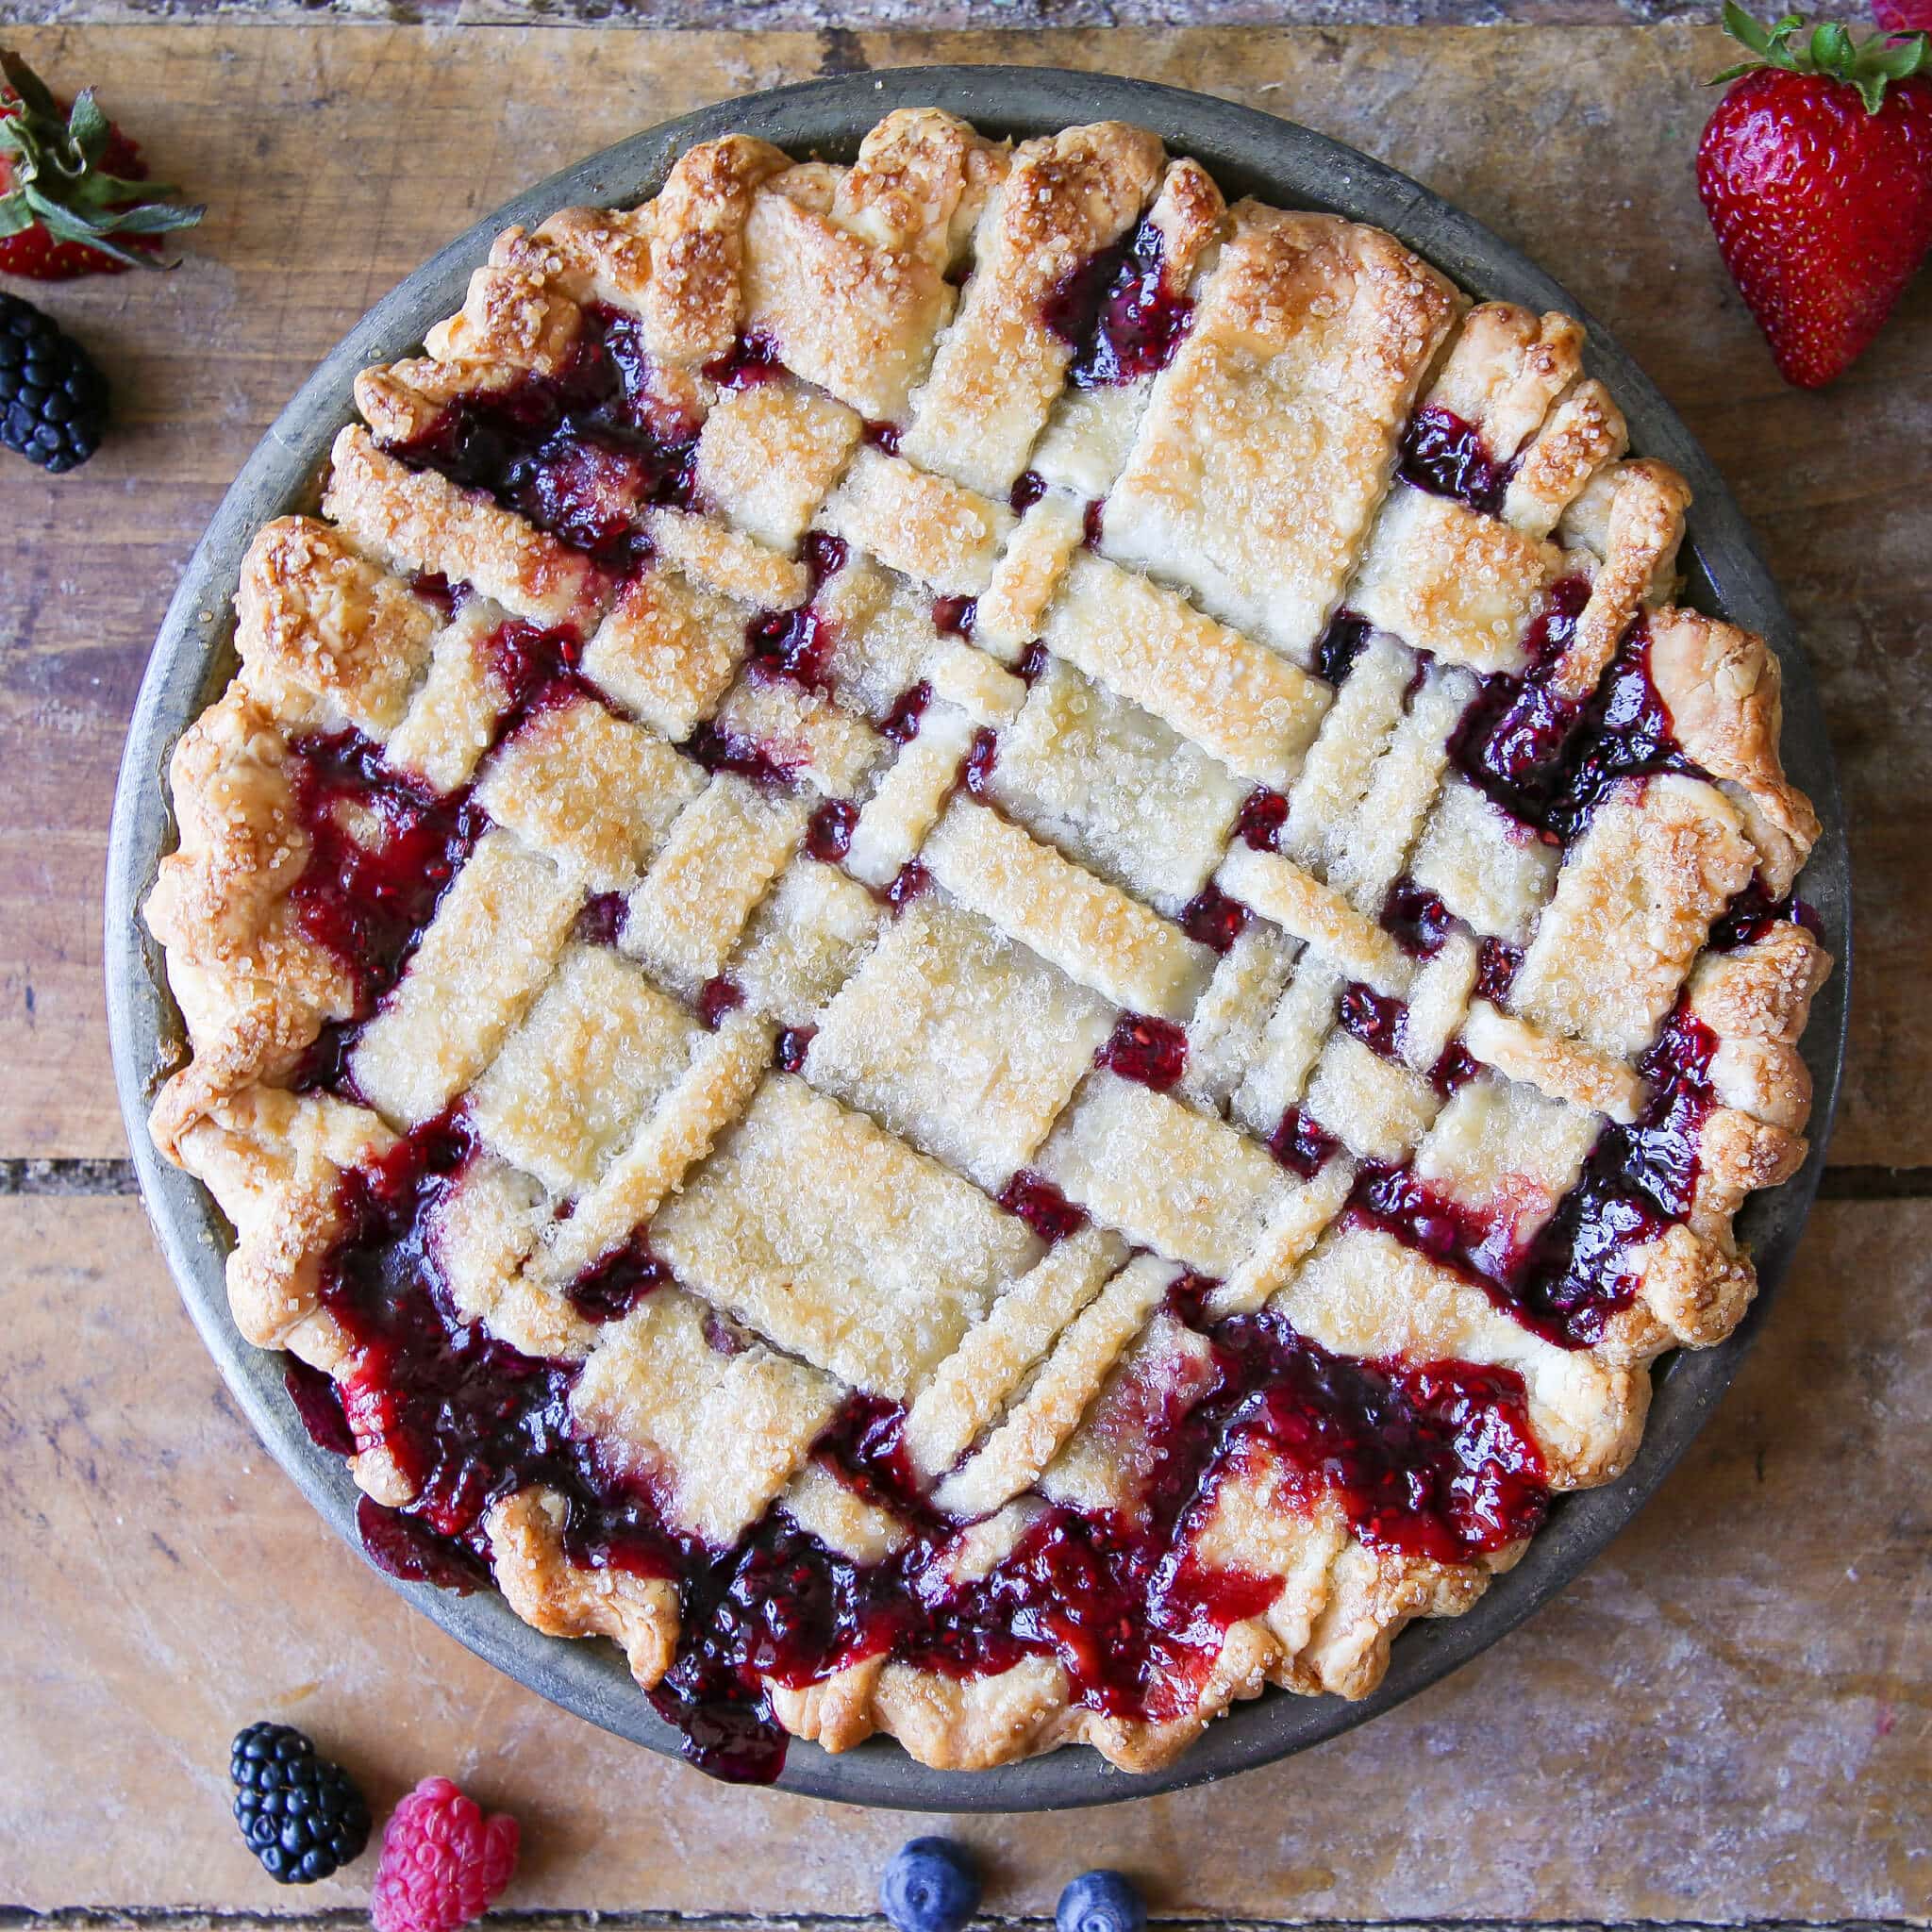
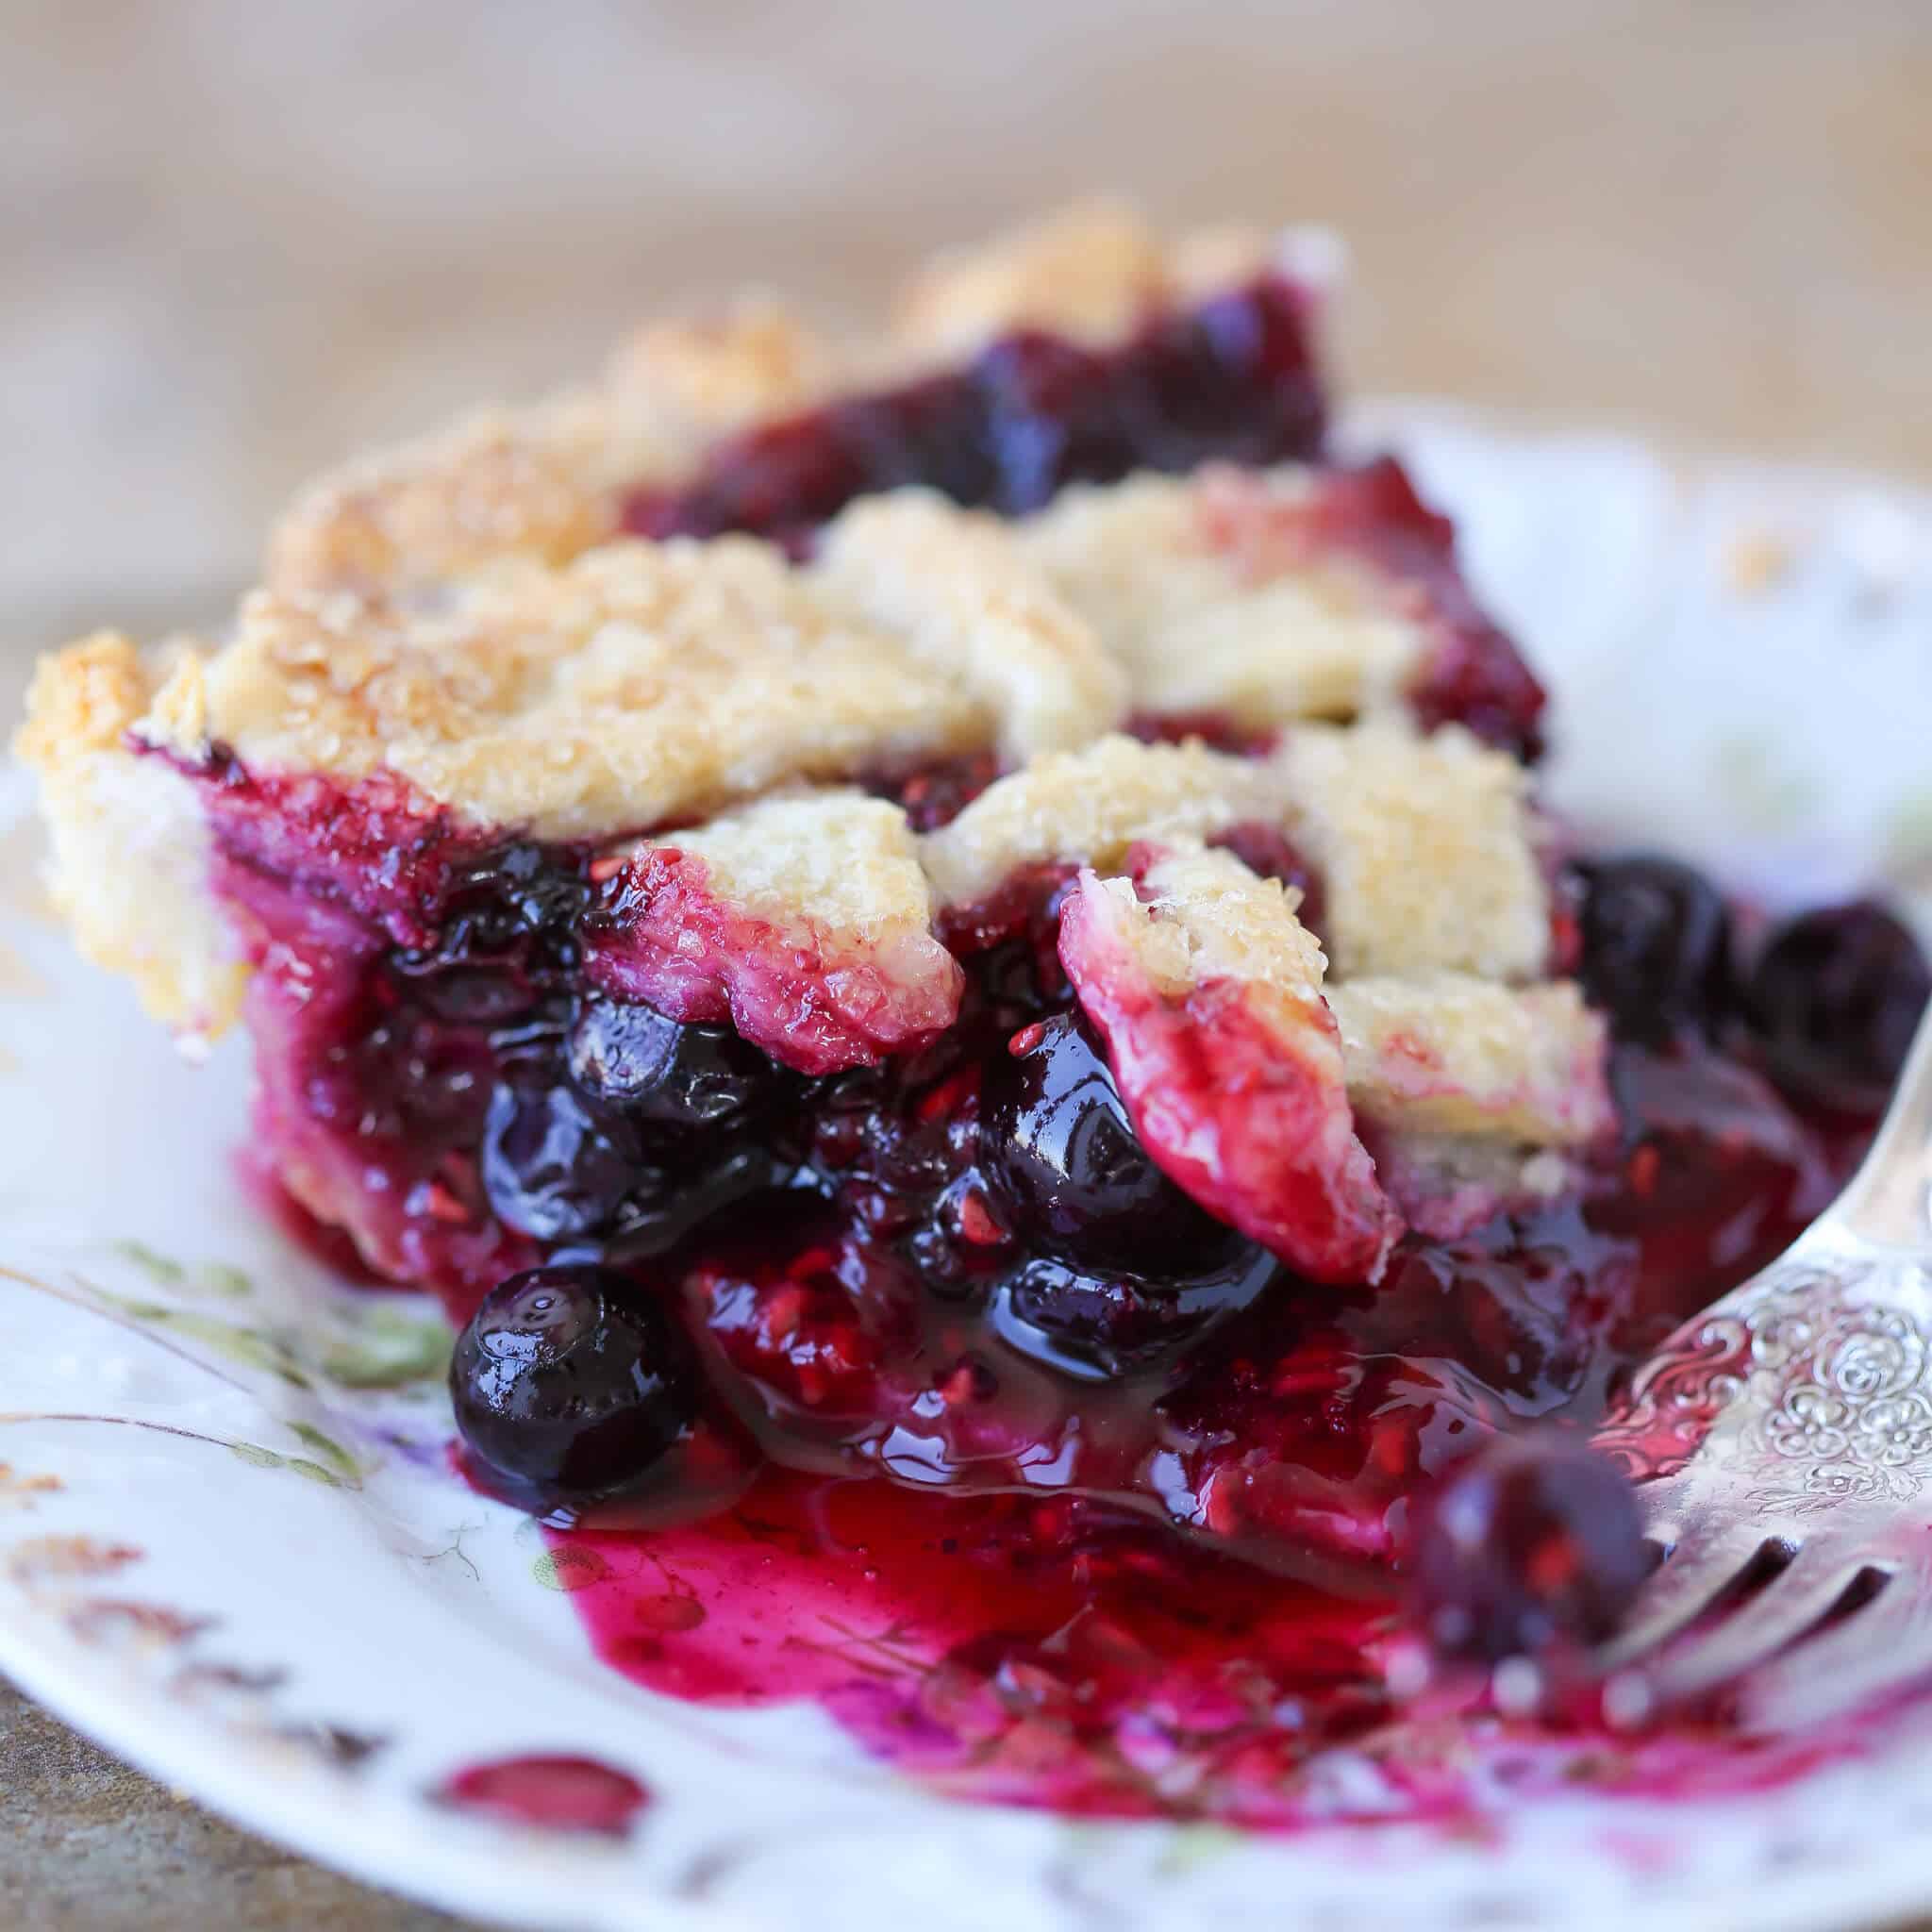
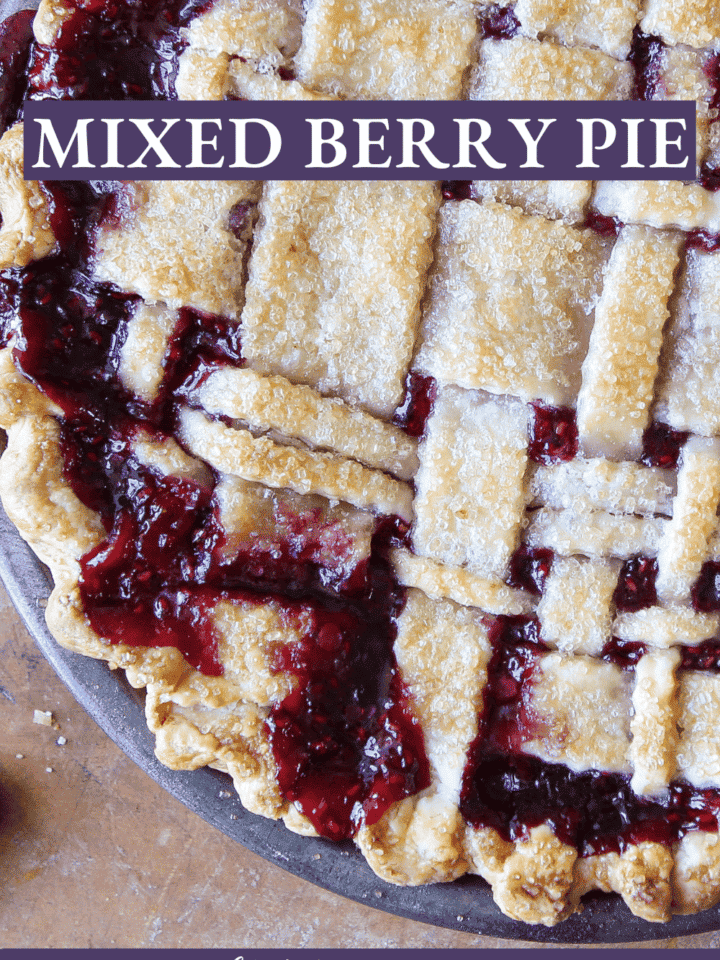
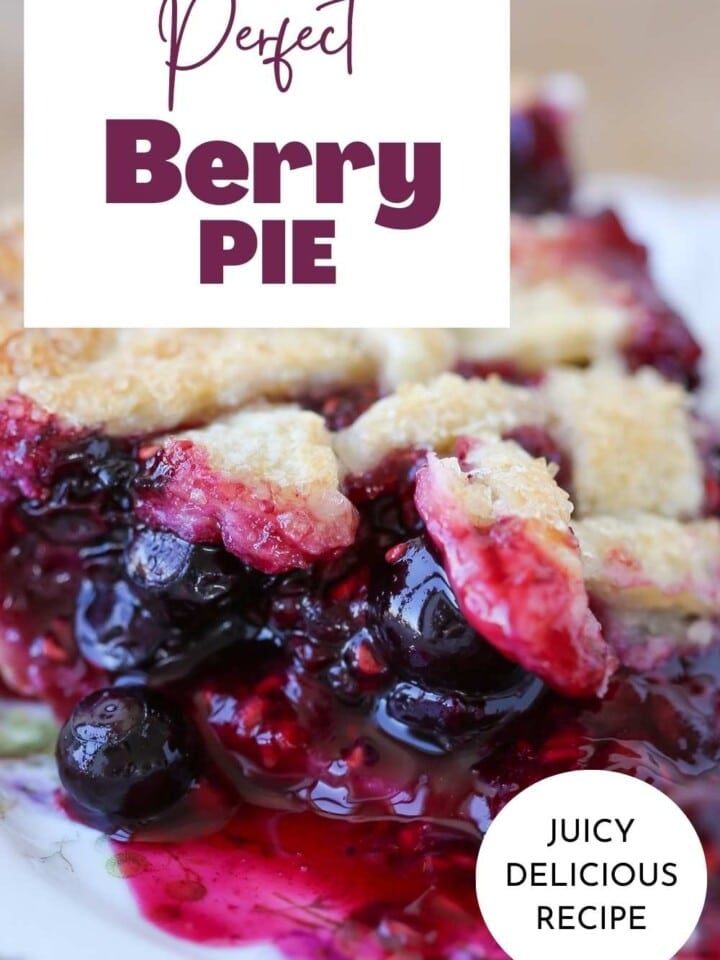
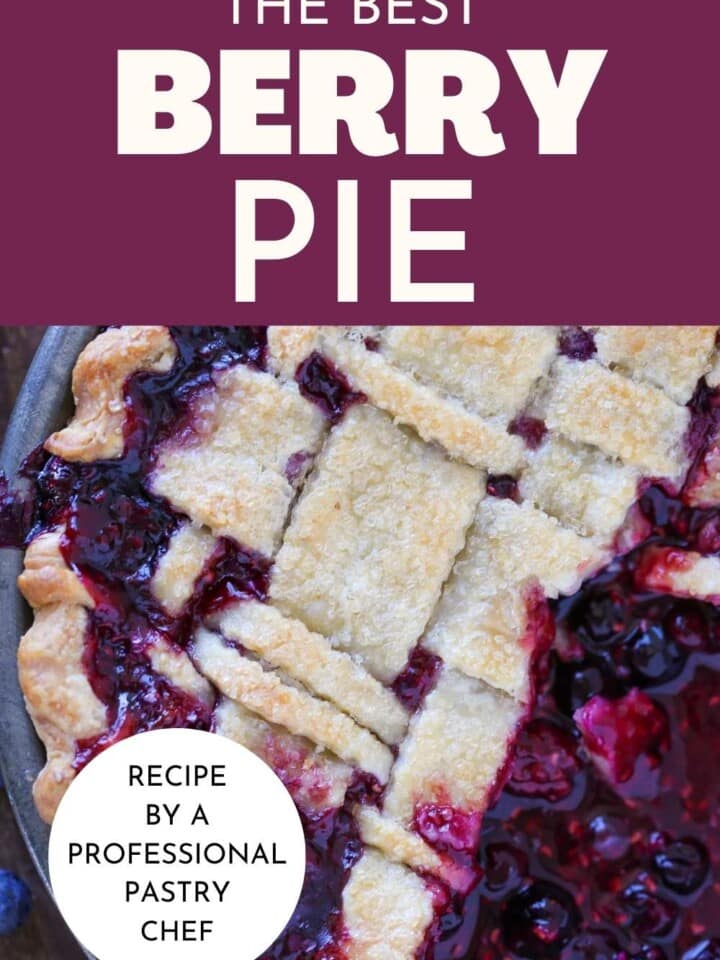
This show-stopping Mixed Berry Pie is topped with a golden lattice crust! Four types of berries meld together in this mixed berry pie recipe for a thick, rich berry filling that is perfectly tart and sweet.
In case we haven’t met before, I wanted to let you know, I take my pies very seriously. I am very particular about their level of sweetness, the pairing of the filling and crust, and getting that perfect slice.
We actually sell this exact mixed berry pie in our pastry shop. And here it is, our secret five-star recipe complete with all the tricks of the trade for you to make at home!
Oftentimes a cold slice of pie from the refrigerator is all you need, but sometimes the occasion calls for a more elaborate dessert. Adorn this mixed berry pie with a generous scoop of French vanilla ice cream or a spoonful of vanilla crème anglaise! Or, perhaps you are a rebel, and you want to top it with a dollop of lemon curd…I see you, and I love it.
Table of Contents
- Why you will love this mixed berry pie:
- Tips for the perfect mixed berry pie:
- Mixed Berry Pie Ingredients
- What berries are best to use?
- Variations
- Substitutions
- How to Make Mixed Berry Pie
- Chef Lindsey’s Recipe Tip
- Why use tapioca flour as a pie thickener?
- Using Frozen Berries vs Fresh Berries
- Can I use tapioca pearls instead of tapioca flour?
- How to use Tapioca Pearls in Mixed Berry Pie
- Frequently Asked Questions
- Mixed Berry Pie Recipe
- Before You Go!
Why you will love this mixed berry pie:
- It’s adaptable: I outline the do’s and don’ts of mixed berry pie so you can mix and match your berries, and even your crusts! Adapt this recipe to your favorite flavors, or what’s in season.
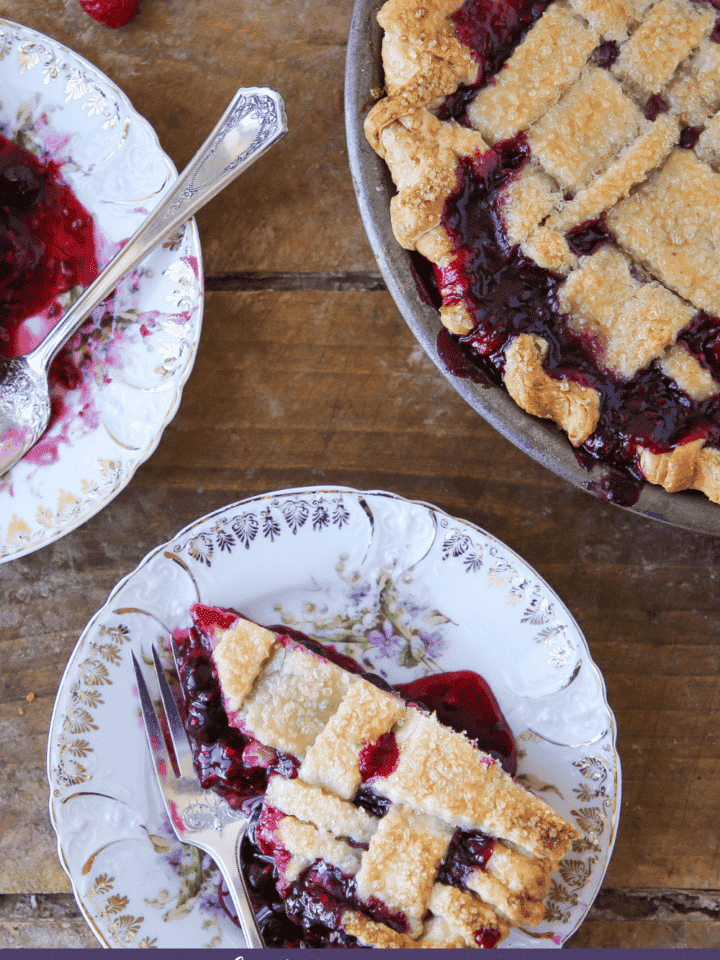
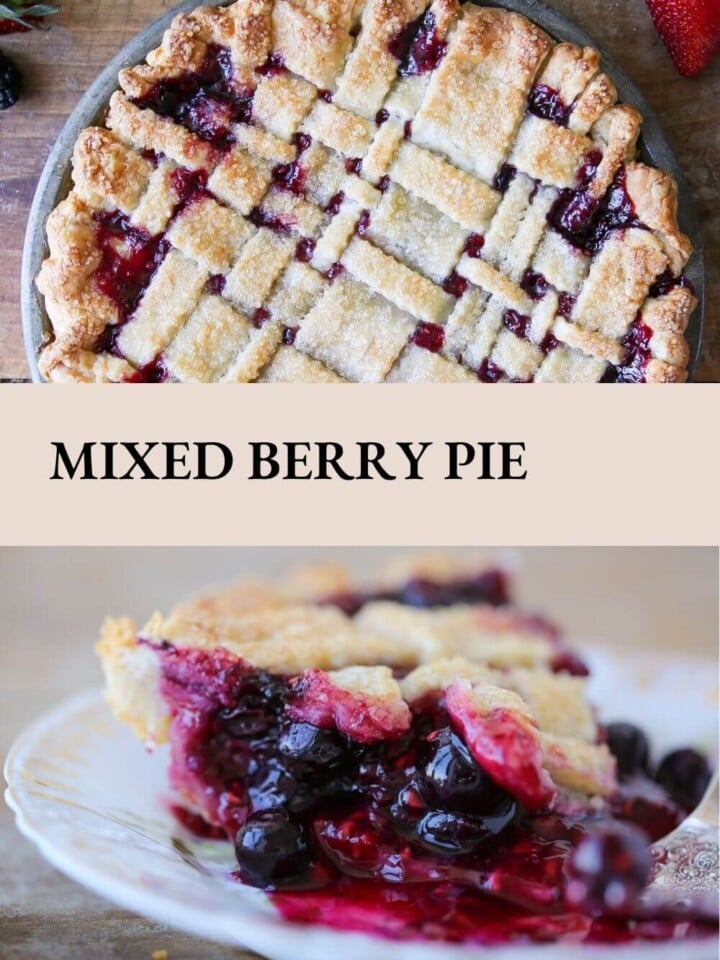
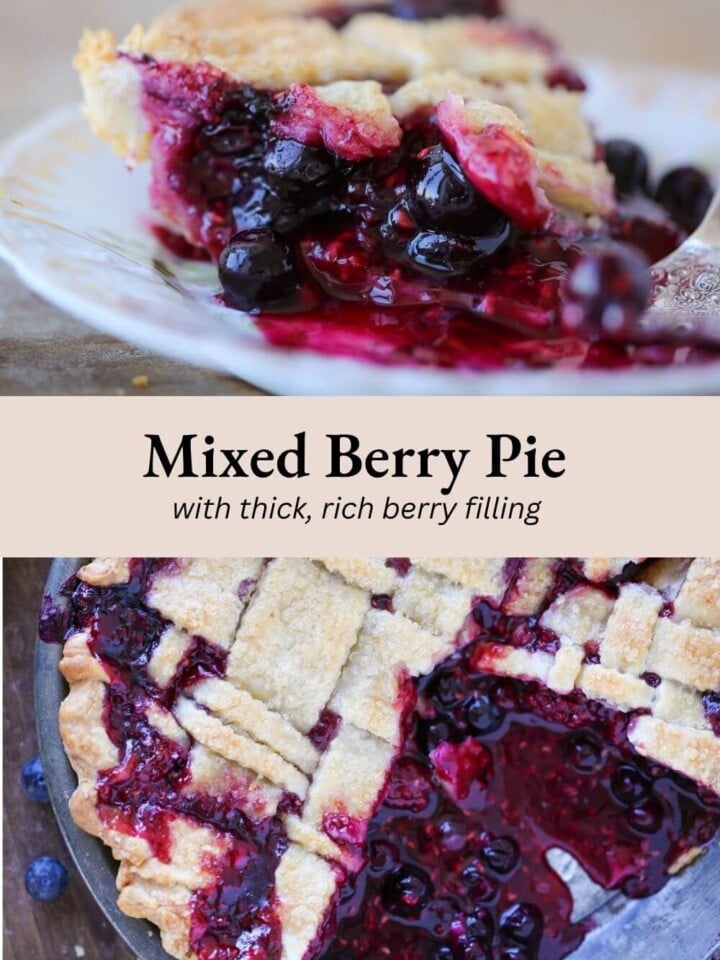
- It’s stunning: This pie is thick and sliceable, with the perfect pop of color.
- It’s sensational: This mixed berry pie is a total crowd-pleaser. It tastes both tart and sweet, with the best flavors of summer throughout! The lemon juice complements and augments the berry flavors.
Tips for the perfect mixed berry pie:
- Precooked Filling: This might seem like an extra step, but I promise you, it’s worth it. Precooking the berries allows for some of their moisture to cook out, the flavors to condense, and the tapioca to activate. You could skip it, but the pie filling will be looser and less sliceable.
- Chill that Filling! Please do not pour hot filling into your beautifully chilled pie crust. It will not be flakey.
- Let’s talk about tapioca: I use Bob’s Red Mill tapioca flour. This is what I have tested with all my pie fillings in my pastry shop, Shop Pastry Creations. Different brands have different thickening powers and you may need more or less. It is trial and error.
Mixed Berry Pie Ingredients
- Mixed Berries: I use a combination of fresh blueberries, blackberries, raspberries and strawberries.
- Lemons: Just as in my favorite recipe for mixed berry jam, lemon juice heightens the flavors of the berries and brightens the whole dish! It also tempers some of the sweetness.
- Sugar: I use plain granulated sugar and adjust the amount to the sweetness of the berries.
- Cinnamon: Ground cinnamon is one of the stars in this mixed berry pie. It warms the whole dish and pairs beautifully with the berries. Choose a high quality variety such as saigon cinnamon or ceylon cinnamon.
- Tapioca: I use tapioca flour to thicken my fruit pies, because it thickens better than cornstarch. It also doesn’t have an off-putting flavor, and you don’t have to let it sit and hydrate before baking. I develop all my pie recipes with Bob’s Red Mill Tapioca Flour. Nothing else is quite the same. There was a shortage in 2021. They were dark times. My business partner and I don’t speak of it.
- Pastry Flour: Pastry flour has just the right amount of gluten to make a tender, flaky pie crust when handled properly. You could also use all-purpose flour. Either way, be sure you measure it by weight or by fluffing the flour and spooning it in the measuring cup.
- Water: Pie crusts require ice-cold water. Be careful not to add too much water! You want the crust to just come together.
- Kosher Salt: Kosher salt is less salty than table salt and a teaspoon weighs less than other finer ground varieties.
- Butter: I use unsalted butter for baking, because you want to control the amount of salt you are adding. Every brand is different and it makes adjusting the recipe a challenge. It’s better to have cold, cubed butter for making a pie crust.
What berries are best to use?
You can mix and match the types of berries you use in this pie. Just be sure the ratio still leaves the majority of your berries as blueberries. Do this because the pectin from the blueberries thickens the filling. If you drastically reduce the proportion of blueberries, you will have a runnier filling or you will need to increase the amount of tapioca flour.
Variations
- Pie Crust: I used my all butter pie crust for this recipe, but it would also be delightful with my almond flour pie crust, foolproof vodka pie crust, or a store-bought pie crust if you’re short on time!
- Different Berries: You can mix and match the types of berries you use in this pie. Just be sure the ratio still leaves the majority of your berries as blueberries. Do this because the pectin from the blueberries thickens the filling. Taste your fruit for sweetness. You might want more or less sugar, or the addition of lemon zest, depending on the ripeness of the berries. I like to mix and then taste to get a real indication of how the flavors will meld.
- Mini Pies: Who says pies always have to be for sharing? You could make smaller, single-serving pies! The cook-time will be shorter, so keep track of them and take them out when the tops are golden and you see the filling bubbling. If you want to make a mini pie plate and have some apples, let a mini apple pie or twelve join the party!
- Top Crust: I latticed the top crust of my pie with strips of dough using the method in this how to lattice pie crust post, but you could also place the second pie crust on top without latticing! You could apply Sometimes I like to use egg wash, turbinado sugar, and cookie cutters for the top so that they are seasonal shapes! You could even use a streusel topping or crumb topping, like I do for my berry crumble recipe!
Substitutions
- Flour: You could use the same recipe with either pastry flour or all-purpose flour for your pie crust.
- Tapioca Pearls: You could substitute tapioca flour with tapioca pearls, as long as you grind them down and hydrate them. Be sure to also adjust your ratio for optimal thickness.
- Other Thickeners: Some people swear by cornstarch or flour to thicken their berry pies, but I find that it impacts the taste in an off-putting way. However, in a pinch, you can absolutely use what you have on hand! At least you will still have pie, and that’s sometimes what matters most.
How to Make Mixed Berry Pie
Use these instructions to make the perfect mixed berry pie every time! Further details and measurements can be found in the recipe card below!
Make the pie crust:
Note: You can also use a store-bought pie crust for this mixed berry pie recipe, just be sure you have enough for a bottom crust and a top crust. For the pictures, I made the recipe for my All Butter Pie Crust with the stand-mixer method.
Step 1: Whisk together pastry flour, salt and sugar.
Step 2: Using your stand mixer, cut the butter into the flour mixture. Do this until the butter is broken down into slightly larger than pea-sized pieces.
Step 3: Slowly begin to add your ice water to the mixer’s large bowl one tablespoon at a time. Gently mix the flour until it is crumbly. Be careful not to add more water than you need, because you do not want to over-hydrate the dough or over-develop the gluten.
Step 4: When your dough is shaggy, which means it looks like shards or strands of pastry, and there is still some loose flour, turn out your dough from the mixer onto a lightly floured surface. Work the dough together by gathering it and pressing it away from you with the heel of your hand. Do this JUST until it comes together. If it is crumbling, then dip your hand in a little ice water and pat it on the pastry dough. Seriously, that’s it. Remember the gluten!
Step 5: Divide the dough in half and press each half into a disk. Wrap in plastic wrap and chill for 2 hours or overnight. If you chill your dough overnight, you will need to let it rest a bit before rolling it out or it will be too cold. If your dough is too cold when you are rolling it, it will crack.
Pre-cook the filling:
Step 6: In a pot, combine all filling ingredients. Cook the filling slowly over low heat until the berries begin to break down. You want to cook it until the tapioca flour is absorbed and no longer visible. This should take at least 15 minutes.
Step 7: Turn up the heat and boil the mixture for one minute to begin activating the tapioca.
Step 8: Pour the cooked filling out onto a baking sheet lined with plastic wrap or parchment paper. Cover the filling and let it cool completely in the refrigerator.
Assemble and bake the pie:
Step 9: Roll out your pie crusts on a lightly floured surface to about an ⅛-inch thickness. I like to use a French rolling pin so that I can control the pressure and shape of my crust more easily.
Step 10: Line a pie dish with one circle of pie dough and fill it with the cooled filling.
For the flakiest pie crusts, use a metal pie tin! This is especially important when you are pre-cooking the filling, because it doesn’t bake as long. Metal tins heat up faster than pyrex, ceramic or glass.
Step 11: Top your pie with a second pie crust circle or a latticed top and crimp the edges decoratively. Read this tutorial on How to lattice a pie crust for step-by-step instructions on how to make a beautiful lattice top.
Step 12, optional: If desired, brush the top crust with heavy cream and sprinkle it with turbinado before baking the pie.
Step 13: Chill at least an hour before baking. Preheat the oven to 350°F.
Step 14: Bake the pie in a preheated oven for 45-50 minutes, or until the filling is bubbling in the center and the pie crust is a dark golden brown.
Step 15: Let the pie cool completely. Serve it with a scoop of vanilla ice cream within a week, or wrap it well and freeze for later enjoyment.
Chef Lindsey’s Recipe Tip
Bake your pie with the pie dish on a baking sheet! This way you can be sure any stray berry filling doesn’t end up on the bottom of your oven. Bonus points for lining that baking sheet with parchment or foil.
Why use tapioca flour as a pie thickener?
- Flavor: Have you ever accidentally eaten plain flour? Eww. The flavor of other thickeners don’t always cook all the way out. Tapioca is flavorless when cooked (and even if it isn’t completely cooked). Other root starches have a subtle flavor that I find off-putting.
- Texture: No one wants a gritty pie. I have found that tapioca produces a smoother, silkier filling than even cornstarch!
- Curb-appeal: Yes, flour will thicken your mixed berry pie but it will make it cloudy in appearance. Don’t mute those berry colors! Let them pop!
- Strength & Staying Power: Tapioca has a firm hold that keeps on holding long after other thickeners begin to weep. Cornstarch has a stronger grip but it starts to leach liquid after about 5 days, sometimes sooner, the more cornstarch you use.
Using Frozen Berries vs Fresh Berries
Though I prefer to use fresh berries when I can, yes you can make this pie with frozen berries! If you throw frozen berries into the mix, just be sure to still keep blueberries as your majority, and still taste-test for sweetness adjustments.
Can I use tapioca pearls instead of tapioca flour?
Yes, you can substitute tapioca pearls for tapioca flour in fruit pies. I buy small pearls and then grind them in a food processor or a spice mill before using them. Let the mixed filling sit for 30 minutes to allow the tapioca pearls to hydrate. This keeps your pie from having unattractive large clumps of tapioca after you bake it.
How to use Tapioca Pearls in Mixed Berry Pie
- Grind Them: I suggest that you grind tapioca pearls down to as close of a powder consistency as possible. This will make it less likely that you will have visible tapioca pearls in your filling.
- Hydrate: Allow the filling at least 30 minutes to hydrate. Do this by mixing your filling with the pearls, and then let it sit in the refrigerator for 30 minutes to an hour. The tapioca pearls need this extra time to absorb the moisture, whereas tapioca flour would not.
- Adjust your ratio: I am not saying it is a one-to-one ratio tapioca pearls to tapioca flour. For this mixed berry pie recipe, you will have to adjust your tapioca pearl ratio to get your desired filling thickness. Sadly, there is no magic bullet. I would suggest starting with a 1:1 swap by volume and then adjusting accordingly!
Frequently Asked Questions
Store baked pie at room temperature for 3 days or in the fridge for 1 week. It can also be frozen for up to 2 months. Wait until the pie has cooled completely, then wrap it in plastic wrap before storing. For the best results, mixed berry pie can be reheated in a preheated 350°F oven. Bake the pie until its filling is warmed and the crust has re-crisped.
The best way to ensure a flakey, not soggy bottom is to use a metal pie tin. The metal pie tin warms up faster and will cook the crust at the same rate as the filling. You also want to make sure you cover the basics like keeping the crust cold and not pouring hot filling into a cold pie crust.
I thicken this berry pie with tapioca because it is tasteless and clear. See the Substitutions section above for a more detailed answer on how to use other thickeners.
The best way to keep a berry pie from being runny is using a combination of tapioca flour as a thickener and pre-cooking the filling. Pre-cooking thickens the filling as well as activates the tapioca thoroughly.
If you tried this recipe and loved it please leave a 🌟 star rating and let me know how it goes in the comments below. I love hearing from you; your comments make my day!

Mixed Berry Pie
Ingredients
For the Filling:
- ¾ cup Tristar strawberries
- 1 ½ cup blueberries
- 1 cup raspberries
- 1 cup blackberries
- ½ cup sugar
- 1 ½ teaspoons lemon Juice
- 1 lemon zested
- ¼ teaspoon cinnamon
- 2 tablespoons tapioca
For the All Butter Pie Crust:
- 2 ¼ cup pastry flour measured by fluffing the flour then spooning it in
- 1 teaspoon kosher salt
- 1 teaspoon sugar
- 9 tablespoons unsalted butter cold and cubed into 1/2 inch cubes
- 2 ¼ oz cold water or as much or as little as needed
- 2 tablespoons heavy cream
- ¼ cup turbinado sugar optional
Instructions
Make the pie crust:
- Note: You can also use a store-bought pie crust, just be sure you have enough for a bottom crust and a top crust. For the pictures, I made the recipe for my All Butter Pie Crust with the stand-mixer method.
- Whisk together pastry flour, salt and sugar.
- Using your stand mixer, cut the butter into the flour mixture. Do this until the butter is broken down into slightly larger than pea-sized pieces.
- Slowly begin to add your ice water to the mixer’s large bowl one tablespoon at a time. Gently mix the flour until it is crumbly. Be careful not to add more water than you need, because you do not want to over-hydrate the dough or over-develop the gluten.
- When your dough is shaggy, which means it looks like shards or strands of pastry, and there is still some loose flour, turn out your dough from the mixer onto a lightly floured surface. Work the dough together by gathering it and pressing it away from you with the heel of your hand. Do this JUST until it comes together. If it is crumbling, then dip your hand in a little ice water and pat it on the pastry dough. Seriously, that’s it. Remember the gluten!
- Divide the dough in half and press each half into a disk. Wrap in plastic wrap and chill for 2 hours or overnight. If you chill your dough overnight, you will need to let it rest a bit before rolling it out or it will be too cold. If your dough is too cold when you are rolling it, it will crack.
Pre-cook the filling:
- In a pot, combine all filling ingredients. Cook the filling slowly over low heat until the berries begin to break down. You want to cook it until the tapioca flour is absorbed and no longer visible. This should take at least 15 minutes.
- Turn up the heat and boil the mixture for one minute to begin activating the tapioca.
- Pour the cooked filling out onto a baking sheet lined with plastic wrap or parchment paper. Cover the filling and let it cool completely in the refrigerator.
Assemble and bake the pie:
- Roll out your pie crusts on a lightly floured surface to about an ⅛-inch thickness. I like to use a French rolling pin so that I can control the pressure and shape of my crust more easily.
- Line a pie dish with one circle of pie dough and fill it with the cooled filling.
- Top your pie with a second pie crust circle or a latticed top and crimp the edges decoratively. Watch my YouTube tutorial on How to lattice a pie crust for step-by-step instructions on how to make a beautiful lattice top. {If you like, send me a picture of your creation so I can see how it turns out!}
- If desired, brush the top crust with heavy cream and sprinkle it with turbinado before baking the pie.
- Chill at least an hour before baking.
- Preheat the oven to 350°F.
- Bake the pie in a preheated oven for 45-50 minutes, or until the filling is bubbling in the center and the pie crust is a dark golden brown.
- Let the pie cool completely. Serve it within a week, or wrap it well and freeze for later enjoyment.
Video
Notes
Nutrition
Before You Go!
I hope you enjoyed this professional chef tested recipe. Check out our other delicious, chef-developed pie recipes! Pair this berry pie with an easy key lime pie and banana cream pie for a Summer spread.


Hi Lindsey I’m gonna make a pie filling right now, but I have a quick question, My uncle bought a potato starch powder and dried corn starch. So is that same thing as a tapioca? And is potato starch powder or dried corn starch work? or it a bad result ,for pie filling?
Hi Jason! No, tapioca is not the same as potato starch or cornstarch. I use tapioca flour to thicken my fruit pies, because it thickens better than cornstarch… and doesn’t have an off-putting flavor. Cornstarch will work, but the filling will be softer, cloudy, and can weep after a day or two. Potato starch thickens quickly but breaks down more easily and can turn gummy. If you can, wait and use tapioca. If not, cornstarch is the better backup but expect a looser slice. Happy baking!
ok, same to you, but i have a one more question, is tapioca starch is work as a same thing tapioca flour or it a bad result for pie filling?
Hi Jason, Yes, it is the same! It isn’t as tightly controlled so different brands use whichever name they prefer. ~Lindsey
hi Chef Lindsey, this pie is so good, is mixed berry flavor. I like this pie. But, my mom already try this pie, she said it too sour, she did not like a lemon flavor. is that ok without add a lemon juice and lemon zested?
Hi Jason! Yes, that’s totally fine. Lemon juice heightens the flavors of the berries and brightens the whole dish, but it isn’t required for structure. You can reduce or skip both the lemon juice and zest. Just know the pie will taste sweeter and a bit flatter without that brightness. Adjust sugar to taste if needed. Happy baking!
hi chef Lindsey, the mixed Berry pies taste amazing I like this pie. But, my mom already tasted, she said it too sour, and she does not like a lemon flavor. Is that OK without add lemon juice and lemon zest for a pie filling?
Hi Jason! Yes, that’s completely okay. The lemon juice and zest are there to brighten the berry flavor, not to thicken the filling or make the pie set. You can reduce or skip them entirely if your mom prefers less tartness. The pie will be sweeter and a little less vibrant, but it will still bake up beautifully.
This came out soooo delicious. I think the 9inch cake pan I used was a bit deeper than most because I couldn’t get the bottom and top crust to connect and it seemed like the filling wasn’t enough to fill it. So I would probably just double both the crust and filling if you are using a deep cake pan.
Chef, I used your lattice tutorial on your youtube channel and I wish I had gotten a picture because it turned out so pretty with your guidance, even though it was my first time making a pie from scratch. Thank you for your replies to my questions about the recipe, they were so helpful. Can’t wait to try out more of your recipes!
Hi Linda! I’m so glad to hear it turned out delicious, and what an accomplishment for your first pie from scratch! Using a deeper 9-inch cake pan can definitely make the filling look a little sparse, so your idea to double both the crust and filling next time is spot on. And I love that you used my lattice tutorial, it makes me so happy to know it helped you create something beautiful. Thank you for taking the time to come back and share your success, it absolutely makes my day!
I came across your video when I was in the middle of making a different mixed berry pie. It was super helpful to me in explaining how to take your time cooking the fruit filling. Your tip of how to cool the filling fast was SO helpful, too. It really cooled down fast and evenly and I was able to transfer the filling into my pie plate using the plastic wrap with no mess. Next time I will be glad to make YOUR recipe for the pie and I am interested to check out your other recipes. I can tell I like your style with giving good cooking tips. Thanks!
Hi Amy! Thanks for stopping by to comment, it made my day! Please do try this recipe out, it’s one of my favorites!
Hi, I wanted to make this but I was wondering if I can make the filling the day before? Also, I only have a 9inch metal cake pan, would this still work?
Hi Linda! Yes, you can make the filling the day before, just be sure it’s cooled completely before assembling. A 9-inch metal cake pan will work in a pinch! Metal is great for crisping the crust. Just keep in mind cake pans are usually a bit taller, so you may have slightly more crust up the sides. Happy baking, I’d love to hear how it turns out!
Sorry to bother but I have a question about the crust. I noticed when I clicked on the recipe for the crust, the flour amount is different. Should I just use the amount that is listed on the pie recipe?
By the way, I just finished making the filling and WOW, it’s soooo delicious
Hi Linda! The amounts differ slightly because one recipe uses pastry flour (2 ¼ cups) and the other uses all-purpose flour (2 cups). So happy to hear you love the filling! I’d stick with the measurements in the Mixed Berry Pie recipe card since that’s the exact crust I made with the filling. I have found that the type of flour used is less important than how the dough is handled! Happy baking!
Kids were amazed by this stunning mixed berry pie! The berry filling is bursting with flavors and it is so vibrant! Such a keeper, just added it to our meal rotation!
Hi Sharina! This pie would be delightful in your rotations, thank you so much for commenting!
I’m not a huge pie person, but I love this one. It’s thick and rich, but not too sweet—it’s perfect for a summer dessert.
Hi Jane! I couldn’t agree more!
Hi Lindsay, I haven’t made this pie yet but I am wondering if I can just cool the cooked filling in the pot I cooked it in.
Hi Audrey! You could certainly do that, but I cool the filling on a baking sheet so that it cools more quickly and so I can control when it stops cooking. Just be sure it’s cooled completely, and you’ll be golden!
As a generally lazy chef, there are very few pies that feel worth the effort. This is one of the exceptions! I just recently made this with foraged bilberries, black raspberries and strawberries from my local farmer’s market. Taking it out of the oven and serving myself up a slice was the highlight of my week.
Foraged and farmer’s market berries? Be still my heart. That does sound like the highlight of a week!
This pie was such a treat for using up our fresh summer berries. Both the filling and crust were outstanding.
Hi Lisa! I’m so happy you enjoyed this pie!
I really loved this mixed-berry pie! Such a great dessert! The flavors are perfectly balanced, plus what I loved about this recipe was that it was easy to follow! This is a must-try!
Hi Janice! I’m so glad you enjoyed both the pie and the process!