This post may contain affiliate links. Please read our disclosure policy.
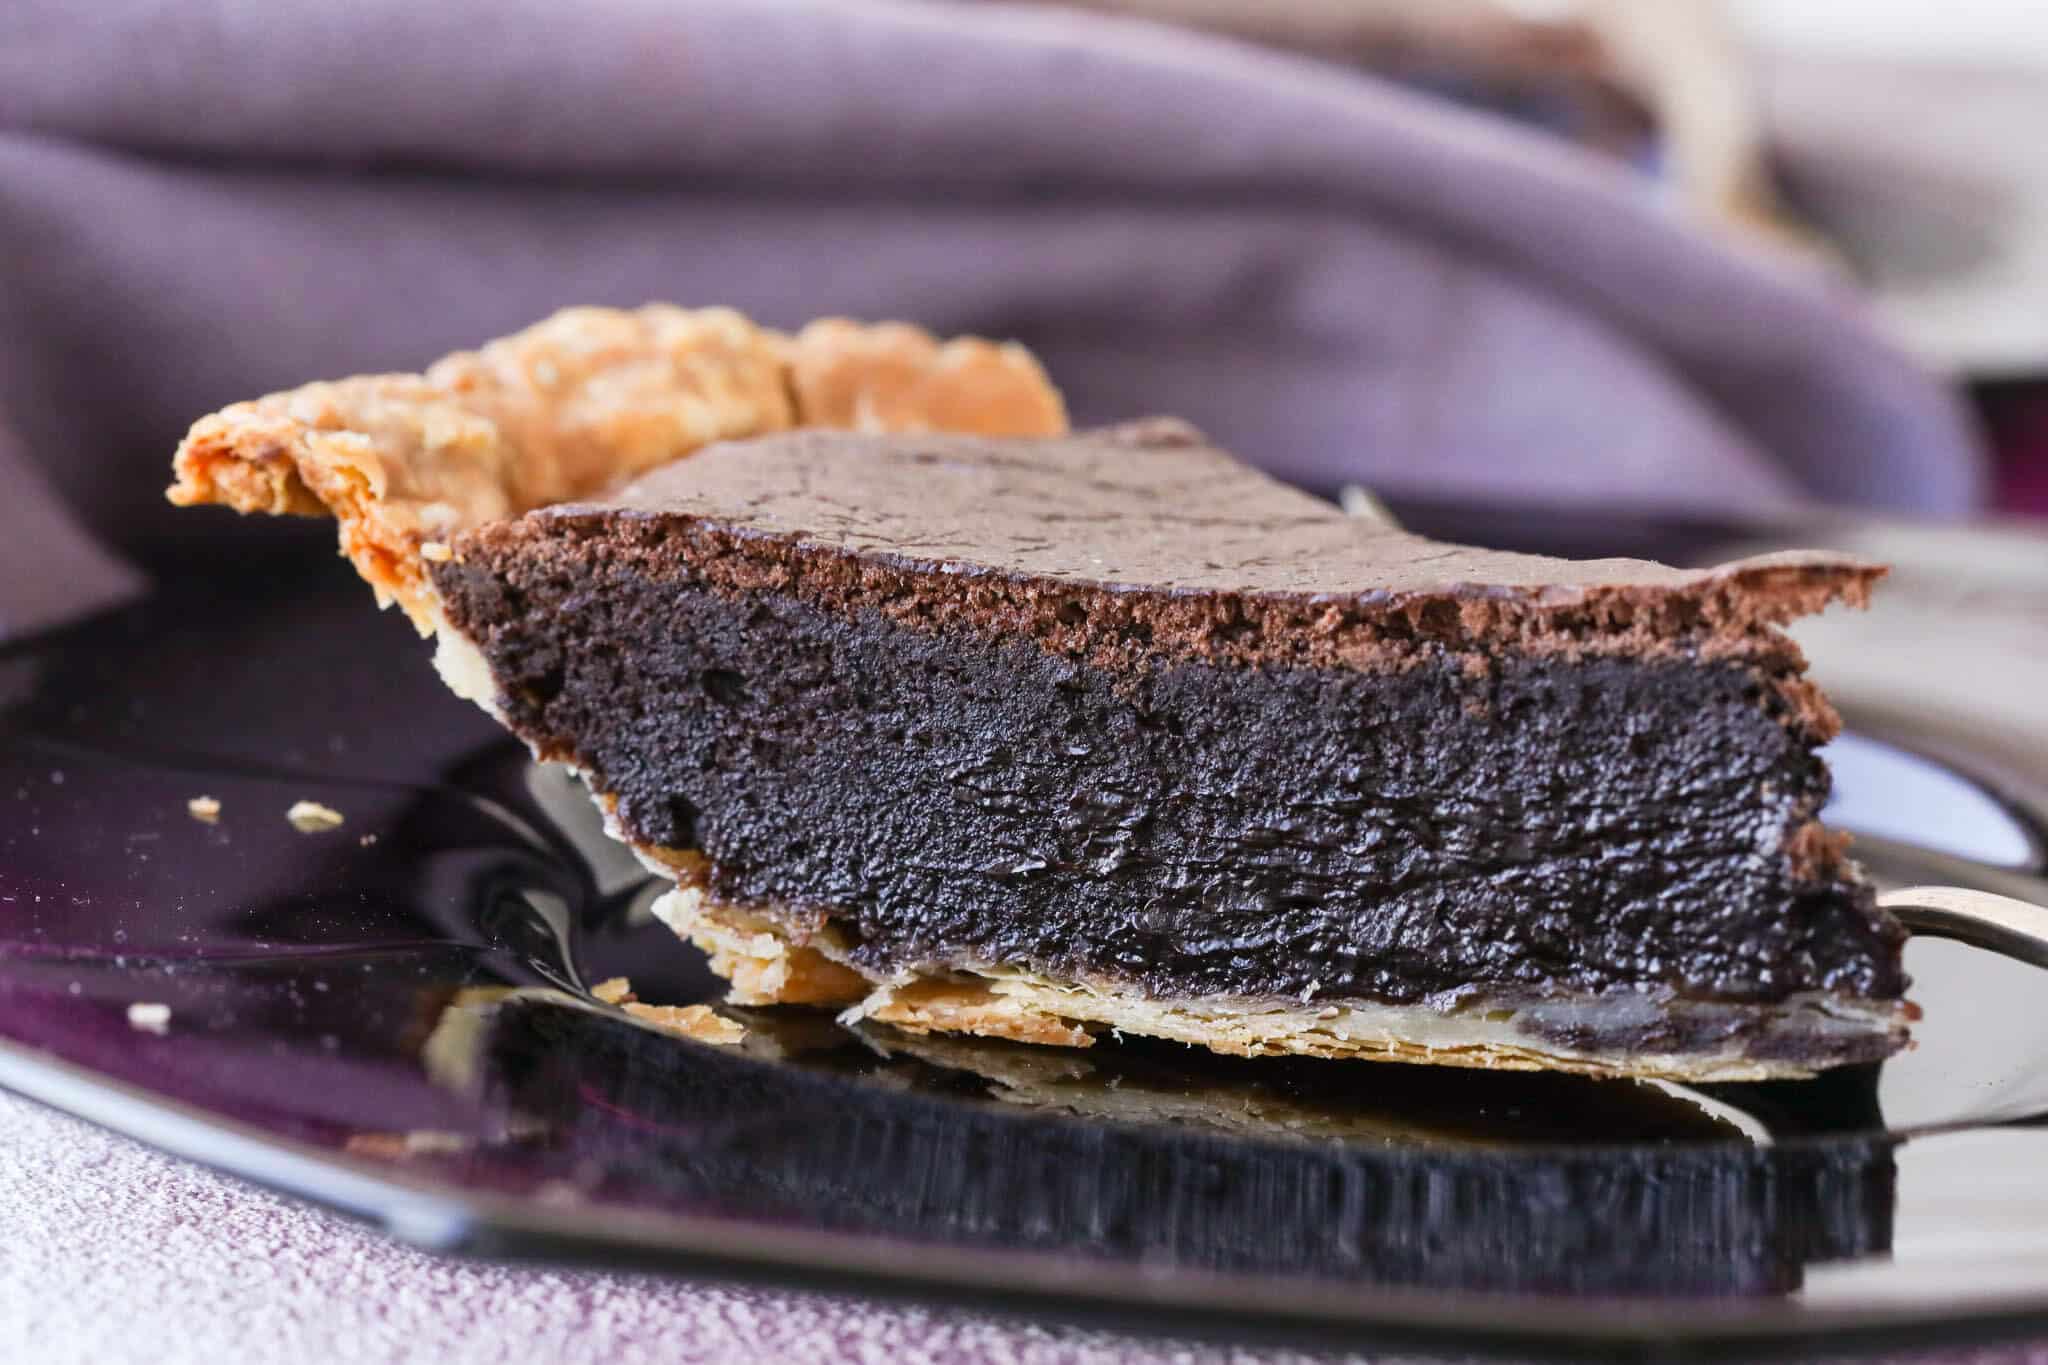
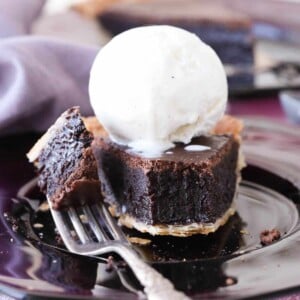
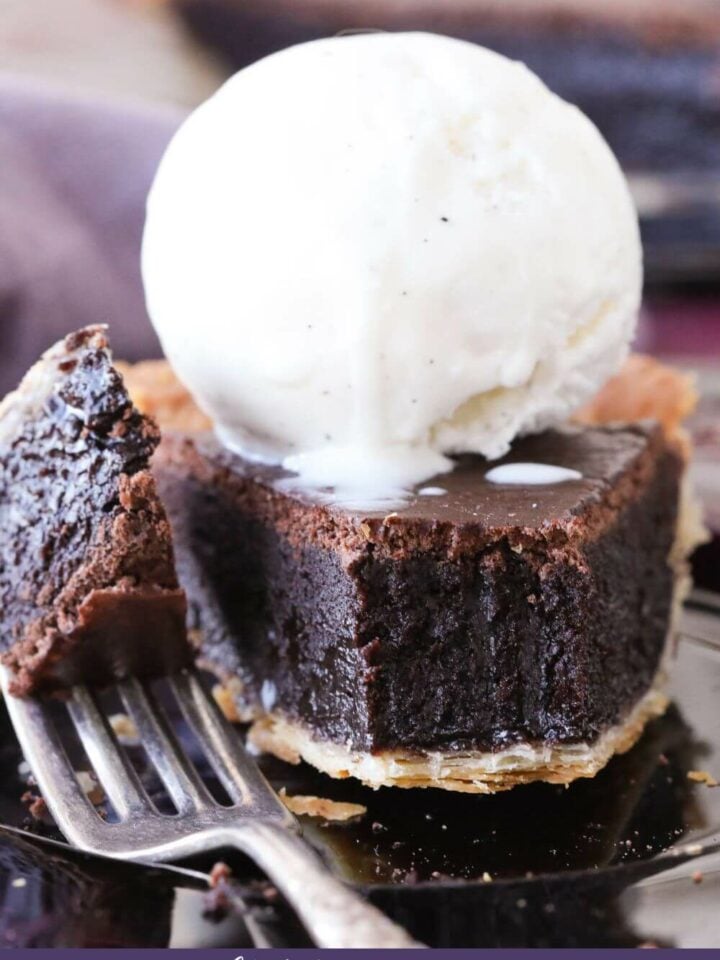
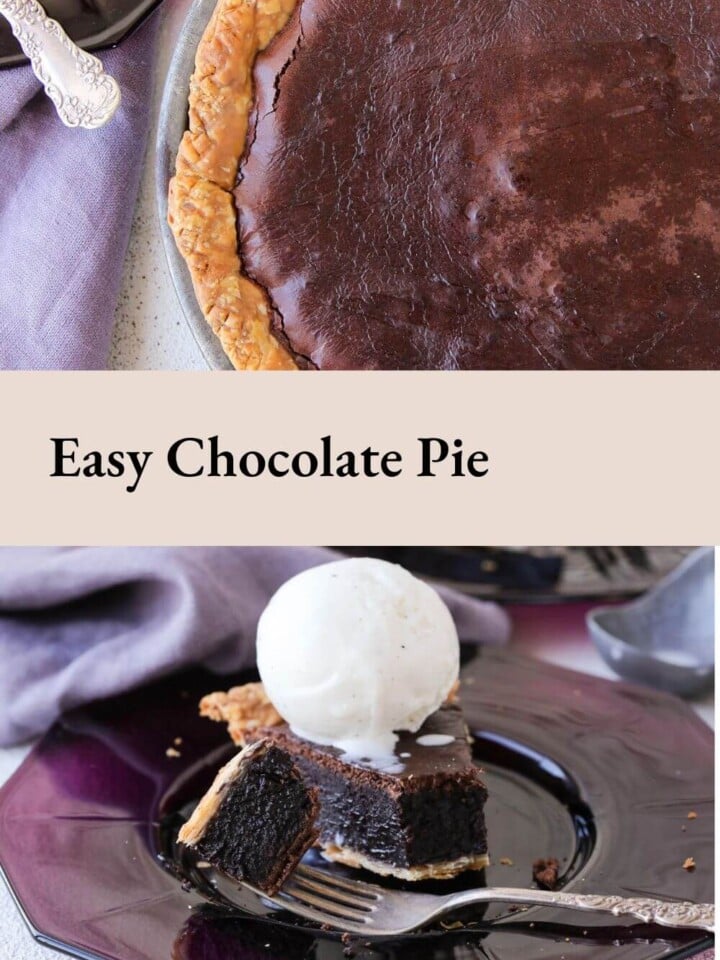
This easy chocolate fudge pie is thick, fudgy and rich! Baked in a flaky all butter pie crust, this simple yet elegant chocolate filling is perfectly silky with effortless notes of espresso.
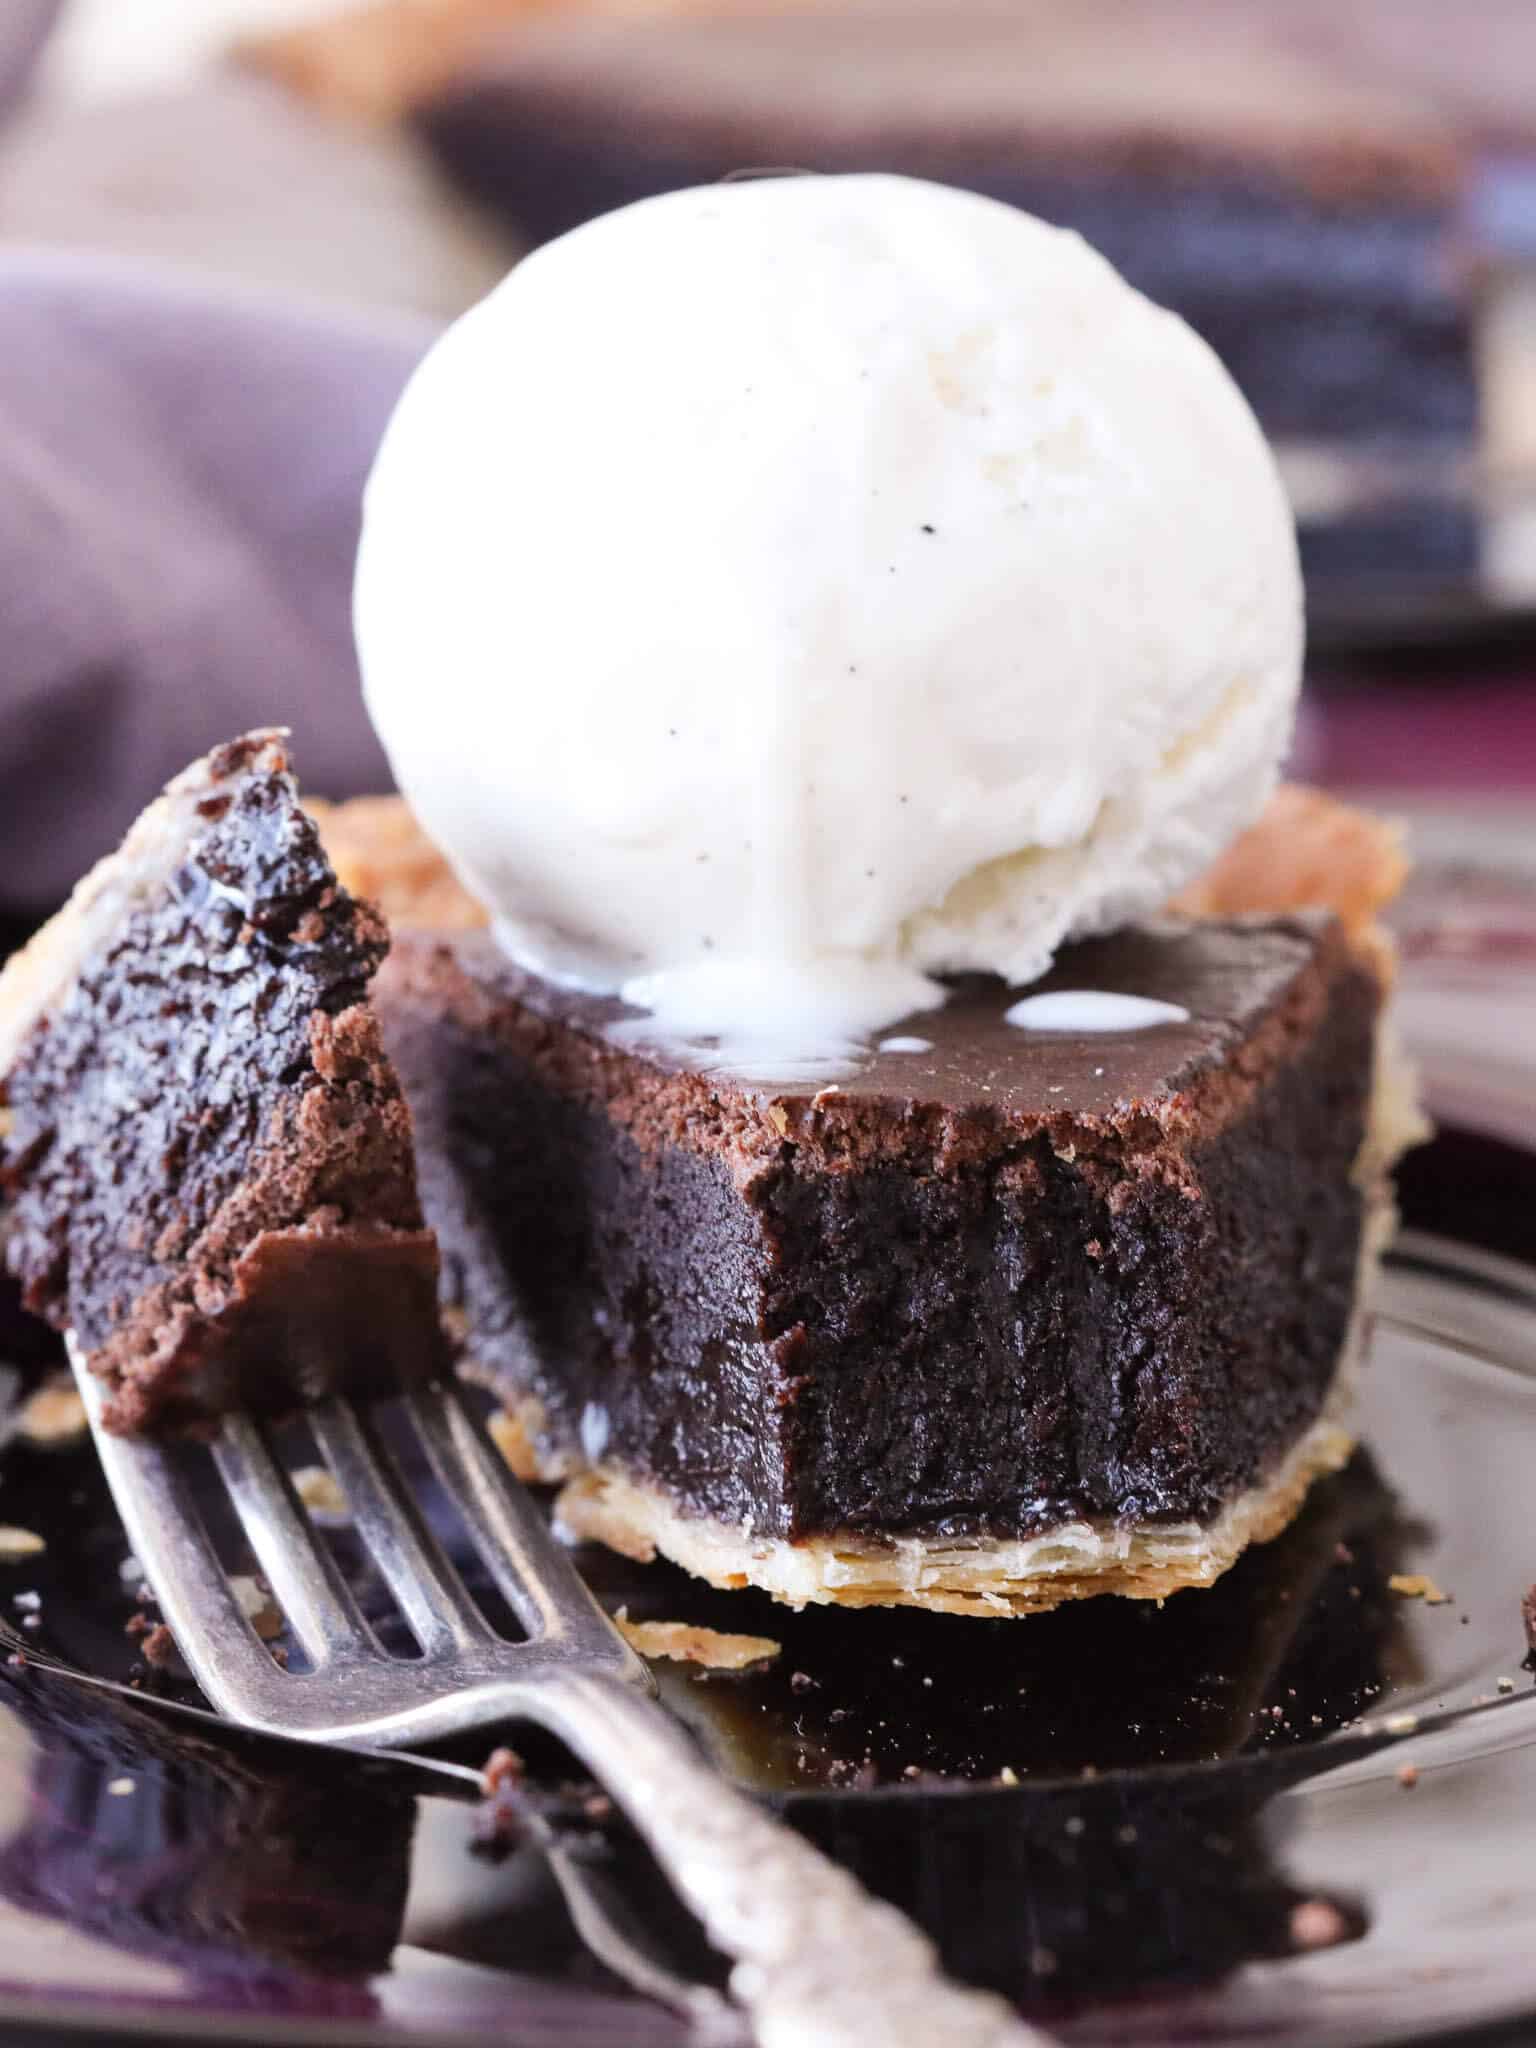
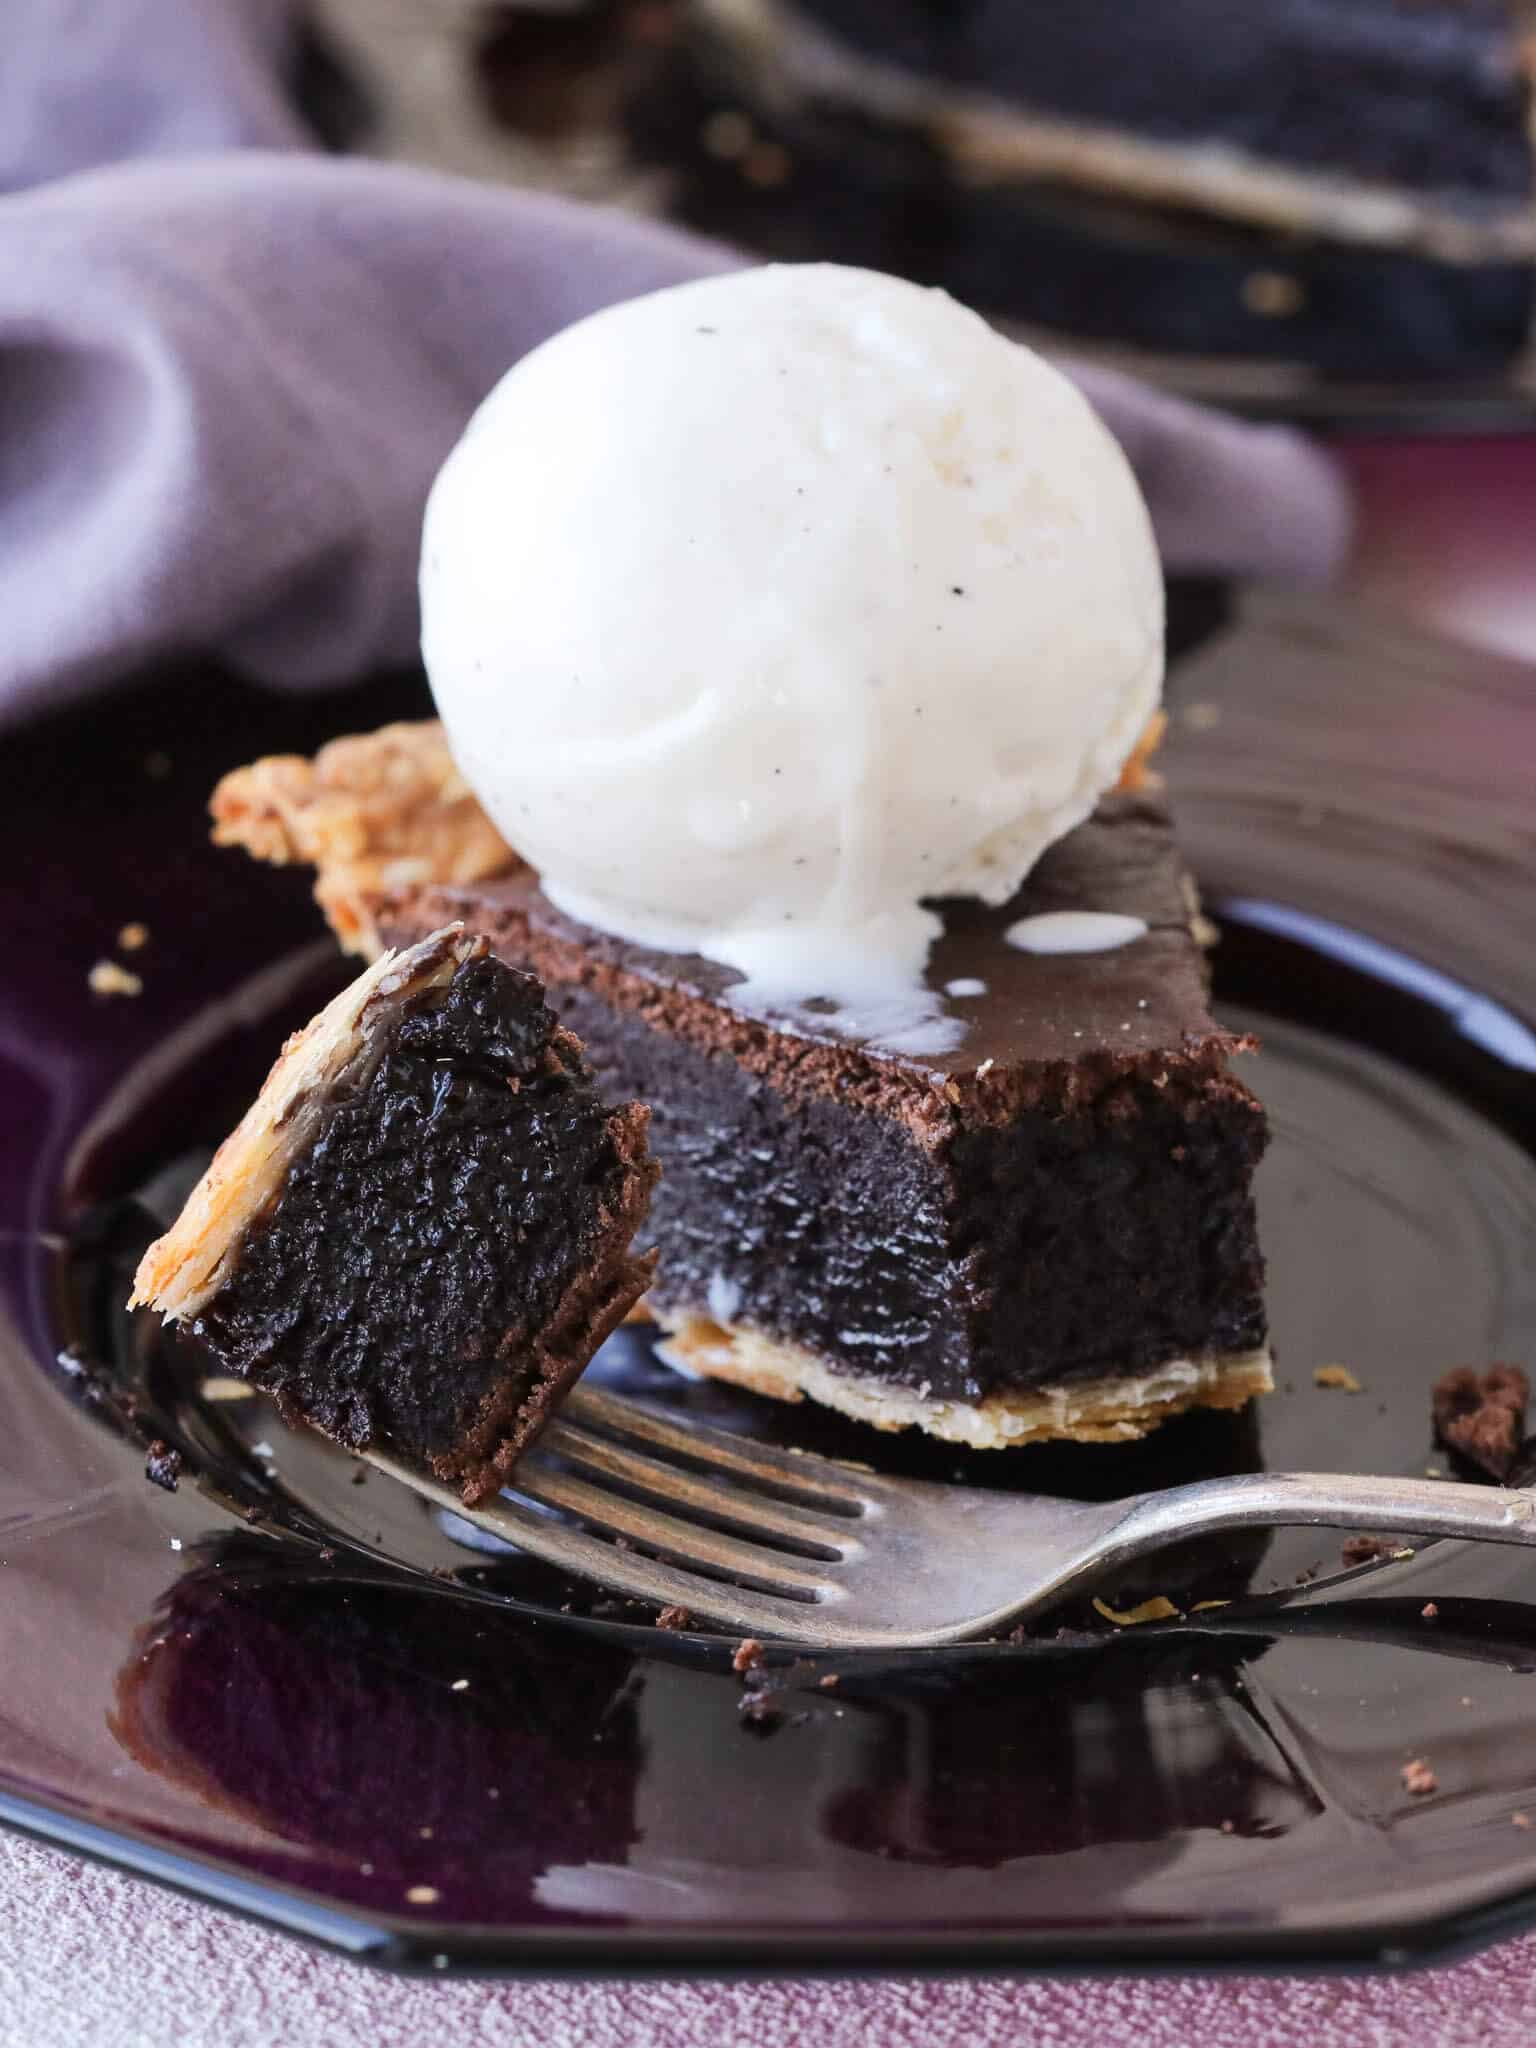
Satiate your most intense chocolate craving with this quick and indulgent chocolate pie! It has a fudge brownie-like texture complete with a crackly top. The sweetness is balanced by dark chocolate, cocoa powder, a little salt, and a flaky, buttery crust. A bit of secret espresso powder enhances the flavor of the chocolate, making this decadent pie taste even more chocolatey than you’ve ever tasted before!
Whisking together the eggs and sugar make the texture light and airy just like in my Fudgy Brownie Recipe, and it joins the ranks of chocolate perfection alongside my no-bake French Silk Pie, chocolate bundt cake and Chocolate Pound Cake. Serve it with a generous scoop of vanilla bean ice cream or lean in and dish out some of the best chocolate ice cream or homemade hot fudge sauce.
Table of Contents
Why this is the best chocolate fudge pie:
- Rich, creamy texture. Whole milk adds richness and joins with bittersweet chocolate and airy eggs to make a thick custard filling. No added water, just fudgy goodness and decadent forkfuls.
- No fuss in one bowl. To minimize your clean-up, you can make this pie in one bowl! You can even leave your filling on the counter for two hours while you focus on other dishes. She’s not as fussy as other chocolate pies!
- Quick and easy prep. My work in professional kitchens has helped me to develop this recipe to have only the most crucial elements, so you can make it quickly and efficiently.
- Unique secret ingredient. A bit of espresso powder makes this pie intensely chocolate, pastry chef’s promise.
Professional Tips for this fudge pie recipe:
- Par bake your pie shell. No soggy bottoms here! Here is my post on how to par bake a pie crust so you can be sure your fudge filling sits on a flaky buttery crust every time.
- Whisk the filling until no streaks of eggs are visible. You want a smooth and homogenous filling so that it bakes evenly to perfection.
- Be careful with your chocolate. When melting the chocolate and butter together, be careful to let everything melt slowly and evenly. Chocolate can seize if it gets too hot, the heat is too direct especially around the edges of the bowl in the water bath, or if water gets into the melting chocolate. Avoid all of these scenarios by keeping the water simmering and not touching the bottom of the bow. Release the steam carefully to avoid stray water droplets falling into your pie filling.
- Jiggle gently to check for doneness. Do not poke your chocolate pie for doneness, instead, you can tell it is done when it puffs a bit in the center, and when the whole pie filling jiggles as a cohesive unit similar to a cheesecake or Jell-O.
What is chocolate pie made of?
- Par Baked Pie Crust: Use either store-bought or homemade pie dough. I would recommend my flaky butter pie crust or vodka all-butter pie crust! Both are made with all purpose flour. Make two and freeze one for later!
- Butter: I use unsalted butter for baking, because you want to control the amount of salt you are adding. The fat and dairy in butter will round out the flavor and create a smoothness in this baked custard.
- Dark Chocolate: The kind of chocolate I like to use for chocolate pie is a chocolate that has at least 54% cocoa solids but up to 65% to balance the sweetness of the pie. Chopping bar chocolate is a better bet than chocolate chips because the bar will melt and incorporate better.
- Cocoa Powder: I use Dutch processed cocoa powder, which means it has been treated with an alkaline solution. It has a rich, deep flavor and a darker color. It’s also the ingredient that puts my Best Red Velvet Cake Recipe over the top!
- Espresso Powder: Espresso powder amplifies the chocolate flavor in this recipe. You can omit it, if desired. I only use Medaglia D’Oro instant espresso when baking. Flavor and quality varies greatly between brands and I prefer this one. It isn’t bitter and it dissolves easily even in cold liquid.
- Kosher Salt: Kosher salt is less salty than table salt and a teaspoon weighs less than other finer ground varieties. It enhances the chocolate notes.
- Granulated Sugar: Sugar is here for sweetness but also to add a little leavening when beaten with the eggs and protects the eggs from the heat of baking.
- Whole Egg: The egg in a baked custard is integral to thickening the custard. Whisking it first with the sugar protects it from the heat.
- Egg Yolk: Egg yolks in a baked custard are also thickeners like the whole eggs but they add more fat than the large eggs without the added moisture from the whites. This makes a thick, rich chocolate pie. Too many yolks will make it taste “eggy”.
- Light Brown Sugar
See the recipe card for full information on ingredients and quantities.
Variations & Substitutions:
- Nuts: Go nuts and add up to 2 cups of roasted, chopped pecans or walnuts.
- Caramel Chocolate Pie: Pour about a cup of my salted caramel sauce on top after the pie has cooled. Chill thoroughly before slicing and serving. As it warms up, the sauce will loosen and sauce the pie. You could also add up to ½ cup of the sauce in the pie filling before baking. It would be kind of like my caramel pudding and dark chocolate pudding had a baby, but in pie form!
- Peanut Butter Chocolate Pie: Add ½ cup of your favorite brand of peanut butter and make it a chocolate peanut butter pie! {My great-grandma loved peanut butter too, as you’ll recall from her Old Fashioned Peanut Butter Cookies.}
- Add streusel: Add an easy and delicious streusel topping. If you want more cohesive streusel pieces, use this brown sugar streusel recipe, or use the crumb topping from my pumpkin coffee cake for a lighter topping.
- Pie Crust: This old-fashioned chocolate pie would also be delicious in a pâte sablée pie crust, in a baked graham cracker crust or in an Oreo pie crust.
How to Make Hot Fudge Pie
Further details and measurements can be found in the recipe card below.
Par-Bake your pie crust:
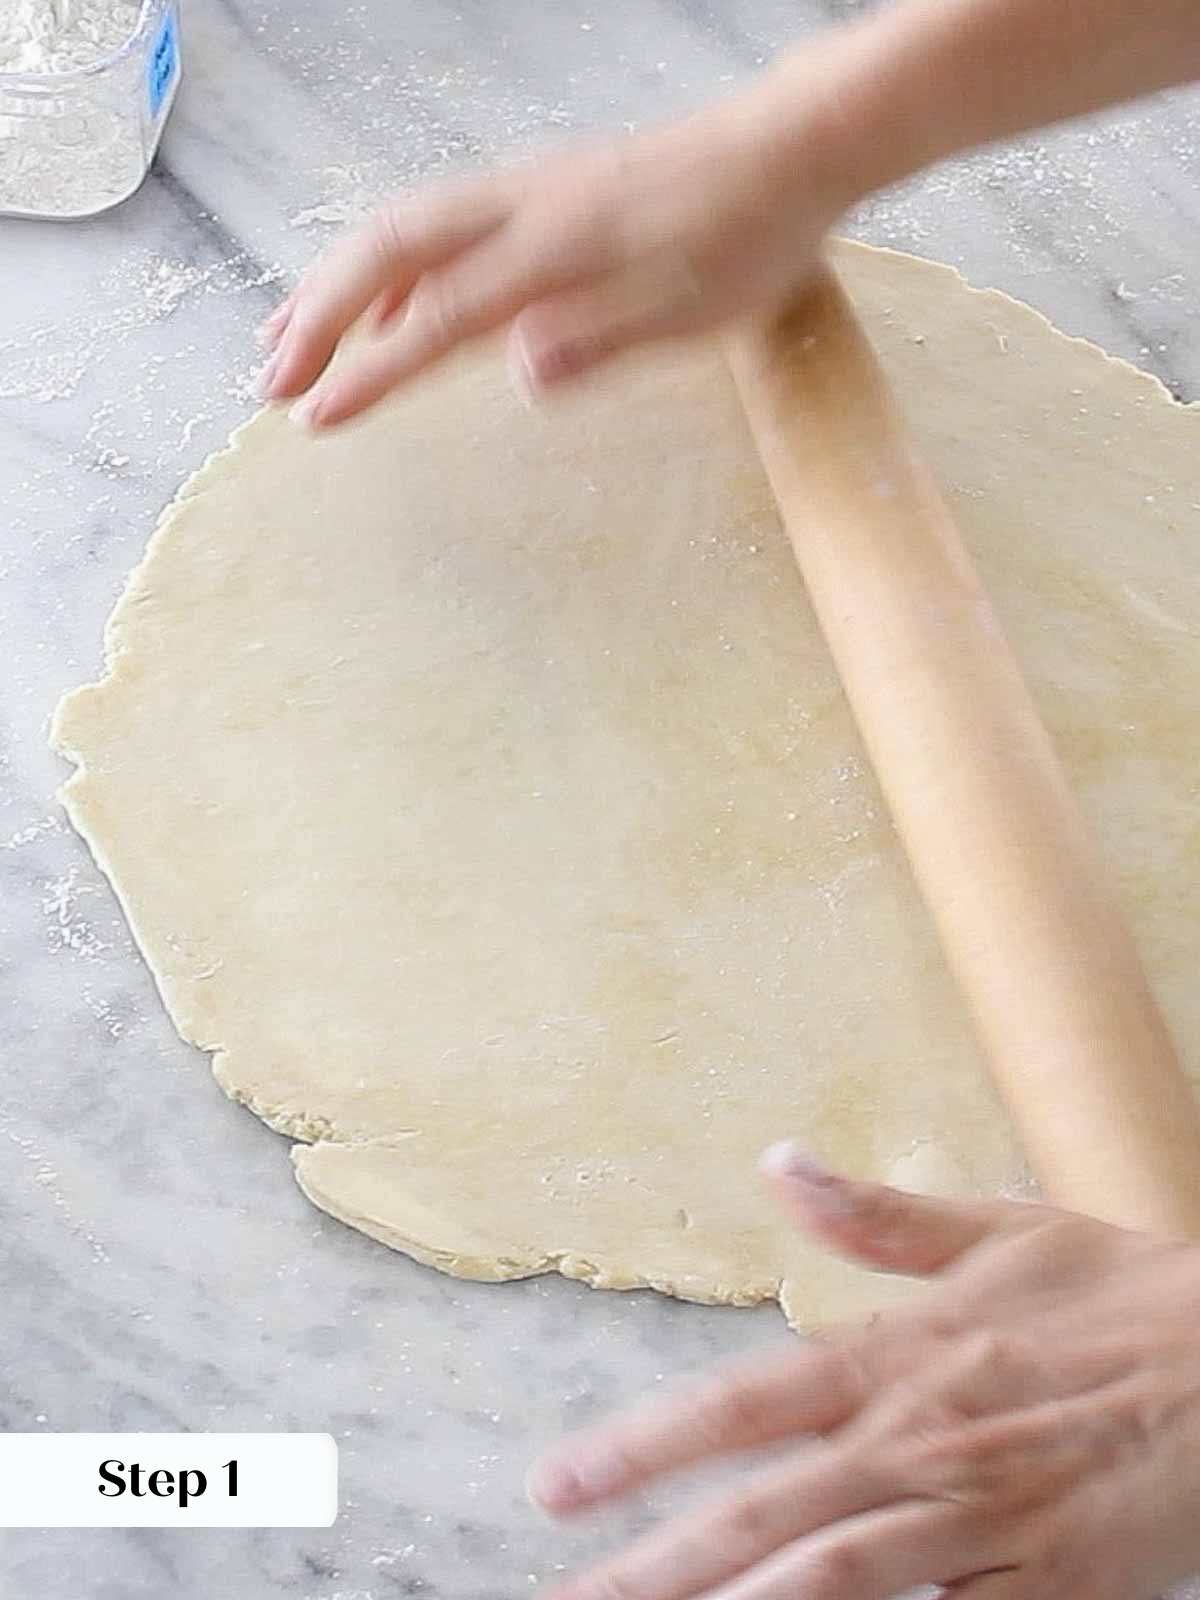
Step 1: Preheat the oven to 350°F convection or 375°F conventional. If using homemade pie dough, roll out one portion of pie dough on a lightly floured surface until about 1/8th inch thick. Chill 30 minutes flat on a baking sheet. This allows the gluten to relax and the butter to re-solidify.
Step 2: Place chilled dough on top of a 9-inch pie plate. Allow to warm up just enough to be workable. Lift up the edges and allow it to settle on the bottom. Gently press the sides to fit the dish allowing the edges to overhang the dish. Start on one side and roll the edges under towards the dish. Roll until you reach the dish then gently press it down on the dish to seal. Repeat with the rest of the crust.

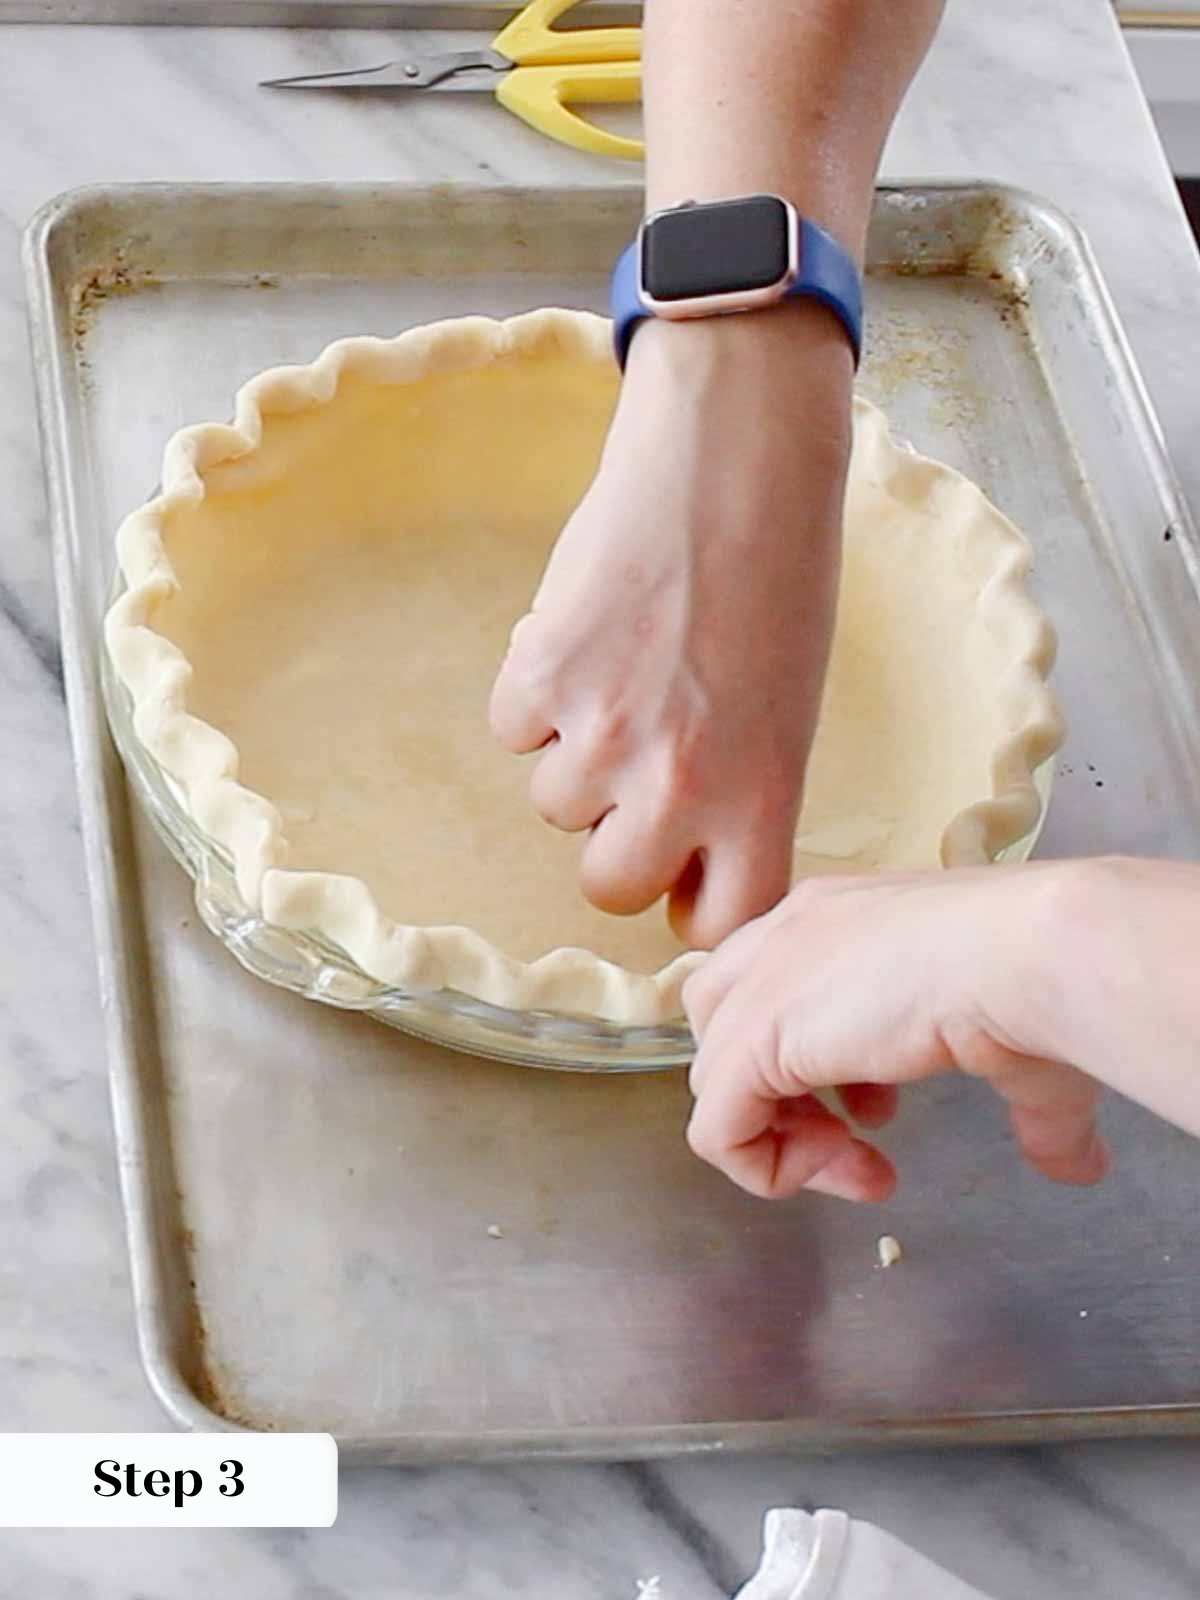
Step 3: Flute the edges by pressing one knuckle on the outside and two knuckles around it from the inside of the crust. I prefer using my knuckles but you could also use your finger tips. Chill for 10-30 minutes depending on how warm it got. If it is still cold, just 10 minutes will do.
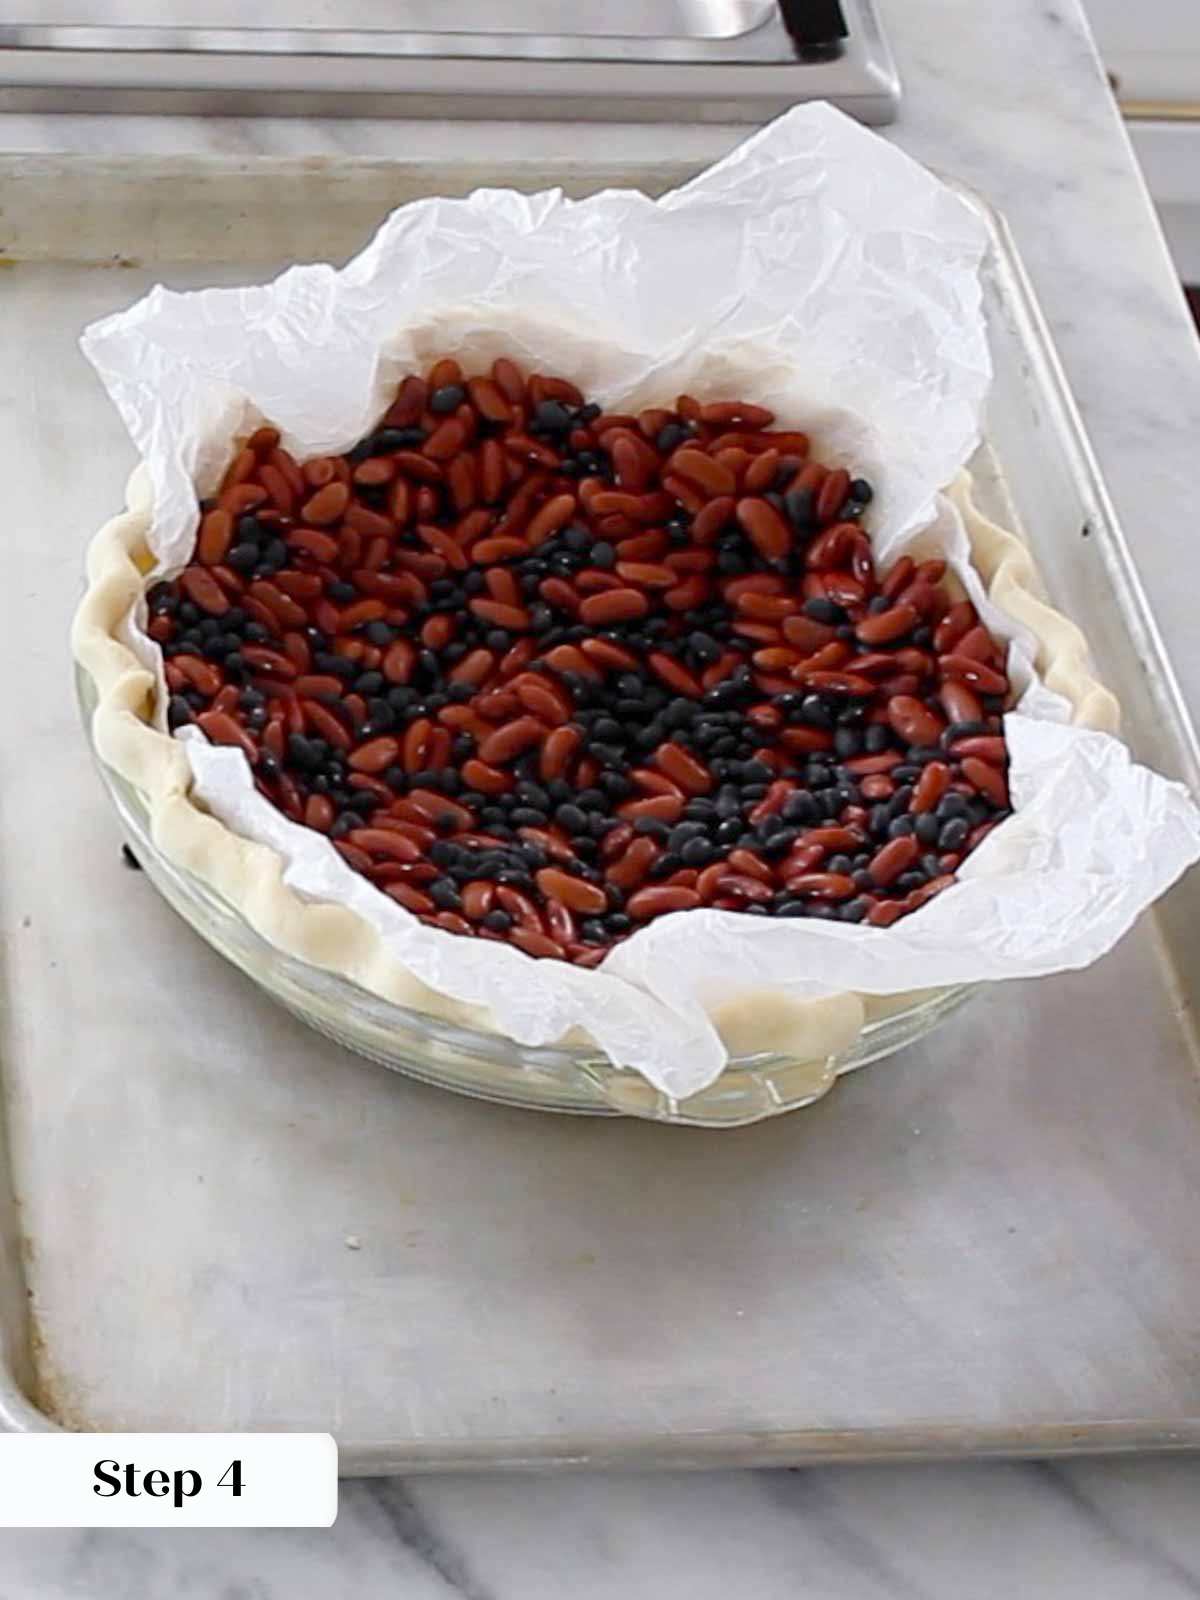
Step 4: Crumple a piece of parchment paper and line the inside of the chilled crust. Fill with pie weights, beans or rice. I find beans work best.
Do not dock the dough. And, if you’re curious about the nitty-gritty of par-baking, I unpack it in my How to Blind Bake a Pie tutorial!
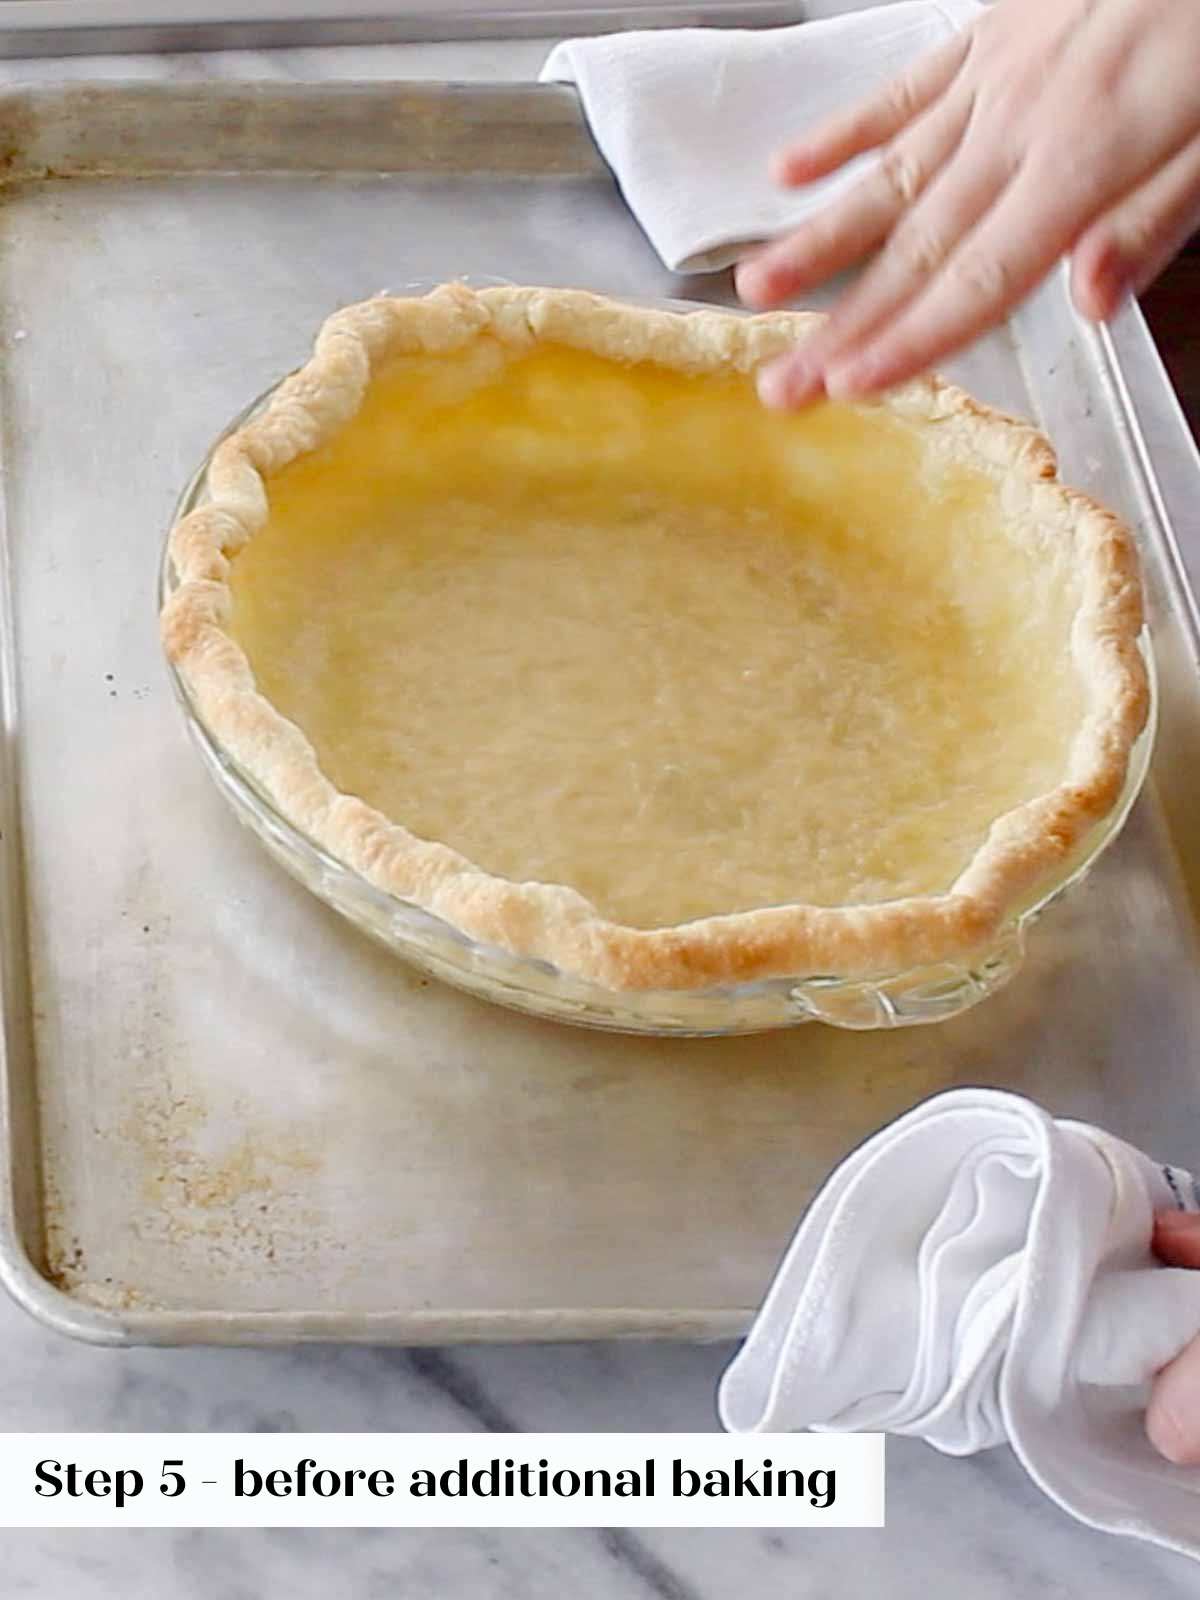
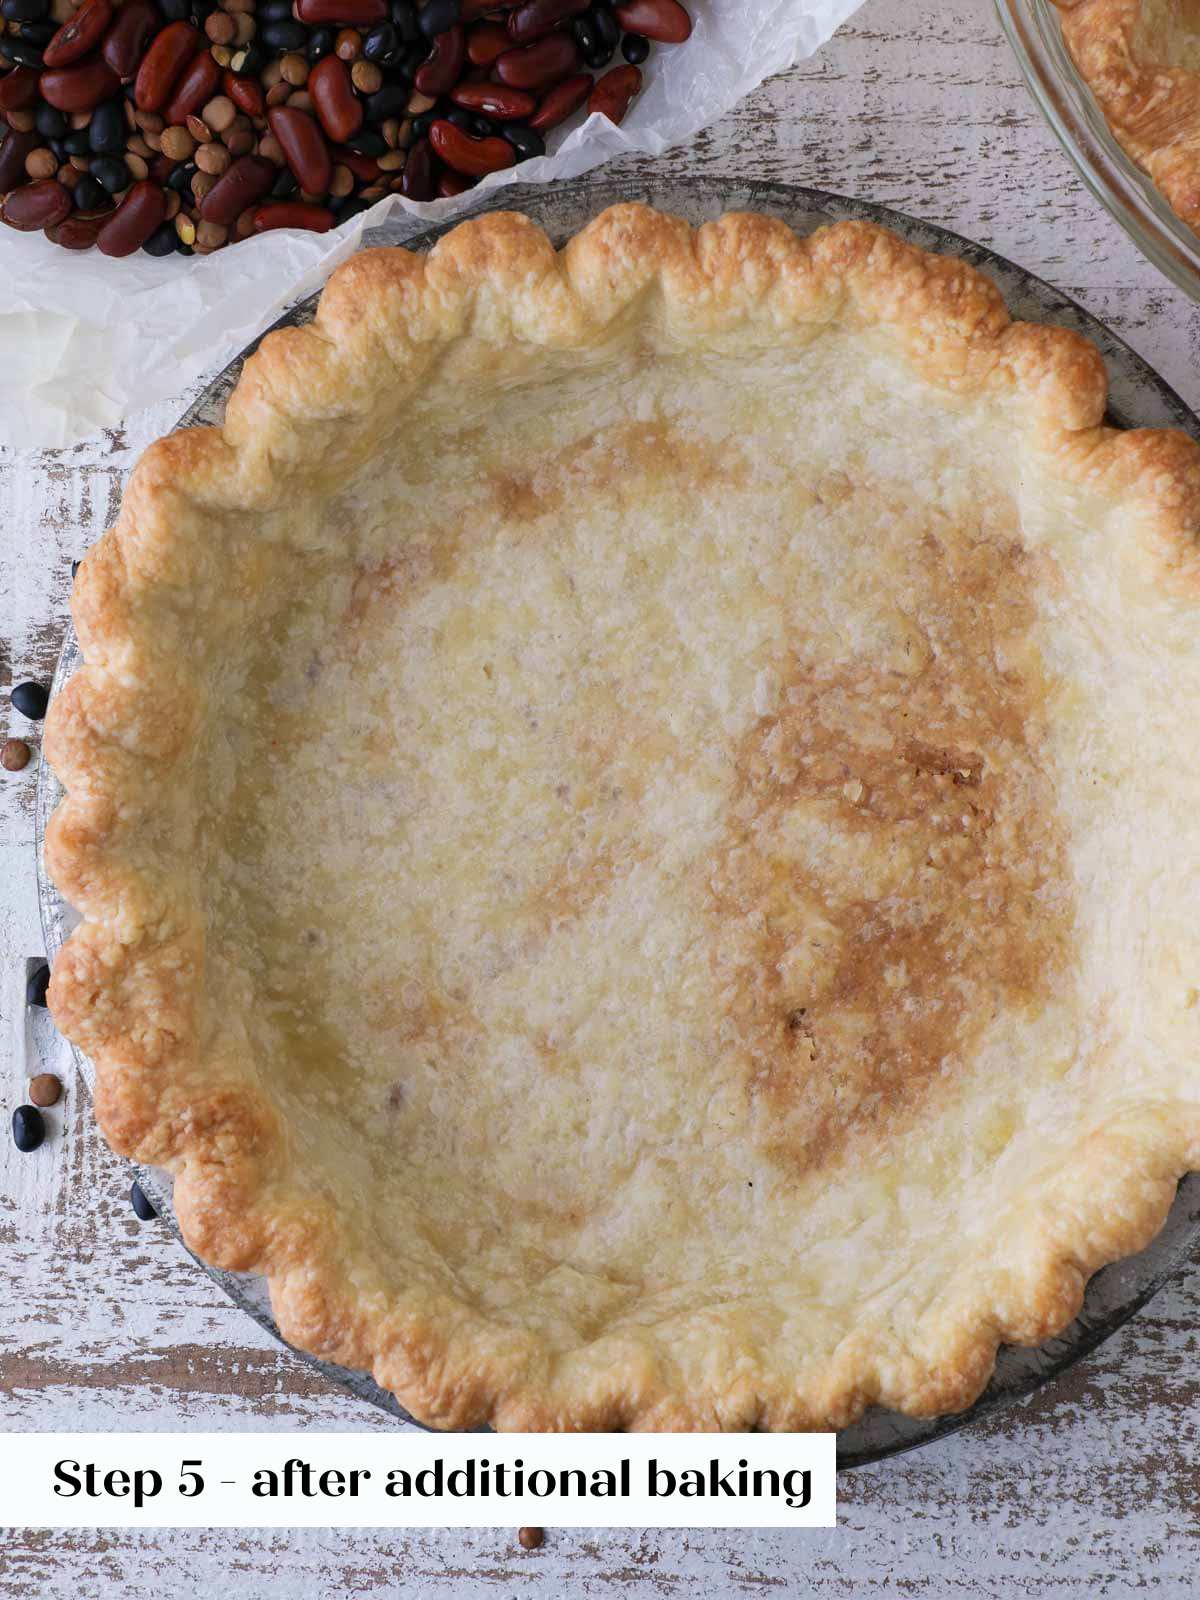
Step 5: Bake crust for 15-20 minutes and then remove the weights and parchment. I remove the parchment and weights when the crust has just begun to brown and doesn’t look raw anymore. This is the par-baked stage. The crust will bake again with the chocolate filling.
At the par-baked stage, you can use your crust immediately while it is still warm or you can cool it completely, wrap and freeze it for a later date. Store at room temperature for up to 3 days.
Make & bake the pie:
Step 6: Reduce the oven temperature to 325°F convection or 350°F conventional (no fan). On the stovetop, cover the bottom of a medium saucepot with about an inch of water.
This recipe makes 1 regular 9” pie. If you have a deep-dish pie pan or a slightly larger pie dish, I would make 1.5 times this recipe. You will need to cook the pie for closer to 50 minutes.
Step 7: Choose a large bowl that will fit on top of the pot. The bottom of the bowl should not touch the water. In this bowl, place butter, dark chocolate, cocoa powder, espresso powder and kosher salt. Bring the water in the pot to a simmer and melt all the ingredients together, stirring occasionally.
Step 8: Meanwhile in another bowl, whisk the whole eggs and egg yolks together until they are slightly lightened, smooth, and no visible whites remain. Whisk in the granulated sugar and light brown sugar until the eggs are light and fluffy.
You can opt to make this whole recipe in one bowl, however I like to use two bowls so I can be sure my eggs are whisked thoroughly and properly.
Step 9: Remove the chocolate mixture from the stove as soon as it melts. You want it to be melted but not hot. Stir or whisk.
Step 10: Pour the chocolate into the egg mixture at one time. Work quickly to keep the chocolate from cooling and seizing or the eggs from cooking prematurely in the warm chocolate. Whisk together thoroughly.
Step 11: Pour into the parbaked shell.
If your pie crust is not ready at this time, don’t fret. This completely mixed filling can sit for up to two hours waiting for you! It can also be poured into a pie crust still warm from the oven. No waiting required.
Step 12: Bake in a preheated oven for 40 minutes or until it puffs in the center and jiggles slightly as a unit like Jell-O or a cheesecake. Try not to poke the pie with a knife or cake tester to test for doneness.
Step 13: Allow to cool completely at room temperature before wrapping and refrigerating. This pie slices best when cold.
Chef Lindsey’s Recipe Tip
Espresso powder is a powerful secret ingredient, and with great power comes great responsibility. Be sure you’re using a brand that you love and that you carefully measure it so that it enhances the chocolate without overpowering your palette.
How to serve chocolate pie?
- Go traditional with some whipped cream. Keep it simple with a dollop of lightly sweetened whipped cream or even crème fraiche whipped cream for an unexpected treat!
- Pour on a sauce. Try a drizzle of salted caramel sauce, or if it’s autumn I recommend just a touch of maple caramel sauce.
- Ice cream is the classic way to go. I like to serve each slice with a scoop of vanilla bean ice cream or a spoonful of Vanilla Bean Crème Anglaise, which is basically melted ice cream! The vanilla compliments the chocolate flavor and the cream balances the rich chocolate pie filling.
- Put some crunch on it: Add a savory crunch with toasted nuts or cocoa nibs {I see you, chocolate lovers!}. You could also get extra fancy and make pumpkin seed brittle!
Frequently Asked Questions
Store cooked chocolate pie at room temperature for 3 days or refrigerated for 1 week. It can also be frozen for up to 2 months. Wrap the cooled pie in plastic wrap before storing.
You do not need to dock the crust for chocolate pie. The baked custard filling is very loose and could seep into the holes created by docking. This could cause the filling to leave the pie crust and burn on the pie tin or just make the bottom soggy.
Prepare the par-baked pie crust up to a week in advance. I usually wrap and store these in the freezer. You can prepare and bake the pie up to one week in advance. You can also prepare the filling two hours in advance of assembly.
If you tried this recipe and loved it please leave a 🌟 star rating and let me know how it goes in the comments below. I love hearing from you; your comments make my day!
Easy Chocolate Pie
Ingredients
- 1 par-baked pie crust using store-bought or homemade pie crust
- ¼ cup unsalted butter cubed
- 3 oz dark chocolate chopped
- ⅓ cup cocoa powder Dutch-processed or regular
- ¼ teaspoon espresso powder
- ¼ teaspoon kosher salt
- 1 cup granulated sugar
- ¼ cup light brown sugar
- 3 whole eggs
- 2 egg yolks
Instructions
Par-Bake your pie crust:
- Preheat the oven to 350°F convection or 375°F conventional. If using homemade pie dough, roll out one portion of pie dough on a lightly floured surface until about 1/8th inch thick. Chill 30 minutes flat on a baking sheet. This allows the gluten to relax and the butter to re-solidify.
- Place chilled dough on top of a 9 inch pie dish or tin. Allow to warm up just enough to be workable. Lift up the edges and allow it to settle on the bottom. Gently press the sides to fit the dish allowing the edges to overhang the dish. Start on one side and roll the edges under towards the dish. Roll until you reach the dish then gently press it down on the dish to seal. Repeat with the rest of the crust.
- Flute the edges by pressing one knuckle on the outside and two knuckles around it from the inside of the crust. I prefer using my knuckles but you could also use your finger tips. Chill for 10-30 minutes depending on how warm it got. If it is still cold, just 10 minutes will do.
- Crumple a piece of parchment paper and line the inside of the chilled crust. Fill with pie weights, beans or rice. I find beans work best.
- Bake crust for 15-20 minutes and then remove the weights and parchment. I remove the parchment and weights when the crust has just begun to brown and doesn’t look raw anymore. This is the par-baked stage. The crust will bake again with the chocolate filling.
Make & bake the pie:
- Reduce the oven temperature to 325°F convection or 350°F conventional (no fan). On the stovetop, cover the bottom of a medium saucepot with about an inch of water.
- Choose a large bowl that will fit on top of the pot. The bottom of the bowl should not touch the water. In this bowl, place butter, dark chocolate, cocoa powder, espresso powder and kosher salt. Bring the water in the pot to a simmer and melt all the ingredients together, stirring occasionally.
- Meanwhile in another bowl, whisk the whole eggs and egg yolks together until they are slightly lightened, smooth, and no visible whites remain. Whisk in the granulated sugar and light brown sugar until the eggs are light and fluffy.
- Remove the chocolate mixture from the stove as soon as it melts. You want it to be melted but not hot. Stir or whisk.
- Pour the chocolate into the egg mixture at one time. Work quickly to keep the chocolate from cooling and seizing or the eggs from cooking prematurely in the warm chocolate. Whisk together thoroughly.
- Pour into the parbaked shell.
- Bake in a preheated oven for 40 minutes or until it puffs in the center and jiggles slightly as a unit like Jell-O or a cheesecake. Try not to poke the pie with a knife or cake tester to test for doneness.
- Allow to cool completely at room temperature before wrapping and refrigerating. This pie slices best when cold.
Video
Notes
Nutrition
Before You Go
Check out our other delicious, chef-developed Pie Recipes! And, learn the tips for pairing this pie with the rest of the collection in my 20 Best Thanksgiving Pie Recipes!


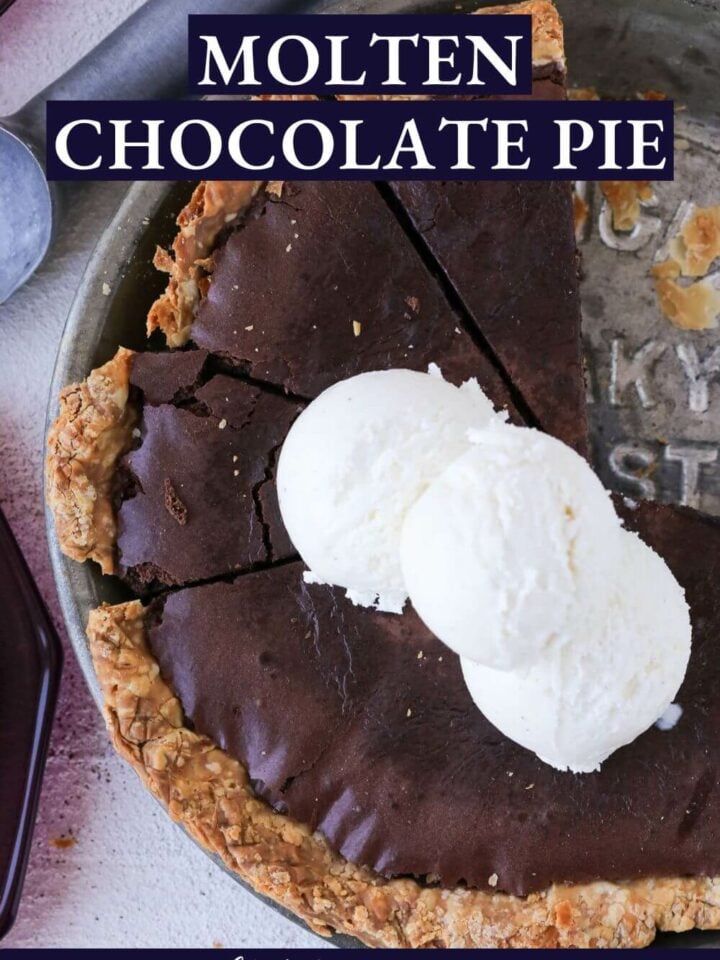

Delicious? Yes yes yes! Easy? Yes! Follow instructions. A “dream to slice?” Ummmm, not for me. I made this pie 4 times over a period of a week. Even if I cooked it so long that it rose so high that the crispy top started separating from the semi-jiggly part, the center was still so soft (even after overnight refrigeration) that I never got a “point” cut. It was always a mush mess in the middle. Yes I used hot water and wiped a very sharp knife each time. I so wanted a lovely presentation because I was taking it to a party. My only other comment is I would like this recipe to have one name. Is it Easy Chocolate Fudge Pie, Easy Chocolate Pie, Molten Chocolate Pie, Molten Fudge Pie? It is referred to several ways on the website, and I know I’m picky about consistency, but being consistent keeps me from having to double-check, and it helps me avoid getting confused. But the pie is super rich and tasty, and I felt like I was making a special gourmet thing, and I had fun hunting down Chef’s preferred products.
Hey Pamela! I hear you! I am also surprised to hear your feedback especially since this pie recipe was one of the products that my team and I produced in a commissary kitchen consistently for several years. My immediate thoughts other than a scaling issue, which I don’t think is the case, is that your knife was actually too hot! It will melt the fudgy pie rather easily. I actually take this pie out of the tin, once refrigerated, and then cut it on a cutting board with a large chef’s knife. I make a version of this pie with caramel sauce and peanuts for my husband every Thanksgiving and that is my go-to serving trick! The names are basically different iterations of me trying to figure out what to call this delightful pie so that people could actually find it! Apparently no one searches for “molten fudge pie” which was my original name! I hope that helps! ~Lindsey
This is a fantastic pie! I love the thick, rich chocolate filling, and it’s kind of amazing how easy and quick the pie gets into the oven after you par-bake the crust. I added a bit of peanut butter and my family loved it!
This is such a delicious recipe and your instructions were so helpful! I had everything I needed to be successful and was so proud of the final product.
Hi Gen! I’m so glad this recipe worked like a charm, thank you for commenting!
It had the perfect texture and was so delicious. Will do this again for sure!
Hi Greta! I love the texture on this one too, thank you for commenting!
This had the perfect level of sweetness and chocolate flavor! What a treat!
Hi Kris! Thank you so much for coming back and commenting!
This chocolate pie was sooo good! I’m a chocolate lover so I knew it was going to be a winner! YUM!
Hi Liz! Chocolate-lovers unite! 🍫
I love how fudgy this chocolate pie comes out, I definitely couldn’t stop eating it!
Hi Shelby! I couldn’t either! l🤣