This post may contain affiliate links. Please read our disclosure policy.
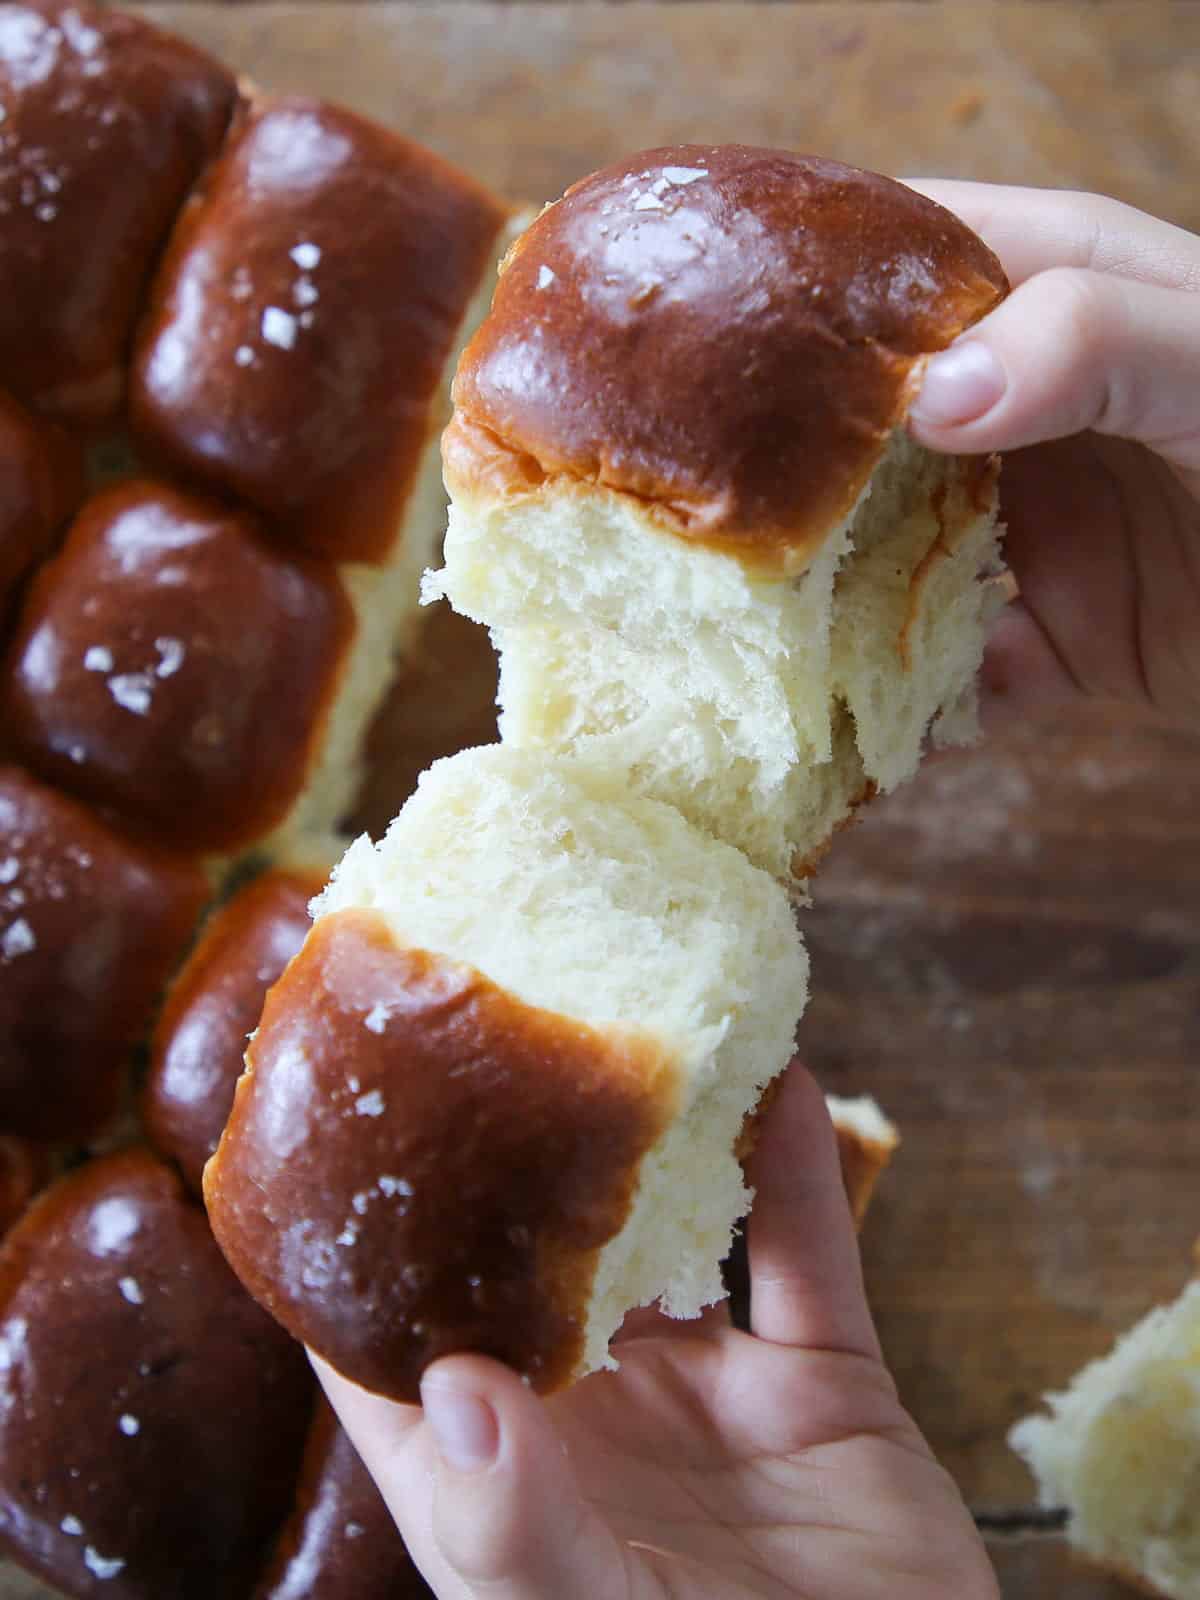
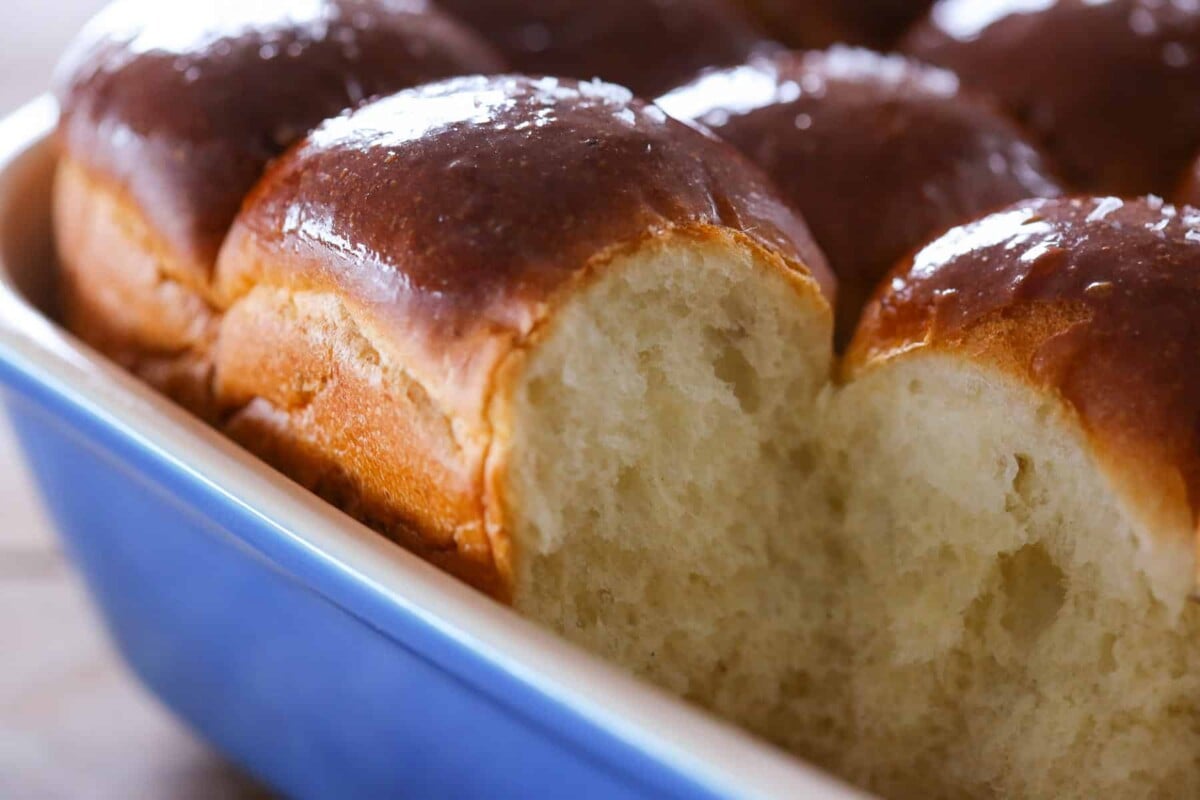
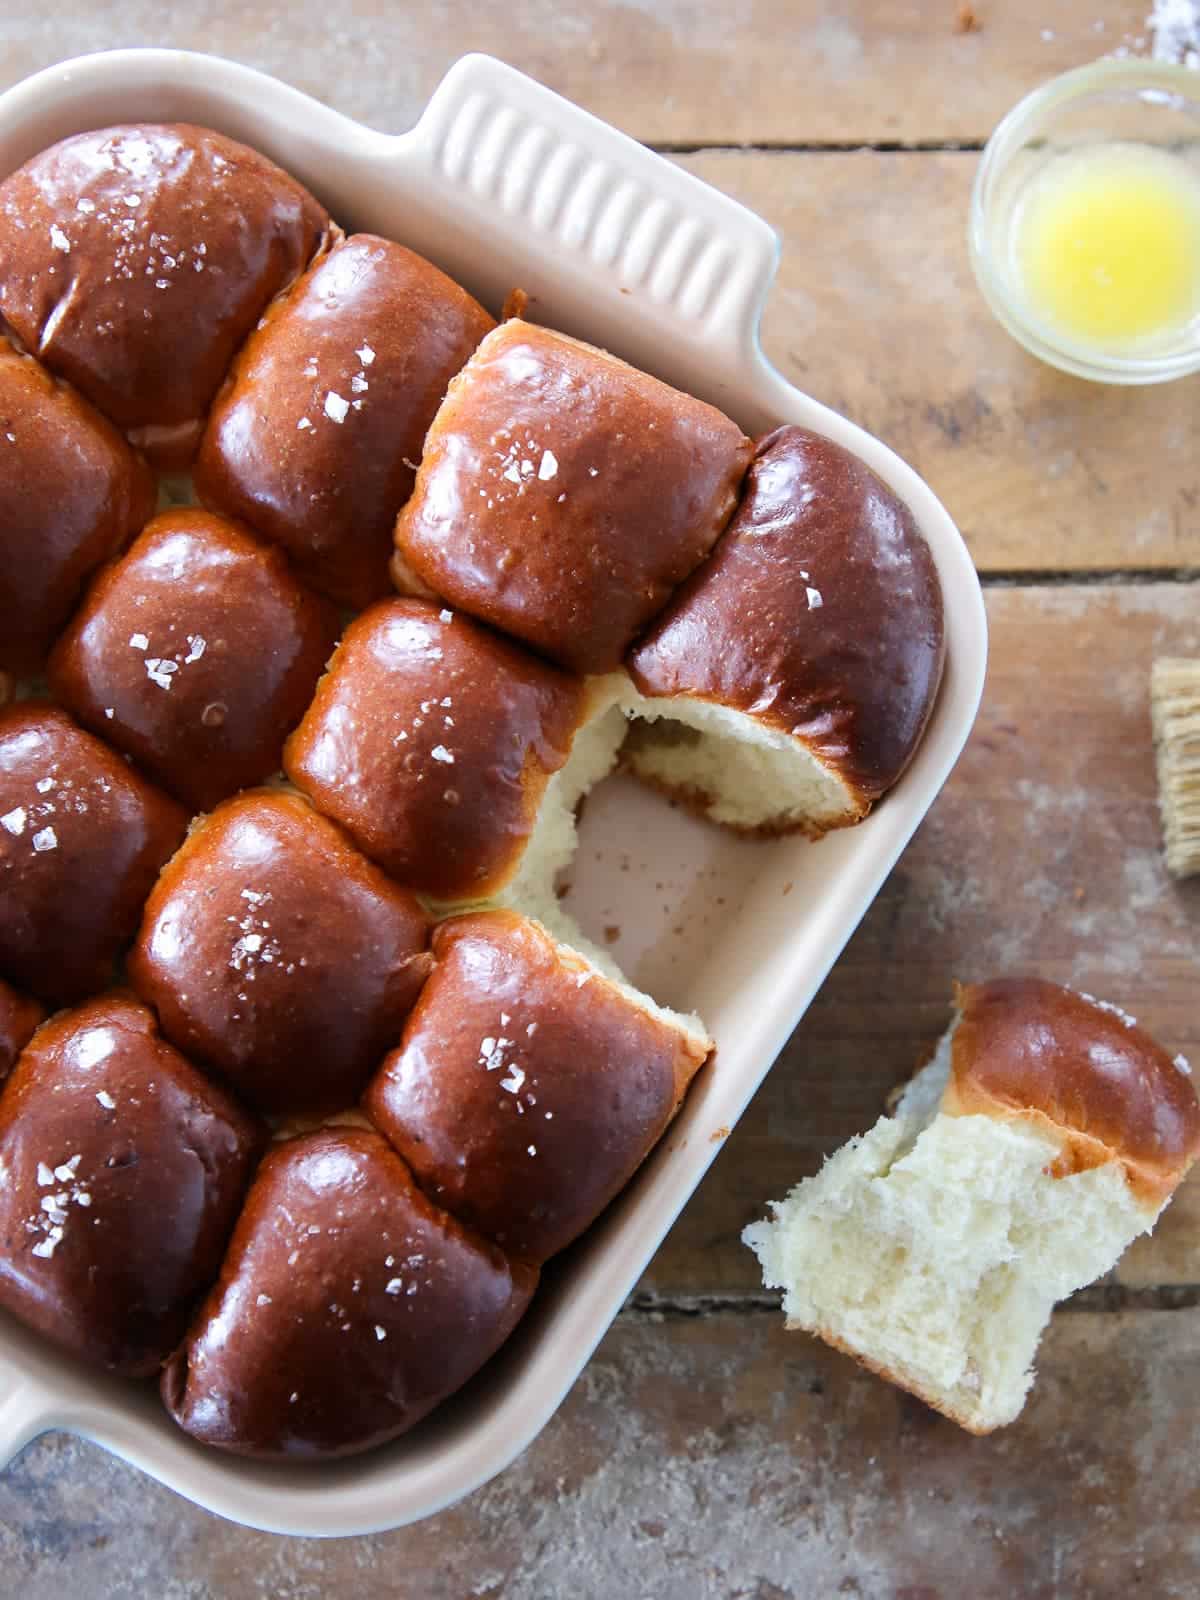
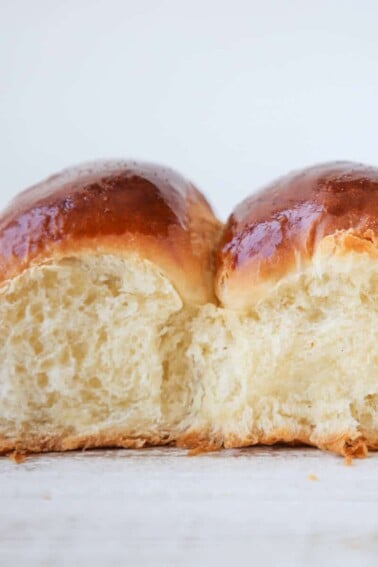
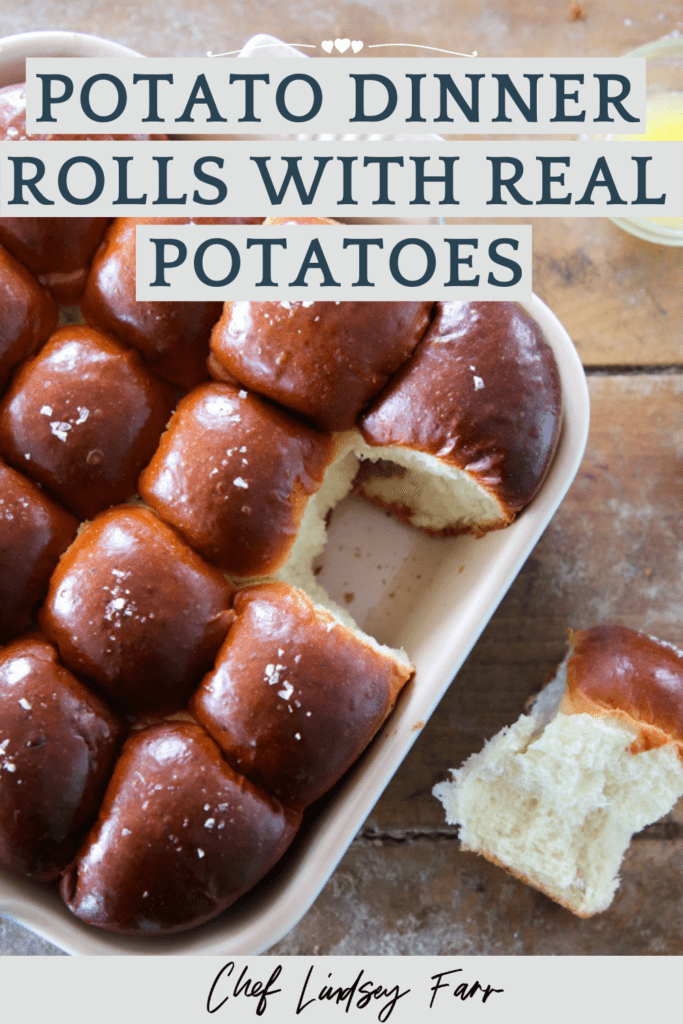
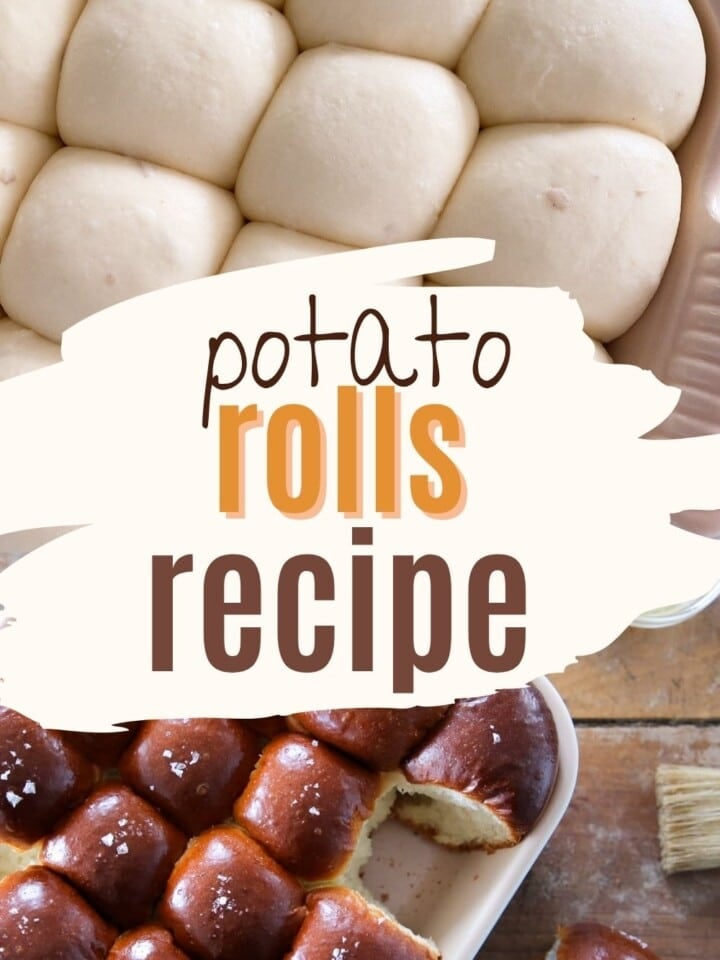
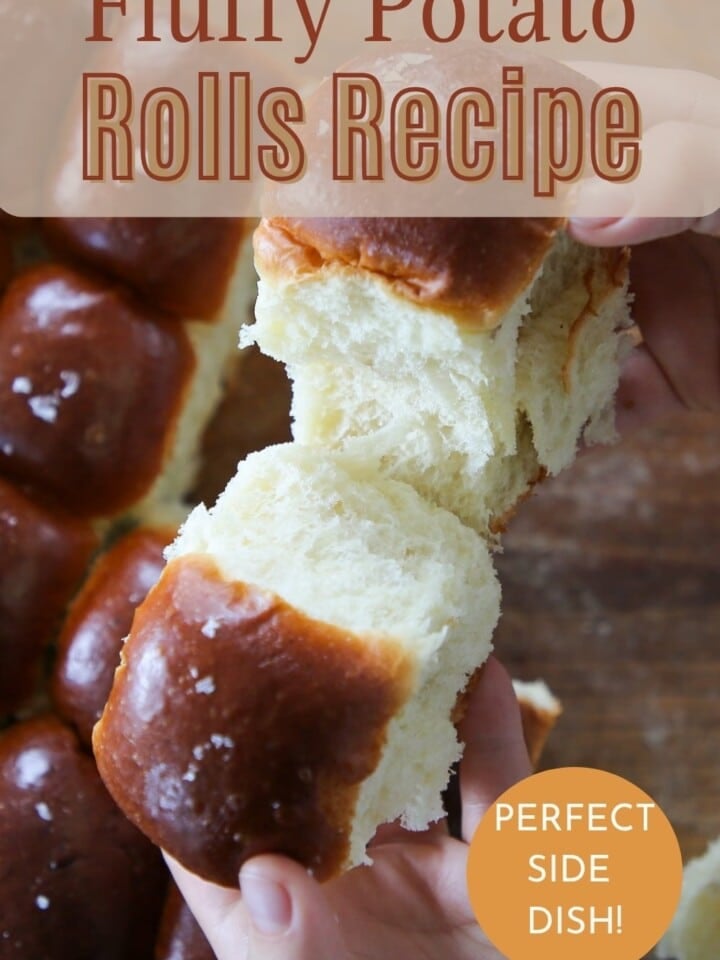
These potato rolls are the best! The dough is beginner-friendly, yielding soft, buttery rolls with rich flavor made from real mashed potatoes.
I have made hundreds of thousands of these potato rolls (fact) and taught over twenty people to make them. So trust me when I promise you that you can make perfect dinner rolls with mashed potatoes. This dough is easy to work with and forgiving! It is so simple that the recipe is based on time. No window-pane test is needed.
These fluffy, rich potato dinner rolls would be so delicious as smaller sandwiches using the best tuna melt recipe or deviled egg salad sandwich! You can also up your side dish game with my quick vegetable casserole recipe or these rich and creamy scalloped potatoes!
Why You Will Love These
- These rolls are enriched potato rolls and a brioche, like this brioche bun recipe! That’s right, an epic amount of butter is worked into the dough to finish.
- They are everything you love about decadent mashed potatoes in bread form.
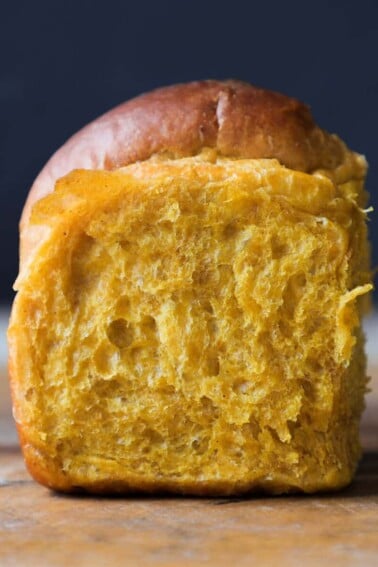
- The potatoes change the game! They are a not-so-secret weapon. They add moisture and structure while creating a luscious and soft dough, like when you add pumpkin puree to these pumpkin dinner rolls.
- This is a foolproof recipe. When it comes to dinner rolls made with mashed potatoes, this is one of the easiest and most reliable. The recipe is down to the minute for easy beginner bread! If you are looking for another dinner roll that doesn’t have potatoes but is just as easy, try this easy dinner roll recipe.
Table of Contents
Ingredients & Substitutions
- All-purpose Flour
- Kosher Salt
- Granulated Sugar
- Whole Egg
- Whole Milk
- Dry Active Yeast: If you don’t have active dry yeast, you can substitute double the fresh yeast’s weight or half the instant yeast’s weight. If using either fresh or instant yeast, you can add them straight to the batter, but mixing them into the sponge will still kickstart the fermentation and gluten development!
- Mashed Potatoes: If you have leftover creamy mashed potatoes from your refrigerator, you can use them. Just be aware that if they are seasoned, don’t add salt to the dough; otherwise, you will have salty potato bread. Like with my potato bread, you can leave the peel on for a rustic texture, but finely mash the potatoes to avoid lumps in the dough.
- Unsalted Butter
See the recipe card for full information on ingredients and quantities.
Variations
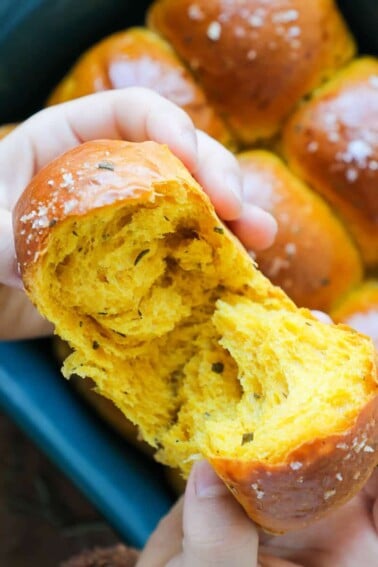
- Change the butter. You can use brown butter, black garlic butter, or throw in some herbs like rosemary and sage while melted to add even more flavor. Take inspiration from my pumpkin herb dinner rolls and be sure to use the butter in the dough and to brush the top when out of the oven.
- Mix in some herbs. Grab your favorite herbs, like sage, thyme, oregano, or rosemary, and add them to the dough! Like with my sourdough rolls, you can use fresh or dried herbs, or even fry them in butter before adding them.
- Cheese and more cheese. I just love a cheesy dinner roll! After the butter is fully incorporated, you can add your favorite, such as parmesan, gruyere, cheddar, or pepper jack, to the dough.
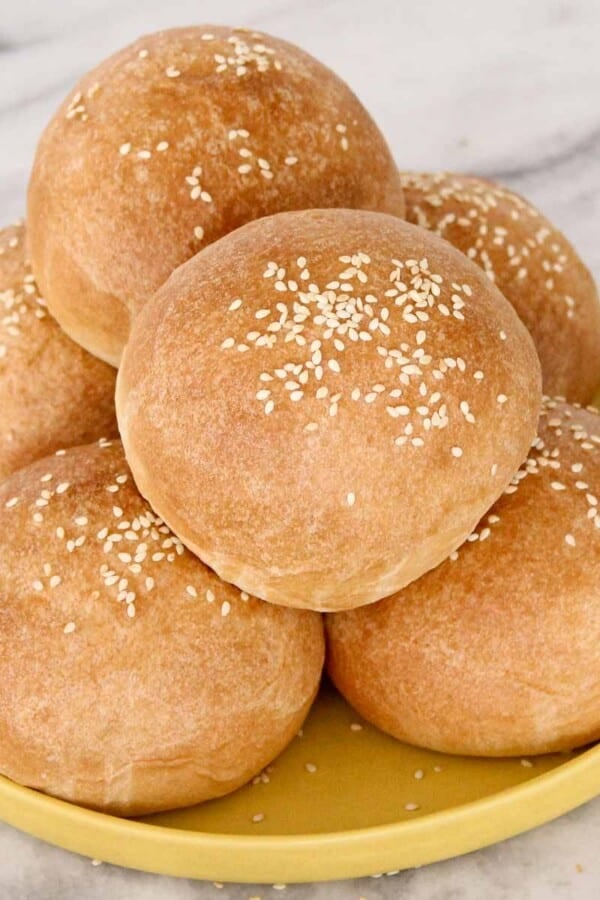
- Loaves or buns. This recipe can be made into a loaf or eight burger buns. Double the rolls for buns and score the top of the bun before baking, or follow the shaping of this brioche bread recipe for a loaf of bread.
Professional Tips
- Use unseasoned boiled potatoes. If you’re feeling fancy, you could boil the potatoes with herbs, just don’t salt the water. Salted potatoes + salt in the dough = too salty rolls.
- Metal baking dish. While it is not a necessity, baking these rolls in a metal baking dish will give them the best texture. Metal reacts to heat differently than glass or ceramic; it will evenly distribute the heat to the rolls instead of holding it in itself.
- Develop that gluten! Between the eggs, butter, milk and potatoes, it will take time for the gluten to develop. If your mixer can’t handle the last few minutes, end kneading by hand. If the gluten is underdeveloped, the roll can collapse after baking.
How to Make Potato Rolls
Use these instructions to make these perfectly soft and tender potato rolls! Further details and measurements can be found in the recipe card below.
Make the potatoes:
Step 1: Place your washed potatoes in a pot. They can be whole or chopped. Cover the potatoes in water. This will help prevent them from absorbing too much moisture.
Step 2: Bring to a boil and cook until fork tender. Drain the liquid and mash the potatoes while still warm. Cool the potatoes at room temperature and place them well-wrapped in the fridge.
You can mash the potatoes by hand or use your Kitchen Aid with the paddle attachment. It is much faster, but just be careful not to overmix the potatoes; they can become gummy.
Make the dough:
Step 3: Warm milk. Add active dry yeast to a small bowl and set aside. Then, warm the milk in a small saucepan or in the microwave. Add a little cold milk to the warm milk until it reaches 100-110°F.
Step 4: Bloom the yeast. Add the milk to the yeast, stir gently, and allow it to bloom for 10 minutes before adding it to the dough.
Step 5: Combine ingredients. In the bowl of a stand mixer fitted with the dough hook, combine the eggs, potatoes, and milk-yeast mixture. Mix on low speed until combined into a smooth paste.
Step 6: Add dry ingredients. Add the flour, sugar, and salt to the mixing bowl and continue to mix on low speed for 15 minutes until a smooth dough forms.
Step 7: Add the cubed butter all at once and mix on medium for 10 minutes—or as long as your stand mixer can handle!
If the dough is sticky due to the potatoes, add a bit of flour until it’s tacky, not wet. This isn’t ideal because your flavor and texture will be slightly off, but many rolls have been saved at the restaurant this way. Trust me.
Shape and Proof:
Step 8: Divide dough. Turn the dough out onto a non-floured surface and divide it into 16 equal pieces. You can eyeball this, but for evenly baked rolls, use a kitchen scale. They should weigh 65g.
Step 9: Shape rolls. Spray the counter and your baking dish with non-stick spray and shape each portion into boules (rounds) using your thumb as a guide.
Don’t flour your work table. If you use flour, the bread will not stick and will not be able to turn in on itself. It will just slip around and not form that tight shape we are looking for.
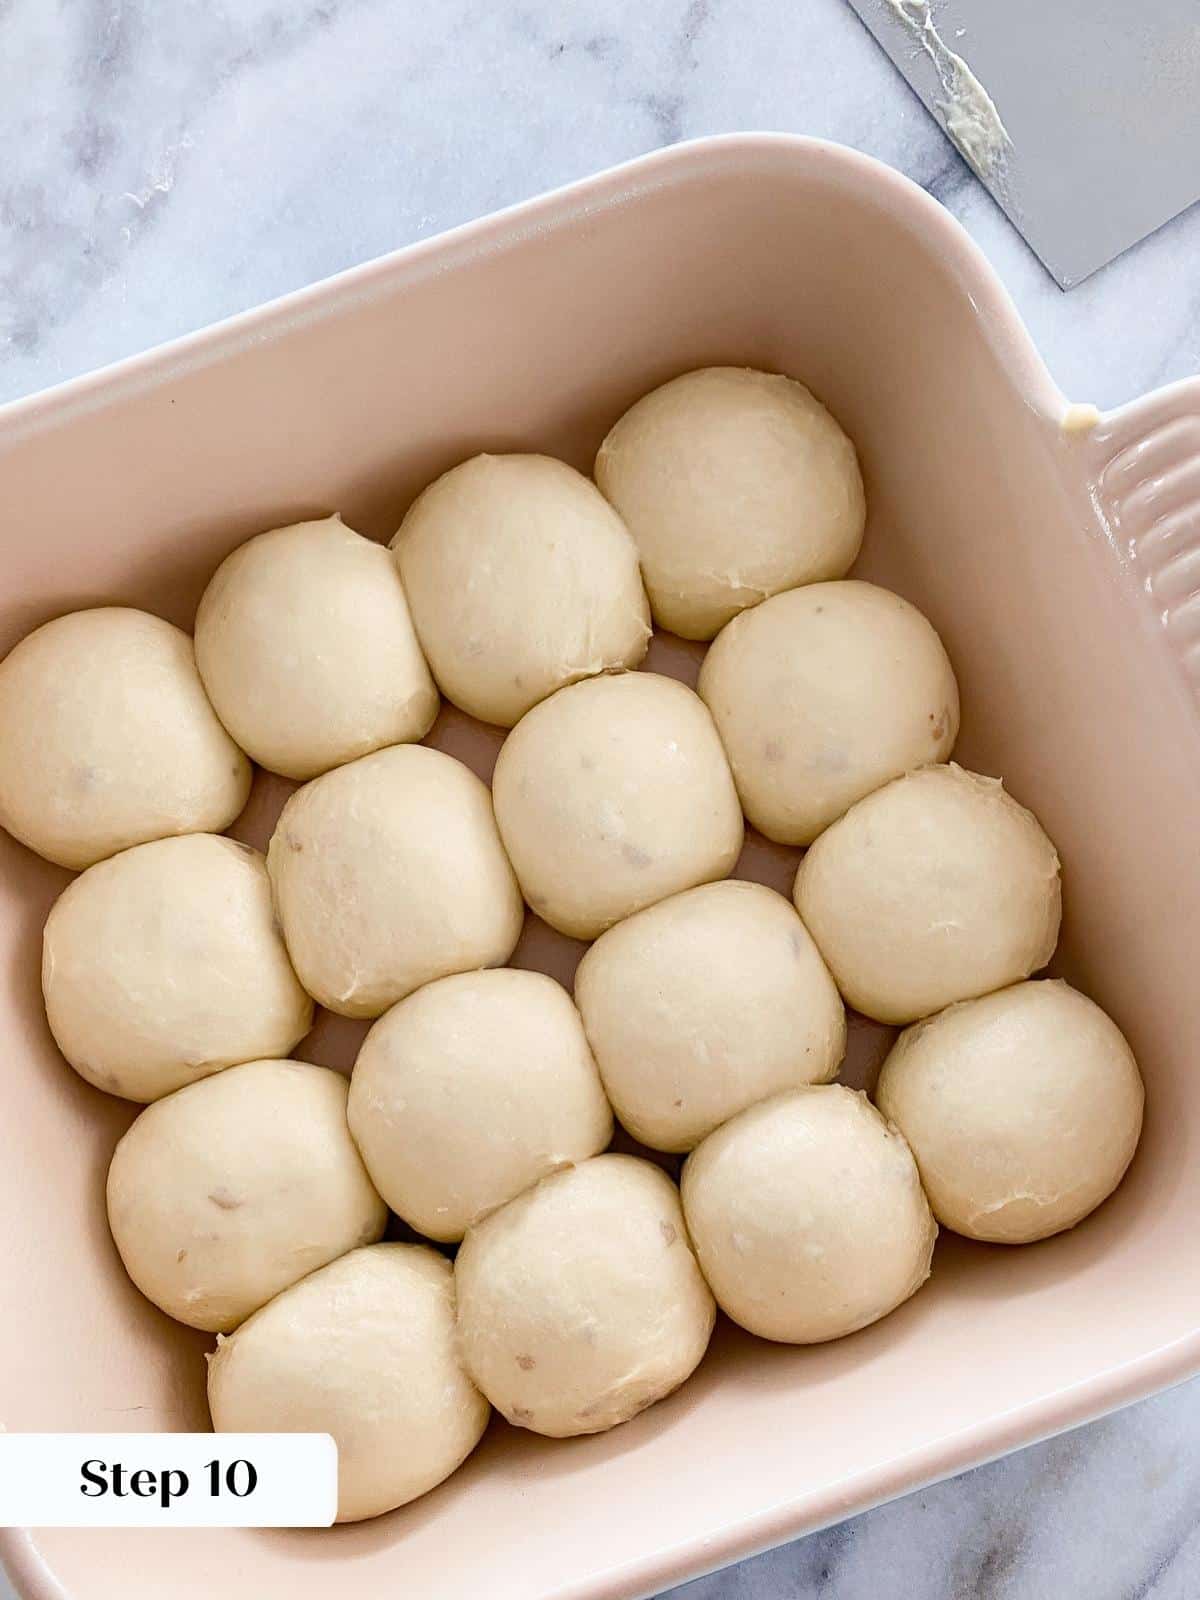
Step 10: Place the rolls in the greased baking dish for tall rolls or on a parchment-lined baking sheet for flatter, but still delicious, rolls (photo 1).
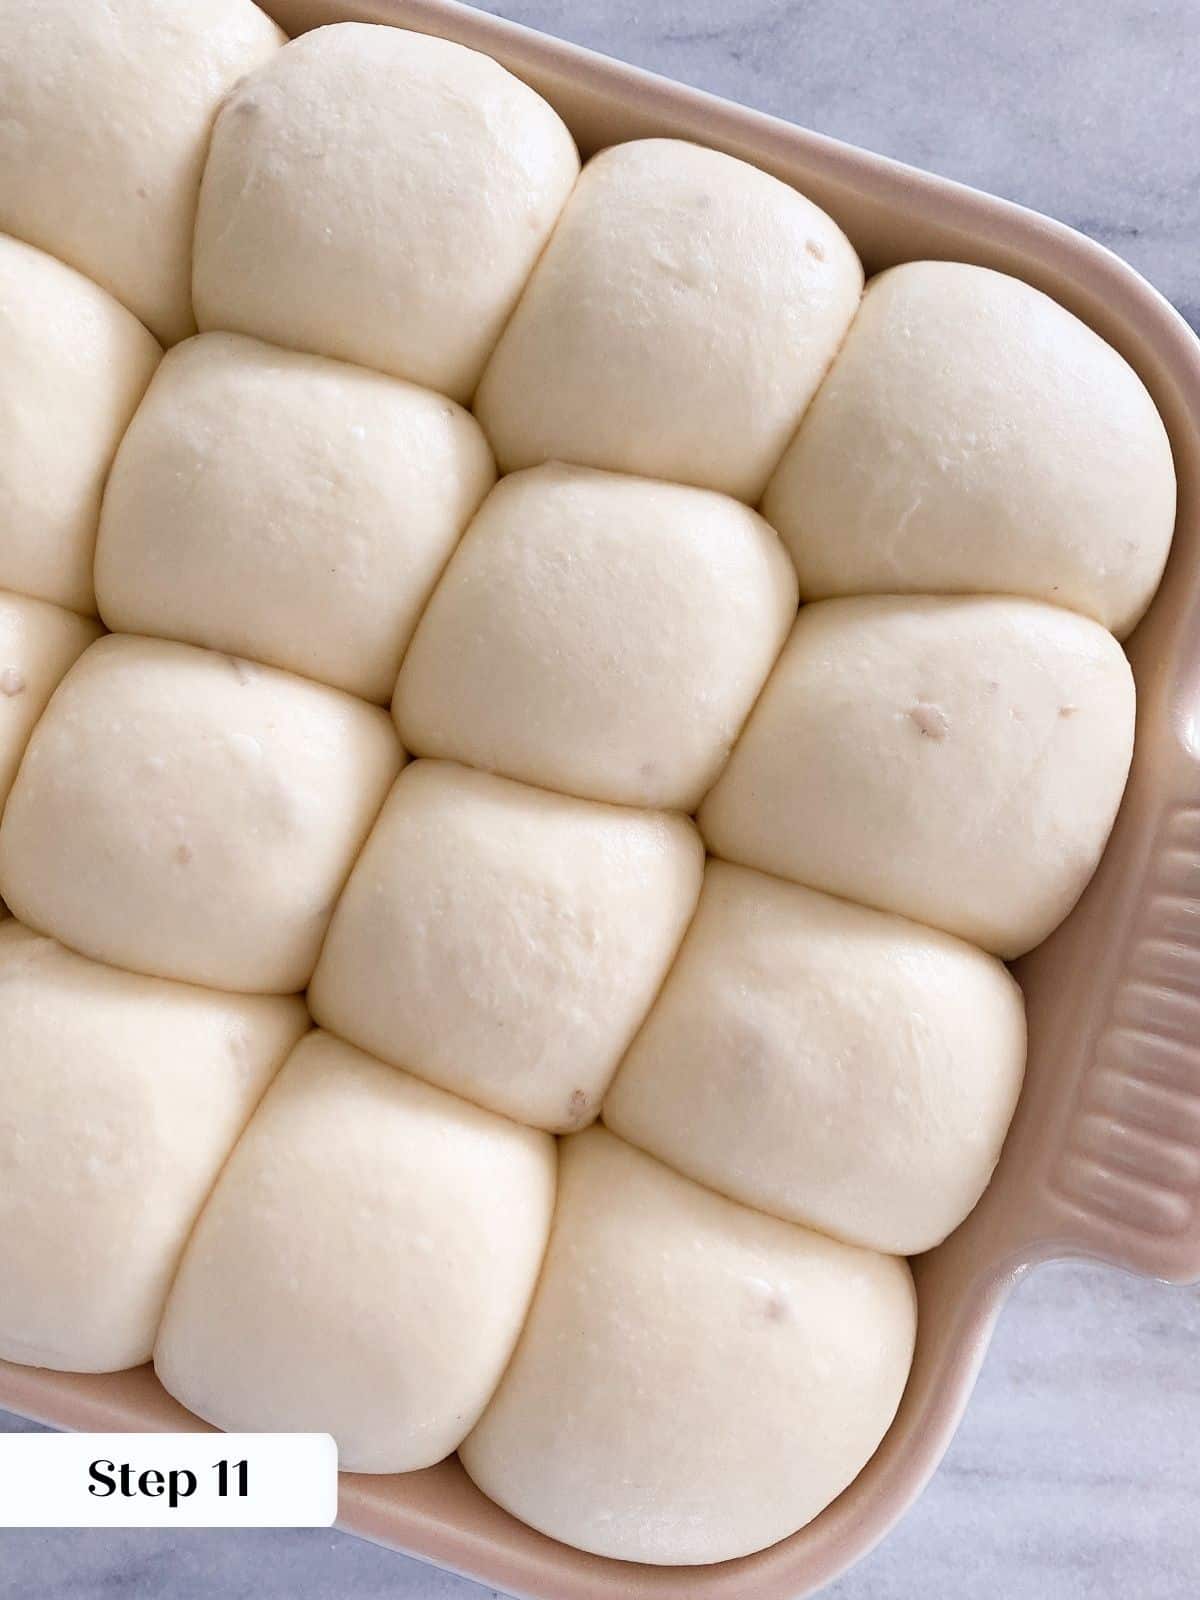
Step 11: Proof rolls. Cover the rolls loosely in plastic wrap or kitchen towel and place them in a warm spot or in your oven on a proof setting. Proof until the rolls tripled in size and are light and fluffy (photo 2). Preheat the oven to 350°F.
If you’re using the proof setting on your oven, be sure to remove the rolls with enough time to preheat the oven. We don’t want over-proofed potato rolls.
Time to Bake:
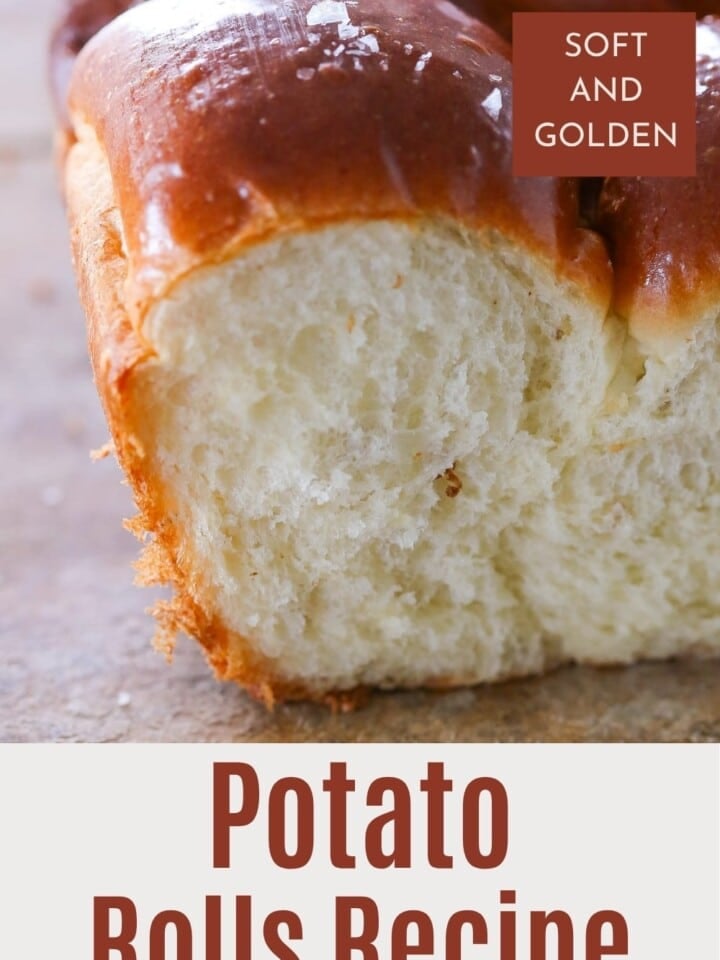
Step 12: Bake in the preheated oven at 350°F for approximately 20-25 minutes or until dark golden brown. The timing will depend greatly on whether the rolls are in a ceramic baking dish or placed individually on the pan. They will bake for about 8-10 minutes.
You can check the doneness with a cake tester or instant-read thermometer. Place in the center most roll and it should read 185°F.
Step 13: Brush with butter. Before serving, brush the tops with melted butter and sprinkle with a little fleur de sel.
Chef Lindsey’s Recipe Tip
If you are making 2x or 3x batch of rolls for Thanksgiving or Christmas, use plastic wrap to cover the dough you aren’t actively working with. Otherwise, the dough can start to form a skin on top, making it difficult to shape.
Recipe FAQs
They can be stored well-wrapped at room temperature for up to 5 days or in the freezer for 2 months. Since they do not contain preservatives, they will have the best texture if consumed within 2-3 days. You can also use leftover bread for this easy bread pudding recipe or this lemon bread pudding.
Russet, Yukon Gold, or Idaho potatoes are the best for this bread. They have higher levels of starch, which helps them become lighter when making the mashed potatoes. This will also make your bread lighter.
Potato bread is different from regular bread due to its use of mashed potatoes or potato flour instead of just wheat flour. This key ingredient swap is what gives potato bread its distinctively richer, moister, and slightly sweeter taste, often with a subtle potato taste.

Recommended Bread Recipes

Homemade Bread Recipes
Potato Bread
Dinner Roll Recipes
Pumpkin Herb Dinner Rolls
Dinner Roll Recipes
Easy Dinner Roll Recipe
Dinner Roll Recipes
Pumpkin Spice Dinner Rolls
If you tried this recipe and loved it please leave a 🌟 star rating and let me know how it goes in the comments below. I love hearing from you; your comments make my day!


Potato Rolls
Ingredients
- 3 ¾ cups all-purpose flour
- 1 tablespoon kosher salt not table salt!
- 3 tablespoons sugar
- 2 eggs large
- 2 tablespoons whole milk
- 3 ½ teaspoons dry active yeast
- 1 ¾ cups mashed potatoes cooled
- ⅓ cup unsalted butter cold, cubed
Instructions
Make the potatoes:
- Place your washed potatoes in a pot. They can be whole or chopped. Cover the potatoes in water. This will help prevent them from absorbing too much moisture.
- Bring to a boil and cook until fork tender. Drain the liquid and mash the potatoes while still warm. Cool the potatoes at room temperature and place them well-wrapped in the fridge.
Make the dough:
- Add active dry yeast to a small bowl and set aside. Then, warm the milk in a small saucepan or in the microwave. Add a little cold milk to the warm milk until it reaches 100-110°F.
- Add the milk to the yeast, stir gently, and allow it to bloom for 10 minutes before adding it to the dough.
- In the bowl of a stand mixer fitted with the dough hook, combine the eggs, potatoes, and milk-yeast mixture. Mix on low speed until combined into a smooth paste.
- Add the flour, sugar, and salt to the mixing bowl and continue to mix on low speed for 15 minutes until a smooth dough forms.
- Add the cubed butter all at once and mix on medium for 10 minutes—or as long as your stand mixer can handle!
Shape and Proof:
- Turn the dough out onto a non-floured surface and divide it into 16 equal pieces. You can eyeball this, but for evenly baked rolls, use a kitchen scale. They should weigh 65g.
- Spray the counter and your baking dish with non-stick spray and shape each portion into boules (rounds) using your thumb as a guide.
- Place the rolls in the greased baking dish for tall rolls or on a parchment-lined baking sheet for flatter, but still delicious, rolls.
- Cover the rolls loosely in plastic wrap or kitchen towel and place them in a warm spot or in your oven on a proof setting. Proof until the rolls tripled in size and are light and fluffy. Preheat the oven to 350°F.
Time to Bake:
- Bake in the preheated oven at 350°F for approximately 20-25 minutes or until dark golden brown. The timing will depend greatly on whether the rolls are in a ceramic baking dish or placed individually on the pan. They will bake for about 8-10 minutes.
- Before serving, brush the tops with melted butter and sprinkle with a little fleur de sel.
Video
Notes
Nutrition
Before You Go
I hope you enjoyed this foolproof dinner roll recipe. Check out our other easy and delicious side dish recipes like this indulgent white cheddar mac and cheese or these loaded mashed potatoes!


I have a question,can you do it by hand if you don’t have a machine?
Hi Jacqueline! Yes, you can make these by hand. Mix in a bowl until cohesive, then knead until smooth and elastic. Expect it to take longer than a mixer (est. ~20–25 minutes). Time is your friend here! Happy baking!
Wow, these rolls right out of the oven are dangerous. The flavor and texture are unreal. I served these with a herb garlic butter for dinner, and there wasn’t a single roll left after dinner.
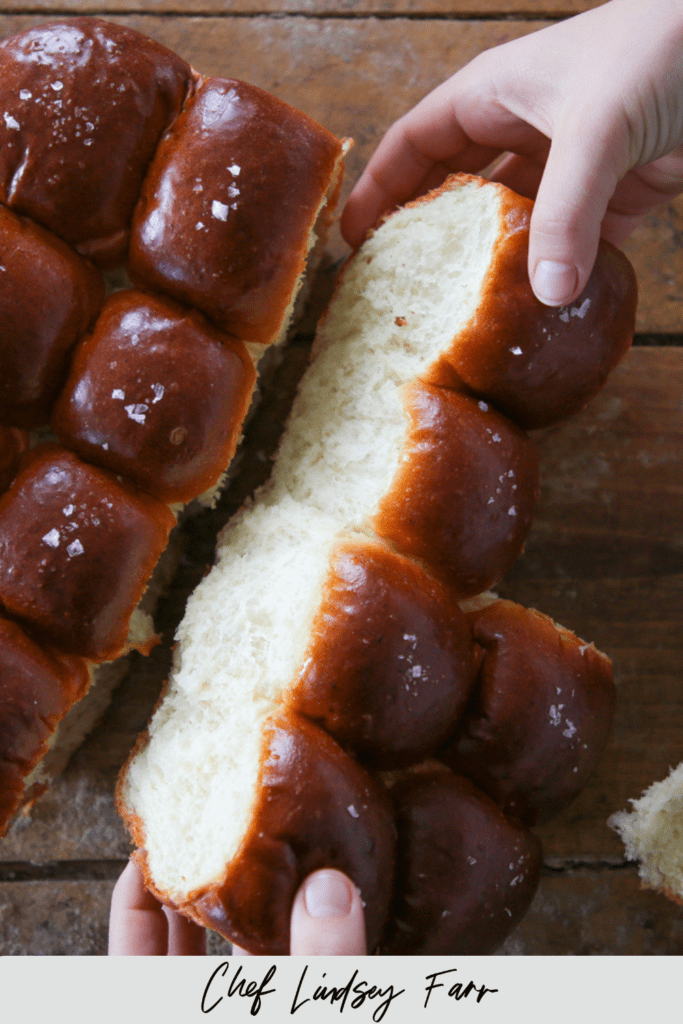
I made these last weekend and they were a hit! The dough was soft and easy to work with, and I loved shaping each roll—there’s something oddly satisfying about the way the dough tucks into itself and turns into these perfectly springy little rounds. They baked up golden and fluffy, and we finished half the pan before dinner even started.
Any advice for kneading these by hand?
Hi Siri, Just keep going 😉 Just kidding, start in the bowl until the dough is less sticky, then kneed it on a lightly floured surface. This is a lovely and forgiving dough. You could also autolyse the dough, which a is a fancy bread term for letting it sit covered for 20-30 minutes after the initial mixing. This allows the gluten to start developing on its own. It will speed up the kneading process. You can also do the autolyse followed by a series of several folds. Time is your friend here, so it will take longer but you won’t have to actually knead the dough. I hope that helps! Happy baking. ~Lindsey
Thanks Chef! This sounds similar to what I do for my focaccia. Of course the yeast % is lower in that one.
Will definitely try it out this way. Thanks again! 🙂
Hi Siri! Your focaccia sounds delish, can’t wait for you to try these! Happy baking 🙂
A TBSP and 1/2 of yeast?? NO WAY!!!
This MUST be a type-o
Use 1 packet of active dry yeast = 2 1/4 Tsp or 19 grams of fresh compressed yeast
Rushing fermentation and/or too much yeast destroys delicious bread flavor and causes bread to smell and taste of yeast – – yuck
Not to mention is a bear to work with.
Potato buns, amish dinner rolls and the many variations are delicious!!!
Hi Theresa, There is not a typo. The original recipe is from one of the restaurants where I was the pastry chef and it was developed with fresh yeast. It does have a lot of dry active yeast (not instant). I can assure you that the flavor is all potato and delightful. Hundreds of thousands of diners in NYC agree with me 😉 .
The additional yeast does speed up the fermentation, which in an enriched bread, like this one, doesn’t really matter. The complex flavor after fermentation is masked by butter, potatoes, eggs and a touch of sugar. This is actually an incredibly easy dough to work with and doesn’t even need bench flour unless you are in a very humid environment.
Happy Baking!
What’s the best way to make these into home made hamburger and hot dog rolls or would you use another recipe for that?
Hey Jeff, you can absolutely use this recipe for burger buns and hot dog rolls. In the restaurant I made these rolls 40g and then used the same dough weight to 100g for burger buns. I scored the burger buns before proofing though. You might find this recipe a little light and airy for hot dogs, but I have made these Brioche Hamburger Buns into hot dog buns with much success. They are are little more substantive. Happy baking (and grilling!)