This post may contain affiliate links. Please read our disclosure policy.
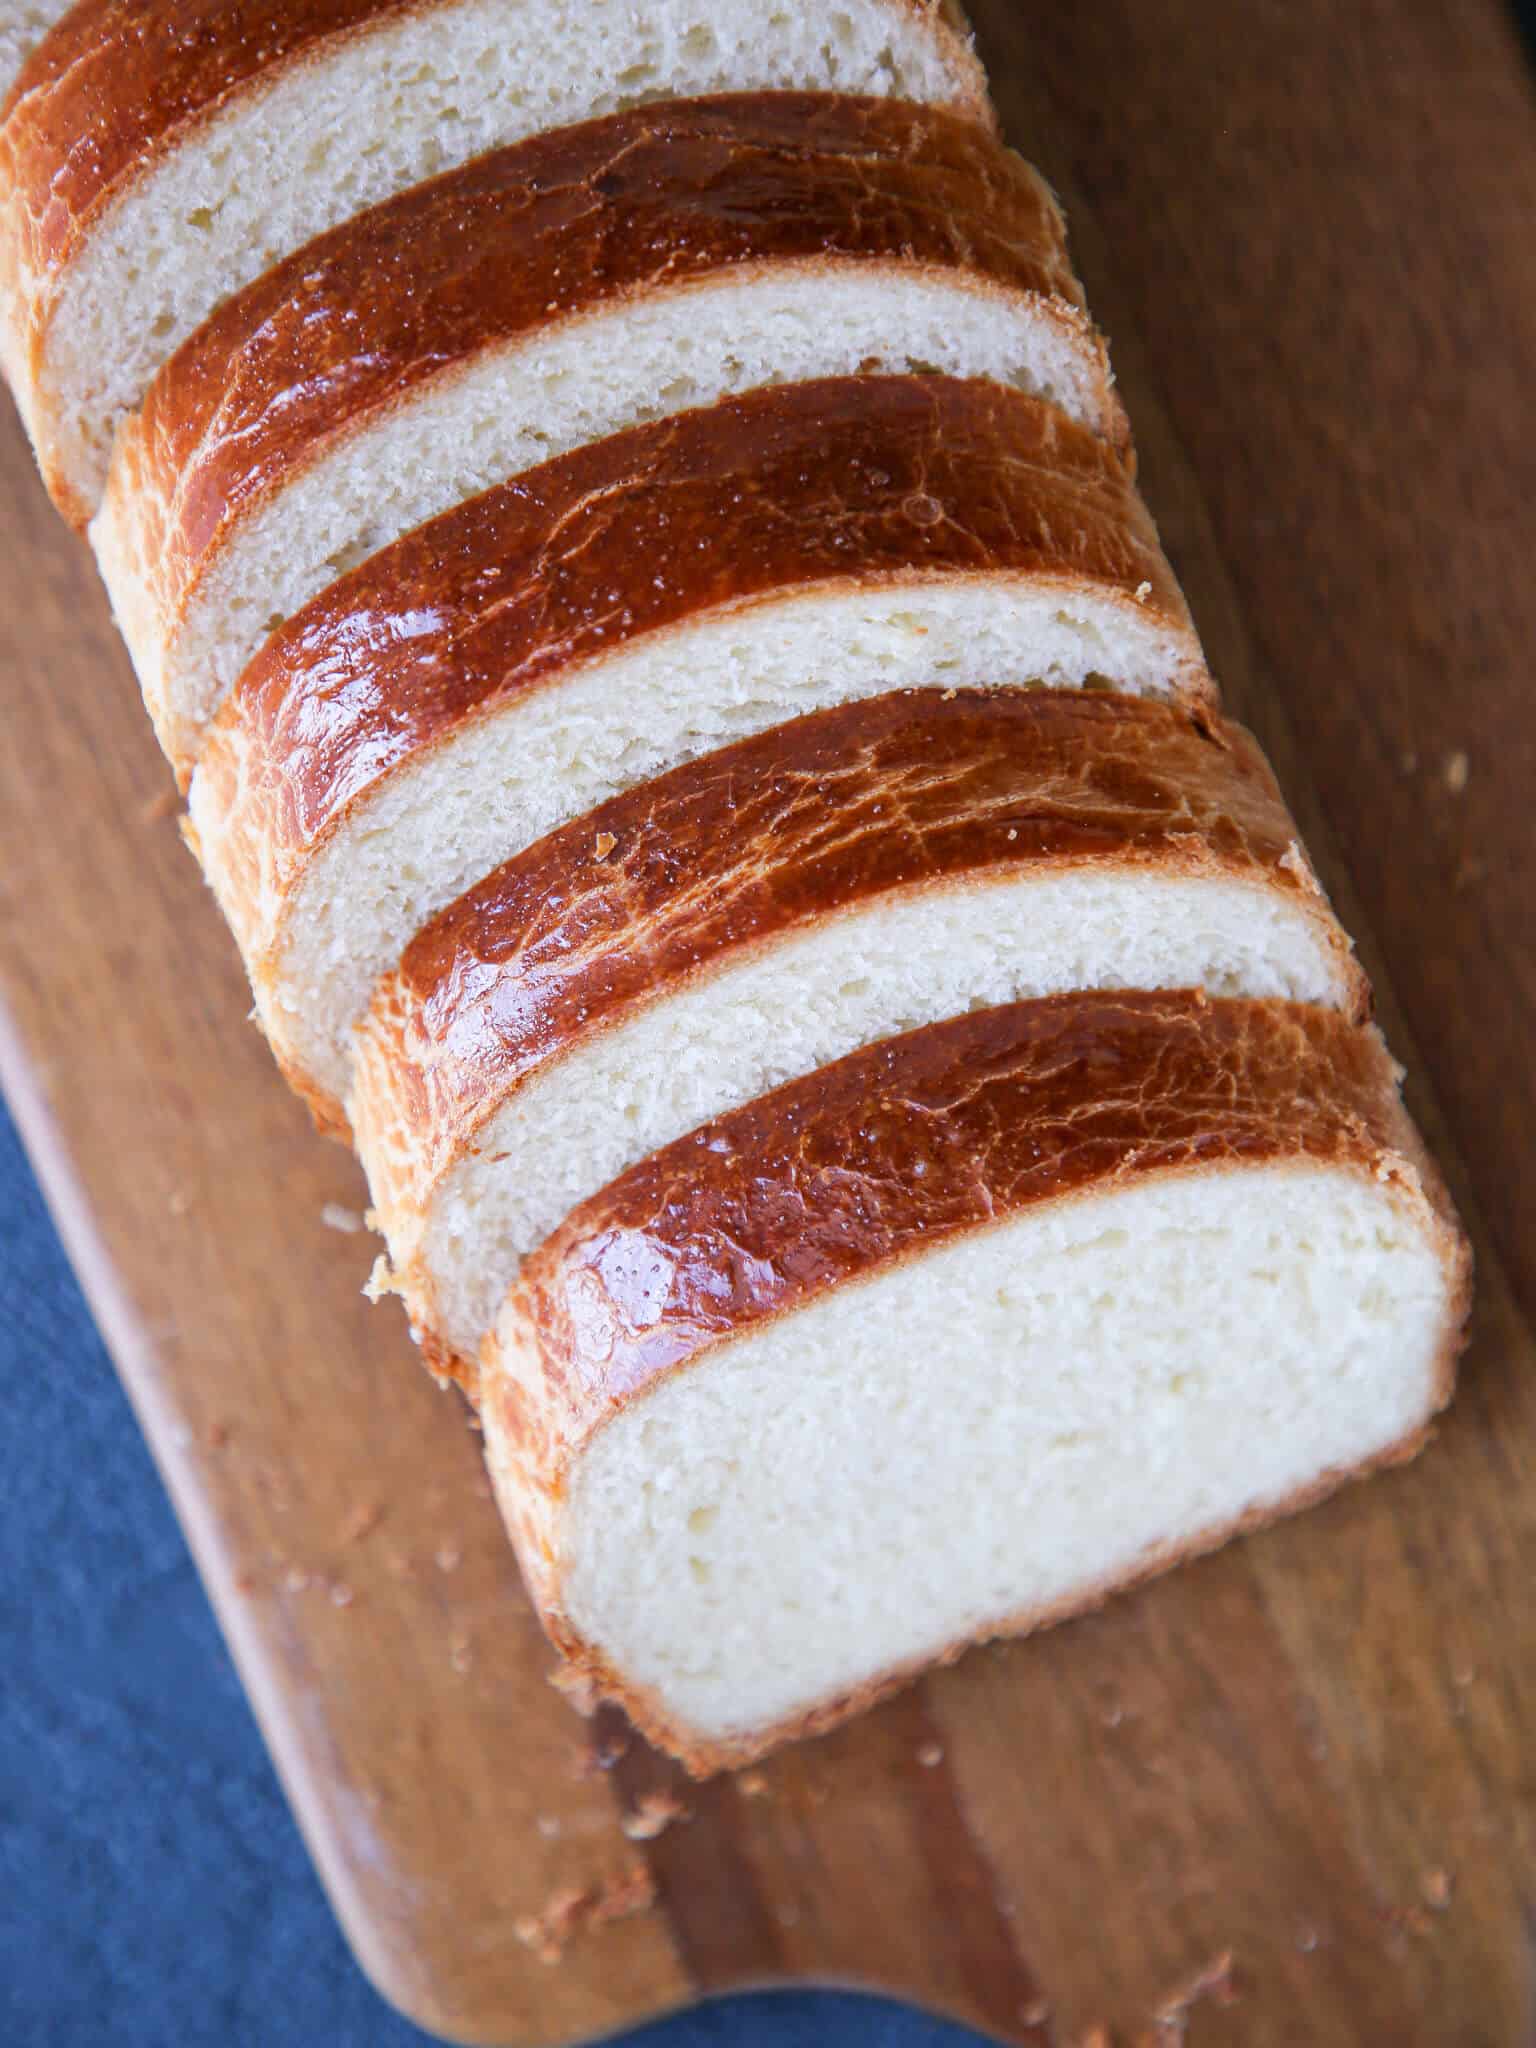
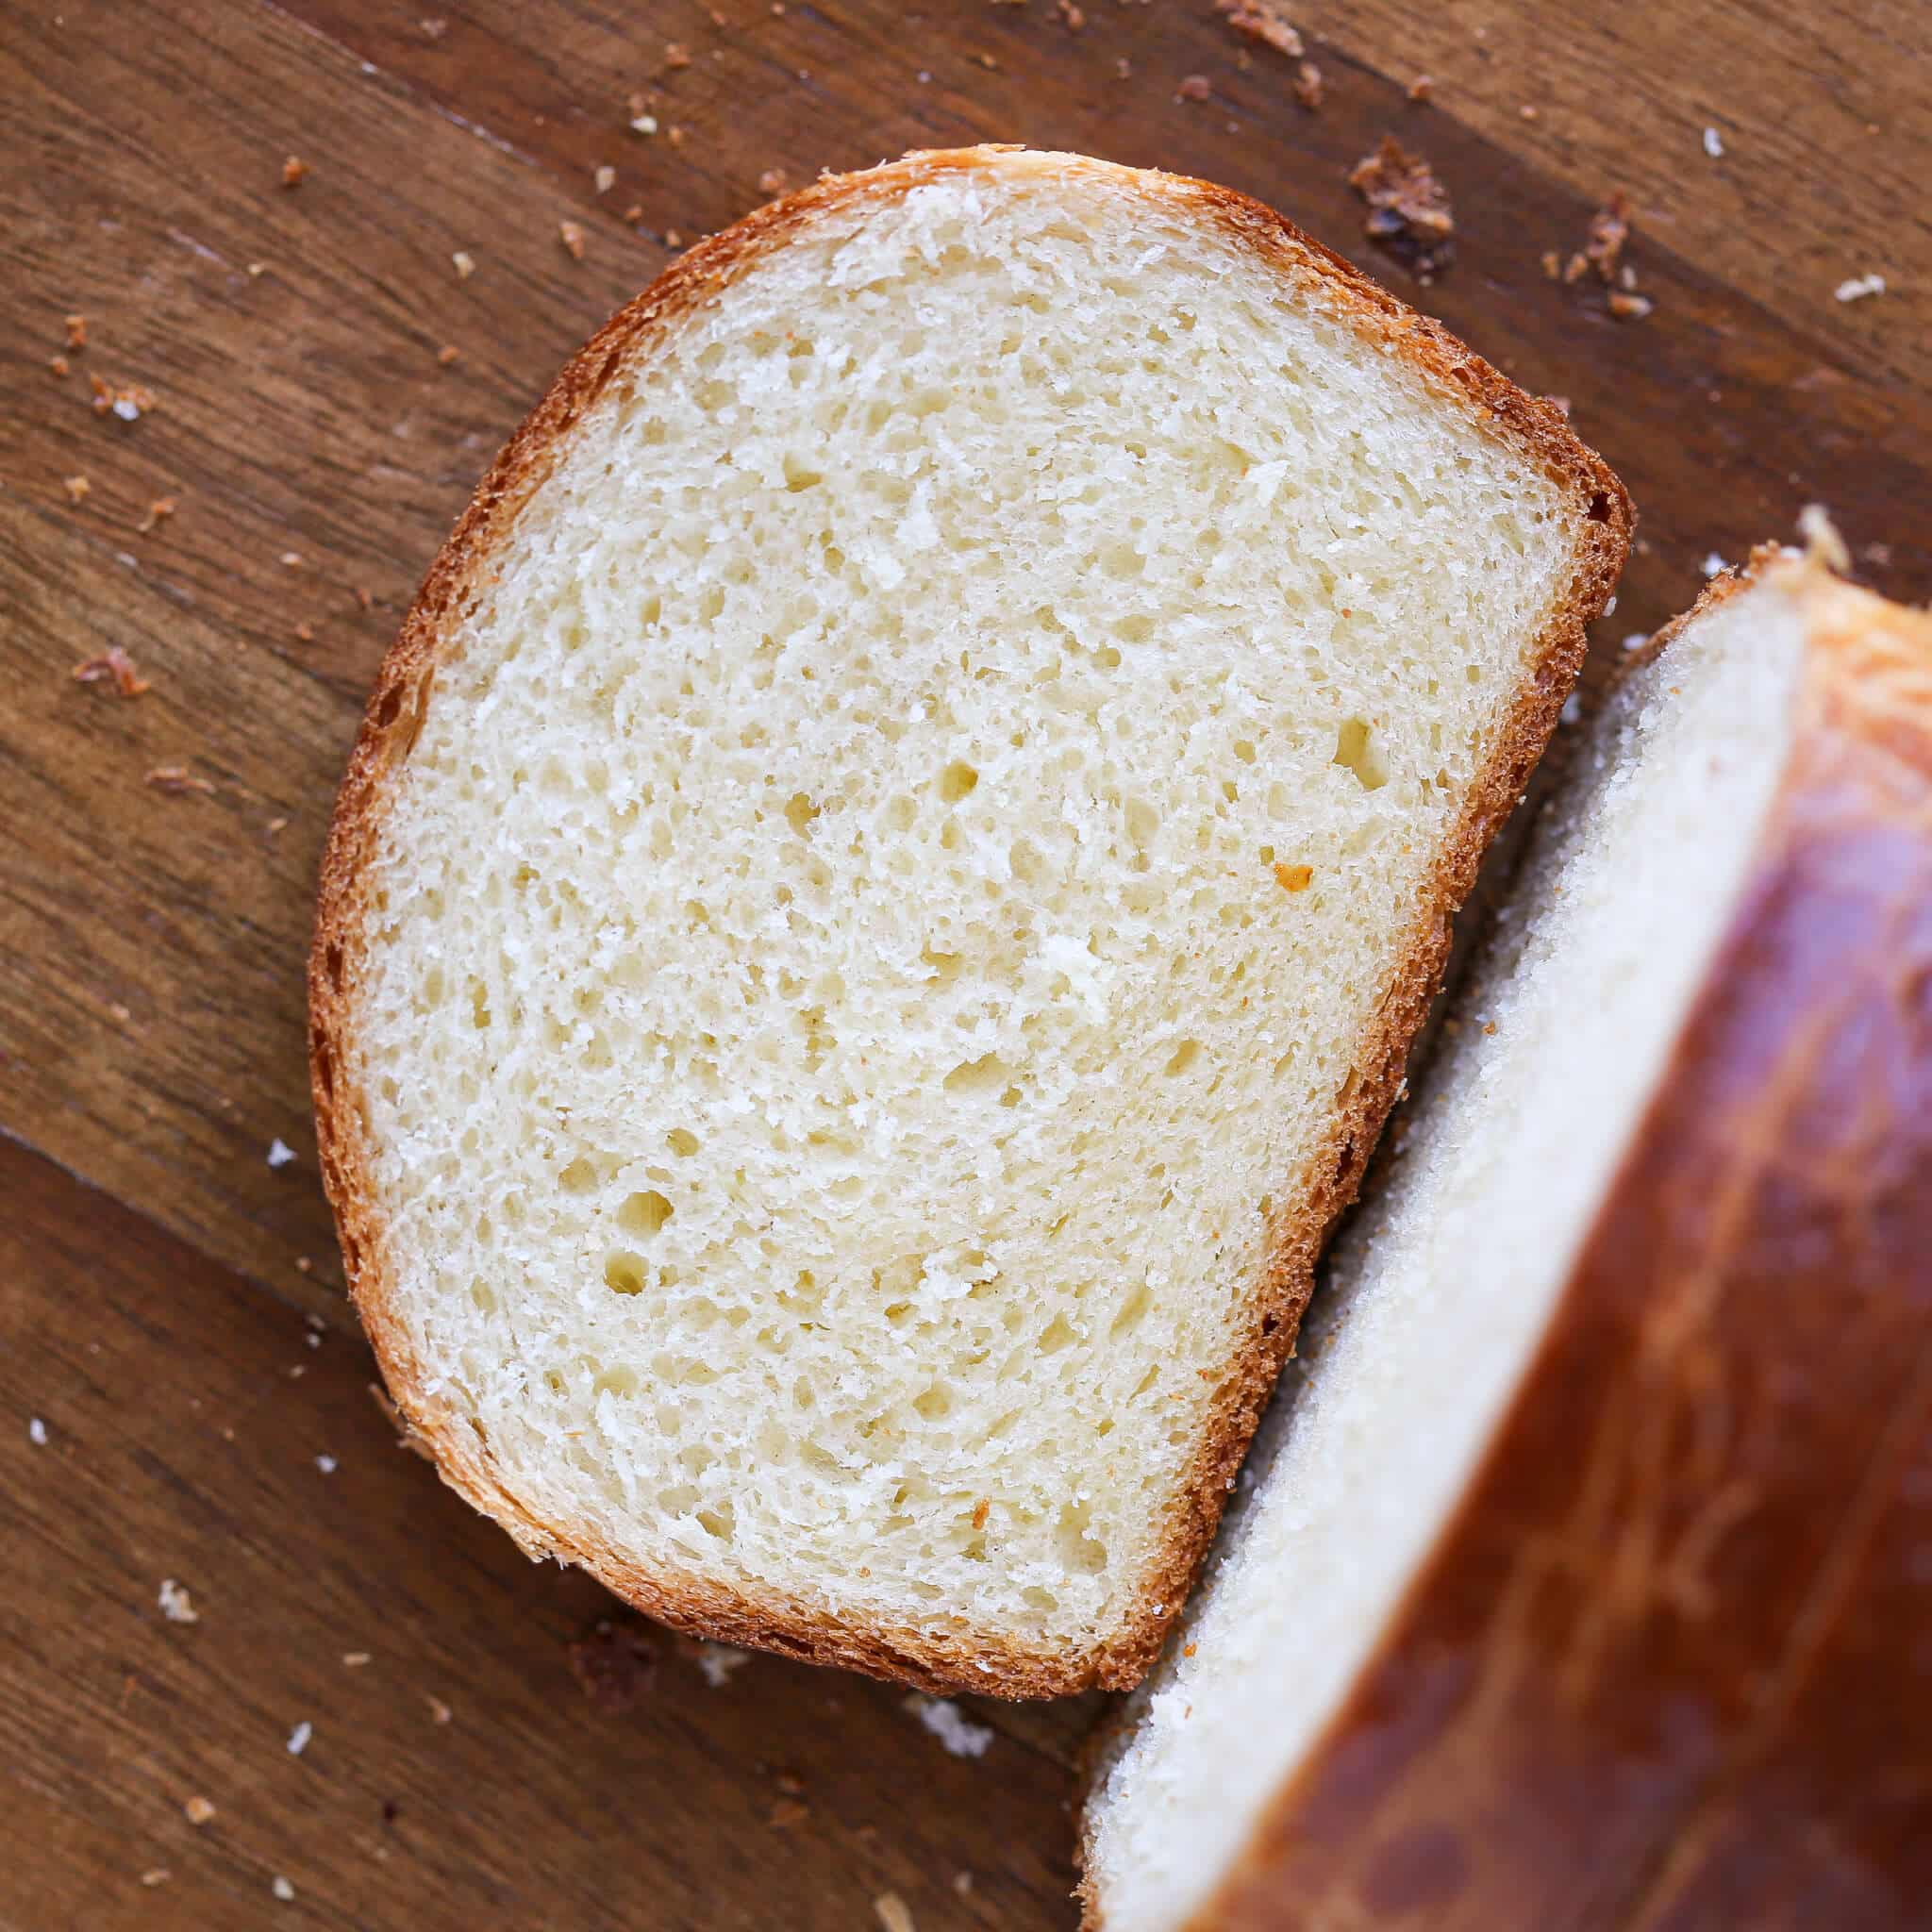
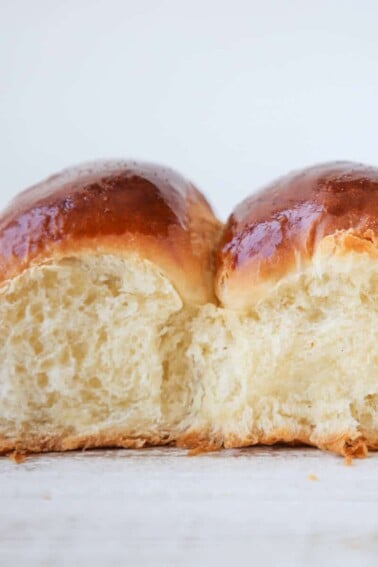
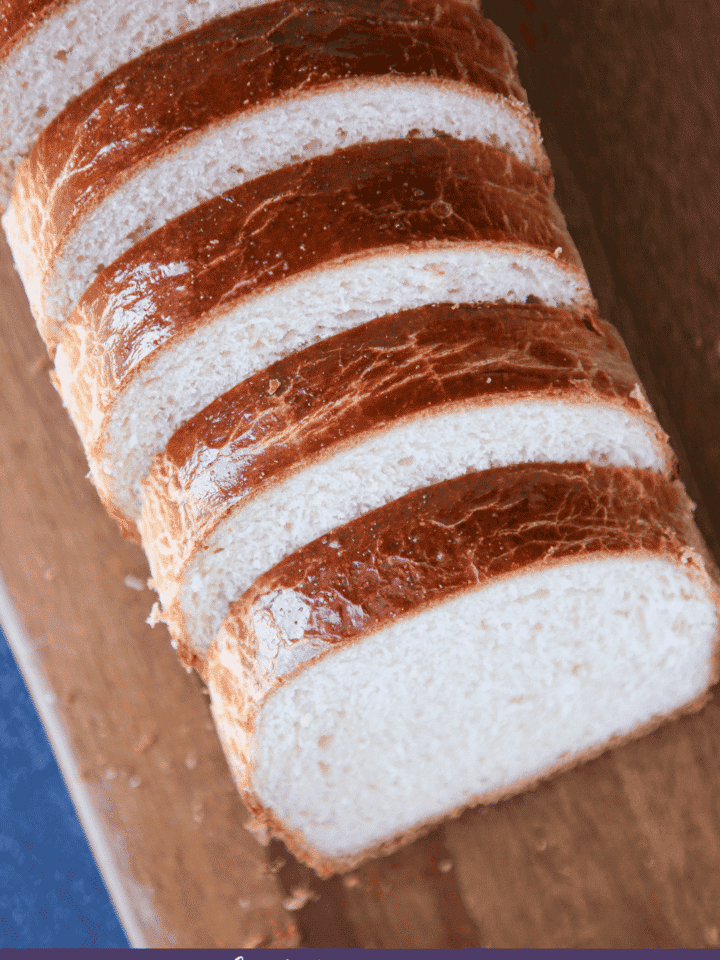
A brioche bread recipe that is not only soft, buttery, and simple to make, but brings a traditional French bakery straight to your kitchen! So tender that it melts in your mouth, while being perfect for dinner, sandwiches, and later some easy bread pudding!

A Quick Look At The Recipe
This is a brief summary of the recipe. Jump to the recipe to get the full details.
Jump to RecipePrep Time
1 hour
Cook Time
35 minutes
Proof Time
2 hours
Total Time
3 hours 35 minutes
Servings
24 Slices
Difficulty
Moderate- Brioche is an easy dough to work with.
Calories *
140 kcal per serving
Technique
Make dough, kneed to window pane, add butter, proof and fold, shape, proof and bake.
Flavor Profile
Buttery tender brioche bread!
* Based on nutrition panel
This brioche has completely ruined store-bought bread for me! I made one loaf for sandwiches and the soft, buttery texture took every sandwich to a whole new level! I used the second loaf for French toast the next morning, and it was absolutely incredible, soaking up the custard perfectly with that rich, tender crumb.⭐⭐⭐⭐⭐
Mara
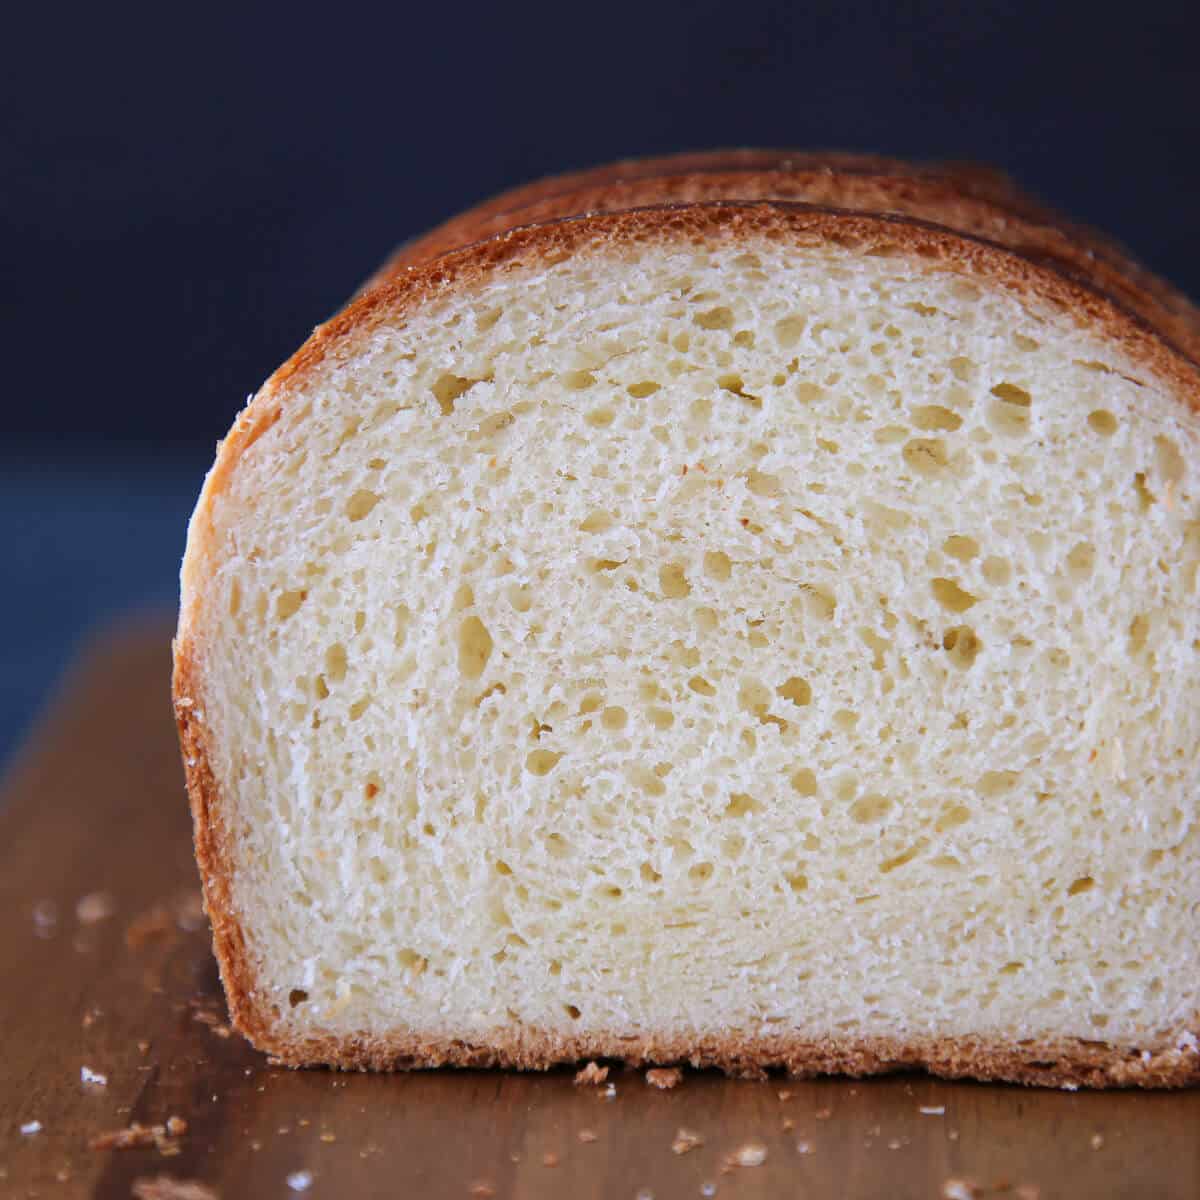
Your very own loaf of perfect brioche with a tender crumb and buttery balance of flavors is well within reach! I’ve included all my steps, photos, and secret tips that I learned as a pastry chef in top NYC restaurants and bakeries.
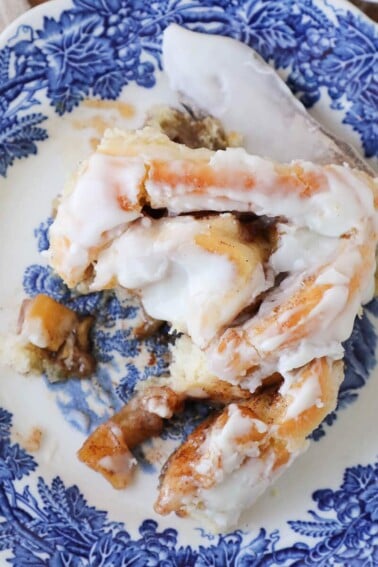
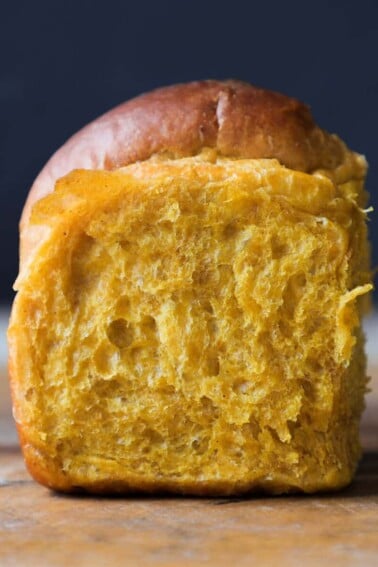
Nothing can get between me and brioche bread, but sometimes I like to mix things up a little. My whole wheat sandwich bread recipe, soft honey whole wheat buttermilk rolls, and easy dinner rolls can all rotate with this classic brioche bread to make your dinners extra special. AND leftovers (if there are any) can go in my decadent lemon bread pudding or pumpkin French toast, depending on the season!
Table of Contents
Why you will love this:
- Developed by a professional chef. It doesn’t get any better than a bread recipe tested and perfected by a pastry chef. It will taste like it came from a professional French bakery, because in a way, it did!
- That soft and tender brioche texture. Just the right amount of butter and a dash of sweetness ensure this brioche has a tender crumb, and subtle buttery flavor.
- An easy to make brioche recipe with no sticky dough. This dough is not wet or difficult to work with. If you opt to use a stand mixer it’ll be ready in no time!
What is brioche bread made of?
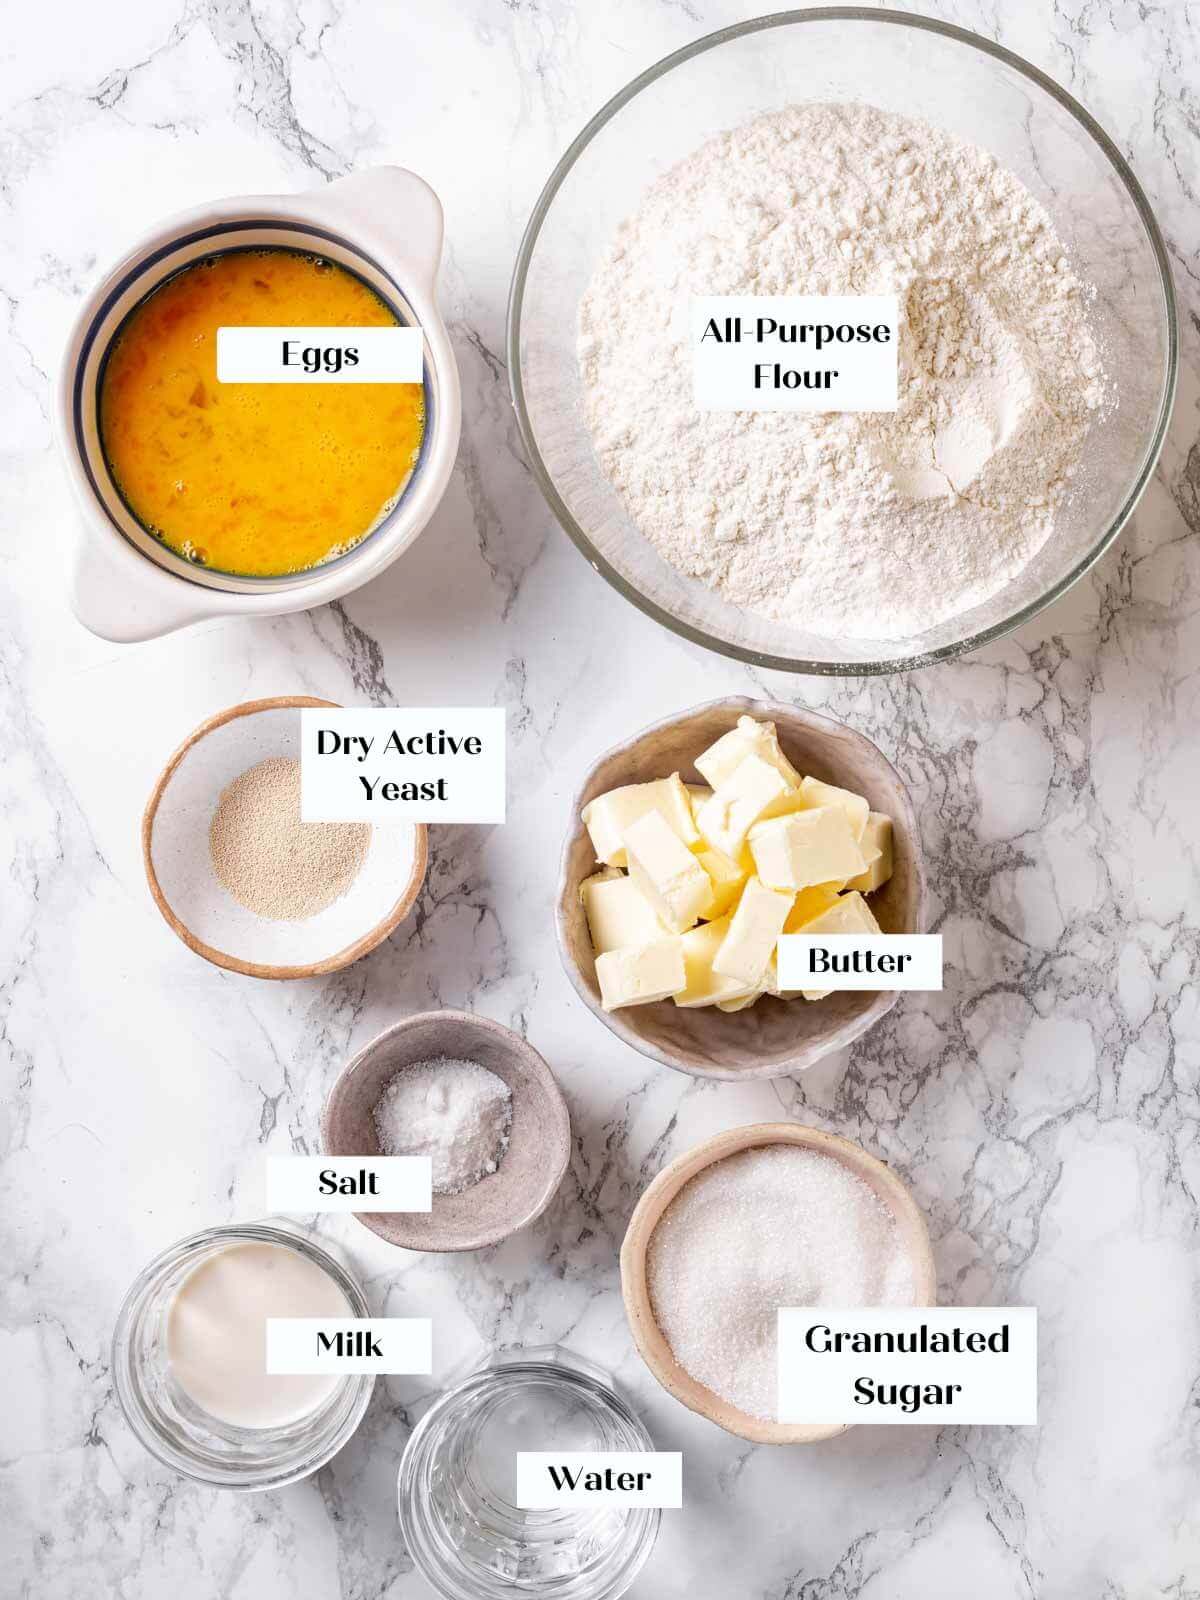
- Water & Milk
- Kosher Salt
- Dry Active Yeast: These little guys require the added step of hydration, but dry active yeast is fast and more consistent than instant yeast. See substitutions for more options.
- Eggs: Large eggs add fat and flavor but they also hydrate the dough. You will need an additional egg for the egg wash.
- Butter: Unsalted butter allows you to control the flavor of the dough while still adding all the buttery goodness! It’s what makes brioche brioche.
- Is there a lot of sugar in brioche? Not really, in comparison to sweet breads like sweet cornbread! And, definitely not when you think about the amount of sugar in ratio to the other ingredients. We only use ¼ cup in this recipe split between two loaves! That’s why brioche is perfect for both sweet and savory courses.
- What type of flour is best for brioche? All-purpose flour! Most people associate bread flour with good bread, but all-purpose flour actually makes lighter, more tender brioche!
See the recipe card for full information on ingredients and quantities.
Variations
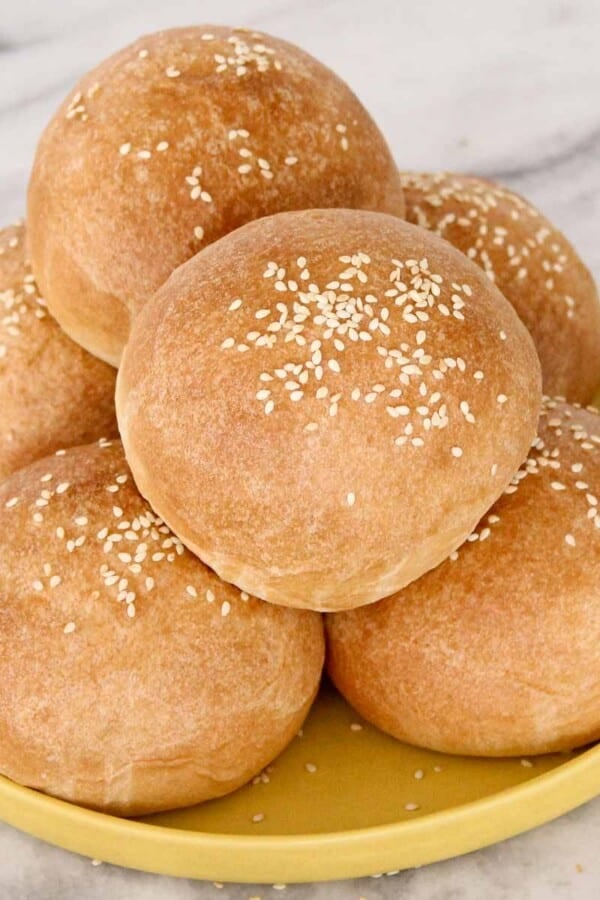
- Make them into rolls. Divide and shape this same recipe into rolls just like in my brioche bun recipe! This same recipe will make 12 dinner rolls. Follow my process for dividing, shaping and baking in this easy dinner roll recipe! If you are pernickety like me, you can weigh each piece. They will be about 82g each!
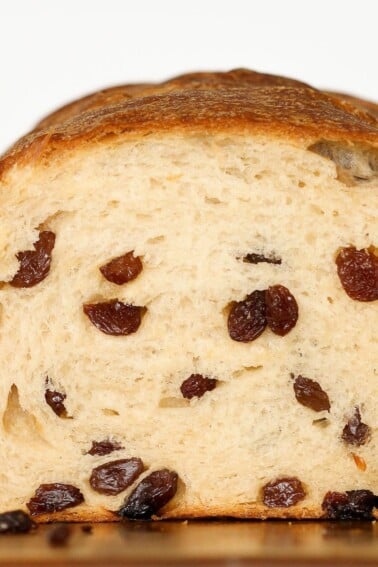
- Whip up a raisin or nut variety! Add any combination of dried fruit or nuts up until one pound. You know how I feel about old fashioned raisin bread! You can add up to a pound (454g) of raisins to the recipe below.
- Add some citrus zing. Bring subtle notes of citrus by adding lemon or orange zest to the batter and substitute the water with orange or another flavor of juice!
Substitutions
- Whole Milk: I prefer baking with whole milk for the flavor and fat, but you could use skim milk, alternative milks or even make this recipe using all water.
- All-purpose flour: If you only have bread flour, you can use that instead, but it will take less time to develop the gluten and your final product will be a bit more chewy than tender.
- Yeast: If you don’t have dry active yeast, you can substitute double the weight of fresh yeast or half the weight in instant yeast. If using either fresh or instant yeast, you can add them straight to the batter, but mixing them into the sponge would kickstart the fermentation and gluten development!
Professional tips:
- Wait, actually wait, for the dough to rise. It is tempting to skip the bulk proof (the first proofing), but that’s one of the most important aspects of fluffy and soft bread! It needs that time for developing its flavor and structure.
- Measure by weight. An inexpensive kitchen scale ensures you have the right amount of ingredients in the dough and helps with consistent results. It also lets you scale this recipe up or down! I have made 40 quarts of this recipe in a commercial kitchen, so I know you can too!
- Develop the dough before adding the butter. This note differs from other homemade brioche bread recipes out there, but trust me. Butter inhibits gluten formation, so developing the dough before adding the butter will honestly speed up the process!
How to Make Brioche Bread
Further details and measurements can be found in the recipe card below!
Mix the dough:
Step 1: In the bowl of a stand mixer whisk together the dry active yeast and warm water. Allow to sit for 10-15 minutes or until bubbly.
I find that two loaves mix better in home mixers, so I always make two at a time and freeze one. You could halve this recipe and make one loaf, but it might be difficult to develop the gluten in most stand mixers.
Step 2: Add the milk, sugar, eggs, salt, and flour to the stand mixer bowl. Fit with the paddle attachment and mix on low speed to incorporate.
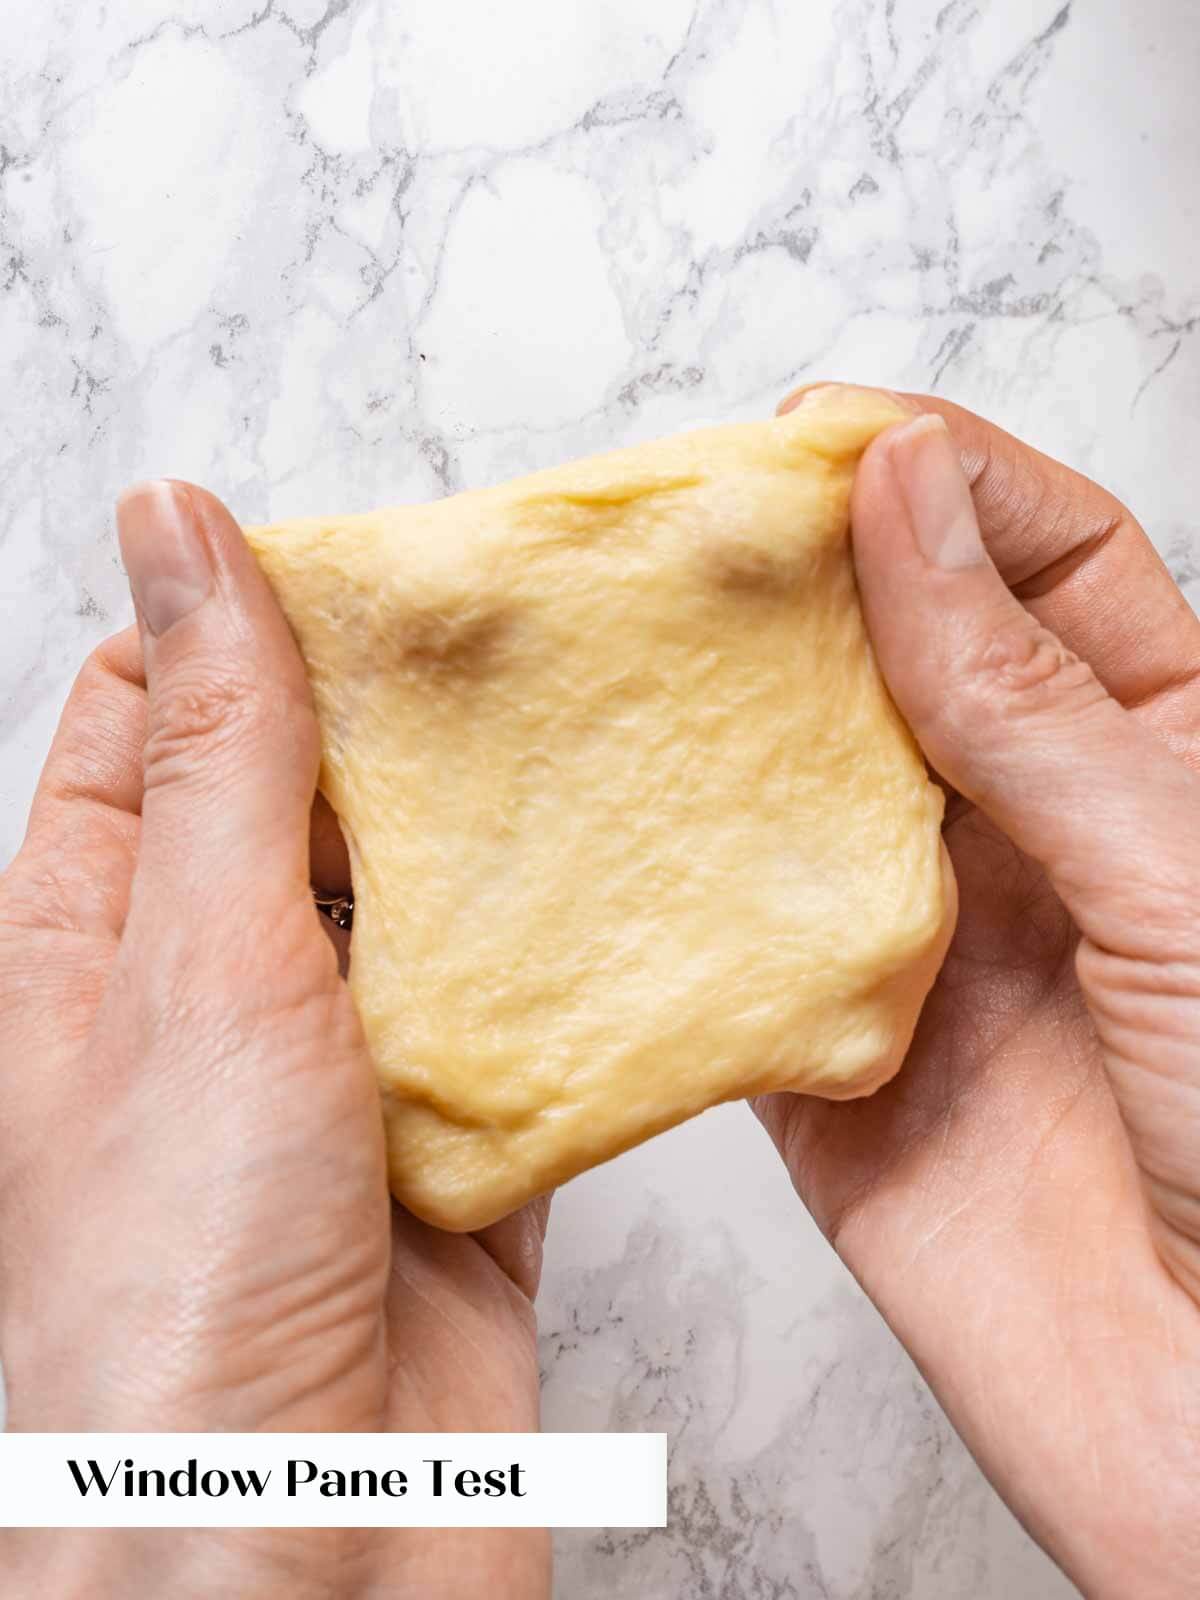
Step 3: Once the ingredients are mixed and the flour has been hydrated, switch to the dough hook attachment and mix on medium speed until a smooth dough forms. It will not stick to the sides of the bowl. Use the window pane test to tell if the dough is ready to add the butter.
WINDOW PANE TEST: Take a golf ball sized portion of the dough from the mixer and gently start to pull the dough apart. I like to think of it as a square and gently pull on two sides, then rotate and repeat. If the dough tears instantly, it is not ready. If it allows you to pull it thin enough to see light through it, then it is ready. There are different degrees of gluten development, but with this dough we want to develop a strong gluten network to hold up to all that butter and eggs! Ideally you want a smooth dough with no visible “veins”, but you can see in this picture, we still have veins and the resulting bread was wonderful.


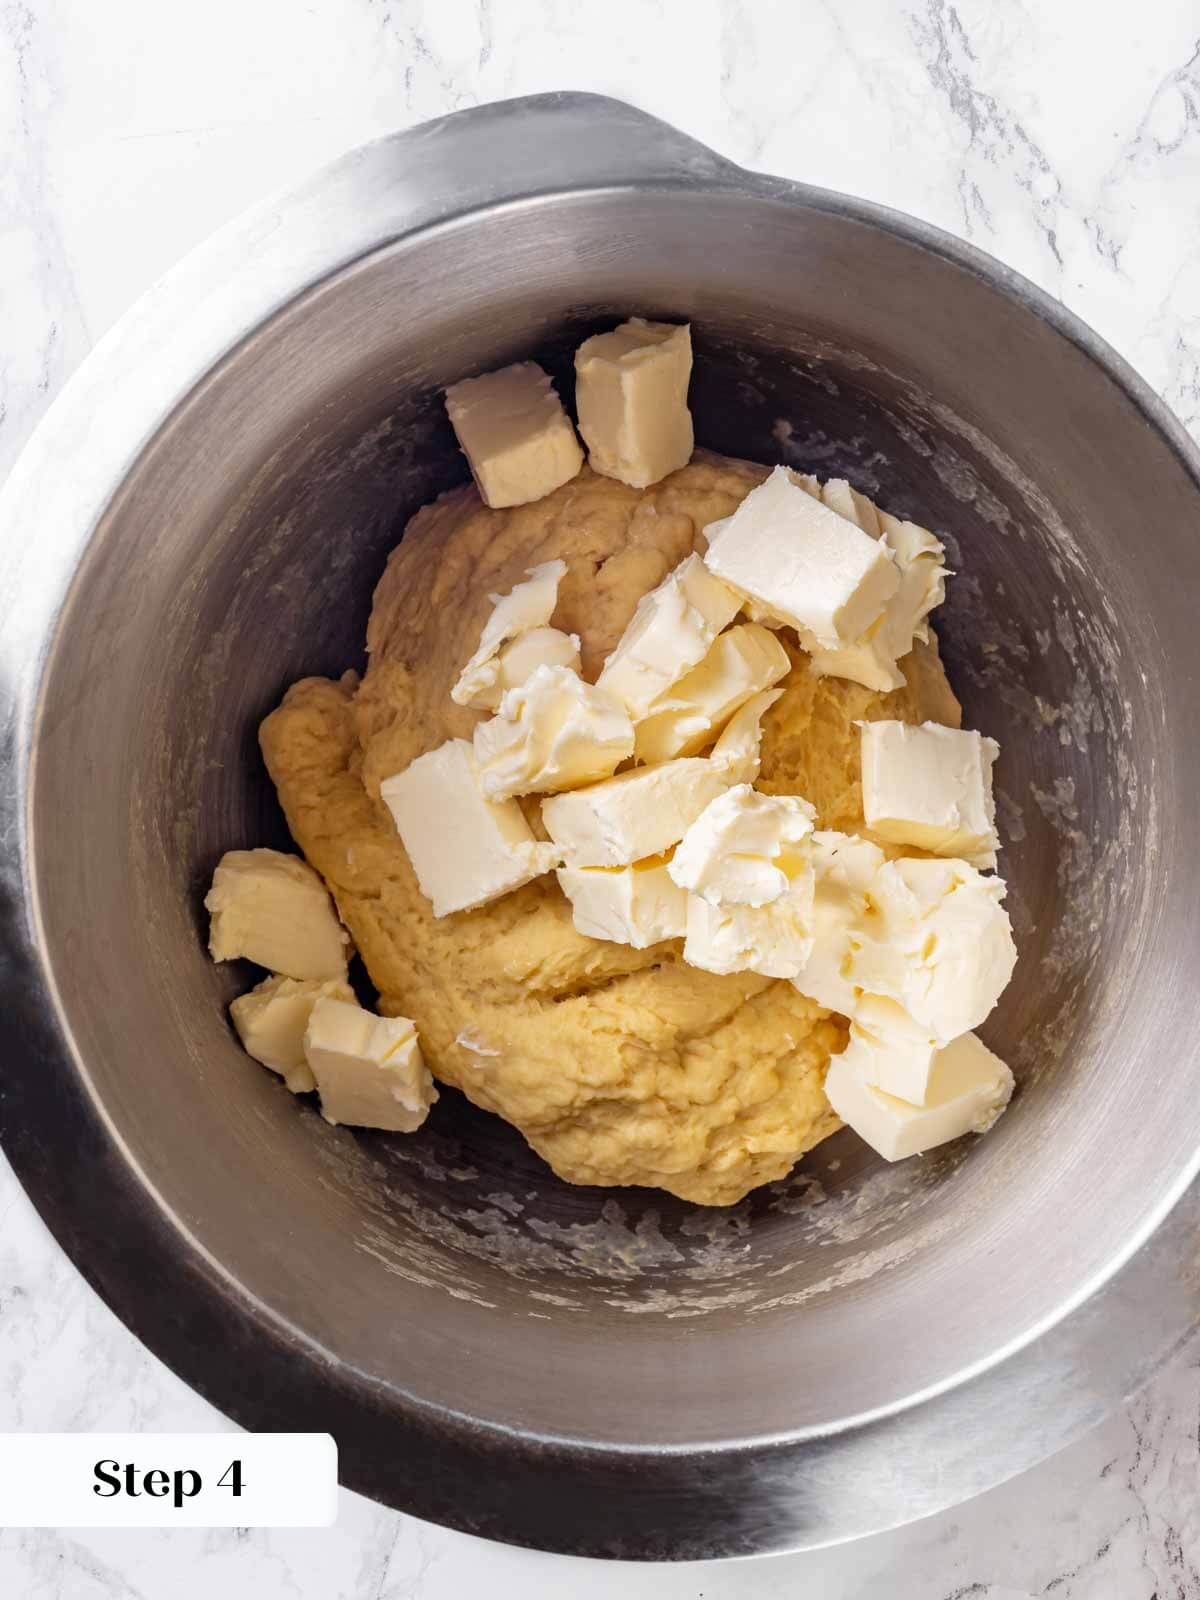
Step 4: Add the softened (not melted) butter to the stand mixer and mix on low until the butter disappears into the dough.
Adding the butter after developing the gluten shortens the mixing process and will ensure a nice strong dough that will support all those eggs and that butter! You can add the butter with the rest of the ingredients in Step 2, but it will take longer to develop. You might need to stop mixing before the perfect window pane has been achieved. If that is the case, simply add another set of folds to develop the gluten instead.
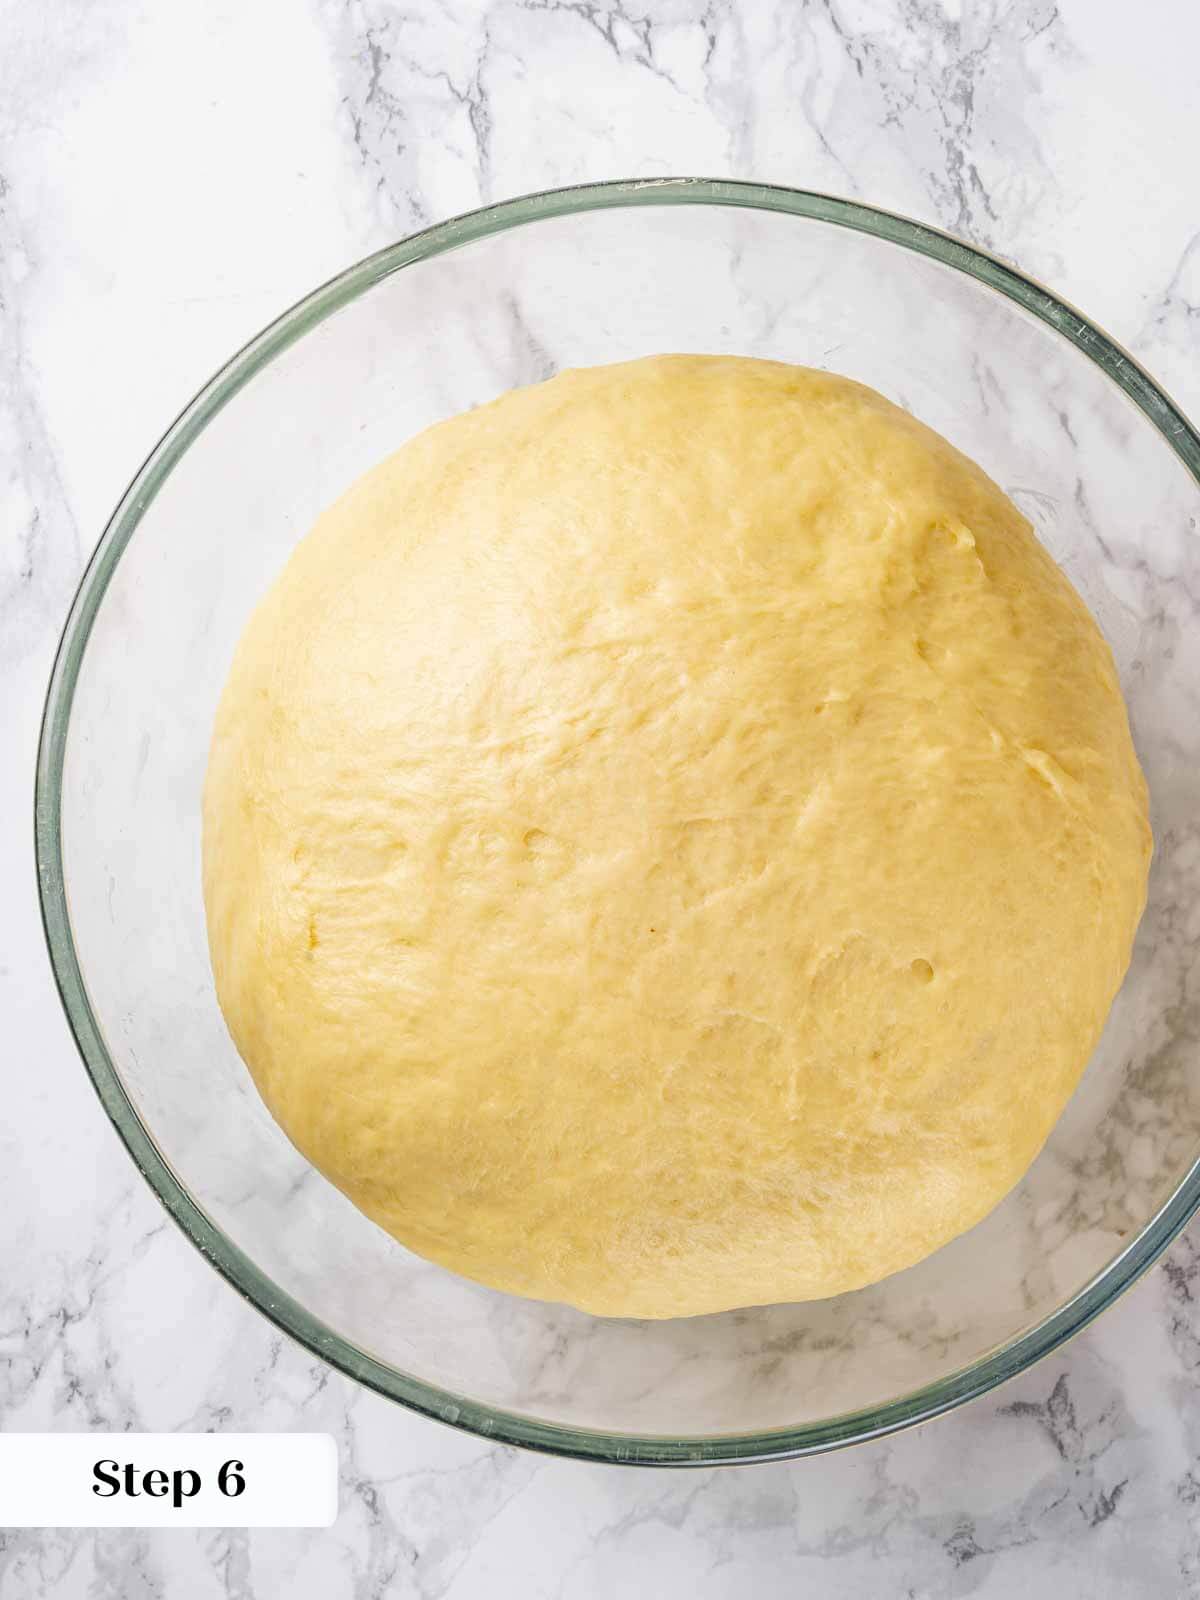
Step 5: Remove the dough from the stand mixer using a stiff silicone spatula or a bowl scraper, and place it in a lightly oiled bowl. Cover with plastic wrap and then place in a warm spot. Allow to proof 30 minutes. Give the dough one set of folds.
Set of folds: A set of folds is actually 4 separate folds. Fold each of the four sides into the center by pulling the dough up on one side and then fold it over on top of the remaining dough in the bowl. Rotate the bowl after each fold. This is developing more gluten!
Step 6: Bulk Proof: Cover the dough and place back into the warm spot to proof. Check the dough every 45 minutes. This will take about 1 ½ hours. You want to oil or flour your hand and feel the dough. It should feel light and airy and not stiff or dense.
Cold Proofing Brioche Dough: Traditional brioche dough is proofed for a long period of time in the fridge. The more butter in the dough, the more essential this step is. This recipe is easy and doesn’t require a cold proof. You can proof in the refrigerator overnight if desired instead.
Step 7: Pre-shape & Bench rest: Turn the dough out onto a lightly floured surface. Divide the dough in half. Fold each of the four sides towards you into the center, turning the dough after each fold. This will create a little packet. Flip the dough so the seam is on the counter. Shape it into a round by using both hands to pull the dough towards you. Once you have a round ball with a smooth top, cover to keep the top from drying out and allow it to sit and bench rest for 15 minutes.

Step 8: Final Shape: We are going to shape these into a log (or bâtard in French bread terminology). Take one of the dough rounds and flip it over. Grab the top and bottom edges and gently pull it into a small rectangle. Place it on the counter and fold the top edge down 2/3rd of the way and press it into the dough. Rotate so that the unfolded edge is now away from you and fold that edge down towards you to meet the bottom edge. Press to seal. Now we are going to do 2 thumb folds. Take the top edge with your right hand and fold it over your thumb about half way down, pressing to seal as you go. Repeat until you have folded the entire length. You will notice the dough getting tighter and also longer.
Keep in mind the length of your pan. You don’t want your dough to be longer than your pan. You can put it on the counter for reference if that makes it easier to judge the length.


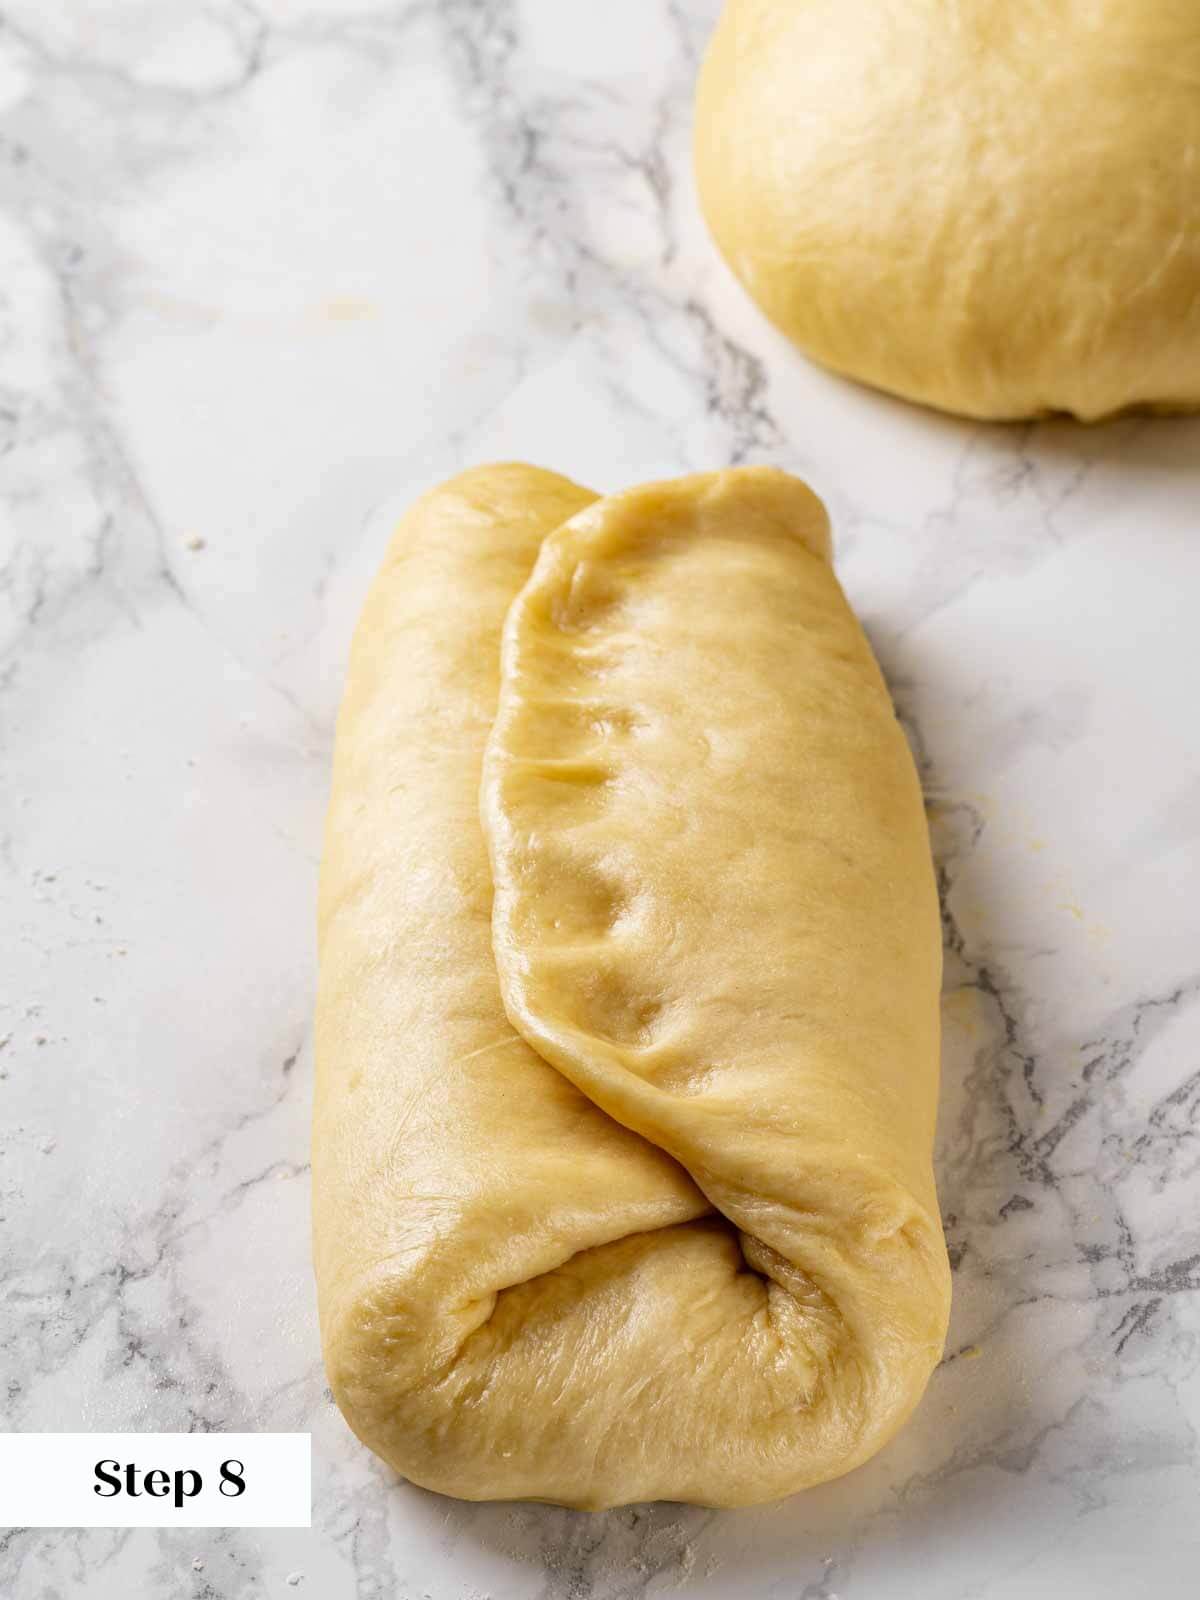
Step 9: Repeat the thumb fold once more, sealing really well on the bottom. You should now have a log shape that is even in width along the whole length, that is the length of your pan, and tight enough to not slouch onto the counter. If the dough is too loose, repeat the thumb fold once more.
Step 10: Spray with non-stick spray or butter a 9×5 inch loaf pan. Place the log into the sprayed pan seam-side down. Cover with plastic wrap and place once more in your warm spot.
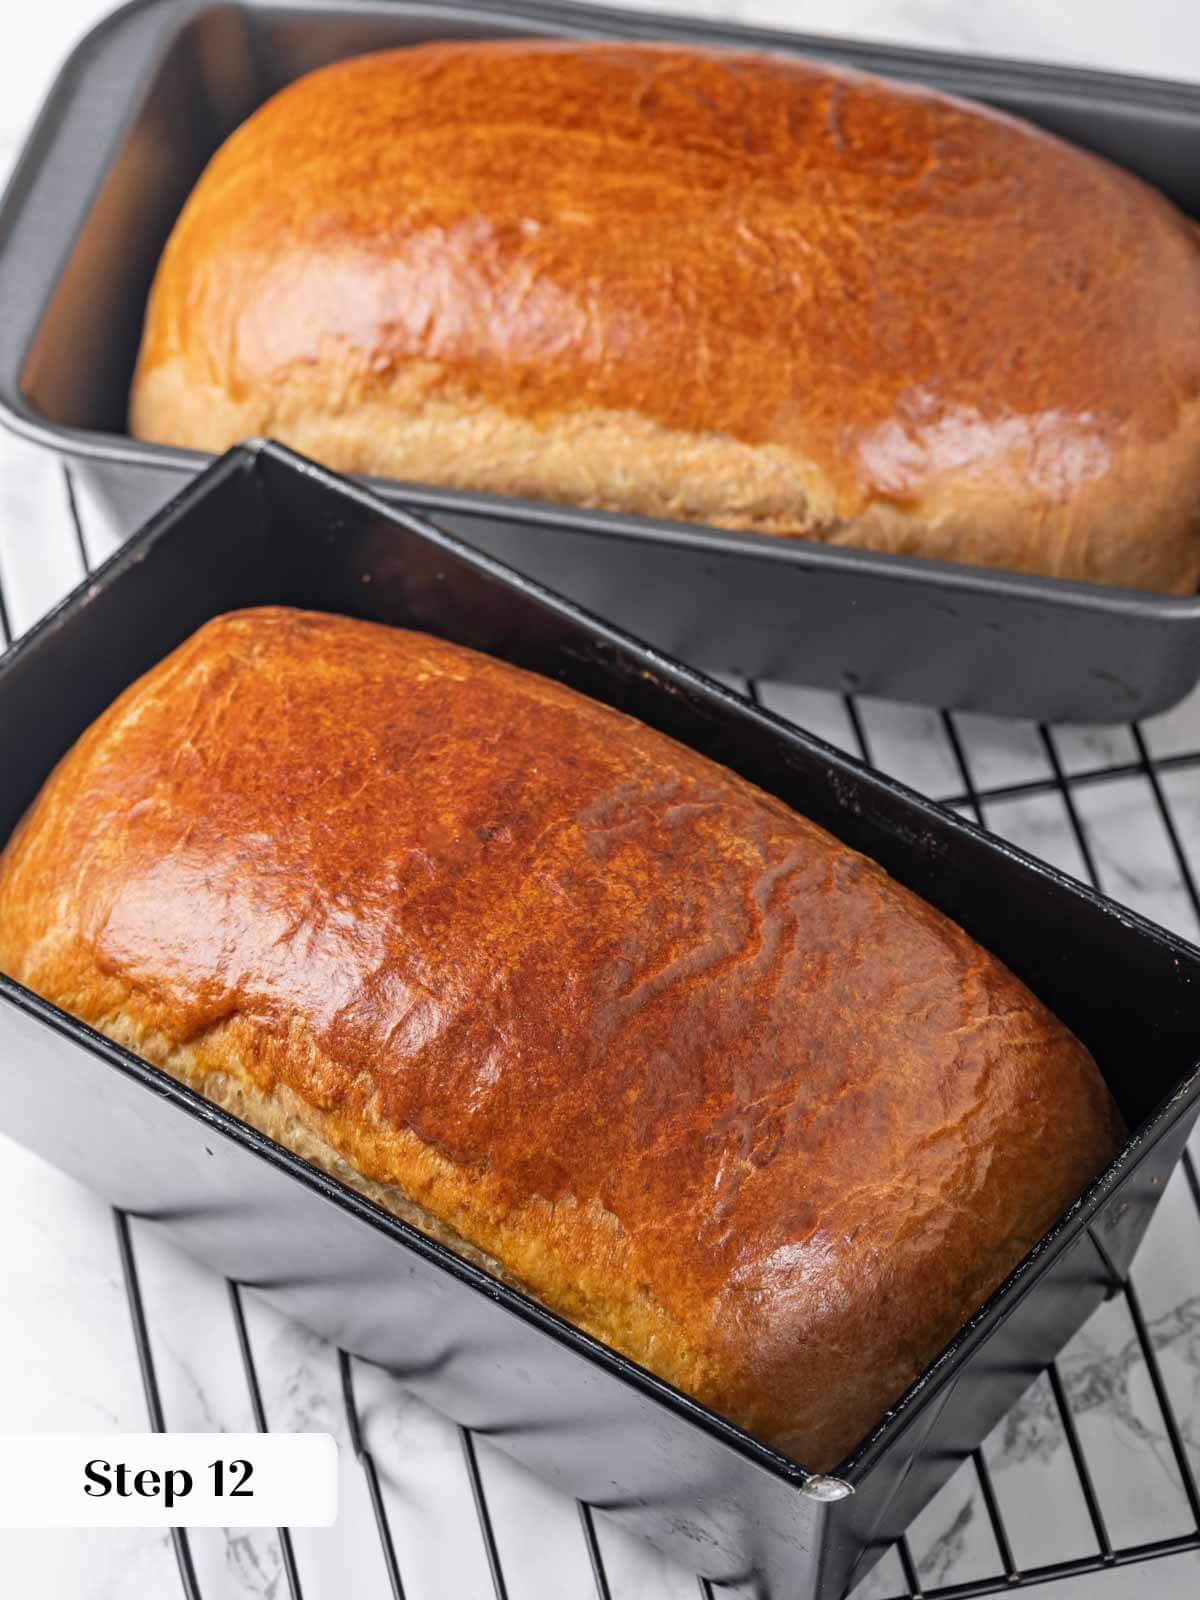
Step 11: Allow to proof until the dough just starts to reach the top of the pan. When that happens, preheat your oven to 350°F. Brush the top of the dough with a well beaten egg for a golden brown finish, being careful not to let it drip down the sides. As soon as it is preheated, bake for 35-40 minutes or until the internal temperature reads 185°F using an instant read thermometer.
Step 12: Allow to cool 5 minutes in the pan then remove to a wire rack to cool completely.
If the brioche loaf sits in the pan too long, it will steam and the sides and bottom will get soggy!


Chef Lindsey’s Recipe Tip
Typical brioche bread mixing methods call for adding the cold butter after gluten development, but I have found it to be different when mixing only 1-2 loaves in a home stand mixer. At home, butter incorporates best when added with the rest of the ingredients and the ingredients are initially incorporated with the paddle attachment!
Recipe FAQs
The butter and sugar will keep brioche soft at room temperature for up to 3 days before it begins to dry out. Store well-wrapped or in an air-tight container at room temperature for up to 5 days or freeze immediately after cooling for up to 2 months. The refrigerator will dry out the bread faster. I find it easier to pre-slice before wrapping and freezing. That way I can take out as many or as few slices as I want! Leftover brioche is also phenomenal in this pumpkin bread pudding, toasted for the best tuna melt, or used to soak up every flavorful bite in this Mangalorean prawn curry!
Brioche is a category of yeasted bread where a substantial amount of butter is added to the dough. Brioche bread, like this one, is often enriched with other additives like eggs and sugar, but it doesn’t have to be. It’s all about that butter! The amount of butter varies and is calculated as a percentage of the total weight of flour. This particular recipe is a 32% brioche, meaning that the weight of butter is 32% of the weight of flour. I have made up to a 50% brioche, which is about the maximum. It is difficult to get the gluten network to support much more than 50% butter. Less than 25% is really more of an enriched dough and not buttery enough to qualify as a brioche! (Still tasty though!)
A sponge is a bread making technique where a portion of the flour is combined with the yeast and all of the liquids. In this recipe that is milk and water. The sponge activates and gives the yeast time to start fermenting. It also allows the gluten network to begin forming. This decreases the total amount of time you have to mix or knead the bread!
Recommended Fluffy Bread Recipes
Dinner Roll Recipes
Brioche Bun Recipe
Sourdough Bread Recipes
Sourdough Raisin Bread

Yeasted Bread Recipes
The Best Stollen Recipe
Dinner Roll Recipes
Easy Dinner Roll Recipe
If you tried this recipe and loved it please leave a 🌟 star rating and let me know how it goes in the comments below. I love hearing from you; your comments make my day!

Brioche Bread
Ingredients
- 4 cups all purpose flour
- ½ cup water
- ¼ cup milk
- 2 ½ teaspoons kosher salt
- 1 tablespoon dry active yeast
- 2 eggs
- ¼ cup sugar
- ⅔ cup unsalted butter cold but pliable
Instructions
Mix the dough:
- In the bowl of a stand mixer whisk together the dry active yeast and warm water. Allow to sit for 10-15 minutes or until bubbly.
- Add the milk, sugar, eggs, salt, and flour to the stand mixer bowl. Fit with the paddle attachment and mix on low speed to incorporate.
- Once the ingredients are mixed and the flour has been hydrated, switch to the dough hook attachment and mix on medium speed until a smooth dough forms. It will not stick to the sides of the bowl. Use the window pane test to tell if the dough is ready to add the butter.
- Add the softened (not melted) butter to the stand mixer and mix on low until the butter disappears into the dough.
- Remove the dough from the stand mixer using a stiff silicone spatula or a bowl scraper, and place it in a lightly oiled bowl. Cover with plastic wrap and then place in a warm spot. Allow to proof 30 minutes. Give the dough one set of folds.
Bulk Proof:
- Cover the dough and place back into the warm spot to proof. Check the dough every 45 minutes. This will take about 1 ½ hours. You want to oil or flour your hand and feel the dough. It should feel light and airy and not stiff or dense.
Pre-shape & Bench rest:
- Turn the dough out onto a lightly floured surface. Divide the dough in half. Fold each of the four sides towards you into the center, turning the dough after each fold. This will create a little packet. Flip the dough so the seam is on the counter. Shape it into a round by using both hands to pull the dough towards you. Once you have a round ball with a smooth top, cover to keep the top from drying out and allow it to sit and bench rest for 15 minutes.
Final Shape:
- Final Shape: We are going to shape these into a log (or bâtard in French bread terminology). Take one of the dough rounds and flip it over. Grab the top and bottom edges and gently pull it into a small rectangle. Place it on the counter and fold the top edge down 2/3rd of the way and press it into the dough. Rotate so that the unfolded edge is now away from you and fold that edge down towards you to meet the bottom edge. Press to seal. Now we are going to do 2 thumb folds. Take the top edge with your right hand and fold it over your thumb about half way down, pressing to seal as you go. Repeat until you have folded the entire length. You will notice the dough getting tighter and also longer.
- Repeat the thumb fold once more, sealing really well on the bottom. You should now have a log shape that is even in width along the whole length, that is the length of your pan, and tight enough to not slouch onto the counter. If the dough is too loose, repeat the thumb fold once more.
- Spray with non-stick spray or butter a 9×5 inch loaf pan. Place the log into the sprayed pan seam-side down. Cover with plastic wrap and place once more in your warm spot.
- Allow to proof until the dough just starts to reach the top of the pan. When that happens, preheat your oven to 350°F. Brush the top of the dough with a well beaten egg for a golden brown finish, being careful not to let it drip down the sides. As soon as it is preheated, bake for 35-40 minutes or until the internal temperature reads 185°F using an instant read thermometer.
- Allow to cool 5 minutes in the pan then remove to a wire rack to cool completely.
Video
Notes
Nutrition
Before You Go
I hope you enjoyed this professional chef developed recipe. Check out our yeasted bread recipes like these sourdough rolls, sourdough cinnamon rolls, or read up on the very best stollen recipe for Christmas (brioche’s big sister!).


This brioche has completely ruined store-bought bread for me! I made one loaf for sandwiches and the soft, buttery texture took every sandwich to a whole new level! I used the second loaf for French toast the next morning, and it was absolutely incredible, soaking up the custard perfectly with that rich, tender crumb.
Hi,
I absolutely love your recipes! Do you have any suggestions for using these recipes in high altitude? I live in Denver, but so far have not been successful with such things as bread and popovers.
Hi Carol! Thank you for your kind words about my recipes! I don’t have much experience with high altitude baking. I do know that at higher altitudes yeast wields more power than lower altitudes, and so you might want to experiment with reducing the yeast and/or proofing time. I might start with reducing the yeast by about 25%. I’ve also read that adding a tablespoon of water or milk can help keep the flour hydrated in those settings. Let me know how your experiments work out, I always get so excited to be in community with folks from all over and to hear the conversation!