This post may contain affiliate links. Please read our disclosure policy.
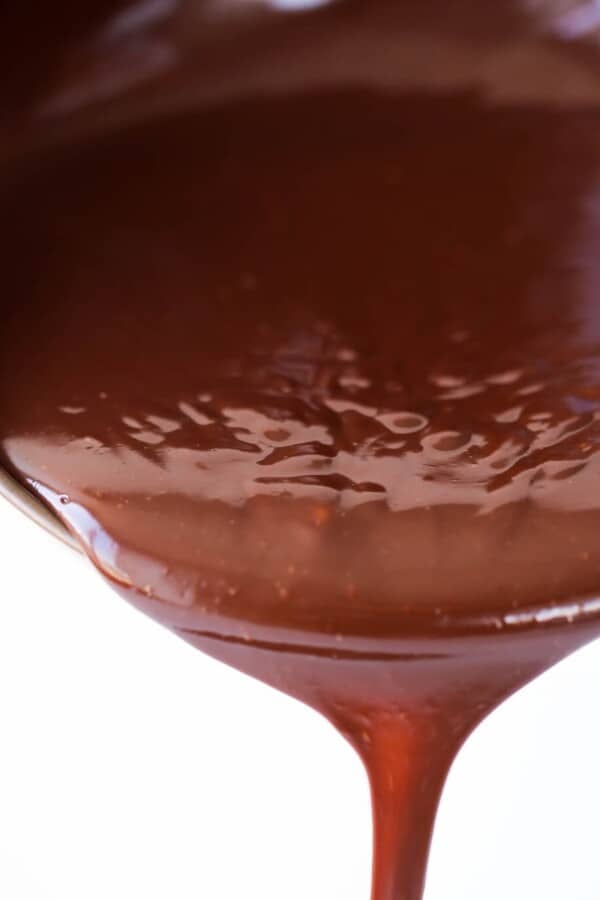
A thick, easy Salted Caramel Sauce recipe that you can make in under 15 minutes! Just 5 ingredients for the best caramel sauce you’ve ever tried! Use in bars, tarts, and cakes, or use it as a topping!
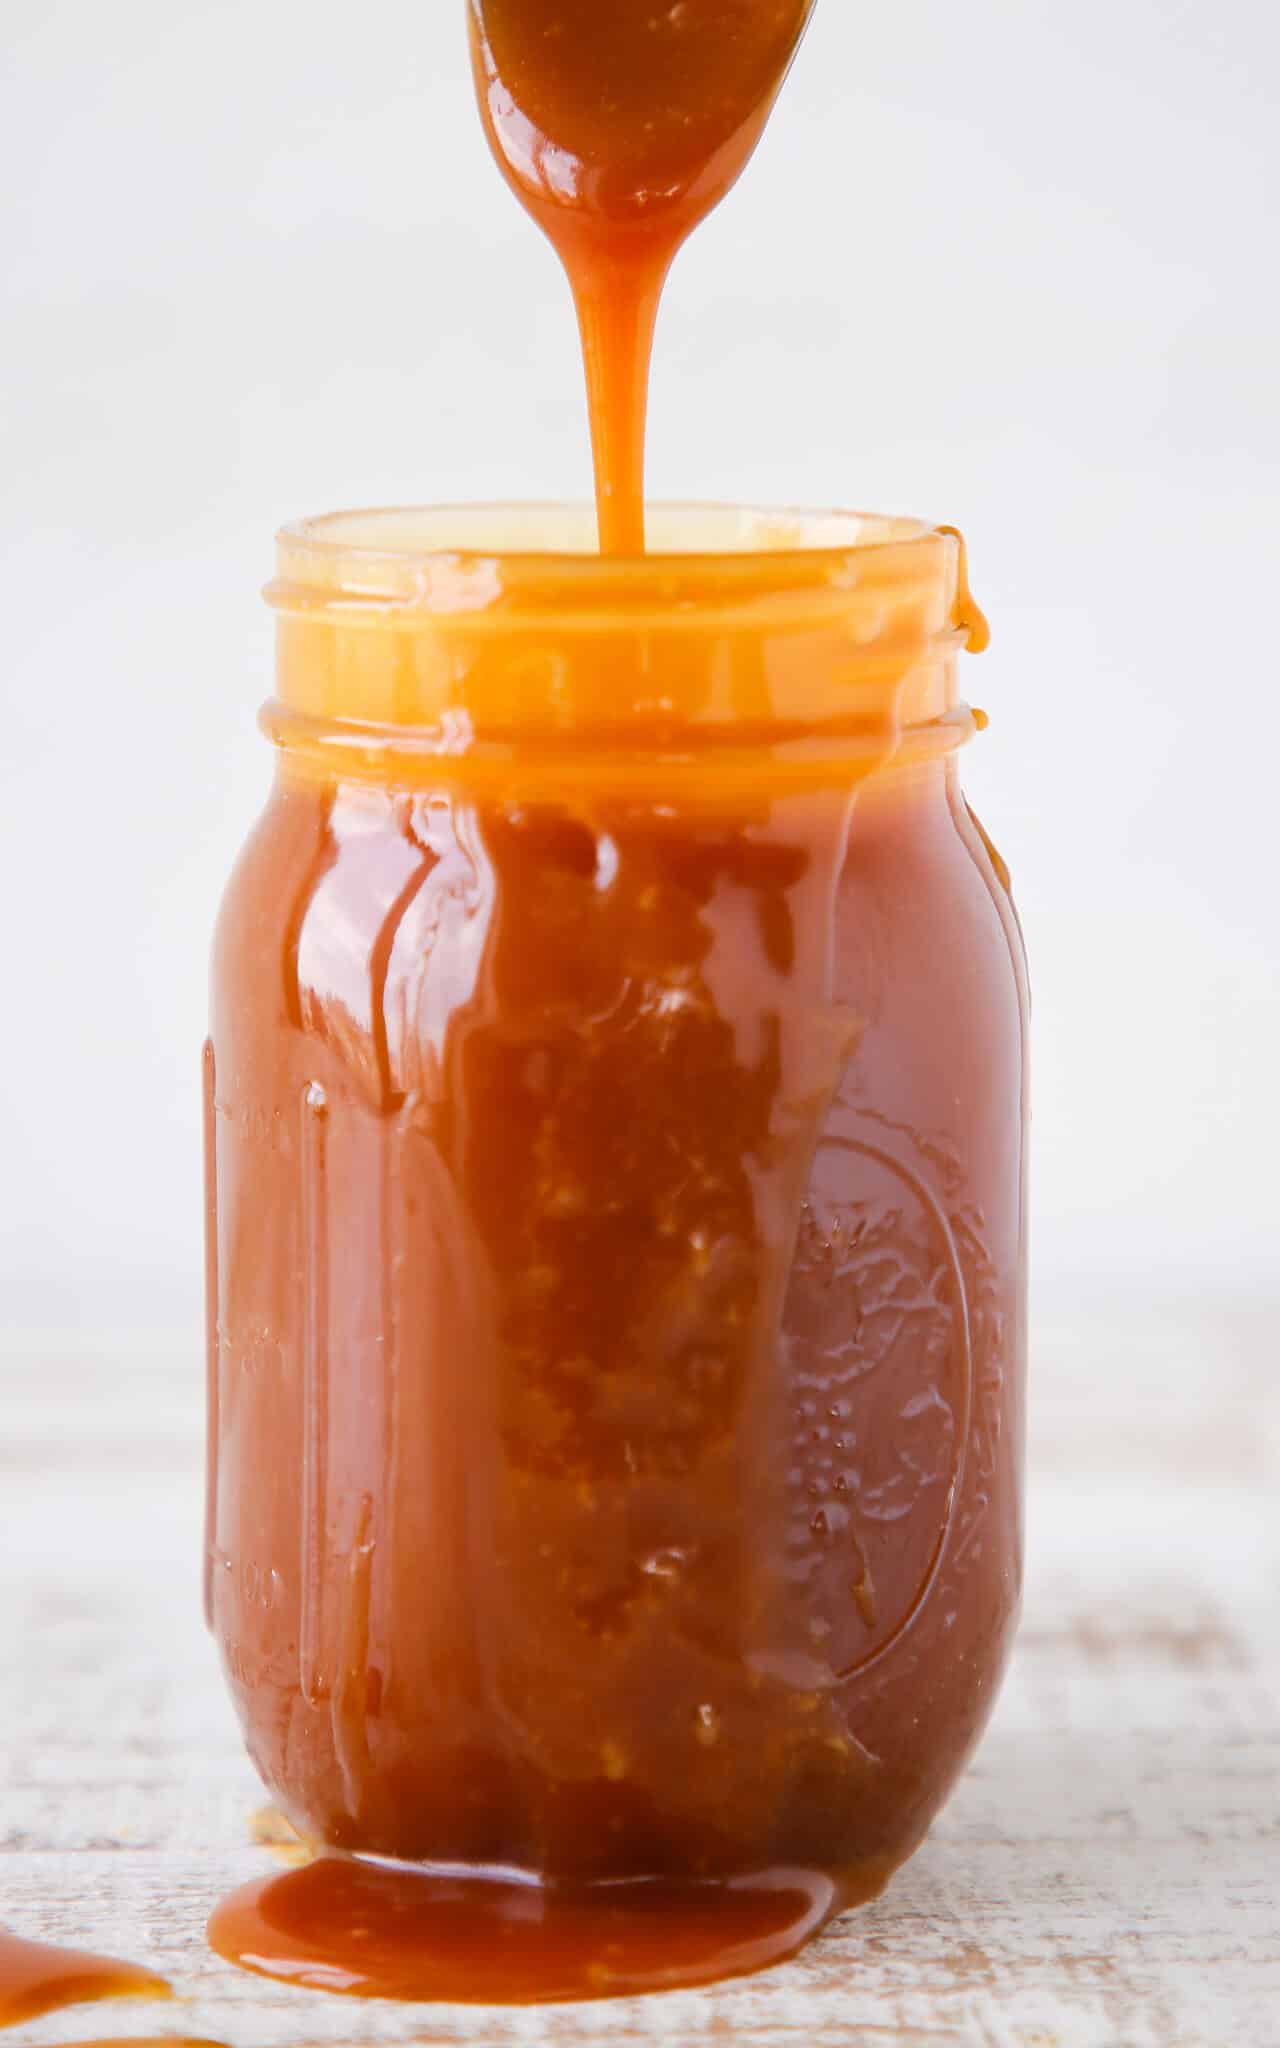
A versatile salted caramel sauce recipe made using the dry caramel method. It makes a thicker sauce, which is ideal for using in baked goods like these caramel chocolate chip blondies, buttercreams like this caramel swiss meringue buttercream, or custards, as well as topping desserts!
I give you all my professional tips and tricks to help you get the perfect caramel every time, and to teach you how to fix it the next time, because bad caramel days happen to everyone.
Table of Contents
- Why This is the Best Salted Caramel Recipe
- Professional Tips for Making Caramel Sauce
- Ingredients Needed
- Possible Variations
- How to use Homemade Caramel Sauce
- How to Make Homemade Salted Caramel Sauce
- How to Make a Wet Caramel
- Chef Lindsey’s Recipe Tip
- Frequently Asked Questions
- Salted Caramel Sauce Recipe
- Before You Go
Why This is the Best Salted Caramel Recipe
- It is thick and pourable. This makes a thicker caramel sauce, which makes it ideal not only for topping ice cream, cakes or other desserts, but also perfect for baking into recipes!
- Developed in a professional kitchen. This is the recipe that Chef Lindsey used in the restaurants. It is adaptable and can be made in very large batches.
- Perfectly balanced flavors. This sauce is rich but does not rely on too much butter or heavy cream for the flavor. The salt, caramel and cream flavors are in balance.
Professional Tips for Making Caramel Sauce
- The #1 Rule of Caramel is remembering that you are in control. You control the heat of the stove, and therefore you control how fast the caramel is cooking.
- Sugar caramelizes at different rates in the same pot. Don’t freak out when you see that parts are already a dark amber and you have a bunch of unmelted sugar. This happens every time. Embrace it. Stir or swirl the sugar crystals into those pockets. This will melt the granules and also lower the temperature of those pockets.
- Bring the butter, cream, vanilla and salt to a boil in the beginning. This way it’s already hot when you add it to the hot caramel and it won’t seize.
- Don’t fear the caramel. Take precautions but don’t have fear. Fear makes people do dumb stuff or act erratically. Never act erratically around 340°F sugar. The worst thing that can happen is your sugar gets too dark and you have to start over.
- Use a whisk to add your wet ingredients at the end and don’t stop whisking. Add them slowly to control the ferocity of the caramel but also don’t stop whisking! The whisking calms the caramel down. Choose the longest handled whisk you own. This is no time for a mini-whisk.
- After incorporating your cream/butter mixture pour the caramel into a heat proof glass, ceramic or metal bowl. This will stop the cooking process or your caramel will continue to get darker especially in a larger batch.
- Practice makes perfect. Sometimes you don’t know what “too dark” is until you take it there. Then you know and next time you can add your cream/butter mixture earlier. When training new cooks, this is the best way for them to learn. I’m like Goldie Locks: too light, too dark, waaaay too dark, just right.

Ingredients Needed
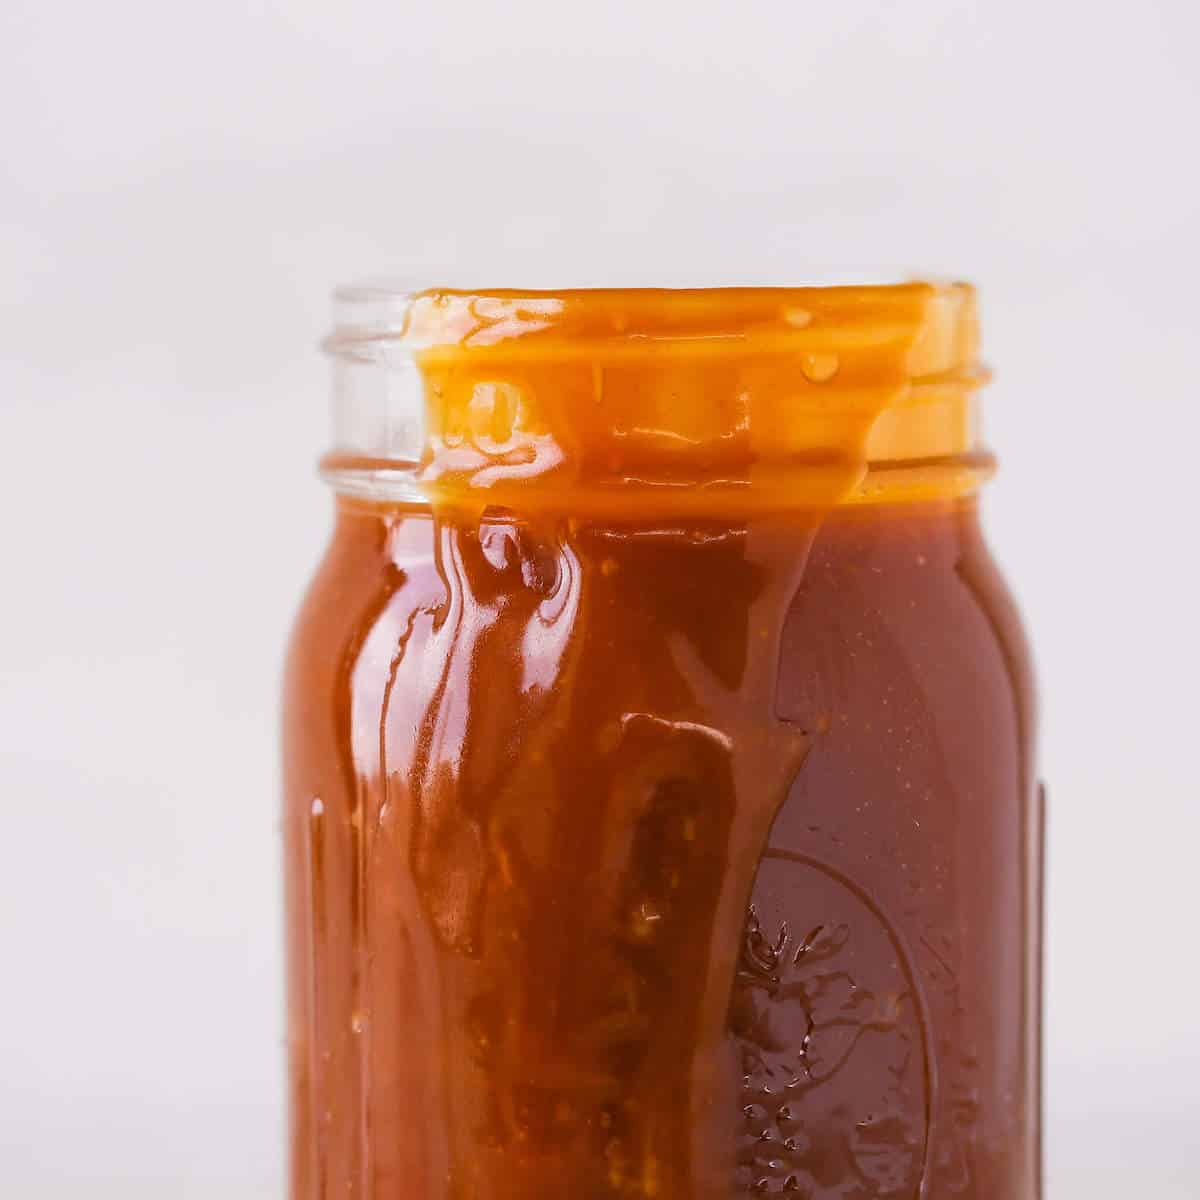
- Butter: This recipe calls for unsalted butter because of the additional salt that is added. You could roll the dice with salted butter and omit the salt.
- Heavy Cream: The heavy cream is here for flavor, texture and also to loosen the caramel into a sauce consistency.
- Vanilla Extract: I love the added vanilla extract in the sauce, but you could certainly omit it for a pure salted caramel version.
- Kosher Salt: A lot of recipes call for fleur de sel, and while flaky sea salt is delightful, I find it harder to ensure it dissolves in the final caramel sauce. I also find the “sea salt” flavor to be overpowering unlike kosher salt or even regular table salt, but these are just my opinions.
- Granulated Sugar
See the recipe card for full information on ingredients and quantities.
Possible Variations
- Change the consistency: For a looser sauce, add more heavy cream to the recipe as written. I don’t suggest adding more than an additional ¼ cup.
- Change the flavor: While technically a gastrique, you can use lemon juice, orange juice or apple cider in place of the heavy cream. This will make a bright caramel sauce that will temper some of the sweetness. I usually finish the gastrique with a touch of butter just for the added silkiness and to round out the flavor. Be sure to reduce the salt if changing out the dairy.
- Infuse the caramel sauce: This is ideal for adding flavors like whole cinnamon sticks, vanilla bean pods (spent), or other unexpected spices. I usually make the sauce, add the spice or vanilla bean, reheat both together, and then remove from the heat and cover to infuse. Taste as you go because some spices can be more overpowering than others.
How to use Homemade Caramel Sauce
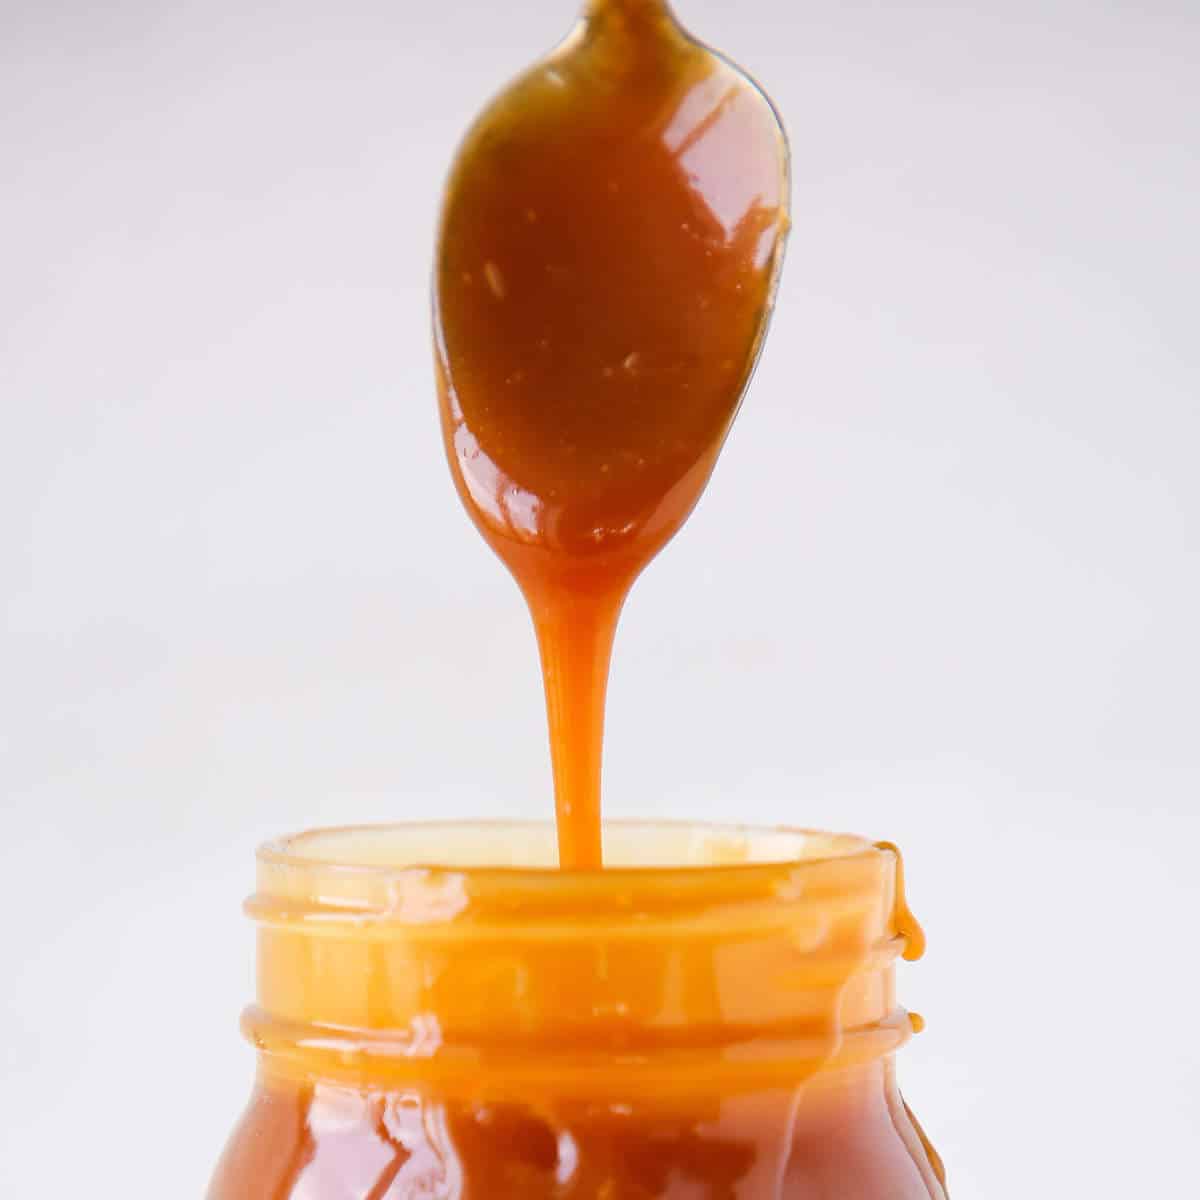
- Baked into cookies, cakes & more! The thickness of this sauce makes it ideal for baking into desserts like these chocolate caramel cupcakes, caramelitas, caramel butter bars, caramel apple tart or these caramel chocolate chip blondies! It won’t loosen the batter too much or change the texture.
- Uses it as a topping for cakes, tarts, & ice cream. Pour this salted caramel sauce over just about anything like I did with this caramel molasses pound cake. Drizzle it on cheesecake or to add extra pizzazz to vanilla cake.
- Mix it in to change the flavor of buttercreams or custards. Use it to flavor buttercream like this caramel Swiss meringue buttercream or the easy caramel buttercream from these caramel apple cupcakes. Then move beyond buttercream and try it in this caramel pastry cream or caramel pudding.
- It makes a delicious filling or swirl. Use it to fill cupcakes like these caramel cupcakes, or swirl into ice cream like the chocolate caramel ice cream! Make an easy dessert by making salted caramel tartlets.
How to Make Homemade Salted Caramel Sauce
Further details and measurements can be found in the recipe card below.
Step 1: In a small saucepan combine cream, butter, vanilla and salt. Bring just to a boil over medium heat and set aside.
Step 2: Heat a heavy bottomed pot with high sides over medium high heat. Begin by sprinkling the granulated sugar over the bottom in a thin layer, when that begins to melt, sprinkle some more. Keep sprinkling until all the sugar is in the pot. As parts begin to melt, gently stir with a wooden spoon and break up any clumps that form.
If, despite your best efforts, you still have undissolved sugar pieces when your caramel reaches dark amber, don’t fret, just strain them out with a sieve. Worse things have happened in pastry.
Step 3: Continue to stir to distribute the sugar into any hot spots and use the already melted sugar to melt the rest. Once the sugar has melted stop stirring and swirl until a dark amber color is achieved.
If you have a hard time telling the color of the caramel, tilt the pot towards you so that there is only a thin layer. I find it easier to see that way. A medium amber is a perfectly acceptable color but I like to take mine to deep amber color, which is right when it starts to smoke but before it smells burnt.
Step 4: Remove from the heat and place on a trivet or folded towel. Slowly pour in your cream/butter mixture while constantly whisking. You don’t want to add the cream too fast or it will bubble up aggressively and could burn you. Don’t fear, just keep whisking.
Step 5: Once all the liquid is incorporated, pour into a heat safe bowl (glass, ceramic, pyrex, metal are all fine). Allow to cool to room temperature then pour into the storage container of your choice.
How to Make a Wet Caramel
You can make this recipe using the wet caramel method by adding ¼ water and ¼ cup light corn syrup. The corn syrup is optional but really helps avoid crystallization.
- Step 1: In a small pot combine cream, butter, vanilla and salt. Bring just to a boil and set aside.
- Step 2: Pour the sugar into a heavy bottomed pot with high sides. Shake to distribute sugar in an even layer over the bottom. Pour the water around the edges and stir to hydrate the sugar. Stir carefully so that no sugar gets on the sides of the pot. If you did get sugar on the sides, don’t worry. Dip a clean pastry brush (or folded paper towel) in water and wash the sugar off. Don’t be concerned with the amount of water because it will all evaporate anyways.
- Step 3: Pour the corn syrup into the sugar water mixture and turn on the burner to medium high. Allow the sugar to come to a boil before you disturb it. Gently swirl the pot but do not stir! This will allow you to redistribute the caramel around the pot and control the hot spots.
- Step 4: Continue to cook and occasionally swirl until a dark amber color is achieved.
- Step 5: Remove from the heat and place on a trivet or folded towel. Slowly pour in your cream/butter mixture while constantly whisking.
Step 6: Once all the liquid is incorporated, pour into a heat safe bowl.
Chef Lindsey’s Recipe Tip
There is a sliding scale of acceptable caramel flavor. From the very light in color and light on taste to the almost burnt, dark, sultry caramel that I prefer. I add the butter when the sugar turns a deeper, rich amber color and there is just the slightest hint of burning scent when you waft the vapors (just like they taught in middle school chemistry).
Frequently Asked Questions
Cool completely then store in an airtight container at room temperature for up to a month, refrigerated for up to 2 months or frozen forever. It will gradually lose its fresh taste, so try to use it within a few months.
If storing frozen, simply thaw at room temperature or in the fridge. You can also microwave at 50% power in 30 second intervals, stirring between with a silicone spatula.
Yes, you can absolutely make a larger batch. You are limited by the size of your pot. Be sure to account for the caramel bubbling up when the cream and butter are added. I don’t need to tell you what happens if you don’t. That being said, I prefer to make large batches of caramel with the wet caramel method because it is more consistent.
Lastly, you must account for carryover cooking when making large batches of caramel. It will continue to caramelize as it cools. I suggest pouring it into a long, flatter container like a baking dish that will increase the surface area and thus allow it to cool faster.
The only critical difference between the wet and dry caramel method is the addition of water and sometimes light corn syrup or glucose to the sugar before caramelization in the wet method. It is imperative to swirl, never stir, a wet caramel.
Using the wet caramel method allows you to make large batches with more control, and it allows you to do other things while the sugar syrup cooks. This is critical in a professional kitchen!
There are 3 reasons to put butter in caramel sauce: it makes the sauce looser, adds flavor and creates a silky mouthfeel.
Caramel sauce can be grainy if the sugar mixture seized while caramelizing, if the sugar wasn’t cooked long enough (it was too light), or if the butter/cream mixture was added to cooled sugar syrup.
You do not need a candy thermometer for caramel sauce. A thermometer will tell you when you’ve reached the caramel stage but it is better to make caramel sauce by sight. The color of the cooking sugar will tell you everything you need to know.
If you tried this recipe and loved it please leave a 🌟 star rating and let me know how it goes in the comments below. I love hearing from you; your comments make my day!
Salted Caramel Sauce
Ingredients
- 4 tablespoons unsalted butter cut into pieces
- ¾ cup heavy cream
- ½ teaspoon vanilla extract
- ¼ tablespoon kosher salt
- 1 ½ cups granulated sugar
Instructions
Dry Caramel Method
- In a small pot combine cream, butter, vanilla and salt. Bring just to a boil and set aside.
- Heat a heavy bottomed pot with high sides over medium high heat. Begin by sprinkling the granulated sugar over the bottom in a thin layer, when that begins to melt, sprinkle some more. Keep sprinkling until all the sugar is in the pot. As parts begin to melt, gently stir with a wooden spoon and break up any clumps that form.
- Continue to stir to distribute the sugar into any hot spots and use the already melted sugar to melt the rest. Once the sugar has melted stop stirring and swirl until a dark amber color is achieved.
- If you have a hard time telling the color of the caramel, tilt the pot towards you so that there is only a thin layer. I find it easier to see that way. A medium amber is a perfectly acceptable color but I like to take mine to dark amber which is right when it starts to smoke but before it smells burnt.
- Remove from the heat and place on a trivet or folded towel. Slowly pour in your cream/butter mixture while constantly whisking. You don’t want to add the cream too fast or it will bubble up aggressively and could burn you. Don’t fear, just keep whisking.
- Once all the liquid is incorporated, pour into a heat safe bowl (glass, ceramic, pyrex, metal are all fine). Allow to cool to room temperature then pour into the storage container of your choice.
Wet Caramel Method
- You can make this recipe using the wet caramel method by adding ¼ water and ¼ cup light corn syrup. The corn syrup is optional but really helps avoid crystallization.
- In a small pot combine cream, butter, vanilla and salt. Bring just to a boil and set aside.
- Pour the sugar into a heavy bottomed pot with high sides. Shake to distribute sugar in an even layer over the bottom. Pour the water around the edges and stir to hydrate the sugar. Stir carefully so that no sugar gets on the sides of the pot. If you did get sugar on the sides, don’t worry. Dip a clean pastry brush (or folded paper towel) in water and wash the sugar off. Don’t be concerned with the amount of water because it will all evaporate anyways.
- Pour the corn syrup into the sugar water mixture and turn on the burner to medium high. Allow the sugar to come to a boil before you disturb it. Gently swirl the pot but do not stir! This will allow you to redistribute the caramel around the pot and control the hot spots.
- Continue to cook and occasionally swirl until a dark amber color is achieved.
- Remove from the heat and place on a trivet or folded towel. Slowly pour in your cream/butter mixture while constantly whisking. You don’t want to add the cream too fast or it will bubble up aggressively and could burn you. Don’t fear, just keep whisking.
- Once all the liquid is incorporated, pour into a heat safe bowl. Allow to cool to room temperature then pour into the storage container of your choice.
Video
Notes
Nutrition
Before You Go
I hope you enjoyed this professional chef tested recipe. Check out our other delicious, chef-developed dessert topping and sauce recipes!



Might I add to your list of “…Things I’ve learned…”? I only use raw sugar and did not imagine this could pose any problems until the sugar starting melting then realized very quickly it was already the desired color just as it completely melted. After a short moment of panic I simply used the smell of the sugar as my guide. It was also imperative to have everything lined up and ready so at the crucial moment of life or death, there’s no need to go madly searching for anything.
I’m happy to say all turned out well in the end and I have several little jars of an absolutely divine sauce..
I’m so glad to hear it worked with raw sugar too! Even with regular sugar the smell is very important. That is a great point about having everything at the ready! It is absolutely necessary! Enjoy your sauce!
Oh my! This *is* the best caramel sauce recipe. I plan to use this sauce later today for this salted caramel pudding: https://www.portuguesegirlcooks.com/2012/01/salted-caramel-pudding/. I hope I don’t sample too much before i have a chance to make it! Thanks for the recipe!
Sampling is definitely always a problem! I’ll check out that caramel pudding! It’s been forever since I made a pudding. Enjoy!!
Hi! Can this sauce be turned into firmer caramel candy if cooked to a higher temp after adding the cream when the sauce is done like other caramel candy recipes call for ? Thanks!
It definitely can!
Oh no! I’m having difficulties!… My sugar that I am melting in step one is already getting much too dark before all the ‘clumps’ have broken down and dissolved!…. Even when my temp is med-low!!! Then finally when it’s just barely dissolved it looks quite dark( almost too dark) so I add my warm butter right away but it doesn’t want to incorporate and I end up with large golfball hardened size clumps among the mixture of butter and sugar that’s not incorporating!!! ( so then the first time I attempted to whisk the butter for a few minutes to get it to incorporate and everything seized up real hard so I couldn’t even add the cream ) but the second time I add the cream right away even though the butter had not come together with the melted sugar and the mixture only starts to smooth out after 5 minutes of hard whisking over medium heat but even then I am left with big clumps of the original sugar mixture that never incorporated well with the butter and cream at first!!! Ahhh! Help! Please! Thankyou!!
Oh no!!! I feel your frustrations! This will sound counterintuitive, but you need to melt the sugar over medium-high heat. If you melt it over low it will take too long for all of it to melt and you will have a mixture of unmelted sugar and burned sugar. I, too, have done this. It sounds like you are using an electric burner which will exacerbate all these problems because the heat is inconsistent and uneven to begin with. When making caramel on an electric stove it is important to swirl the caramel more frequently and use a heavy-gauge saucepan if possible. When the sugar starts to melt, it will melt unevenly. Don’t worry, just swirl and try to rotate your pan to get it to cook evenly on the burner. You can also try a long handled spoon instead of a whisk to add the butter and cream.
One more thing…when you say “clumps” what do you mean? If your sugar is clumped before you start melting it, you definitely want to smash those because they will take too long to melt otherwise. I hope all that helps, Lisa! Caramel is so temperamental! One of these days I’ll get a gas stove and I’ll make caramel carefree! 🙂
Thank you a million times! I will try again! But when I said clumps I meant basically the sugar ( which had no clumps before starting) as it is starting the melting process forms it’s own clumps and somehow some of them never finish dissolving by the time the rest is perfect darkness! Maybe the higher heat will help this. But the mixture is really darkening so quickly on me! And like I said im also really struggling to get first the butter and then the cream to incorporate smoothly the butter really just stays liquid apart from the sugar ! I’ll try again ! My goal then at the end was to turn this in caramels to cut so basically after i finally get a smooth mixture ( hopefully) then I would continue to cook to a higher heat ( how high?? Of just a few minutes longer of cooking?) in order for this to firm enough to turn in caramel candies? Thank you thank you! Would lemon juice help to keep this from crystallizing? Or is that for a completely different purpose?
Welcome! The sugar will melt unevenly and that is totally normal! Just swirl vigorously to try and get some of the melted sugar on the dry sugar! I only get crystalized clumps in the beginning if I try to stir or whisk my sugar before it melts. Others have had success doing this but it NEVER works for me, so I just leave it alone and swirl. You can also get crystals in the beginning if you have something else in the pan other than sugar when you start cooking it. I have read that adding lemon juice can keep this from happening but I’ve never tried it. You can also try the wet method, which means just adding just enough water to wet the sugar in the pan, stirring until the sugar is dissolved and then following the recipe as written. I prefer the dry method but that is a personal preference. If the sugar crystalizes before adding the butter, I have never been able to melt it all back down after adding the butter and sugar. If it is only a few pieces, then you can just take them out with a spoon and no one will be the wiser! 🙂
To make soft caramel candies you want to cook the sugar to the firm ball stage which is around 245 degrees F. If you don’t have a candy thermometer, then you can do the test the old fashioned way by dropping a dollop into cold water. When you remove the caramel from the water it should be in a firm ball that will flatten when squeezed but will stay in a ball in your hand. It should be malleable. If you cook it past this stage then you will get into the soft and hard crack stages that get completely hard when you drop them in the water.
Ps- the last batch even after whisking and whisking to smooth it out still has all sorts of clumps and chunks left in it now after setting!
Thanks I’m still trying!! To make caramels Do you mean cook it to 245 after adding the cream and butter?
That’s correct. Add the butter and cream when the caramel hits your desired level of “burnt”. I like mine a darker amber but that is personal preference. The caramel as pictured was a lighter amber before I added the butter and cream. Return the caramel to the heat and continue to cook until it reaches the correct temperature. You can also stir or whisk away at this point.
Thankyou for all your help! Ok well after 2 more attempts I’ve managed to get much less clumping when I do it the way you described with less mixing! but during the sugar melting period it’s turning much too dark before it’s all melted resulting in burnt flavored very too dark caramel! I just can’t get it to darken less quickly to give the rest of the sugar time to melt! Hmmm any other ideas with my darkening problem? It’s just much much too dark to quick that’s all I can say to explain! The portions that melt first hit the perfect color when there’s still a lot of sugar left to melt so then I wait for the rest to melt while swirling like you said ( which was a great idea) but before that happens it’s already too dark and burnt! Yes I’m using an electric. Thankyou again for trying to help me!
Hi, Lindsey. What a great recipe! I’m going to try it soon with an apple pie (or perhaps a crumble). Are 12 tablespoons of butter 170 grams? Thanks
I hope you do try it, Flo! It would be delicious with apples. 12 T of butter weigh approximately 170 grams.
I am suuuuch a failure….. I tried making your caramel sauce and everything went wrong… I added water to the sugar, but I think I added a bit too much. My sugar got clumpy and then, after about 10 minutes, it started to turn amber (it was still clumpy, though). I had to clean up my mess with boiling water.
I think I’ll just give up on caramel, since it’s the second time i’ve tried making it (the first time it burnt).
Oh no!! You are not a failure! I would be willing to bet that 99% of people who have made caramel have also ruined caramel. I include myself in this 99%. I actually burned the caramel twice and my hand in this post!
This is a dry caramel recipe meaning you don’t mix the sugar with water before heating. I have tried several “wet” caramel recipe before and they often add corn syrup in with the water and sugar to keep the sugar from clumping or seizing up. You are also supposed to stop stirring as soon as the sugar dissolves. I have had more luck using the dry method. It sounds like it worked except that your sugar seized. I have never had luck getting the sugar to remelt completely before caramelizing, so you are not alone here either! I hope you do try again; it’s so much better than store-bought! 🙂
This looks totally irresistible.. a perfect sauce for ice cream in this time of the year,
Yes it is! I was just trying to figure out how to swirl it into my first batch of homemade ice cream!
Have you tried canning this? I would like to make several batches to have on hand ( since I go through it so quickly!), but I didn’t want to waste all my beautiful caramel if it wouldn’t work:(
I haven’t tried canning it but I have used it over the course of several months and found it tasted exactly the same. I keep it in the jar pictured, tightly sealed in the coldest part of my refrigerator. I’ve done this with several batches and the only trouble I had was that some of the larger flakes of salt eventually settled towards the bottom but I think this was because I forgot to crush the salt prior to adding it so it didn’t fully dissolve.
Wow, I’m just about to lick my screen! Seriously, this looks amazing! I love caramel, salted, butterscotch, you name it! Definitely pinning it! I have to make this asap!
I hope you do! It’s so delicious! And thanks for the pin!
Not sure how I could’ve possibly missed this post – I absolutely adore caramel sauce!
Sigh. Caramel! Its a fabulous thing. Whoever created it should win some sort of award.