This post may contain affiliate links. Please read our disclosure policy.
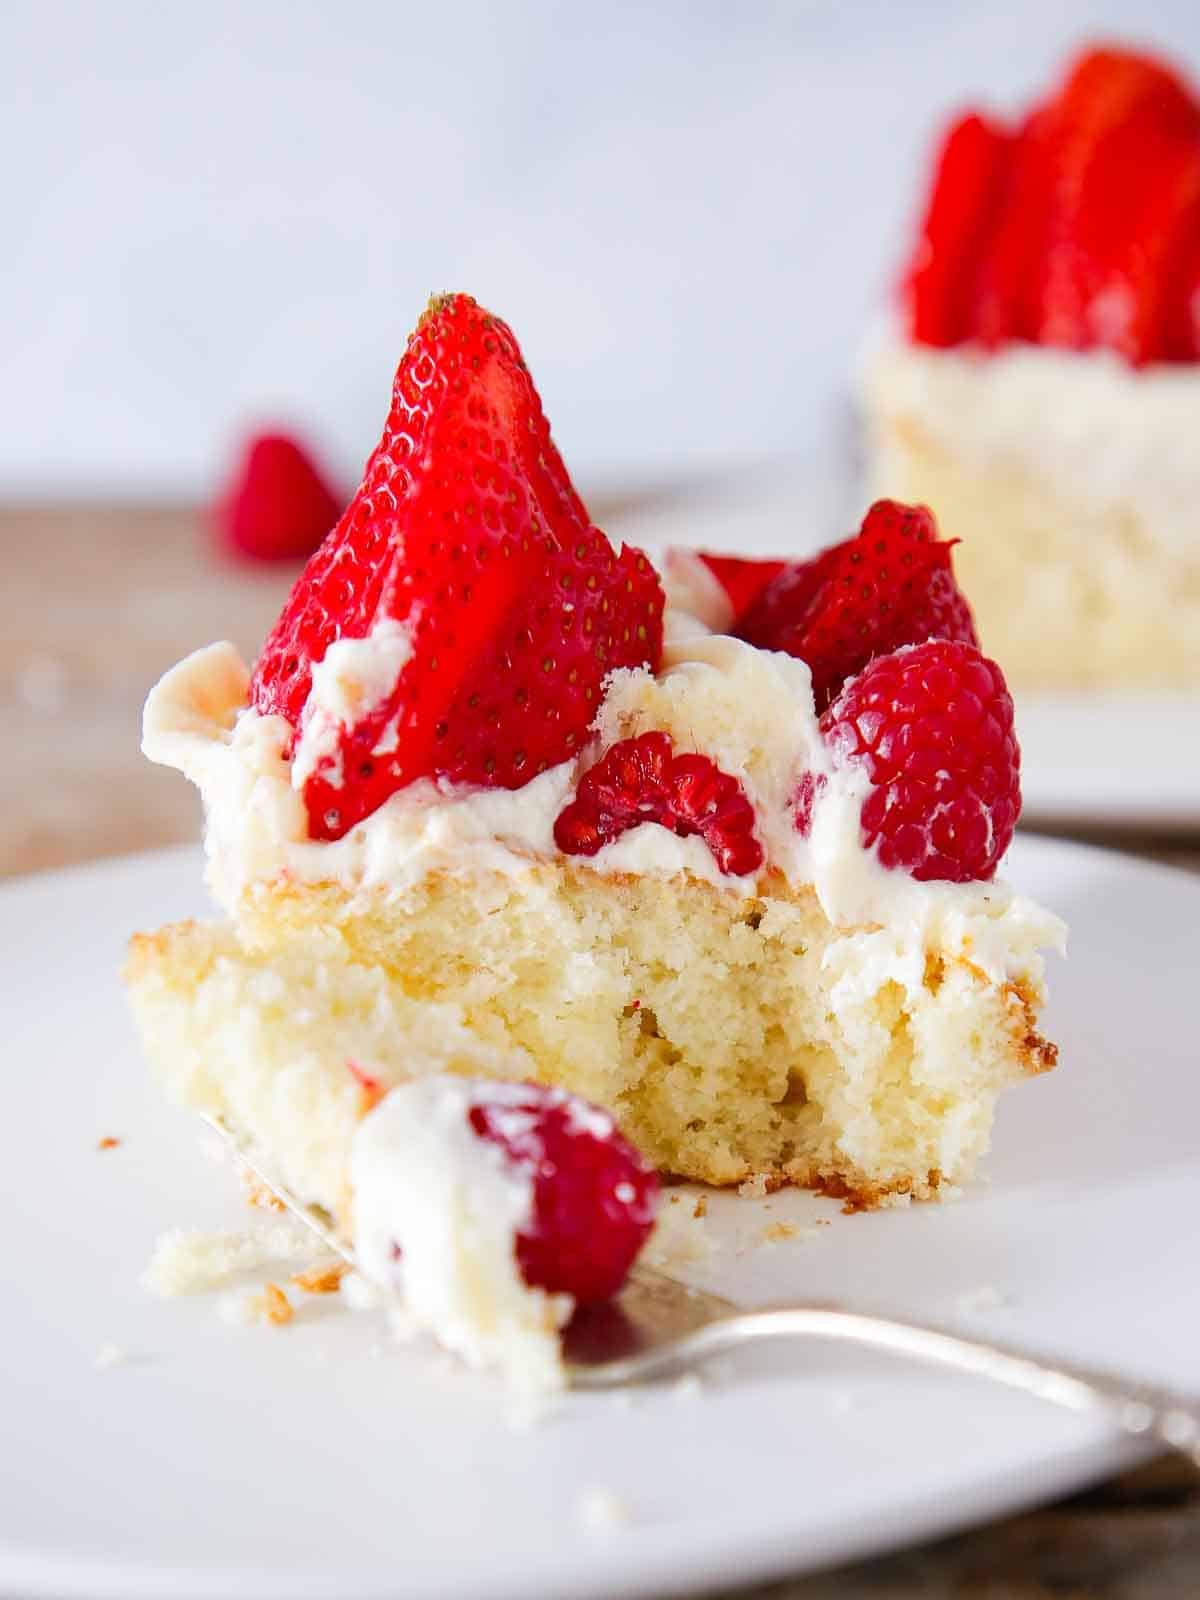
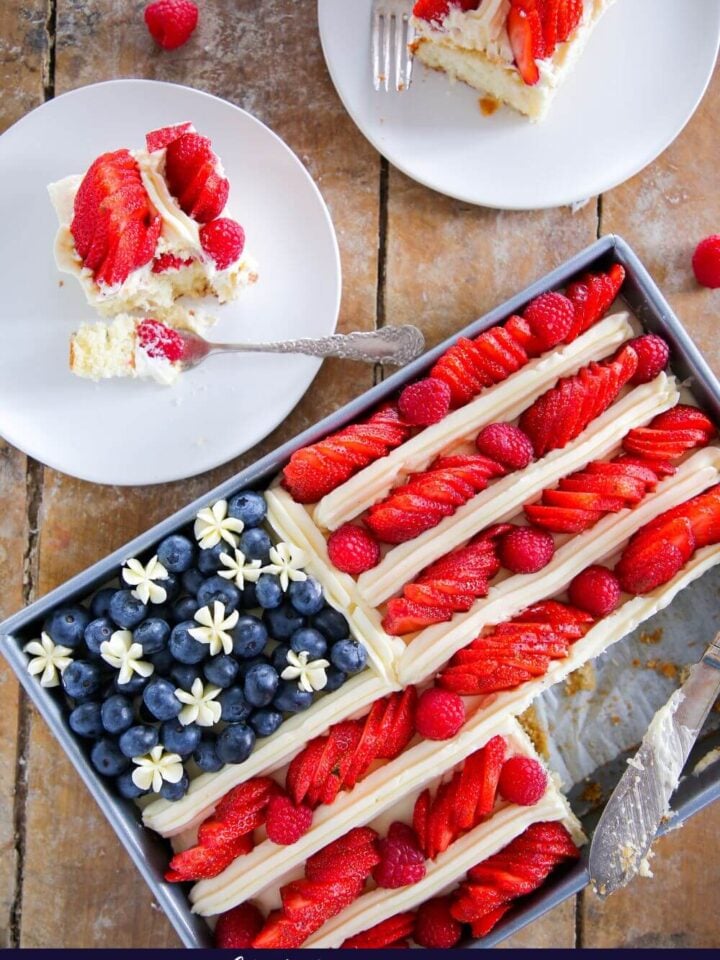
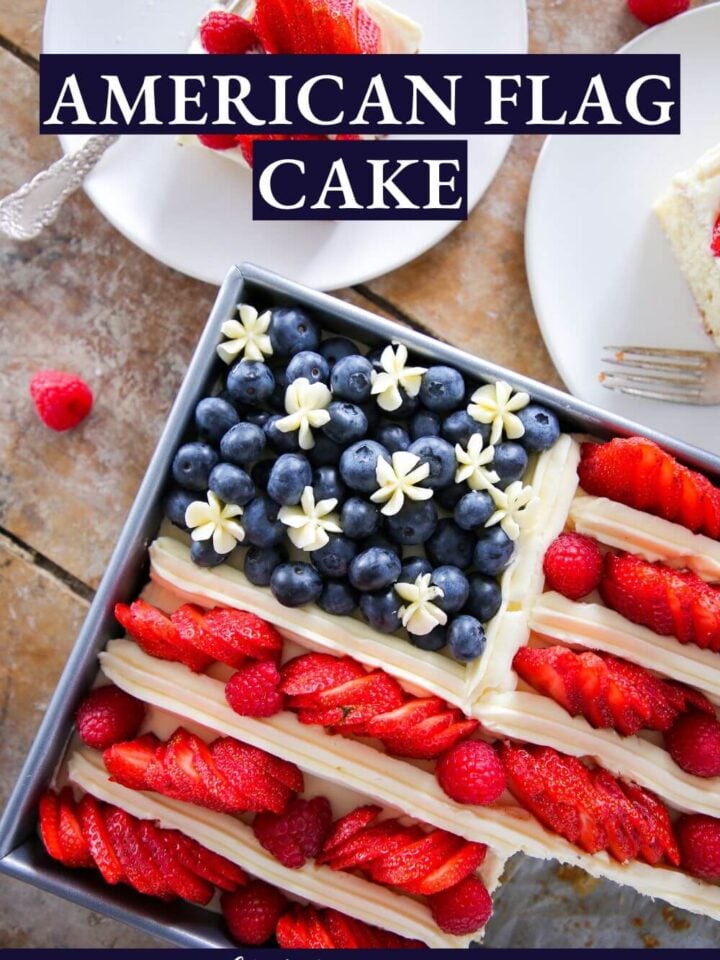
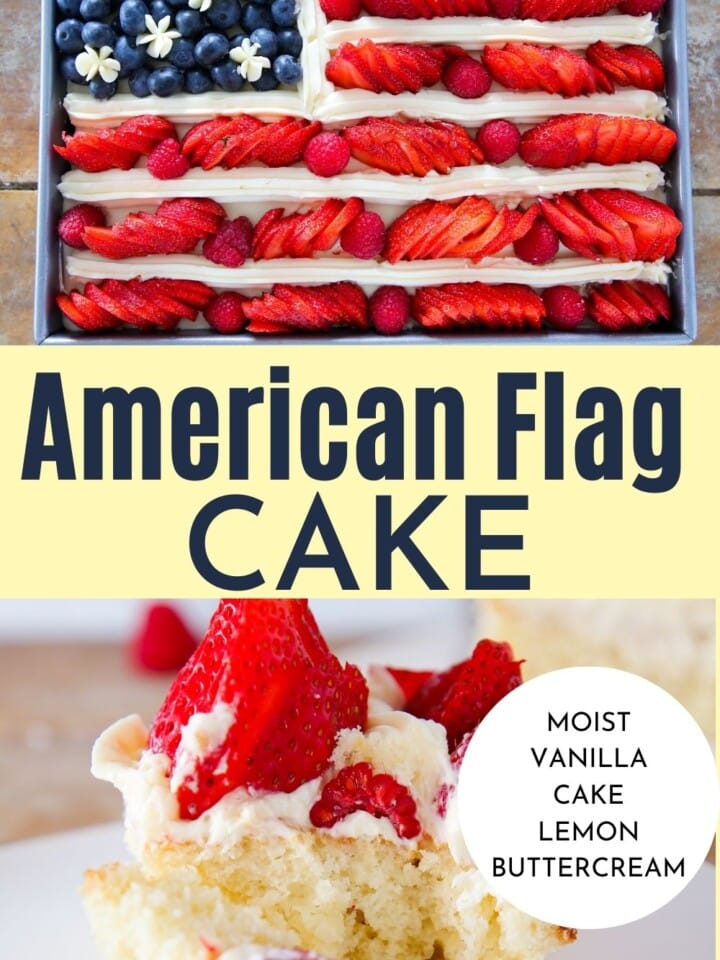
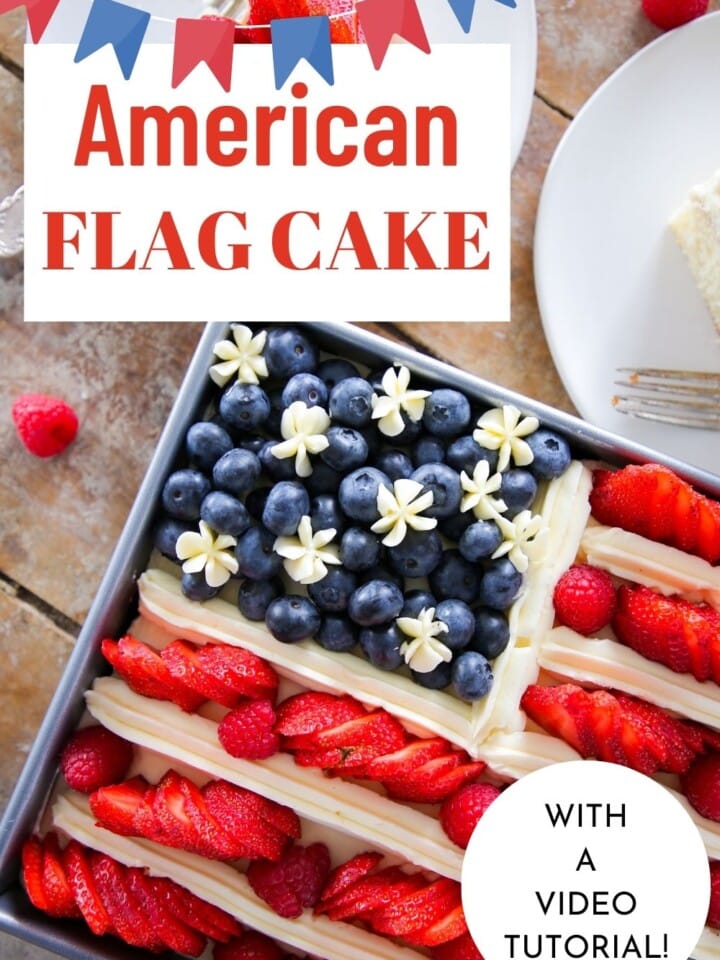
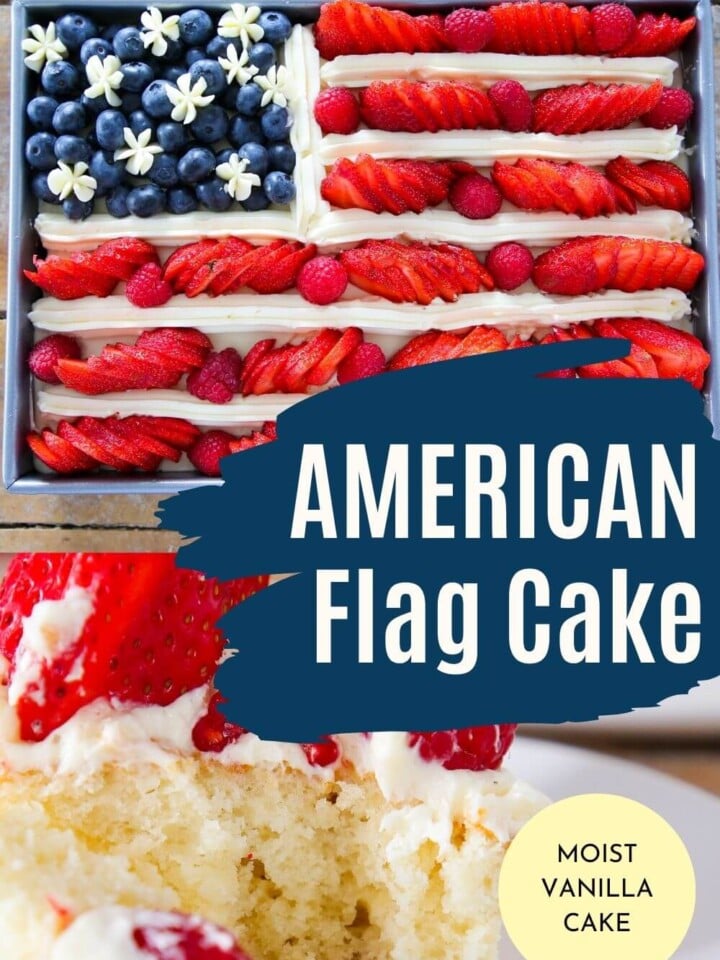
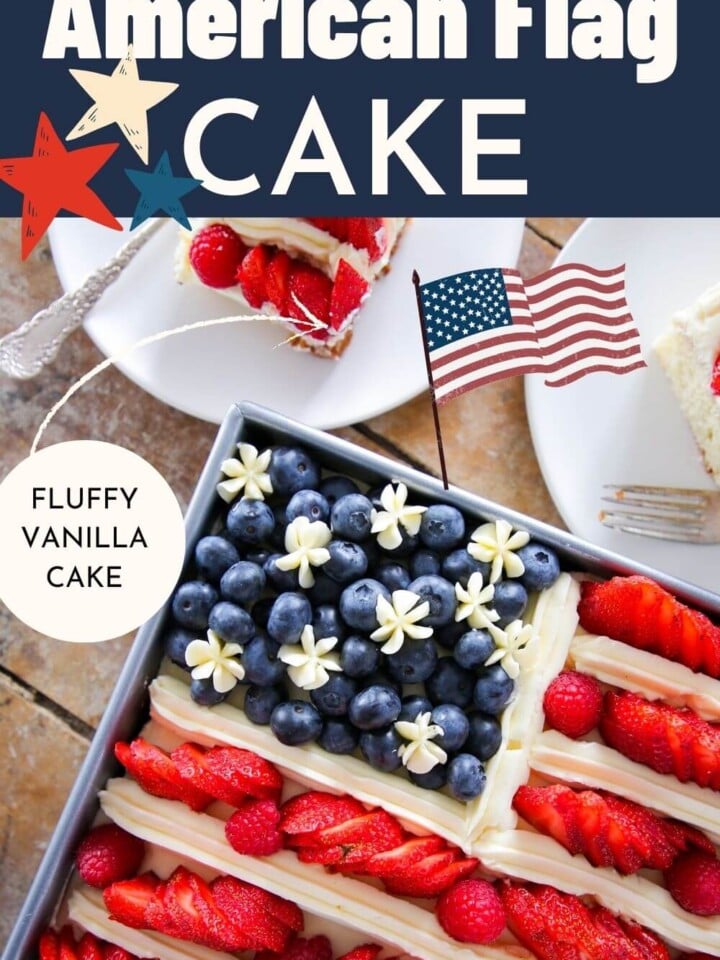
This American Flag Cake is a soft, tender vanilla cake topped with a Lemon Swiss Meringue Buttercream and decorated with berries! It is the perfect July 4th Centerpiece!

I smile just thinking about this cake. I know that seems odd but all the colors and flavors just make me happy! July 4th is one day when Americans can just totally embrace their ostentatious natures, and there isn’t any Independence Day dessert quite so ostentatious as this American Flag Cake!
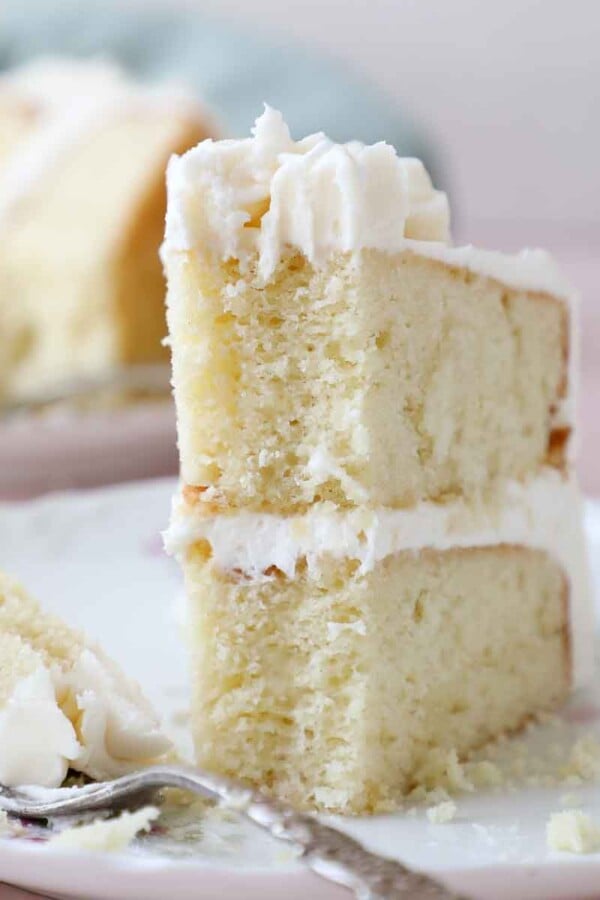
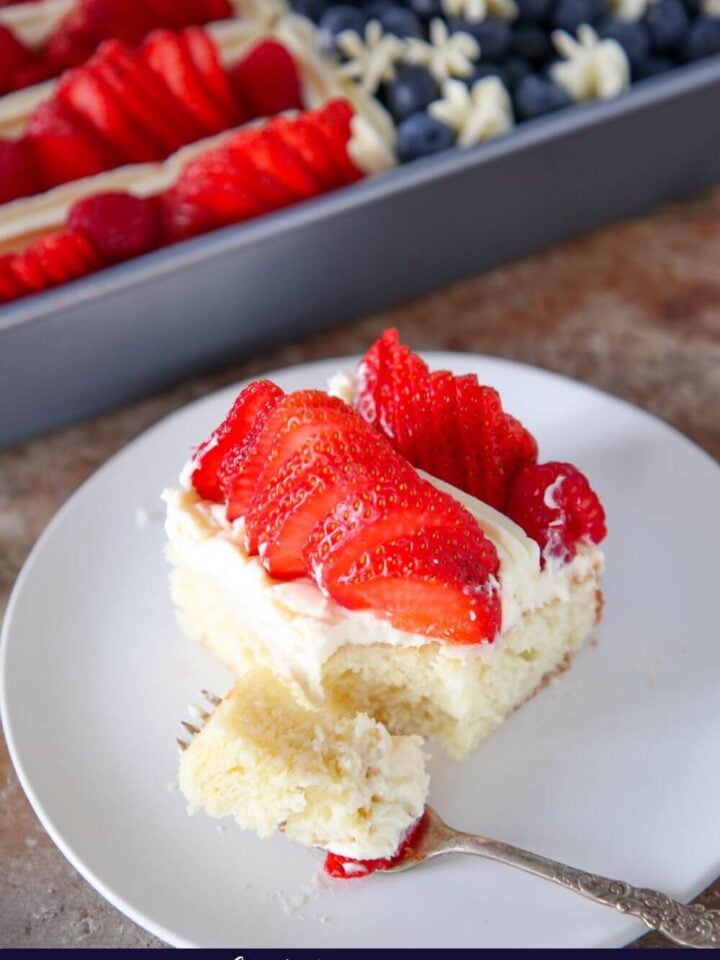
The soft, moist vanilla cake lightly soaked in simple syrup then topped with a silky Lemon Swiss Meringue Buttercream. The white stripes are also the lemon buttercream and then I filled in the gaps with sliced strawberries and raspberries. I even filmed a video to make it as easy as possible!
Why This is the Best Recipe
- A beautiful array of sliced berries and stripes of lemon buttercream. Every other flag cake on the internet is just whole berries plunked down in a stripe shape or all buttercream. I wanted a little movement like the flag was waving in the wind, so I sliced and fanned out the strawberries and interspersed them with raspberries. It also makes the cake easier to cut, but that is just a bonus!
- Delicious homemade vanilla cake with a bright buttercream. This cake isn’t just pretty, she is delicious too! I topped my moist vanilla cake with a lemon Swiss meringue buttercream for a cake befitting the occasion.
- Easy to follow instructions and a video tutorial!
Table of Contents
Ingredients & Substitutions
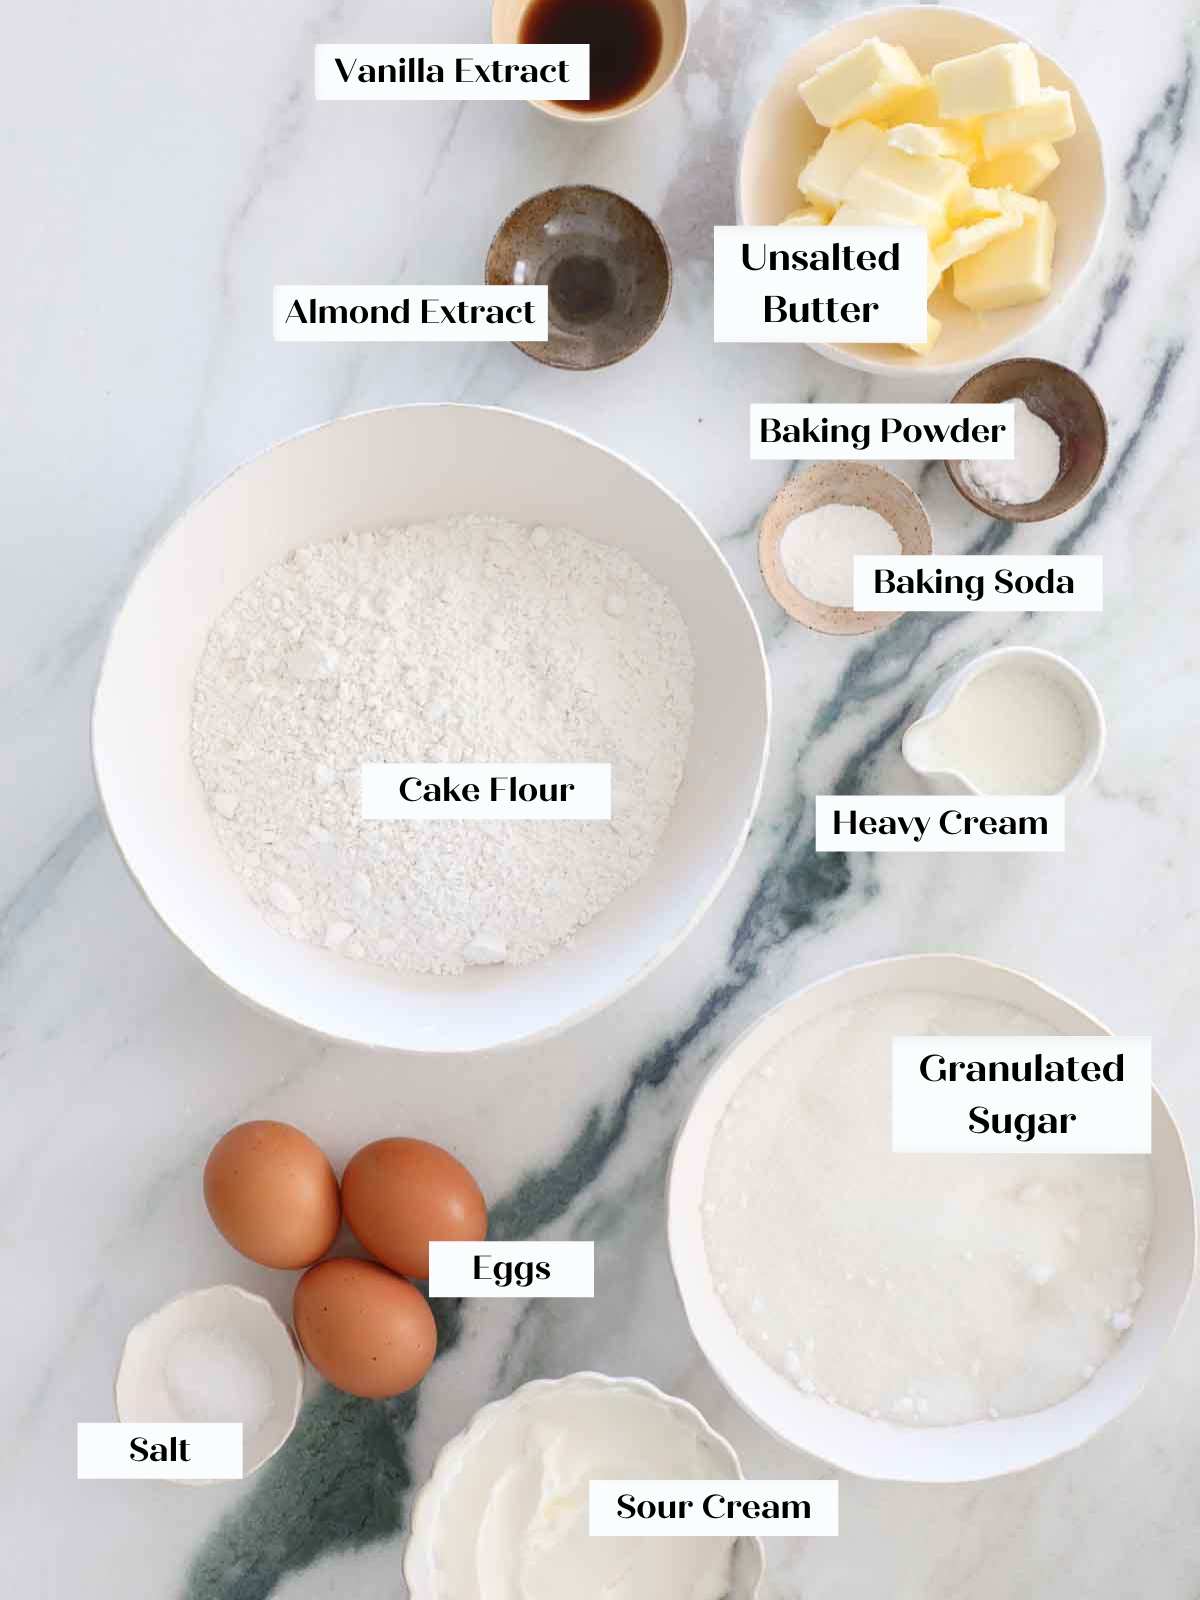
- Unsalted Butter: Cool but pliable butter will incorporate well in the batter and allow you the time to add volume to the cake by trapping air between the molecules of sugar. It also makes the best buttercream.
- Granulated Sugar
- Large Eggs: I use whole eggs for this recipe because they add moisture and fat as well as aid in the leavening. Since it is a butter based cake, I don’t need to lighten it with whipped egg whites like I do in my classic white cake.
- Vanilla Extract: This is the main flavor so choose a vanilla extract that you enjoy. I love Nielson Massey’s vanilla extract.
- Almond Extract: A hint of almond extract takes this great from “great” to “WOW!” You can omit if you do not like it.
- Sour Cream: I use full fat sour cream for the softest, moistest cake! You can also use Greek yogurt. If you don’t have sour cream or Greek yogurt, I suggest you make my vanilla cupcakes recipe instead. It uses only milk. Double it for the same thickness!
- Whole Milk: The fat in whole milk adds flavor and contributes to the moist, tender texture.
- Cake Flour: Cake flour is essential in this Flag cake as it is in my lemon cupcakes. You can use all-purpose flour but the texture will be less tender and fluffy.
- Baking Powder & Baking Soda: I use a combination of baking powder and baking soda to get the initial intense volume from the soda in combination with the even, slow rise of the double acting baking powder.
- Kosher Salt: Do be sure you use kosher salt or reduce the salt in the recipe by half. Kosher salt has larger granules and is less salty than sea salt or table salt by the teaspoon.
- See the recipe card for full information on ingredients and quantities.
Variations
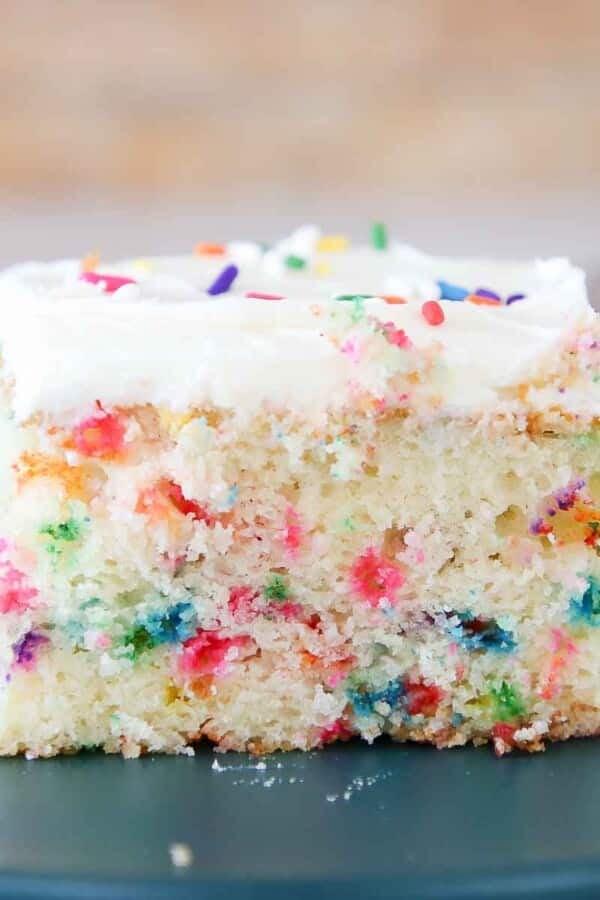
- Add sprinkles! We are here for the extra, so add ½ cup red, white and blue sprinkles like in my Funfetti cake and really bring the celebration.
- Choose a different frosting: The homemade lemon curd in this lemon Swiss meringue buttercream is really fantastic, but you could also make this easy lemon buttercream frosting instead. For a less sweet topping, try my ermine frosting, which is airy like whipped cream! If you are more comfortable with Italian meringue buttercream you can add lemon curd to that recipe instead, or you can go all American with a vanilla American buttercream frosting or cream cheese frosting!
- Have fun with the fruit on top. Play with the fruit in the stars and stripes. Try sliced starfruit on top of the blueberries or use a mix of blackberries, black raspberries and blueberries. Use any red fruit that you love like raspberries, strawberries, sliced cherries, or pomegranate arils. You could even sprinkle on a few currants if you like them.
- Spread a thin layer of jam between the cake and buttercream. A thin layer of jam would be an excellent addition to this cake. Not only will it add flavor but it will add moisture too! Try my mixed berry jam, easy strawberry jam, or your favorite raspberry jam!
- Use a different cake for the sheet cake. Make it a red cake with this red velvet cake recipe or a blue cake by using food coloring. You could use my lemon cake recipe from these lemon cupcakes, lemon olive oil cake, or use a classic yellow cake. I also think my lemon pound cake recipe would be delightful! You could also use white cake mix or use my classic white cake recipe instead.

How to Make American Flag Cake from Scratch
Use these instructions to make a professional looking American Flag Cake! Further details and measurements can be found in the recipe card below. For more details on the buttercream read my Swiss Meringue Buttercream tutorial post and this easy lemon curd post for how to make the lemon curd from scratch.
Make the cake:
Step 1: Preheat oven to 350°F (either convection or regular) & spray and line a 9x 13-inch pan with parchment paper.
All ingredients should be at room temperature.
Step 2: Sift the cake flour, baking powder, baking soda, and salt. In another bowl whisk together the sour cream and milk. Set aside.
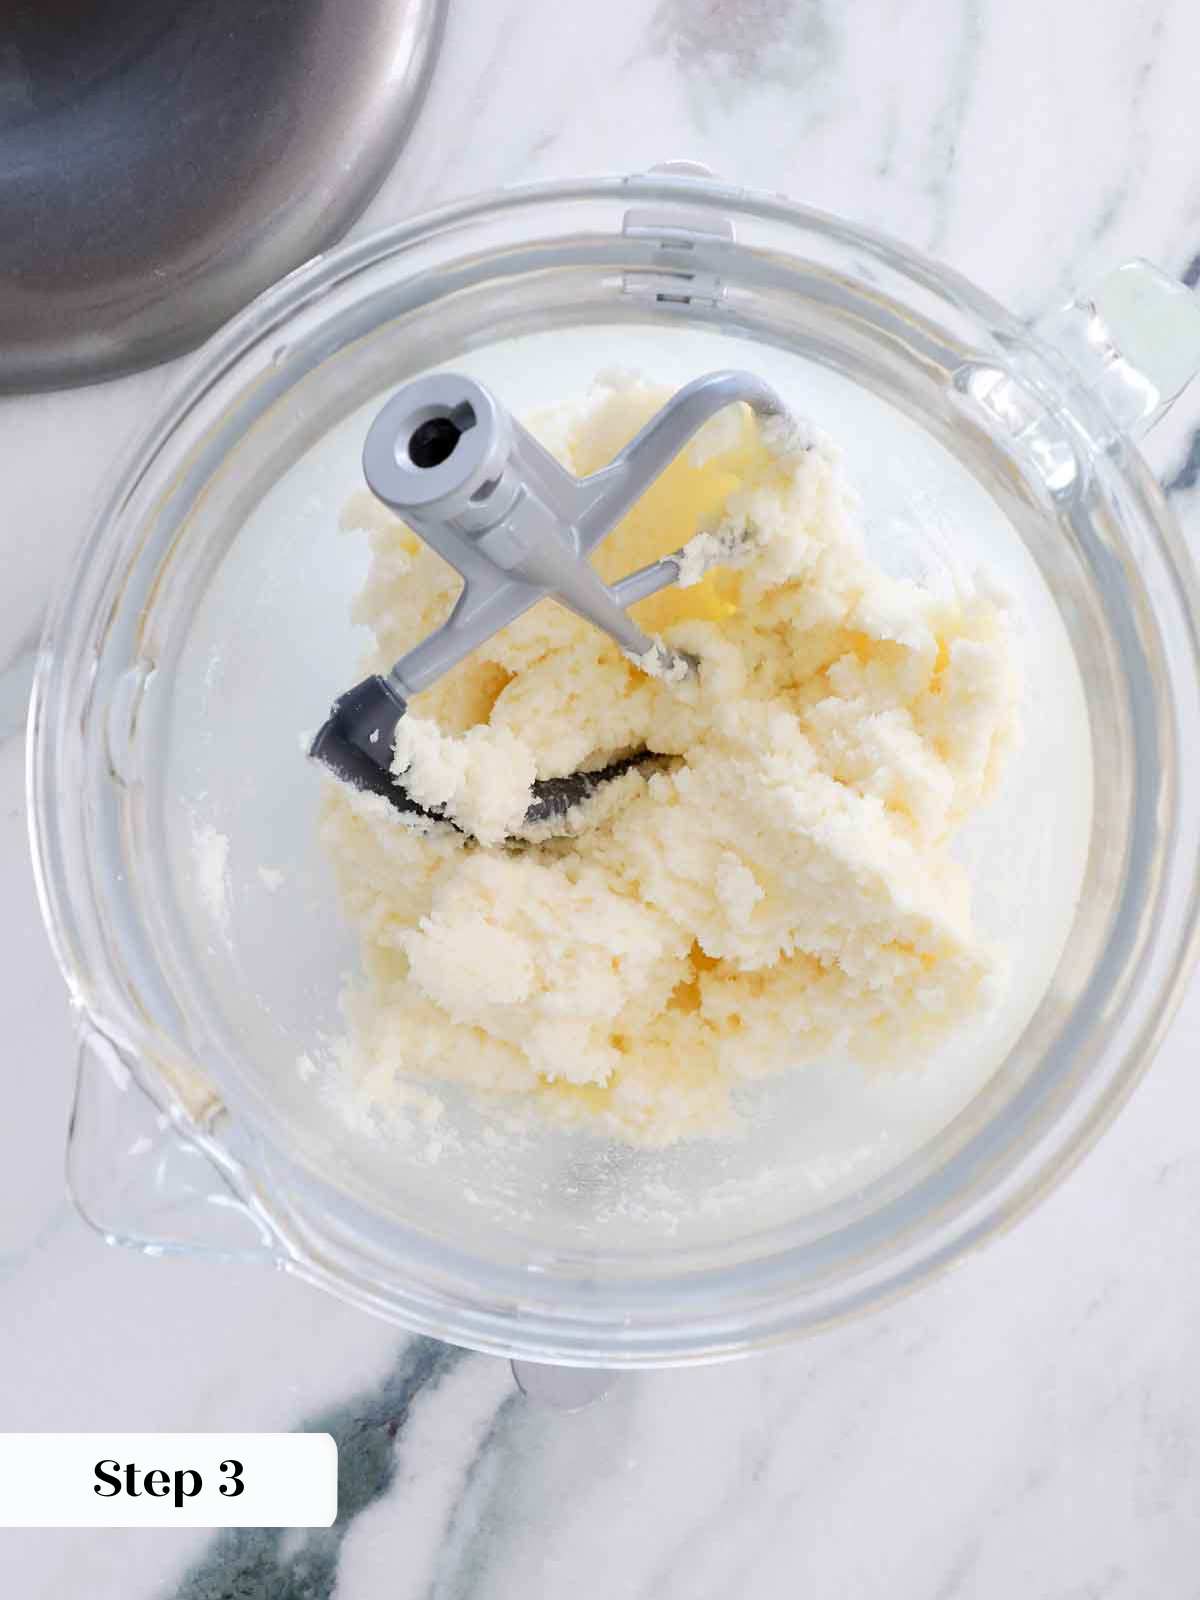
Step 3: In the bowl of a stand mixer fitted with the paddle attachment (or with a hand mixer) cream butter and sugar until light and fluffy.
Step 4: Add the eggs one at a time, beating well after each addition. Add the extracts with the last egg.
Step 5: Alternately add milk and dry ingredients, beginning and ending with dry. I often finish folding by hand.

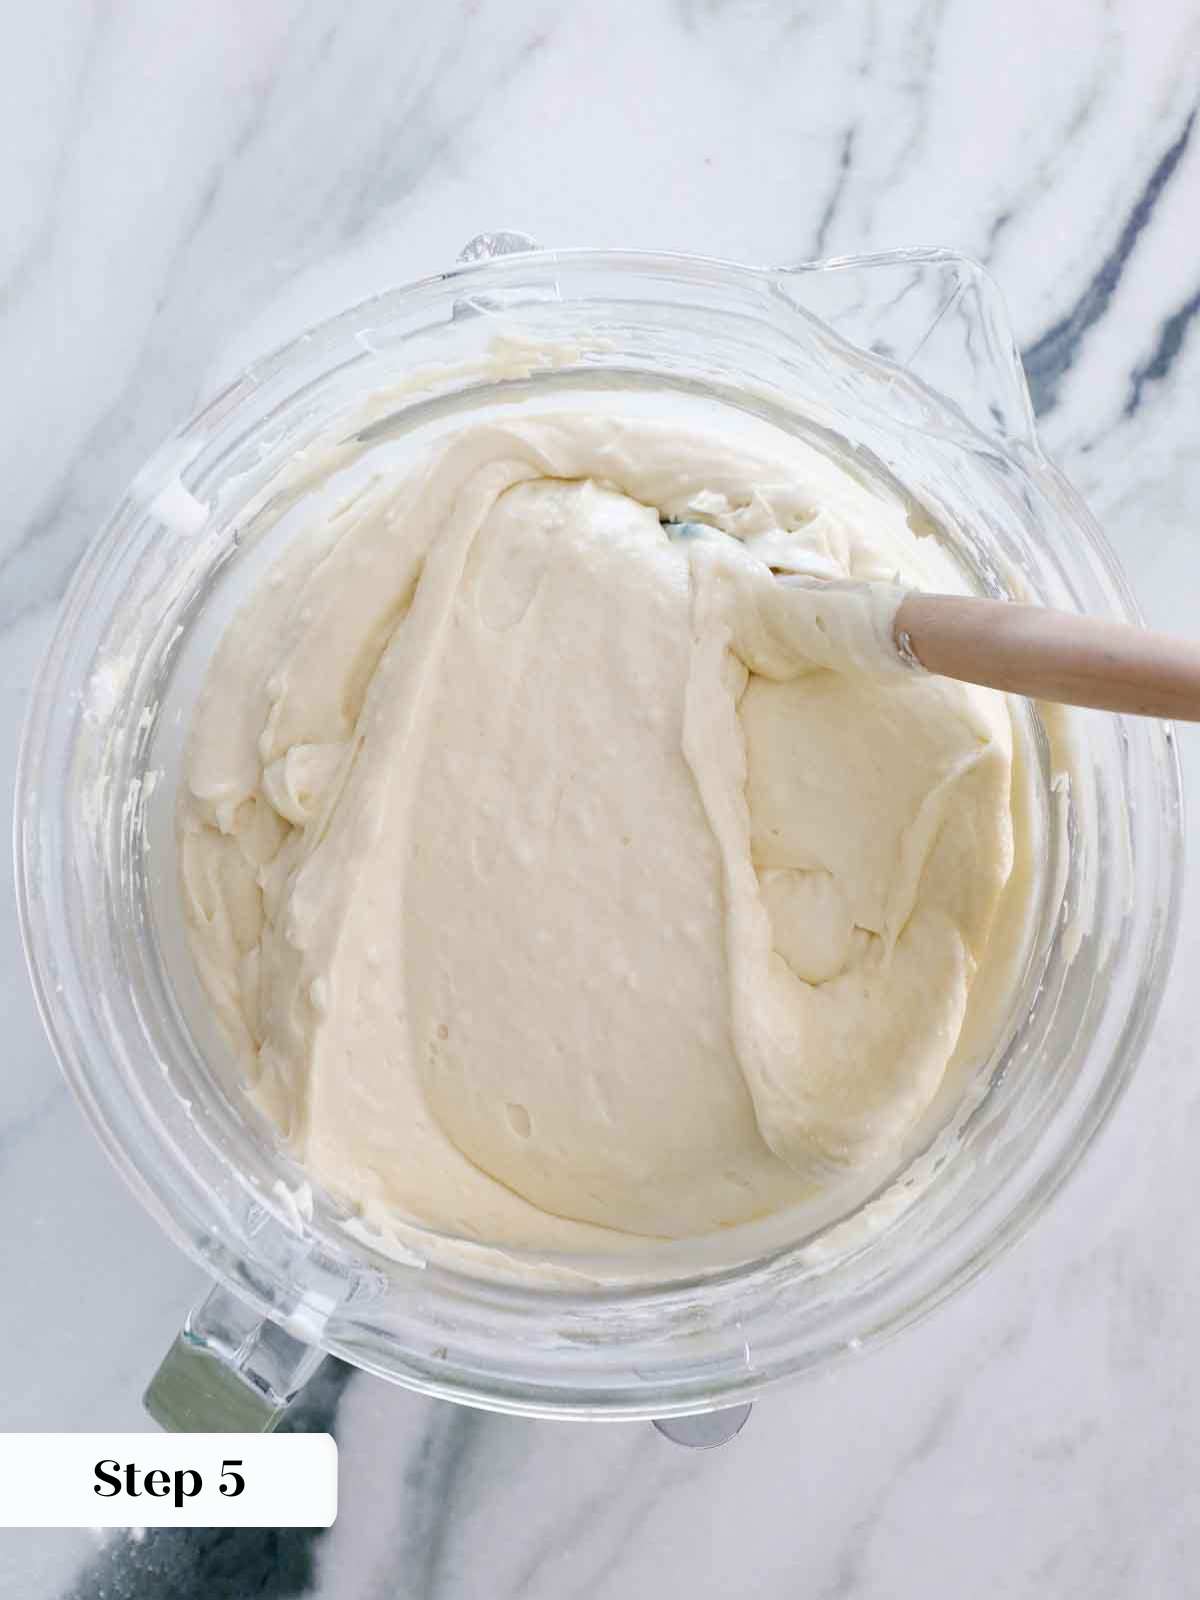
Step 6: Pour batter into prepared pan. Spread out with an offset spatula.
Step 7: Bake immediately in preheated oven until a cake tester or toothpick comes out with a few clinging crumbs, approximately 20-25 minutes. Be careful not to over bake or it will dry out.
Step 8: Allow the cake to cool in the pan on a wire rack.
For the Optional Simple Syrup Soak:
In a small pot mix the water and sugar and heat on high just until it comes to a boil. Remove from heat and cool completely.
You can add a little lemon juice or vanilla extract if you would like! Gently soak your cake with a pastry brush. Keep the rest of the simple syrup for cocktails!
Assembling the Cake:
Step 1: While your cake is cooling, prepare the Swiss Meringue Buttercream from scratch or refresh buttercream that you made in advance. Once it has come together and is nice and light and fluffy, add the lemon curd. If you are using the lemon curd from the lemon bars (they have gelatin), mix the curd a bit in a small bowl with a spatula to loosen it. If you add the cold, stabilized curd to the silky buttercream, you might get lumps!
Step 2: Prepare a piping bag with a tip of choice. I used an Ateco 885 tip for the stripes and a Wilton 2D for the stars. I would have preferred to use an Ateco 842 or 843 but my closed star tips are at work.
Step 3: Slice the strawberries.
I sliced them about 1/8 inch thick but the thinner you slice them the more movement you’ll achieve in fanning them out.
Step 4: Spread a thin layer of the buttercream on the cake using an offset spatula. Pipe a border where the blueberries (stars) will go. I made mine in the upper left third of the cake.
Step 5: Pipe the stripes. Keep in mind how many rows of berries you want. You can also pipe afterwards if you are nervous.
Step 6: Fan out the strawberries for the red stripes and then transfer them to the cake using a small offset spatula or knife. I alternated one strawberry with one raspberry and then repeated until I got to the end of the row. I then started with the opposite berry so that I didn’t end up having a line of raspberries in my flag. It’s all in the details!
Step 7: Serve within 2 hours or wrap well and refrigerate. The buttercream will taste best at room temperature but it is up to you!
Chef Lindsey’s Recipe Tip
I used an Ateco 885 tip for the stripes and a Wilton 2D for the stars. I would have preferred to use an Ateco 842 or 843 but my closed star tips are at work.

Recipe FAQs
I recommend frosting the cake the day it is baked because that will lock in the moisture. Store it refrigerated for a week or frozen for up to 2 months. Store in an airtight container or well wrapped in plastic wrap. The berries will begin to weep after 12 hours in the refrigerator, if that bothers you, simply add the berries the day of serving.
It is a dessert in itself, but I find a sauce or ice cream are always welcome. Try adding a spoonful of crème anglaise, a giant scoop of vanilla bean ice cream, raspberry sorbet or chocolate ice cream, a drizzle of my easy blueberry sauce or easy strawberry jam loosened with lemon juice.
Recommended Cake Recipes
Cake Recipes
Moist Vanilla Cake Recipe
Cake Recipes
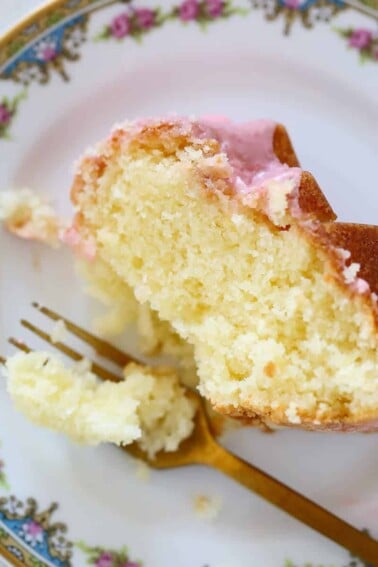
Lemon Pound Cake
Cake Recipes
Funfetti Cake
Cupcake Recipes
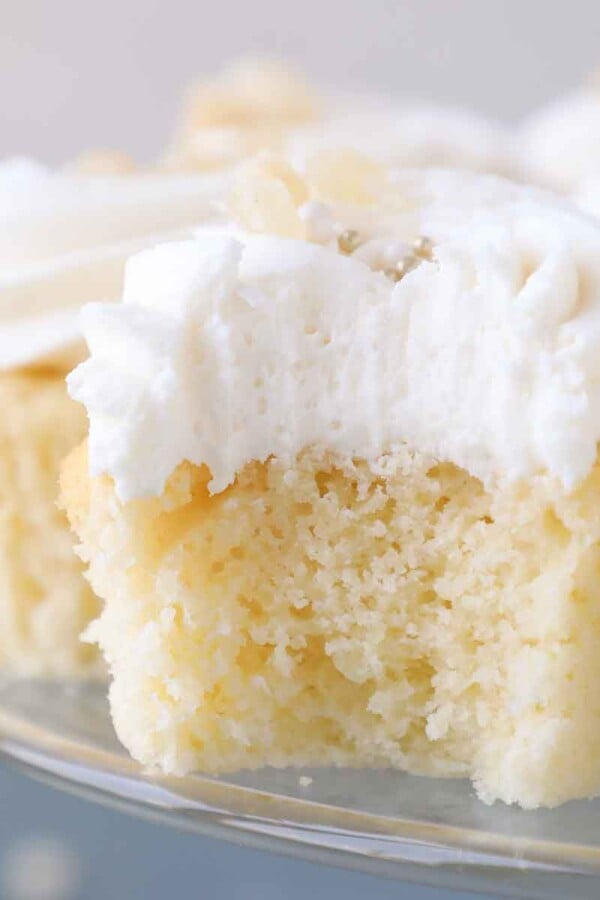
Lemon Cupcakes
If you tried this recipe and loved it please leave a 🌟 star rating and let me know how it goes in the comments below. I love hearing from you; your comments make my day!

American Flag Cake
Ingredients
For the cake:
- ¾ cup unsalted butter soft and pliable (170g)
- 1 ½ cup sugar 345
- 3 large eggs
- 1 tablespoon vanilla extract
- ½ teaspoon almond extract
- 1 cup sour cream 225g
- ½ cup whole milk 130g
- 2 ½ cups cake flour 300g (see note*)
- 1 teaspoon baking powder
- ½ teaspoon baking soda
- 1 ½ teaspoons kosher salt
- ¾ cup rainbow sprinkles 124g
Optional Simple Syrup Soak:
- ½ cup granulated sugar
- ½ cup water
For the buttercream:
- 5 large egg whites
- 1 ¼ cup granulated sugar
- ¼ teaspoon kosher salt
- 2 cups unsalted butter room temperature, 4 sticks, cool but still pliable
- 2 teaspoons vanilla extract
- ½ cup lemon curd
For the decorations:
- 2 quarts fresh strawberries
- 1 cup fresh raspberries
- 1 ½ cups fresh blueberries
Instructions
For the Cake:
- Preheat oven to 350°F (either convection or regular)
- All ingredients should be at room temperature. Sift the cake flour, baking powder, baking soda, and salt. In another bowl whisk together the sour cream and milk. Set aside.
- Spray baking dish and set aside.
- In the bowl of a stand mixer fitted with the paddle attachment (or with a hand mixer) cream butter and sugar until light and fluffy. Add the eggs one at a time, beating well after each addition. Add the extracts with the last egg.
- Alternately add milk and dry ingredients, beginning and ending with dry.
- Pour batter into prepared pan. Bake immediately. Bake in preheated oven until a cake tester comes out clean, approximately 20-25 minutes. Be careful not to over bake or it will dry out.
For the Optional Simple Syrup Soak:
- In a small pot mix the water and sugar and heat on high just until it comes to a boil. Remove from heat and cool completely.
- You can add a little lemon juice or vanilla extract if you would like! Gently soak your cake with a pastry brush. Keep the rest of the simple syrup for cocktails! ?
Prepare Remaining Ingredients:
- While your cake is cooling, prepare the Swiss Meringue Buttercream from scratch or refresh buttercream that you made in advance. Once it has come together and is nice and light and fluffy, add your lemon curd. If you are using the lemon curd from the lemon bars, mix the curd a bit in a small bowl with a spatula to loosen it. If you add the cold, stabilized curd to the silky buttercream, you might get lumps!
- Prepare a piping bag with your tip of choice. I used an Ateco 885 tip for the stripes and a Wilton 2D for the stars. I would have preferred to use an Ateco 842 or 843 but my closed star tips are at work.
- Slice your strawberries. I sliced them about 1/8 inch thick but the thinner you slice them the more movement you’ll achieve in fanning them out.
Assembling the Cake:
- Spread a thin layer of the buttercream on the cake using an offset spatula. Pipe a border where the blueberries (stars) will go. I made mine in the top third of the cake. Pipe the stripes.
- Fan out the strawberries and then transfer them to the cake using a small offset spatula or knife. I alternated one strawberry with one raspberry and then repeated until I got to the end of the row. I then started with the opposite berry so that I didn’t end up having a line of raspberries in my flag. It’s all in the details!
- Serve immediately or wrap well and refrigerate. The buttercream will taste best at room temperature but it is up to you!
Video
Notes
Nutrition
Before You Go!
I hope you enjoyed this professional chef tested recipe. Check out our other chef-developed cake recipes, or keep the Americana going with some classic gooey butter cake!


Really smiling from ear to ear….Lindsey, this is the cutest darn recipe I’ve seen on your site. I wish I had a big family to prepare this for. BUT…maybe I will just make it for just me and my sweetheart of 56 years! I promise you that old people never let desserts go to waste. 😉 thanks so much for posting this gorgeous recipe.
Hi Andrea! I might just have to quote you on that! Thank you so much for taking the time to leave a comment, and I can’t wait to hear how it turns out!