This post may contain affiliate links. Please read our disclosure policy.
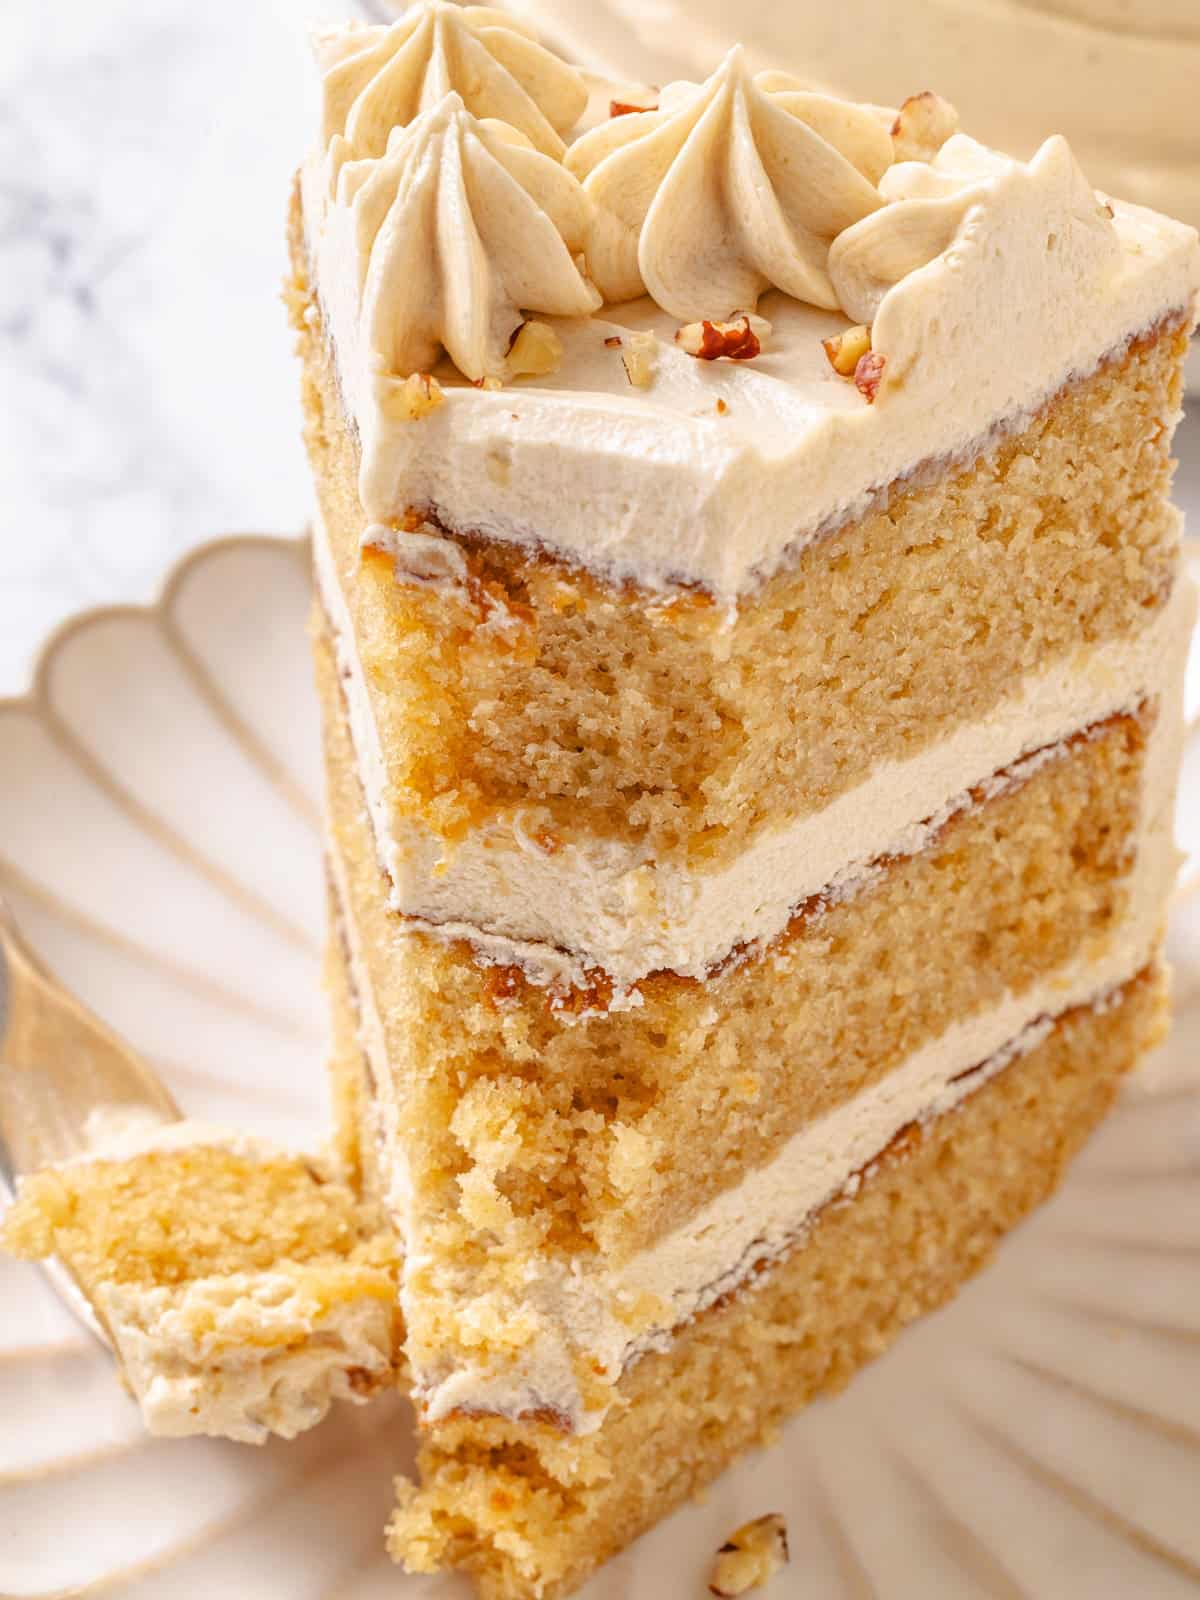
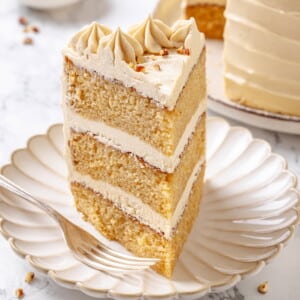
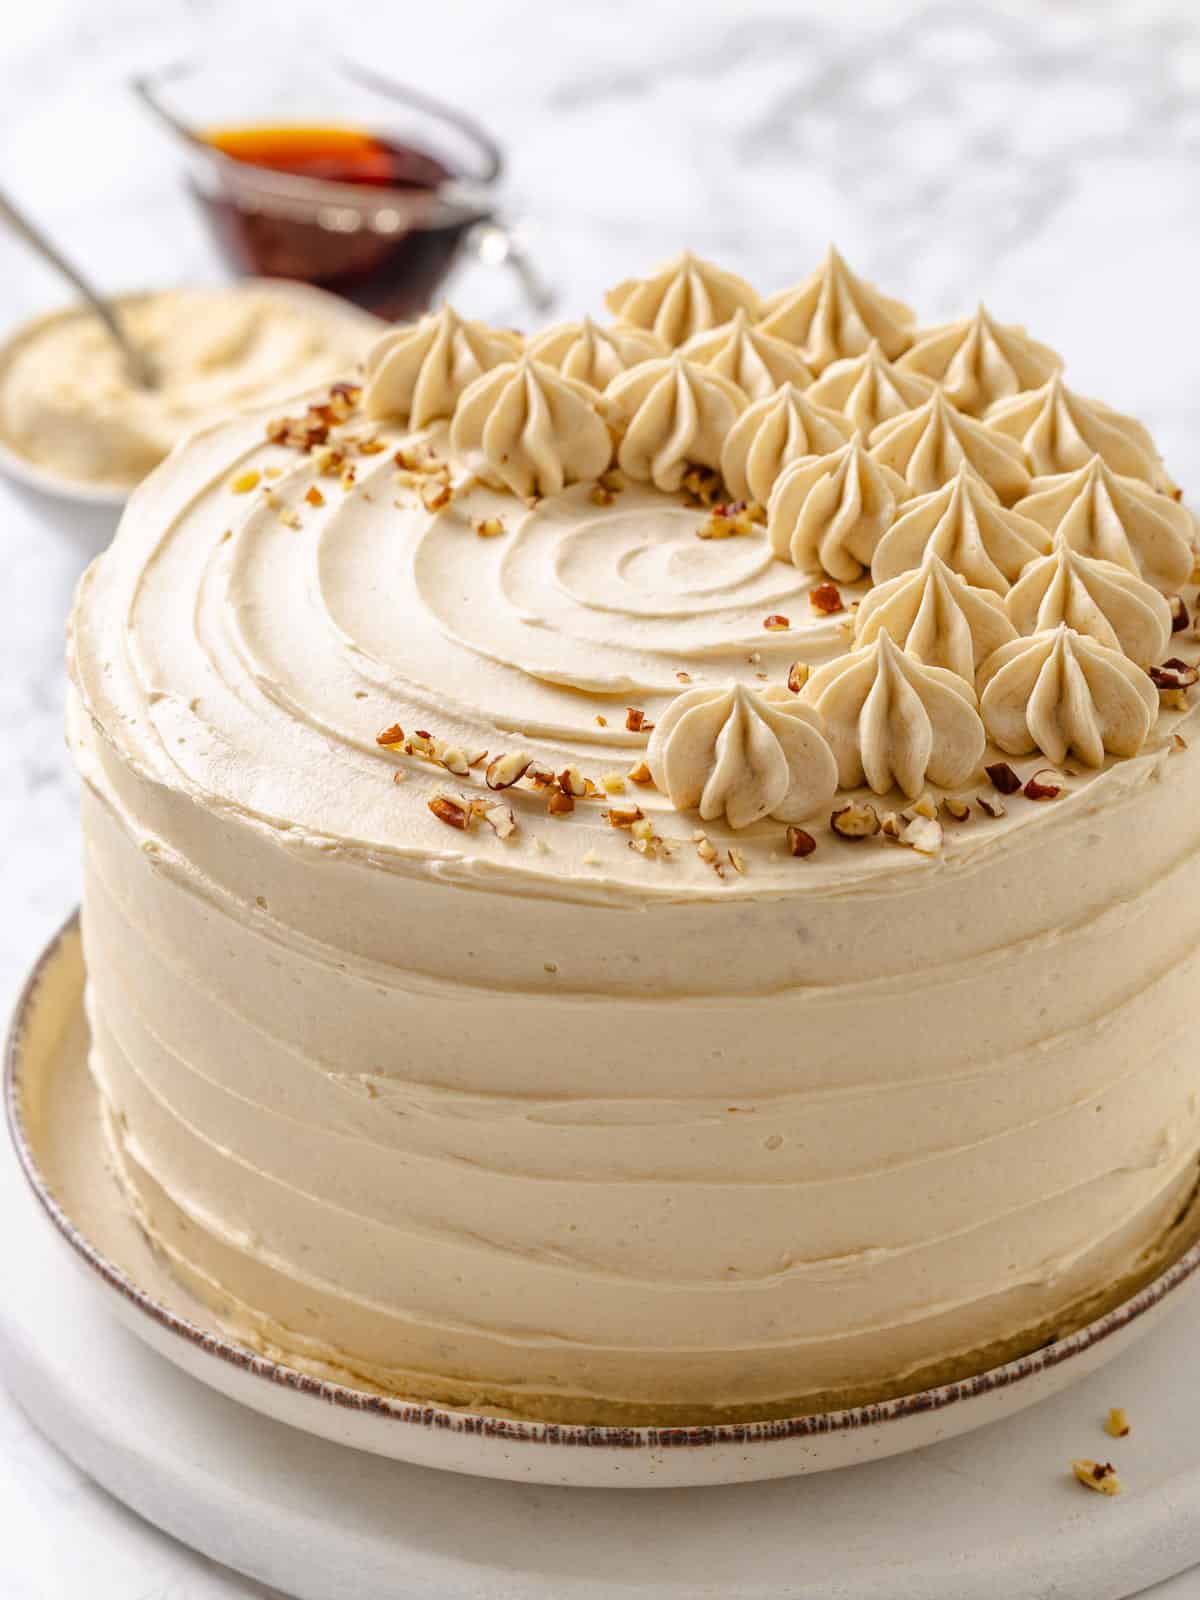
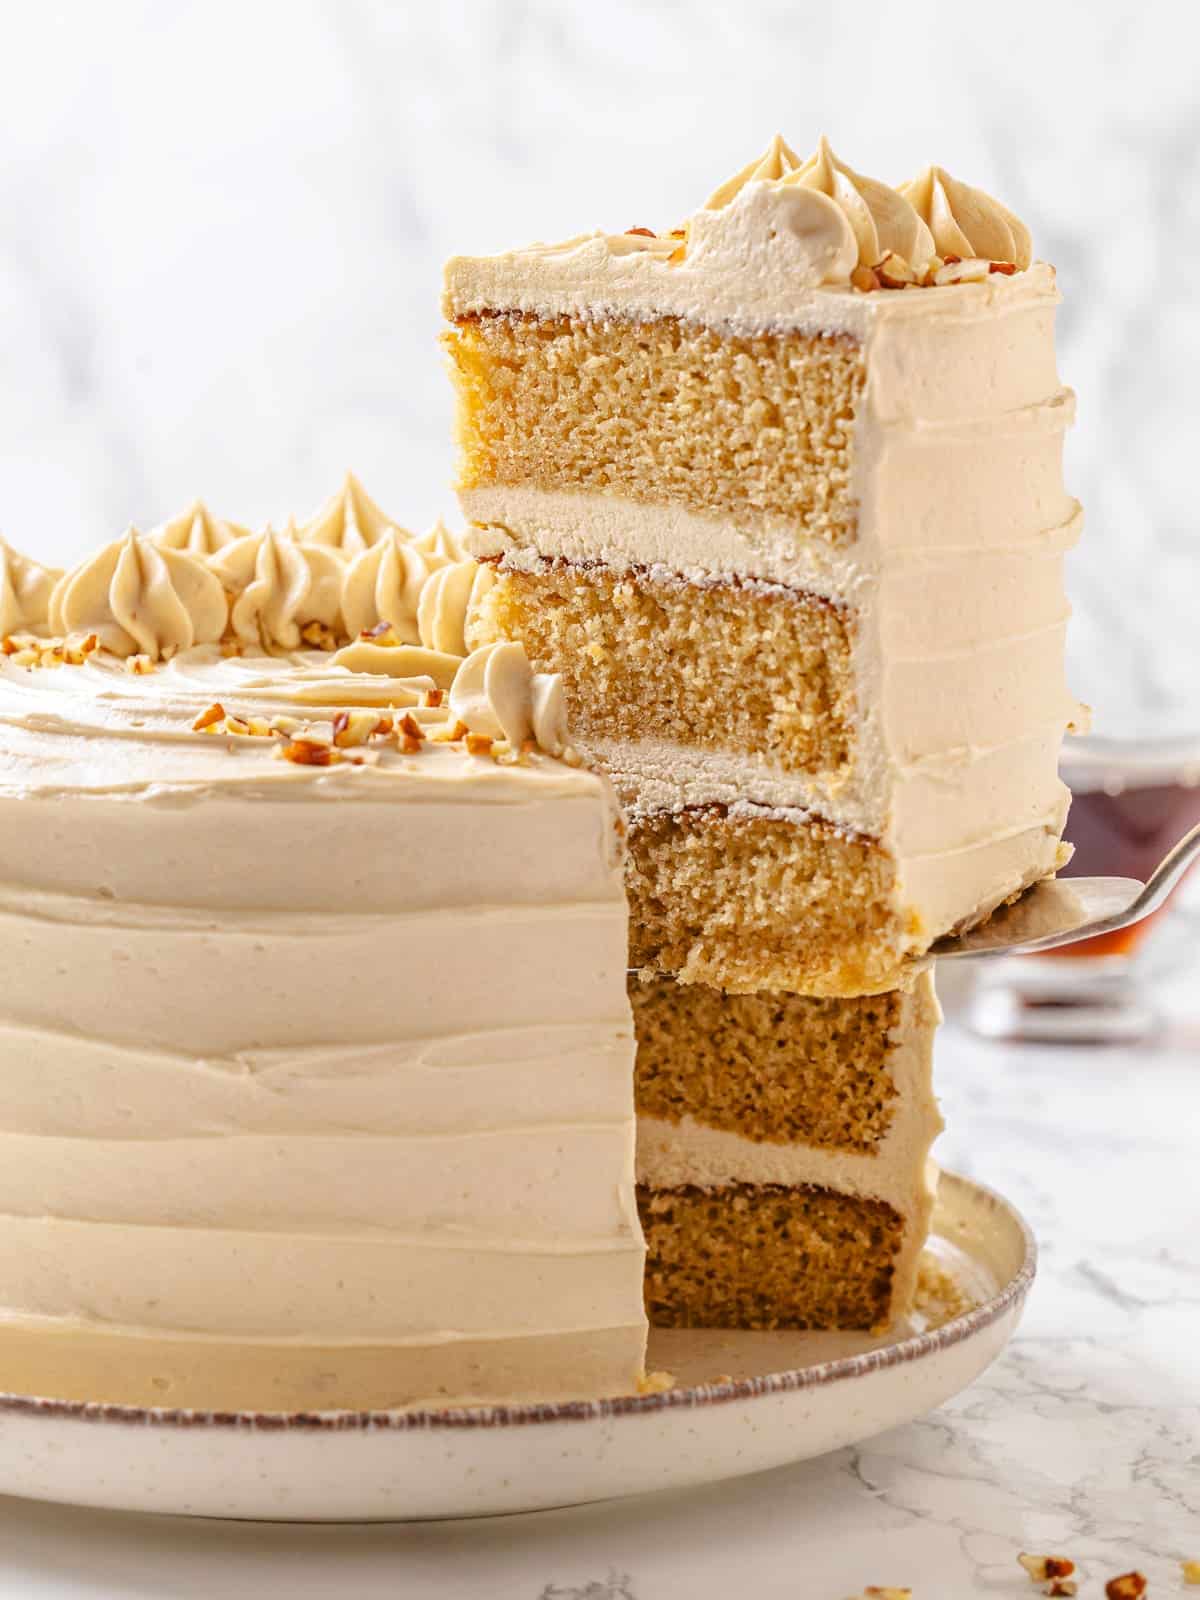
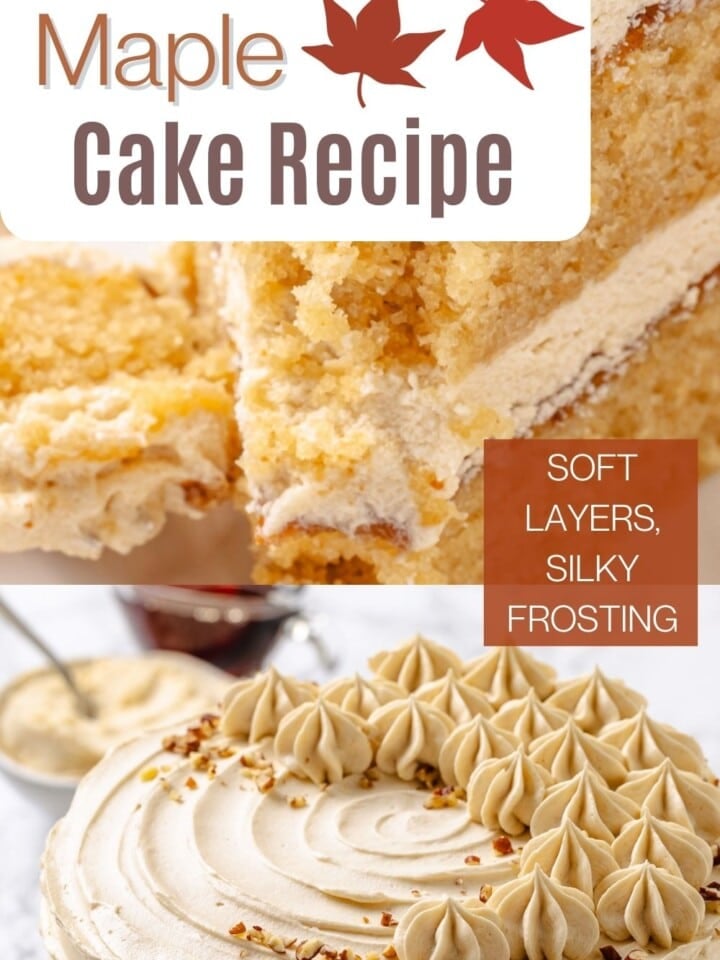
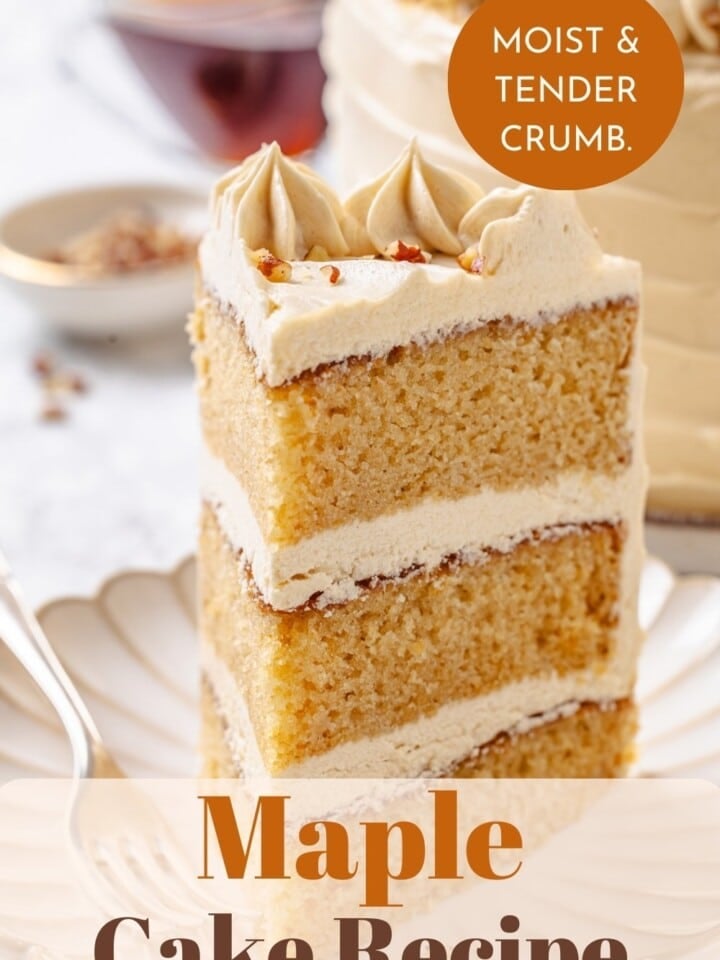
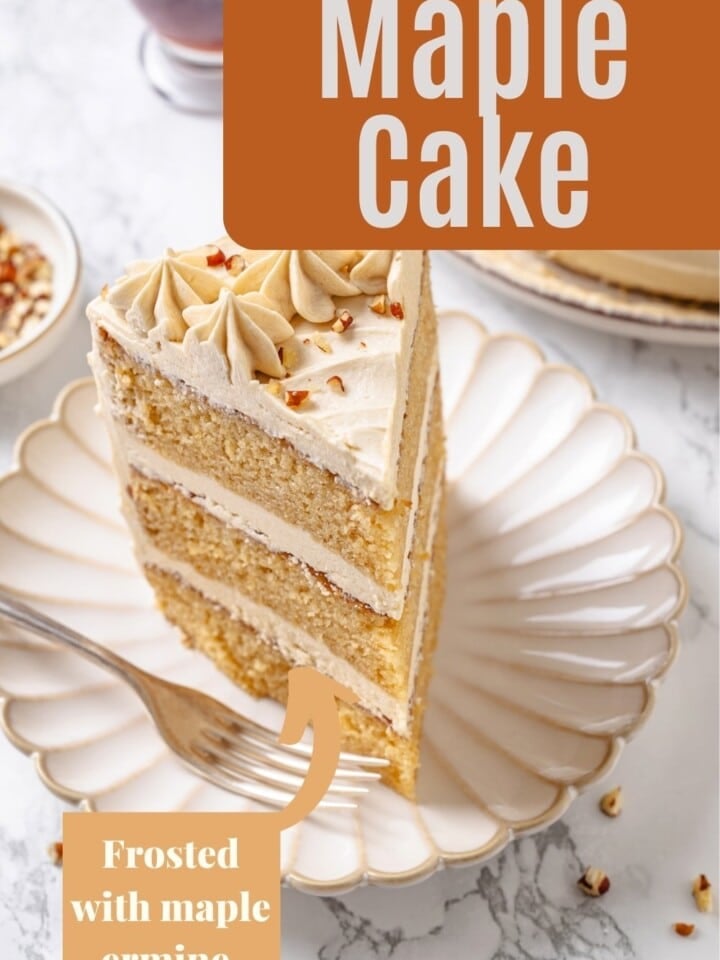
Maple Cake is soft, tender, and made in one bowl for an easy treat. This moist cake pairs with silky cooked maple frosting that balances its sweetness perfectly.
A Quick Look At The Recipe
This is a brief summary of the recipe. Jump to the recipe to get the full details.
Jump to RecipePrep Time
25 minutes
Cook Time
35 minutes
Total Time
1 hour
Servings
24 cupcakes
Difficulty
Moderate
Calories *
428 kcal per serving
Technique
Make maple cake, cook flour base for frosting, make frosting, layer cooled cake.
Flavor Profile
Maple cake with maple frosting that isn't overly sweet.
* Based on nutrition panel
I made this cake for Rosh Hashanah with an apple compote filling, and it was a hit! The cake is incredibly moist, and honestly, the frosting was easier to make than I thought it would be. Definitely have to stir the entire time while cooking the flour base, but so worth it! ⭐⭐⭐⭐⭐
Mara
A lot of testing has gone into this maple cake. I wanted to give you the best flavor and texture possible! My initial test for this cake was using a butter-based cake. In fact, I adapted my perfect vanilla cupcakes for my first test, but it resulted in a less tender and less moist cake. I switched to an oil-based cake like my easy moist chocolate cake, which produced this super soft, moist, and tender cake.
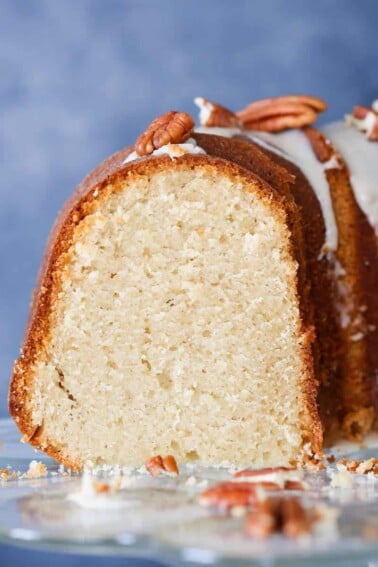
I hope you splurge and get yourself that pure grade A maple syrup! It’s completely worth it because you can then use it to make this maple bundt cake and my pumpkin trifle. Any leftover syrup you can use on these whole wheat pancakes.
Why You Will Love This
- Real maple flavor. This cake has an authentic pure maple syrup flavor that isn’t cloyingly sweet. I’ve tested this recipe to ensure I add the perfect amount of maple syrup for full flavor that is perfectly balanced in the cake and frosting.
- Easy cake that stays moist for days. Mixed by hand, this cake is incredibly easy to make, and the combination of maple syrup and oil makes it super moist.
- Light and fluffy maple frosting. This maple frosting is whipped to create a light and fluffy texture! Cooking the flour gives it the stability of an Italian meringue buttercream!
Table of Contents
Ingredients & Substitutions
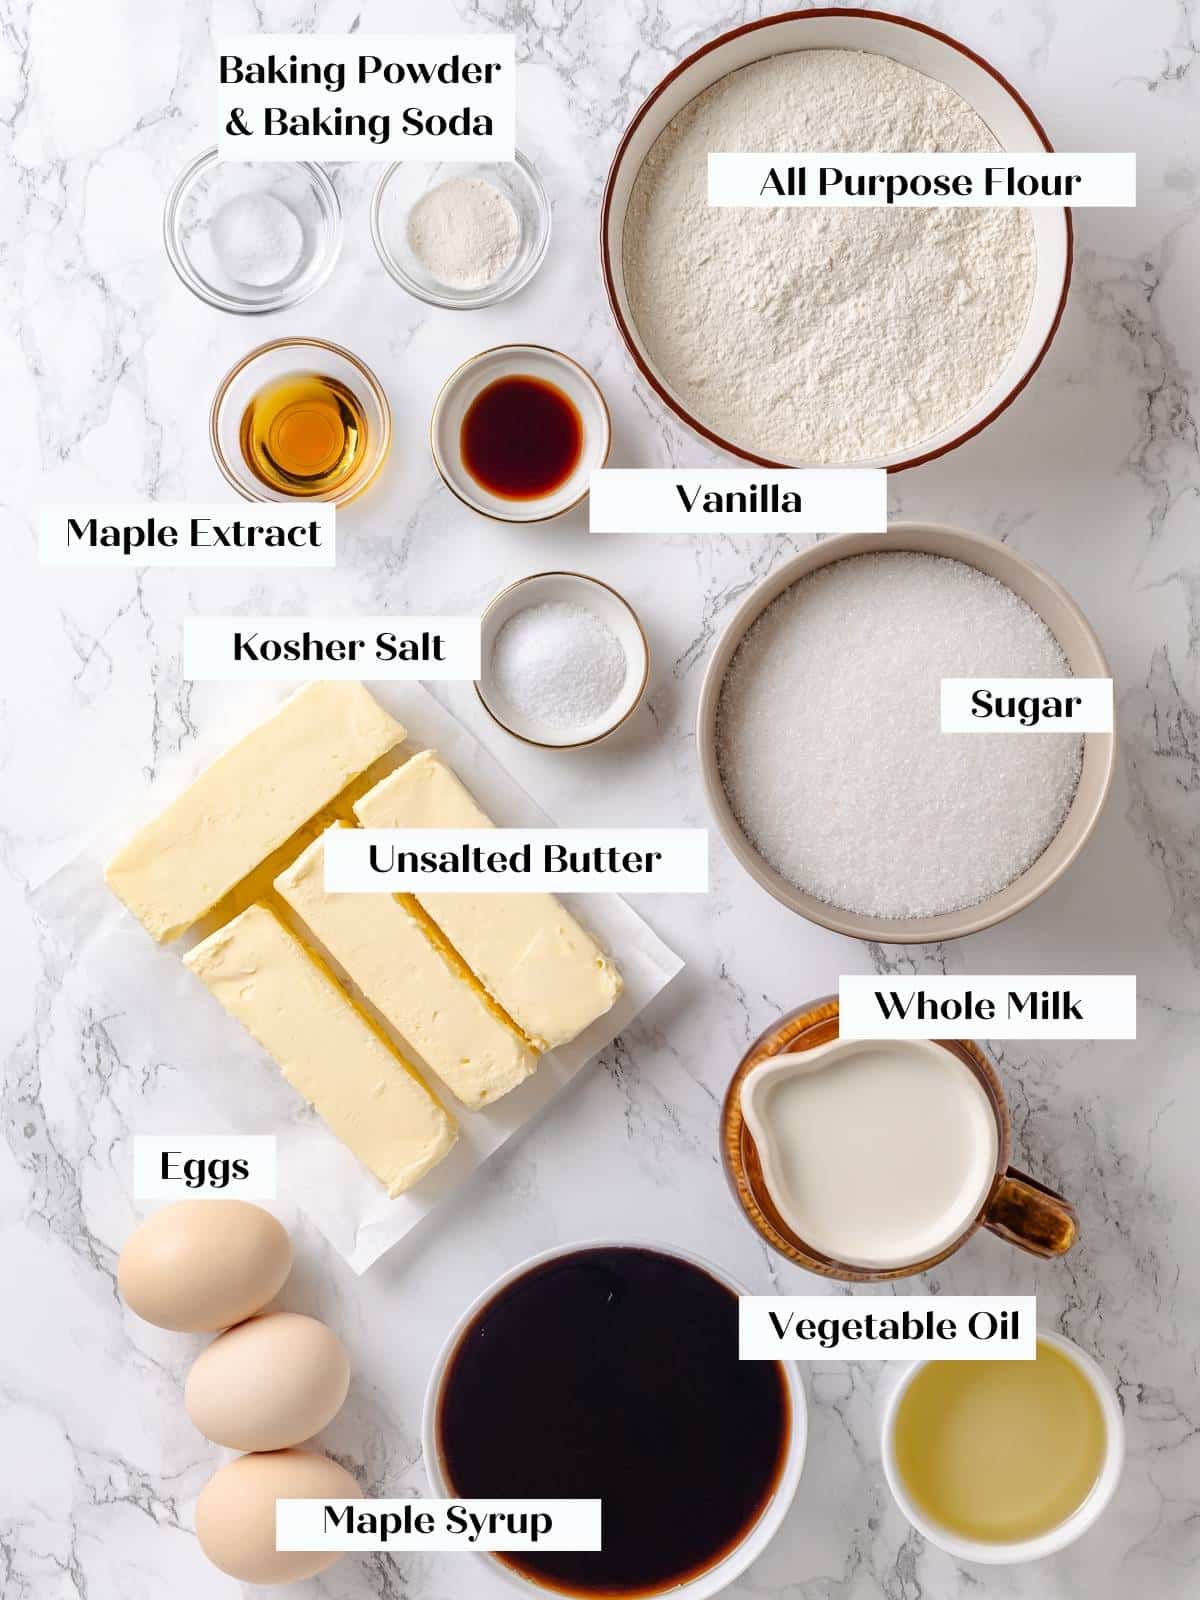
- All-Purpose Flour: You can make this cake gluten-free by substituting King Arthur’s cup4cup for the all-purpose flour. When it comes to the frosting, using gluten-free flour can make it grainy. I would suggest using a Swiss meringue buttercream if you plan to make this cake entirely gluten-free.
- Eggs: Whole eggs allow you to emulsify all that oil and maple syrup into the batter, resulting in a moist, not greasy, cake.
- Maple Extract: Maple extract is optional, but it does add additional robust flavor to the cake.
- Granulated Sugar: Try substituting light or dark brown sugar for a slight molasses flavor. Maybe even use maple sugar for more maple flavor.
- Vegetable Oil: Oil makes this cake exceptionally moist. Be sure to choose a neutral oil, as the cake contains enough for you to be able to taste it. So save the olive oil for this pumpkin olive oil cake!
- Maple Syrup: I use pure Vermont maple syrup. They have changed the rating system, but I use what used to be “Grade B” and is now “Grade A: dark amber color and robust flavor.” It has the best flavor and is thicker than the lower grades. You can also use “Grade A: Very Dark and Strong Flavor, but it is generally costly and difficult to find.
- Whole Milk: Whole milk adds flavor and fat. It has a lower water content, and the extra fat helps keep baked goods tender and moist. You can use any of your favorite milk substitutes.
See the recipe card for full information on ingredients and quantities.
Variations
- Add some nuts! Mix in some toasted pecans, walnuts, or hazelnuts into the cake; bonus points for candied nuts on the outside of the cake for decorations.
- Make into cupcakes. Bake the cake into 24 cupcakes. The cupcakes will take 15-20 minutes in the oven. Then once cooled, pipe the maple frosting on top!
- Use a different buttercream. Top this cake with caramel Swiss meringue buttercream, cream cheese buttercream frosting, or flavor the American buttercream recipe with maple liqueur or extract!
- Add a filling. Create a dam using the maple frosting and layer the cake with salted maple caramel sauce, easy apple compote, or cranberry chutney!
Professional Tips
- Ensure you cook the flour base enough. The cooked flour base is directly correlated to the stability of your frosting. You want to cook the base until it plops off your spoon or spatula. It will also hold a line that is drawn through it.
- Perfect timing for making this cake. I mix the cake, then while the cake is baking, I make the cooked frosting base. This gives ample time for both the cake and the frosting base to cool before assembling. If you need the base to cool faster, place it in the fridge for 20-minute intervals.
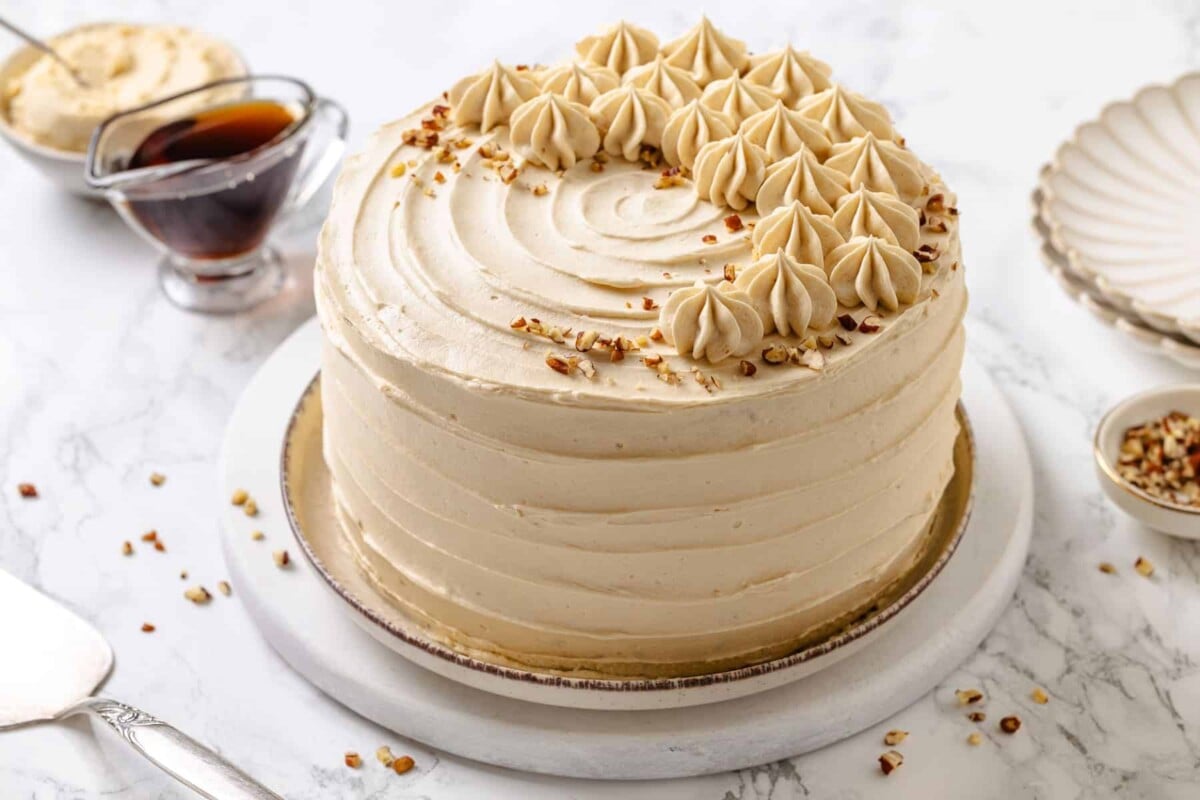
- Decide what kind of finish you want on the cake. If you want to do a smooth, more perfect finish like this chocolate raspberry cake, I recommend refrigerating the crumb-coated cake again until firm. This will allow you to build the layers more easily and smooth the exterior without the frosting giving way. If you want a more rustic, swirled finish like this chocolate mayonnaise cake, you can just layer on as much frosting as you desire and swirl with the back of a spoon or an offset spatula.
How to Make Maple Cake
Use these instructions to make a perfect maple cake! Further details and measurements can be found in the recipe card below.
Prepare the Cake:
Step 1: Preheat the oven. Preheat the oven to 325°F convection (with the fan) or 350°F conventional (without the fan)—spray and line 2 (or 3) 8 or 9-inch cake pans with parchment paper.
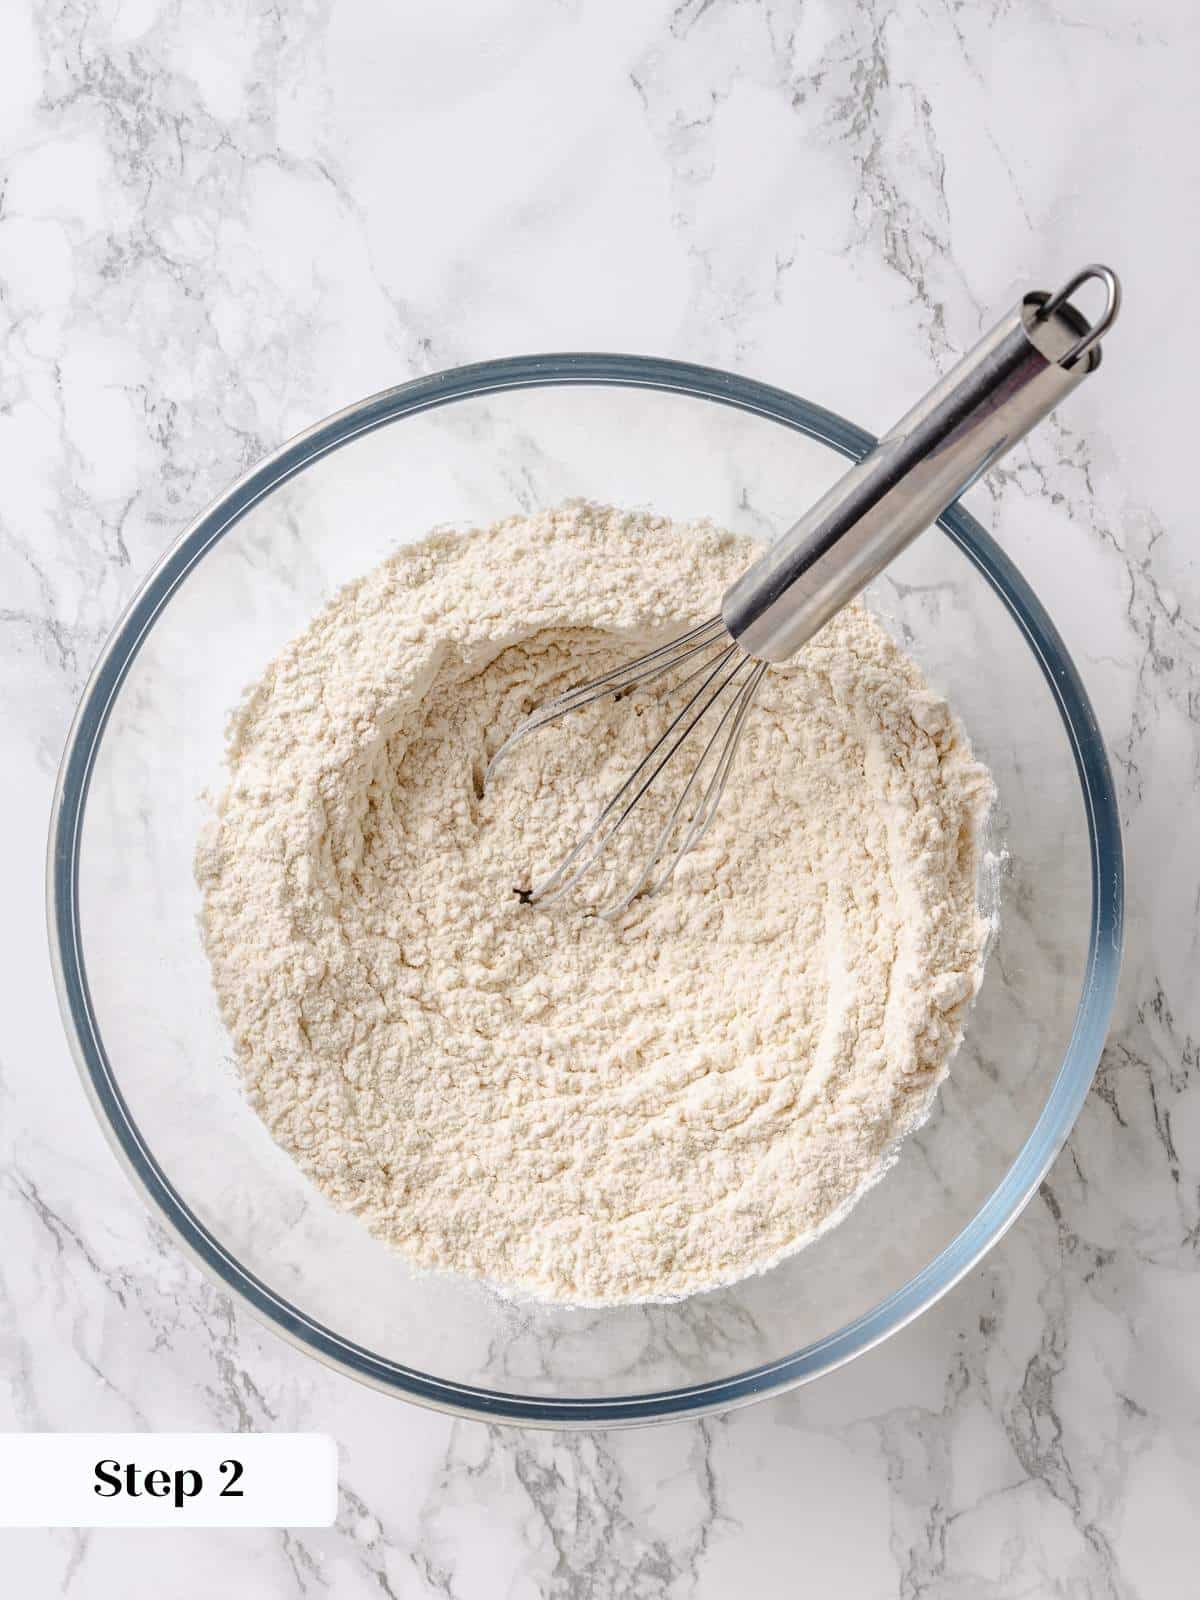
Step 2: Mix dry ingredients. Into a medium bowl, combine the all-purpose flour, salt, baking powder, and baking soda. Set aside (photo 1).
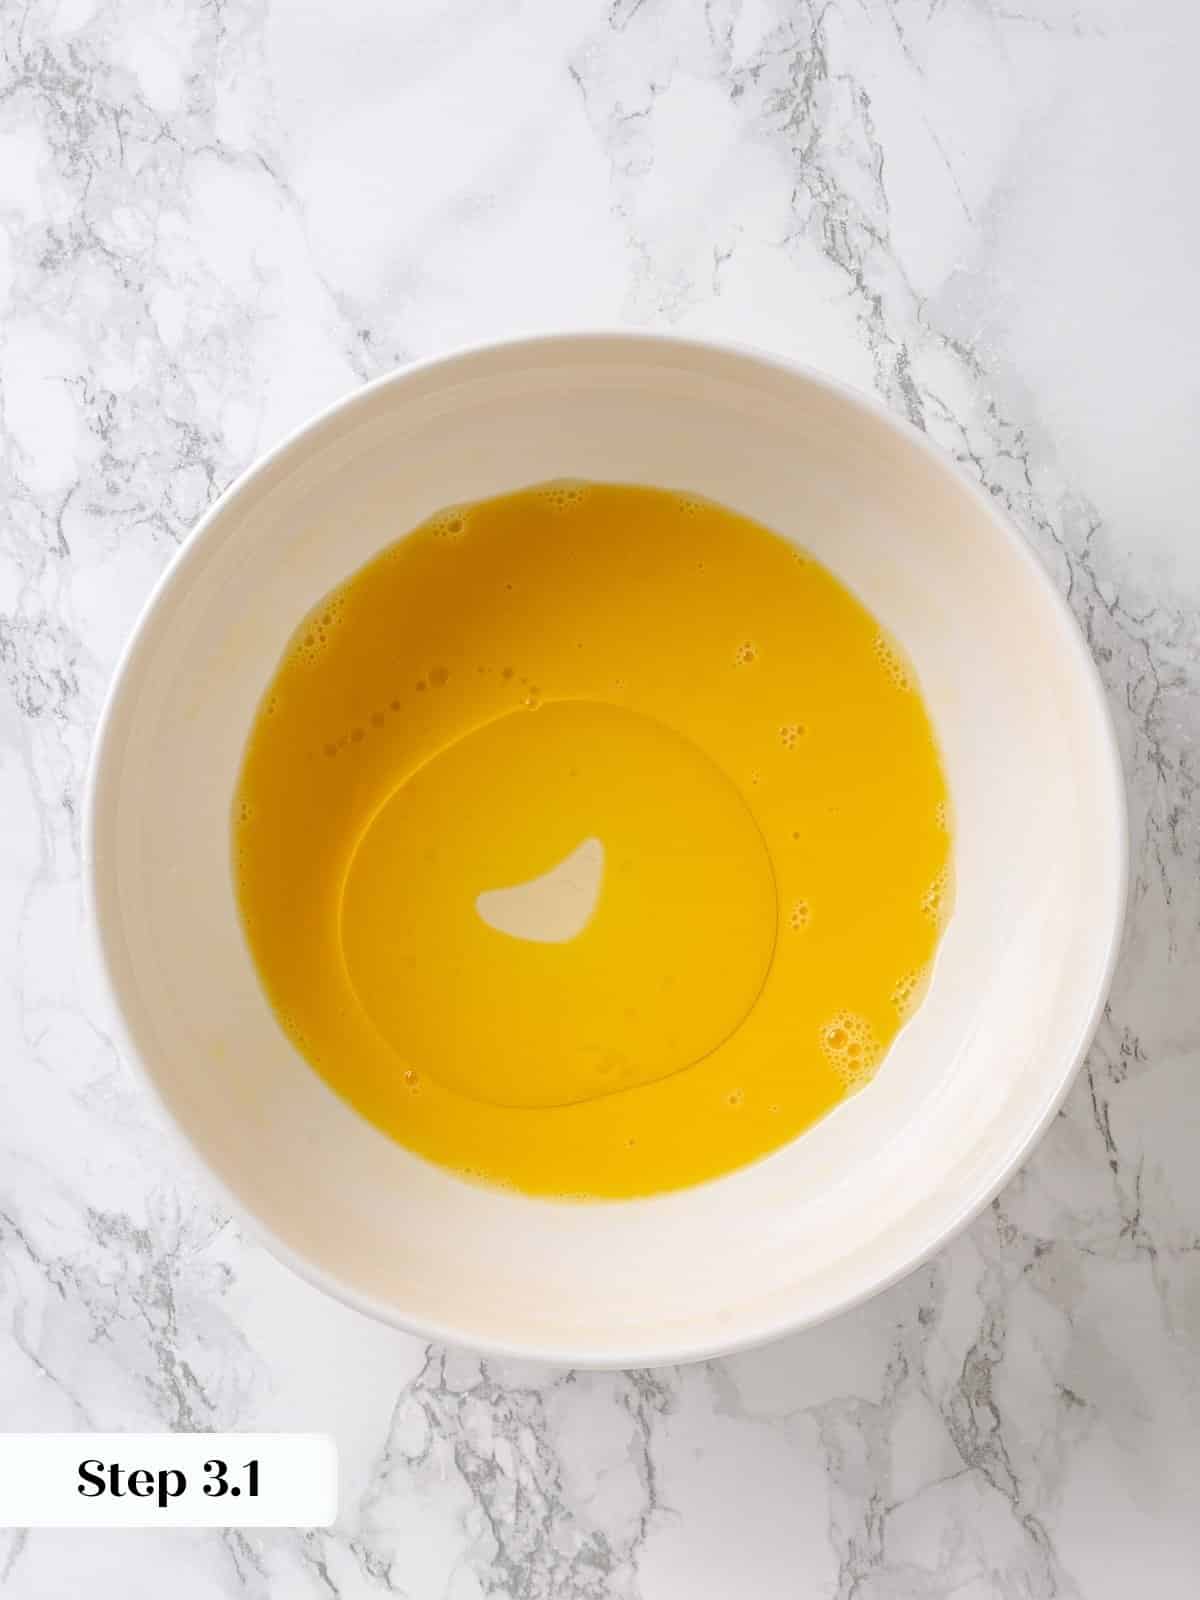
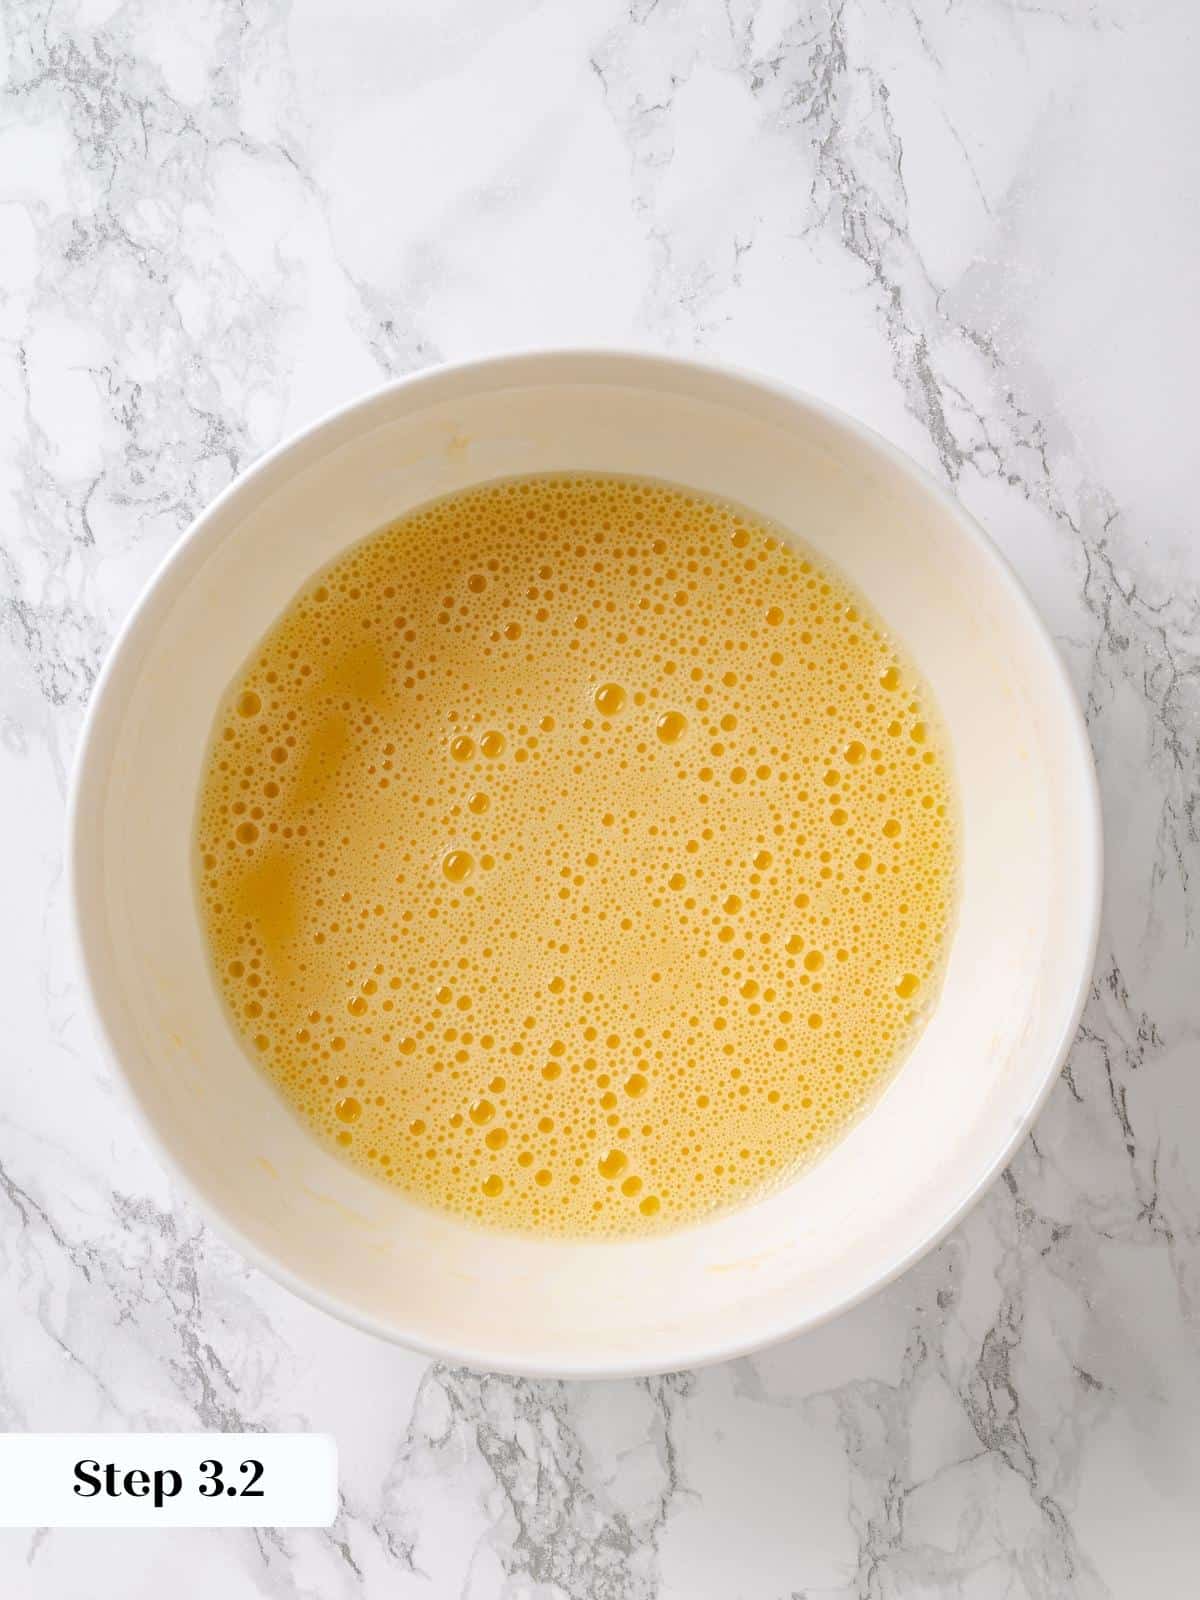
Step 3: In a separate large bowl, whisk the eggs until smooth and homogenous. Slowly pour the oil into the eggs while whisking to create an emulsion (photos 2 & 3).
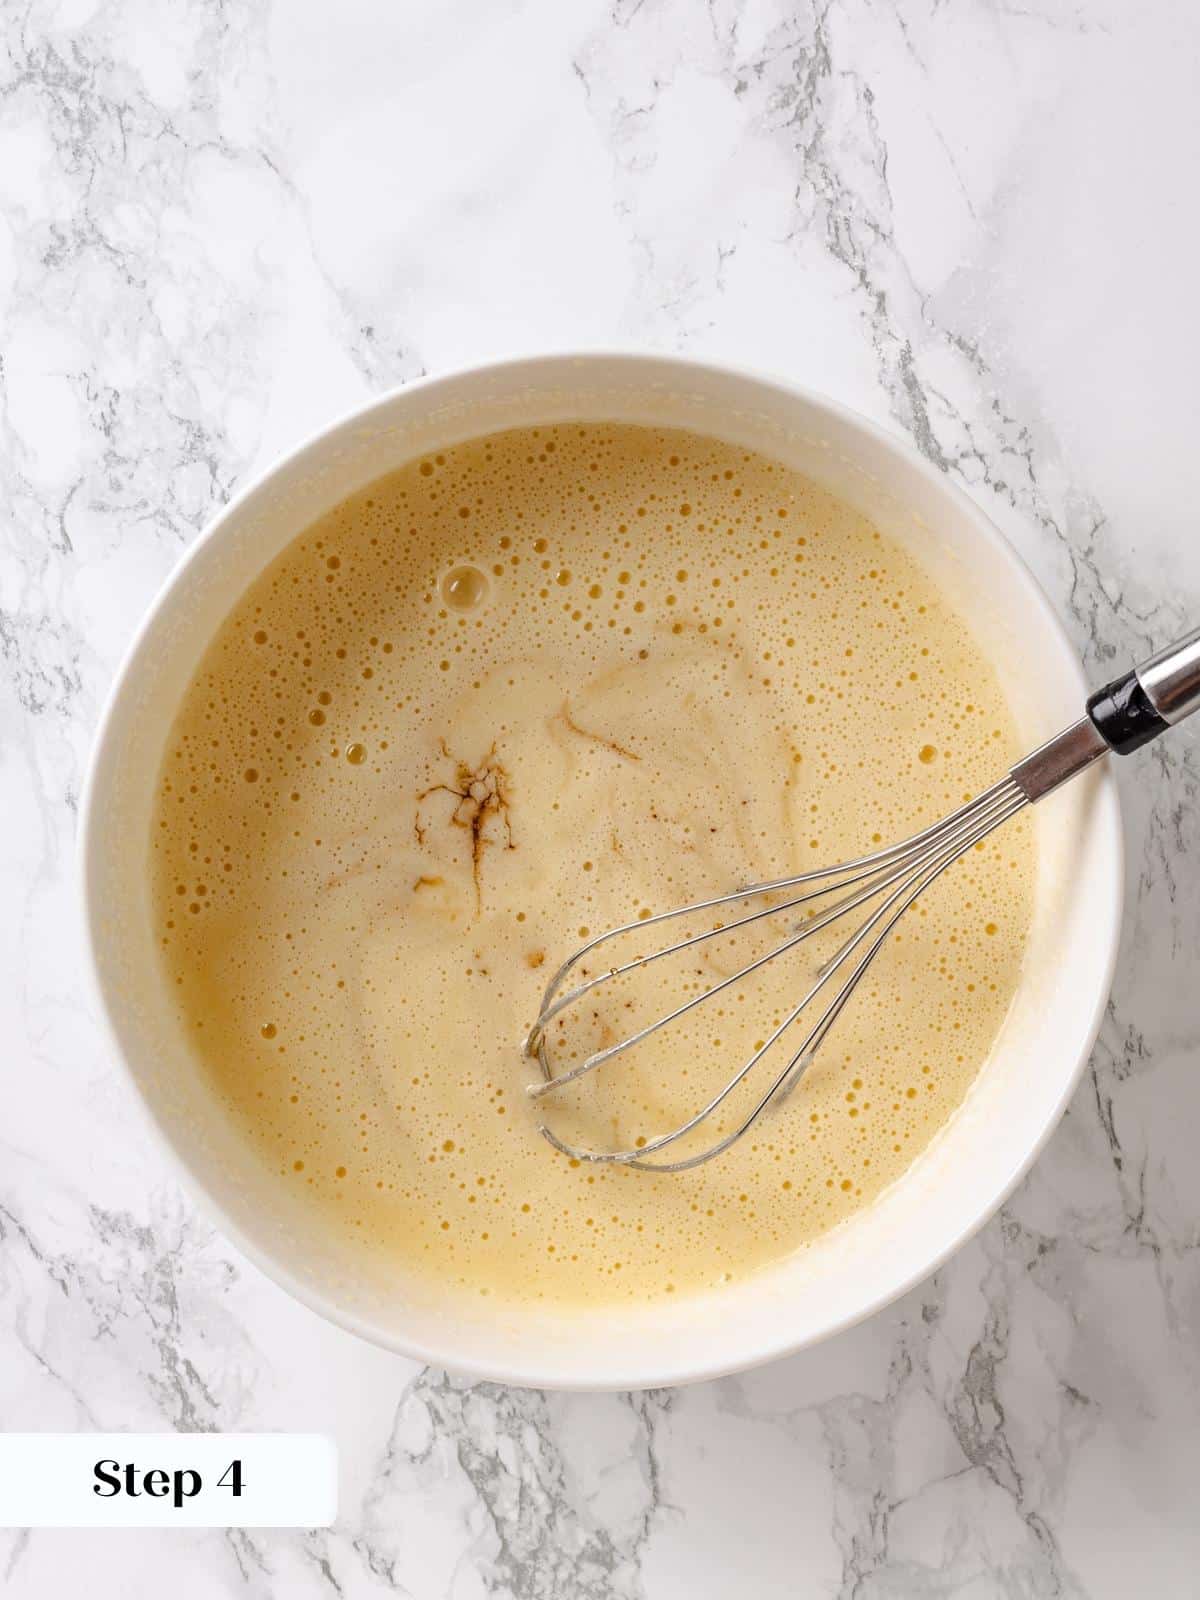
Step 4: Add the sugar to the bowl and the maple extract (optional) and whisk until smooth and incorporated. Whisk in the maple syrup (photo 4).
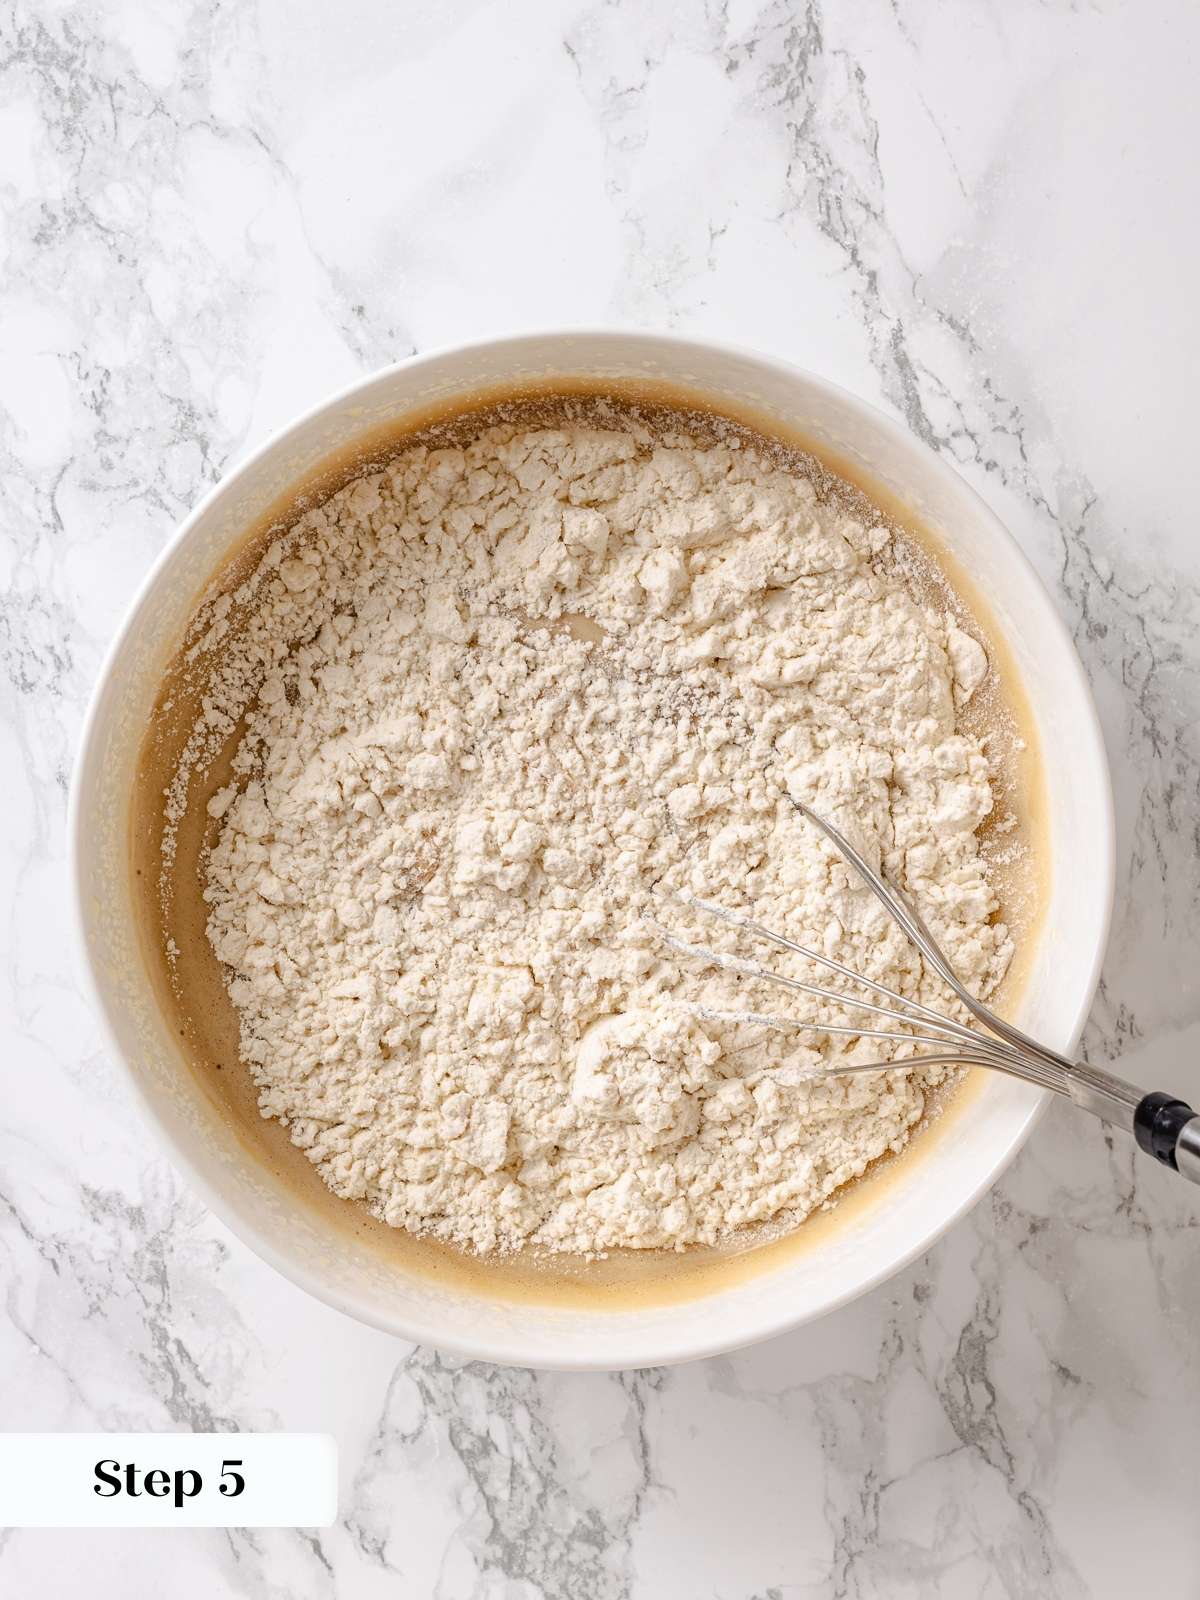
Step 5: Alternately add the flour and milk in 3 additions. I add about 1/3 of each at the same time, then whisk until no lumps remain. Repeat with the remaining dry ingredients and milk (photo 5).
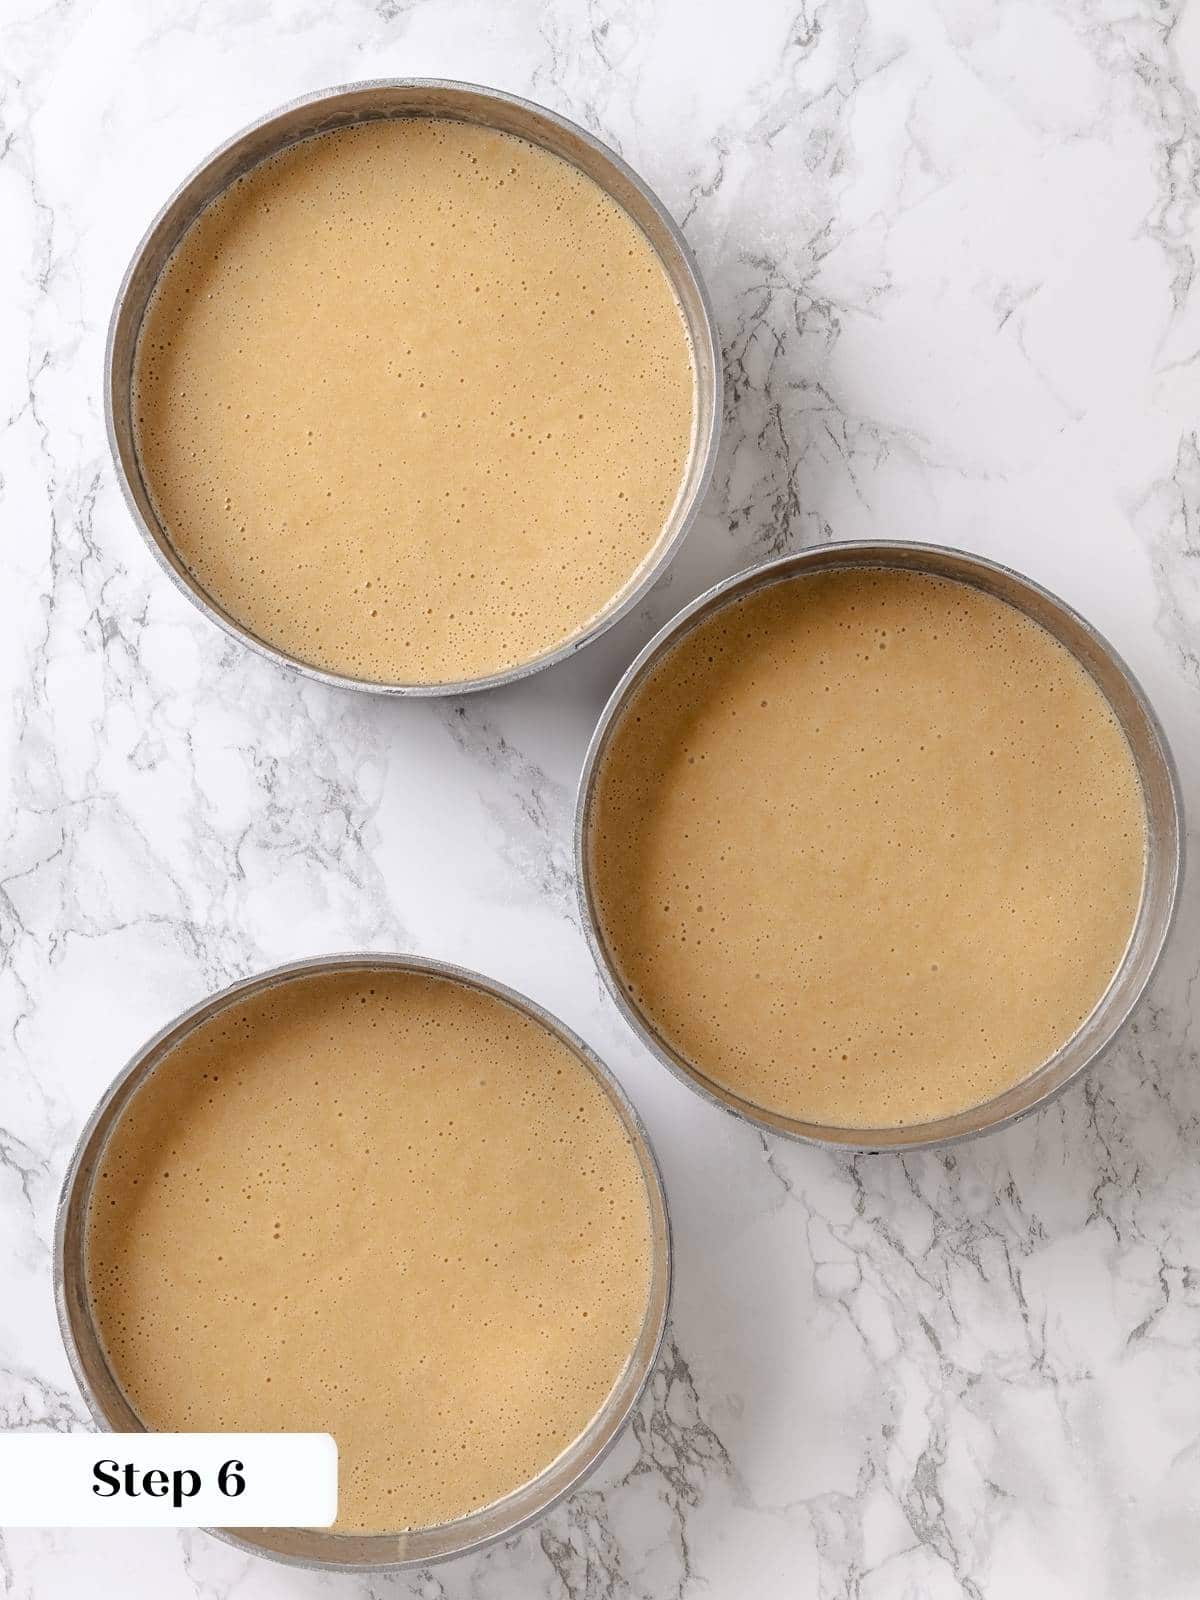
Step 6: Divide the batter between the cake pans and bake in the preheated oven (photo 6).
I did two layers, so each was 850g, and they baked for 37 minutes at 325°F convection.
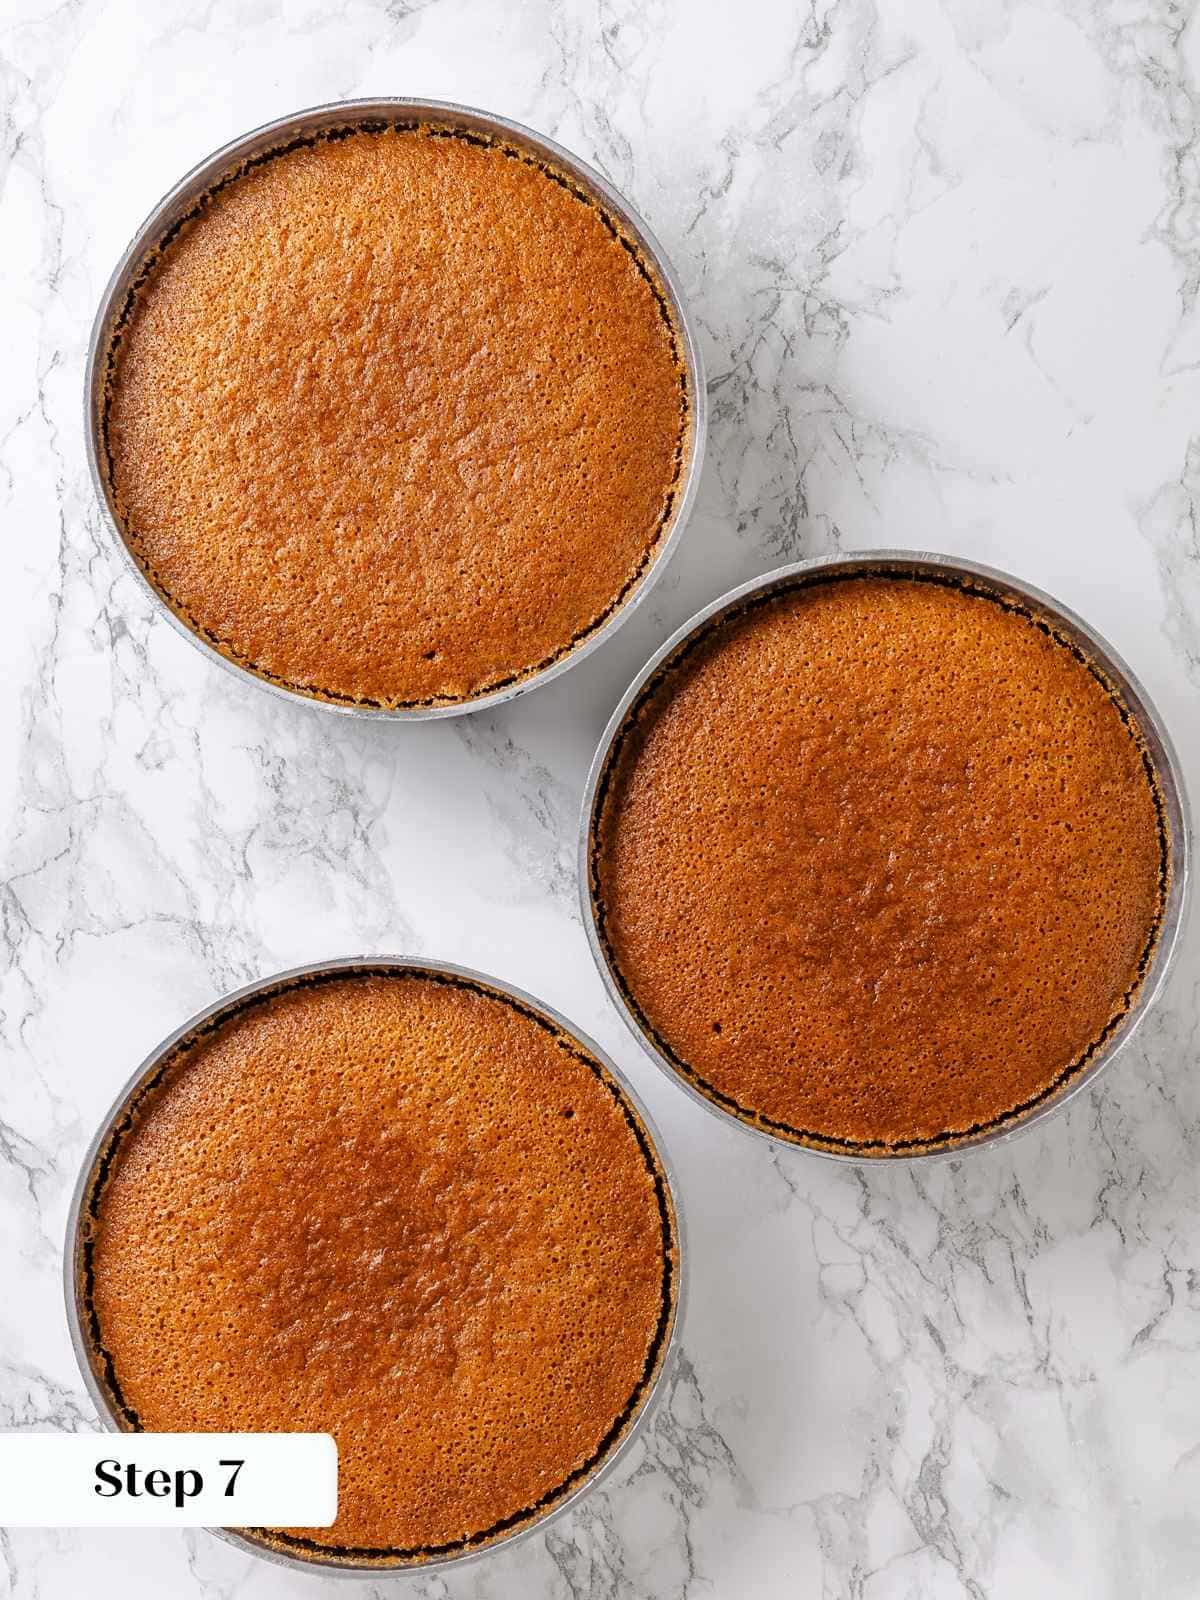
Step 7: Bake until a cake tester comes out clean or with just a few clinging crumbs. The tops will be a nice golden brown but darker around the edges (photo 7).
Step 8: Let cool for 10 minutes in the pans, then loosen the sides by running a paring knife or small offset spatula around the edges. Flip out onto a wire rack, remove parchment paper, and then cool completely before frosting.
Prepare Maple Frosting:
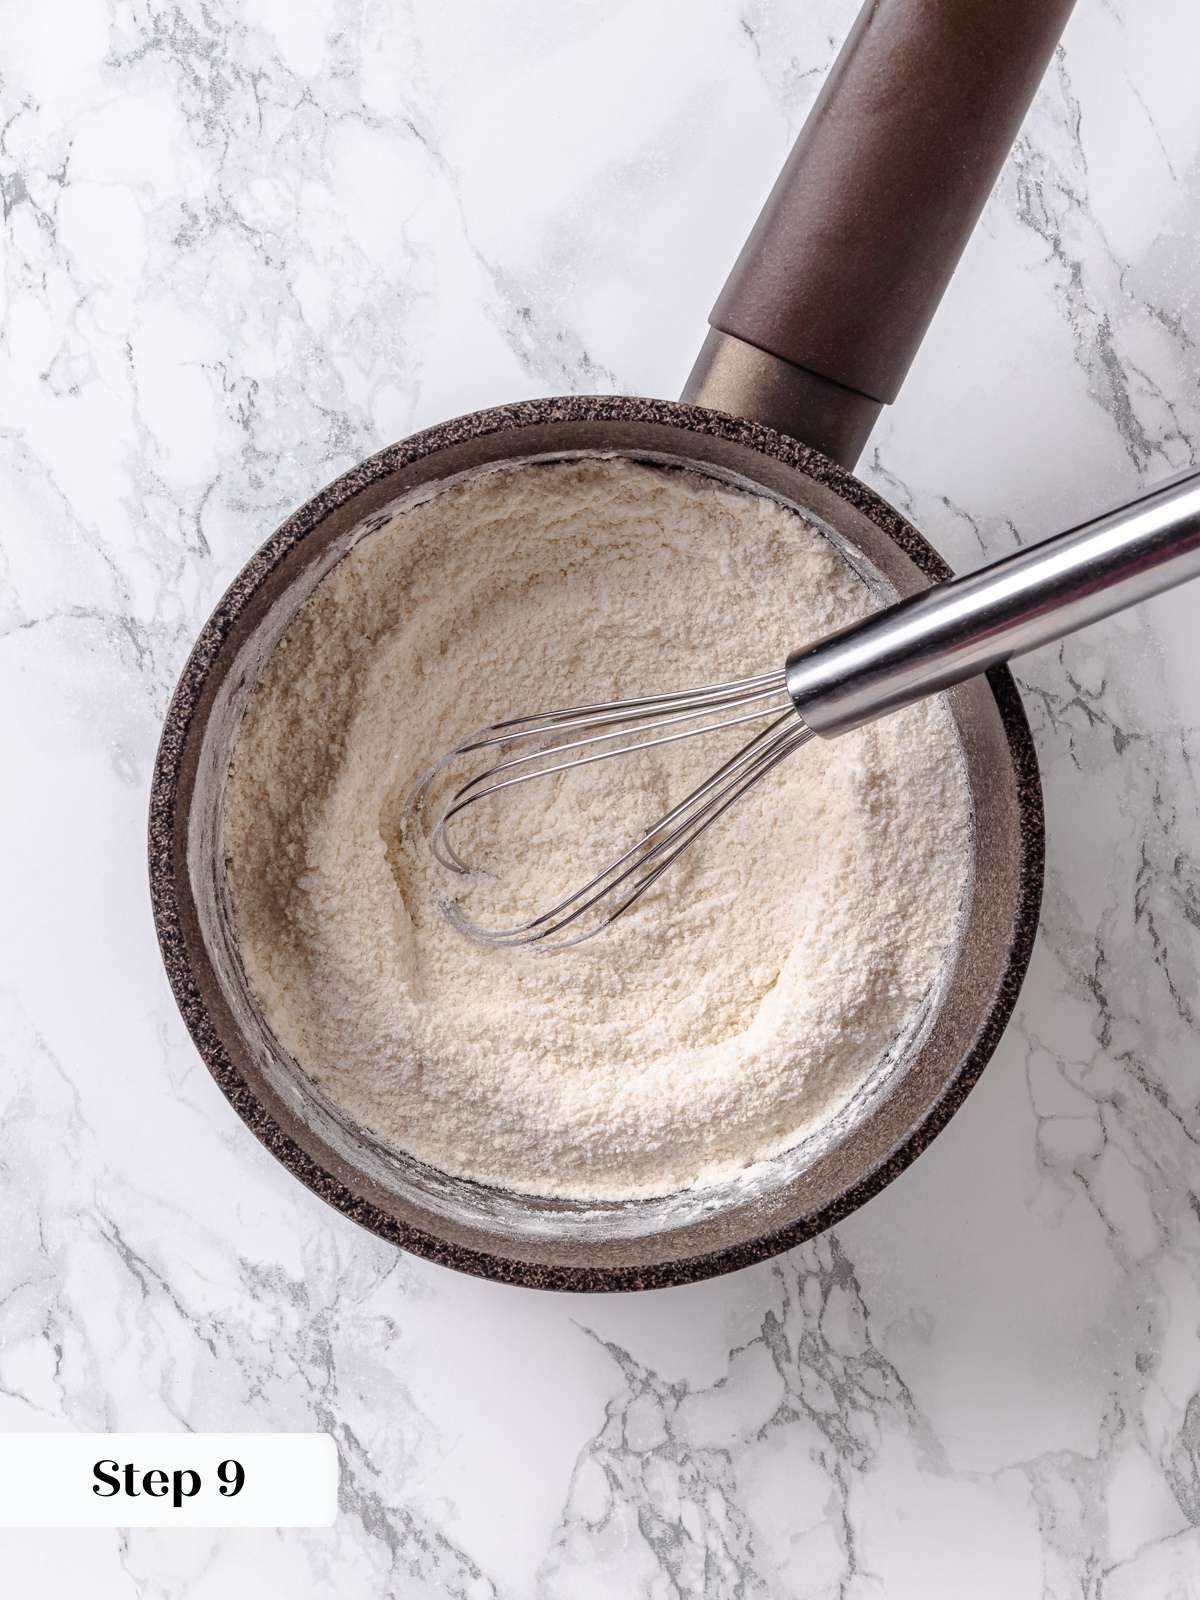
Step 9: Combine base. In a large saucepan, combine the flour, sugar, and salt. Stir to combine (photo 8).
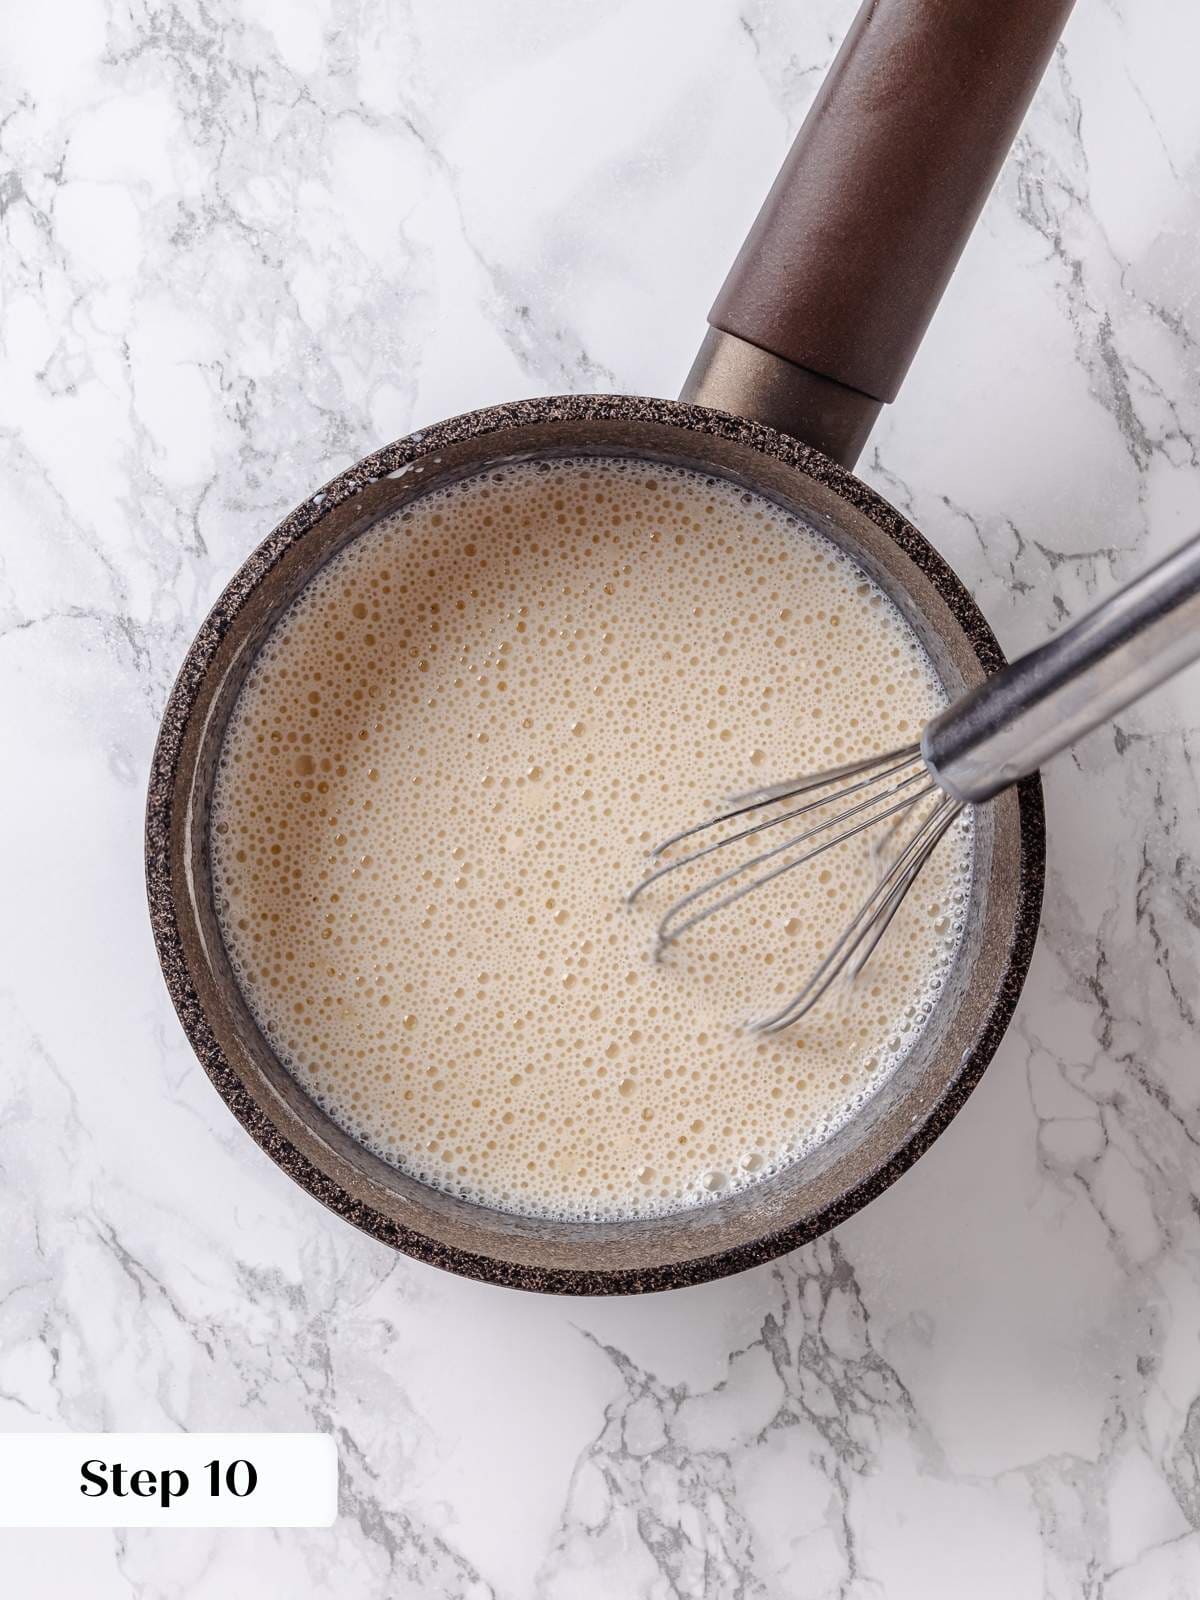
Step 10: Slowly whisk in the milk, adding just a little at a time, making sure it is completely incorporated before adding more. This will keep it lump-free, just like when making homemade vanilla pudding (photo 9).
Step 11: Add in the maple syrup. Switch from the whisk to a silicone spatula and stir constantly over medium heat (photo 10).
I like to use a zig-zag pattern across the pot and then around the edges. I repeat this same pattern to ensure that I am scraping the whole bottom and none will burn. It is the same technique that I use for crème anglaise or easy lemon curd!
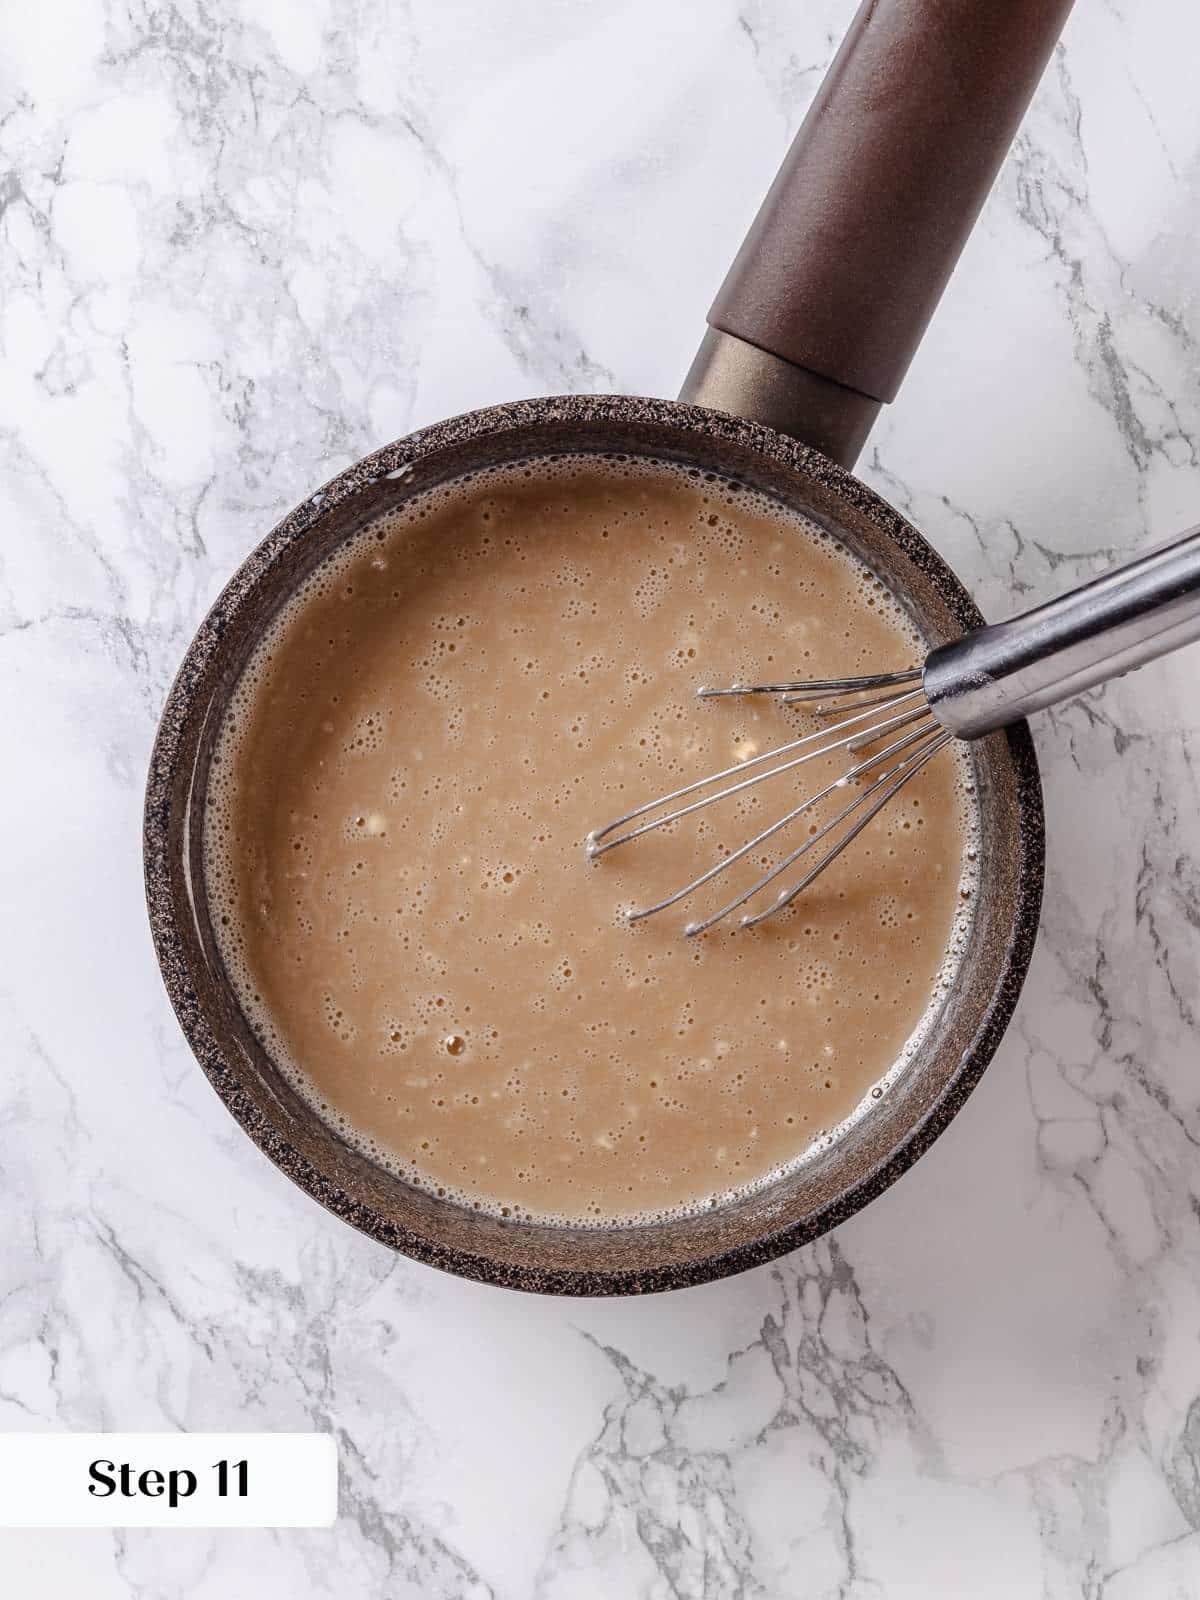
Step 12: Continue cooking until the flour mixture has thickened and will drop off a spoon in clumps rather than pour off in a stream.
This thickness will determine the consistency of your final frosting. A thicker base will make a pipeable frosting that holds beautiful lines and details even in high heat and humidity. This took about 25 minutes.
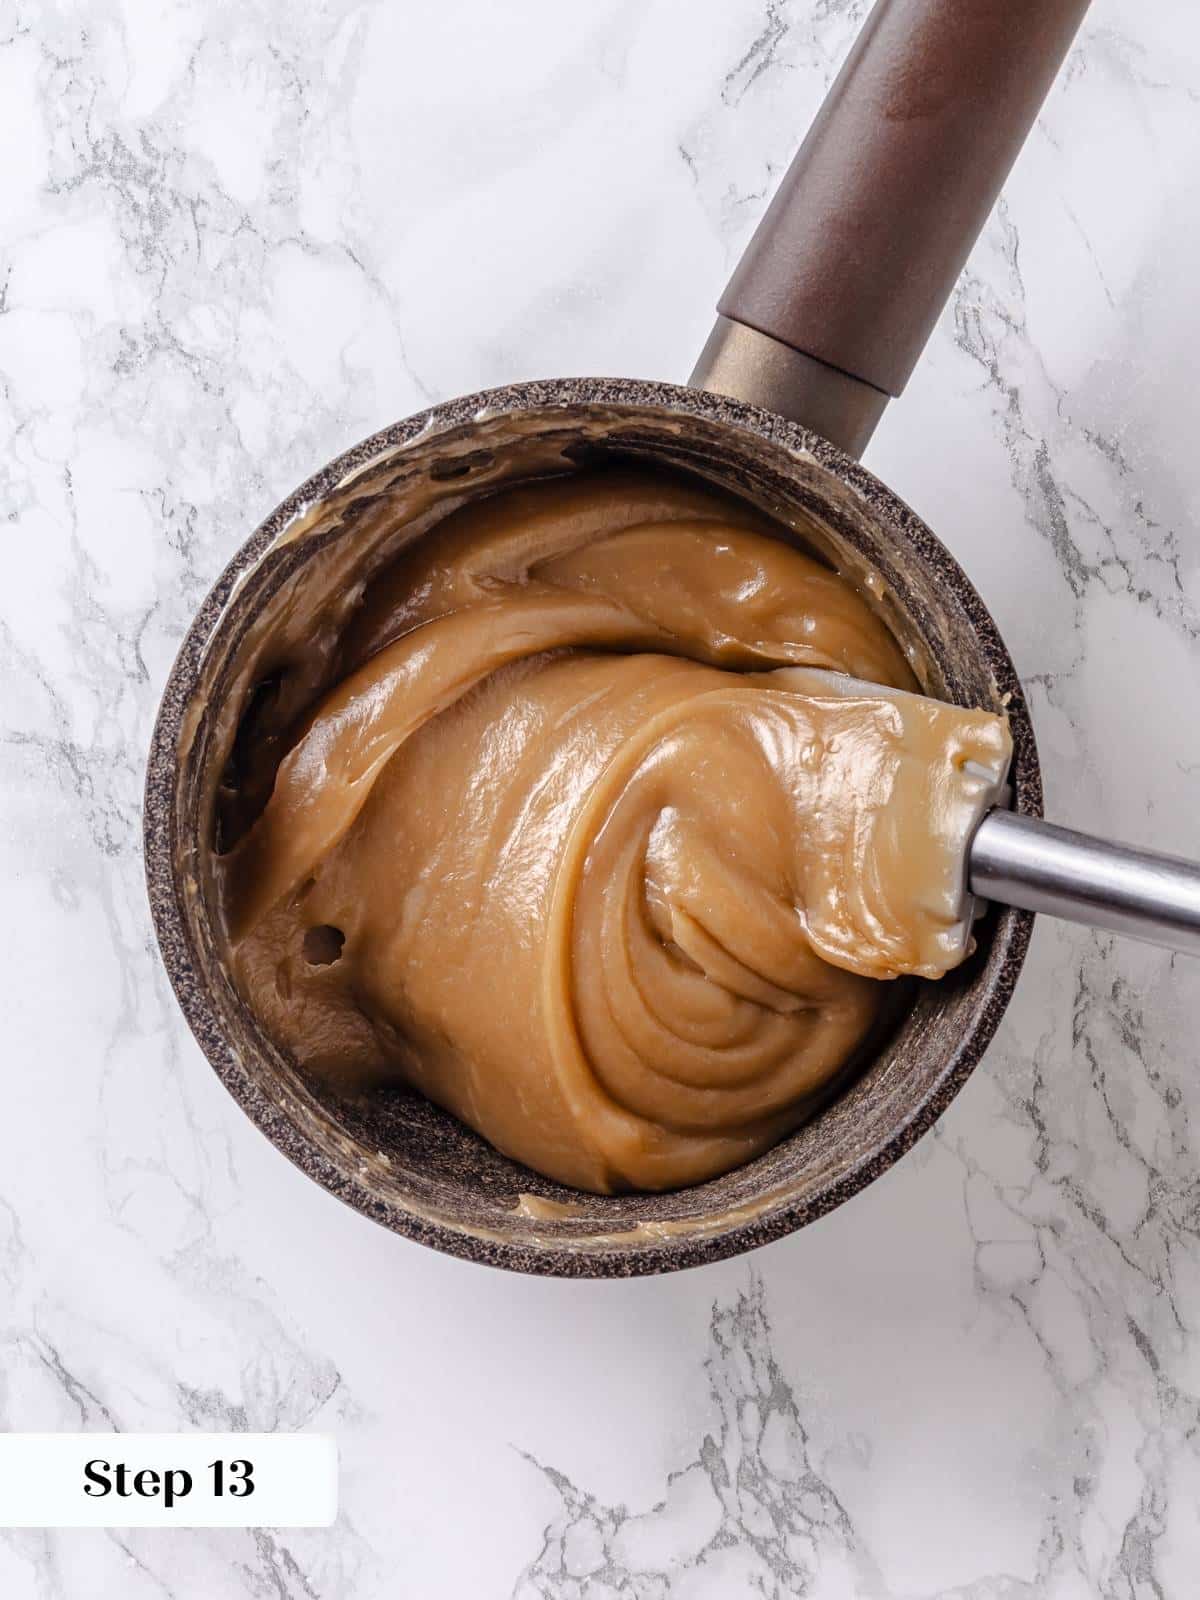
Step 13: Remove from the heat and scrape into a large bowl with the spatula. Cover the top with plastic wrap that is touching the surface, and allow to cool at room temperature until it is no longer warm to the touch. You can speed this up by cooling it in 20-minute intervals in the refrigerator, stirring and repeating until it is body temperature (photo 11).
Step 14: Whip the butter. In the bowl of a stand mixer fitted with the whisk attachment, beat the butter on medium-high speed until fluffy and almost white in color.
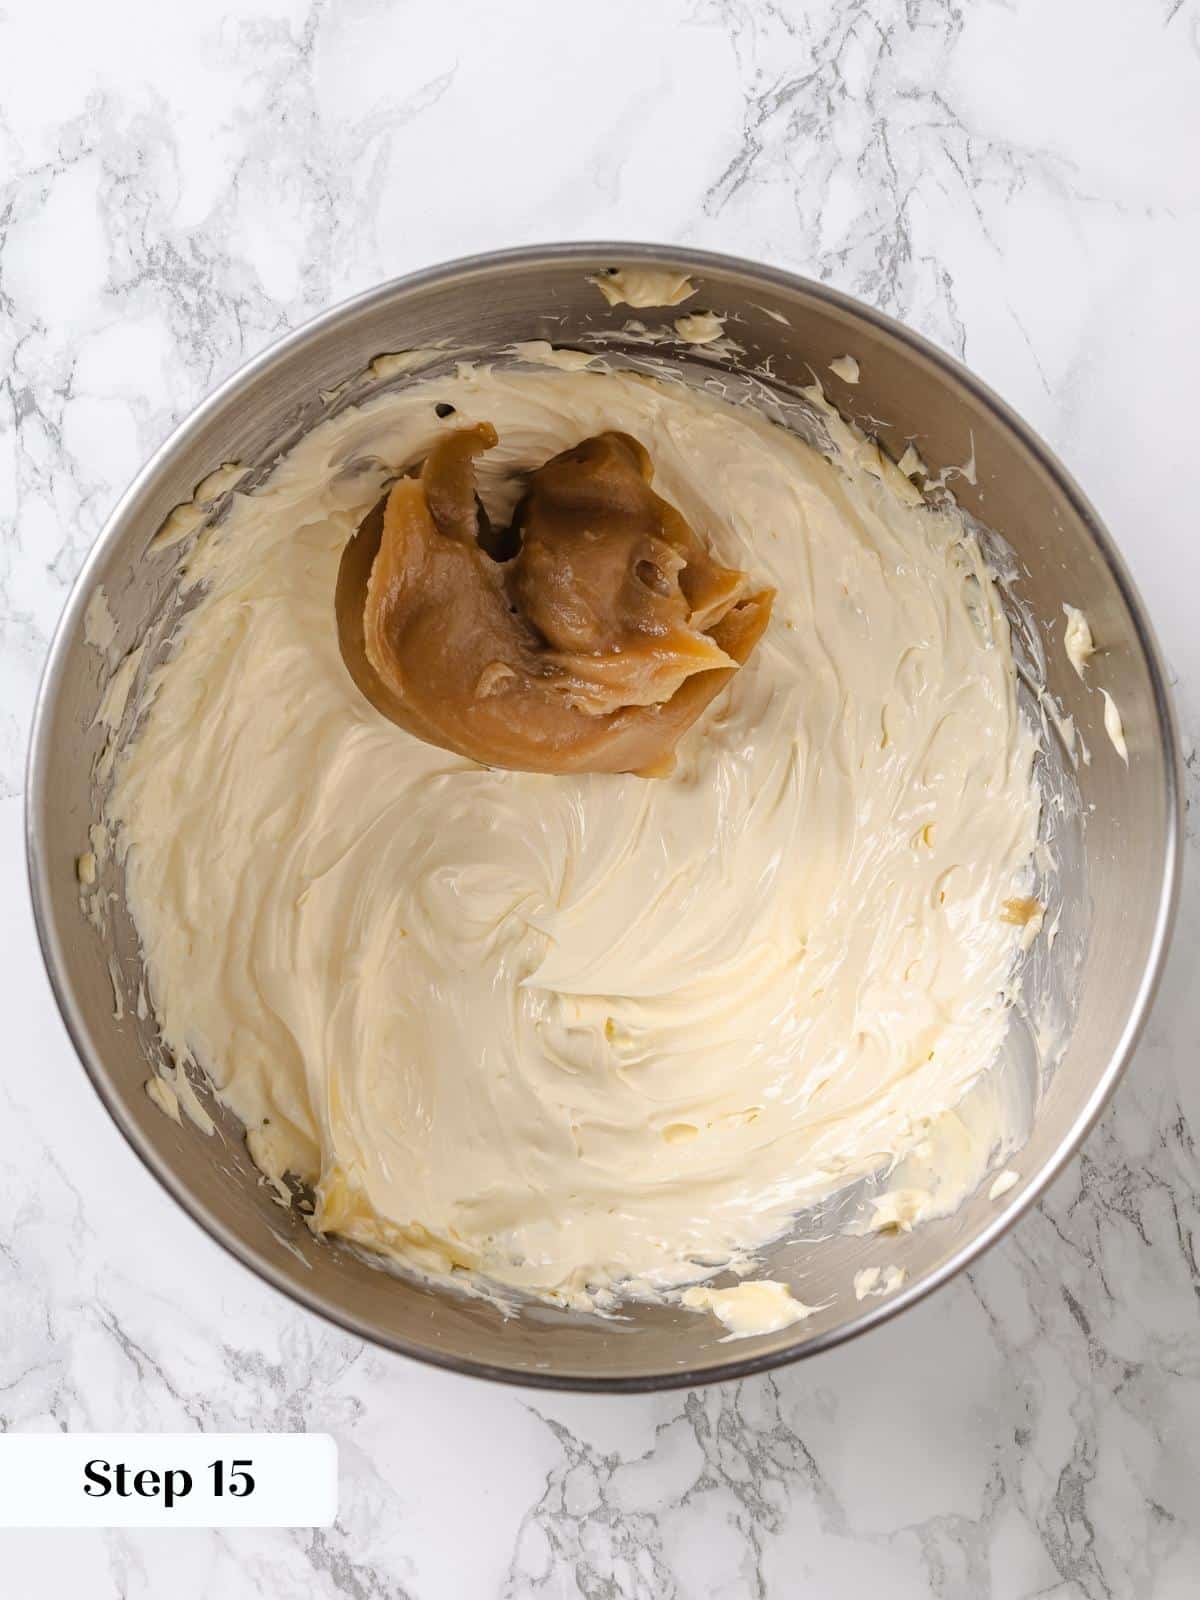
Step 15: Add base gradually. With the mixer running, add a spoonful of the maple mixture and allow it to beat in thoroughly before adding the next. Scraping down the sides of the bowl as you go (photo 12).
Step 16: Scrape sides and bottom. Stop the mixer to scrape in the last of the flour mixture and scrape down the sides and bottom of the bowl.
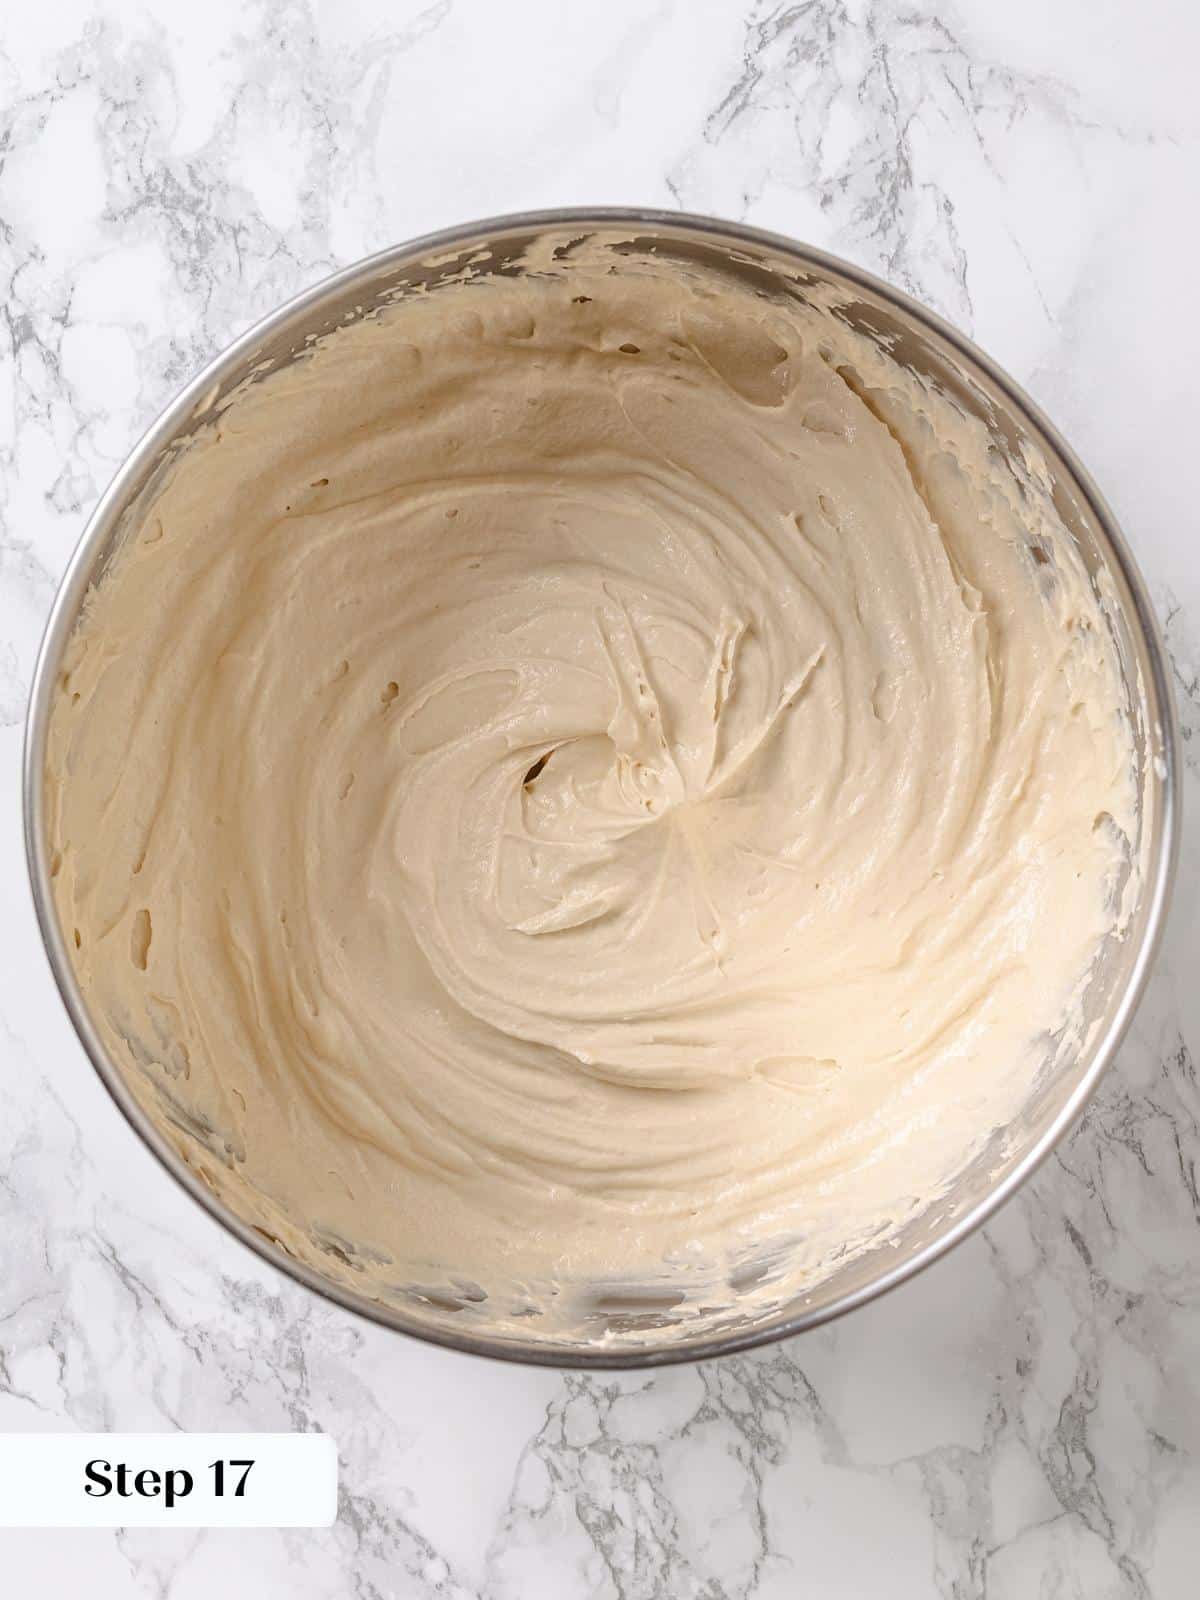
Step 17: Beat to stiff peaks. Add the vanilla extract and continue to mix on high until it holds stiff peaks (photo 13).
Assembly:
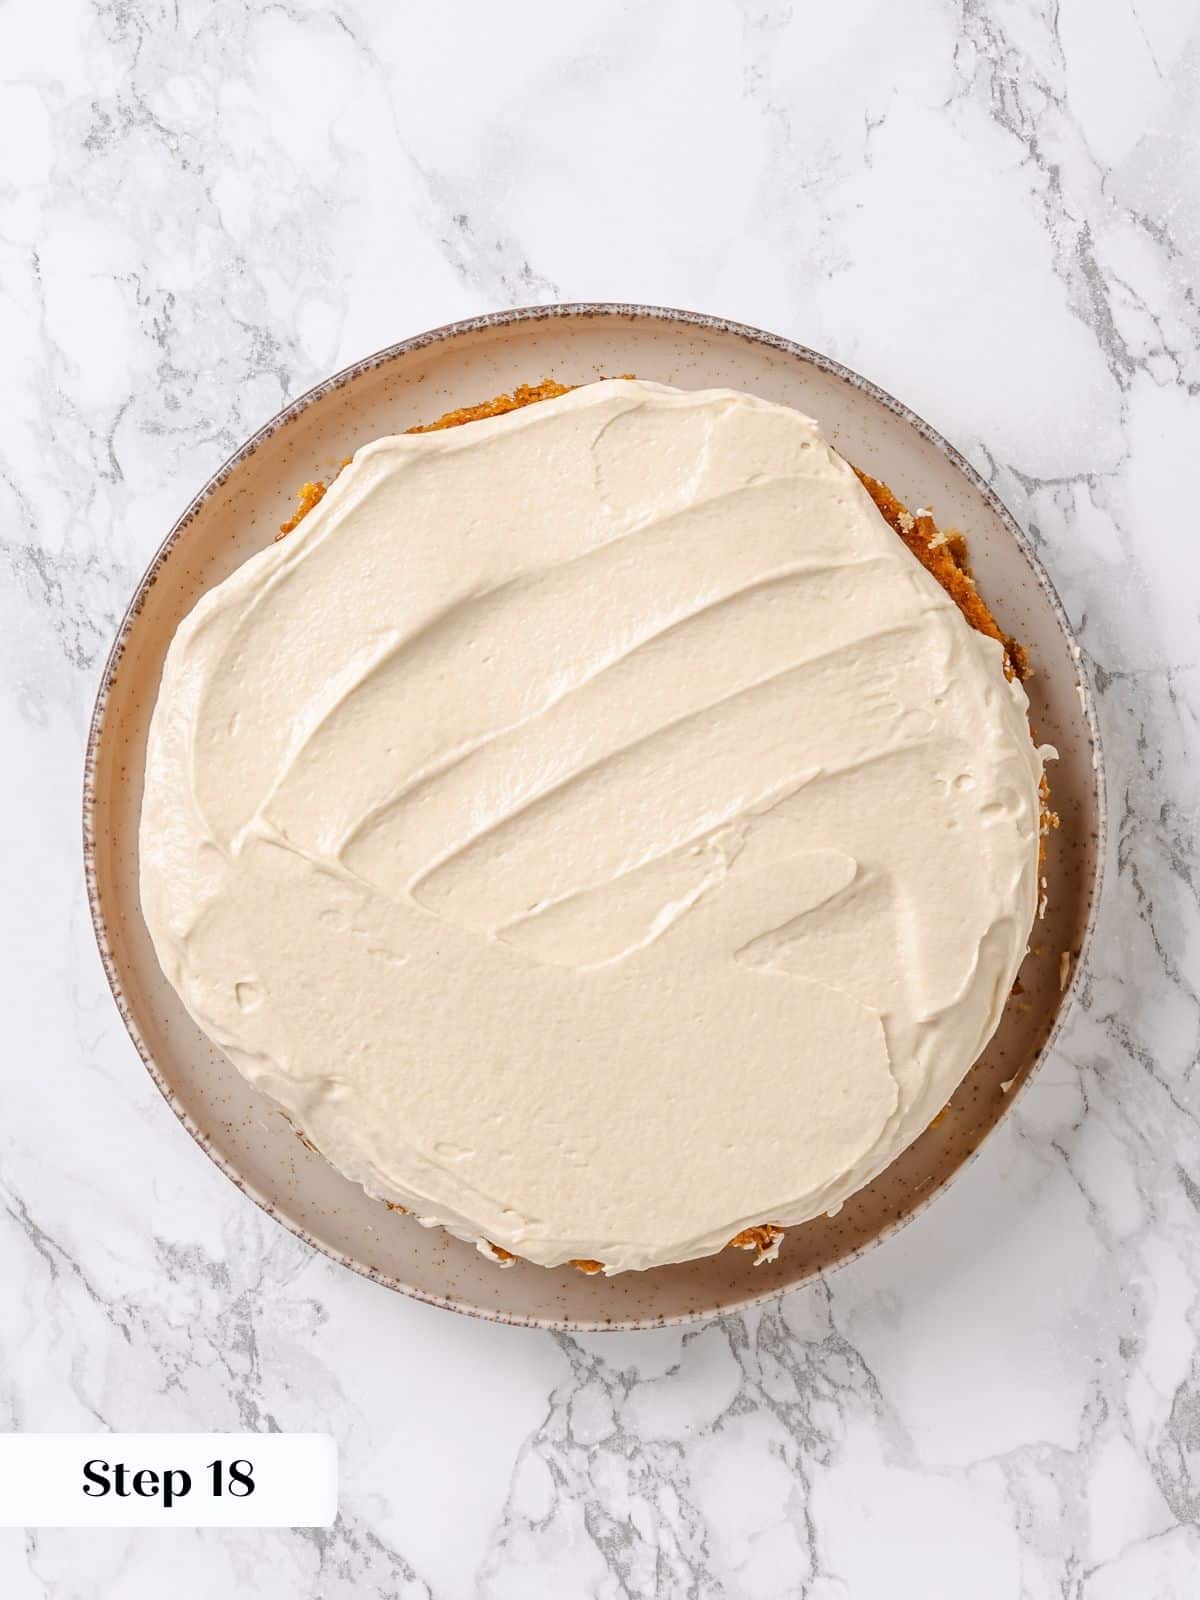
Step 18: First layer and crumb coat. Once the cakes are cooled, place one layer on your favorite cake stand, cake plate, or platter. Add about 1/3 of the frosting to the top of the cake and spread it out, allowing some to fall over the edges. Coat the edges with the frosting that spilled over – this is your crumb coat! (photo 14)
Ideally, refrigerate for 30 minutes to an hour to allow the buttercream to set a little. This cake is pretty heavy, and its weight will squish out the soft frosting. If you are short on time or patience, you can proceed without chilling.
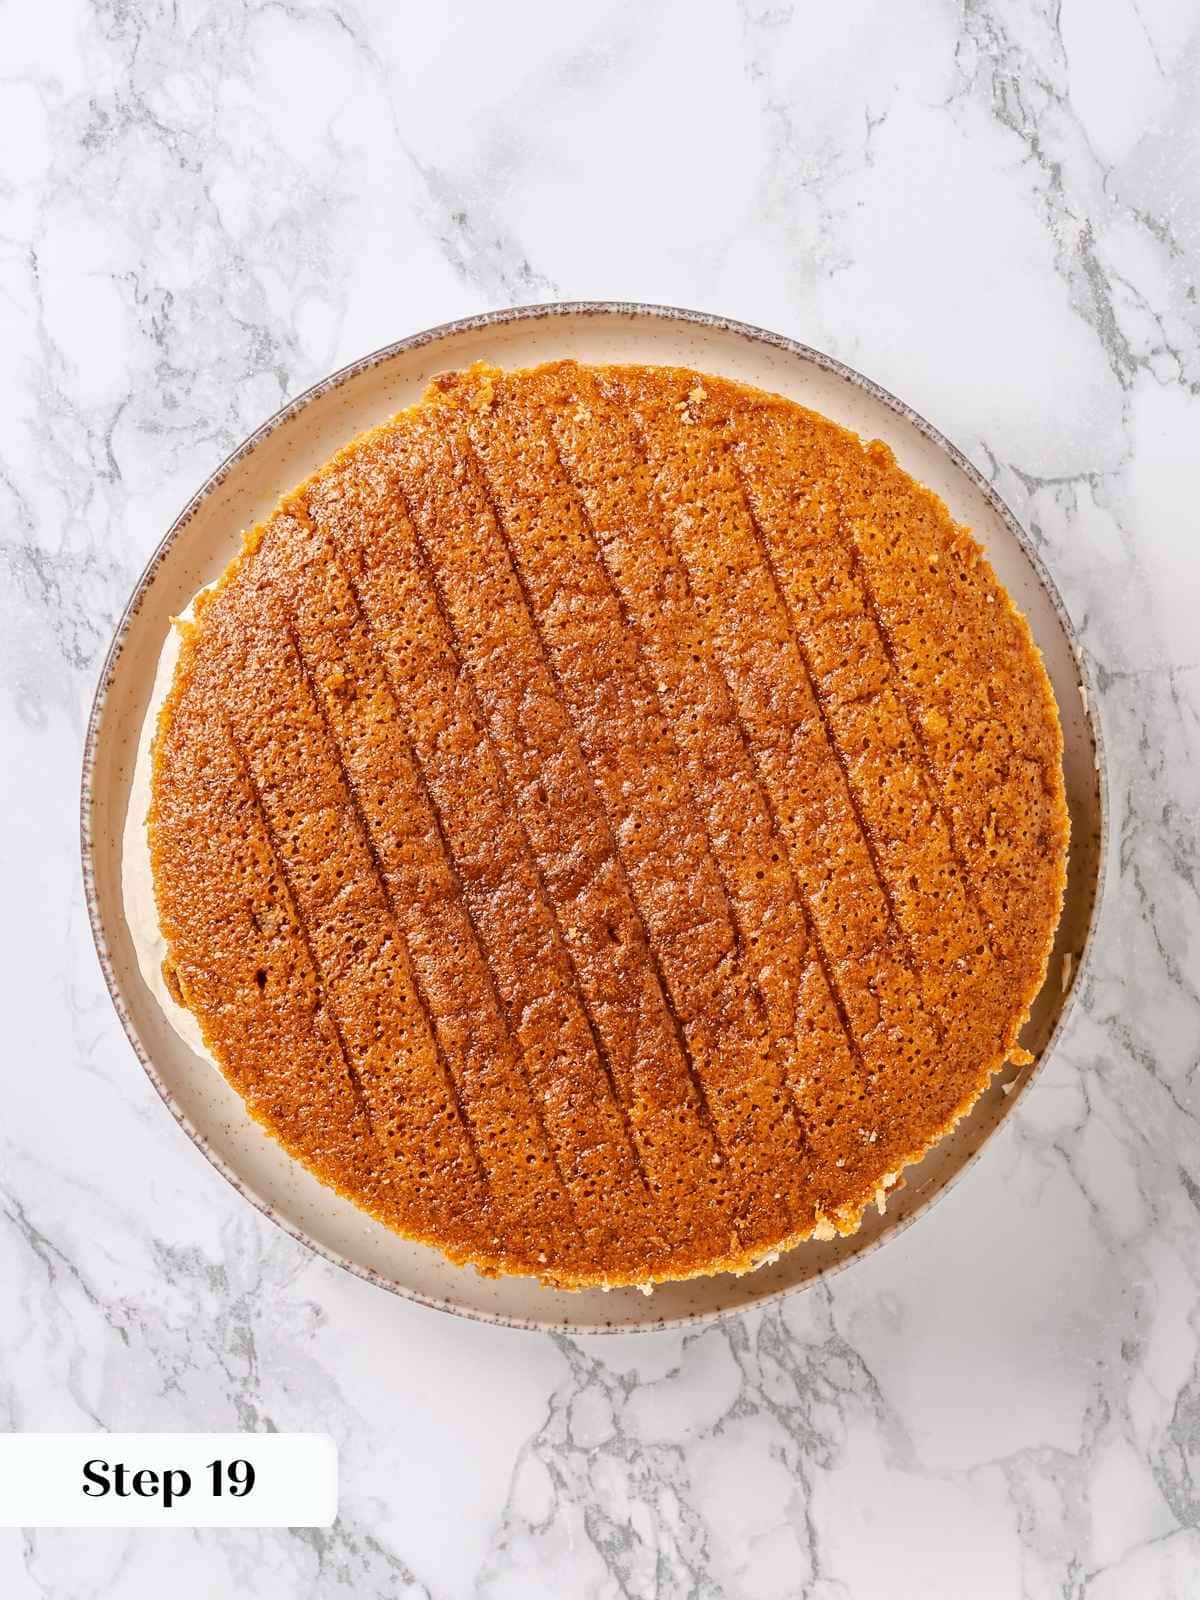
Step 19: Place the second layer on top of the frosting (photo 15) and repeat with another 1/3 of the frosting. Covering the top and crumb coating the sides.
Step 20: Fill in any gaps between the cake layers using an offset spatula or by filling a small piping bag with frosting and piping it in. This feels unnecessary for this cake, but I’m just giving you all the possibilities!
Step 21: Store and serve (photo 16). The cake will stay moist for 4 days. I do prefer to wrap and refrigerate after 1 day, but it is best served at room temperature.
Chef Lindsey’s Recipe Tip
I reduced the maple syrup in the frosting as much as possible without compromising the flavor. To further reduce the sweetness, consider making this ermine frosting recipe and substituting some of the vanilla extract with maple extract.
Recipe FAQs
Store unfrosted maple cake well-wrapped at room temperature, in the refrigerator, or frozen. Store unused maple frosting in an airtight, clean container in the fridge for up to 2 weeks. Once frosted, the cake can be kept at room temperature for up to four days. For longer storage, store in the refrigerator.
For the best texture and flavor, it is imperative to use pure maple syrup that is Grade A: dark amber, rich taste. This is formerly Grade B. This grade has been reduced more before bottling to concentrate the flavor and evaporate more moisture.
Not cooking the flour base long enough will cause the frosting to become too runny. Also, if you use butter that is too warm, the frosting won’t have enough structure to hold its shape when piped.
Recommended Cozy Cake Recipes
Cake Recipes
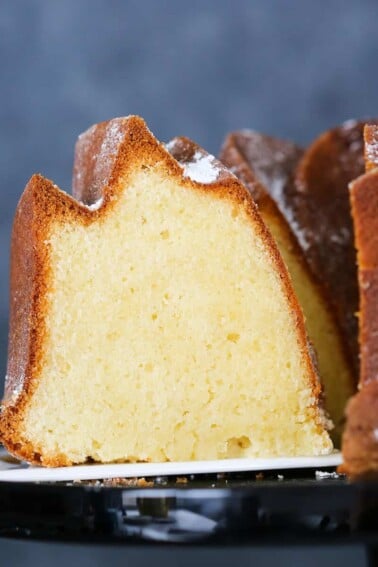
Maple Pound Cake with Maple Glaze
Cake Recipes
Applesauce Cake
Cake Recipes
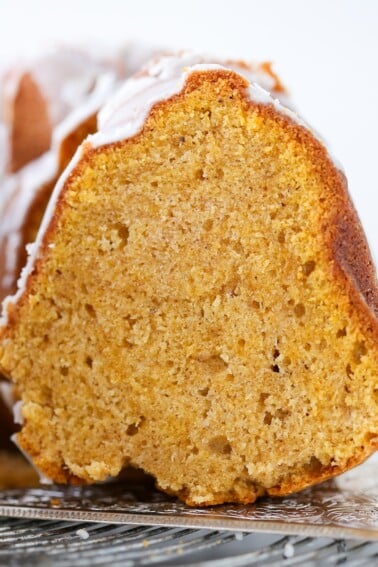
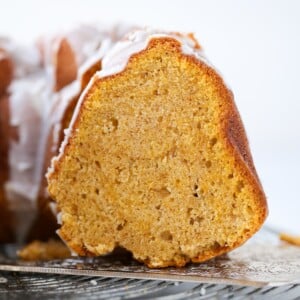
Pumpkin Bundt Cake
Cake Recipes
Sour Cream Pound Cake
If you tried this recipe and loved it please leave a 🌟 star rating and let me know how it goes in the comments below. I love hearing from you; your comments make my day!
Maple Cake
Ingredients
For the cake:
- 3 ½ cups all-purpose flour
- 1 ½ teaspoons kosher salt
- 2 teaspoons baking powder
- ½ teaspoon baking soda
- 3 large eggs
- ½ teaspoon maple extract optional
- ¾ cup vegetable oil or another neutral oil
- 1 ½ cups granulated sugar
- 1 cup maple syrup grade A, dark amber
- 1 cup milk
For the maple ermine frosting:
- 10 tablespoons all-purpose flour
- 1 cup whole milk
- ¾ cup maple syrup grade A, dark amber
- ⅔ cup granulated sugar
- 2 teaspoons vanilla extract
- 1 teaspoon kosher salt
- 2 cups unsalted butter room temperature
Instructions
Prepare the Cake:
- Preheat the oven to 325°F convection (with the fan) or 350°F conventional (without the fan)—spray and line 2 (or 3) 8 or 9-inch cake pans with parchment paper.
- Into a medium bowl, combine the all-purpose flour, salt, baking powder, and baking soda. Set aside.
- In a separate large bowl, whisk the eggs until smooth and homogenous. Slowly pour the oil into the eggs while whisking to create an emulsion.
- Add the sugar to the bowl and the maple extract (optional) and whisk until smooth and incorporated. Whisk in the maple syrup.
- Alternately add the flour and milk in 3 additions. I add about 1/3 of each at the same time, then whisk until no lumps remain. Repeat with the remaining dry ingredients and milk.
- Divide the batter between the cake pans and bake in the preheated oven.
- Bake until a cake tester comes out clean or with just a few clinging crumbs. The tops will be a nice golden brown but darker around the edges.
- Let cool for 10 minutes in the pans, then loosen the sides by running a paring knife or small offset spatula around the edges. Flip out onto a wire rack, remove parchment paper, and then cool completely before frosting.
Prepare Maple Frosting:
- In a large saucepan, combine the flour, sugar, and salt. Stir to combine.
- Slowly whisk in the milk, adding just a little at a time, making sure it is completely incorporated before adding more. This will keep it lump-free, just like when making homemade vanilla pudding.
- Stir in maple syrup. Switch from the whisk to a silicone spatula and stir constantly over medium heat.
- Continue cooking until the flour mixture has thickened and will drop off a spoon in clumps rather than pour off in a stream.
- Remove from the heat and scrape into a large bowl with the spatula. Cover the top with plastic wrap that is touching the surface, and allow to cool at room temperature until it is no longer warm to the touch. You can speed this up by cooling it in 20-minute intervals in the refrigerator, stirring and repeating until it is body temperature.
- In the bowl of a stand mixer fitted with the whisk attachment, beat the butter on medium-high speed until fluffy and almost white in color.
- With the mixer running, add a spoonful of the maple mixture and allow it to beat in thoroughly before adding the next. Scraping down the sides of the bowl as you go.
- Stop the mixer to scrape in the last of the flour mixture and scrape down the sides and bottom of the bowl.
- Add the vanilla extract and continue to mix on high until it holds stiff peaks.
Assembly:
- Once the cakes are cooled, place one layer on your favorite cake stand, cake plate, or platter. Add about 1/3 of the frosting to the top of the cake and spread it out, allowing some to fall over the edges. Coat the edges with the frosting that spilled over – this is your crumb coat!
- Place the second layer on top of the frosting and repeat with another 1/3 of the frosting. Covering the top and crumb coating the sides.
- Fill in any gaps between the cake layers using an offset spatula or by filling a small piping bag with frosting and piping it in. This feels unnecessary for this cake, but I’m just giving you all the possibilities!
- Store and serve. The cake will stay moist for 4 days. I do prefer to wrap and refrigerate after 1 day, but it is best served at room temperature.
Notes
Nutrition
Before You Go
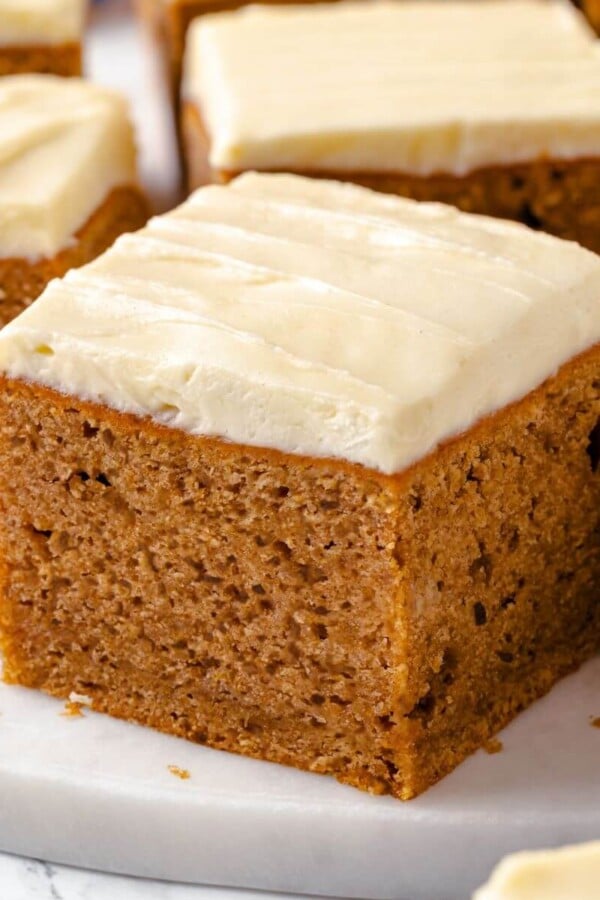
I hope you enjoyed this sweet autumnal layered cake recipe. Check out our other delicious fall dessert recipes like this pumpkin cake, molasses cake, or these pecan pie bars!


I made this cake for Rosh Hashanah with an apple compote filling, and it was a hit! The cake is incredibly moist, and honestly, the frosting was easier to make than I thought it would be. Definitely have to stir the entire time while cooking the flour base, but so worth it!
This cake was exactly what I was hoping for: soft, moist, and just the right amount of sweet. The frosting is smooth and delicate without being heavy. I loved that I could enjoy a big piece without feeling overwhelmed.