This post may contain affiliate links. Please read our disclosure policy.
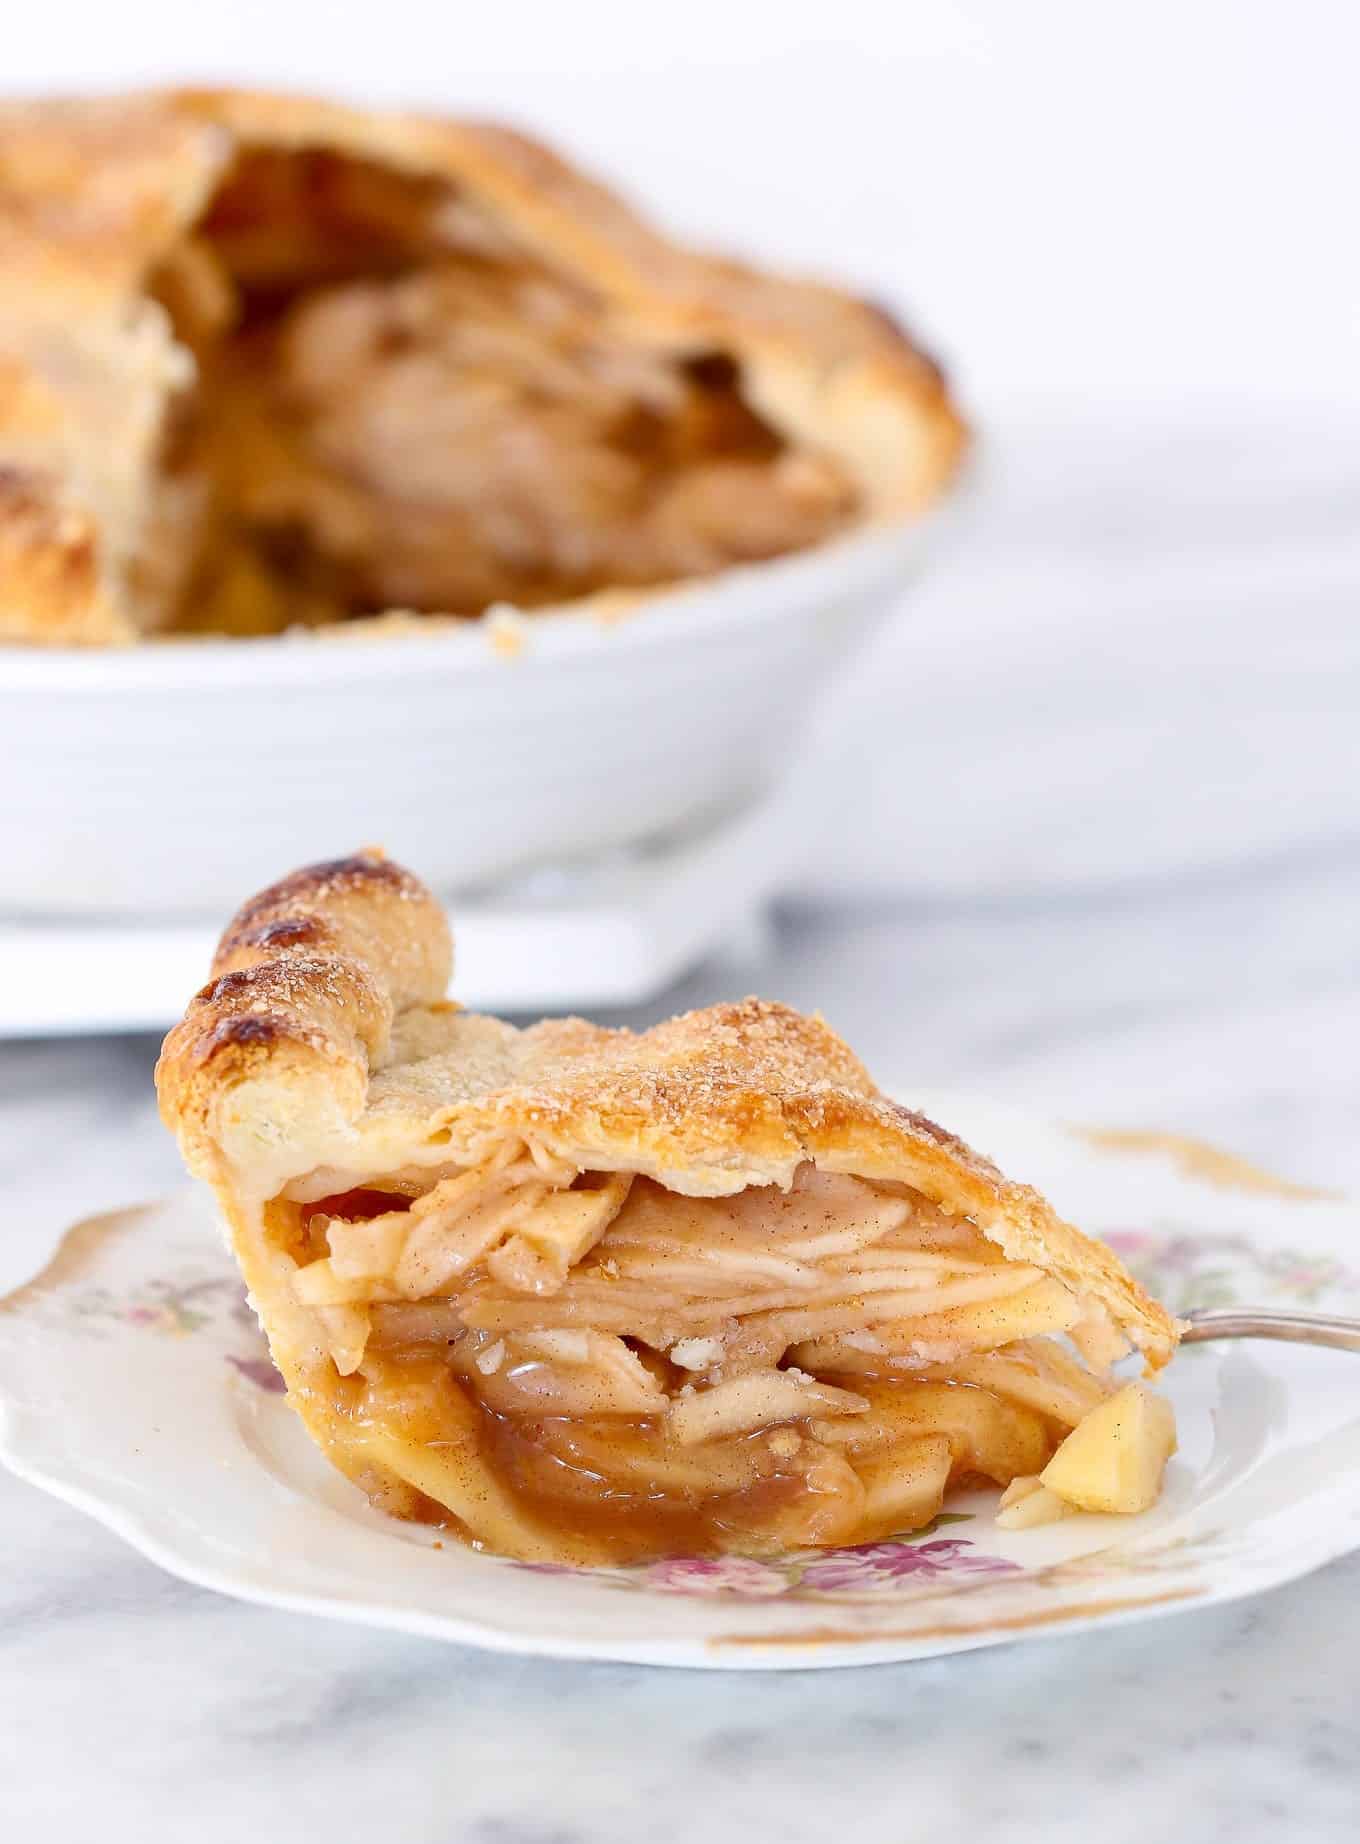
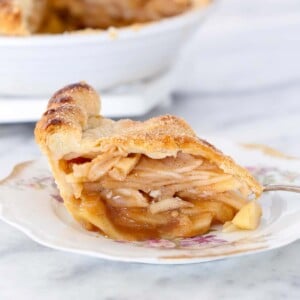
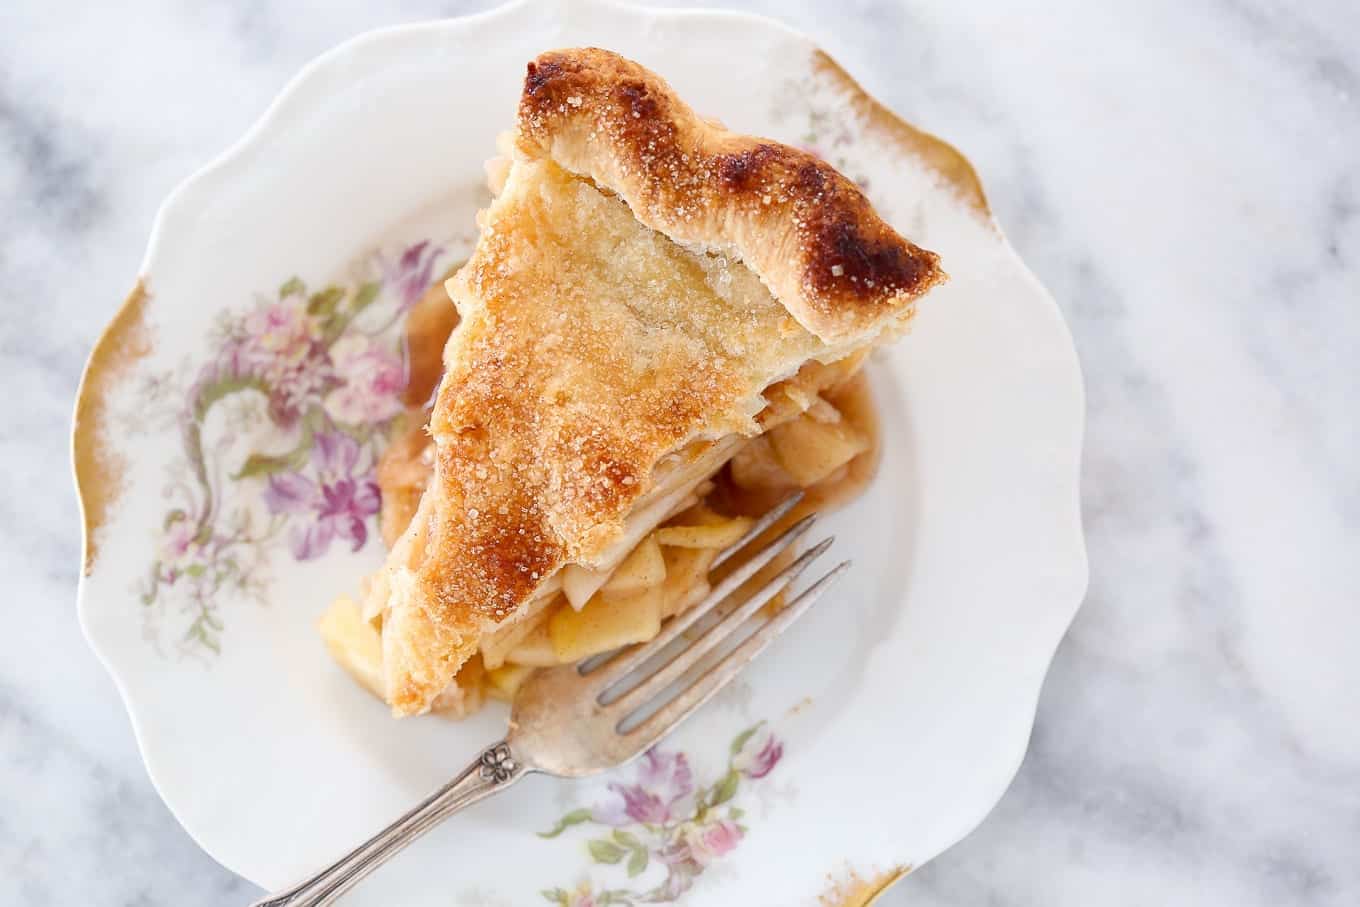
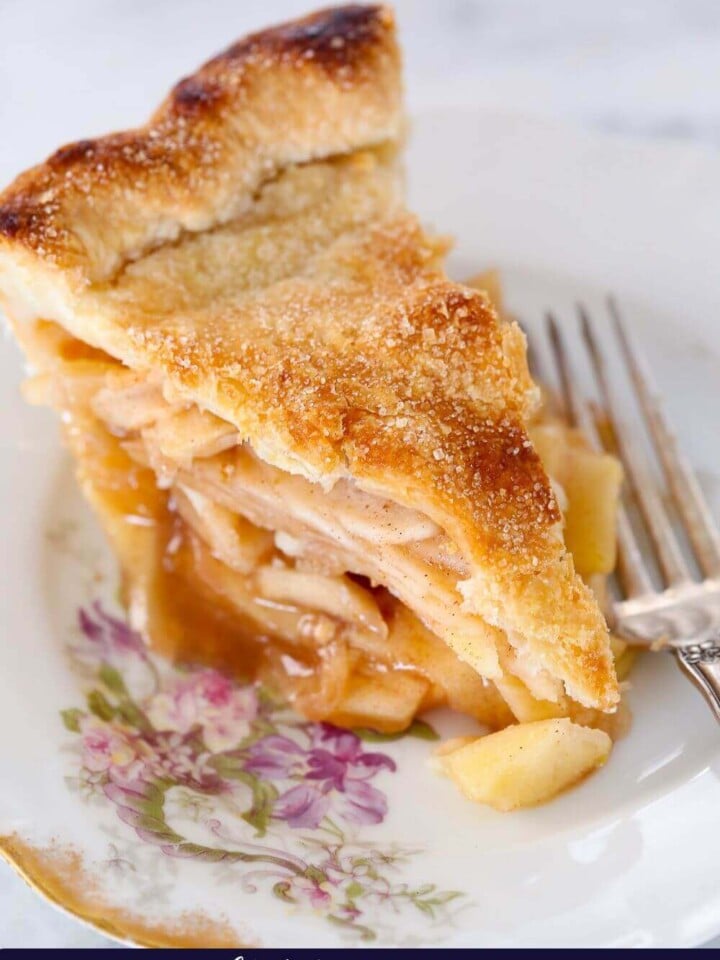
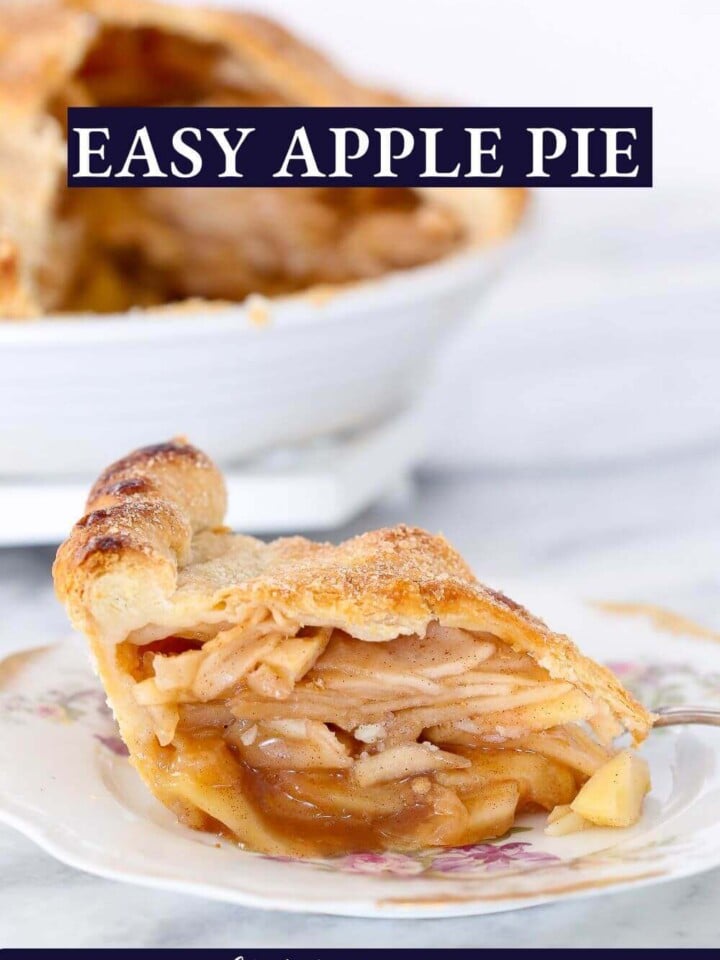
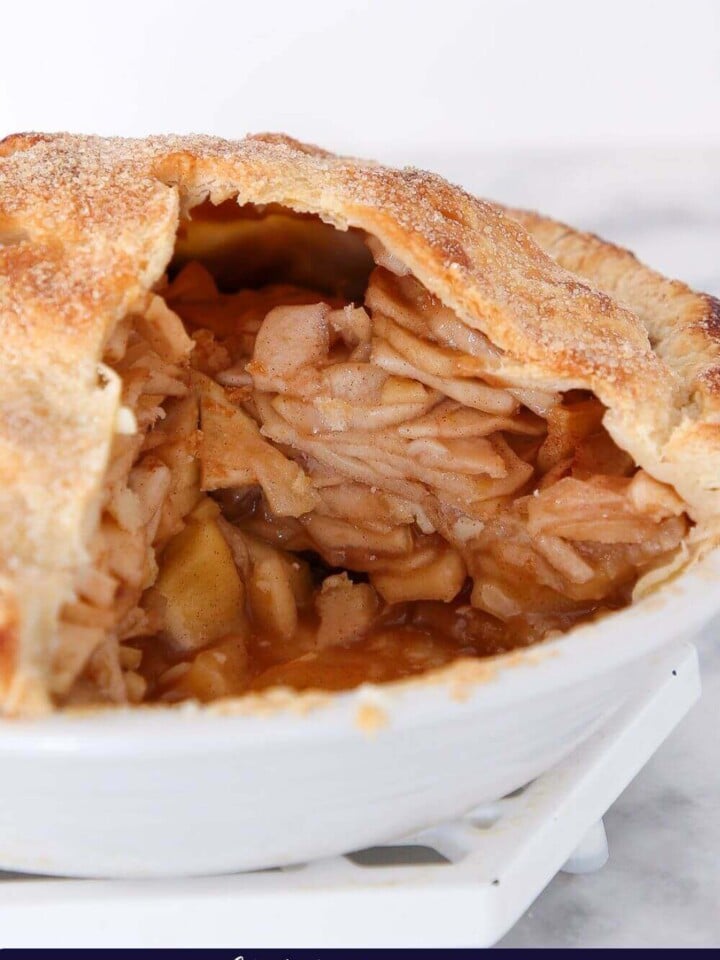
This Easy Apple Pie has a brown sugar cinnamon apple filling baked to perfection inside a flakey all-butter pie crust! Fresh tart apples softened by cinnamon sugar and a hint of lemon all under a crispy golden top crust: apple decadence at its finest.
A Quick Look At The Recipe
This is a brief summary of the recipe. Jump to the recipe to get the full details.
Jump to RecipePrep Time
1 hour
Cook Time
45 minutes
Total Time
1 hour 45 minutes
Servings
12 people
Difficulty
Easy
Calories *
319 kcal per serving
Technique
Make crust, roll crust, make filling, assemble pie and bake.
Flavor Profile
Cinnamon apple pie filling inside a flaky and buttery pie crust.
* Based on nutrition panel
TMy first apple pie and I baked this recipe! It came out so good! Thank you for sharing your knowledge of baking! ⭐⭐⭐⭐⭐
Kerry
The secret to a crowd-pleasing dessert, and this apple pie recipe, is the balance between sweet, tart, and savory. With that in mind, I toss moderately tart apples in granulated and brown sugar, and balance the sweetness with lemon juice! The pie’s flavor is perfectly rounded out by the floral dimensions of the lemon zest and the warming qualities of cinnamon.
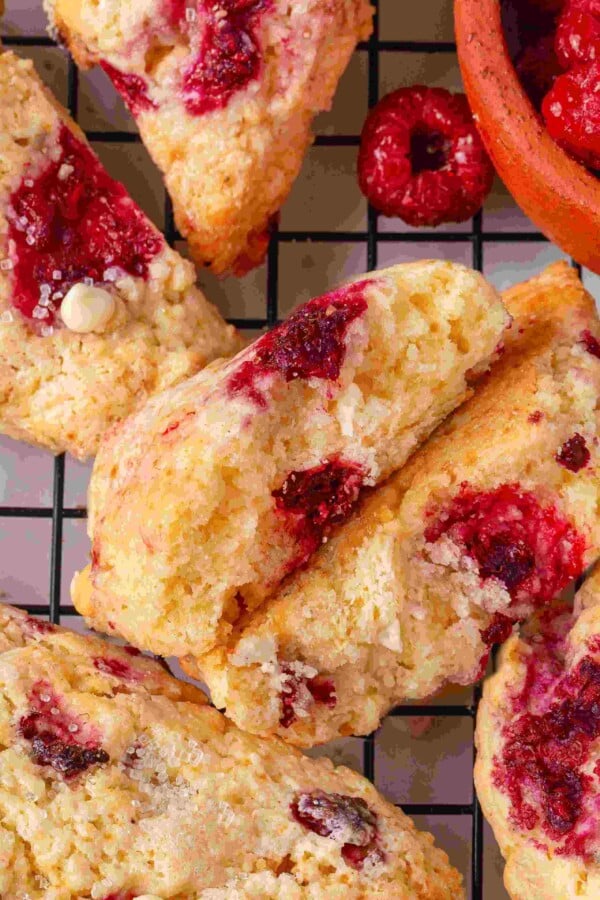
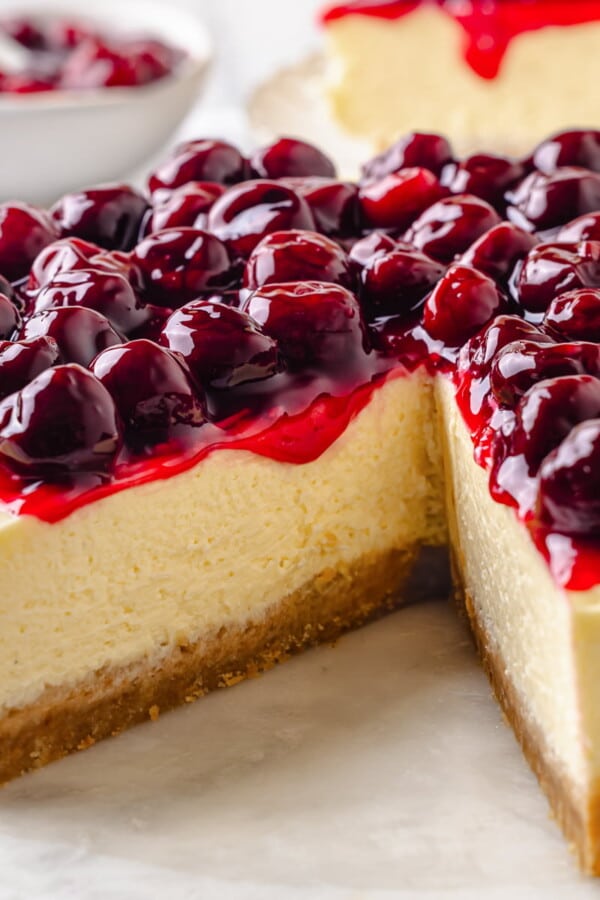
This gorgeous, sliceable pie is perfect all year round served with warm salted caramel sauce and vanilla ice cream, but is also lovely next to an easy pumpkin pie, cherry pie or sweet potato pie for the holidays!
Table of Contents
- Why you will love this easy apple pie recipe:
- Professional tips for perfect apple pie:
- What you’ll need for easy apple pie:
- Variations
- Substitutions
- How to Make Apple Pie from Scratch:
- Chef Lindsey’s Recipe Tip
- What are the best apples for pie?
- How do you serve apple pie?
- Frequently Asked Questions
- Easy Apple Pie Recipe
- Before You Go!
Why you will love this easy apple pie recipe:
- Delicious taste, balanced texture: This pie is not too sweet, not too tart, and each soft bite has a flaky crust finish. You’ve found the recipe that’s sure to become a family tradition year after year!
- Packed with apples: It’s going to look like a lot of apples, but the apples cook down and this ensures that every bite is full of cinnamon apple pie filling!
- Professional pie recipe: A professional chef teaches you how to make an easy apple pie with a crispy crust and soft, never mushy, apple filling.
Professional tips for perfect apple pie:
- I use a variety of apples in my pies. Mixing different apple varieties offers diverse flavors and textures just like in these mini apple pies. I lean towards pink lady, gala, fuji, and braeburn because they stay crisp when baked instead of turning mushy.
- Slice your apples to about ⅛ of an inch thick. If they are thicker than ⅛ inch, they will not cook fast enough. Keeping the apple slice thickness uniform will also allow the apples to cook evenly.
- Let your apple mixture sit for 30 minutes. After mixing apples with the rest of the filling ingredients, allow it to sit for thirty minutes. This lets the sugar and thickening agents begin to extract moisture and start the process of breaking the apples down. It will yield a shorter cooking time and juicier filling!
- Be sure the filling cooks completely. Wait until the filling is bubbling in the center before you remove your pie from the oven to ensure the filling has had time to thicken and the taste of raw flour has cooked out.
What you’ll need for easy apple pie:
- All-purpose flour: I use all-purpose flour for basic apple pie crusts because it is the one I always have on hand. Pastry flour has a slightly lower gluten content, and thus, produces a slightly more tender and delicate pie crust. Just don’t use bread flour, save it for some pumpkin herb dinner rolls!
- Kosher Salt: I use kosher salt because it is less salty per teaspoon than table salt. Salt is critical in pie crust because it inhibits gluten formation and it adds flavor.
- Unsalted Butter: I use unsalted butter with 40% milkfat. Other butters can be used to similar effect. It should be cubed and cold, but not frozen.
- Ice Water: I keep my ice water in the refrigerator up until the moment I add it to the dough.
- Apples: I choose moderately tart apples such as Braeburn, pink lady, Cortland, Macoun, and Ginger Gold. When using fresh apples, remember that Granny Smith are also great for baking but they are very tart. Be sure to taste your filling and add more sugar if needed.
- Lemon: Lemon zest adds a nice floral dimension plus you already have the lemons for juice!
- Granulated Sugar: The granulated sugar is here for sweetness but also to aid in the thickening process. Sugar absorbs moisture as the filling bakes, which results in a thicker fruit filling.
- Light Brown Sugar: Using light brown sugar adds sweetness along with a nice, light molasses flavor.
- Cinnamon: I prefer to use Saigon cinnamon, but what you have on hand is what you should use!
See the recipe card for full information on ingredients and quantities.
Variations
- Crumble topping: If you want to make a crumble topping instead of a top crust, I have the absolute best streusel topping recipe ready for you. Or you could also make the oat crumble topping from my easy apple crisp!
- Size: You could make tiny apple pies using a muffin pan, or add some Southern pecans and make mini apple crumble pies. I’m also a big fan of individual apple hand pies myself.
- Make a tart: Check out my Caramel Apple Tart recipe for further inspiration. You could also go in a totally different direction and make an apple-topped puff pastry tart.
- Make the filling thicker. You can make a thicker apple pie filling by pre-cooking the filling as I do in my mile high apple pie recipe. You can also add 2 tablespoons of tapioca flour or cornstarch to the filling mix in place of the flour, just be sure the pie filling boils in the center to activate the starch and cook out the raw starch flavor.
Substitutions
- Cinnamon: You could substitute or add different warming spices based on your preferences. Homemade Apple Pie Spice Mix would be lovely in this filling recipe, but when substituting be sure to taste your filling as these spices (like nutmeg) are stronger and you will need less of them. You could also omit the cinnamon completely.
- Pie Crust: I outlined the instructions for an all-butter homemade pie crust, but you could absolutely use my vodka pie crust recipe, like I do in my Apple Pie Youtube Tutorial, Crisco pie crust, or the pie crust of your choice from my list of pie crust recipes. I also have all the YouTube pie crust tutorials you could ever need because I believe a flaky pie crust is in everyone’s wheelhouse.
- Gluten Free: You can easily make this pie gluten free by using a Gluten Free Pie Crust Recipe and omitting the flour by following the instructions I outlined above for making the filling thicker!
How to Make Apple Pie from Scratch:
Use these instructions to make the perfect apple pie every time! Further details and measurements can be found in the recipe card below!
You can also make this recipe with a store-bought crust by skipping forward to the steps for preparing the filling. No rolling out crust for you!
Make all-butter pie dough:
Step 1: In the bowl of a stand mixer fitted with the paddle attachment, combine the flour, salt, sugar and cubed butter until most of the butter has been worked in.
Step 2: Little by little, add in the ice water until a shaggy dough forms.
Step 3: Turn all the contents of the mixer out onto a countertop and press it together gently until a dough forms, lovingly working it into a log shape.
Step 4: Press out into 1 ½ inch thick disks and seal in plastic wrap.
Step 5: Refrigerate your dough for 2 hours or until it is cold.
Roll out pie dough:
Step 6: Lightly flour a work surface, your rolling pin, and dough. Roll the dough to a ⅛ inch thickness. Working quickly and efficiently with firm pressure, adding flour as needed and chilling if the dough shrinks.
Step 7: Place the dough on a parchment lined baking sheet and in the fridge for 30 minutes. Let your crust chill in the refrigerator while you make your filling.
Prepare the cinnamon apple pie filling:
Step 8: Preheat the oven to 425°F regular or 400°F convection.
Step 9: Peel, core and slice apples to about 1/8th inch thick. Try to make sure they are all roughly the same size or you have an unevenly baked filling.
Use a mandoline for quick and perfect apple slices, just like the professionals!
Step 10: Place apples in a large bowl. Zest lemon over apples then squeeze the juice into the bowl of apples. Add sugars and cinnamon. Mix well with a spoon. Taste a piece of apple and add more sugar if desired. After you have made any adjustments add the flour and mix well.
Step 11 : I let my apples sit for about 30 minutes but this is technically optional. It helps draw out some of the moisture from the apples and gives you a juicier pie filling later on. It will help them bake faster and more evenly.
Assemble & bake:
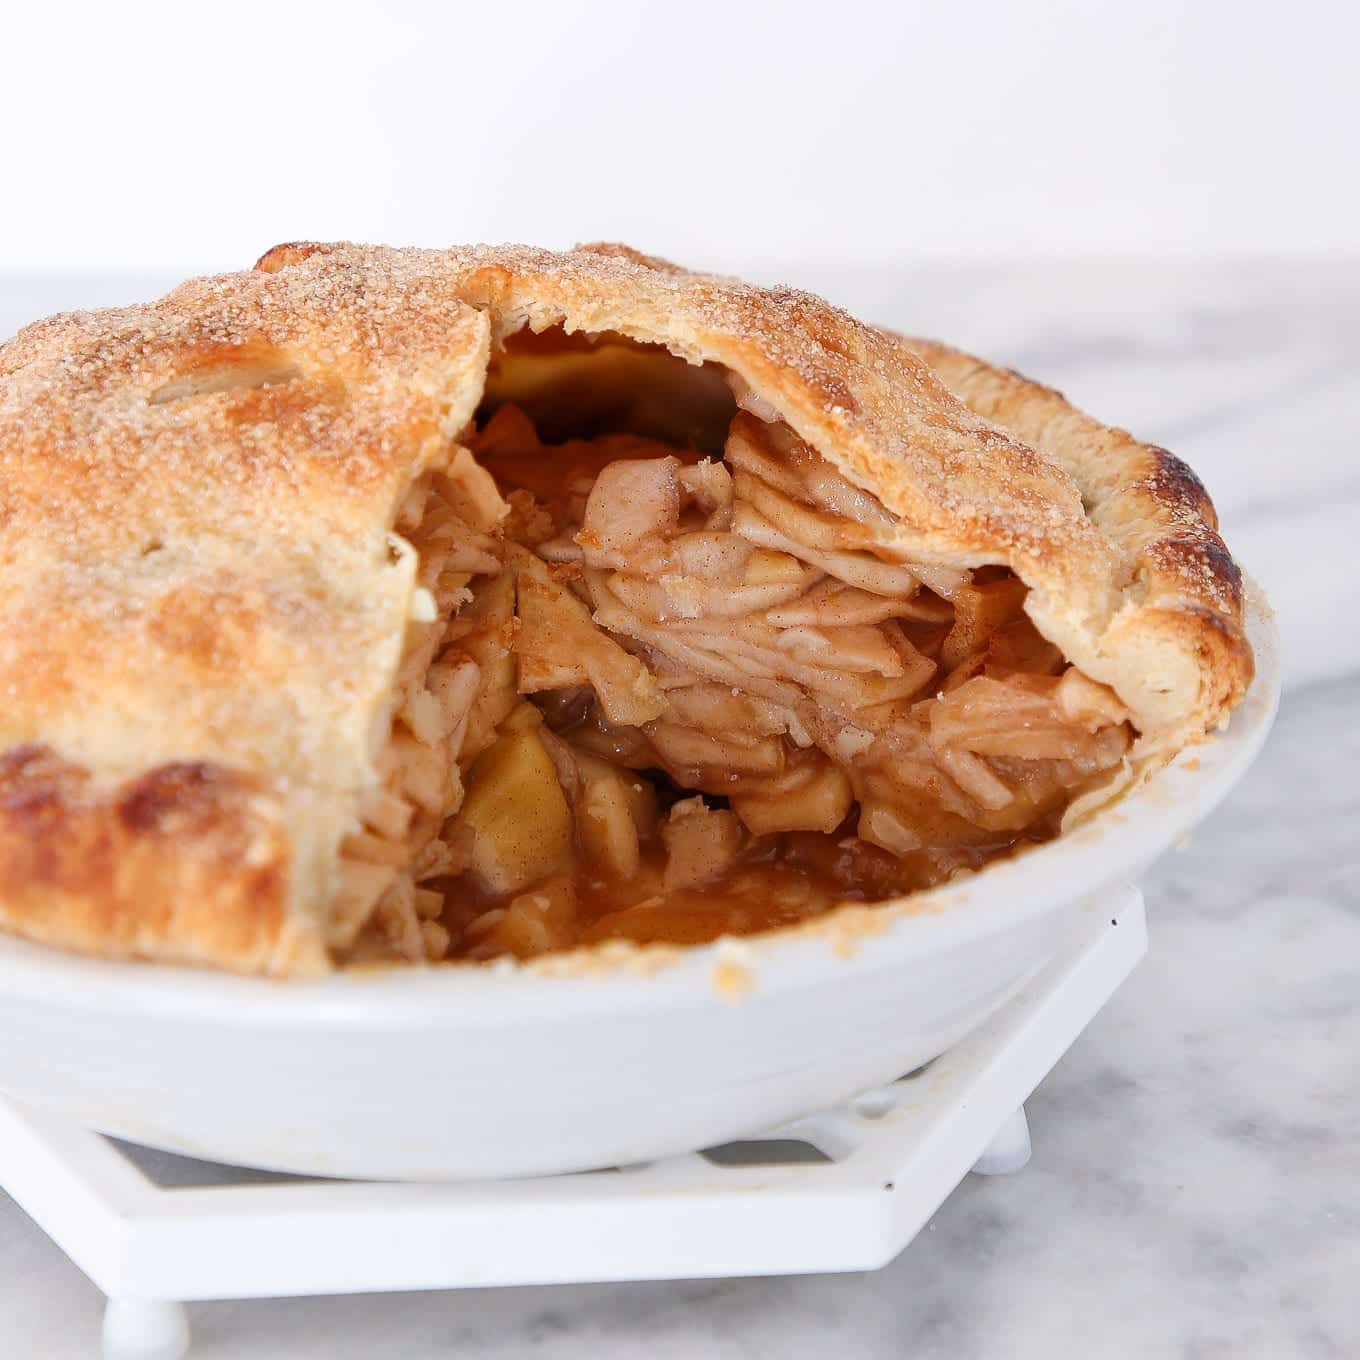
Step 12: Remove one pie crust from the refrigerator and line a 9-inch pie dish (or 10-inch) allowing the excess crust to hang over the edges. Pour all the apples into the lined dish and mound them up slightly in the center. Dot the cubed butter around the filling.
Step 13: Remove top crust from the refrigerator and lay over the filling. Trim any excess crust over 1 inch from the sides using kitchen shears. Gather the top and bottom crust together and roll inwards. Crimp decoratively and then cut steam vents in the top of the crust. Be sure not to cut too close to the edges or the juices will just run out of your pie and into your oven.
If you’d like to make a latticed or woven top crust, I put together a quick Pie Latticing Tutorial for you!
Step 14: Place the pie dish on a baking sheet (to catch any wayward juices). Brush the top crust lightly with heavy cream or egg wash (being careful not to let it pool) and sprinkle the top with the turbinado or sanding sugar. Work quickly so that the crust does not get too warm.
Step 15: Bake the pie in your preheated oven for 15 minutes, rotate the pie plate, and then reduce temperature to 350°F. Continue cooking for 45-60 minutes or until the filling is bubbling in the center, the apples are tender when poked with a paring knife or cake tester, and the top crust is a dark golden brown. If the edges begin to burn, tent them with strips of aluminum foil and continue baking.
Step 16: Cool completely before serving or storing.
Chef Lindsey’s Recipe Tip
If you want an even thicker filling, you can add 2 tablespoons of tapioca flour or cornstarch to your filling mixture. If you do so, you’re going to want to be sure you activate the starch by pre-cooking your filling or baking it until it comes to a boil in the center.
What are the best apples for pie?
When baking I use a large variety of apples! This creates a more complex flavor even in simple dishes. Choose apples that retain their flavor and texture when cooked like gala, honeycrisp, pink lady, or Braeburn.
As far as what apples not to use for apple pie, Red Delicious and Macintosh break down very easily, which makes them wonderful for things like applesauce and apple butter but not so wonderful for applications in which you would like to preserve their texture. Keeping these small details in mind is what takes one’s baked goods from good to great!
How do you serve apple pie?
Serve this easy apple pie with homemade whipped cream, a scoop of French vanilla ice cream, or a generous spoonful of vanilla bean anglaise. You could even drizzle some caramel sauce on top! Salted caramel or butterscotch sauce really heightens the apple flavor, and could also be put inside the pie itself. If you’re feeling seasonal, a maple caramel sauce would add a beautiful buttery finish.
Frequently Asked Questions
Store covered at room temperature for 3 days, refrigerated for a week or frozen for up to 3 months. Thaw at room temperature and refresh (heat) in a warm oven.
The best crust for apple pie is one with a flaky texture to balance the sweet, soft apple filling. This can be an all butter pie crust or even a shortening pie crust. Professionally speaking, I would stay away from a sweet pastry crust or shortbread crust because it will make the whole pie too sweet.
There are several common mistakes that most often make a pie soggy. This is the oven temperature being too low to properly cook the pie crust, using a ceramic pie dish, and not cooking the pie long enough. Adding a hot filling to a pie crust can also make for a soggy bottom.
Whether or not you pre-cook the apples for pie depends on how many apples you are using and the desired consistency of your pie. If you do not pre-cook the apple pie filling you must ensure you bake the full pie until the center of the filling bubbles.
If you tried this recipe and loved it please leave a 🌟 star rating and let me know how it goes in the comments below. I love hearing from you; your comments make my day!

Easy Apple Pie
Ingredients
For the all-butter pie crusts:
- 2 cups all-purpose flour measured by fluffing the flour then spooning it in
- 1 teaspoon kosher salt
- 1 teaspoon sugar
- 9 tablespoons unsalted butter cold, cubed into ½ inch cubes
- 2 ½ oz cold water or as much or as little as needed
For the apple filling:
- 3 lbs apples variety or just all honey-crisp if you want
- 1 medium lemon
- ¾ cup granulated sugar
- ½ cup light brown sugar packed
- 1 teaspoon cinnamon optional
- 2 Tablespoons all-purpose flour
- 2 Tablespoons unsalted butter cubed
- heavy cream
- turbinado / sanding sugar
Instructions
Make all-butter pie dough:
- In the bowl of a stand mixer fitted with the paddle attachment, combine the flour, salt, sugar and cubed butter until most of the butter has been worked in.
- Little by little, add in the ice water until a shaggy dough forms.
- Turn all the contents of the mixer out onto a countertop and press it together gently until a dough forms, lovingly working it into a log shape.
- Press out into 1 ½ inch thick disks and wrap in plastic wrap.
- Refrigerate your dough for 2 hours or until it is cold.
Roll out pie dough:
- Lightly flour a work surface, your rolling pin, and dough. Roll the dough to a ⅛ inch thickness. Working quickly and efficiently with firm pressure, adding flour as needed and chilling if the dough shrinks.
- Place the dough on a parchment lined baking sheet and refrigerate for 30 minutes. Let your crust chill in the refrigerator while you make your filling.
Prepare the cinnamon apple pie filling:
- Preheat the oven to 425°F regular or 400°F convection.
- Peel, core and slice apples to about 1/8th inch thick. Try to make sure they are all roughly the same size or you have an unevenly baked filling.
- Place apples in a large bowl. Zest lemon over apples then squeeze the juice into the bowl of apples. Add sugars and cinnamon. Mix well with a spoon. Taste a piece of apple and add more sugar if desired. After you have made any adjustments add the flour and mix well.
- I let my apples sit for about 30 minutes but this is technically optional. It helps draw out some of the moisture from the apples and gives you a juicier pie filling later on. It will help them bake faster and more evenly.
Assemble & Bake:
- Remove one pie crust from the refrigerator and line a pie dish allowing the excess crust to hang over the edges. This recipe will work for any dish between 9-10 inches. Pour all the apples into the lined dish and mound them up slightly in the center. Dot the cubed butter around the filling.
- Remove top crust from the refrigerator and lay over the filling. Trim any excess crust over 1 inch from the sides using kitchen shears. Gather the top and bottom crust together and roll inwards. Crimp decoratively and then cut steam vents in the top of the crust. Be sure not to cut too close to the edges or the juices will just run out of your pie and into your oven.
- Place the pie dish on a baking sheet (to catch any wayward juices). Brush the top crust lightly with heavy cream (being careful not to let it pool) and sprinkle the top with the turbinado or sanding sugar. Work quickly so that the crust does not get too warm.
- Bake the pie in your preheated oven for 15 minutes, rotate, and then reduce temperature to 350°F. Continue cooking for 45-60 minutes or until the filling is bubbling in the center, the apples are tender when poked with a paring knife or cake tester, and the top crust is a dark golden brown. If the edges begin to burn, tent them with strips of aluminum foil and continue baking.
- Cool completely before serving or storing.
Video
Notes
Nutrition
Before You Go!
I hope you enjoyed this professional chef tested recipe. Check out our other delicious, chef-developed pie recipes! Why not continue the apple cinnamon party with my apple cinnamon roll recipe or the 21 Best Apple Dessert Recipes? Or keep it classic with some Classic Pecan Pie?


I 100 % recommend this recipe! Must have watched the video several times, but it’s not that complicated. Used only Johnathan Gold apples, and cut back a bit on the sugar, and gave it a bit more (1/2 oz.) lemon juice. Loved it. First apple pie we’ve ever made. And the vodka crust was great. When we make it again, we’ll roll the crust thinner, and grease the pan so it releases easier. Also, we used a large glass baking dish (Anchor hocking 9”) and a crust protector. Even with our crust sticking to the dish, it came out EXCELLENT. Best pie I’ve had. The filling was delicious. Lindsey, thanks for such a great recipe!
Hi Dave! This made my day, I’m so glad your first apple pie was such a hit. Jonathan Golds are a great choice. Rolling the crust a bit thinner will help next time, and lightly greasing glass dishes definitely makes release easier. So happy the vodka crust worked for you. Thanks for taking the time to share, we truly appreciate it!
I’m in charge of baking pies this year for Thanksgiving, and of course, I had to do a test run, and the pie turned out perfect! The pie crust is flaky, and the apple filling was perfect. I love the flavor. Next stop pecan pie!
Not a good recipe of ingredients amount if there after looking and using option to jumpi to recipe nothing of ingredient amounts for apple filling. All the while continuous ads jumping out and moving about to distract. Will not visit this site again. Do not email me.
I’m sorry you feel that way, Sharon. I understand the irritation of the ads but that is the only way that I make money. My 2 blogs cost $10,000 a month to run. Yes, you read that right. I have been an executive pastry chef in restaurants and run my own National pie business. This recipe is one of the ones that people pay $60 to have shipped to them, and I shared it with you and everyone else for free. And not just the recipe but all my hard-won advice about how to make the filling in larger batches and how to make the best pies. Writing a post like this takes hours. The jump-to button is there so you don’t have to see my advice, but I would appreciate a little understanding that this how I make a living. ~Lindsey
I have been making your vodka pie crust dough which is so easy to do. I have used the vodka/butter recipe with your peach pie recipe. It’s a great pie crust, but I wanted to try the Crisco one because I want a more crumbly pie crust rather than chewy like the vodka/butter one. So, Can I use the Crisco recipe with the apple pie recipe or are the apples too heavy for the Crisco pie crust because the Crisco pie crust is more crumbly and the apples are heavier than the peaches. I have made your French silk pie, vodka pie crust and peach pie recipe (several times). All have been amazing. Thanks for your feed back on Crisco pie crust with the Apple pie recipe. I can’t wait to try it since fall is coming.
Hi Lori! I’m so happy to hear all those recipes have been doing so well! You’re right, apples are heavier than peaches. But you can absolutely make this pie with my crisco pie crust! Just be sure to chill your crust well, and you might need to tent the edges of the crust to keep it from over browning. Sometimes I also pre-cook my apple pie filling a bit if using a crisco crust, but you don’t need to! Can’t wait to hear how it turns out and happy baking!
My first apple pie and I baked this recipe! It came out so good! Thank you for sharing your knowledge of baking!
Hi Kerry! I’m so pleased to hear that, thank you for coming back and commenting, it made my day!
Really tasty pie and crust. Thanks for the recipe I will be making this for sure for Thanksgiving.
Hi Stephanie, thank you! Happy Thanksgiving and Happy Baking!